
Introductory
There is a screen with many text fields. There can be 5 or 30 of them. Between them there can be various widgets.

Task
- Place a block with the "Next" button above the keyboard to switch to the next field.
- When changing the focus, scroll the field to the block with the "Next" button.
Problem
The block with the button overlaps the text field. It is necessary to implement automatic scrolling by the size of the overlapping space of the text field.

Preparing for a solution
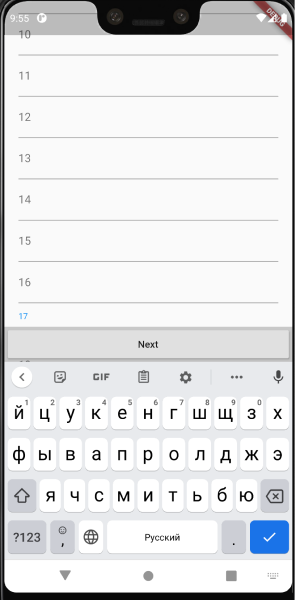
1. Let's take a screen of 20 fields.
The code:
List<String> list = List.generate(20, (index) => index.toString());

@override
Widget build(BuildContext context) {
 return Scaffold(
   body: SingleChildScrollView(
     child: SafeArea(
       child: Padding(
         padding: const EdgeInsets.all(20),
         child: Column(
           children: <Widget>[
             for (String value in list)
               TextField(
                 decoration: InputDecoration(labelText: value),
               )
           ],
         ),
       ),
     ),
   ),
 );
}
With focus in the text field, we see the following picture: The

field is perfectly visible and everything is in order.
2. Add a block with a button. Overlay is
used to display the block . This allows you to show the plate independently of the widgets on the screen and not use the Stack wrappers. At the same time, we have no direct interaction between the fields and the "Next" block. Nice article on Overlay. In short: Overlay allows you to overlay widgets on top of other widgets, through the overlay stack . OverlayEntry allows you to control the corresponding Overlay. The code:
bool _isShow = false;
OverlayEntry _overlayEntry;

KeyboardListener _keyboardListener;

@override
void initState() {
 SchedulerBinding.instance.addPostFrameCallback((_) {
   _overlayEntry = OverlayEntry(builder: _buildOverlay);
   Overlay.of(context).insert(_overlayEntry);
   _keyboardListener = KeyboardListener()
     ..addListener(onChange: _keyboardHandle);
 });
 super.initState();
}

@override
void dispose() {
 _keyboardListener.dispose();
 _overlayEntry.remove();
 super.dispose();
}
Widget _buildOverlay(BuildContext context) {
 return Stack(
   children: <Widget>[
     Positioned(
       bottom: MediaQuery.of(context).viewInsets.bottom,
       left: 0,
       right: 0,
       child: AnimatedOpacity(
         duration: const Duration(milliseconds: 200),
         opacity: _isShow ? 1.0 : 0.0,
         child: NextBlock(
           onPressed: () {},
           isShow: _isShow,
         ),
       ),
     ),
   ],
 );
void _keyboardHandle(bool isVisible) {
 _isShow = isVisible;
 _overlayEntry?.markNeedsBuild();
}
3. As expected, the block overlaps the margin.
Solution Ideas
1. Take the current scroll position of the screen from the ScrollController and scroll to the field.
The size of the field is unknown, especially if it is multi-line, then scrolling to it will give an inaccurate result. The solution will not be perfect or flexible.
2. Add the sizes of widgets outside the list and take into account scrolling.
If you set the widgets to a fixed height, then, knowing the position of the scroll and the size of the widgets, it will be known what is now in view and how much you need to scroll to show a certain widget.
Cons :
- You will have to take into account all the widgets outside the list and set them fixed sizes that will be used in calculations, which does not always correspond to the required design and behavior of the interface.
- UI edits will lead to revisions in the calculations.
3. Take the position of the widgets relative to the screen of the field and the "Next" block and read the difference.
Minus - there is no such possibility out of the box.
4. Use a render layer.
Based on the article , Flutter knows how to arrange its descendants in the tree, which means this information can be pulled. RenderObject is responsible for rendering , we will go to it. The RenderBox has a size box with the width and height of the widget. They are calculated when rendering for widgets: be they lists, containers, text fields (even multi-line ones), etc.
You can get the RenderBox through
context context.findRenderObject() as RenderBoxYou can use the GlobalKey to get the context of a field.
Minus :
GlobalKey not the easiest thing. And it is better to use it as little as possible.
“Widgets with global keys redraw their subtrees as they move from one location in the tree to another. To redraw its subtree, the widget must arrive at its new location in the tree in the same animation frame in which it was removed from the old location.
Global keys are relatively expensive in terms of performance. If you don't need any of the features listed above, consider using Key, ValueKey, ObjectKey, or UniqueKey.
You cannot include two widgets in a tree with the same global key at the same time. If you try to do this, there will be a runtime error. " Source .
In fact, if you keep 20 GlobalKey on the screen, nothing bad will happen, but since it is recommended to use it only when necessary, we will try to look for another way.
Solution without GlobalKey
We will be using a render layer. The first step is to check if we can pull something out of the RenderBox and if this is the data we need.
Hypothesis Testing Code:
FocusNode get focus => widget.focus;
 @override
 void initState() {
   super.initState();
   Future.delayed(const Duration(seconds: 1)).then((_) {
	// (1)
     RenderBox rb = (focus.context.findRenderObject() as RenderBox);
//(3)
     RenderBox parent = _getParent(rb);
//(4)
     print('parent = ${parent.size.height}');
   });
 }
 RenderBox _getParent(RenderBox rb) {
   return rb.parent is RenderWrapper ? rb.parent : _getParent(rb.parent);
 }

Widget build(BuildContext context) {
   return Wrapper(
     child: Container(
       color: Colors.red,
       width: double.infinity,
       height: 100,
       child: Center(
         child: TextField(
           focusNode: focus,
         ),
       ),
     ),
   );
}

//(2)
class Wrapper extends SingleChildRenderObjectWidget {
 const Wrapper({
   Key key,
   Widget child,
 }) : super(key: key, child: child);
 @override
 RenderWrapper createRenderObject(BuildContext context) {
   return RenderWrapper();
 }
}
class RenderWrapper extends RenderProxyBox {
 RenderWrapper({
   RenderBox child,
 }) : super(child);
}
(1) Since you need to scroll to the field, you need to get its context (for example, via FocusNode), find the RenderBox and take size. But this is the size of the text box and if we also need parent widgets (for example Padding), we need to take the parent RenderBox through the parent field.
(2) We inherit our RenderWrapper class from SingleChildRenderObjectWidget and create a RenderProxyBox for it. RenderProxyBox simulates all the properties of the child, displaying it when the widget tree is rendered.
Flutter itself often uses heirs of SingleChildRenderObjectWidget:
Align, AnimatedSize, SizedBox, Opacity, Padding.
(3) Recursively traverse the parents through the tree until we encounter a RenderWrapper.
(4) Take parent.size.height - this will give the correct height. This is the right way.
Of course, you cannot leave this way.
But the recursive approach has its drawbacks too :
- Recursive tree traversal does not guarantee that we will not run into an ancestor for which we are not ready. He may not fit the type and that's it. Somehow on tests I ran into RenderView and everything fell. You can, of course, ignore the unsuitable ancestor, but you want a more reliable approach.
- This is an unmanageable and still not flexible solution.
Using RenderObject
This approach is the result of the render_metrics package and has long been used in one of our applications.
Operation logic:
1. Wrap the widget of interest (a descendant of the Widget class) in RenderMetricsObject . Nesting and target widget doesn't matter.
RenderMetricsObject(
 child: ...,
)
2. After the first frame, its metrics will be available to us. If the size or position of the widget relative to the screen (absolute or in scrolling), then when the metrics are requested again, there will be new data.
3. It is not necessary to use the RenderManager , but when using it, you must pass the id for the widget.
RenderMetricsObject(
 id: _text1Id,
 manager: renderManager,
 child: ...
4. You can use callbacks:
- onMount - Create RenderObject. Receives the passed id (or null, if not passed) and the corresponding RenderMetricsBox instance as arguments.
- onUnMount - removal from the tree.
In the parameters, the function receives the id passed to RenderMetricsObject. These functions are useful when you don't need a manager and / or you need to know when a RenderObject was created and removed from the tree.
RenderMetricsObject(
 id: _textBlockId,
 onMount: (id, box) {},
 onUnMount: (box) {},
 child...
)
5. Obtaining metrics. The RenderMetricsBox class implements a data getter, in which it takes its dimensions via localToGlobal. localToGlobal converts the point from the local coordinate system for this RenderBox to the global coordinate system relative to the screen in logical pixels.

A - the width of the widget, converted to the rightmost point of coordinates relative to the screen.
B - The height is converted to the lowest coordinate point relative to the screen.
class RenderMetricsBox extends RenderProxyBox {
 RenderData get data {
   Size size = this.size;
   double width = size.width;
   double height = size.height;
   Offset globalOffset = localToGlobal(Offset(width, height));
   double dy = globalOffset.dy;
   double dx = globalOffset.dx;

   return RenderData(
     yTop: dy - height,
     yBottom: dy,
     yCenter: dy - height / 2,
     xLeft: dx - width,
     xRight: dx,
     xCenter: dx - width / 2,
     width: width,
     height: height,
   );
 }

 RenderMetricsBox({
   RenderBox child,
 }) : super(child);
}
6. RenderData is simply a data class that provides separate x and y values as double and coordinate points as CoordsMetrics .
7. ComparisonDiff - Subtracting two RenderData returns a ComparisonDiff instance with the difference between them. It also provides a getter (diffTopToBottom) for the position difference between the bottom of the first widget and the top of the second, and vice versa (diffBottomToTop). diffLeftToRight and diffRightToLeft respectively.
8. RenderParametersManager is a descendant of RenderManager. To get widget metrics and the difference between them.
The code:
class RenderMetricsScreen extends StatefulWidget {
 @override
 State<StatefulWidget> createState() => _RenderMetricsScreenState();
}

class _RenderMetricsScreenState extends State<RenderMetricsScreen> {
 final List<String> list = List.generate(20, (index) => index.toString());
 ///    render_metrics
 ///
 final _renderParametersManager = RenderParametersManager();
 final ScrollController scrollController = ScrollController();
 /// id    ""
 final doneBlockId = 'doneBlockId';
 final List<FocusNode> focusNodes = [];

 bool _isShow = false;
 OverlayEntry _overlayEntry;
 KeyboardListener _keyboardListener;
 ///   FocusNode,
 FocusNode lastFocusedNode;

 @override
 void initState() {
   SchedulerBinding.instance.addPostFrameCallback((_) {
     _overlayEntry = OverlayEntry(builder: _buildOverlay);
     Overlay.of(context).insert(_overlayEntry);
     _keyboardListener = KeyboardListener()
       ..addListener(onChange: _keyboardHandle);
   });

   FocusNode node;

   for(int i = 0; i < list.length; i++) {
     node = FocusNode(debugLabel: i.toString());
     focusNodes.add(node);
     node.addListener(_onChangeFocus(node));
   }

   super.initState();
 }

 @override
 void dispose() {
   _keyboardListener.dispose();
   _overlayEntry.remove();
   focusNodes.forEach((node) => node.dispose());
   super.dispose();
 }

 @override
 Widget build(BuildContext context) {
   return Scaffold(
     body: SingleChildScrollView(
       controller: scrollController,
       child: SafeArea(
         child: Padding(
           padding: const EdgeInsets.all(20),
           child: Column(
             children: <Widget>[
               for (int i = 0; i < list.length; i++)
                 RenderMetricsObject(
                   id: focusNodes[i],
                   manager: _renderParametersManager,
                   child: TextField(
                     focusNode: focusNodes[i],
                     decoration: InputDecoration(labelText: list[i]),
                   ),
                 ),
             ],
           ),
         ),
       ),
     ),
   );
 }

 Widget _buildOverlay(BuildContext context) {
   return Stack(
     children: <Widget>[
       Positioned(
         bottom: MediaQuery.of(context).viewInsets.bottom,
         left: 0,
         right: 0,
         child: RenderMetricsObject(
           id: doneBlockId,
           manager: _renderParametersManager,
           child: AnimatedOpacity(
             duration: const Duration(milliseconds: 200),
             opacity: _isShow ? 1.0 : 0.0,
             child: NextBlock(
               onPressed: () {},
               isShow: _isShow,
             ),
           ),
         ),
       ),
     ],
   );
 }

 VoidCallback _onChangeFocus(FocusNode node) => () {
   if (!node.hasFocus) return;
   lastFocusedNode = node;
   _doScrollIfNeeded();
 };

 /// ,
 /// .
 void _doScrollIfNeeded() async {
   if (lastFocusedNode == null) return;
   double scrollOffset;

   try {
     ///    id,  data    null
     scrollOffset = await _calculateScrollOffset();
   } catch (e) {
     return;
   }

   _doScroll(scrollOffset);
 }

 ///
 void _doScroll(double scrollOffset) {
   double offset = scrollController.offset + scrollOffset;
   if (offset < 0) offset = 0;
   scrollController.position.animateTo(
     offset,
     duration: const Duration(milliseconds: 200),
     curve: Curves.linear,
   );
 }

 ///     .
 ///
 ///         ""
 ///  (/).
 Future<double> _calculateScrollOffset() async {
   await Future.delayed(const Duration(milliseconds: 300));

   ComparisonDiff diff = _renderParametersManager.getDiffById(
     lastFocusedNode,
     doneBlockId,
   );

   lastFocusedNode = null;

   if (diff == null || diff.firstData == null || diff.secondData == null) {
     return 0.0;
   }
   return diff.diffBottomToTop;
 }

 void _keyboardHandle(bool isVisible) {
   _isShow = isVisible;
   _overlayEntry?.markNeedsBuild();
 }
}
Result using render_metrics
Outcome
Digging deeper than the widget level, with the help of small manipulations with the render layer, we got useful functionality that allows you to write more complex UI and logic. Sometimes you need to know the size of dynamic widgets, their position, or compare overlapping widgets. And this library provides all these features for faster and more efficient problem solving. In the article, I tried to explain the mechanism of operation, gave an example of a problem and a solution. I hope for the benefit of the library, articles and your feedback.