
Good day, friends!
I present to your attention the translation of the article "The Deno Handbook: A TypeScript Runtime Tutorial with Code Examples" by Flavio Copes.
In this article, we will learn how to work with Deno. We'll compare it to Node.js and build a simple REST API with it.
What is Deno?
If you're familiar with Node.js, the popular server-side JavaScript ecosystem, Deno is pretty much the same thing. Almost, but not quite.
Let's start with a list of Deno features that I like the most:
- It is based on modern JavaScript
- It has an extensible standard library
- It has standard TypeScript support (this means you don't have to manually compile TypeScript, Deno does it automatically)
- It supports ES modules
- It has no package manager
- It has a global
await - It has a built-in testing facility
- Its goal is maximum browser compatibility. For this, it provides an inline
fetchand a global objectwindow
In this tutorial, we'll explore all of these possibilities.
After getting familiar with Deno and its capabilities, Node.js will seem a bit dated.
Especially since Node.js is based on callback functions (it was written before promises and async / await). They are unlikely to ever appear there, as this means fundamental changes are needed.
Node.js is great and will remain the de facto standard in the JavaScript world. However, I believe Deno will grow in popularity rapidly thanks to its TypeScript support and modern standard library.
Deno can afford modern code as it doesn't need backward compatibility. Of course, there is no guarantee that this code will remain up-to-date in the next decade, but today it is.
Why Deno? Why now?
Deno was announced almost 2 years ago by Node.js creator Ryan Dahl at JSConf EU. Watch the YouTube video , it's very interesting and must-see if you're working with Node.js and JavaScript.
Each project manager (creator) is forced to make decisions. Ryan regrets some of the early decisions in Node. In addition, technology is advancing and JavaScript is a completely different language today than it was in 2009 when Node. Think back to ES6 / 2016/2017 and so on.
So he decided to start a new project, a kind of second wave of server-side JavaScript applications.
The reason I am only writing this article now is because it takes quite a long time for the technology to mature. Finally, we got Deno 1.0 (it was released on May 13, 2020), the first stable release.
This may seem like a common number, but 1.0 means there won't be any drastic changes until Deno 2.0. As you learn new technology, you don't want it to change too quickly.
Should you learn Deno?
Good question.
Learning something new like Deno takes a lot of effort. My advice: if you're just starting out with server-side JS and don't know Node.js yet, and have never written TypeScript before, start with Node.
No one has ever been fired for choosing Node (paraphrasing a famous quote).
But if you like TypeScript, which doesn't depend on a ton of npm packages, and want to use it everywhere
await, Deno might be what you're looking for.
Will it replace Node.js?
No. Node.js is a giant, a big authority, an incredibly well-supported technology that won't go anywhere in the next decade.
First-class TypeScript support
Deno is written in Rust and TypeScript, both very popular languages in today's world.
This means we get a lot of benefits from TypeScript, even if we are writing JavaScript.
Running TypeScript code with Deno does not require pre-compilation - Deno does this automatically.
You don't have to write TypeScript code, but the fact that Deno's core is written in TypeScript makes a huge difference.
First, a large percentage of JavaScript developers love TypeScript.
Second, the tools you use can get a lot of information about software written in TypeScript like Deno.
This means that when we write code in VS Code, for example (which has been tightly integrated with TypeScript since its inception), we get benefits such as type checking when writing code or advanced IntelliSense capabilities. In other words, the help of the code editor becomes much more efficient.
Differences from Node.js
Since Deno is essentially a replacement for Node.js, it makes sense to compare the two.
General:
- Both are based on the V8 engine
- Both are great for server side JavaScript development
Differences:
- Node is written in C ++ and JavaScript. Deno is written in Rust and TypeScript.
- Node has an official package manager
npm. Deno doesn't have such a manager, instead it lets you import any module using a URL. - Node uses CommonJS syntax to import packages. Deno uses the official way - ES modules.
- Deno ECMAScript , Node.js .
- Deno () . . Node.js , .
- Deno , .. , , Go, . .
Not having a package manager and using a URL to get and import packages has its advantages and disadvantages. One of the main advantages is the great flexibility in the ability to create packages without having to publish them to a repository such as npm.
I think that some alternative to the package manager in Deno will appear sooner or later.
Deno official website is hosting third party packages: https://deno.land/x/
Installing Deno
Enough talking! Let's install Deno.
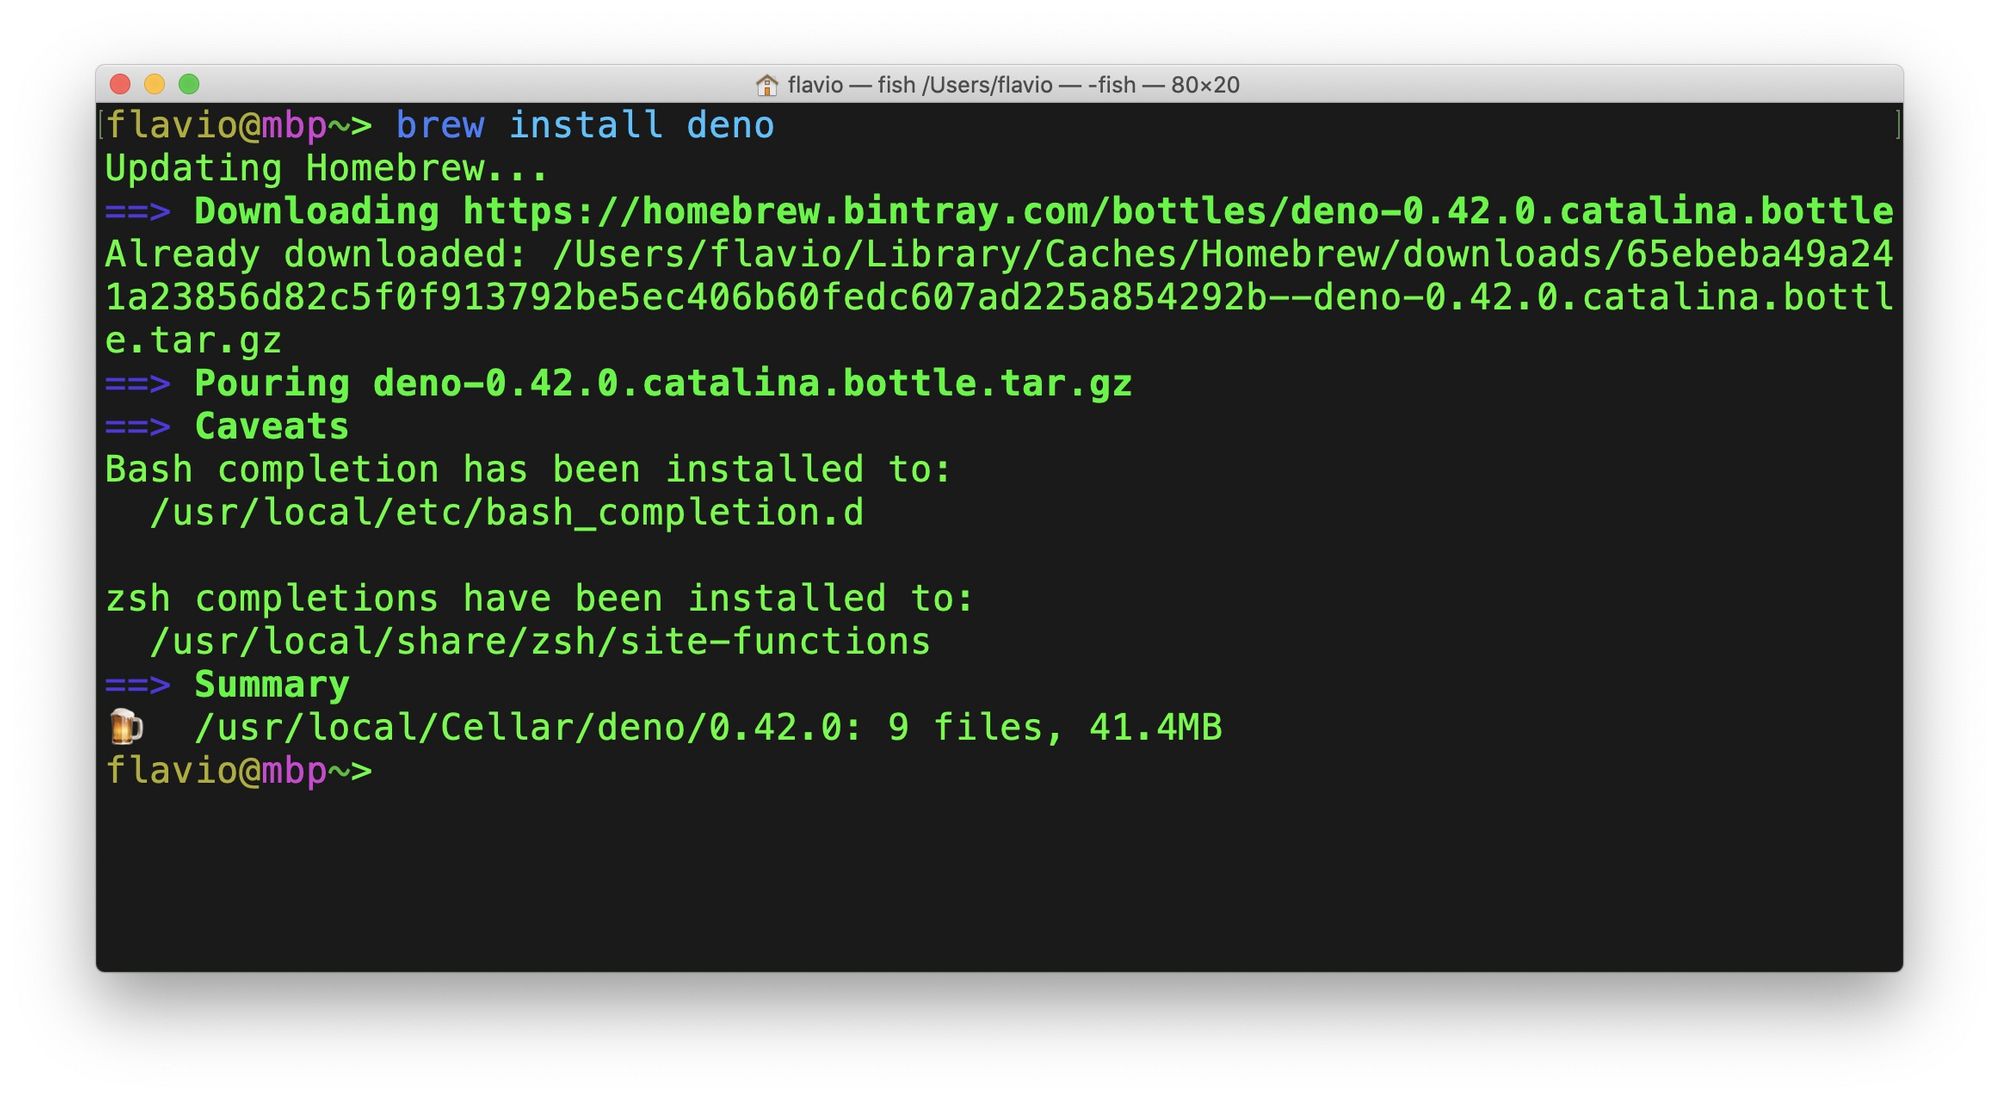
The easiest way to do this is using Homebrew:
brew install deno
Other installation methods are listed here .
After installation, the command becomes available
deno. Here's the help you can get by typing deno --help:
flavio@mbp~> deno --help
deno 0.42.0
A secure JavaScript and TypeScript runtime

Docs: https://deno.land/std/manual.md
Modules: https://deno.land/std/ https://deno.land/x/
Bugs: https://github.com/denoland/deno/issues

To start the REPL, supply no arguments:
  deno

To execute a script:
  deno run https://deno.land/std/examples/welcome.ts
  deno https://deno.land/std/examples/welcome.ts

To evaluate code in the shell:
  deno eval "console.log(30933 + 404)"

Run 'deno help run' for 'run'-specific flags.

USAGE:
    deno [OPTIONS] [SUBCOMMAND]

OPTIONS:
    -h, --help
            Prints help information

    -L, --log-level <log-level>
            Set log level [possible values: debug, info]

    -q, --quiet
            Suppress diagnostic output
            By default, subcommands print human-readable diagnostic messages to stderr.
            If the flag is set, restrict these messages to errors.
    -V, --version
            Prints version information


SUBCOMMANDS:
    bundle         Bundle module and dependencies into single file
    cache          Cache the dependencies
    completions    Generate shell completions
    doc            Show documentation for a module
    eval           Eval script
    fmt            Format source files
    help           Prints this message or the help of the given subcommand(s)
    info           Show info about cache or info related to source file
    install        Install script as an executable
    repl           Read Eval Print Loop
    run            Run a program given a filename or url to the module
    test           Run tests
    types          Print runtime TypeScript declarations
    upgrade        Upgrade deno executable to newest version

ENVIRONMENT VARIABLES:
    DENO_DIR             Set deno's base directory (defaults to $HOME/.deno)
    DENO_INSTALL_ROOT    Set deno install's output directory
                         (defaults to $HOME/.deno/bin)
    NO_COLOR             Set to disable color
    HTTP_PROXY           Proxy address for HTTP requests
                         (module downloads, fetch)
    HTTPS_PROXY          Same but for HTTPS
Deno Teams
Did you notice the section
SUBCOMMANDS? This is a list of all the commands that we can run. What teams do we have?
bundle- collects the module and project dependencies into one filecache- caches dependenciescompletions- generates shell refillsdoc- shows the documentation for the moduleeval- used to compute a block of code, for exampledeno eval "console.log(1 + 2)"fmt- built-in code formatter (likegoFmtin Go)help- displays a list of auxiliary commandsinfo- shows information about the cache or fileinstall- sets the script as executablerepl- read-calculate-output cycle (default)run- runs the program with the given name or URL for the moduletest- runs teststypes- displays a list of TypeScript featuresupgrade- updates Deno to the latest version
You can run
deno <subcommand> helpto get information about a specific command, for example deno run --help.
We can use a command
denoto start a read-evaluate-output loop:

This is the same as starting
deno repl.
Typically
denoused to run a Deno application contained in a TypeScript file.
You can run both TypeScript files (.ts) and JavaScript files (.js).
If you're unfamiliar with TypeScript, don't worry: Deno is written in TypeScript, but you can write your client applications in JavaScript.
First app on Deno
Let's create our first application.
To do this, we don't even have to write code, we will run it in the terminal using the URL.
Deno downloads the program, compiles it and runs it:

Of course, I would not recommend running random code from the Internet. In this case, we are launching it from Deno's official site, plus Deno has a sandbox that prevents programs from doing what we did not explicitly allow them to do.
This program is very simple and is a call
console.log():
console.log('Welcome to Deno ') // ,
If you open https://deno.land/std/examples/welcome.ts in a browser, you will see the following:

Strange, isn't it? You probably expected to see a TypeScript file, but instead got a web page. The point is that the Deno website server knows that you are using a browser and provides you with a more user friendly page.
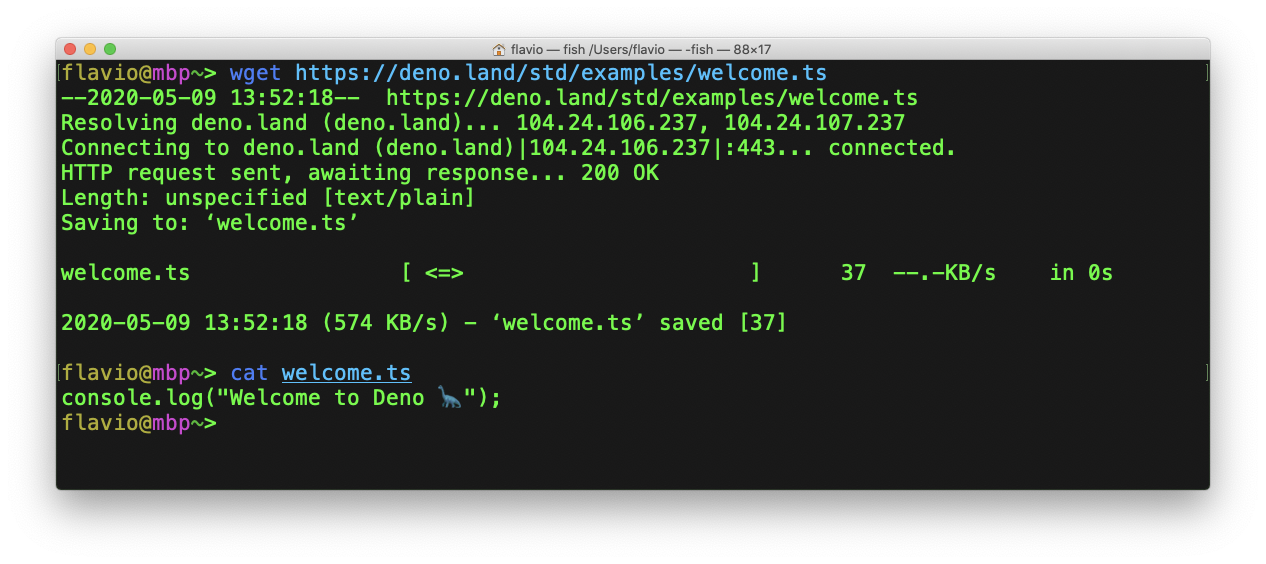
Load the same URL using
wget, for example, and get text/plaininstead text/html:
When you restart the program, thanks to caching, a restart is not required: A forced restart can be performed

using a flag
--reload: it

deno runhas many different functions that are not displayed through deno --help. In order to see them, you should run deno run --help:
flavio@mbp~> deno run --help
deno-run
Run a program given a filename or url to the module.

By default all programs are run in sandbox without access to disk, network or
ability to spawn subprocesses.
    deno run https://deno.land/std/examples/welcome.ts

Grant all permissions:
    deno run -A https://deno.land/std/http/file_server.ts

Grant permission to read from disk and listen to network:
    deno run --allow-read --allow-net https://deno.land/std/http/file_server.ts

Grant permission to read whitelisted files from disk:
    deno run --allow-read=/etc https://deno.land/std/http/file_server.ts

USAGE:
    deno run [OPTIONS] <SCRIPT_ARG>...

OPTIONS:
    -A, --allow-all
            Allow all permissions

        --allow-env
            Allow environment access

        --allow-hrtime
            Allow high resolution time measurement

        --allow-net=<allow-net>
            Allow network access

        --allow-plugin
            Allow loading plugins

        --allow-read=<allow-read>
            Allow file system read access

        --allow-run
            Allow running subprocesses

        --allow-write=<allow-write>
            Allow file system write access

        --cached-only
            Require that remote dependencies are already cached

        --cert <FILE>
            Load certificate authority from PEM encoded file

    -c, --config <FILE>
            Load tsconfig.json configuration file

    -h, --help
            Prints help information

        --importmap <FILE>
            UNSTABLE:
            Load import map file
            Docs: https://deno.land/std/manual.md#import-maps
            Specification: https://wicg.github.io/import-maps/
            Examples: https://github.com/WICG/import-maps#the-import-map
        --inspect=<HOST:PORT>
            activate inspector on host:port (default: 127.0.0.1:9229)

        --inspect-brk=<HOST:PORT>
            activate inspector on host:port and break at start of user script

        --lock <FILE>
            Check the specified lock file

        --lock-write
            Write lock file. Use with --lock.

    -L, --log-level <log-level>
            Set log level [possible values: debug, info]

        --no-remote
            Do not resolve remote modules

    -q, --quiet
            Suppress diagnostic output
            By default, subcommands print human-readable diagnostic messages to stderr.
            If the flag is set, restrict these messages to errors.
    -r, --reload=<CACHE_BLACKLIST>
            Reload source code cache (recompile TypeScript)
            --reload
                Reload everything
            --reload=https://deno.land/std
                Reload only standard modules
            --reload=https://deno.land/std/fs/utils.ts,https://deno.land/std/fmt/colors.ts
                Reloads specific modules
        --seed <NUMBER>
            Seed Math.random()

        --unstable
            Enable unstable APIs

        --v8-flags=<v8-flags>
            Set V8 command line options. For help: --v8-flags=--help


ARGS:
    <SCRIPT_ARG>...
            script args
Code examples
There are other examples on the Deno website which can be found here .
At the time of this writing, the following could be found in the specified repository:
cat.ts- displays the contents of files passed as argumentscatj.ts- does the same thing,cat.tsbut first performs some manipulations with the contents of the fileschat/- chat implementationcolors.ts- an example of styling text using modulescurl.ts- a simple implementationcurlthat outputs the content of the URL passed as an argumentecho_server.ts- TCP echo servergist.ts- program for placing files in gist.github.comtest.ts- testing programwelcome.ts- the program that we launchedxeval.ts- allows you to run TypeScript obtained from any standard data source.deno xevalhas been removed from the list of official teams
First real app on Deno
Let's write some code.
The first app we launched with
deno run https://deno.land/std/examples/welcome.tswas already written, so you haven't learned anything new about Deno.
Let's start with a standard example posted on the Deno website:
import { serve } from 'https://deno.land/std/http/server.ts'
const s = serve({ port: 8000 })
console.log('http://localhost:8000/')
for await (const req of s) {
    req.respond({ body: 'Hello World\n' })
}
Here we are importing a function
servefrom a module http/server. See? We didn't have to install it, and it's not stored on our computer like Node modules. This is one of the reasons for the quick installation of Deno.
With the help
https://deno.land/std/http/server.tswe import the latest version of the module. A specific version can be imported using @VERSION:
import { serve } from 'https://deno.land/std@v0.42.0/http/server.ts'
This is what the function is
serve:
/**
 * Create a HTTP server
 *
 *     import { serve } from "https://deno.land/std/http/server.ts";
 *     const body = "Hello World\n";
 *     const s = serve({ port: 8000 });
 *     for await (const req of s) {
 *       req.respond({ body });
 *     }
 */
 export function serve(addr: string | HTTPOptions): Server {
  if (typeof addr === 'string') {
    const [hostname, port] = addr.split(':')
    addr = { hostname, port: Number(port) }
  }

  const listener = listen(addr)
  return new Server(listener)
}
Next, we call the function
serve()and pass it an object with a property port.
We then run a loop to respond to each request from the server:
for await (const req of s) {
  req.respond({ body: 'Hello World\n' })
}
Note that we are using the keyword
awaitwithout wrapping the code in a asyncfunction.
Let's run the program locally. I am using VS Code, but you can use any editor.
I recommend installing an extension from justjavac (there is another one with the same name, but it is deprecated and may disappear in the future): The

extension provides several utilities to help you write Deno applications.
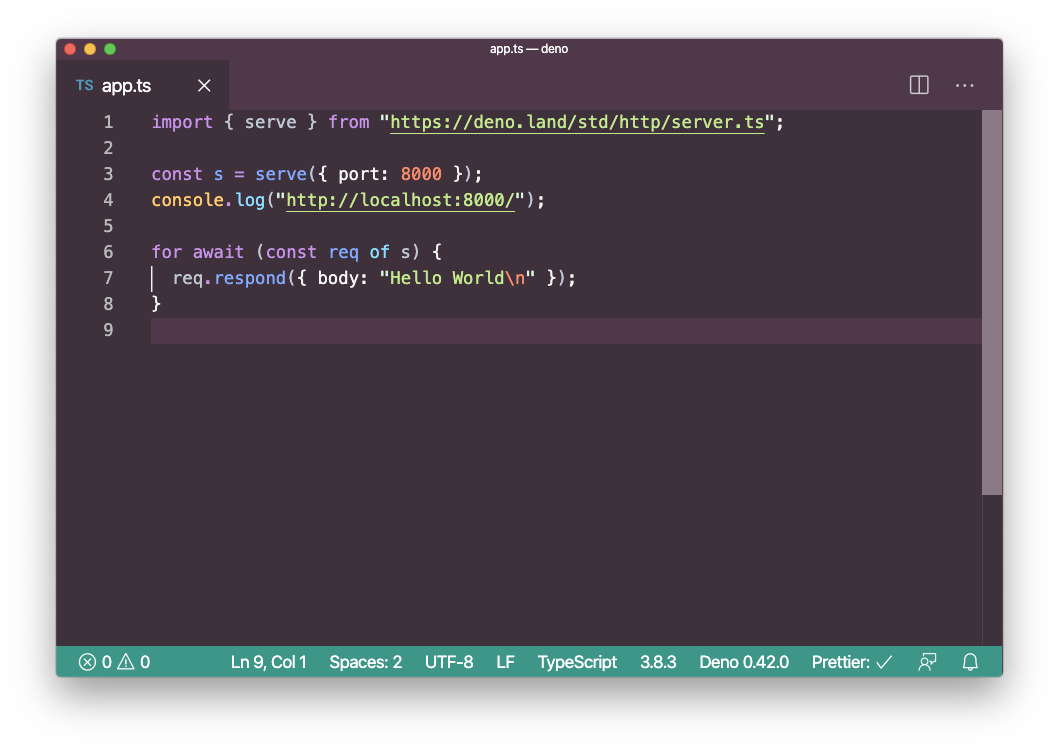
Let's create a file
app.tsand paste our code into it:

Run it with
deno run app.ts:

Deno will load all the dependencies that the program needs, but first the one that we import in the file.
The https://deno.land/std/http/server.ts file has several dependencies of its own:
import { encode } from '../encoding/utf8.ts'
import { BufReader, BufWriter } from '../io/bufio.ts'
import { assert } from '../testing/asserts.ts'
import { deferred, Deferred, MuxAsyncIterator } from '../async/mod.ts'
import {
    bodyReader,
    chunkedBodyReader,
    emptyReader,
    writeResponse,
    readRequest,
} from './_io.ts'
import Listener = Deno.Listener
import Conn = Deno.Conn
import Reader = Deno.Reader
These dependencies are imported automatically.
At the end, we have a problem:
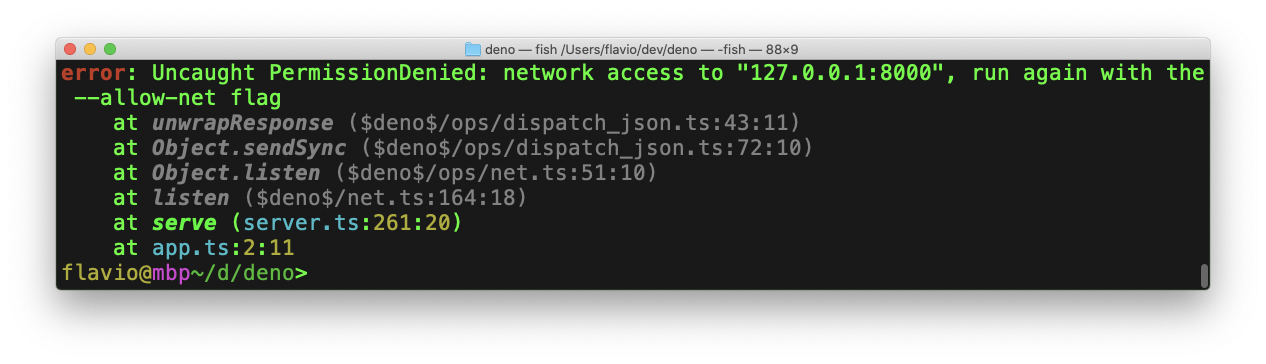
What is going on? We got a permission denied error.
Let's talk about the sandbox.
Sandbox
As I mentioned earlier, Deno has a sandbox that prevents programs from doing things for which they have not received permission.
What does this mean?
As Ryan says in his talk, sometimes you want to run a JavaScript program outside of the browser, and you don't want the program to have access to everything on your system. Or when it comes to the outside world using the network.
Nothing prevents the Node.js application from getting your SSH key or other information from your system and sending it to the server. This is why we usually only install Node packages from trusted sources. But how do we know if one of the projects we are using has been hacked?
Deno mimics the permission system used by the browser. JavaScript code running in a browser cannot do anything with your system until you explicitly allow it to do so.
Going back to Deno, if a program needs network access, we have to give it permission to do so.
This is done using the flag
--allow-net:
deno run --allow-net app.ts

The server is now running on port 8000:

Other flags:
--allow-env- allows access to environment variables--allow-hrtime- allows high resolution measurement--allow-net=<allow-net>- allows access to the network--allow-plugin- allows loading plugins--allow-read=<allow-read>- allows reading files--allow-run- allows starting subprocesses--allow-write=<allow-write>- allows writing files--allow-all- grants all permissions (similar-A)
Permissions for
net, readand writemay be partial. For example, we can allow read-only files that are in a certain directory: --allow-read=/dev.
Code formatting
One of the things I love about Go is the command
gofmt. All Go code looks the same. Everyone is using it gofmt.
JavaScript developers usually use Prettier, and
deno fmtin fact also use it under the cut.
Let's say you have such a badly formatted file:
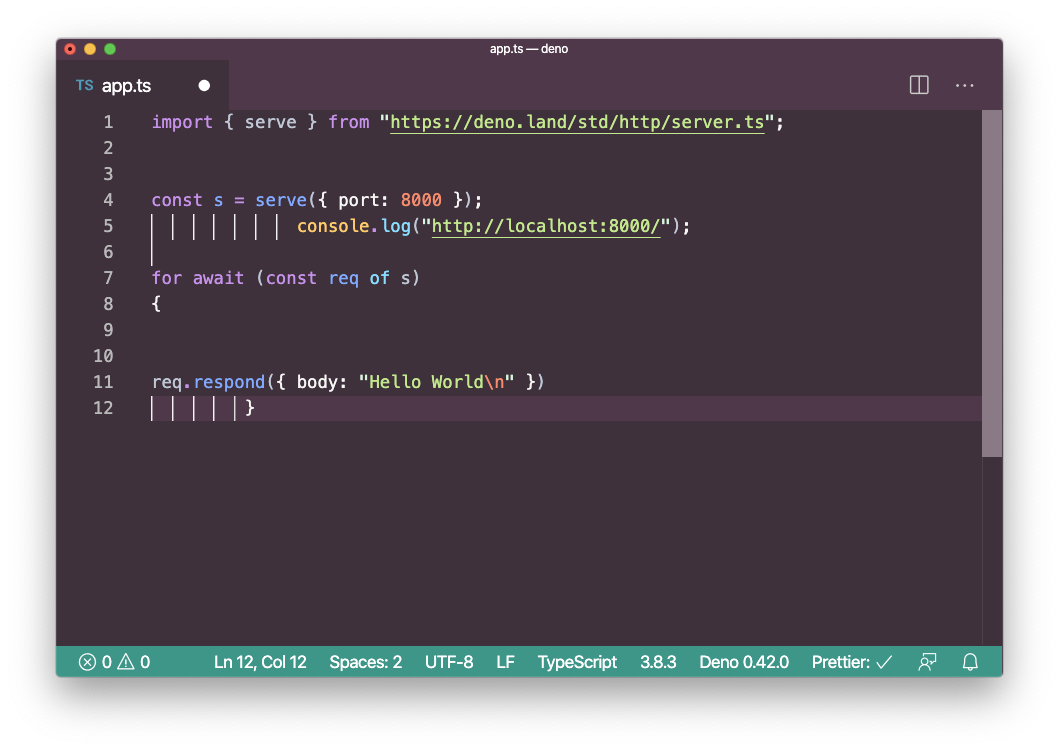
You start
deno fmt app.tsand automatic formatting takes place with missing semicolons:
Standard library
Deno's standard library is quite extensive despite the age of the project.
It includes the following:
archieve- utilities for archivingasync- utilities for working with asynchronous codebytes- helper functions for splitting bytesdatetime- parsing dates / timesencoding- encoding / decoding in different formatsflags- parsing command line flagsfmt- formation and displayfs- application interface for working with the file systemhash- encryption libraryhttp- HTTP serverio- library of input / output operationslog- utilities for loggingmime- mixed data supportnode- backward compatibility layer with Nodepath- work with pathsws- web sockets
One more example
Let's take a look at another official example -
cat.ts:
const filenames = Deno.args
for (const filename of filenames) {
    const file = await Deno.open(filename)
    await Deno.copy(file, Deno.stdout)
    file.close()
}
We assign
filenamescontent to a variable Deno.args, which is a variable containing the arguments passed using the command line.
We iterate over them, and for each one, we first use them
Deno.open()to open the file and then Deno.copy()copy the content to Deno.stdout. Finally, we close the file.
If you run:
deno run https://deno.land/std/examples/cat.ts
The program will load and compile, but nothing happens because we did not pass any arguments.
Now let's try this:
deno run https://deno.land/std/examples/cat.ts app.ts
We
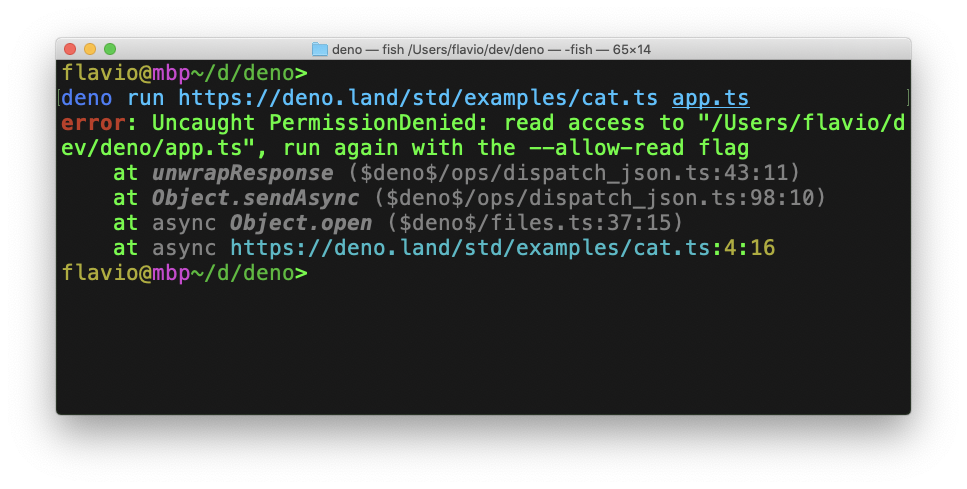
get permission error: Deno does not have access to the system by default. Let's grant him this permission with
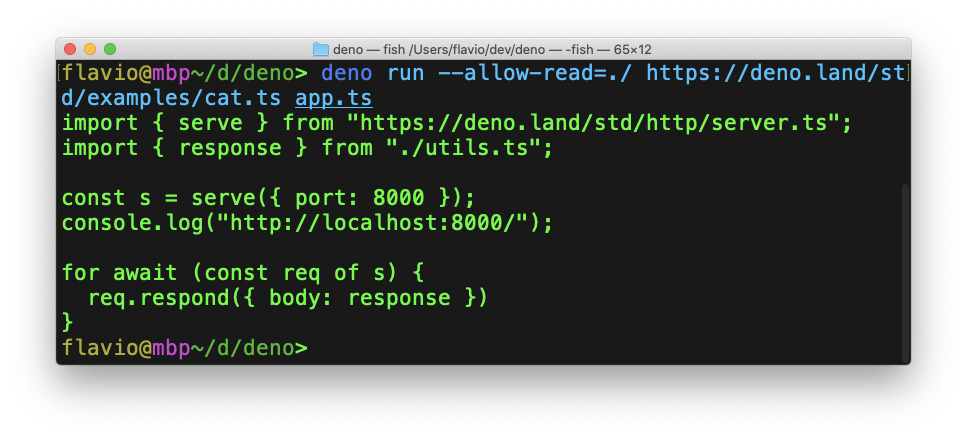
--allow-read:
deno run --allow-read=./ https://deno.land/std/examples/cat.ts app.ts
Does Express / Hapi / Koa / * exist for Deno?
Oh sure. Take a look at the following projects:
Example: using Oak to create a REST API
I am going to create a REST API using Oak. Oak is interesting in that it is inspired by Koa, the popular middleware for NOde.js, and has a similar syntax.
Our API will be very simple.
Our server will store in memory a list of dogs, their names and ages.
We want to get the following functionality:
- add new dogs to the list
- get a list of all dogs
- get information about a specific dog
- remove a dog from the list
- update the dog's age
We'll be writing the code in Typescript, but nothing prevents you from doing it in JavaScript - just don't specify the data types.
We create a file
app.ts.
Let's start by importing objects to
Applicationand Routerfrom Oak:
import { Application, Router } from 'https://deno.land/x/oak/mod.ts'
We get the environment variables PORT and HOST:
const env = Deno.env.toObject()
const PORT = env.PORT || 4000
const HOST = env.HOST || '127.0.0.1'
By default, our application will run on localhost: 4000.
Create an Oak application and launch it:
const router = new Router()

const app = new Application()

app.use(router.routes())
app.use(router.allowedMethods())

console.log(`Listening on port ${PORT}...`)

await app.listen(`${HOST}:${PORT}`)
The application should now work.
We check:
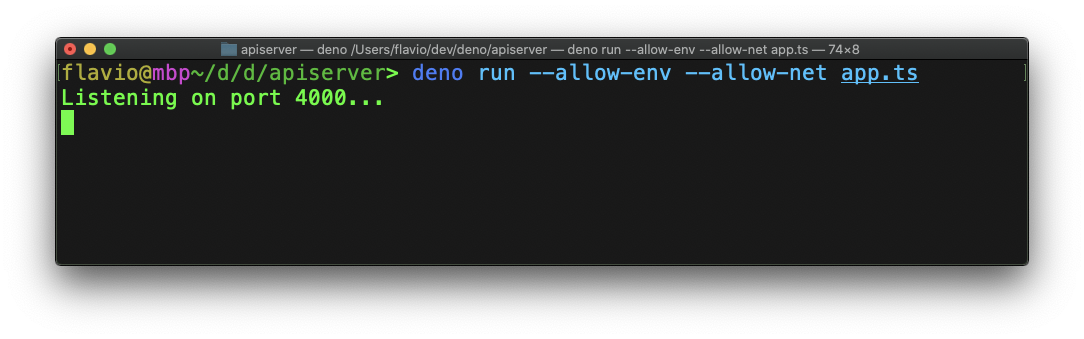
deno run --allow-env --allow-net app.ts
Deno downloads the dependencies:
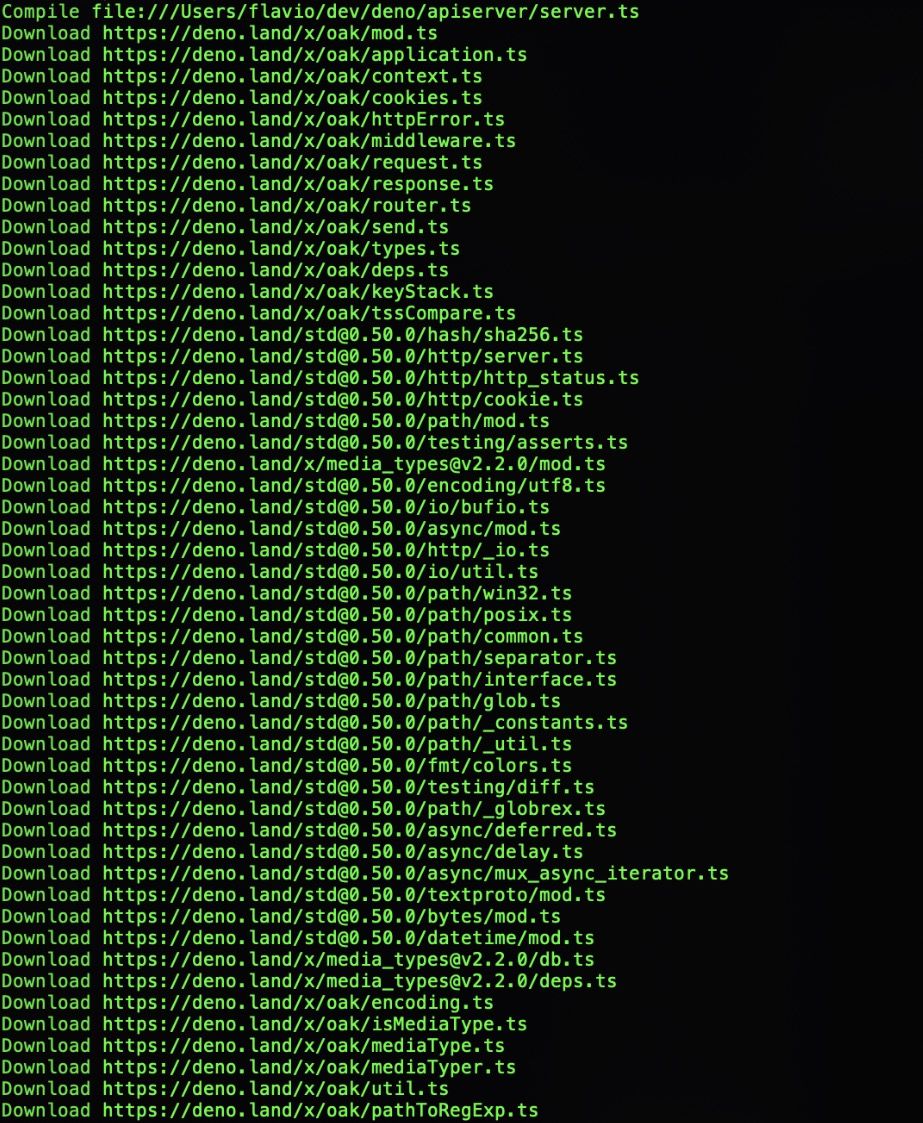
And starts listening on port 4000.
On restart, the installation step will be skipped thanks to caching:
Define an interface for the dog, then define an array
dogcontaining the objects Dog:
interface Dog {
  name: string
  age: number
}

let dogs: Array<Dog> = [
  {
    name: 'Roger',
    age: 8,
  },
  {
    name: 'Syd',
    age: 7,
  },
]
Let's start implementing the API.
Everything is in place. Let's add several functions to the router that will be called when accessing the specified endpoint:
const router = new Router()

router
    .get('/dogs', getDogs)
    .get('/dogs/:name', getDog)
    .post('/dogs', addDog)
    .put('/dogs/:name', updateDog)
    .delete('/dogs/:name', removeDog)
We have defined the following:
GET /dogsGET /dogs/:namePOST /dogsPUT /dogs/:nameDELETE /dogs/:name
Let's implement these routes one by one.
Let's start with
GET /dogs, which returns a list of all dogs:
export const getDogs = ({ response }: { response: any }) => {
    response.body = dogs
}

Here's how to get a specific dog by name:
export const getDog = ({
  params,
  response,
}: {
    params: {
        name: string
    },
    response: any
}) => {
    const dog = dogs.filter(dog => dog.name === params.name)
    if (dog.length) {
        response.status = 200
        response.body = dog[0]
        return
    }

    response.status = 400
    response.body = { msg: `Cannot find dog ${params.name}` }
}

Here's how to add a new dog to the list:
export const addDog = async ({
    request,
    response,
}: {
    request: any
    response: any
}) => {
    const body = await request.body()
    const dog: Dog = await body.value
    dogs.push(dog)

    response.body = { msg: 'OK' }
    response.status = 200
}

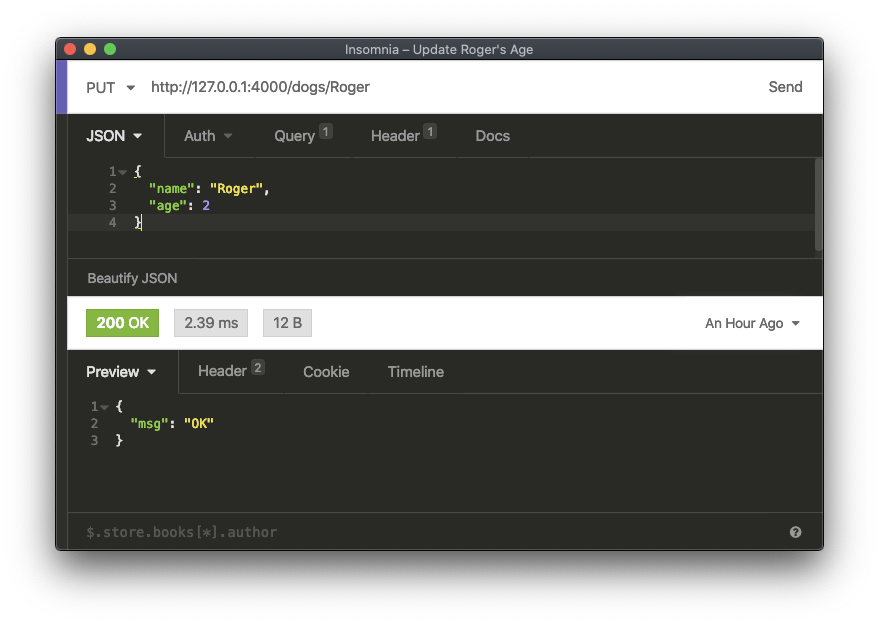
Here's how to update your dog's age:
export const updateDog = async ({
    params,
    request,
    response,
}: {
    params: {
        name: string
    },
    request: any
    response: any
}) => {
    const temp = dogs.filter((existingDog) => existingDog.name === params.name)
    const body = await request.body()
    const { age }: { age: number } = await body.value

    if (temp.length) {
        temp[0].age = age
        response.status = 200
        response.body = { msg: 'OK' }
        return
    }

    response.status = 400
    response.body = { msg: `Cannot find dog ${params.name}` }
}
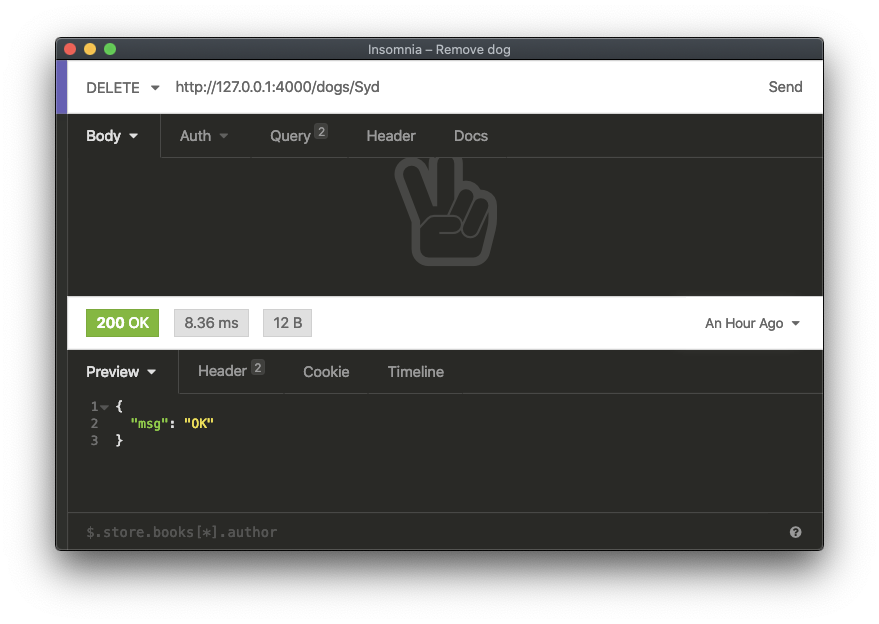
And here's how to remove a dog from the list:
export const removeDog = ({
    params,
    response,
}: {
    params: {
        name: string
    },
    response: any
}) => {
    const lengthBefore = dogs.length
    dogs = dogs.filter((dog) => dog.name !== params.name)

    if (dogs.length === lengthBefore) {
        response.status = 400
        response.body = { msg: `Cannot find dog ${params.name}` }
        return
    }

    response.body = { msg: 'OK' }
    response.status = 200
}
Full application code:
import { Application, Router } from 'https://deno.land/x/oak/mod.ts'

const env = Deno.env.toObject()
const PORT = env.PORT || 4000
const HOST = env.HOST || '127.0.0.1'

interface Dog {
  name: string
  age: number
}

let dogs: Array<Dog> = [
  {
    name: 'Roger',
    age: 8,
  },
  {
    name: 'Syd',
    age: 7,
  },
]

export const getDogs = ({ response }: { response: any }) => {
  response.body = dogs
}

export const getDog = ({
  params,
  response,
}: {
  params: {
    name: string
  },
  response: any
}) => {
  const dog = dogs.filter(dog => dog.name === params.name)
  if (dog.length) {
    response.status = 200
    response.body = dog[0]
    return
  }

  response.status = 400
  response.body = { msg: `Cannot find dog ${params.name}` }
}

export const addDog = async ({
  request,
  response,
}: {
  request: any
  response: any
}) => {
  const body = await request.body()
  const { name, age }: { name: string; age: number } = await body.value
  dogs.push({
    name: name,
    age: age,
  })

  response.body = { msg: 'OK' }
  response.status = 200
}

export const updateDog = async ({
  params,
  request,
  response,
}: {
  params: {
    name: string
  },
  request: any
  response: any
}) => {
  const temp = dogs.filter((existingDog) => existingDog.name === params.name)
  const body = await request.body()
  const { age }: { age: number } = await body.value

  if (temp.length) {
    temp[0].age = age
    response.status = 200
    response.body = { msg: 'OK' }
    return
  }

  response.status = 400
  response.body = { msg: `Cannot find dog ${params.name}` }
}

export const removeDog = ({
  params,
  response,
}: {
  params: {
    name: string
  },
  response: any
}) => {
  const lengthBefore = dogs.length
  dogs = dogs.filter(dog => dog.name !== params.name)

  if (dogs.length === lengthBefore) {
    response.status = 400
    response.body = { msg: `Cannot find dog ${params.name}` }
    return
  }

  response.body = { msg: 'OK' }
  response.status = 200
}

const router = new Router()
router
  .get('/dogs', getDogs)
  .get('/dogs/:name', getDog)
  .post('/dogs', addDog)
  .put('/dogs/:name', updateDog)
  .delete('/dogs/:name', removeDog)

const app = new Application()

app.use(router.routes())
app.use(router.allowedMethods())

console.log(`Listening on port ${PORT}...`)

await app.listen(`${HOST}:${PORT}`)
Thank you for attention.