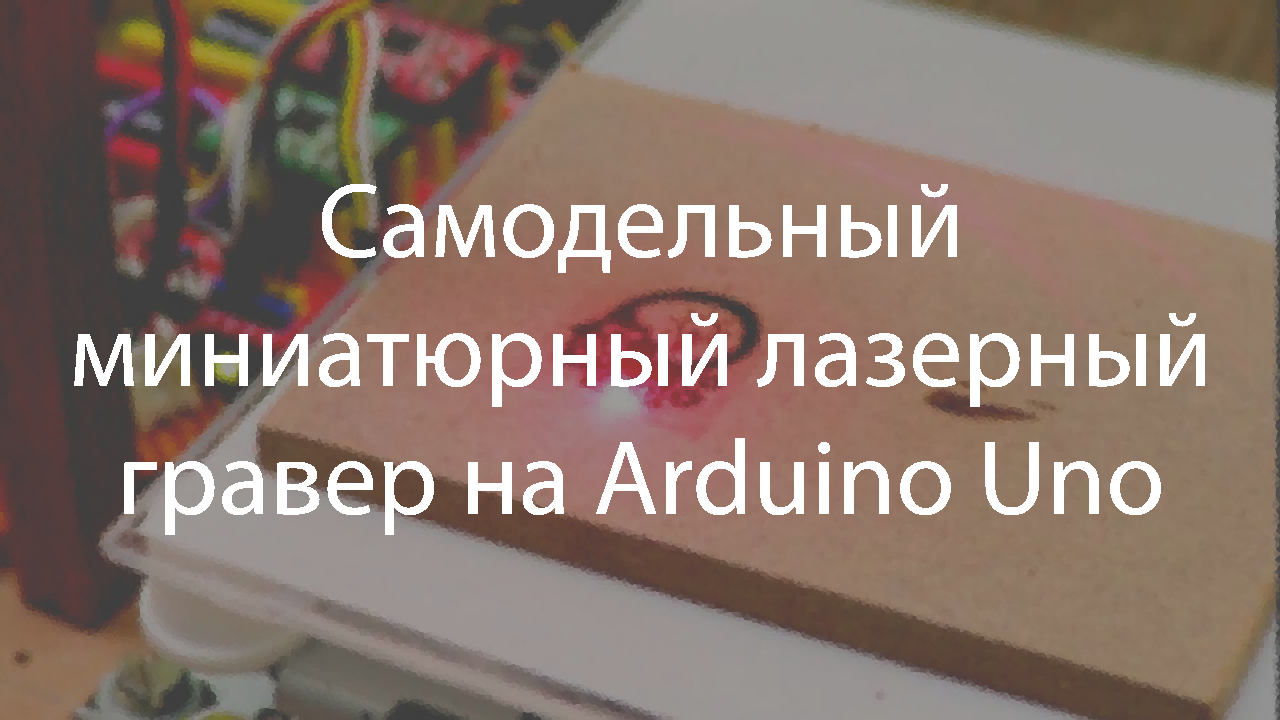
I believe that the project I want to talk about will be of interest to everyone involved in electronics. Namely, we are talking about a miniature laser engraver with which you can apply images to cardboard, wood, vinyl stickers and other similar materials. I got the idea for the project from this tutorial, doing something my own way.
Laser engraver in action and device assembly process
Materials and tools
To create an engraver, you need the following main components:
- Arduino UNO (with USB cable).
- 2 stepper motors from DVD drives.
- 2 stepper motor controllers A4988 and corresponding expansion board for Arduino.
- 250 mW laser with adjustable optics.
- Power supply (minimum - 12V, 2A).
- 1 N-channel field-effect transistor IRFZ44N.
Here is a list of the tools you need:
- Soldering iron.
- Drill.
- Metal file.
- Sandpaper.
- Nippers.
- Glue gun.
Step 1. Stepper motor
In our project, we will need two stepper motors from DVD drives. One is needed to move the engraver's table in the X-axis and the other in the Y-axis. Look for suitable drives on non-working computers or at your local used electronics store. I found what I needed very cheaply in such a store.

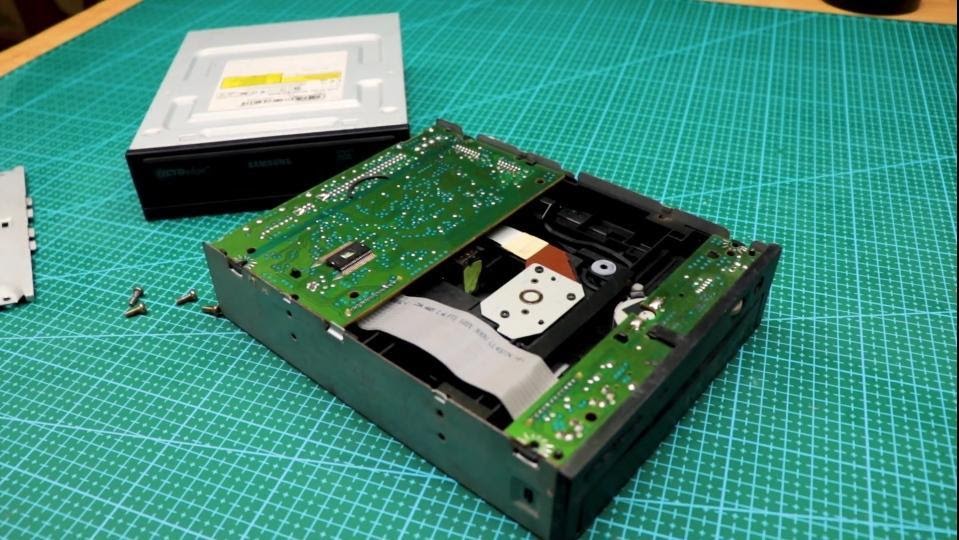

drives we need DVD drives need to be disassembled. The sequence of actions for "getting" from the drive what we need looks like this:
- Unscrew all the screws using a Phillips screwdriver.
- Disconnect all cables.
- We open the case and unscrew the screws that secure the stepper motor and the corresponding mechanism.
- We remove the engine and the mechanism attached to it.
As a result, we have two 4-pin bipolar stepper motors at our disposal.
Step 2. Exploring the stepper motor

stepper motor is an electromechanical device that converts sequences of electrical impulses into discrete angular movements of the rotor. That is, the rotor of such an engine can, in response to a signal arriving at it, perform a certain number of steps. Stepper motors can be compared to digital-to-analog converters that convert digital signals from control circuits into something related to the physical world. These motors are used in a wide variety of electronic devices. For example - in computer peripherals, in disk drives, in robotics.
Step 3. Prepare stepper motors


To begin with, using a multimeter in the continuity check mode, we find the contacts connected to two motor coils - to coil A, and to coil B.
I prepared 2 pairs of wires of different colors, one pair for connecting to the coil A, the second is for connecting to coil B.
Step 4. Assembling the engraver's table

To assemble the movable engraving table, I glued the mechanisms of the stepper motors, placing them perpendicular to each other. The base of the table is made of chipboard.
Step 5. Assembling the laser holder


The holder for the laser is assembled from wood. The laser module is attached to it with a cable tie.
Step 6. Attaching the laser to the holder

This project uses a 200-250mW laser module (650nm wavelength). The optical system of this module allows you to focus the laser at the desired distance.
In order to ensure cooling of the engraver during its long-term operation, you can use a radiator. It can be bought or removed from an old motherboard.
Step 7. Connecting electronic components

Now you need to connect the expansion board to the Arduino. To it you need to connect stepper motor controllers, stepper motors, laser and power supply.
Step 8. Download and Install Benbox Laser Engraver, Arduino IDE and CH340 Driver

Now it's time to download and install the required software. In particular, we need the following programs:
- Benbox Laser Engraver 3.7.99.
- Arduino IDE .
- CH340 driver for Arduino (included in Benbox Laser Engraver distribution).
After installing the software, you need to restart your computer and connect the Arduino to your computer via USB.
Step 9. Installing Firmware for Arduino Nano

Now in the Benbox Laser Engraver window you need to click on the button with the lightning bolt (it is located in the top row of buttons, on the right). Next, in the window that appears, select the appropriate COM port, select the device (UNO (328p)) and specify the path to the .hex firmware file. Now you need to click on the checkmark button. After successfully completing the Arduino firmware, a green checkmark will appear in the title bar.
Step 10: Configuring Benbox Laser Engraver Settings

Now you need to set up the parameters of the engraver. To do this, click on the blue menu button, which is located in the upper right corner of the program window. Then, to open the list of parameters, you need to click on the button with the arrow pointing to the right. Next, you need to fill in the list of parameters as shown in the previous figure.
After that, click on the left arrow button and select the port to which the engraver is connected.

Step 11. First engraving session

engraving start point (0, 0) is marked with a marker that looks like a red arc in the figure. It is located in the upper left corner of the working area of the program. When checking the correctness of the system, you can draw a simple figure in the working area using the tools on the left side of the program window. After the image is ready, you can start engraving by clicking on the green arrow button located in the upper toolbar. But before that you need to focus the laser beam.
Step 12. Working with the engraver
If you succeed in everything that we talked about above, it means that now you have your own laser engraver.

Are you planning to make a laser engraver?