
I've always wanted to have personal space on the web. A place where everything would be arranged as convenient for me. I saw the best solution as an inexpensive VPS that I could equip according to my needs. For a long time I could not approach the solution of this problem, but somehow imperceptibly a set of tools came up that allowed me to organize just such a software environment as I wanted.
If you also want to create your own personal space on the network, but you do not know where to start, or you are simply interested in such wonderful software products as Docker, Portainer, Traefik - welcome under cat.
Introduction
To be honest, I don't really like the command line. That is, I like the very idea of a light, minimalistic universal interface that requires almost no resources, but a black window with a blinking cursor makes me feel frustrated and helpless. And I even know where I got it from.
When I was studying at the institute (this is the time when the Internet with cards and the first Internet cafe just appeared in my city), my friend, who by that time had managed to get a job as a laboratory assistant at the Department of Computer Science, actively tried to hook me on Linux. And here I am, considering myself an advanced computer scientist, having experience, probably, hundreds of Windows installations, come home after graduation and with a confident movement insert the disk with the Linux distribution kit into the drive ... So what? And nothing.
For many years I don’t remember all the details, I probably even managed to establish it, but then there was a failure - I just didn’t understand what to do. The usual way that worked in Windows - rummaging through the control panel randomly including different settings until everything works (or breaks completely, but then it was possible to reinstall Windows and start all over again) did not work here. All I had was a console that rejected my attempts to tweak things over and over again. I remember that I even had a book on Linux, which also did not help in any way - the commands that were given there, for some reason, for some reason did not work. In general, after suffering for several days, I then decided for myself that Linux is some kind of nonsense, and with relief I returned to my usual Windows.
There were also attempts to master Linux, life over and over again brought me together with his fans who tried to drag me to their camp, I even somehow tried to put a ghent (unsuccessfully naturally, although I had a printout with a step-by-step guide on how to do it), but the curse of the console hovered over me, and with each failure, that same feeling of helplessness grew stronger. After the Windows graphical interface, where all the settings are in front of you at a glance, colliding with the console, I felt blind, trying to find my way by touch in an unfamiliar place. So for a very long time I was a supporter of the Microsoft technology stack, programming in .net using VisualStudio (it's gorgeous, and no console). Please do not judge strictly, perhaps if at that time I had the opportunity to put Linux on a virtual machine,in order to calmly deal with it and a decent Internet at hand, this story would take a completely different turn.
Now everything has changed. With the advent of the web in its modern form into our life, I switched to Node.js and willy-nilly began to be imbued with the ideology of the console and Linux. To host my developments, I needed a VPS, and it turned out that VPS with Windows are much more expensive, so my toad outweighed my frustrations regarding the console, and the presence of high-speed Internet made it possible to instantly find answers to the questions that arose.
I learned to use ssh, realized the power of git and began to actively use docker, but I also like to use a graphical interface for my tasks, and in this article I want to introduce you to a wonderful set of tools that allow me to solve my everyday tasks, not referring once again to the console.
Preparation
I created a VPS of minimal configuration (vCPU: 1 core, RAM: 1 GB, NVMe: 20 GB) on macloud . For installation on a VPS, I chose the Debian 10 distribution. When installing, I immediately added an SSH key through the control panel, so that it would be convenient to enter the console using an SSH client. For further experiments, you will need the following:
- Update the system
- Install docker and docker-compose
- Include swap file.
You can update the operating system with the following commands:
# apt update


# apt upgrade

 ,    .
To install docker, follow the official instructions https://docs.docker.com/engine/install/debian/
Install the required dependencies:
# apt-get install apt-transport-https ca-certificates curl gnupg lsb-release
Add the official Docker GPG key:
# curl -fsSL https://download.docker.com/linux/debian/gpg | gpg --dearmor -o /usr/share/keyrings/docker-archive-keyring.gpg
Add the repository:
# echo «deb [arch=amd64 signed-by=/usr/share/keyrings/docker-archive-keyring.gpg] https://download.docker.com/linux/debian $(lsb_release -cs) stable» | tee /etc/apt/sources.list.d/docker.list > /dev/null
Now it remains to update the package list:
# apt-get update
and install docker:
# apt-get install docker-ce docker-ce-cli containerd.io
You can check that everything is installed correctly by running the command:
# docker run hello-world
If a greeting appears, then everything went well. At the time of this writing, I have the following version installed:
# docker -v

Docker version 20.10.6, build 370c289
Now you need to install docker-compose. To do this, we will use the official instructions:
https://docs.docker.com/compose/install/
First, we need to get a link to the latest release of docker-compose. The list of releases can be found here: https://github.com/docker/compose/releases
At the time of this writing, the most recent version was 1.29.2. We need a linux version, so we select a file called docker-compose-Linux-x86_64. Let's copy the link to it. Now you need to enter the following command in the console (paste the link you received above in the right place):
# curl -L "< >" -o /usr/local/bin/docker-compose
In my case, it turned out:
# curl -L «https://github.com/docker/compose/releases/download/1.29.2/docker-compose-Linux-x86_64» -o /usr/local/bin/docker-compose
Run the command and download the docker-compose binary.
The last step is to set execution permission for it. This can be done with the following command:
# chmod +x /usr/local/bin/docker-compose
If everything went well, then the installation process is over, now you can check the version of docker-compose. I got it like this:
# docker-compose -v

docker-compose version 1.29.2, build 5becea4c
The last step is to enable the paging file, given the small amount of memory it will definitely not be superfluous:
Create a 4 GB file
# fallocate -l 4G /swapfile
Let's assign him the necessary rights:
# chmod 600 /swapfile
Let's initialize it as a swap file:
# mkswap /swapfile
Finally, we activate:
# swapon /swapfile
You can check if the paging file has appeared in the system with the free command. I got it all:
# free

              total        used        free      shared  buff/cache   available

Mem:        1010900      150500      143788        2892      716612      714916

Swap:       4194300           0     4194300
There is one last step left: in order for the paging file to remain active after a reboot, add the following line to the / etc / fstab file:
/swapfile swap swap defaults 0 0
For such tasks, I like to use the Midnight Commander file manager. It is a console file manager with a classic interface. If you have come across Norton Commander / FAR / TotalCommander, you will easily understand how to use it. You can install it with the following command:
# apt-get install mc
And run with the command
# mc
Let's see a painfully familiar picture:
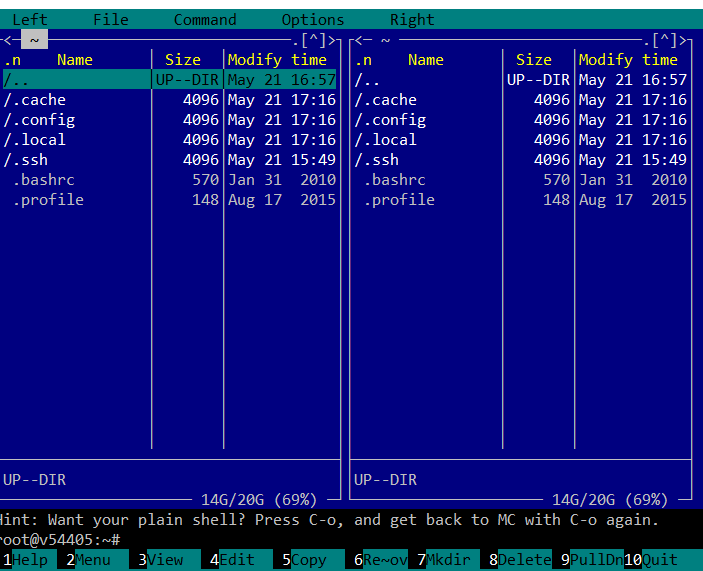
Now we will find the required file and edit it:

This completes the preliminary setup, you can move on.
Portainer
The first tool I would like to introduce you to is Portainer. Portainer is a container management tool for Docker, Swarm, Kubernetes, and Azure ACI. As Portainer's documentation states:
"By negating the need for users to use the command line interface, write YAML, or understand manifests, Portainer makes application deployment and troubleshooting so easy that anyone can do it."
For my purposes, Portainer is just perfect. Let's get to know him better. According to the documentation https://documentation.portainer.io/v2.0/deploy/ceinstalldocker/, the easiest way to do this is as follows:
Create a volume for storing data:
# docker volume create portainer_data
Now you can start Portainer with the following command:
# docker run -d -p 8000:8000 -p 9000:9000 --name=portainer --restart=always -v /var/run/docker.sock:/var/run/docker.sock -v portainer_data:/data portainer/portainer-ce
After starting Portainer, it will be available at http: // <server ip>: 9000 /
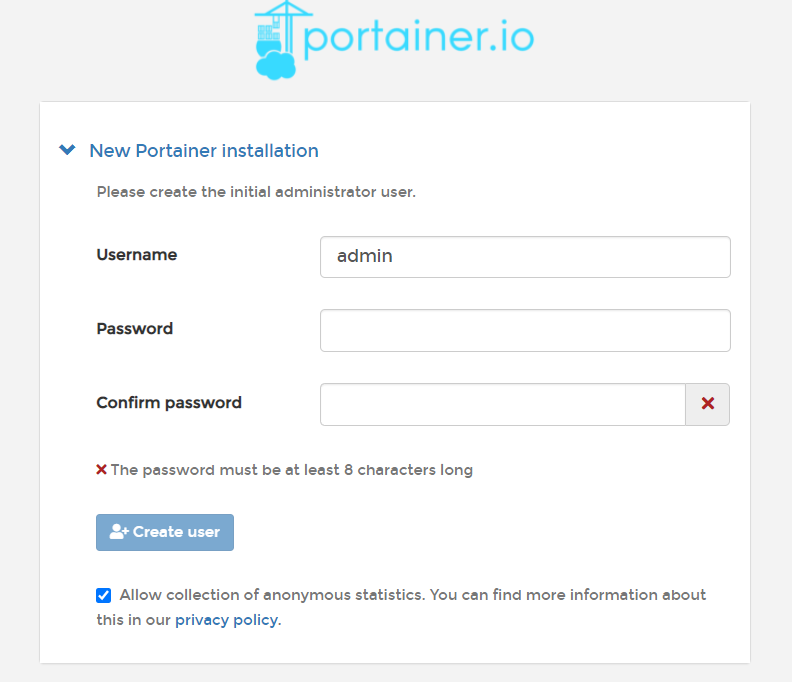
When you first start Portainer, it will ask you to specify the administrator password, after which it will ask you how to connect to the environment:
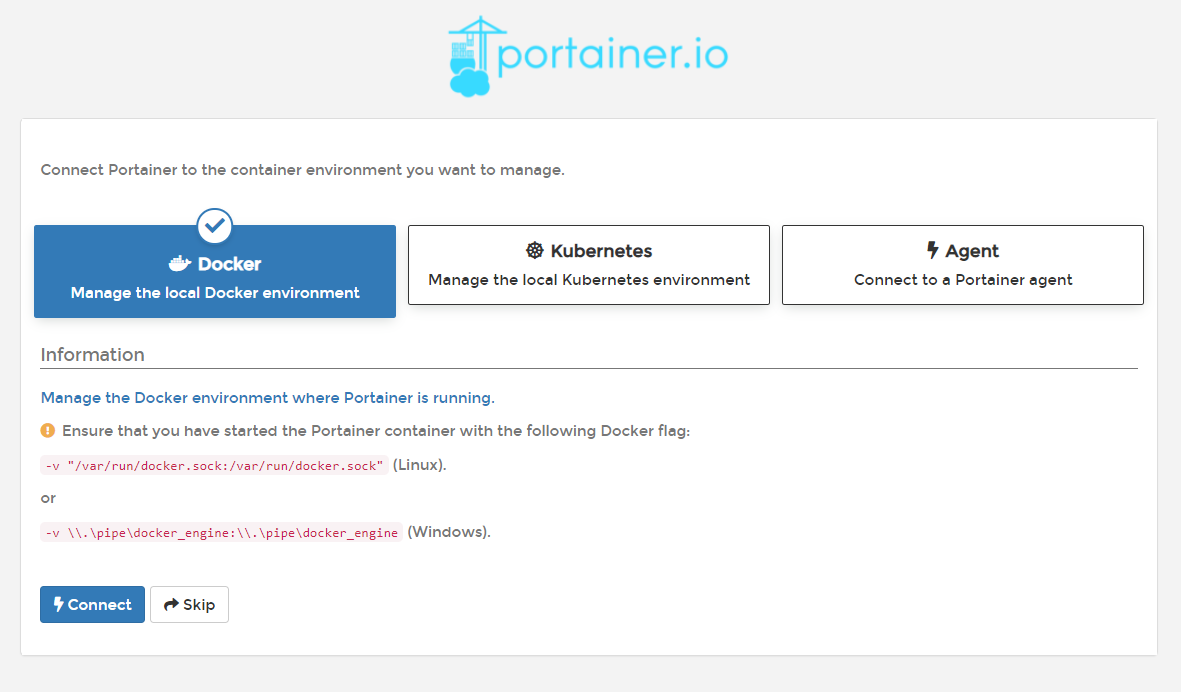
I selected the option to connect to local Docker, after which Portainer's home screen appeared:

As you can see, a local endpoint is available, later you can add connections to other nodes if necessary.
Let's go into it, and we will see a convenient dashboard with summary information:
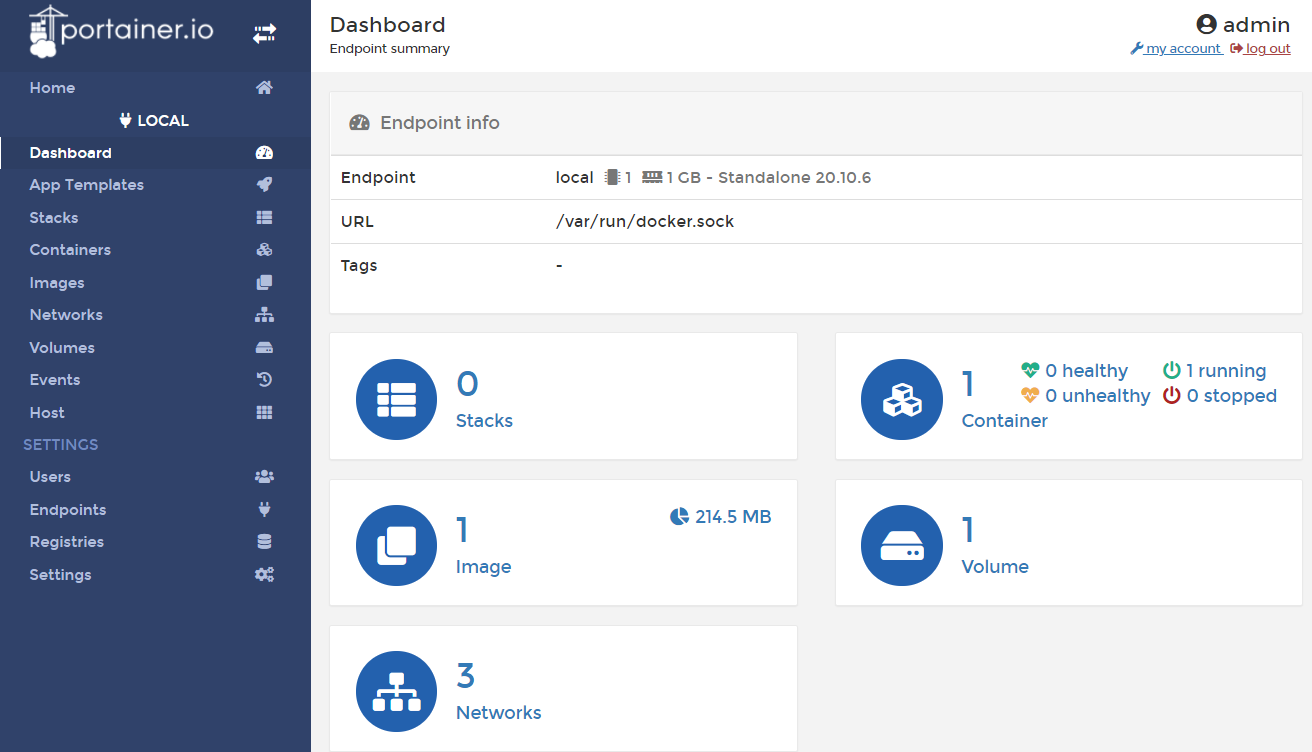
This is where we can manage all aspects of how Docker works. Let's see what we have in our containers:

So far, one container is Portainer itself. The interface is very convenient to view and manage containers, and there is also the ability to add new ones. You can go through the rest of the tabs and see how convenient and thoughtful interface Portainer has.
Of most interest is the Stacks tab. A stack is a collection of interconnected containers that run and work together. In fact, this is the same as Docker Compose, the configuration of which we describe in the docker-compose.yml file and then run with the docker-compose up command.
Portainer allows you to add a stack to the system in a variety of ways, from editing with the built-in editor to downloading from github.
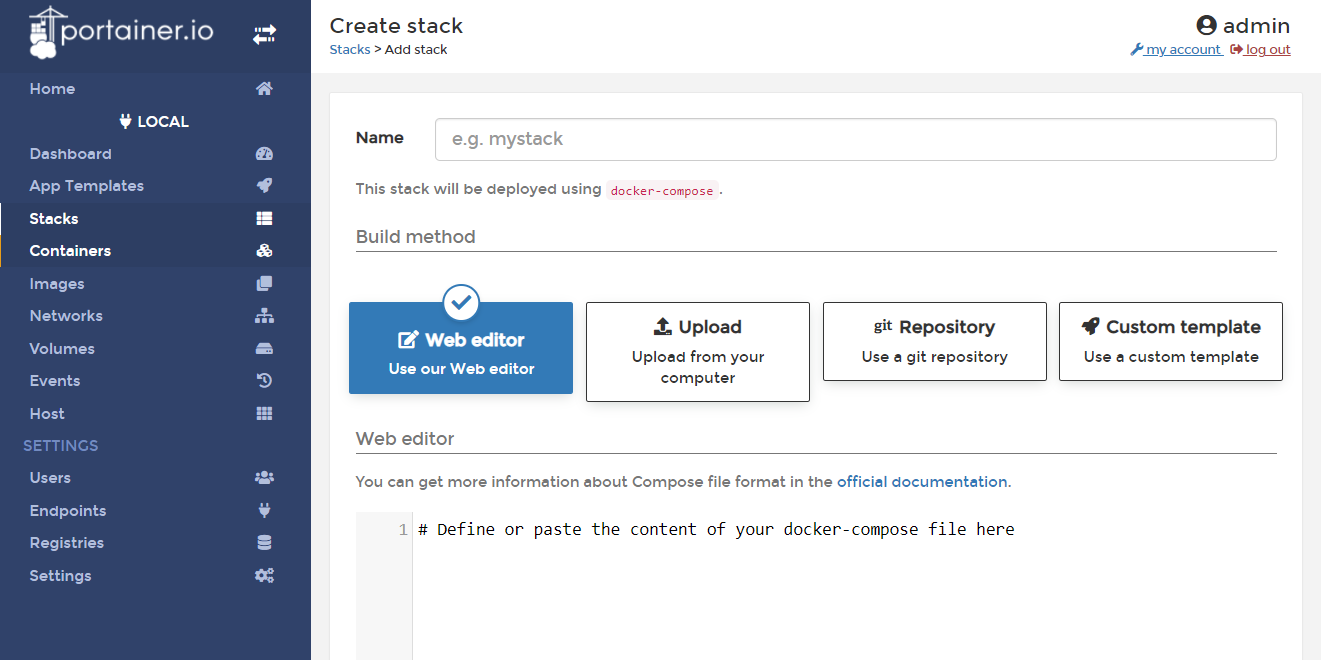
The docker-compose format is used to define the stack, which is what works here under the hood. Using this function, it is most convenient for me to build the necessary infrastructure from containers.
At this point, I propose to distract from studying the portainer's capabilities. I think you have already seen that this is a serious tool, thanks to which you can almost completely abandon the use of the docker CLI. Now let's take a quick look at what I want to get as a result on this VPS.
I periodically have a need to develop "fast" projects. This is what I call projects that do not require deep study. These can be experiments, small sites, bots, information collectors, etc. Anything that does not require building a CI / CD chain. It would be extremely convenient for me to develop and debug such applications right where they will work. Also, I quite often have a situation when I am away from my workplace with a configured development environment, and if something in these projects of mine starts to work wrong, I would like to be able to quickly understand the situation and fix the problem. or just work on projects while you have a free minute from any computer, even if there is nothing on it except a browser and Internet access.
For ease of access, I have a purchased domain name, and I want to configure third-level domains for various tools, so that for example the portainer is available at portainer.example.com. I also want everything to work through https, and in order not to bother buying SSL certificates, use Let's Encrypt. Another requirement is that everything that is not supposed to be publicly accessible is closed by authentication.
In order to implement all this, let's get acquainted with the following great tool. It…
Traefik
Traefik is a reverse proxy server that is tuned for container handling. The following features are important to me:
- on-the-fly configuration update
- docker support as configuration provider
- working with Let's encrypt out of the box
To run traefik with portainer, we will use the docker-compose.yml example provided in the portainer documentation: https://documentation.portainer.io/v2.0/ad/traefik/rp-traefik/
version: «3.9»

services:

  traefik:

    container_name: traefik

    image: «traefik:latest»

    container_name: traefik

    command:

      - «--entrypoints.web.address=:80»

      - «--entrypoints.websecure.address=:443»

      - «--providers.docker=true»

      - «--providers.docker.exposedbydefault=false»

      - «--log.level=ERROR»

      - «--certificatesresolvers.leresolver.acme.httpchallenge=true»

      - «--certificatesresolvers.leresolver.acme.email=user@mymail.com»

      - «--certificatesresolvers.leresolver.acme.storage=./acme.json»

      - «--certificatesresolvers.leresolver.acme.httpchallenge.entrypoint=web»

      - «--entrypoints.web.http.redirections.entryPoint.to=websecure»

      - «--entrypoints.web.http.redirections.entryPoint.scheme=https»

      - «--metrics.prometheus=true»

    ports:

      - «80:80»

      - «443:443»

    volumes:

      - «/var/run/docker.sock:/var/run/docker.sock:ro»

      - «./acme.json:/acme.json»

    networks:

      - intranet

    labels:

      - «traefik.http.routers.http-catchall.rule=hostregexp(`{host:.+}`)»

      - «traefik.http.routers.http-catchall.entrypoints=web»

      - «traefik.http.routers.http-catchall.middlewares=redirect-to-https»

      - «traefik.http.middlewares.redirect-to-https.redirectscheme.scheme=https»

portainer:

    image: portainer/portainer-ce:2.5.0-alpine

    container_name: portainer

    command: -H unix:///var/run/docker.sock

    restart: always

    volumes:

      - /var/run/docker.sock:/var/run/docker.sock

      - portainer_data:/data

    networks:

      - intranet

    labels:

      - «traefik.enable=true»

      - «traefik.http.routers.frontend.rule=Host(`portainer.example.com`)»

      - «traefik.http.routers.frontend.entrypoints=websecure»

      - «traefik.http.services.frontend.loadbalancer.server.port=9000»

      - «traefik.http.routers.frontend.service=frontend»

      - «traefik.http.routers.frontend.tls.certresolver=leresolver»

volumes:

  portainer_data:

networks:

  intranet:

    name: intranet
For the process of obtaining the Let's encrypt certificate to be successful, you need to make sure that the DNS records are configured correctly before starting. I use cloudflare for these purposes, and in it the configuration should look something like this:

The "Content" column should contain the address of our VPS.
Now, if you copy the resulting docker-compose.yml to the server, run the following command:
# docker-compose up -d
Then, after launching at portainer.example.com, the following picture will appear :
Moreover, it will already be protected by the Let's Encrypt certificate:

Traefik has a very handy dashboard to help you understand if the configuration settings were applied correctly. In order to activate it, you need to add the following lines to docker-compose.yml:
services:

  traefik:

  ...

    command:

      ...

      - «--api.dashboard=true»

    labels:

      ...

      - «traefik.enable=true»

      - «traefik.http.routers.traefik.entrypoints=websecure»

      - «traefik.http.routers.traefik.rule=Host(`traefik.example.com`)»

      - «traefik.http.routers.traefik.tls=true»

      - «traefik.http.routers.traefik.service=api@internal»

      - «traefik.http.routers.traefik.tls.certresolver=leresolver»

      - «traefik.http.services.traefik.loadbalancer.server.port=8080»
You also need to add the third-level domain traefik.example.com in the DNS settings. This can be done by analogy with how the domain for portainer was added earlier. After applying the settings at traefik.example.com, we will see the dashboard:
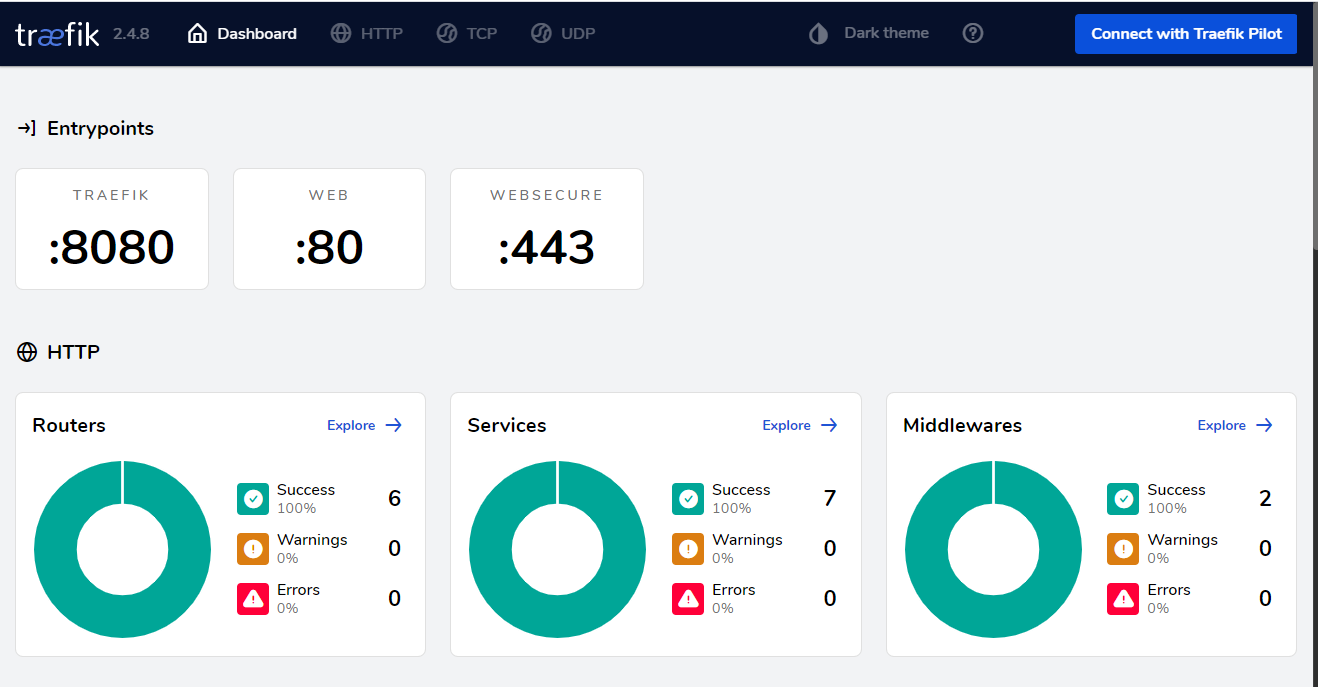
As you can see, Traefik has proven to be a great tool. It works closely with docker, and its dynamic configuration capabilities allow you to completely abandon the use of configuration files for routing settings. Instead, we just write all the necessary parameters as labels for the custom service, so that all the settings are in one place.
Now I propose to digress a little from setting up basic services and add a development environment to the system. It will be…
Visual Studio Code Server
For me, the development environment or IDE has always been something so serious. A powerful software package that is installed on a developer's machine takes up many gigabytes of disk space and RAM. An example of such an IDE that I have been using for many years and still find it the best choice if you are working with the Microsoft technology stack is Microsoft VisualStudio. When I started learning Node.js, I discovered VSCode, and despite the related names, it is a completely different IDE, with a completely different concept and capabilities. The fact that VSCode uses the Chrome engine to display its interface allows VSCode itself to be spaced apart. Thanks to this architecture, the Visual Studio Code Server was born, which can run on a VPS, while the VSCode interface will be accessible through a browser. And no, this is not another online code editor,it is a full-fledged VSCode IDE that has all its great features.
To add VSCode Server to my VPS, I'll create a new stack in Portainer, call it code-server and add the following configuration there:
version: «3.9»

volumes:

  codeserverdata:

  codeappdir:

networks:

  intranet:

    external: true

services:

  code-server:

    image: ghcr.io/linuxserver/code-server

    container_name: code-server

    environment:

      - PUID=1000

      - PGID=1000

      - TZ=Europe/London

#      — PASSWORD=password #optional

      - SUDO_PASSWORD=password #optional

      - PROXY_DOMAIN=code.example.com

    volumes:

      - codeserverdata:/config

      - codeappdir:/app

    extra_hosts:

      host.docker.internal: host-gateway

    restart: always

    networks:

      - intranet

    labels:

      - «traefik.enable=true»

      - «traefik.http.routers.code.rule=Host(`code.example.com`)»

      - «traefik.http.routers.code.tls=true»

      - «traefik.http.routers.code.tls.certresolver=leresolver»

Also, before starting, do not forget to add the third-level domain code.example.com to your DNS records. Now it remains to click the Deploy the stack button.
After the end of the process, a new stack will appear in the portainer, and if we go to code.example.com , we will see the following picture (I immediately turned on the dark theme):

Here you can develop in the same way as in the desktop version of VSCode. By and large, the only difference that I encountered is the difference in the default binding of some keyboard shortcuts, but you quickly get used to it in the process of using.
For convenience, I connected the volume that I mounted to the / app directory to the code-server container, so it's best to create or clone projects from the repository there, in which case the data will not be lost even when the container is re-created.
This image already has Node.js installed, so I don't have to do anything and can start working on my projects right away. If you need other programming languages in your work, please note that the creators of this image maintain a catalog of mods that allow you to add support for various platforms. You can read about how to use them in the image description on Docker Hub, and the list of official mods can be found here: mods.linuxserver.io/?mod=code-server
Please also note that the sudo password is specified in the container settings ... For the sake of demonstration, I left it simple, but in practice it is better to make it complex, or even better to use the SUDO_PASSWORD_HASH property so as not to store the password in clear text. You can read how to do this in the description of the image here: hub.docker.com/r/linuxserver/code-server .
As you probably already noticed, at the moment access to the code-server is not protected in any way and now anyone who visits code.example.com will get access. This is a very bad option, and although you can enable password access in the image settings, I would like to have a single login to access all resources located on the server. To do this, I propose to get acquainted with the following tool. It will be…
KeyCloak
KeyCloak is a modern tool for organizing access to distributed systems using single sign-on technology. In fact, it is the only free tool with such powerful functionality that I have been able to find. If you know a worthy alternative, be sure to write about it in the comments.
In order to add it to my system, I created a new stack called auth in portainer and added the following configuration to it:
version: '3.9'

networks:

  intranet:

    external: true

services:

 keycloak:

    image: jboss/keycloak

    container_name: keycloak

    restart: always

    networks:

      - intranet

    environment:

      KEYCLOAK_PASSWORD: password

      PROXY_ADDRESS_FORWARDING: «true»

    labels:

      - «traefik.enable=true»

      - «traefik.http.routers.keycloak.rule=Host(`auth.yourdomain.com`)»

      - «traefik.http.routers.keycloak.tls=true»

      - «traefik.http.routers.keycloak.tls.certresolver=leresolver»

After clicking the Deploy the stack button, KeyCloak will be available at auth.example.com . If we go there, we will be greeted by the KeyCloak welcome window:

Let's go to the admin console:
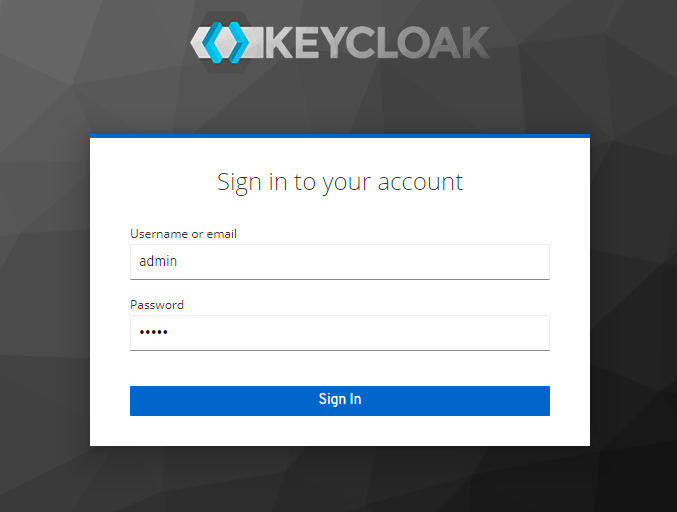
The username will be admin, and the initial password is the one we set in the stack configuration of the KEYCLOAK_PASSWORD environment variable. After login, we will get to the KeyCloak admin panel:
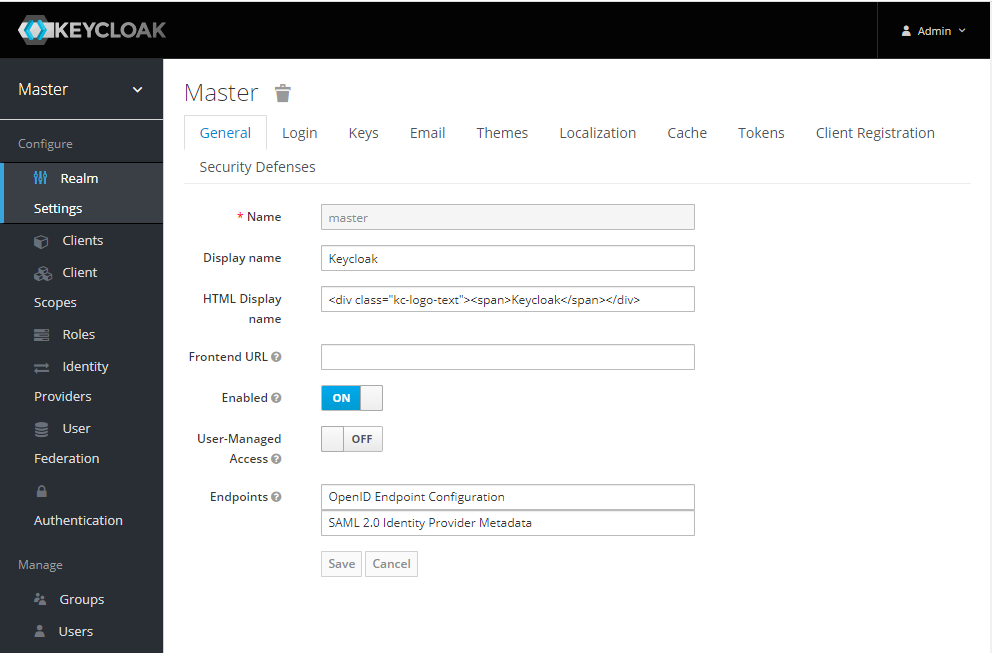
Recommendations for the initial configuration of KeyCloak for docker can be found in the official documentation here www.keycloak.org/getting-started/getting-started-docker .
In short, you need to create a new custom Realm, create a user in it and add a new client.
For the client, you need to set Access Type: confidential and add our domains to the Valid Redirect URIs, while these are "https://traefik.example.com/*" and " code.example.com *":

After installing Access Type: confidential, the Credentials tab will appear, in which you can pick up the Secret, it will be useful to us later when setting up.
This concludes the KeyCloak setup for now. Now we need to make friends with Traefik. Let me remind you that we want to prevent unauthenticated users from accessing code.example.com and traefik.example.com. For these purposes, traefik has a ForwardAuth middleware that allows you to organize authorization through an external service. To ensure its KeyCloak interaction we need an intermediate service, I will use github.com/thomseddon/traefik-forward-auth . It is also available as an image on Docker Hub, so I'll just add the portainer's auth stack configuration with this service:
  traefik-forward-auth:

    image: thomseddon/traefik-forward-auth

    container_name: traefik-forward-auth

    environment:

      - DEFAULT_PROVIDER=oidc

      - PROVIDERS_OIDC_ISSUER_URL=https://auth.example.com/auth/realms/example

      - PROVIDERS_OIDC_CLIENT_ID=traefik

      - PROVIDERS_OIDC_CLIENT_SECRET=d7fb86f0-71a9-44f7-ab04-967f086cd89e

      - SECRET=something-random

      - LOG_LEVEL=debug

    labels:

      - «traefik.enable=true»

      - «traefik.http.middlewares.traefik-forward-auth.forwardauth.address=http://traefik-forward-auth:4181»

      - «traefik.http.middlewares.traefik-forward-auth.forwardauth.authResponseHeaders=X-Forwarded-User»

      - «traefik.http.services.traefik-forward-auth.loadbalancer.server.port=4181»

    restart: always
Here, the PROVIDERS_OIDC_ISSUER_URL variable should contain the path to the Realm we created earlier in Keycloak, PROVIDERS_OIDC_CLIENT_ID should contain the name of the client I created earlier in this realm, and PROVIDERS_OIDC_CLIENT_SECRET should be taken from the Credentials tab of this client. In the SECRET variable, you need to fill in a random string.
Now, to close the service, routing to which Traefik provides, it is enough to add the following line to labels:
- "traefik.http.routers.< >.middlewares=traefik-forward-auth"
To begin with, I decided to close the code server with authentication, for which I went into its stack and added its configuration. The result is the following (for brevity, I cite only the labels section):
    labels:

      - «traefik.enable=true»

      - «traefik.http.routers.code.rule=Host(`code.example.com`)»

      - «traefik.http.routers.code.tls=true»

      - «traefik.http.routers.code.tls.certresolver=leresolver»

      - «traefik.http.routers.code.middlewares=traefik-forward-auth»
Click the Update Stack button and try to visit code.example.com. If everything is done correctly, the login window will appear:

After entering the correct username and password (which I had previously configured in KeyCloak), I got into the Code server interface. Everything is working!
Similarly, I closed the traefik dashboard from prying eyes. To do this, I had to go to the console (Portainer cannot make changes to the configuration of the stack, which was not created by him, but I raised Traefik from the console) and similarly edit docker-compose.yml:
    labels:

      - «traefik.http.routers.http-catchall.rule=hostregexp(`{host:.+}`)»

      - «traefik.http.routers.http-catchall.entrypoints=web»

      - «traefik.http.routers.http-catchall.middlewares=redirect-to-https»

      - «traefik.http.middlewares.redirect-to-https.redirectscheme.scheme=https»

      - «traefik.enable=true»

      - «traefik.http.routers.traefik.entrypoints=websecure»

      - «traefik.http.routers.traefik.rule=Host(`traefik.example.com`)»

      - «traefik.http.routers.traefik.tls=true»

      - «traefik.http.routers.traefik.service=api@internal»

      - «traefik.http.routers.traefik.tls.certresolver=leresolver»

      - «traefik.http.routers.traefik.middlewares=traefik-forward-auth»

      - «traefik.http.services.traefik.loadbalancer.server.port=8080»
To check, I went to traefik.example.com. To make sure that everything works as it should, I had to open a browser window in incognito mode, otherwise the system recognized me and did not ask for a password, since I had previously logged in to access the code-server and therefore KeyCloak authenticated me automatically.
Thus, using a combination of KeyCloak and Traefik, I managed to protect sensitive elements of my system from unauthorized access. The advantage of this approach is that it allows you to do this even where there are no proprietary authentication mechanisms. There are, of course, drawbacks - KeyCloak is quite heavy, it takes up a lot of resources, primarily memory, and in terms of capabilities this is an obvious overkill, most likely I will not need most of what it can do. Alternatively, a cloud service could be used, for example traefik-forward-auth has built-in Google OAuth support.
conclusions
In this article, we got acquainted with a set of tools, the joint use of which can greatly simplify and automate a wide range of tasks that arise today in the practice of many IT specialists. Settings such as:
- Domain names connection
- TLS configuration
- Obtaining and installing certificates
- Authentication
are done in several lines right in the service configuration.
Of course, when setting up, I had to do a lot from the console, but in the future, with everyday use, the built system will allow me to reduce its use, which is undoubtedly a plus for me.
When I wrote this article, the main difficulty was to collect all the necessary information together. Many things from the documentation are not obvious and often in order to make the system work as needed, you had to look for a solution to the problem on various issues on github and questions from stackoverflow. Therefore, I tried to highlight a number of points in more detail, and I hope my research will help someone to better understand the products described.
I also sincerely look forward to constructive criticism in the comments, and ideas on how to do what I tried to implement here better. For example, I would really like to find a lighter weight alternative to KeyCloak, because it is somewhat heavy for this kind of task.
For convenience, I placed the configuration files in the repository here: https://github.com/debagger/vps-docker-workspace
Thank you for your attention!
Cloud servers from Macleod are fast and secure.
Register using the link above or by clicking on the banner and get a 10% discount for the first month of renting a server of any configuration!
