There is an understanding that a video camera, affordable and functionally uncomplicated, will help solve some issues of both motorists and summer residents.
The article will not touch upon the ethical side of the issue of a DIY (do it yourself) product and who will need it more - violators or law-abiding citizens. Instead, it is suggested to concentrate on the technical side of the solution, which will certainly be interesting in the situations presented in the title of the article.
So, what will the camera, which is proposed to be assembled on a budgetary basis, do, and not dive into the technical aspects of the issue.
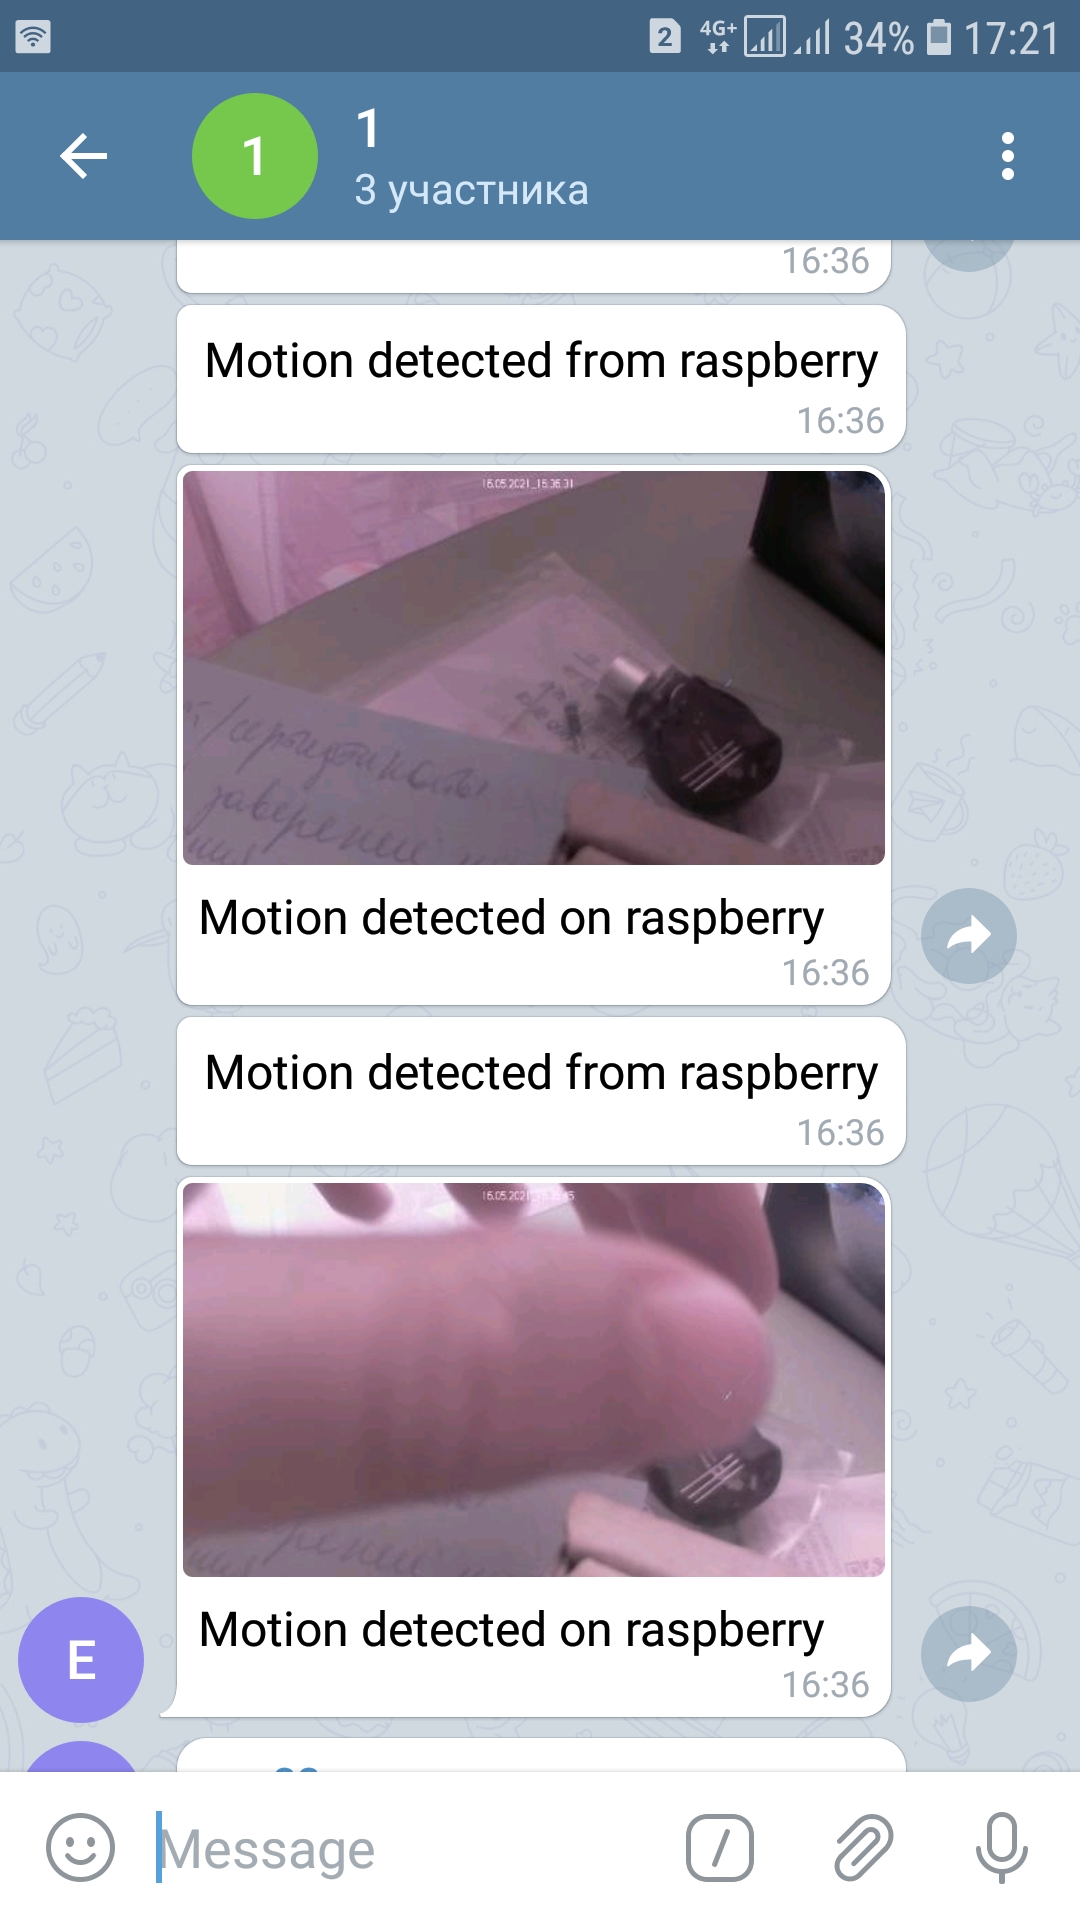
The work algorithm is as follows. After switching on, the camera "picks up the connection" via a usb 3G modem, connects to the VPN, monitors the picture and, when movement appears on it, takes a photo and, at the same time, sends the photo to the owner's telegram channel. From the options - the ability to record timelapse, video and ... the ability to "shake your head" remotely, that is, control the camera and see "what's what." There are no neural networks here, everything is quite simple.
Will this work?
Perhaps it will, since 1-3 minutes should be enough to reach the car and pay only the fine with satisfaction; see who is stealing strawberries from the garden and even turn the camera remotely in his direction. Even if unknown persons demolish the camera or smear it, a photo will remain in the telegram as a keepsake.
For discerning connoisseurs of everything moving, motion detection can be "roughened" so that the sighs of trees and the flight of a moth are not recorded.

original image link
RPi-web-interface is used as software.
In general, the project will partially repeat my similar project, previously described in the post here .
Differences, additions are as follows:
- communication with the telegram channel (sending a photo to the channel),
- 3G connection simultaneously with the presence of wi-fi,
- feedback with the camera via vpn,
- other changes in the settings.
A bit of boring backstory
During the development of the prototype, several questions arose sharply:
- how to create feedback with a camera that has a "gray" dynamic ip-address,
- how to power it, what batteries are needed to last at least a few hours,
- how to control the camera, since constantly choosing the angle of the installation without the possibility of correcting it in the future, the lesson is not very interesting.
The first implementation of the camera in terms of software had an abundance of crutches.
Initially, everything was assembled on a raspberry pi 3b with a non-native camera (usb, not csi). Skype was used as a "feedback". To communicate with the camera, it was necessary ... to call.
Via skype. Skype had an auto-answer function, “after picking up the phone”, a video communication channel was established and you could see what the camera saw. It's simple.
And everything was just creepy in terms of speed, the sound was disgusting and so on. Then skype stopped updating packages for raspberry. An attempt was made to extend the life of this product using exagear desktop, which emulated win and allowed applications such as icq, viber, teamspeak to be installed. But all this worked extremely slowly and ineffectively. Then exagear desktop, which was also with a paid license (thank God, a one-time payment) was shut down and support was discontinued.

In terms of nutrition, everything was also not entirely simple. Raspberry pi 3b loved and loves to eat, and powerbanks were needed with abundance. There were attempts to supply power from solar panels, but it immediately became clear that this option would not work.
Let's move on to the current implementation, which is also not without sin, but quite tolerably fulfills its functions.
The basis of the camcorder

As a base, from which we will push off when creating a camera, there will be the same raspberry pi, only the zero w model (with wifi support).
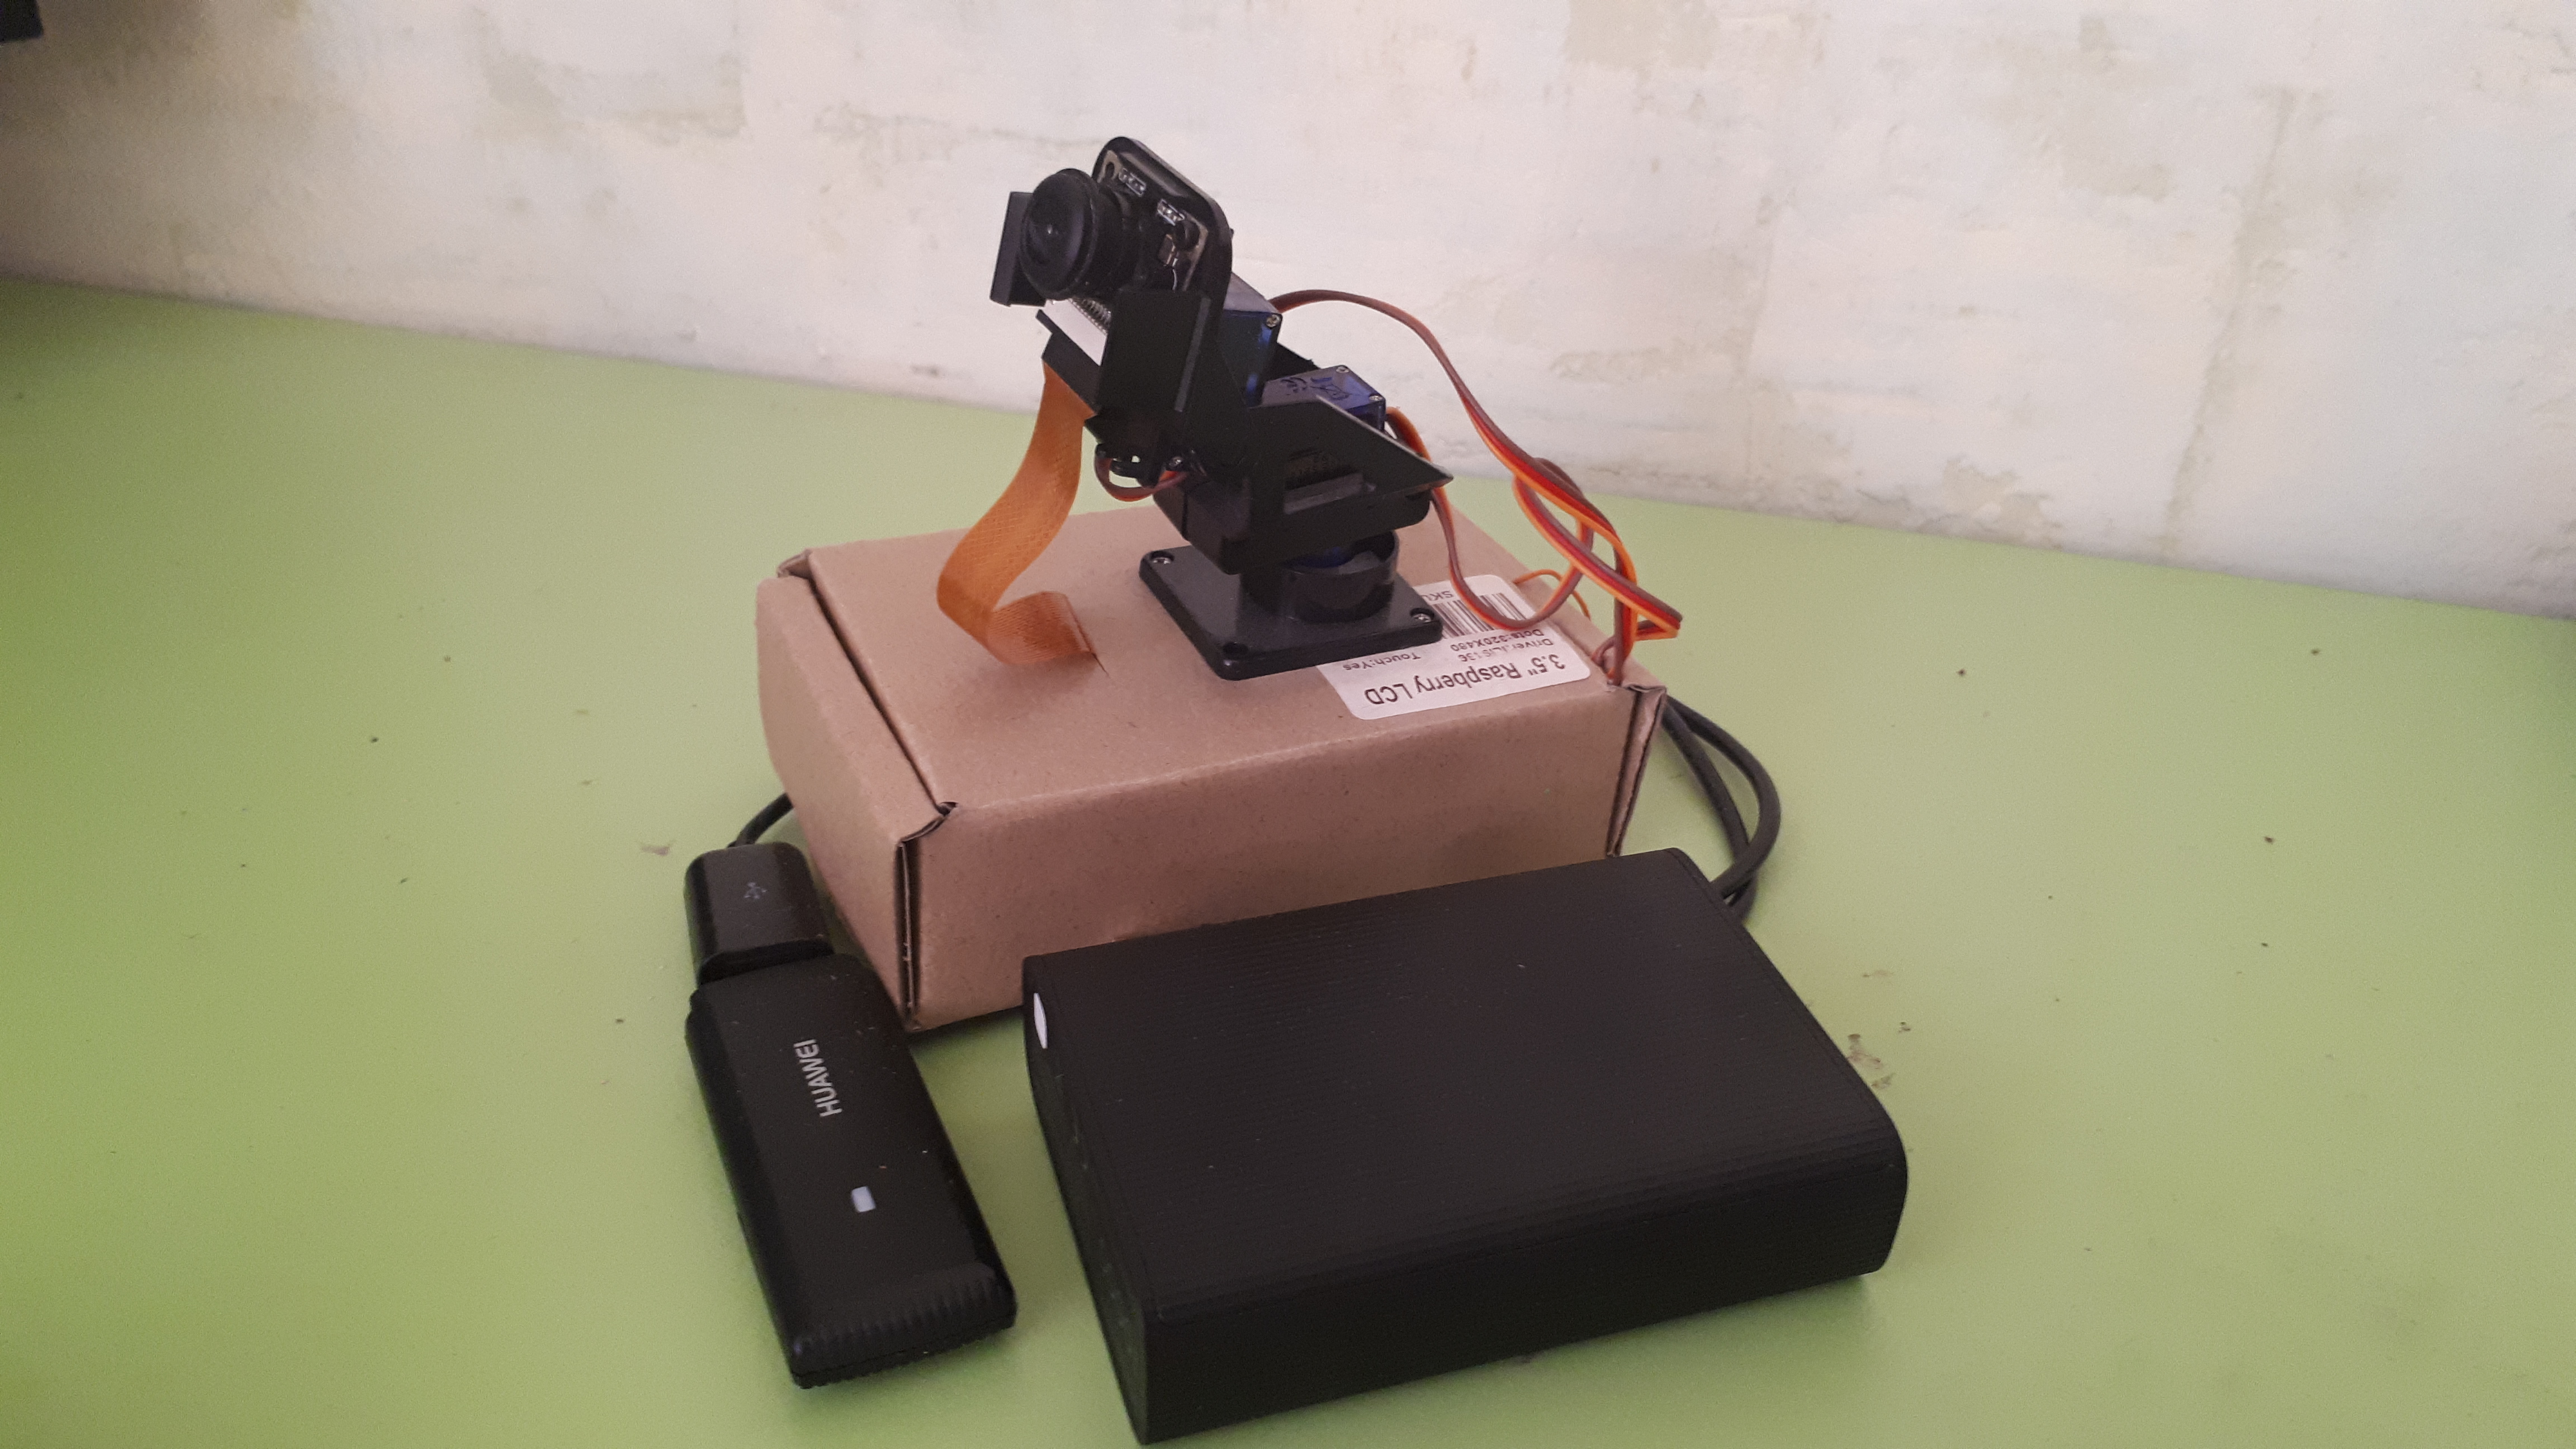
Our components are as follows:
- raspberry pi zero w - 1.8 to rubles;
- camera with a loop - 500 rubles.
- servo drives sg-90 - 2 pcs. - 200 rubles.
- plastic suspension - 100 rubles.
- power supply unit - 1000 rubles;
- sd card for 8, or better for 16GB - 1000 rubles;
- 3g modem Huawei E171 - 2k rub.
- sim card with a package of Internet services, for example from mts - 500 rubles.
- adapter from mini-usb to usb for connecting a usb 3g modem - 200 rubles.
- the box in which the raspberry pi was sent is free.
Total: 7300 rubles.
The connection diagram with the camera suspension servos is the same as used earlier.
Go to settings
Let's not go far from the image with the preinstalled Rpi-web-interface, servoblaster, given in the previously published article - a link to the image . It will need to be supplemented a little.
The first thing we will configure is a 3g modem.

Its configuration after connecting to the raspberry largely repeats the steps from the article published here .
But the article contains a lot of unnecessary steps to get a feel for the modem, so to speak. Therefore, you can safely start configuring with the "RECONNECT WHEN DROP" step and not perform all the previous ones:
$ mkdir ~/3g
$ cd ~/3g
$ wget http://zool33.uni-graz.at/petz/umtskeeper/src/umtskeeper.tar.gz
$ tar -xzvf umtskeeper.tar.gz
$ chmod +x umtskeeper
$ ./umtskeeper --sakisoperators "USBINTERFACE='0' OTHER='USBMODEM' USBMODEM='12d1:1506' APN='CUSTOM_APN' CUSTOM_APN='internet.mts.ru' APN_USER='mts' APN_PASS='mts'" --sakisswitches "--sudo --console" --devicename 'Huawei' --log --nat 'no'
$ sudo nano /etc/rc.local
/home/pi/3g/umtskeeper --sakisoperators "USBINTERFACE='0' OTHER='USBMODEM' USBMODEM='12d1:1506' APN='CUSTOM_APN' CUSTOM_APN='internet.mts.ru' APN_USER='mts' APN_PASS='mts'" --sakisswitches "--sudo --console" --devicename 'Huawei' --log --silent --nat 'no' &
* 12d1: 1506 - change to your own, which can be found through lsusb.
** if the modem does not start, add sudo at the beginning of the command.
After configuring the modem and editing /etc/rc.local, there will be a small bug, so to speak. Despite the fact that rc.local starts all the scripts specified in it at boot, umtskeeper starts very slowly. And it can take from 1 minute to 3 to start the modem. This can be critical in some situations. How to deal with this is not yet clear.
Now let's set up sending messages to the telegram channel with raspberry pi

We need the following article .
Here, difficulties may arise with setting up a bot in telegram, if there is no experience of creating it through Godfather, as well as obtaining a token and API, which must be reflected in the script:
#Telegram details
tokenurl="https://api.telegram.org/bot<your API key>"
chatid="<your chat id>"
However, after configuration, the functionality will work like a clock:
picture
Configuring camera parameters

By default, in Rpi-web-interface, when you enable motion monitoring, the camera first takes a snapshot and then starts recording streaming video. It is written about it here . Q - Is it possible to record still images using the RPi Cam Web interface on motion detect?
On the one hand, it is convenient, I took a couple of photos, sent them in telegram and then writes a video. But in practice, this leads to a freeze, since the recording is going on while there is movement in the frame, and only the first couple of images get into the telegrams.
Therefore, the camera settings must be changed as follows:

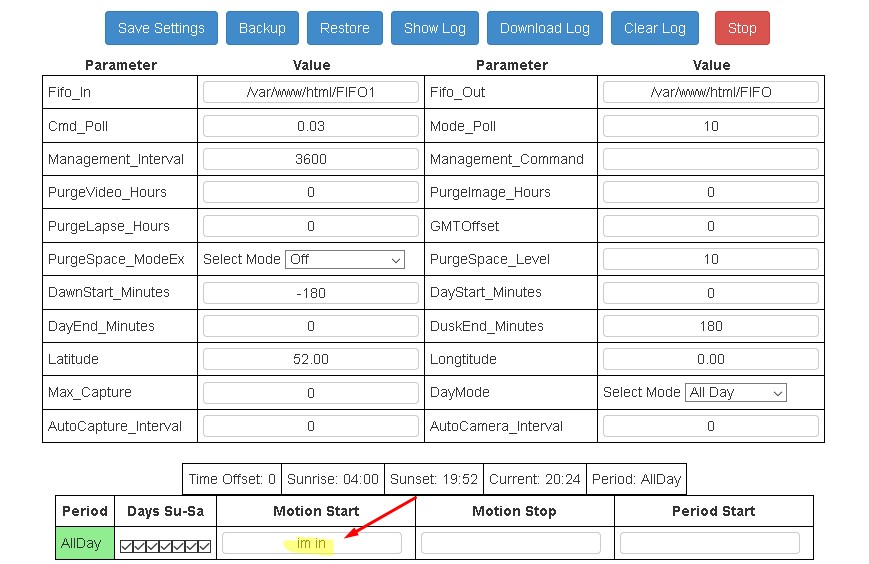
Then instead of ca 1 and ca 0 write only im in.
Now almost all photos will arrive in telegram.
Setting up a VPN

link to the original image
There were some reflections on several options.
The first and the simplest one is to buy a "white" (static) ip and access the camera without unnecessary troubles. Previously, this was possible with some operators. But now this option is not available to an individual for the mobile Internet. To issue an individual entrepreneur or buy a fake company just for the sake of this is not an option.
Secondoption - reverse ssh-, vpn- tunnel. That is, a tunnel is created from the raspberry pi to the existing own vpn server. In this case, the vpn server must have a white ip in order for the raspberry pi to reach it. Not a bad option, but here you need to purchase this white ip, forward the port on the router behind which the server sits, solve the issue with the drop in vpn. Easy, but troublesome.
The third (it was decided to stop there) is the vpn service, in particular vpnki .
The site offers a free 14-day period, then vpn tunnels are blocked if you do not purchase a paid service package:

The tariffs themselves do not bite, and detailed instructions will guide you through the easy way of configuring tunnels. You will need at least two of them - one for the raspberry pi, the second for the device from which there will be access (for example, an android phone). In our case, this configuration option was used for the raspberry pi .
And here another unpleasant pitfall awaits, again associated with rc.local.
In short, the modem and vpn are competing for the ppp0 connection and, as a result, the one who starts up faster takes it. The question is described in more detail here .
Exit - do not start vpn until the modem starts (does not establish a ppp connection). Next, manually raise vpn through the command -
sudo pon vpnki updetach
Again, the issue with the fall of vpn will not be resolved here. * The modem (umtskeeper) restores its connection in case of a fall and messages in telegrams will come in any case, but vpn does not come to life. So the "shake your head" option may be a little lame if the connection from the raspberry pi is poor.
That's all. There are still thoughts to add information about the balance of mts and vpn to the web interface.
Questions and suggestions are welcome.