
We get acquainted with the distribution kit: we consider the possibilities, evaluate the ease of setup and applications, of which there are more than 200 on the platform. We also install Yunohost on a VPS or our own VM.
Dear friends, I noticed that a good product, powerful enough and with excellent potential, was bypassed on Habré - this is Yunohost. The project was born in 2012. The product is positioned as an operating system based on Debian and intended for hosting primarily personal projects, projects of friends, family or related small companies. I have been using it on a daily basis in my IT life since 2018, and I have gained experience that I want to share.
Dating history
My acquaintance with Yunohost began, no matter how trite, with necessity and laziness. A couple of years ago, I had to look for an alternative to popular clouds. I chose a software product that would combine the functions of the cloud, easy to install, and easy to administer.
I'm not afraid of the terminal, but having a UI is also a plus (why not?). So the choice fell on Yunohost .
The developer positions his product as a Debian-based operating system designed to host primarily his personal projects, projects of friends, family or related small companies.
The main requirement is that you must trust those you host on this platform, and they trust you. This is not a product for providing hosting services to a wide range of users, and this is important!
How Yunohost can be used
I would consider it for personal use - for studying, storing my code, downloading videos from hosting sites, as a cloud storage for access from anywhere and my own mail server.
But if you are the owner of a small company and administer web services yourself, then this product will greatly simplify your work. You can organize your Git server and work as a team on the code.
You can install Wekan, distribute tasks and schedule the work of your employees. Host your site on this platform. Install the NextCloud application, get your own full-fledged cloud and accept materials from customers, as well as share layouts using public links.
The biggest plus of using Yunohost is the security of your data. Layouts, code, etc - all this is in your hands in one place, and not scattered across the Internet on various third-party services.
Let's move on to practice and appreciate the ease of working with this platform.
Getting Started: Installing on a VPS

There are several options for installing Yunohost: this is VirtualBox, use as the main system on a regular computer (download and install from a USB stick), images for ARM platforms - Raspberry Pi / OrangePi PC and that's not all. We will consider installation on a remote computer, in our case a VPS. Installing on a virtual machine on your own server is no different.
This system does not require high computing power, so a machine with the following characteristics will be enough for us:
- 1 GB of RAM
- 1 core. It will be enough for our purposes.
- HDD 20 GB. This is enough for a start, then you can expand. By the way, ruVDS has an option that almost no one on the market provides - "Big Disk" up to 18 TB.
- OS Debian 10. This version is obligatory, it will not take off on another one.
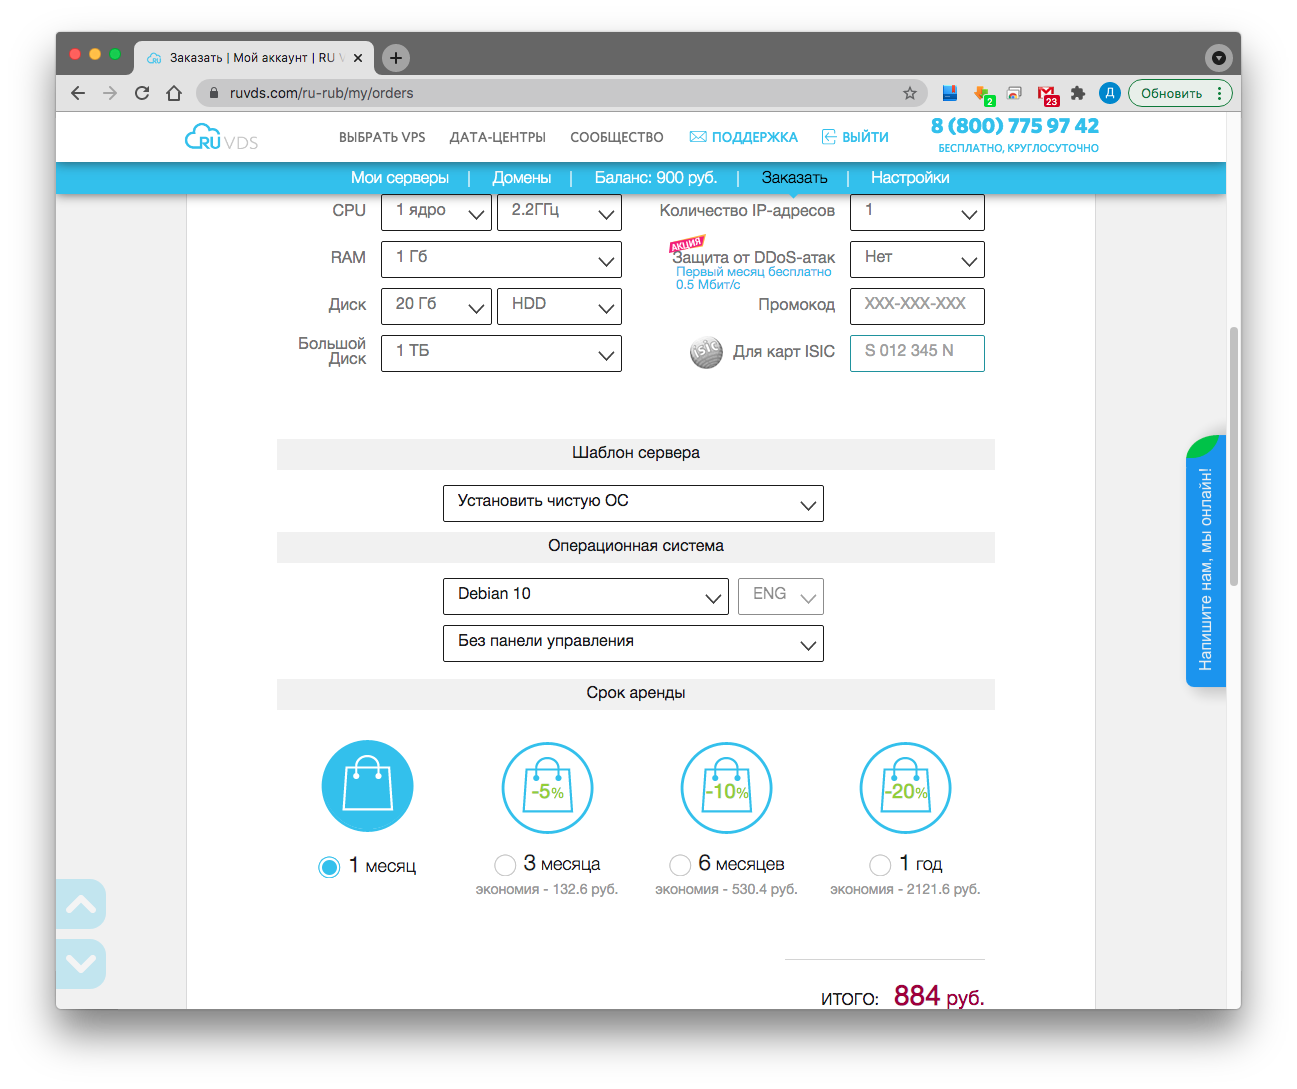
We order a car , wait, when ready, in your personal account we get a login / password combination for SSH access.
Next, you need to connect to the server remotely. I use iTerm, you can use whatever software you like. You can also do this through the server's VNC console, available in your personal account.
ssh root @ <IP_your_server> , enter the password, connect.
Update the system
apt update
apt upgrade -y
Install curl
apt install curl -y
We get the script and install
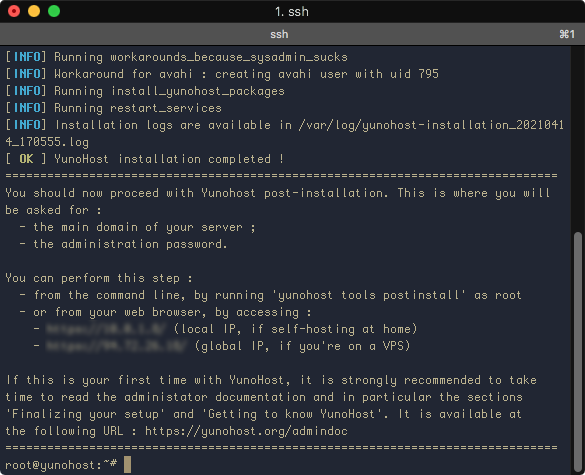
curl https://install.yunohost.org | bash
During the installation process, the script will notify you about overwriting some configuration files, as well as setting up an SSH server - you need to agree with it. Then he will install all the necessary packages himself. There will be no more requests.


Installation takes 10 to 15 minutes. After successful, but otherwise I have never succeeded, the installation you will receive a notification that the system is installed and available at: https: // <your_server_address>
The backend setup is complete, all further manipulations will be done through the UI.
We enter in the browser line
https://<__>
or
, if you already have DNS configured, as in my case.
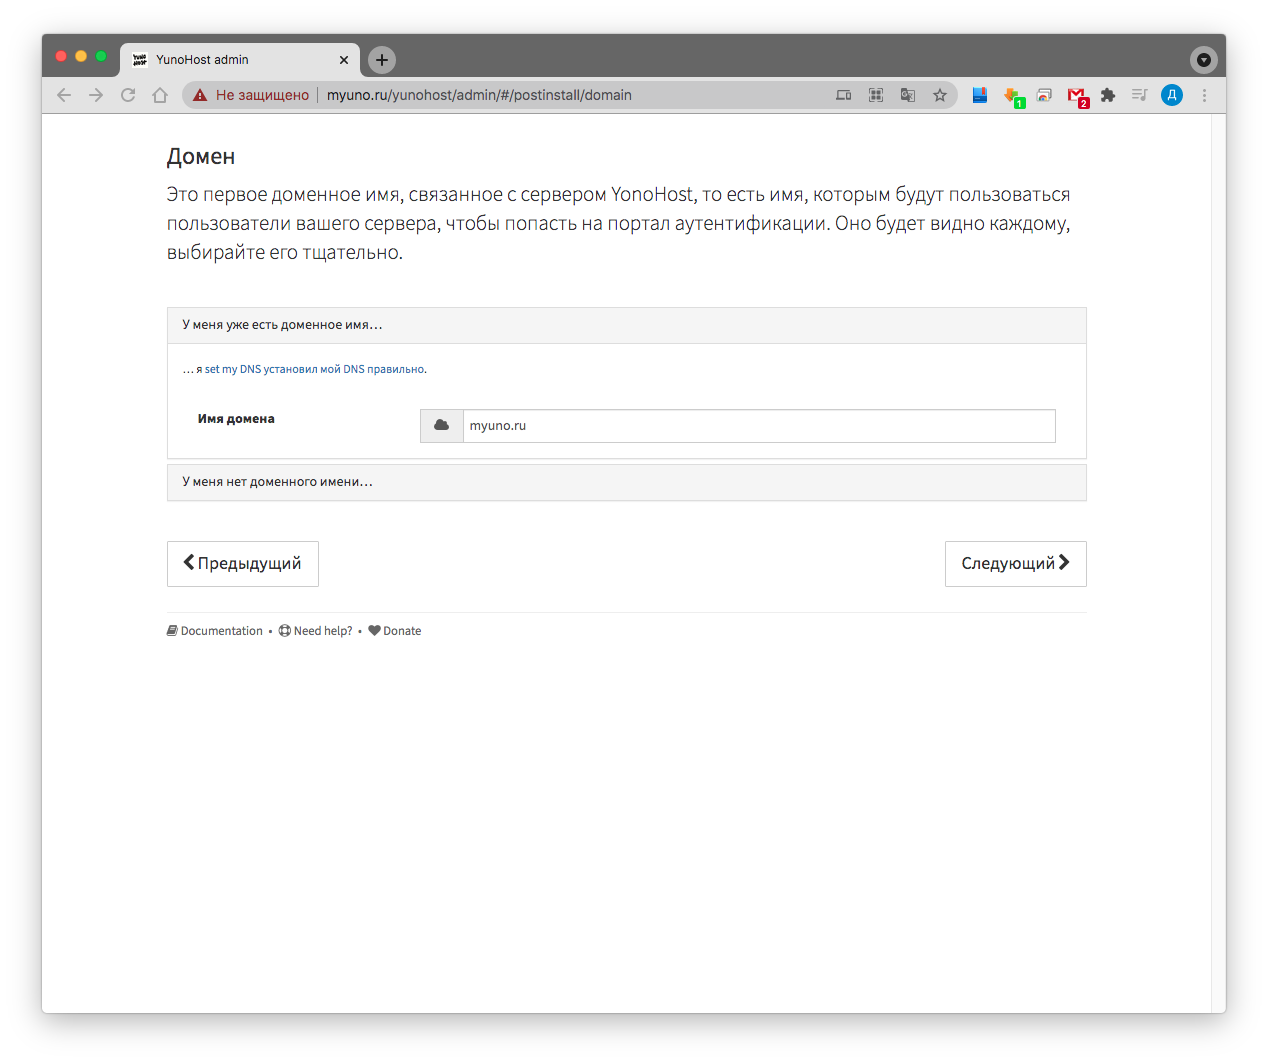
We ignore the notification about the self-signed certificate and see a greeting with an invitation to go through a short setup:

1. Specify the domain name, if available, which is required to automatically obtain a certificate from Let'sEncrypt:
2. Set the administrator login and password:
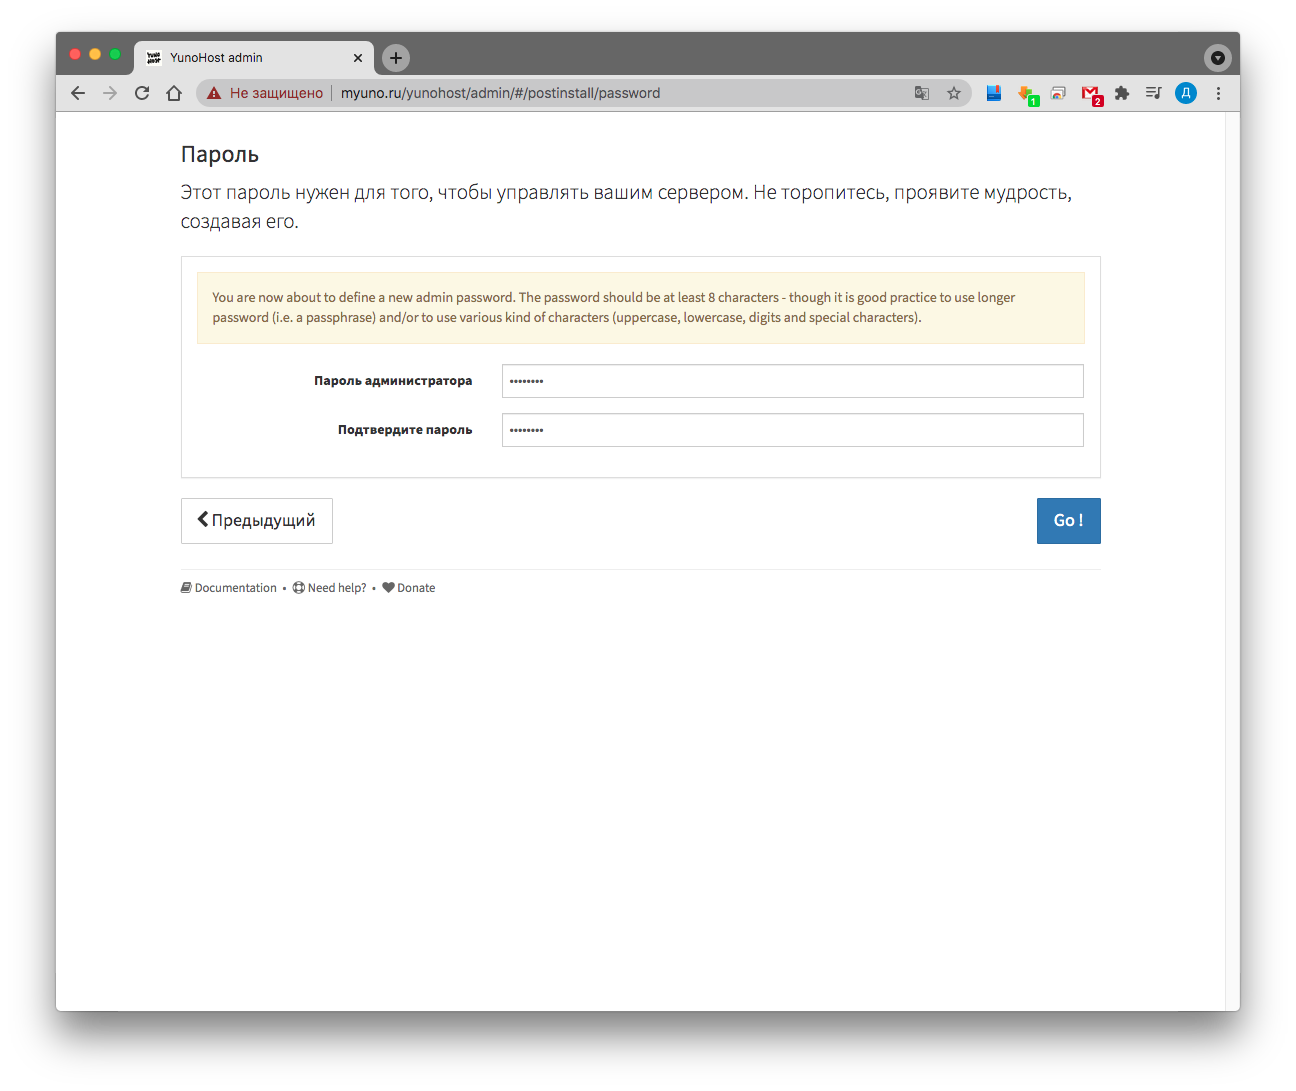
At this point, the post-installation configuration process will begin:

That's it, the system is installed. By default, when you go to the server address, the user authorization panel opens, the administrator will not be able to log in to it.
Therefore, we go to the address:
https://<__>/yunohost/admin
Now you can log in by entering the password set a few minutes earlier.

User creation
To get started, you need to create a new user, specifying a username and password.
"Users → New User" The
user will immediately receive mail like @ <domain_name>, but it can be changed later if you decide to add a separate domain to the user.
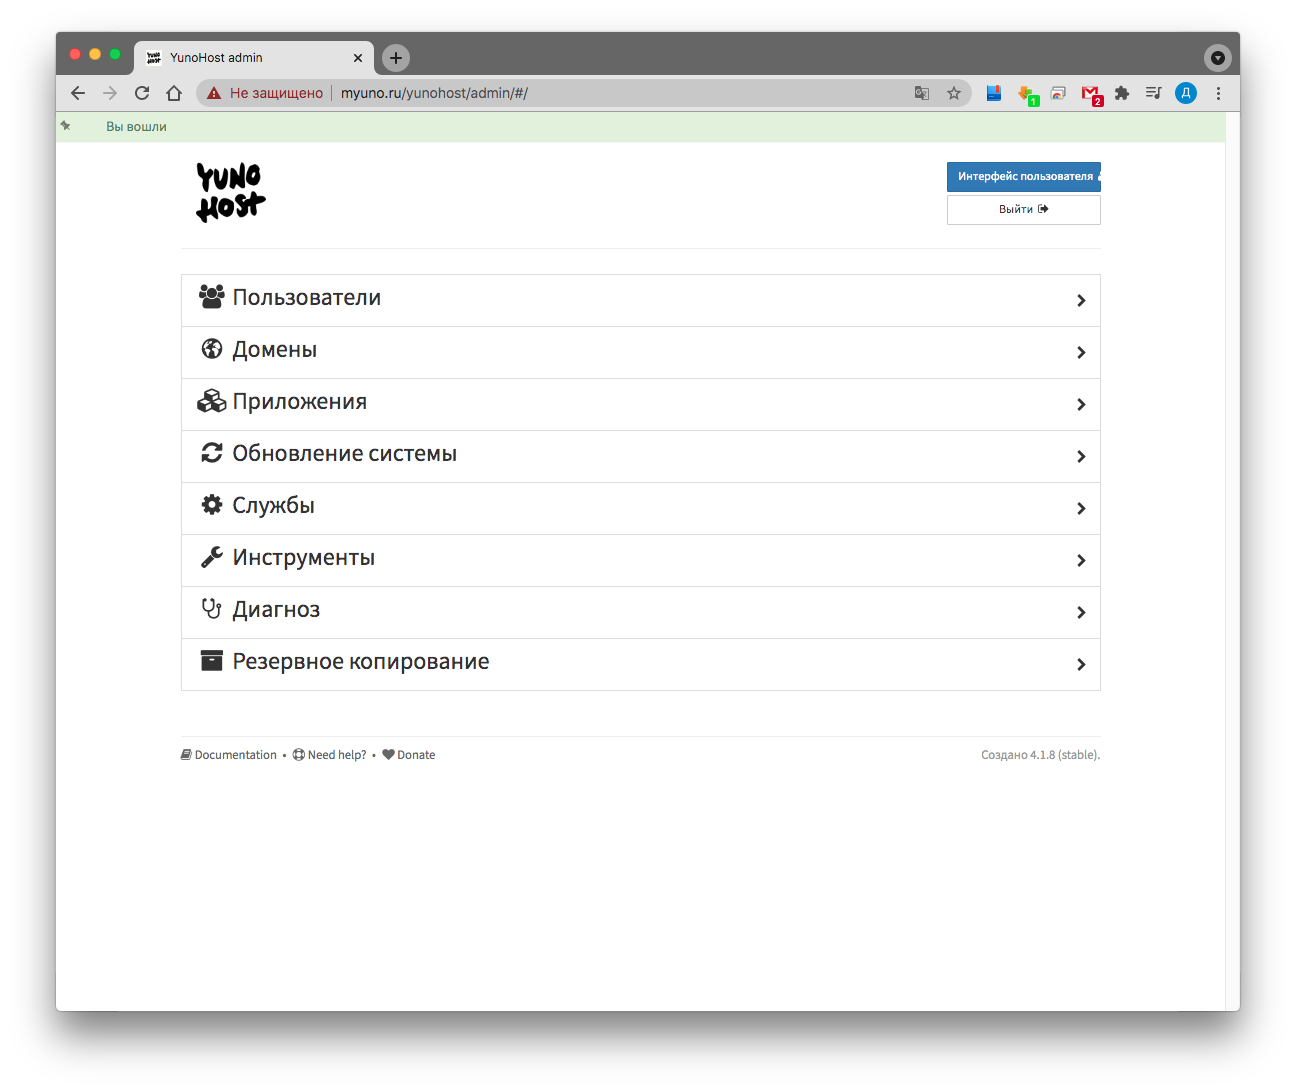
Yunohost is flexible and allows you to manage users, domain names, installed applications and security. The interface is simple, as you can see on the screenshots from the installation process, but at the same time functional and convenient. All controls are placed in places where you expect them to be, so it is comfortable to work.
In the section of the administrator menu
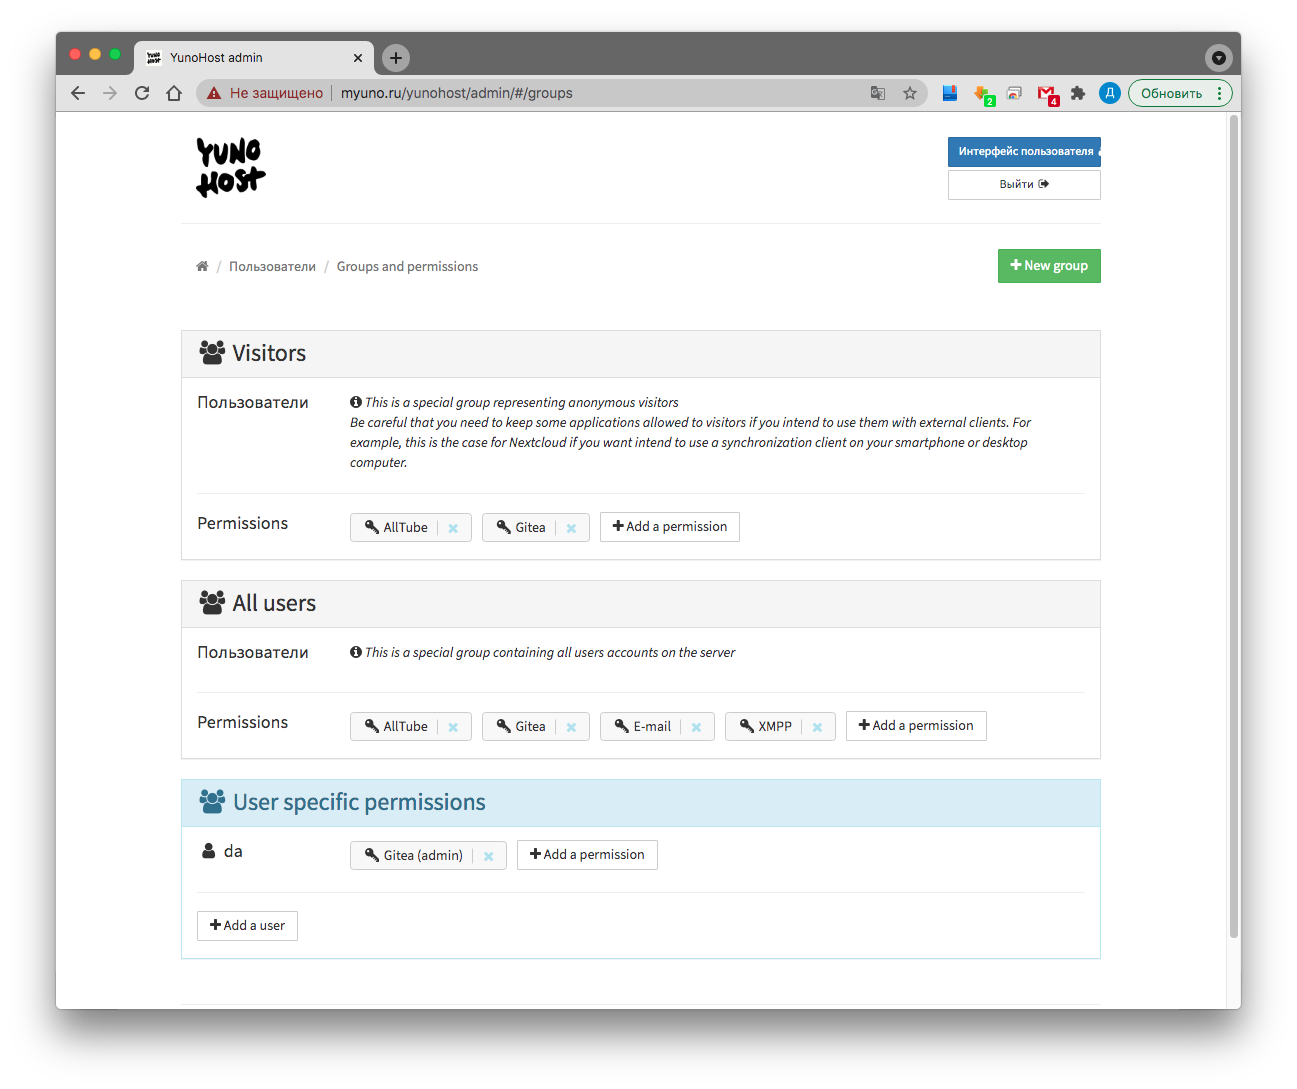
"Users → Manage groups and permissions"
you can manage user rights, allow / deny access to any of the installed applications, and assign administrator rights for a specific application.
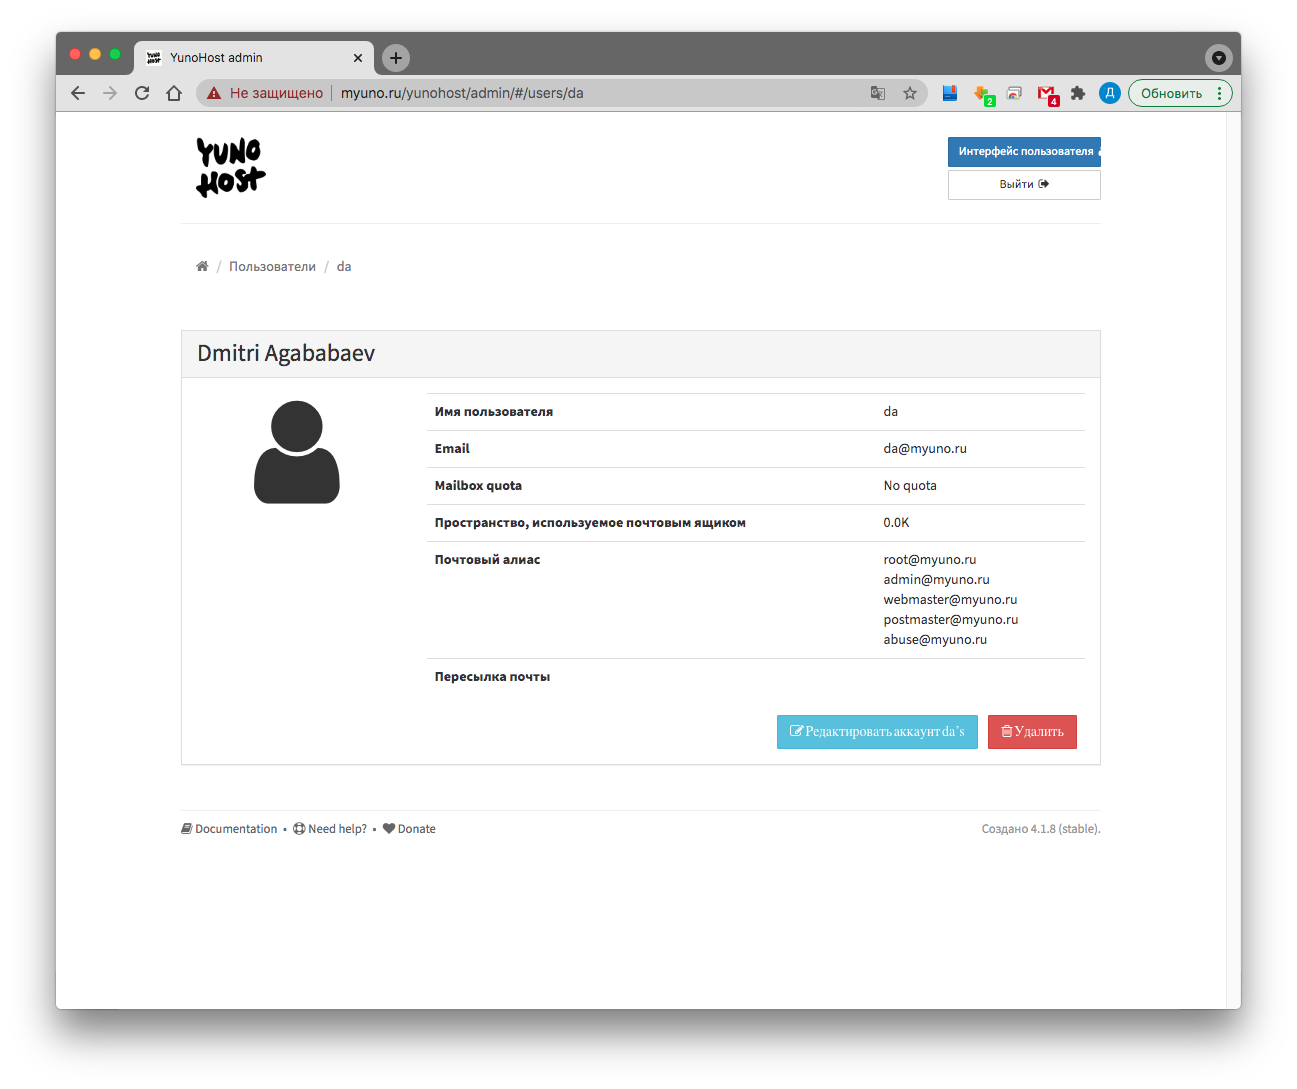
A specific user is managed in the section:
"Users → User_name"
Here you can change the password, change the mailbox quota, add mail aliases or specify addresses for forwarding mail:
Working with applications
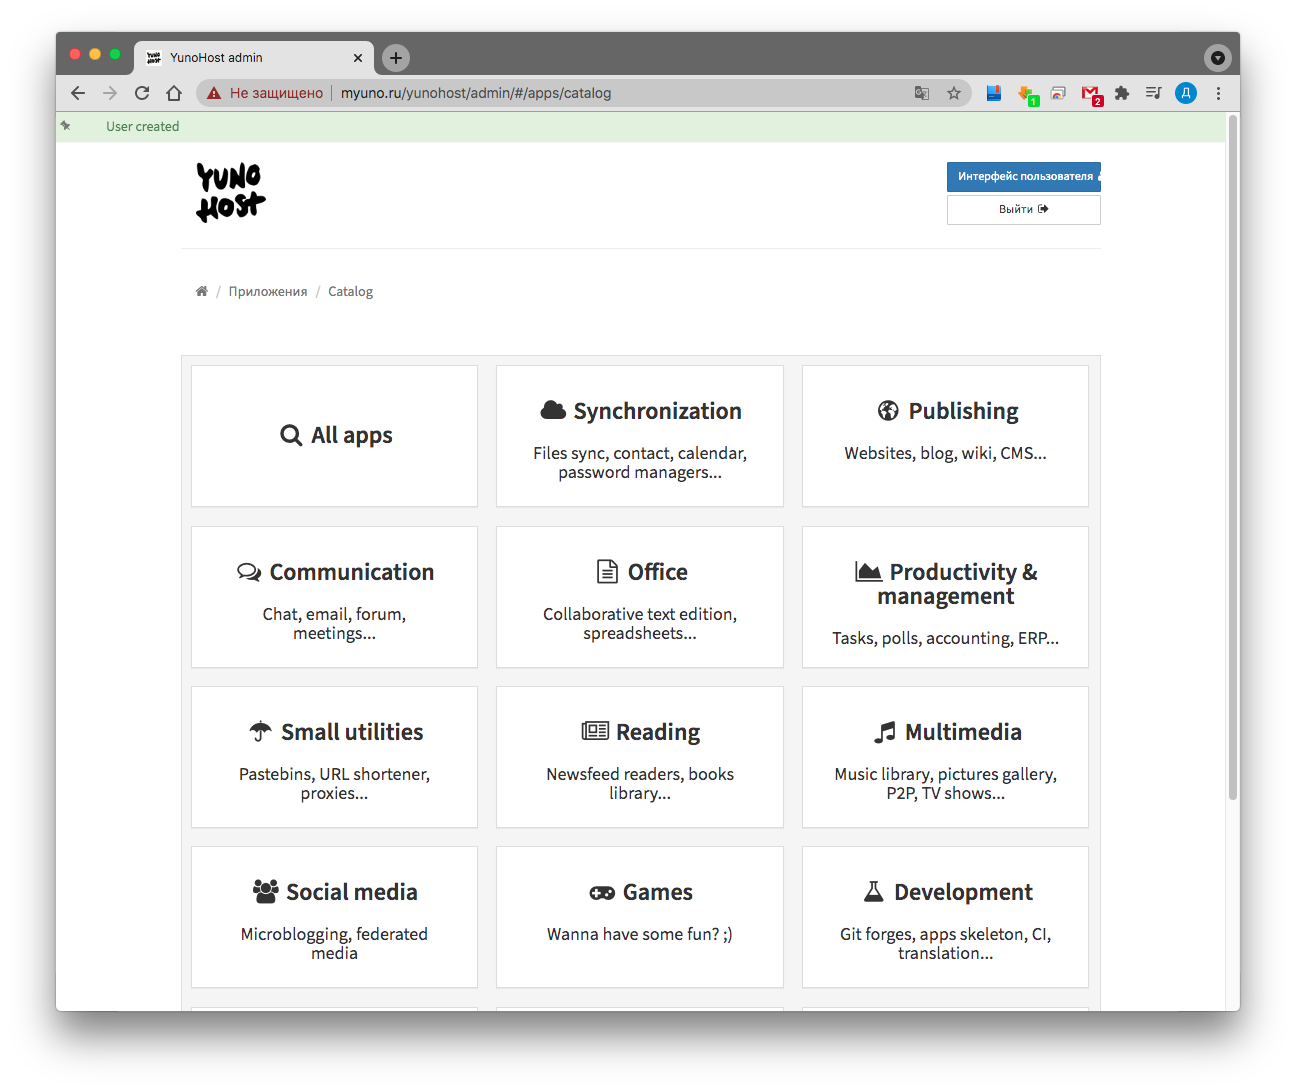
But the most important thing about Yunohost is its applications. The variety is truly amazing. At the time of this writing, there were 213 of them. All applications were tested and ranked according to the quality of integration with the service. The rating is made by the platform developer himself, and the place in it depends on how fully the application uses the platform's capabilities. This list includes authorization through SSO, backup, recovery, and other features. The list of applications can be found from the admin panel: "Applications → Install" All of them are presented in the official catalog . The application installation process is identical, so we will only cover it based on Gitea - the git server.
To install, go to:
Applications → Development,
find Gitea and click Install:

In the next window, you need to select the name that will be displayed on the shortcut in the user panel, the path to access the application, the user who will have administrator rights.
Pay special attention to the ability to access the application directly. If the box is not checked, then only users will have access to the application using the token generated by the system.
If we need authorization from other applications, then access from the outside must be provided. Or, if we want to make a public cloud based on Nextcloud, then access must also be opened.

Then click Install, wait a couple of minutes and that's it, the application is available for access from the user interface:

Other applications are installed in the same way. Simple, isn't it?
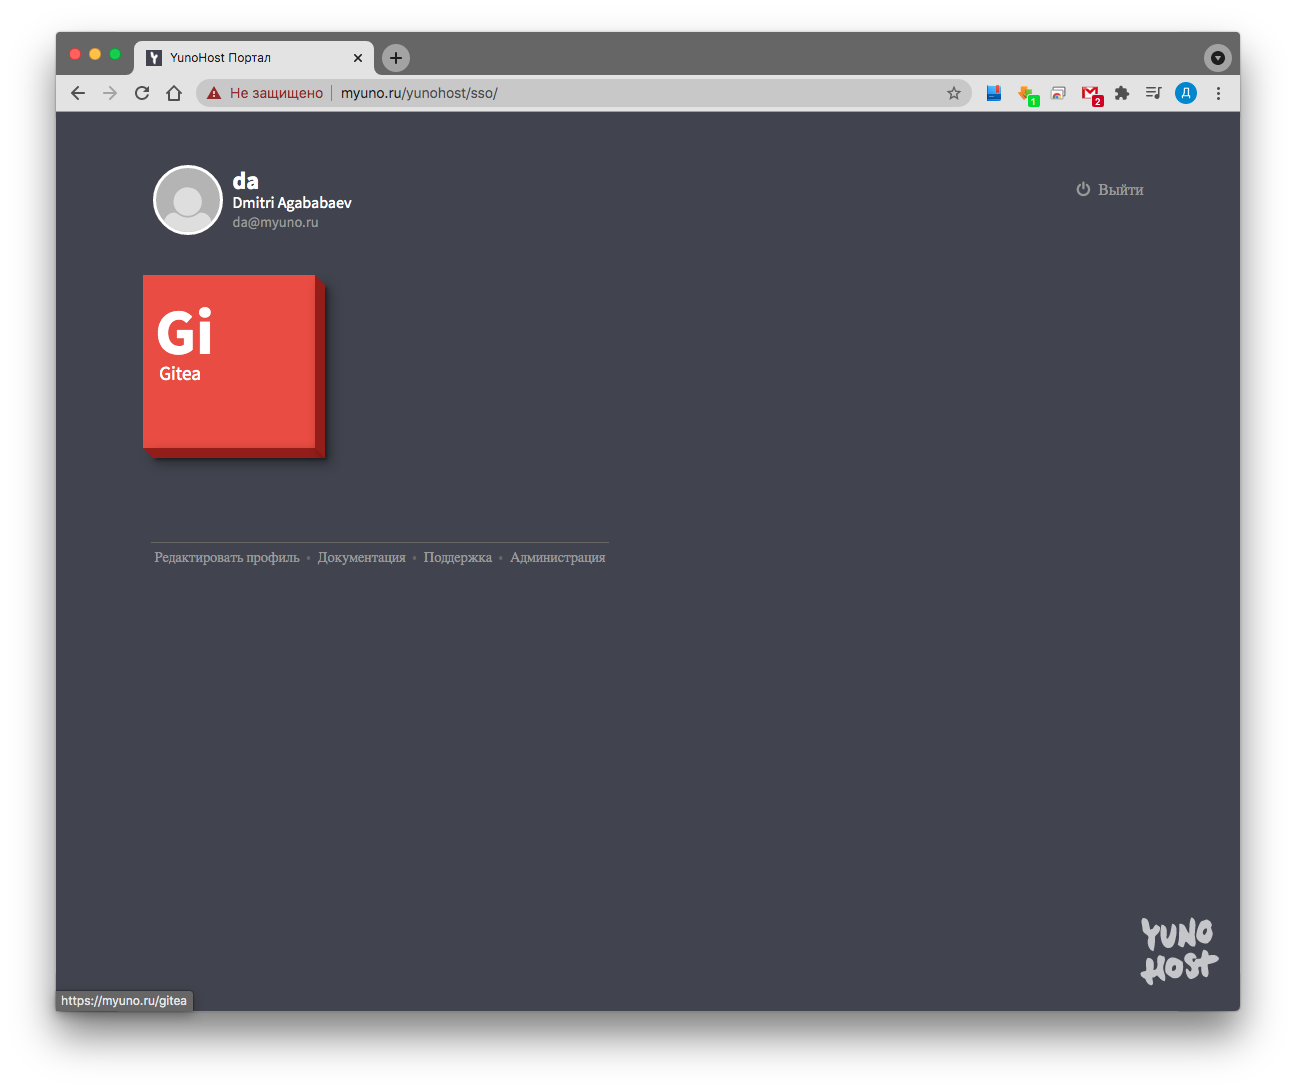
You can return from the application to the main panel by clicking on the gray Yunohost square in the lower right corner (it is not static, and you can move it to a more convenient place).
I would also like to dwell on Alltube - an application for downloading from various video hosting sites with a simple interface built on youtube-dl. The app will install, but it won't work right out of the box. An error will be displayed when trying to get video information.
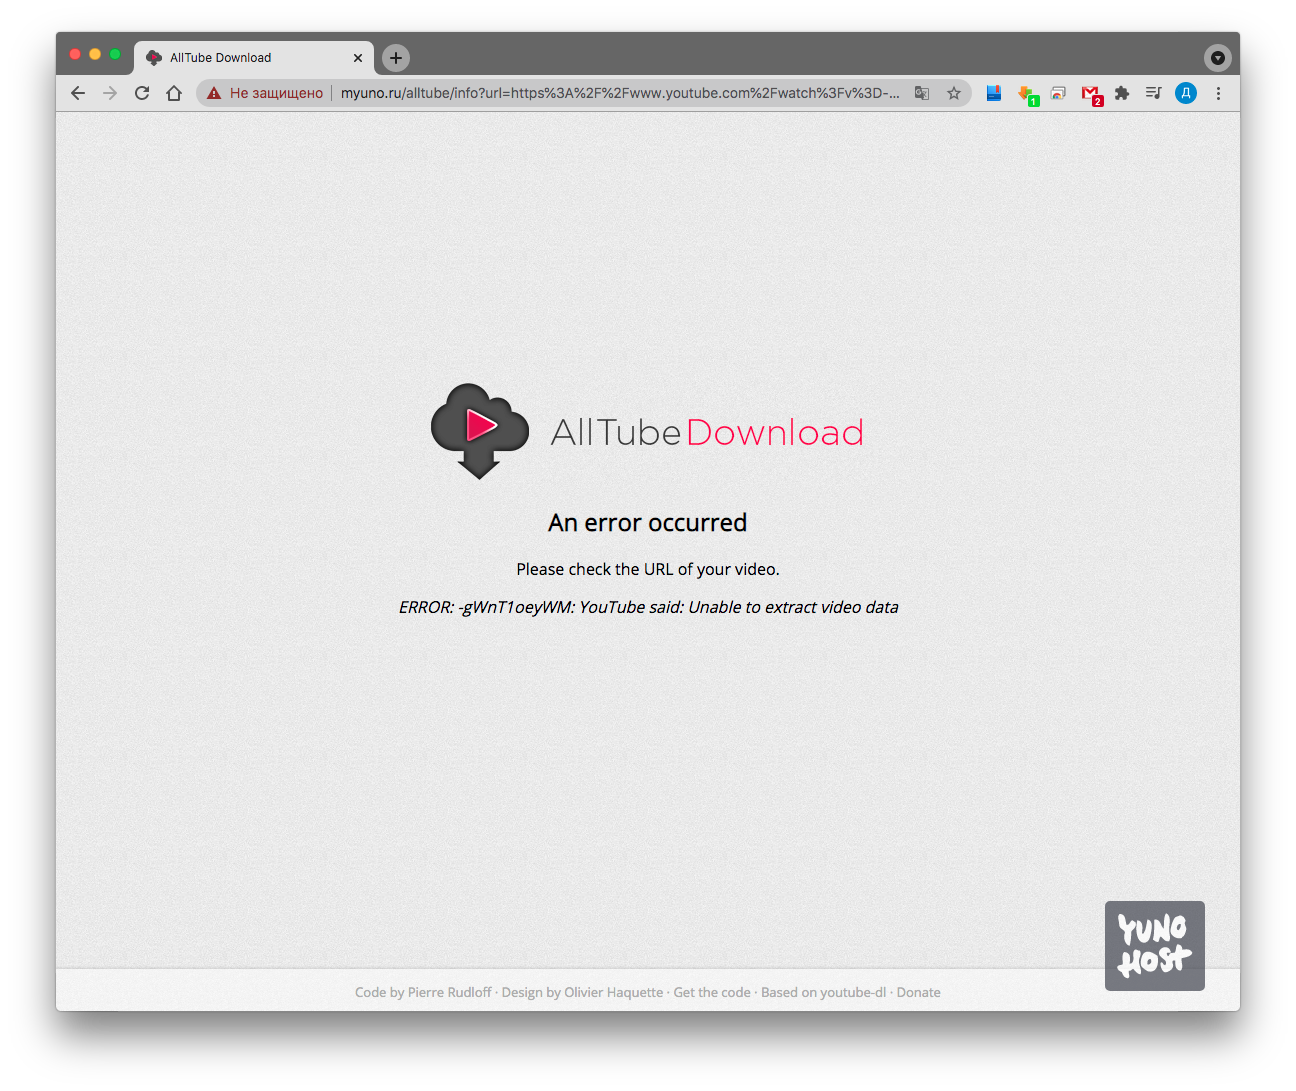
Error (YouTube said: Unable to extract video data)
I spent a lot of time looking for a solution, but the problem was simple and the solution was not difficult. The error is due to the fact that the application includes an outdated version of the youtube-dl package. To fix it after installation, you need to delete the package folder and clone the newest one from the official git. Let's start fixing:
- Connect via ssh to the server
- Go to the application folder: cd / var / www / alltube / vendor / ytdl-org /
- Remove everything inside: rm -r *
- Clone : git clone github.com/ytdl-org/youtube-dl.git
Refresh the page and see that everything worked.
Applications to watch out for:
- AllTube - download videos from video hosting sites;
- PHP Server Monitor — , , . ping, Telegram;
- osTicket — - ;
- Gitea — git-;
- lstu — ;
- Lufi — ;
- Nextcloud — -, . , .
- Etherpad MyPads — - ;
- Rainloop — - ;
- Zabbix — , , IoT .
- Transmission – BitTorrent–.
We have installed Yunohost on our VPS and it works successfully. Now is the time to think about backups and consider the recovery order.
To create a backup, you need to go to the section
"Backup → New backup"
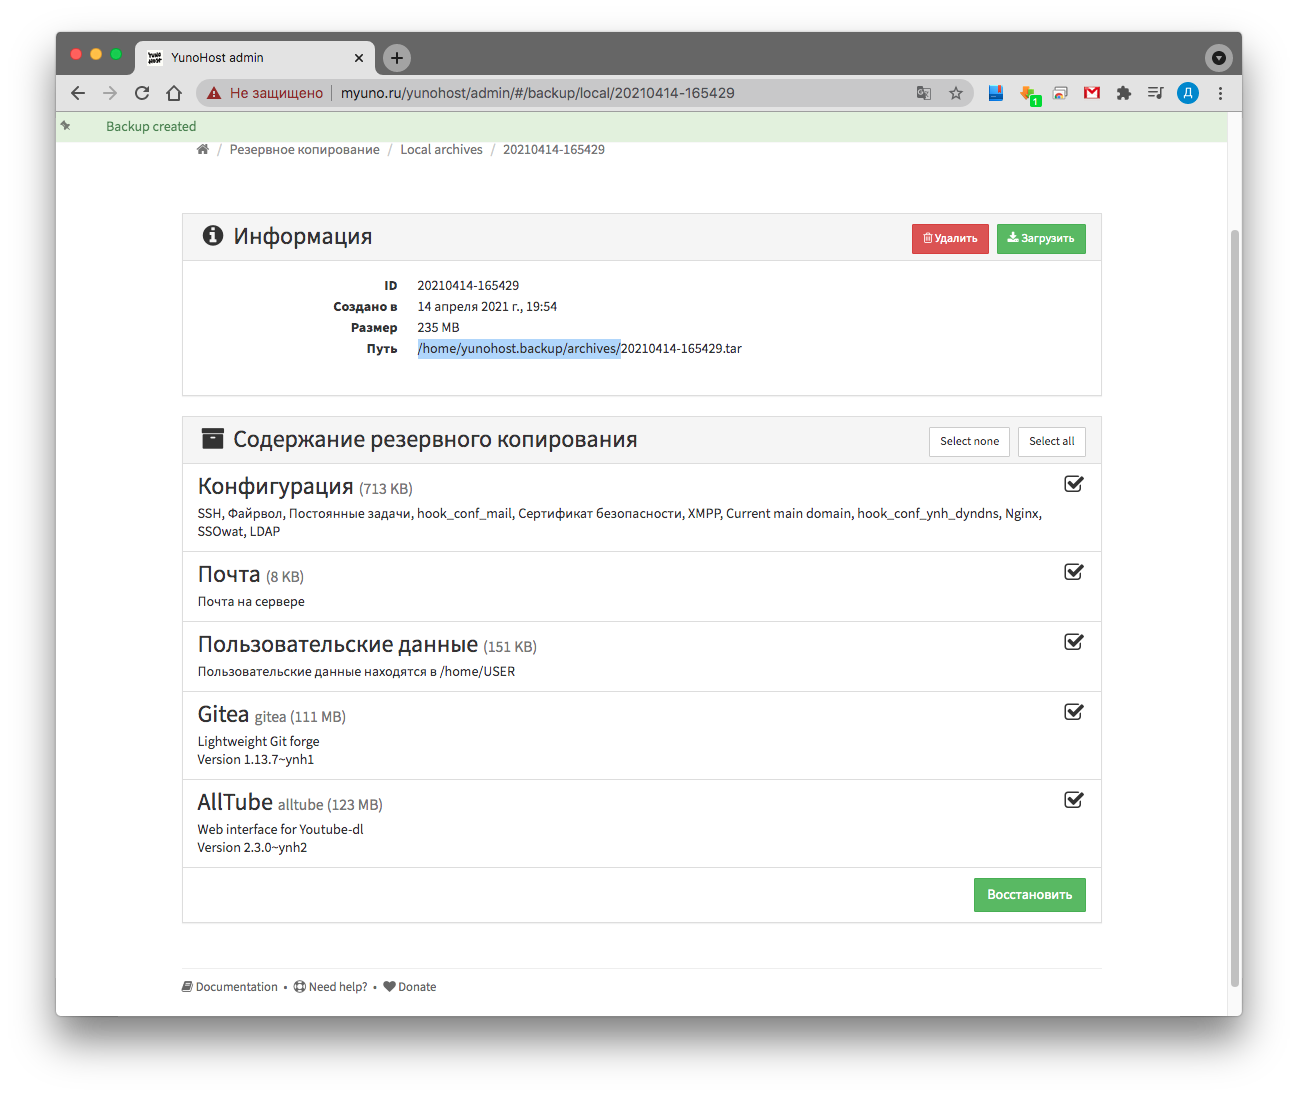
We will be asked what exactly we want to back up. I usually make a complete copy, but variations are possible. After a successful backup, an archive will be created along the path /home/yunohost.backup/archives/, which can be downloaded to your computer from the web interface.
The backup contains all user data - administrator passwords and repositories with gitea, for example, which simplifies the transition to another server:

Recovery
To restore data or change VPS, you need to install Yunohost on the new machine until you can log into the admin panel.
Then either upload via ssh, or connect via sftp and download the archive with the backup along the path /home/yunohost.backup/archives/.
Now you can go through the UI to
"Backup → Local archives",
select the archive with your backup and click "Restore".
And it's all!
I sincerely hope that my experience and this article will be useful and you can easily make your own cloud, store your code in a convenient git, and files in Nextcloud, host your site on WordPress and deploy your mail server.
