Introduction
The goal is to blink the LED on the GPIO of the SBC in your Qt project.
The first thing that comes to mind is to use a ready-made solution such as wiringOP . However, for me, as a microcontroller programmer, it is strange to install a package to work with GPIO. But besides that, the third-party package also needs to be dynamically linked to my application. And then the question of compatibility with the new version of the package arises, and the question of whether this package will be installed on the system. Thus, I decided to attach wiringOP to my Qt project statically, and also be able to edit wiringOP as a static library project directly in Qt Creator.
As it turns out, the wiringOP project's codebase is clearly redundant. For example, I don't need any code to work with shift registers. The key function is wiringPiSetup (), which asks Ubuntu for the GPIO and other registers in memory by reading the / dev / mem file. Looking ahead, I will say that this is a security hole , because by reading / dev / mem you can access not only the I / O ports, but also the entire RAM.
Once initialized with wiringPiSetup (), you're ready to go. So, the pinMode function sets the operating mode of the comb output: input, output, PWM generation. An example of a blinking code by an LED at pin8.
wiringPiSetup();
pinMode(3, OUTPUT);
while(1){
  digitalWrite(3, LOW);
  delay(1000); //for(volatile uint64_t i=0;i<0xFFF;i++);
  digitalWrite(3, HIGH);
  delay(1000); //for(volatile uint64_t i=0;i<0xFFF;i++);
}
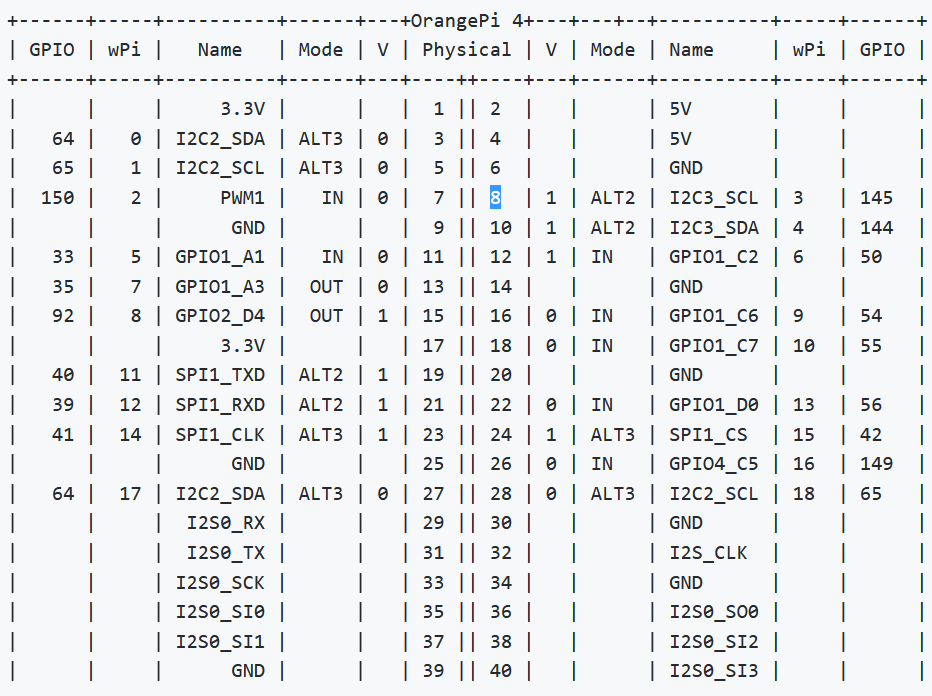
The LED itself must be connected to the comb. In the case of Orange Pi 4B, the situation is as follows.

Static linking wiringOP
, . . , wiringOP
git clone https://github.com/orangepi-xunlong/wiringOP.git
Statically Linked Library. qmake.
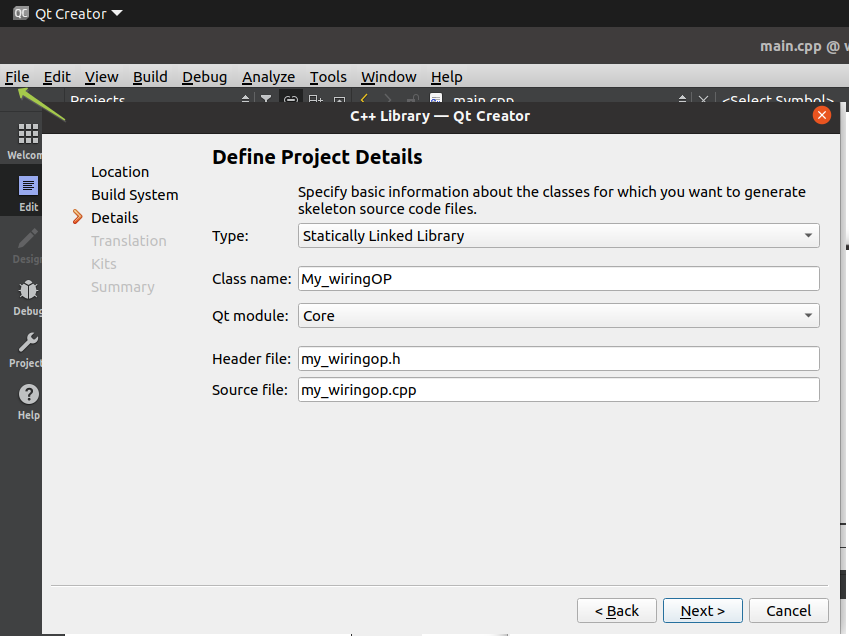
wiringOP .
.pro , . -, SBC. -, , libmy_wiringOP_v5.a wiringOP_build_artifacts.
DEFINES += CONFIG_ORANGEPI
DEFINES += CONFIG_ORANGEPI_4
DESTDIR = $$PWD/../wiringOP_build_artifacts
. ; $$PWD .
. libmy_wiringOP_v5.a
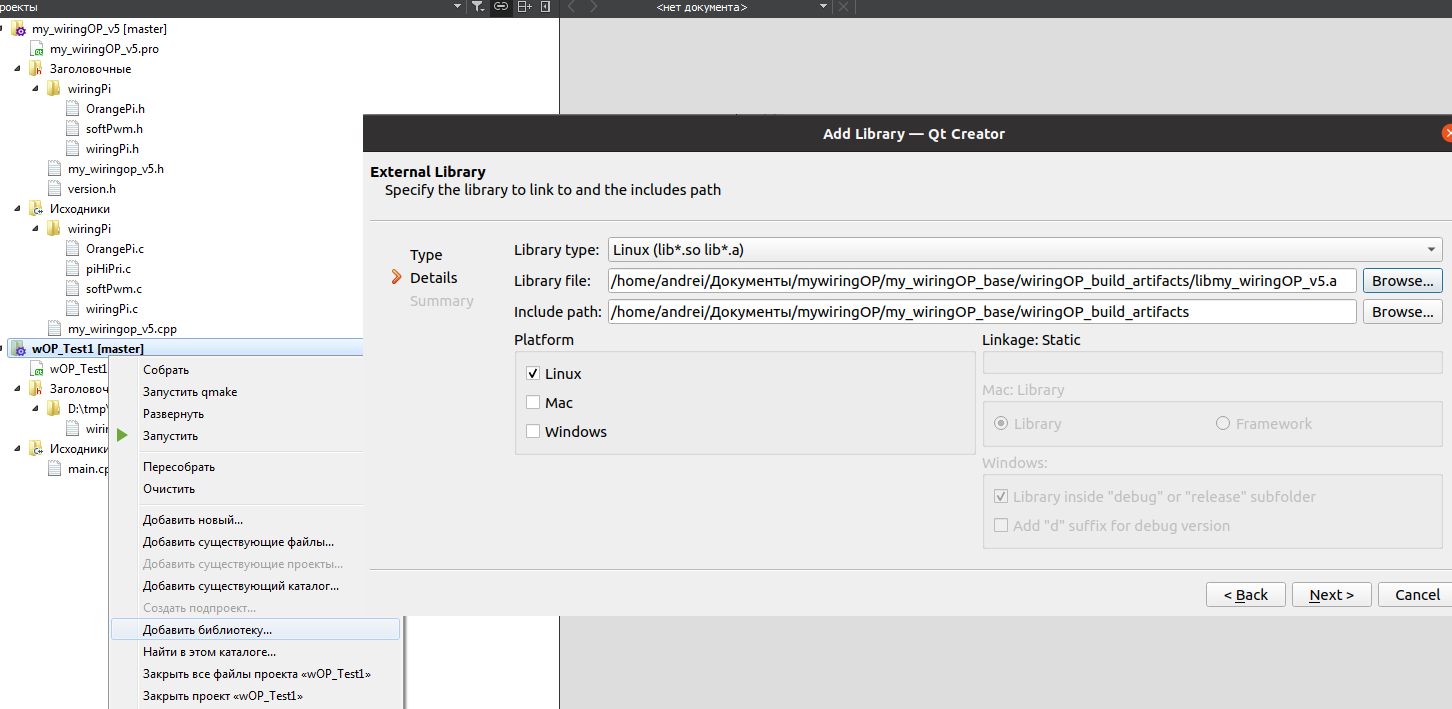
Let's move on to a test project, in my case a console one. It is necessary to add our library to the project as External Library according to the screenshot.
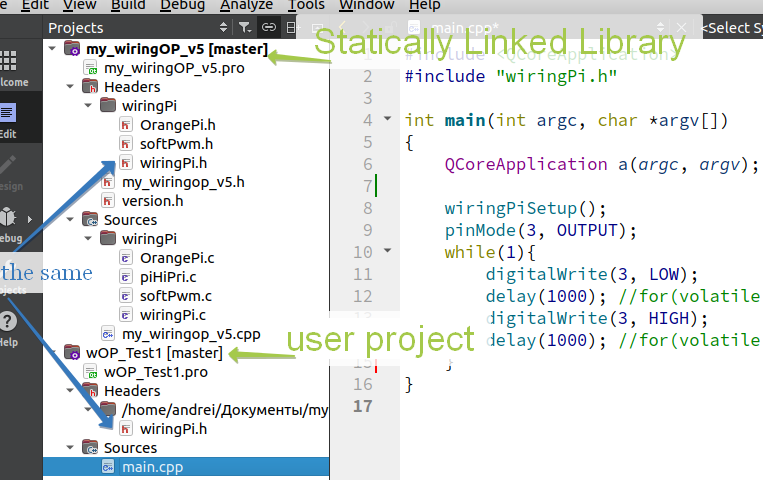
Note that the same wiringPi.h file is used both when creating the library and in the test program. Finally, you can write a program to blink the LED. Next, let's transfer the source codes to the target machine.
rsync -avz /home/andrei//mywiringOP/my_wiringOP_base/my_wiringOP_v5  a@192.168.0.112:/home/a/Documents/QtProj
rsync -avz /home/andrei//mywiringOP/my_wiringOP_base/wOP_Test1  a@192.168.0.112:/home/a/Documents/QtProj
Next, let's build the library and example on the target machine. It blinks at me , and at you?