
Resource management in Zimbra is based on resource accounts - special types of accounts that the administrator can assign to premises and equipment used for business negotiations and meetings. The booking system is based on the fact that Zimbra users, when creating meetings, indicate the meeting rooms in which they will take place, as well as the equipment that will be used during the meetings. Booking information is automatically added to the resource account calendar, eliminating situations where two different appointments can be scheduled in the same meeting room at the same time.
Enterprise resources are managed in the administrator console and command line. A delegated administrator created in Zextras Admin can also manage resource accounts . To do this, go to the "Management" section and select the "Resources" section in the left panel. In this section, you can create, delete and edit resource accounts, as well as view a list of already created resources.
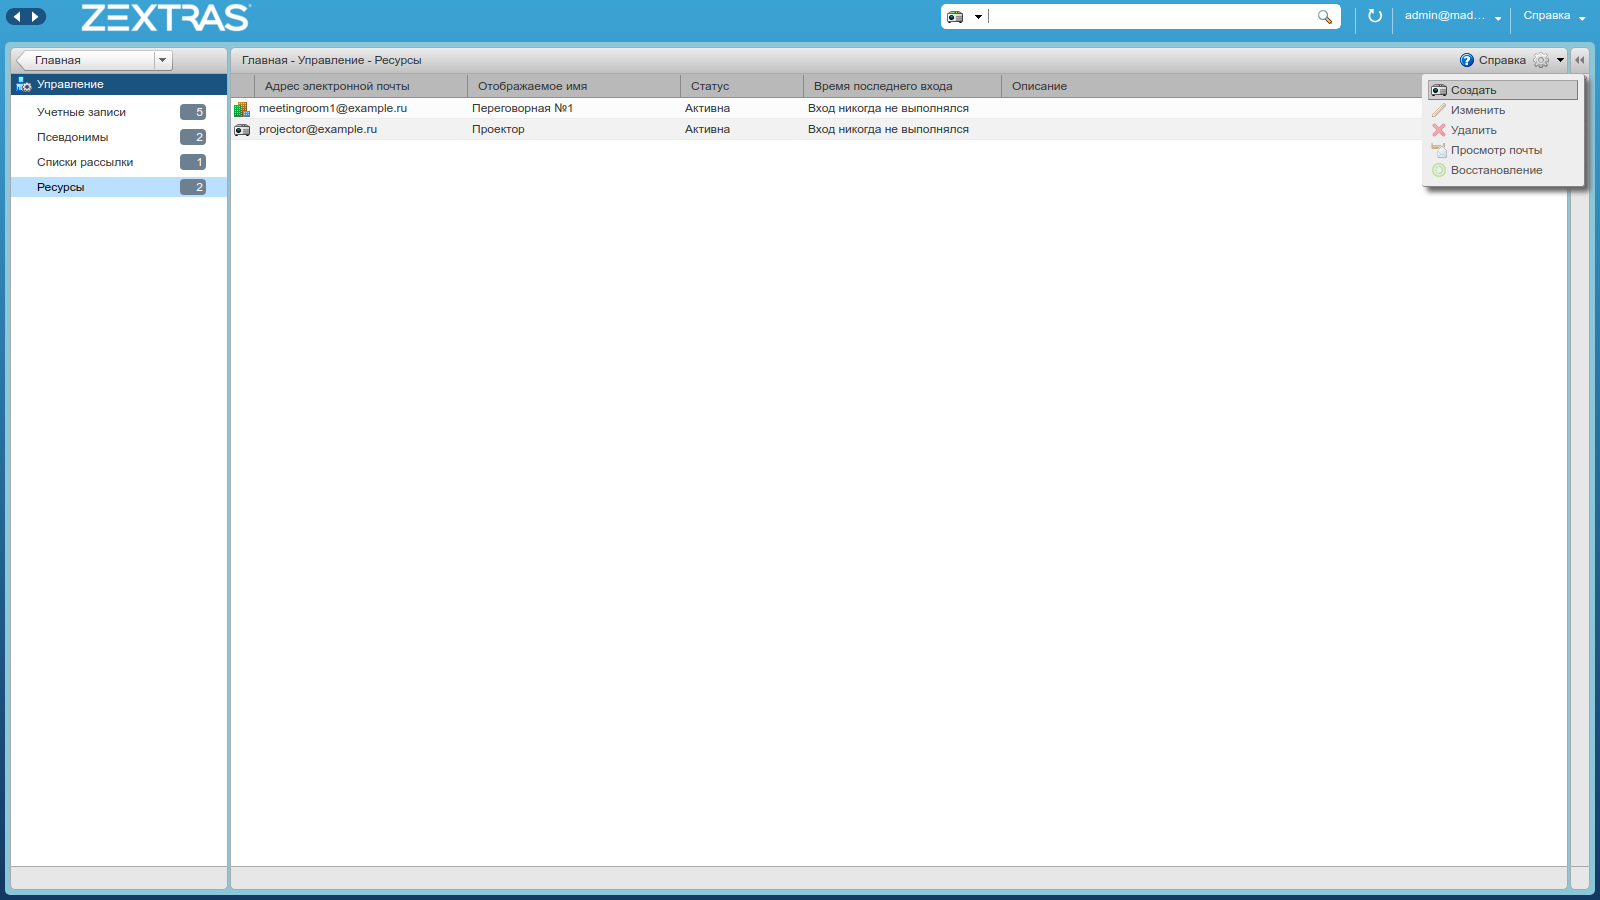
To create a new resource account, click on the "Options" icon and select "Create".
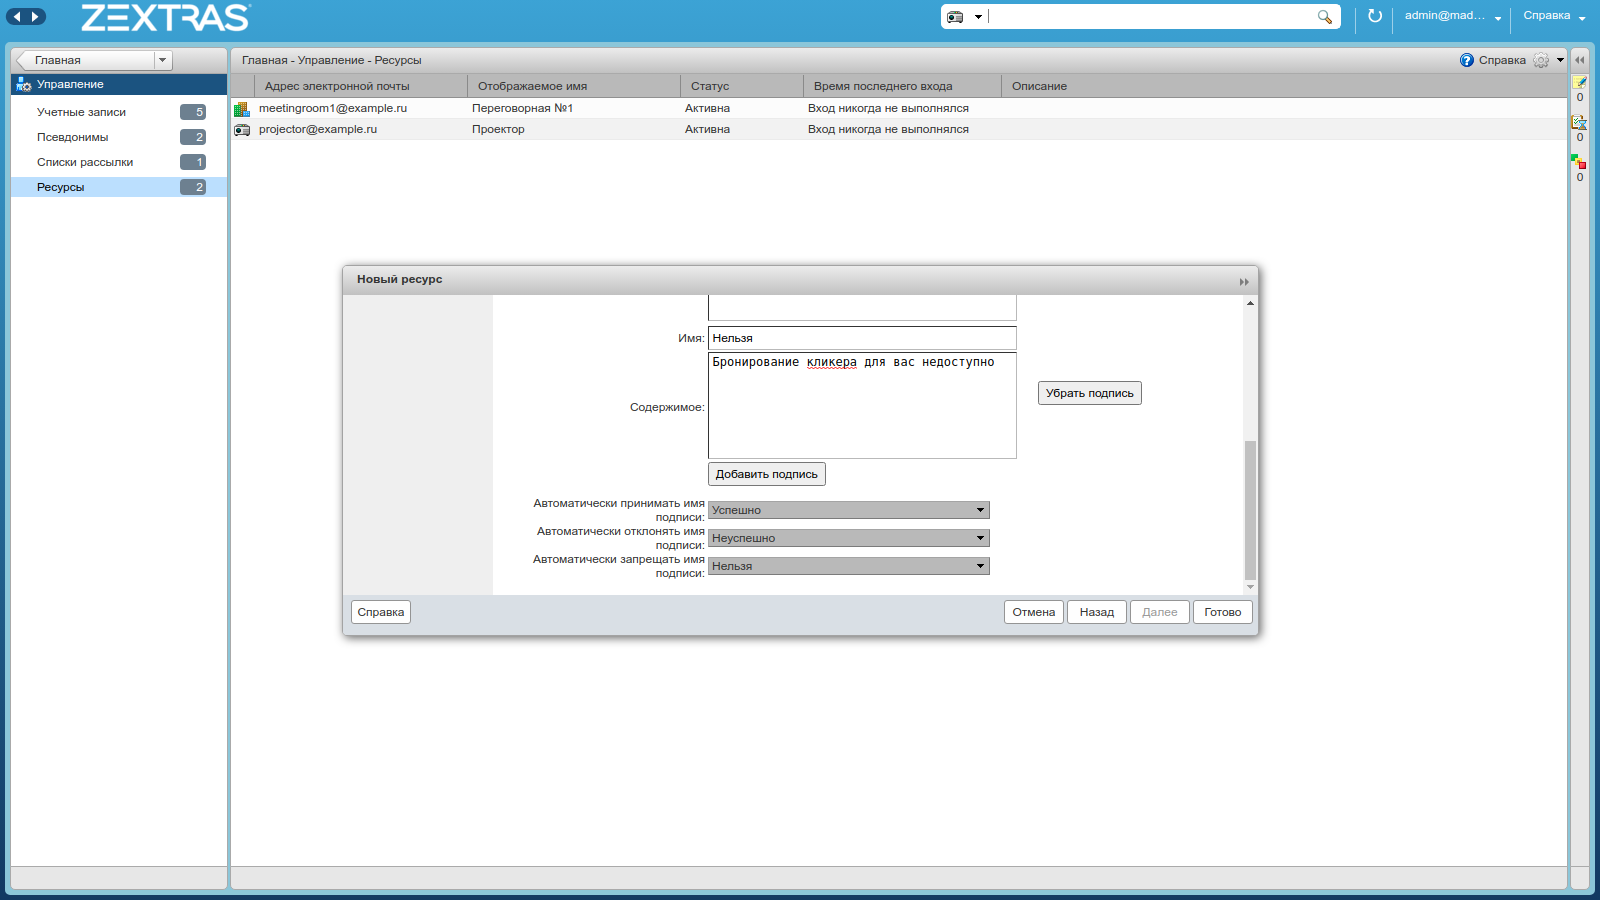
In the window that appears, you must specify the name of the resource and the account of the person responsible for the room or device. In addition, the following settings are available to the administrator:
- — .
- — . ,
- — , .
- — . , .
- — , . , , 0, , ,
- —
- — ,
- — -.
The name and name of the account is sufficient to create a resource account, but you can continue to configure it by clicking the "Next" button.

In the following dialog boxes, you can specify the necessary contact information associated with the created resource account, as well as customize the message texts that will be sent to users in case of a successful booking or rejection of the booking.
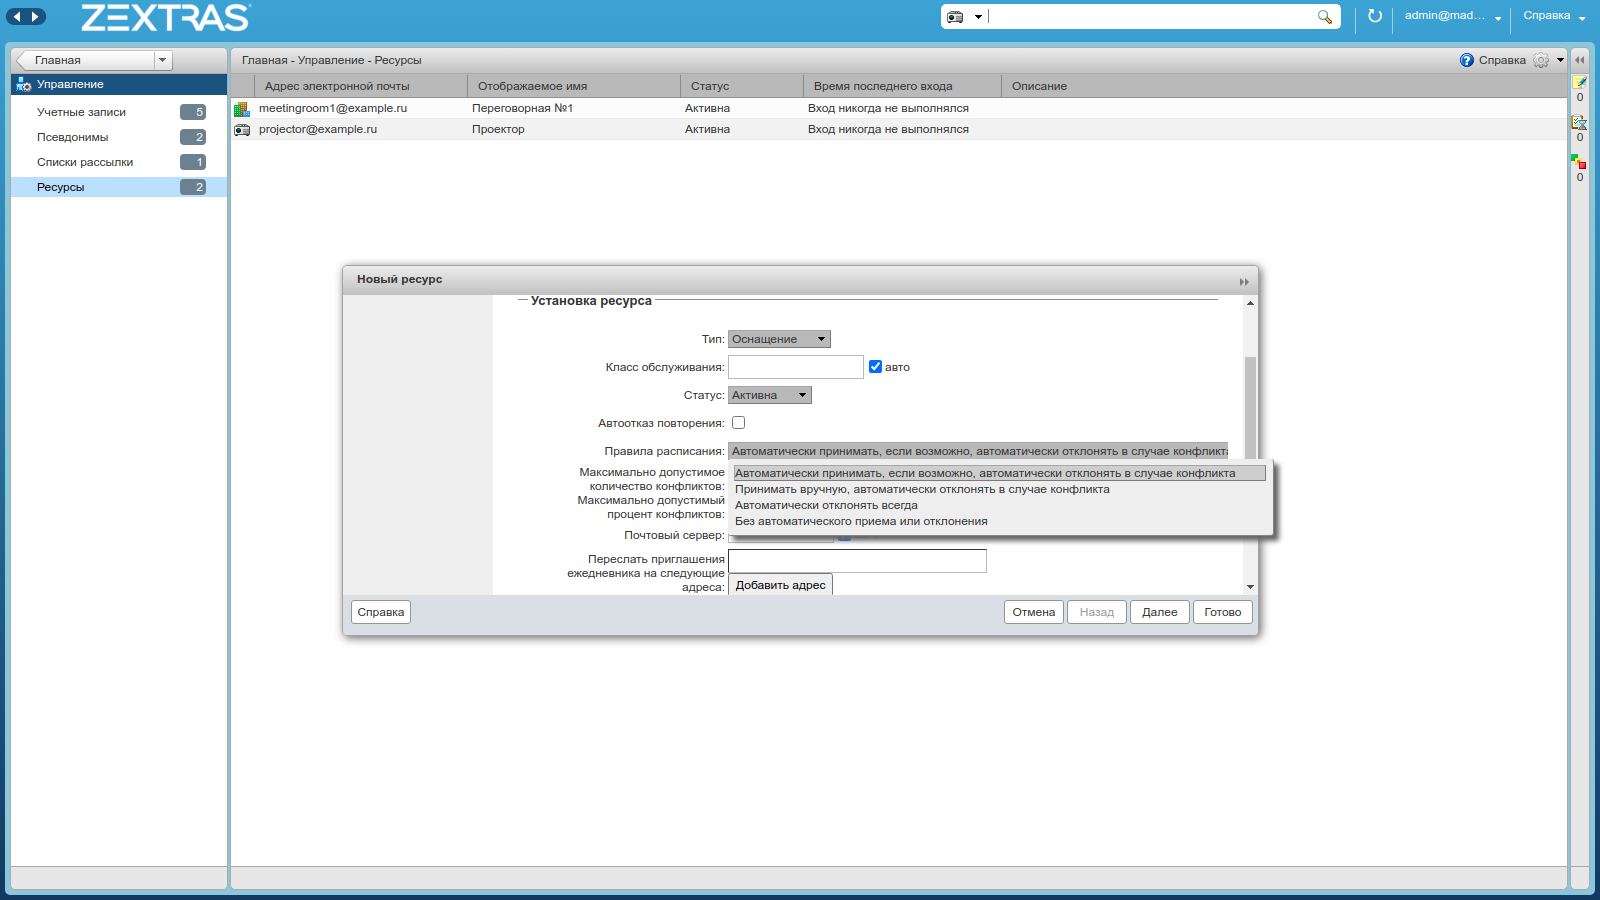
Let's take a closer look at the "Schedule rules" setting. It is a drop-down list of four policies:
- , , — , , , - , , - .
- , — , , - . . , .
- — . .
- Without automatic acceptance or rejection - confirmation and rejection of the reservation will be carried out manually by the employee responsible for this resource
Please note that in the case of manual management of a resource booking, the responsible officer must be granted the right to accept or decline invitations to the resource account.
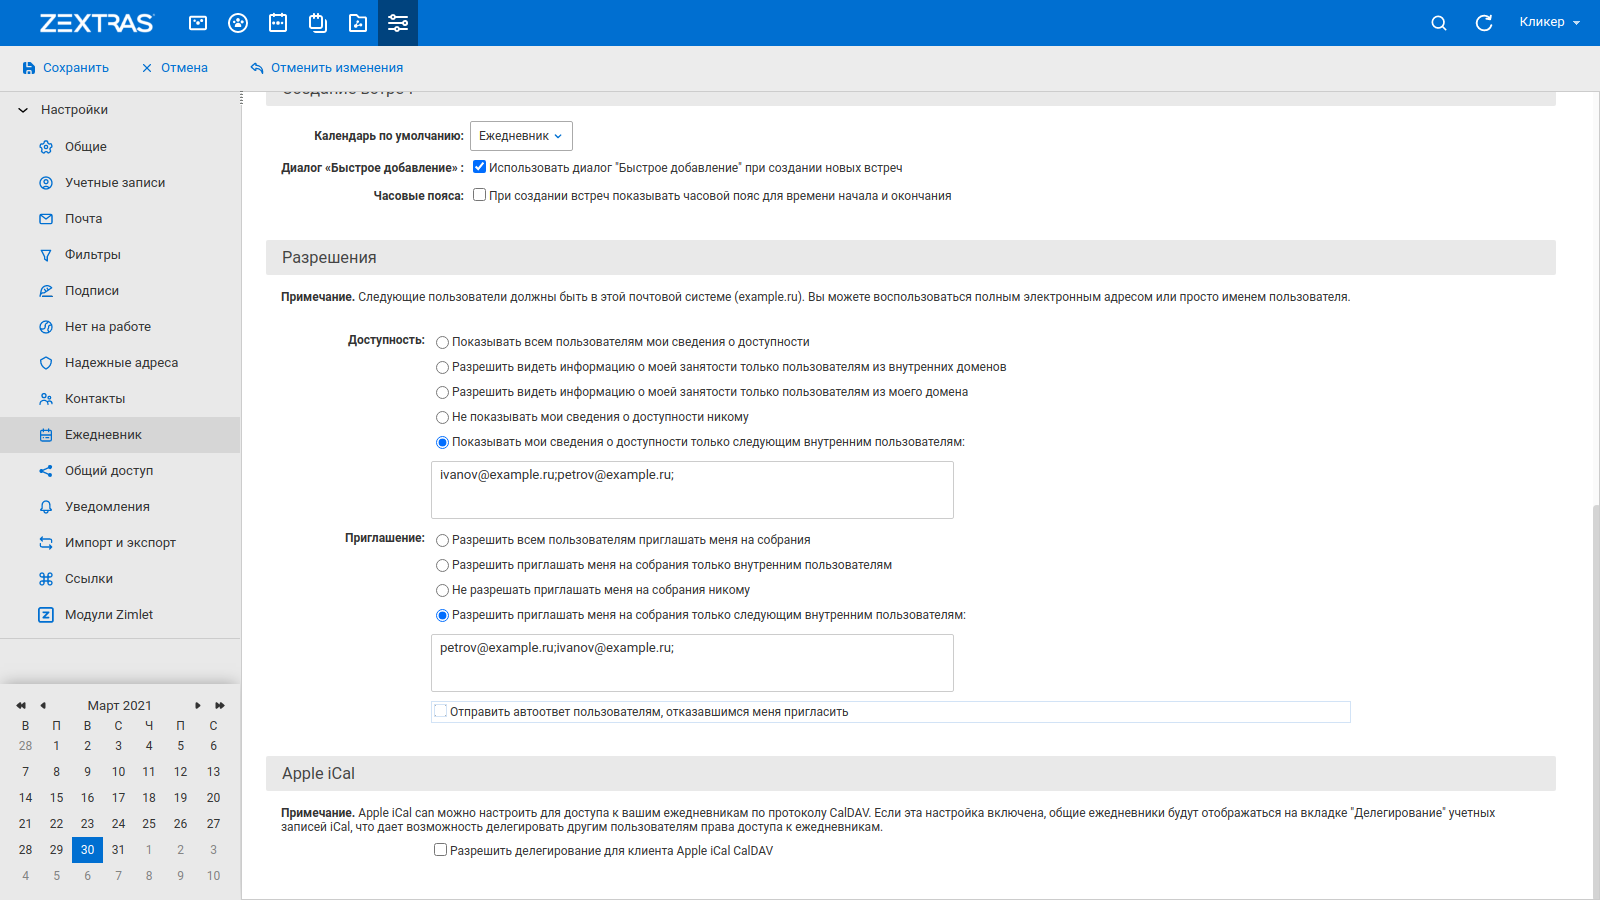
The administrator or person in charge of a room or device can limit the number of users who are allowed to book it for their events and view its availability. To do this, you need to log into the web client under the resource account and go to the settings. In the "Diary" section, select the option "Allow only the following internal users to invite me to meetings:" and enter the account names of those who are allowed to book this resource in the text box below. To restrict viewing of free / busy data, select the option "Show my free / busy information to the following internal users only:" and in the text box below, enter the names of the accounts that are allowed to view the resource's free / busy data.
You can also create resource accounts on the command line. To do this, you must first create a regular account, and then transfer it to a resource account. For example, let's create an account for a corporate car using the first command, and then make it a resource account using the second.
zmprov ca car@example.ru password
zmprov ma car@example.ru +objectClass zimbraCalendarResource displayName "Volkswagen Polo B360TA" zimbraAccountCalendarUserType RESOURCE zimbraCalResType Equipment
To create a resource account associated with a room, use the following commands:
zmprov ca MeetingRoom1@example.ru password
zmprov ma MeetingRoom1@example.ru +objectClass zimbraCalendarResource displayName "Meeting Room 1" zimbraAccountCalendarUserType RESOURCE zimbraCalResType Location
Users can book resources when creating new appointments. You can book a room for a meeting right in the meeting creation window by entering its name in the autocomplete line. When you click on the "Meeting" button, an advanced resource search window will open. You can also book several rooms for a meeting at once. To do this, in the advanced search window, select the "Allow multiple locations" setting and add additional rooms that will be used in the event.

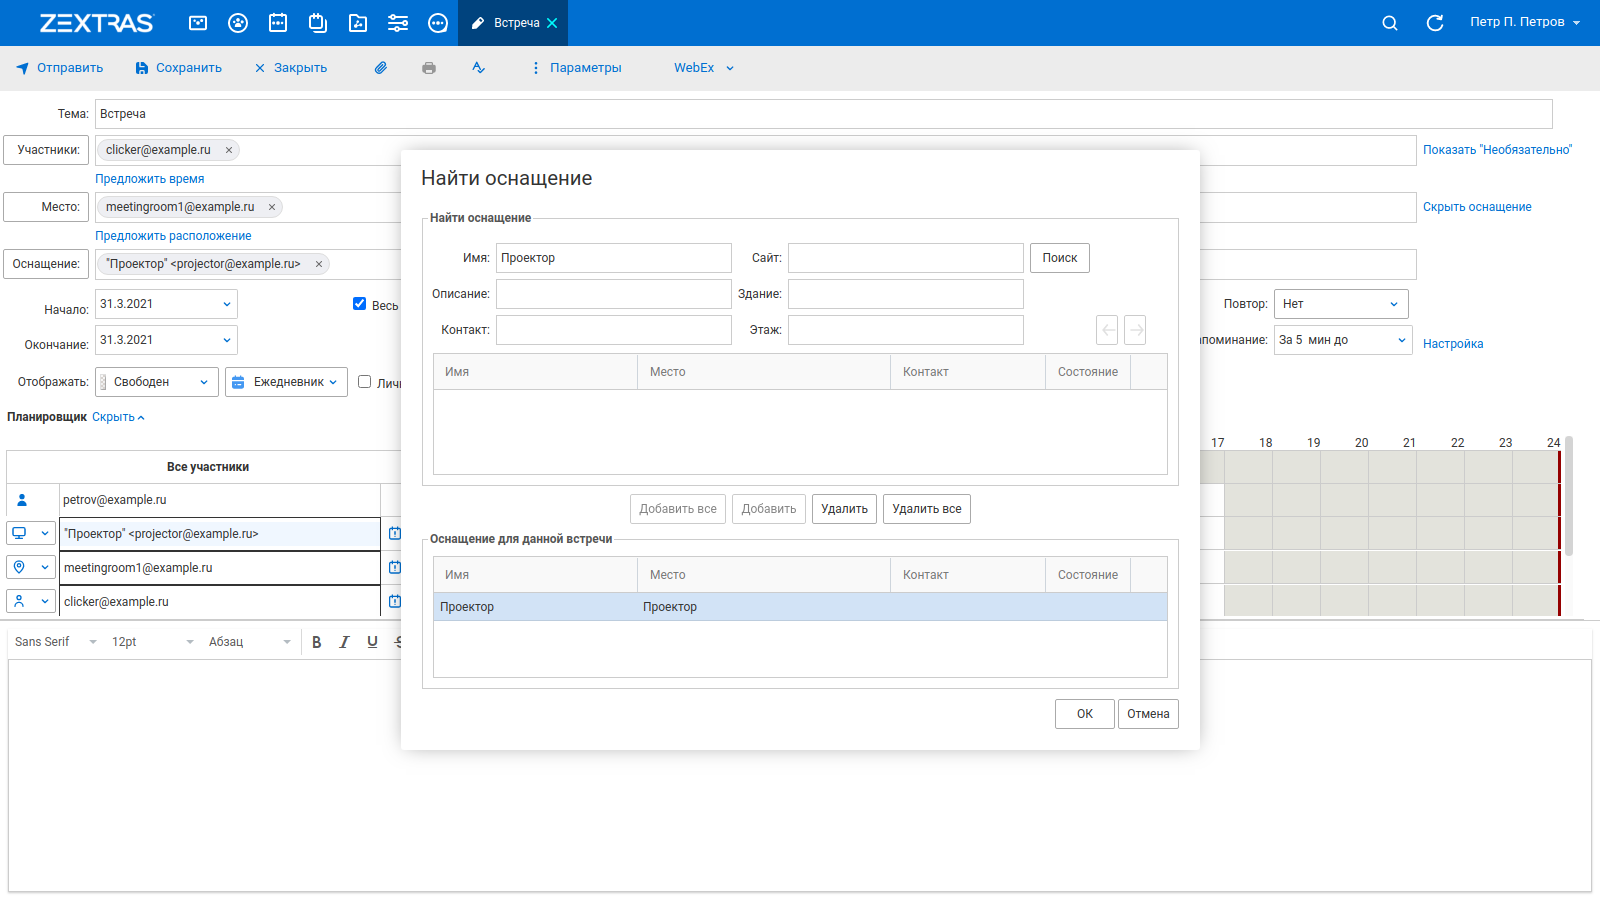
To book equipment, click on the "Show equipment" button. You can add resources by entering their name in the line with autocomplete, or by clicking on the "Equipment:" button to open the advanced search window for resources. You can book resources for a meeting after its creation, during editing.
It is also possible to share the resource account calendar with other Zimbra OSE users. To do this, you also need to log into the web client under a resource account and share the calendar with users who need to have access to it. If there are a lot of users who should have access to the resource account's calendar, you can automate the process of granting them access using the command line and a script.
The idea is to unite all employees who need to provide access to the resource account calendar into a single mailing list and, based on it, add the necessary rights and mount the calendar in the Zimbra OSE web client. In our example, we share the meetingroom1@example.ru meeting calendar with members of the group@example.ru mailing list.
To do this, in the Zimbra north, as the zimbra user, run the command: zmmailbox -z -m meetingroom1@example.ru mfg / Calendar account group@example.ru rwixda. This command will provide access to the calendar to all members of the distribution group, but in order for it to appear in the user's web client, this calendar must be mounted. We will solve this task using a script.
First of all, let's create the MountCalendar.sh file, make it executable and add the following lines to it:
!/bin/bash
while read line
do
zmmailbox -z -m $line createMountpoint -view appointment ‘/Resource/Meeting Room 1’ meetingroom1@example.ru /Calendar
Next, create a list of all members of the mailing list using the command zmprov gdl group@example.ru> accountlist.txt , and run the previously created script using the list of accounts: ./MountCalendar.sh <accountlist.txt . After the completion of the execution of this script, the web client of each member of the mailing list will display the calendar of the account meetingroom1@example.ru.
When using Zextras Suite, resource accounts are not taken into account when calculating the total number of mailboxes in the system. Their creation does not entail an increase in licensing costs, however, all data associated with resource accounts is included in the backup created by Zextras Backup.
For all questions related to Zextras Suite Pro and Team Pro, you can contact the Representative of Zextras Technology Ekaterina Triandafilidi by e-mail ekaterina.triandafilidi@zextras.com