Many had questions and doubts. I will try to answer questions and dispel doubts.
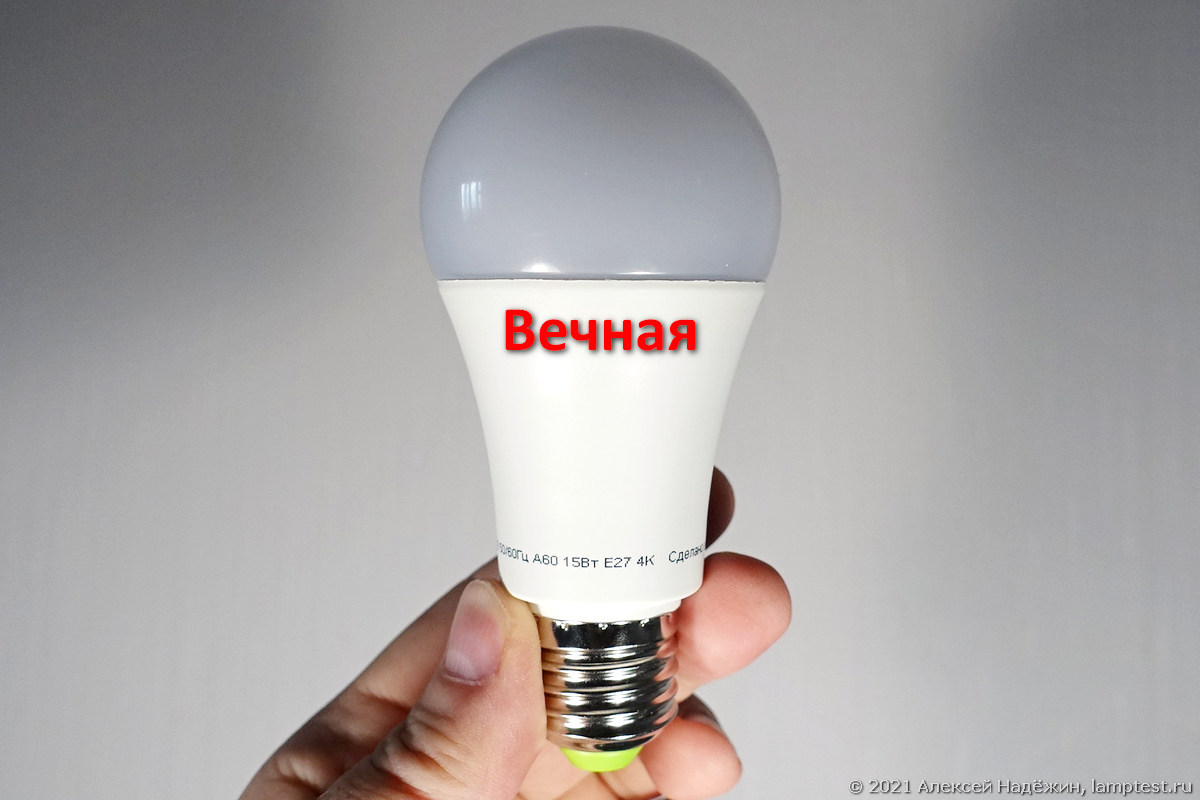
More than 880 thousand people have already read my article on different sites (442 thousand on Pikabu, 261 thousand reads on Zen (impressions 2.9 million), 113 thousand on Habré ( https://habr.com/ru/company/lamptest/blog/547730 /) , 20 thousand on Mysku, 45 thousand on LJ). The total number of comments has exceeded 2500. Physically I cannot answer every one, but I will answer the most frequently encountered ones.
For the first time I saw this method on the Internet years ago, what's new here?
I do not pretend to be an idea. I just found a light bulb that was perfect for rework, explained in detail how to modify it, and measured its parameters before and after the rework. I learned about this method from the blog of the Israeli woman Amit Terko.
I do not understand - "we break the resistor." Do we break and disconnect or break the resistor and solder the legs?
Judging by the picture, is there a solder instead of R2? Or am I wrong and there must be a break?
The resistor must be interrupted. The photo shows the remnants of a broken resistor (it had a conductive layer on top, and the rest is just ceramics).
"Well, at least he offered to vypayat, and not break it."
"Why break, you can just unsolder."
"Is it possible to unsolder, but not break?"
The lamp board is aluminum and it will not be easy to unsolder the resistor. And not everyone knows how to solder, and everyone with "straight" hands can break it.
I wonder how much power dissipation does R1 have? And won't it overheat and eventually burn out?
These resistors are connected to the input of the microcircuit and set the current. The power dissipated on them is small.
Here is a typical circuit of an LED lamp with a pulse driver (current setting resistors RS1, RS2).

I wonder why they put two resistors, and not one?
So that you can more accurately select the total resistance and, accordingly, the current through the LEDs.
And what about all 2 resistors, and therefore it is necessary to break the second resistor?
In cheap lamps, for the sake of economy, they put one resistor. To alter such a lamp, you will have to replace the resistor with another larger value.
If there are two resistors, and they are in parallel, you need to break the one with the higher rating.
And if, instead of R2 (5.6 Ohm), you unsolder the resistance R1 (2.7 Ohm) - how much will the brightness and temperature decrease?
It will decrease greatly, you should not do this.
And after the alteration, did you measure the parameters, except for temperature? How about ripple and CRI?
Measured. Nothing changes.
Isn't it easier to immediately buy a less powerful lamp and not bother with "tuning"?
Not! A less powerful lamp has fewer LEDs, which in the same way "wear out". By modifying the lamp, we enable the LEDs to work in a sparing mode.
How to remove the cap?
The Navigator light bulb, which I found for rework, can simply be torn off by hand. With other lamps, it can be very difficult to remove the cap. It is advised to warm it up with a hairdryer before trying to tear it off. Caution! Very old lamps (for example, the first IKEA) have a glass cap and if you try to tear it off, you can get severely injured.
How to put the cap back so that it does not fall off when screwed in?
For the same Navigator, the cap snaps into place and holds well. For other lamps, you can fix the cover with two drops of super glue.
Of course, I probably don't understand something, but if I = U / R, then with a decrease in resistance, the current increases ... accordingly, the power also increases ... or I don't understand something?
In the lamp we are modifying, two resistors are connected in parallel. When we break off one, the total resistance increases.
How did you find that the lamp has a gut navigator outside? Did you shine something in stores through a frosted bulb?
I just took apart a few lamps and found the right one.
Manufacturers also read you and modify products so that it would not be so easy to fit in and "twist". This information needs to be distributed clandestinely, otherwise it becomes outdated very quickly.
Contrary to popular belief, the manufacturer will only be happy if his lamp works longer. After all, when a lamp burns out prematurely, the buyer tries not to buy lamps from this manufacturer anymore.
It is also good to drill 4 holes with a diameter of about 4 mm in the plastic base. then hot air will come out of the lamp and the temperature inside will drop, which will also increase the lamp's life.
There will be no special convection there, and if this prolongs the service life, it will be insignificant. By the way, many people think that the body is entirely plastic, but this is not so - the lamp body is an aluminum heat sink, covered with plastic on the outside.
“If there is space in the socket or switch, you can connect a 0.5 ÷ 1 μF capacitor in series with the lamp. Depends on the power of the lamp, for 160 ÷ 250V. The brightness will drop but it will work forever. "
No, if the lamp is with a pulse driver, it doesn't work.
“If a light bulb is in (under) a closed shade, it’s easier to just tear off the diffuser from the bulb and the heat sink will increase and the brightness will increase, and the resource should increase (overheating of the LEDs will decrease, and the heat dissipation of the bulb radiator will improve), but the shade must be closed, protection from fools and kids. "
If you remove the plafond, the overall brightness will increase by only 5-8% ( https://ammo1.livejournal.com/1220220.html ) and the lighting angle will greatly decrease. Overheating will indeed decrease slightly, but not as much as with decreasing current.
How did the energy efficiency increase?
The energy efficiency of an LED depends on the applied current. The lower the current, the higher the efficiency.
And if the lamp has separate boards, what needs to be broken off there?
There are usually two of the same current-setting resistors on the driver board, but removing two boards and putting them back is a very difficult task and it will definitely take more than five minutes.
What lamps are suitable for rework?
For the simplest modification with breaking out the resistor, only a few lamps are suitable. They must have a single-board design and two current-setting resistors connected in parallel. And they should more or less easily remove the diffuser cap.
Many lamps have a two-board design, they have only a board with LEDs under the cap, and the driver board is inside the case.
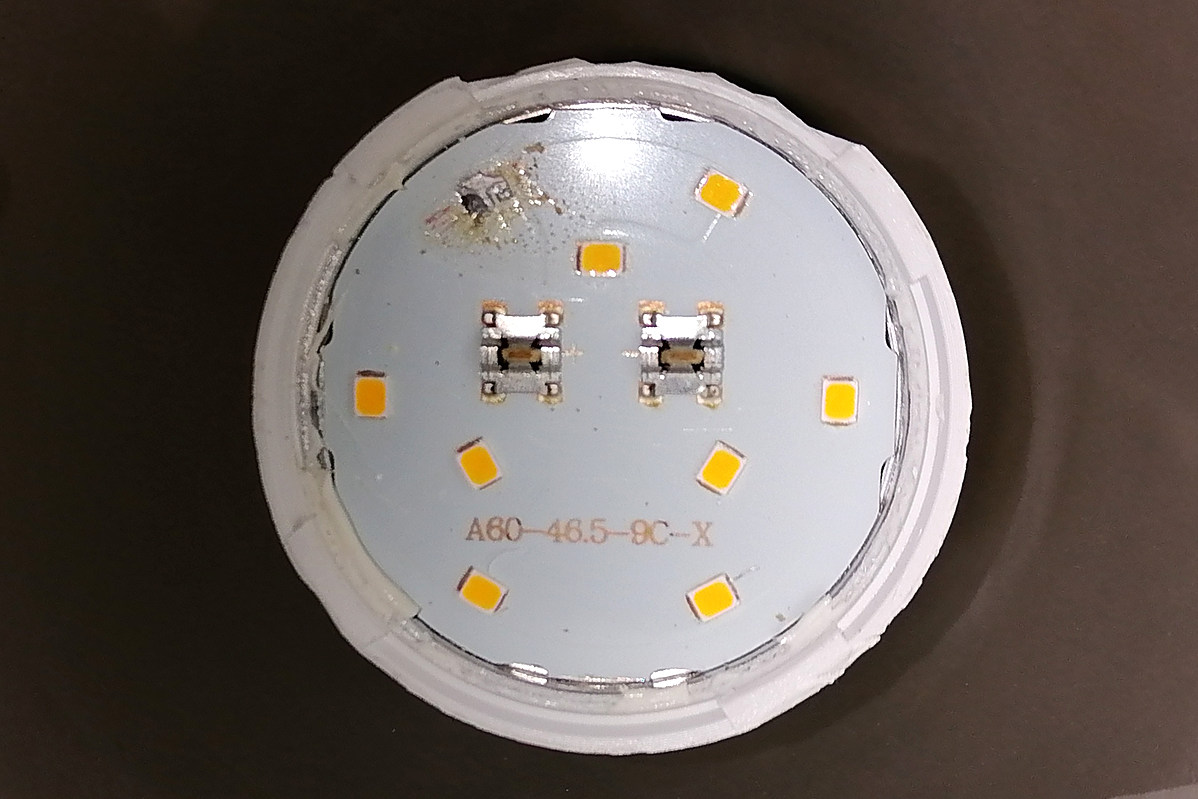
Fussing with disassembling and assembling such a lamp will take more than one hour (you may even have to drill the rolling of the base) and, in my opinion, this is inappropriate.
For cheap lamps with a single board design, for the sake of economy, only one resistor is installed. For example, Era 15 W with release date 03/15/19.
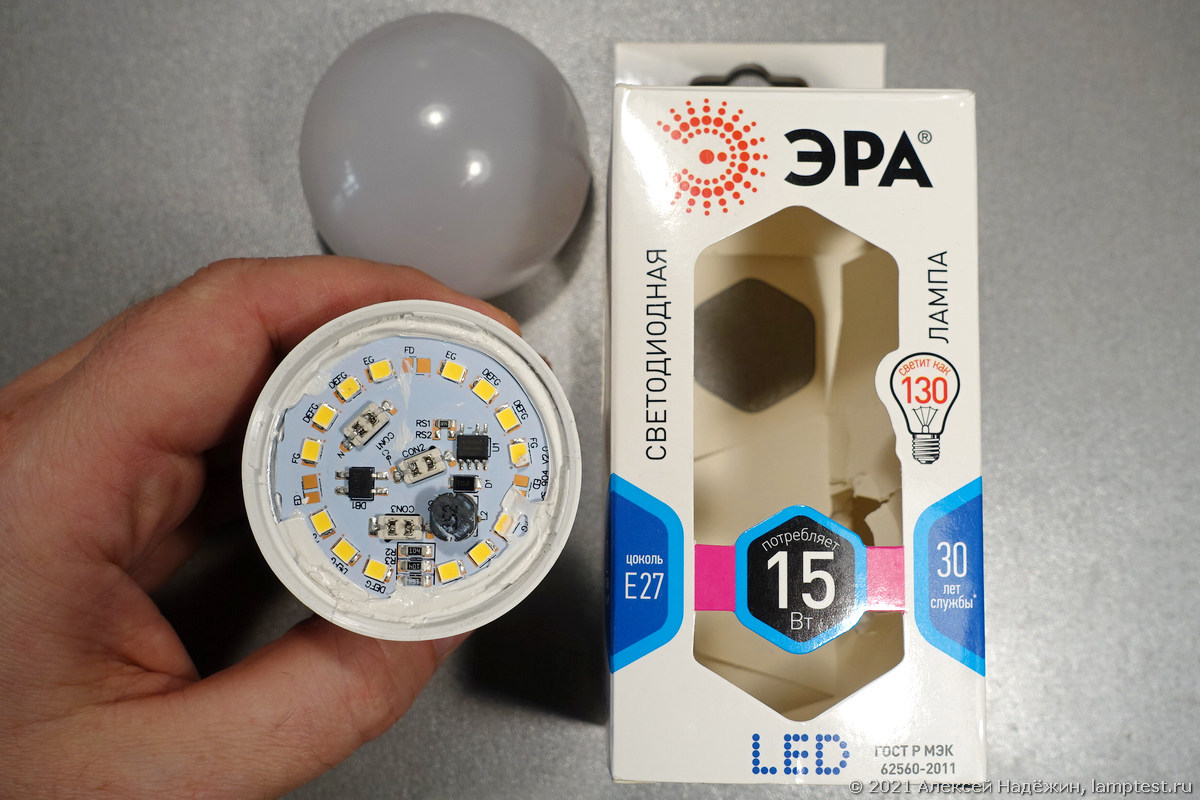
There is a place for the second resistor, but there is only one for 1.74 Ohm.
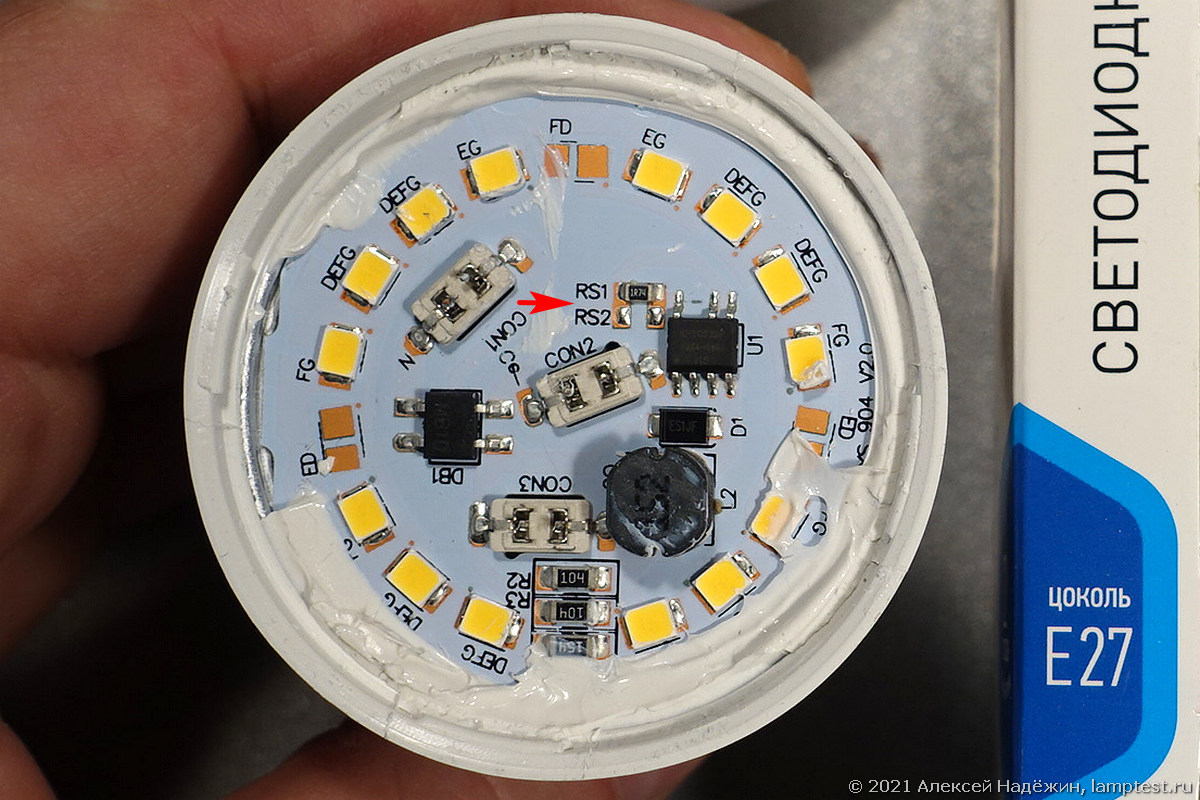
Another example: Start 15 W with release date 08.2019.
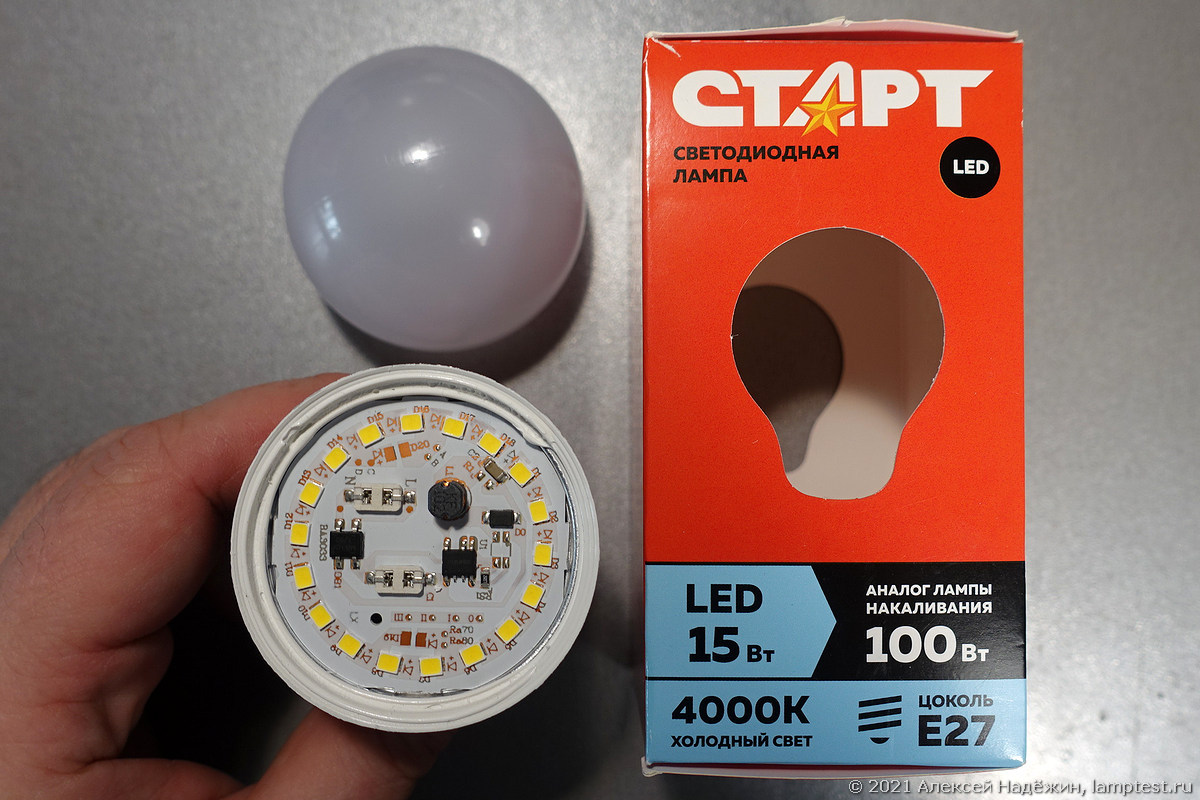
There is only one resistor for 2.87 ohms.
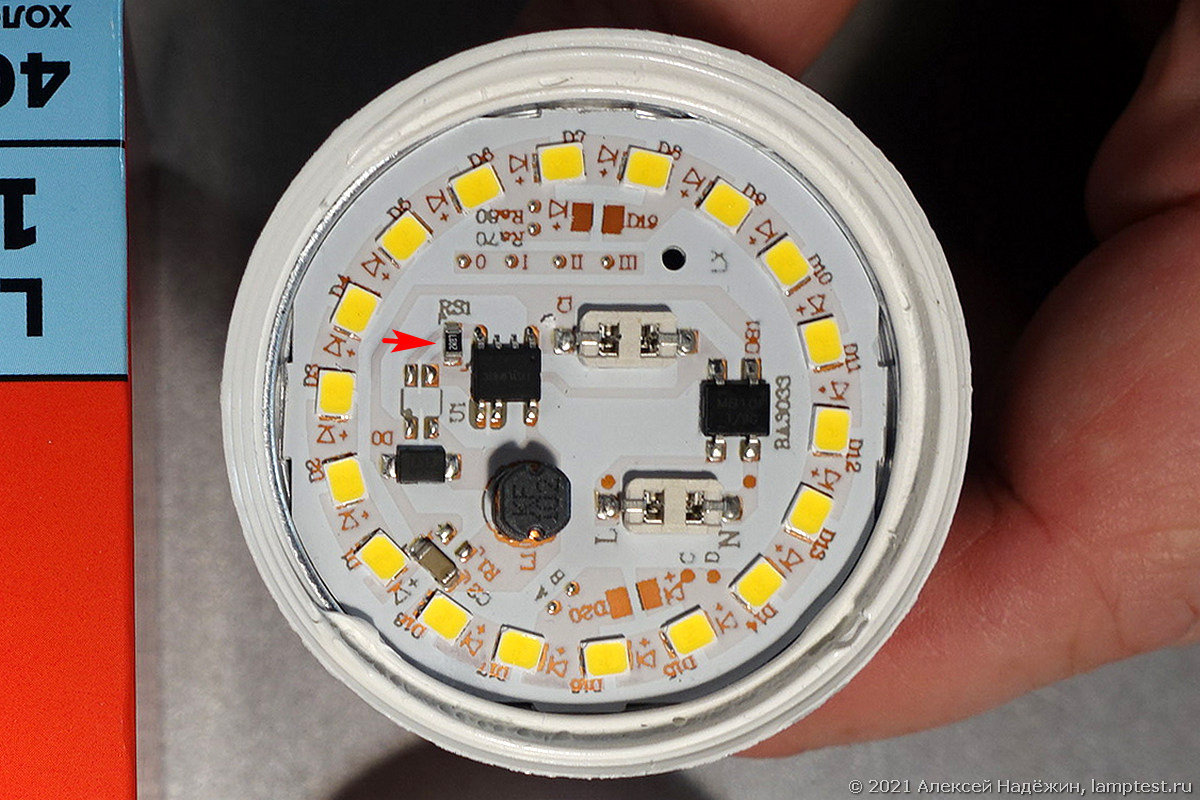
To modify such lamps, you will have to replace the resistor with another larger value.
There are also lamps in which two current-setting resistors are connected not in parallel, but in series (one of the readers found this with an OSRAM lamp). In this case, you will also have to replace the resistors.
I'm not even 100% sure that exactly the same Navigator lamps with a different release date are suitable for alteration - it is possible that their design has changed.
I will continue to search for lamps suitable for quick modification. As soon as I find something, I will take all the measurements "before and after" and tell you about it.
© 2021, Alexey Nadyozhin