Today I will tell you how, in five minutes, without any tools, you can modify a light bulb so that its lifespan is significantly increased.

First of all, let me remind you that all LED bulbs are guaranteed from one to seven years. If a light bulb fails during the warranty period, it can be exchanged at the store where it was purchased. For exchange in large stores like Leroy Merlin, you don't even need a check and packaging.
In the Lamptest.ru project I test the light parameters of the lamps, but I cannot test the reliability. I understand perfectly well that for most buyers it is more important that the light bulb works for a long time, and not what parameters it has.
The reasons for the failure of the lamps are mainly two - the burnout of the LEDs and the failure of the capacitors.
If you reduce the lamp power by a third, the life of the LEDs will increase significantly (of course, the brightness of the lamp will decrease). This is what we will do.
The cheapest lamps use very poor capacitors that do not last even a year. There is no point in modifying such lamps - they will not last long anyway.
For modification, lamps of the middle price segment are best suited (there is a chance that there are better capacitors). The higher the power, the better (after all, after reducing it, the lamp should shine brightly enough). Optimal lamps are 15 watts. Of course, it is better to take lamps with a pulse driver, which have a built-in stabilizer and they shine equally brightly at any mains voltage.
There are two types of lamp design - traditional two-board (inside the case is a driver board, above it is a round board with LEDs) and single-board (the driver is located directly on the board with LEDs, and the capacitors are soldered to this board at the back). A single-board lamp is needed for a simple and quick modification.
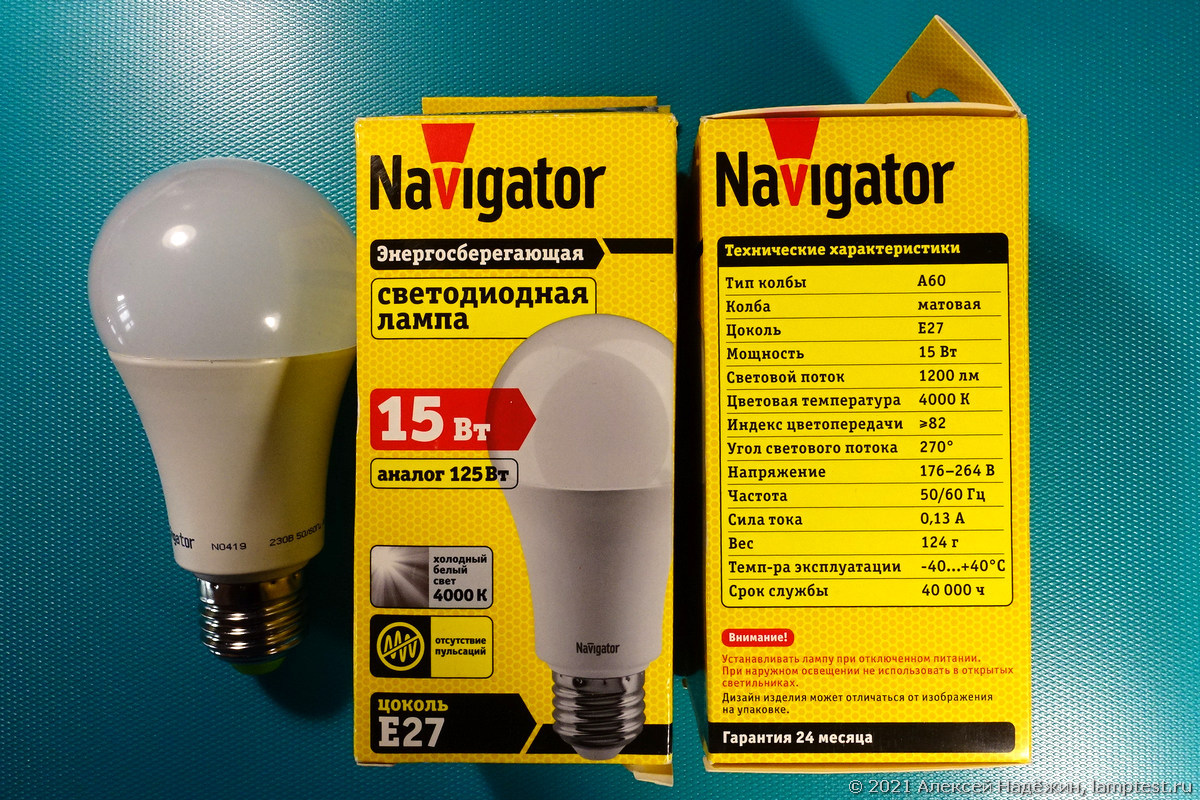
From my stocks, I found lamps that are ideal for rework - Navigator NLL-A60-15-230-4K-E27 with a production date of 0419 (I hope modern lamps of this type have the same design). This lamp has a real power of 13.66 W, gives 1210 lm of light, has a CRI (Ra) 83 color rendering index, and has absolutely no ripple. The lamp is equipped with a pulse driver. Such lamps can be found on sale at a price of 120 rubles.

Of course, you can take the model with warm light NLL-A60-15-230-2.7K-E27.
The first step is to remove the cap. From this lamp, it can simply be torn off by hand (it will take a lot of effort). There is a single board under the hood. On it we are interested in resistors R1 and R2, they set the current of the LEDs.

The resistors are connected in parallel, their ratings are 2.7 ohms and 5.6 ohms. We carefully break the resistor R2, trying with all our might not to break everything around the resistor.

That's all. You can put the cap back on.
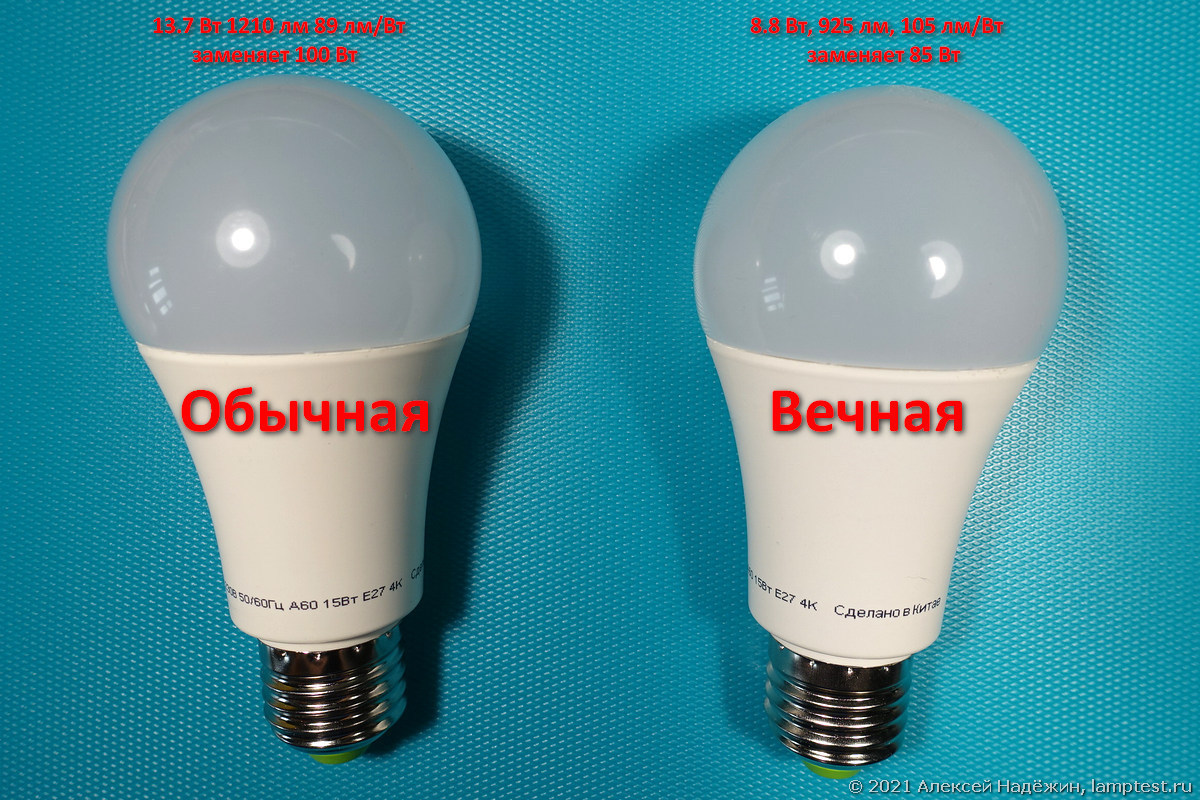
The lamp power dropped from 13.66 to 8.83 watts. The luminous flux has decreased from 1210 to 925 lumens. The lamp is now capable of replacing an 85 W incandescent lamp, which is also not bad. The efficiency of the lamp has significantly increased: it was 89 lm / W, now it is 105 lm / W.
The main thing is that the lamp has become much "colder".

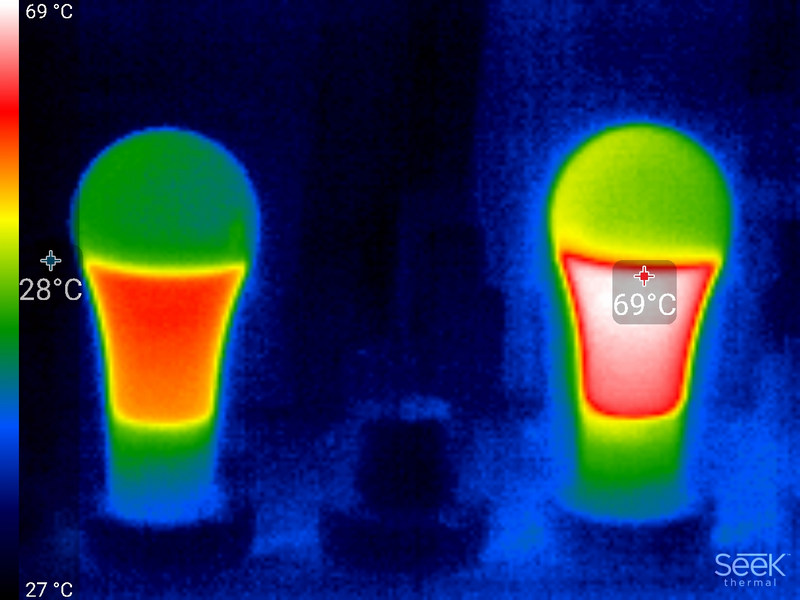
The temperature of the body of the unreconstructed lamp reaches 67 degrees, while the modified lamp reaches only 52 degrees.

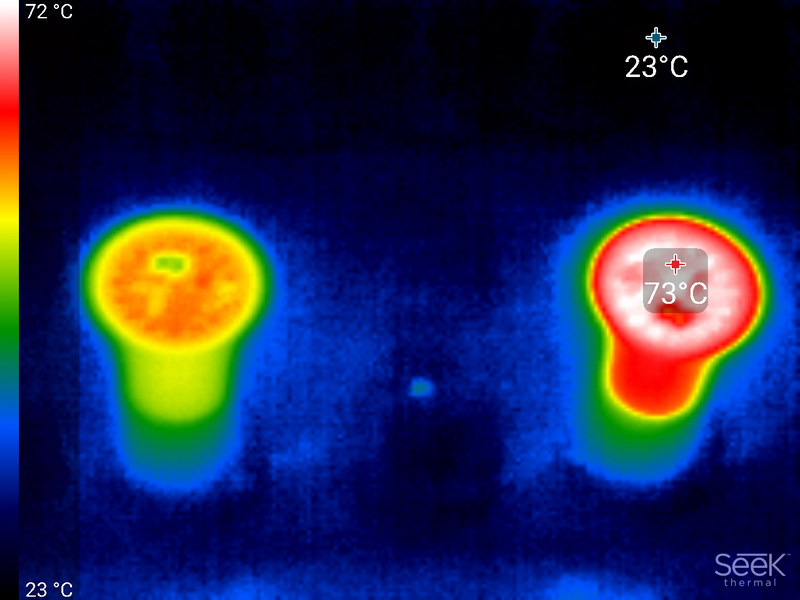
The thermal imager shows the temperature on the switched on LEDs incorrectly, but it is quite possible to compare.

The difference in temperature on the LEDs is very large - 21 degrees.

The LEDs in the modified lamp will now work for a very long time, it's up to the capacitors (by the way, they will also be easier because of the lower temperature inside the lamp). If they don't fail, this light bulb will last for decades.
A few important notes:
- only new bulbs are suitable for modification (if the lamp has been working for a long time, the degradation of LEDs has already begun and it will not stop);
- when reworking, you lose the guarantee for the lamp (however, if the lamp still fails and you glue the cover back, no one will figure out that you broke off the resistor inside there);
- Remember that hazardous voltages are present on the board when the lamp is plugged in.
I will continue to search for successful and mass models for such a modification, and as soon as I find interesting options, I will tell you how to redo them and, of course, measure the parameters after the alteration.
© 2021, Alexey Nadyozhin