
Most recently, the guys from the Raspberry Foundation presented a new board, the main element of which is its own SoC, the RP2040. The board is excellent, you won’t say anything, but, of course, some features are lacking.
Third-party developers have tackled this issue: - on the basis of the same system-on-a-chip, they create their own boards with new functions. One of them is the Adafruit Feather RP2040. What's new there?
We take the bull by the horns
Yes, let's get down to the technical specifications right away. And they are like this:
- 21 multi-function GPIO pins at 3.3V.
- 2 SPI ports.
- 2 I2C.
- 2 UART.
- 4 12-bit ADCs.
- 16 controlled PWM channels.
- 8 Programmable I / O (PIO) state machines to support custom peripherals.
- Possibility of desoldering on the carrier board.
- Built-in WS2812 Neopixel STEMMA QT connector.
- Built-in battery charging and support for LiPo and Lilon batteries, hot swappable USB Type C.
As for the system-on-a-chip, it is a dual-core ARM Cortex M0 + chip with a core frequency of up to 133 MHz, 264 KB SRAM and 8 MB of flash memory.
Adafruit Feather RP2040: - how it's done
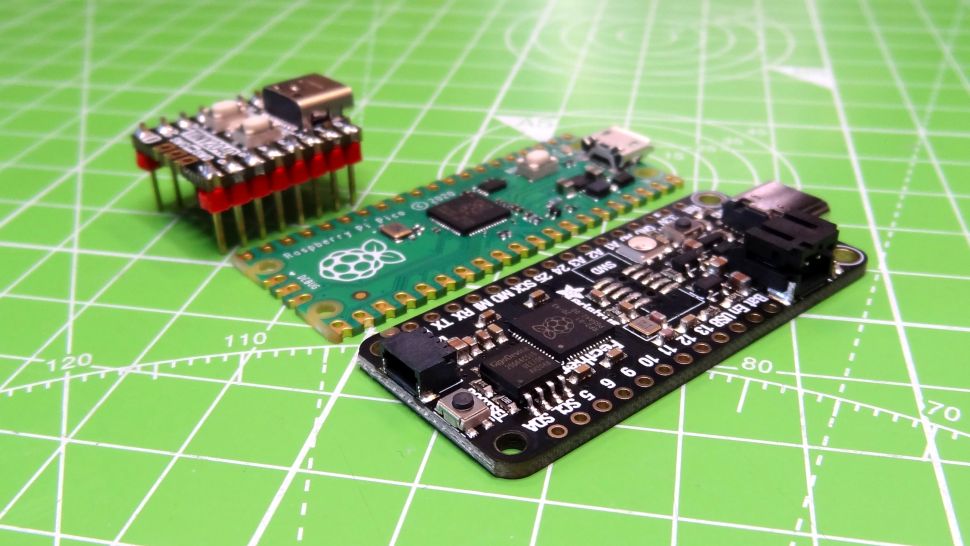
If you are familiar with the Adafruit Feather family, then at the first glance at the new board you will find the design features common to Feather. Belonging to this ecosystem is another advantage of the board, as it is compatible with a whole range of systems from this developer, including FeatherWings.
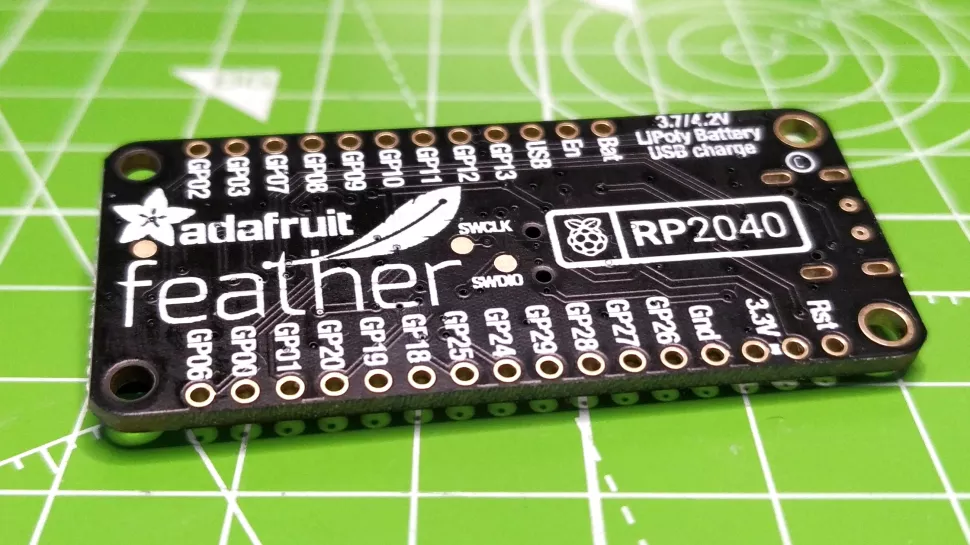
The board size is 50.8x22.8 mm, which is only slightly larger than the original "raspberry", whose dimensions are 51x21mm.
By the way, there are fewer GPIO pins here than in the Raspberry - 21 instead of 40. The pinout is typical for Feather. On both sides of the board, each of the pins is registered, so there should be no problems with understanding.
The pins include 4 12-bit ADCs, one more than the Pico. More - two sets of l2C, two SPI and two UARTs. 16 pins can be used for PWM (Pulse Width Modulation), LED and audio output.
There is a single red LED on board the board for monitoring the system operation mode. Flash memory is four times that of the Raspberry Pi Pico - 8 MB instead of 2 MB. If you use CircuitPython, you get 7 MB of file space for saving code and libraries.
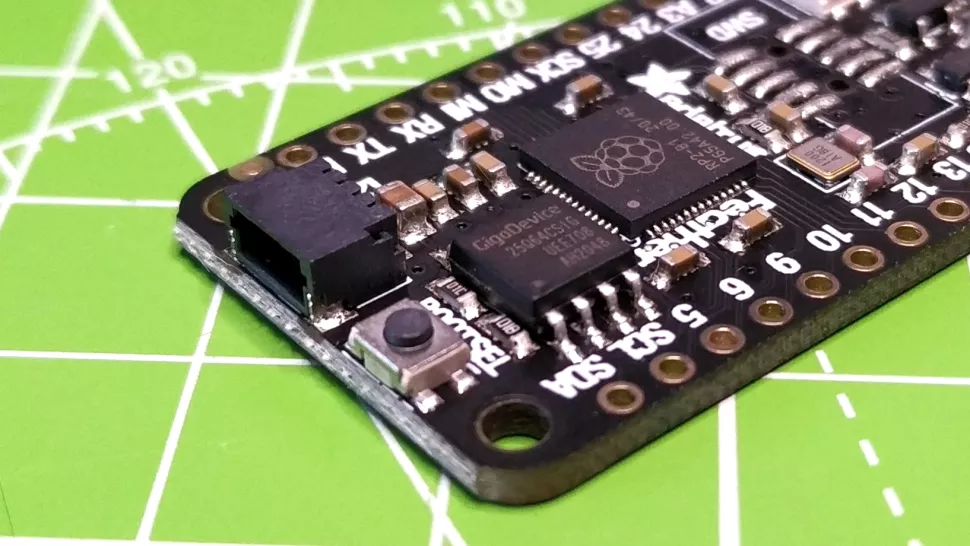
Feather boards always have extra features, and this board is no exception. On the left is the JST connector for connecting compatible Lithium Ion and Lithium Polymer batteries. When connected via USB, the charging current is 200 mA.
Batteries can be changed without shutting down, in "hot" mode, which is important for many projects. In a test performed by Tom's Hardware while processing the code, the USB power was turned off, but the board continued to execute the code.
Another possibility is the presence of the STEMMA QT connector, which is used to quickly connect compatible components. This is just a great option to make it easier to work with the board.
And then there are two additional buttons. BOOTSEL, which is used to configure the board or flash new software. And RESET, which, logically, allows you to reboot the system without having to turn off the power.
Programming with Adafruit Feather RP2040

Since the board is part of the Adafruit ecosystem, it is natural that the developers suggest using CircuitPython, their own version of MicroPython, to work with it. You can download and flash the software without much difficulty.
CircuitPython has advantages over MycroPython, including USB HID support. Accordingly, the board is displayed as a USB stick when connected. You can use code.py to generate code. But it's best to work with editors like Visual Studio Code, Thonny, or Mu. The libraries are available for download from the company's website and are worth using because they make things a lot easier.
Visual Studio Code was used for the test. With its help, testers wrote a script to control the built-in LED to monitor the operating mode of the board. Much more complex projects can also be implemented. The same testers wrote a script to control the connected Neopixel LEDs.
STEMMA QT and I2C connections
The board's built-in STEMMA QT connector was also tested. A capacitive sensor board MPR121 was connected to it to the Feather RP2040. Then the CircuitPython library was installed on the board. Then the testers wrote code to detect when the contact was touched. Everything worked right away and without any problems.
Then a new stage began - connecting the I2C HD44780 LCD display with a resolution of 16 x 2 characters. And here the problems already appeared: the display could not be connected without pull-up resistors on both l2C pins. The board does not have its own resistors, so you need to either install them additionally, or use the STEMMA QT board with them.
In general, everything turned out to be good. There were some problems, but all this could be solved. By the way, an important point - now the board does not work with C or MicroPython. However, CircuitPython runs smoothly, so additional features may not be needed.
There are a lot of things you can plug into the board: the Adafruit ecosystem includes an OLED screen, Wi-Fi coprocessor, RGB LED matrix, joystick, and an LCD QWERTY keyboard.
What can the board be used for?
For everything from small home projects to more or less large-scale IoT systems, outdoor devices, etc. The form factor of the board is convenient, the system can be easily soldered onto a carrier board.
In the dry residue
If you are lucky enough to see this board on sale, be sure to buy it. It is an excellent alternative to the official "malinka", but with a number of advantages.
The only drawback of the board is that it works with elements of its own ecosystem. The system does not work with most Pico accessories. It will not work, for example, to connect it to Pico Explorer from Pimoroni with 40 pins.
But there are many more pluses than minuses. It is a versatile board with many use cases.
