Yes, I call Zoom every day. Yes, I have a child who often interferes with these calls. Instagram ad delivery algorithm, you won, I need this button.
But I have prejudices. Instagram advertises a project with Kickstarter. Plus, I don't want to contribute to Facebook's ad revenue even by clicking on this video. Jenny Odell 's expression “There are no free hours” fully describes my point of view on product quality in Instagram ads. In addition, my funding limit for Kickstarter projects is almost exhausted.
I have supported many projects on Kickstarter, and sometimes the result of these projects reminded me of the hamburger that Michael Douglas got in the movie "I've Enough!"
So let's put together such a button ourselves.
The first thing to think about is which button would I like to press?
I love keyboards with Cherry MX switches. There are three types of mechanical switches: linear, tactile, and clicky. Linear - The simplest type of switch that moves up and down with almost no feedback. The tactile switches have a protrusion in the middle of the stroke that allows you to feel when a key is pressed. And clickable switches have stronger tactile feedback AND produce an audible click when pressed.
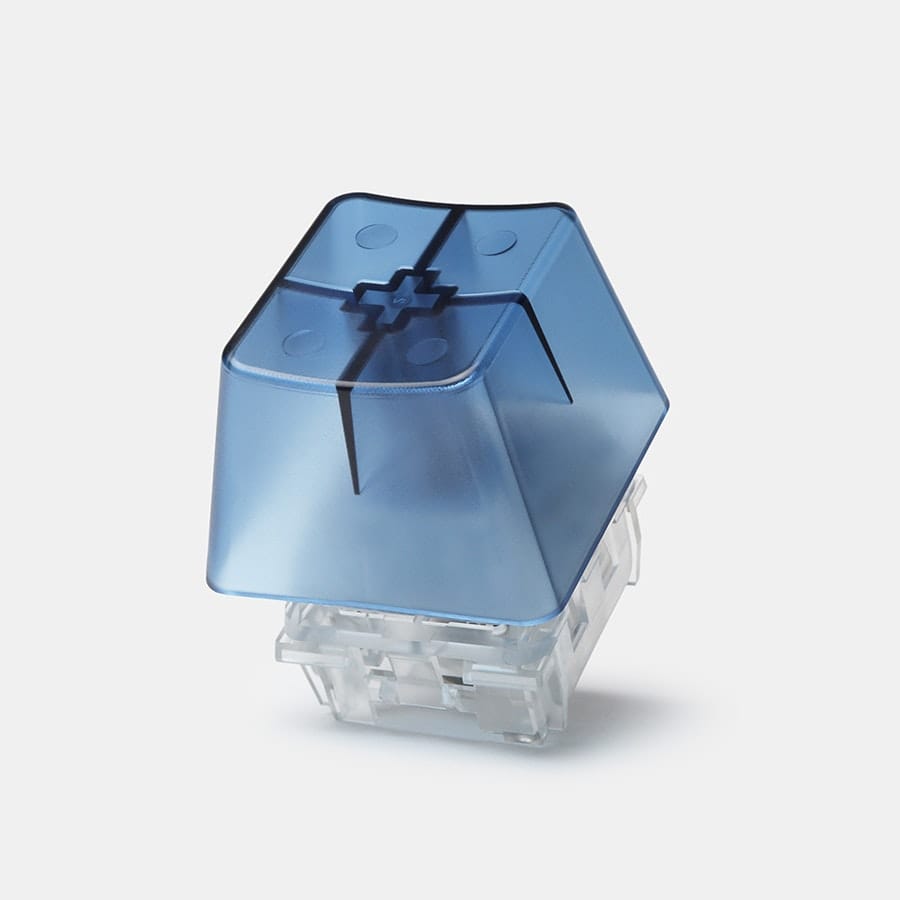
Normally, we would buy a switch tester to figure out which type is responding to us. , and we would also ask our colleagues what sound the keyboard should make so that they do not kill us. But we are in the middle of the COVID pandemic, so there are no colleagues around! Opt for a Cherry MX Blue switch with comfortable tactile feedback that is extremely loud. The Cherry MX website calls this switch "clickable and visible", but this is still very little said.

Looks pretty, but you could think of something better. If I'm happy to hit the Cherry MX Blue switch, wouldn't it be even nicer to hit the comically large Cherry MX Blue?
And this is the Novelkeys Big Switch .

It is 4 times larger in each dimension and 64 times larger in volume than a conventional switch. It even has a huge cap!
Unfortunately, the Big Switch is not sold in a case, so I had to use 3D printing. A beautiful case was found on Thingiverse: NovelKeys Big Switch Case . It's always worth looking for remixes just in case someone wants to improve on the original design. In this case, there was a remix that added a compartment for the Pro Micro, and the switch fits tighter, so I printed it.
Now that we have a case, we need a board that we insert into it and attach to the switch.
The Pro Micro has an ATmega32U4 chip to emulate a USB HID device such as a USB keyboard. Plus, this board is small.

There are two metal contacts at the bottom of the Large Switch.

When a key is pressed inside the switch, a circuit is closed between these two contacts.
Let's take a look at the pin layout of Pro Micro:
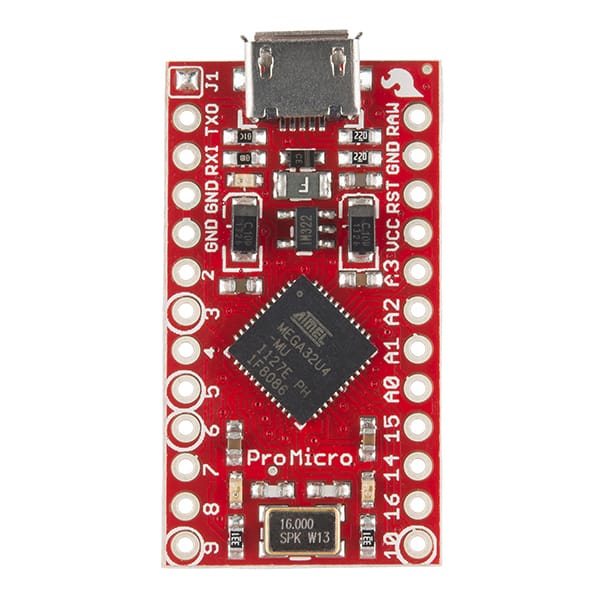
You can connect GND to one metal pin and Pin 2 to the other. Pin 2 is a digital I / O pin that reads HIGH when a key is pressed and LOW when not.
It would also be great to have some kind of visual indicator of the Mute status, so an LED can be added.
I ordered a 10mm LED:

And a 220 ohm resistor:

The long leg of the LEDs connects to PWR and the short leg connects to GND. We'll insert a resistor between the long leg and the other pin to reduce the amount of current. I selected Pin 9 at the bottom of the board. I connected the short leg to GND. I found this page about LEDs and resistors helpful .
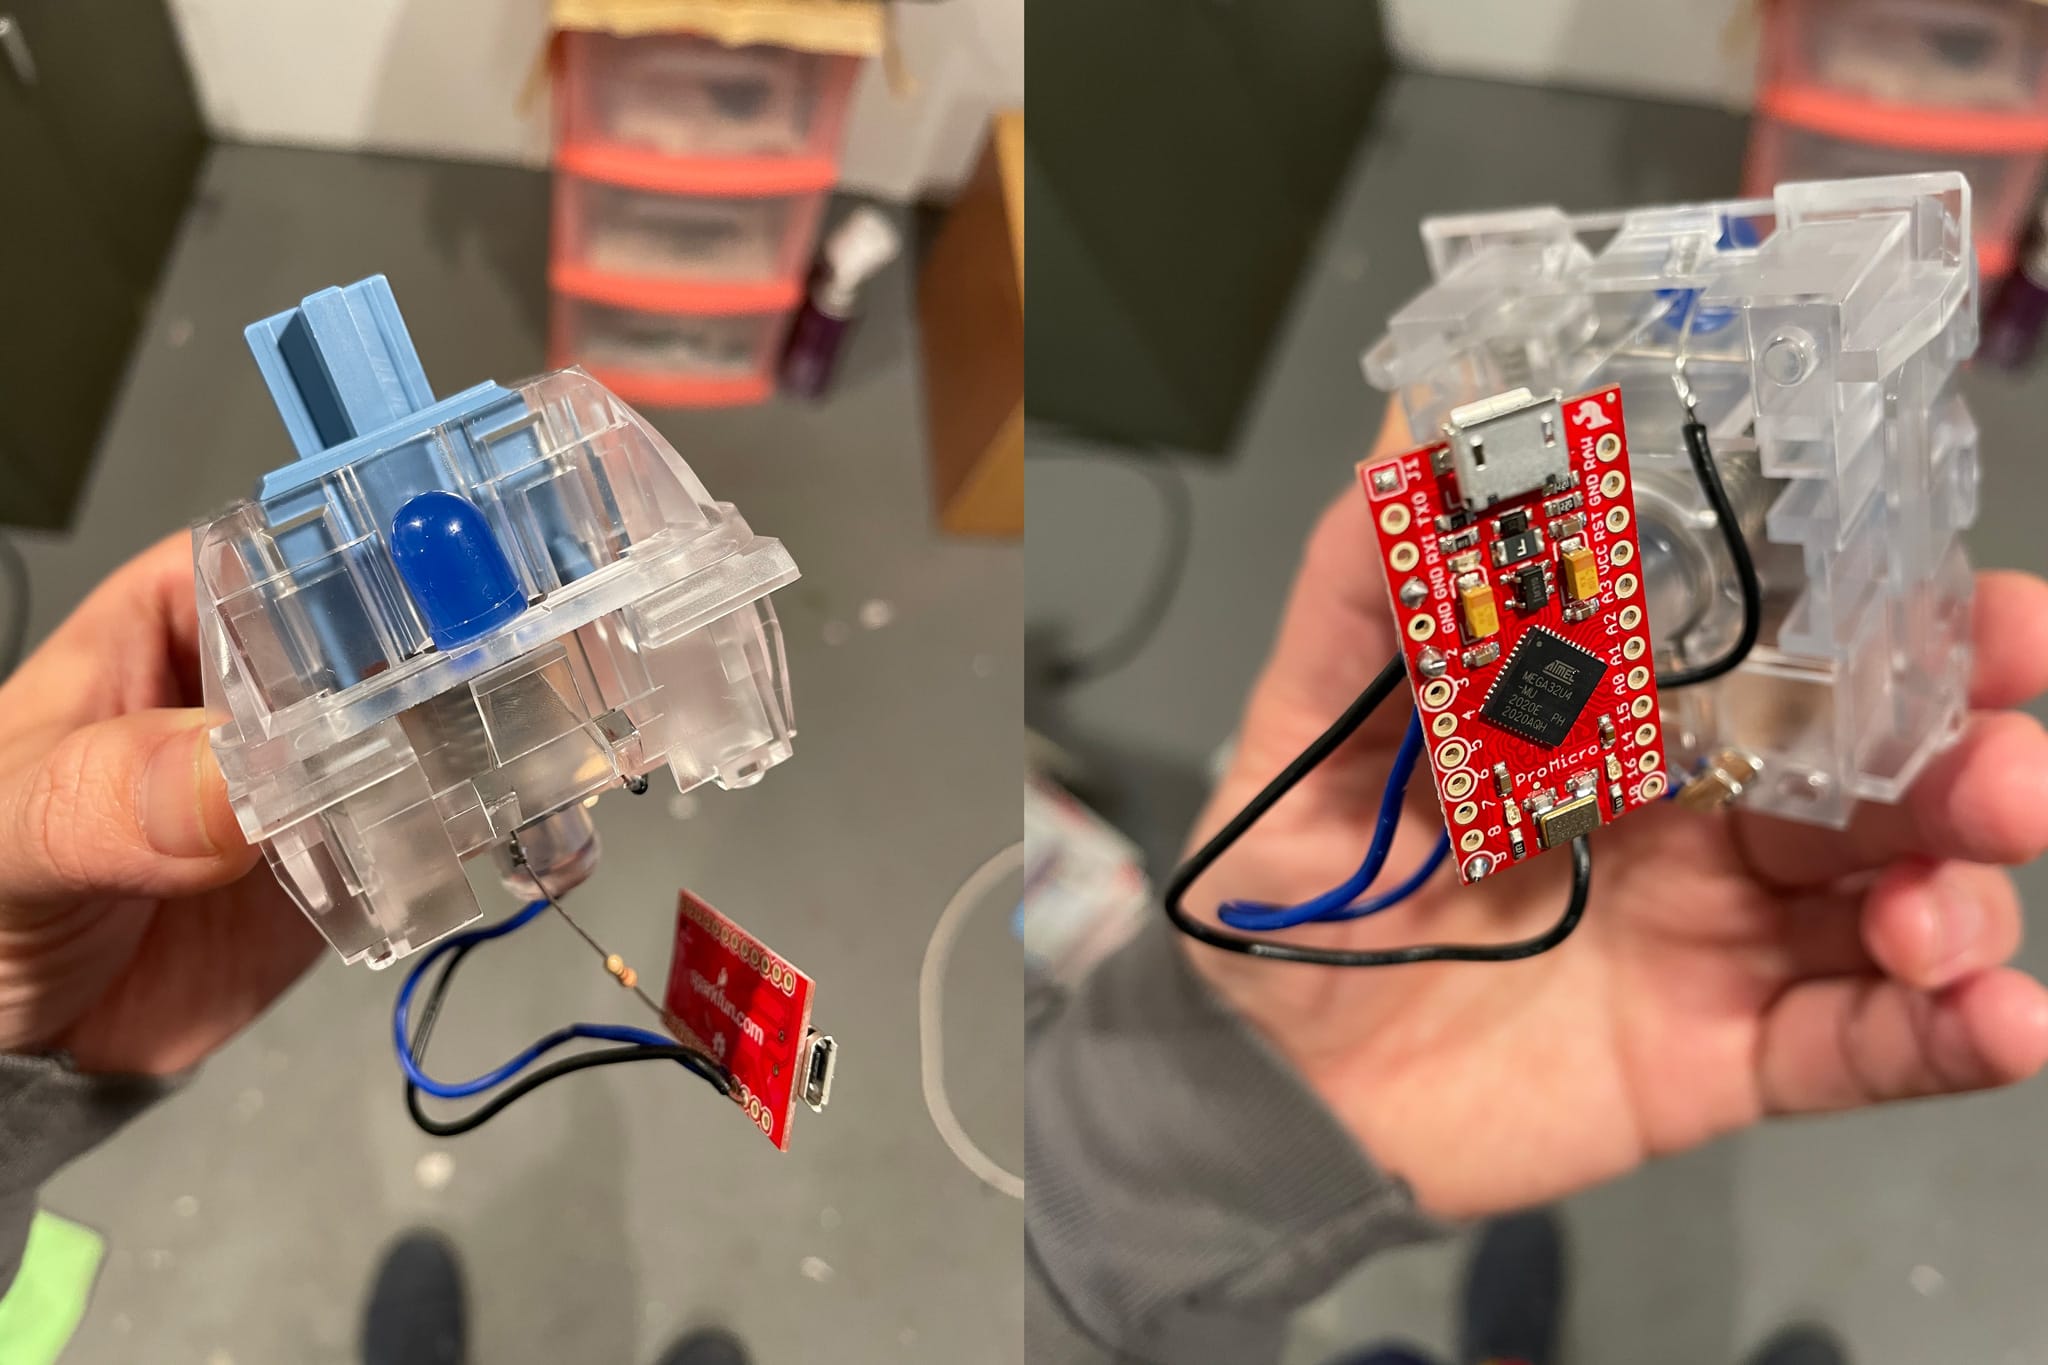
I soldered this 20 AWG wire between the board and the switch:

The result is the following construction:
Let's just stuff it all into our printed case:

Now we need to write the code.
I started with the code Sparkfun wrote to create a huge Save Button and modified it a bit.
The principle is as follows: when you press a key, it sends a keyboard shortcut Zoom on and off (on Mac it is Cmd-Shift-A). You will need to change the Zoom settings for this keyboard shortcut to be recognized even when the Zoom is out of focus. Check the Enable Global Shortcut box :

We also want to turn the LED on or off after each key press. I decided that the LED would be analogous to the "On Air" light - when the blue LED is on, my sound is on and people hear what I'm saying.
But if you just turn the LED on and off each time you press a key, then how to keep in sync with the Mute state in the Zoom itself?
The convenience of the Pro Micro is that it also has a serial connection. It is usually used to print debug information in the Arduino IDE, but we can use it to keep it in sync with the audio on state in Zoom.
Here's the code we load into Pro Micro itself:
#include "Keyboard.h"

// OS parameters
typedef enum {
  LINUX,
  WINDOWS,
  MAC
} os_types;

// Change this to your operating system
const os_types OS = MAC;

// Pins
const int btn_pin = 2;
const int led_pin = 9;

// Constants
const int debounce_delay = 50;              // ms

// Globals
int btn_state = HIGH;
int btn_prev = HIGH;
unsigned long last_debounce_time = 0;
int os_ctrl;
int led_state = LOW;

void setup() {

  Serial.begin(57600); // opens serial port, sets data rate to 57600 bps

  // Set up LED and button pins
  pinMode(btn_pin, INPUT_PULLUP);  // Set the button as an input
  pinMode(led_pin, OUTPUT);
  digitalWrite(led_pin, led_state);

  // Begin keyboard
  Keyboard.begin();

  // Switch to correct control/command key
  switch(OS){
    case LINUX:
    case WINDOWS:
      os_ctrl = KEY_LEFT_CTRL;
      break;
    case MAC:
      os_ctrl = KEY_LEFT_GUI;
      break;
    default:
      os_ctrl = KEY_LEFT_CTRL;
      break;
  }

  // Get initial timestamp

  Serial.println("started");

}

void loop() {

  // Read current state of the button
  int btn_read = digitalRead(btn_pin);

  // Remember when the button changed states
  if ( btn_read != btn_prev ) {
    last_debounce_time = millis();
  }

  // Wait before checking the state of the button again
  if ( millis() > (last_debounce_time + debounce_delay) ) {
    if ( btn_read != btn_state ) {
      btn_state = btn_read;
      if ( btn_state == LOW ) {

        // Send cmd+shift+a
        Keyboard.press(KEY_LEFT_SHIFT);
        Keyboard.press(os_ctrl);
        Keyboard.press('a');
        delay(100);
        Keyboard.releaseAll();

        Serial.println("pressed");

        if (led_state == LOW) {
          led_state = HIGH;
        } else {
          led_state = LOW;
        }
        digitalWrite(led_pin, led_state);

      }
    }
  }

  // Remember the previous button position for next loop()
  btn_prev = btn_read;

  if (Serial.available() > 0) {

    String incomingString = Serial.readStringUntil('\n');

    if (incomingString == "muted") {
      led_state = LOW;
    } else if (incomingString == "unmuted") {
      led_state = HIGH;
    }

    digitalWrite(led_pin, led_state);

  }

}
Next, we can add an Applescript to report the current state of the Zoom. I found a Zoom Streamdeck plug-in that contained the original Applescript, and modified it to report if Zoom is open and what the state of its sound is. I also modified the script to output JSON.
set zoomStatus to "closed"
set muteStatus to "disabled"
tell application "System Events"
	if exists (window 1 of process "zoom.us") then
		set zoomStatus to "open"
		tell application process "zoom.us"
			if exists (menu bar item "Meeting" of menu bar 1) then
				set zoomStatus to "call"
				if exists (menu item "Mute audio" of menu 1 of menu bar item "Meeting" of menu bar 1) then
					set muteStatus to "unmuted"
				else
					set muteStatus to "muted"
				end if
			end if
		end tell
	end if
end tell

copy "{\"mute\":\"" & (muteStatus as text) & "\",\"status\":\"" & (zoomStatus as text) & "\"}" to stdout
If we now run it during a call to Zoom, then it will output something like this:
$ osascript get-zoom-status.scpt
{"mute":"muted","status":"call"}
Then I wrote a small application in Node, used as an intermediary between Pro Micro and this script:
const { exec } = require('child_process');

const SerialPort = require('serialport');
const Readline = require('@serialport/parser-readline');
const port = new SerialPort('/dev/tty.usbmodemHIDPC1', {
    baudRate: 57600
});

var checkStatus = function() {
    console.log('Checking status...');
    exec('osascript get-zoom-status.scpt', (error, stdout, stderr) => {

        if (error) {
            console.error(`exec error: ${error}`);
            return;
        }

        var status = JSON.parse(stdout);
        if (status.mute == 'unmuted') {
            port.write('unmuted');
        } else {
            port.write('muted');
        }

    });
}

const parser = port.pipe(new Readline({ delimiter: '\r\n' }))
parser.on('data', function (data) {
    if (data == "pressed") {
        console.log('Button pressed.');
        checkStatus();
    }
})

checkStatus();
setInterval(checkStatus, 30000);
This script does two things. When the button is pressed, it sends a “pressed” command to the Pro Micro board via the serial port, which runs Applescript to determine the current state of the audio in Zoom. It then sends a “beep off” or “beep on” command to the Pro Micro board, causing the LED to switch to the appropriate state. I also created a timer that runs a script every 30 seconds in case I accidentally mute or unmute the sound through the Zoom interface rather than the button, otherwise the state will only update when the button is pressed.
This is what the button looks like when used in a call via Zoom:
Please support my Kickstarter - just kidding, I don't have any Kickstarter, but hopefully now you can create one yourself.
Advertising
Order a server and start working right away! Creation of VDS of any configuration within a minute. Epic :)