
Good afternoon, readers.
Today I want to share with you my development, or rather not only my own, but made jointly with my 7-year-old daughter.
Background
Once, on the eve of the autumn school holidays 2020, at lunch, he suggested to his daughter - “Come up with something that you would like us to work out with you during this vacation. For example, it can be a robot or some kind of mechanism, or ..., but the main thing is that it is a constructor and you can assemble it yourself! "
To which the daughter replied - "I want a night light in the form of a lighthouse, and it should project stars on the ceiling."
It was unexpected for me, but it was said - done and, in our opinion, it turned out quite well! :) Now we want to share all this with you. For further history, I ask in the article
, 3 , , .
Task 1 - choose a sample
Before the holidays, in the evenings, we began to prepare for the upcoming work. We spent several evenings on google in search of the "one" beacon that is dear to the heart and which I would like to take as a basis.
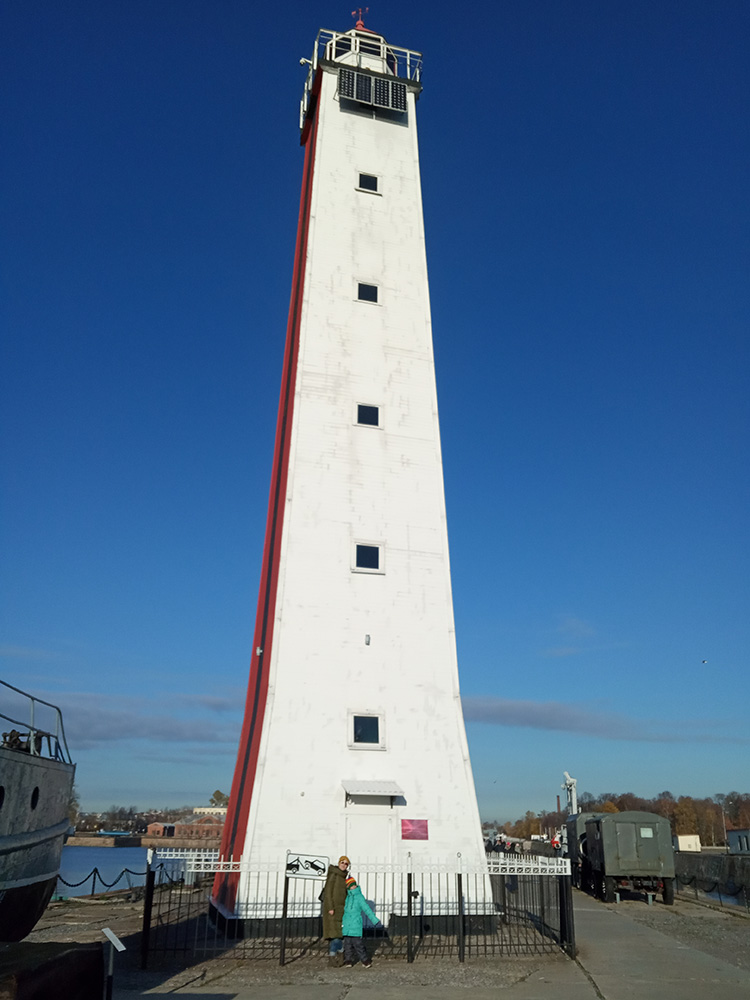
Among the huge variety, Yulia really liked this lighthouse (alas, the link to the original site is lost):

Problem 2 - test
Now we are faced with the question - will a small LED have enough power to create a shadow on the ceiling from a distance of 2 meters? For her daughter, this was the most exciting thing, just the offer to "set up an experiment" inspired her so much that even when we already knew everything, she asked to check something else :)
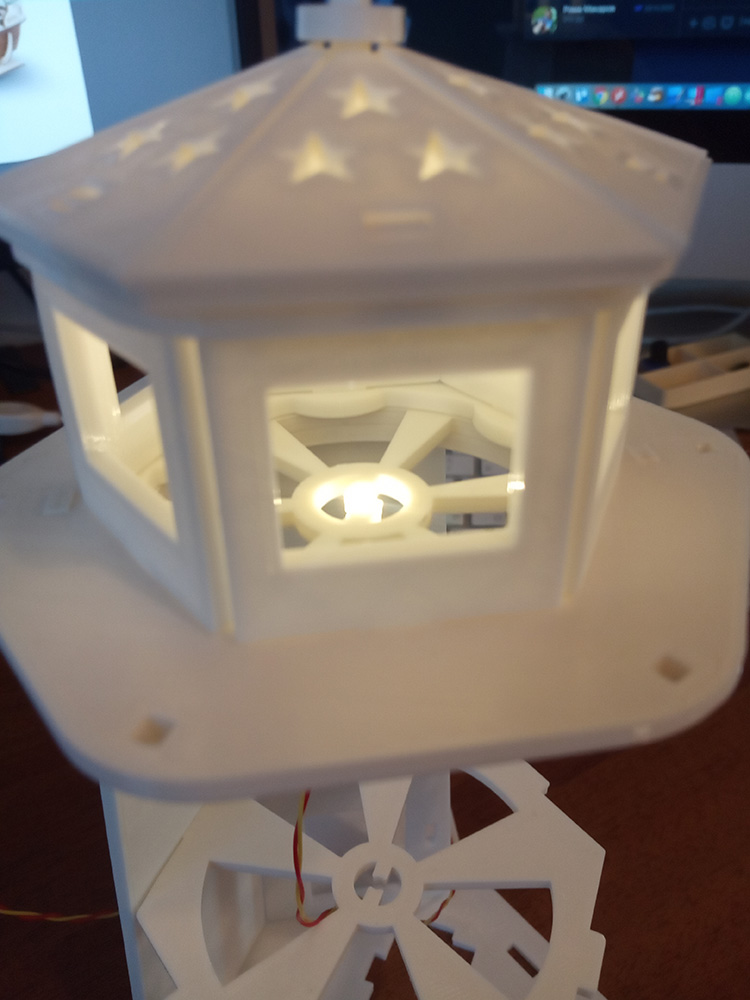
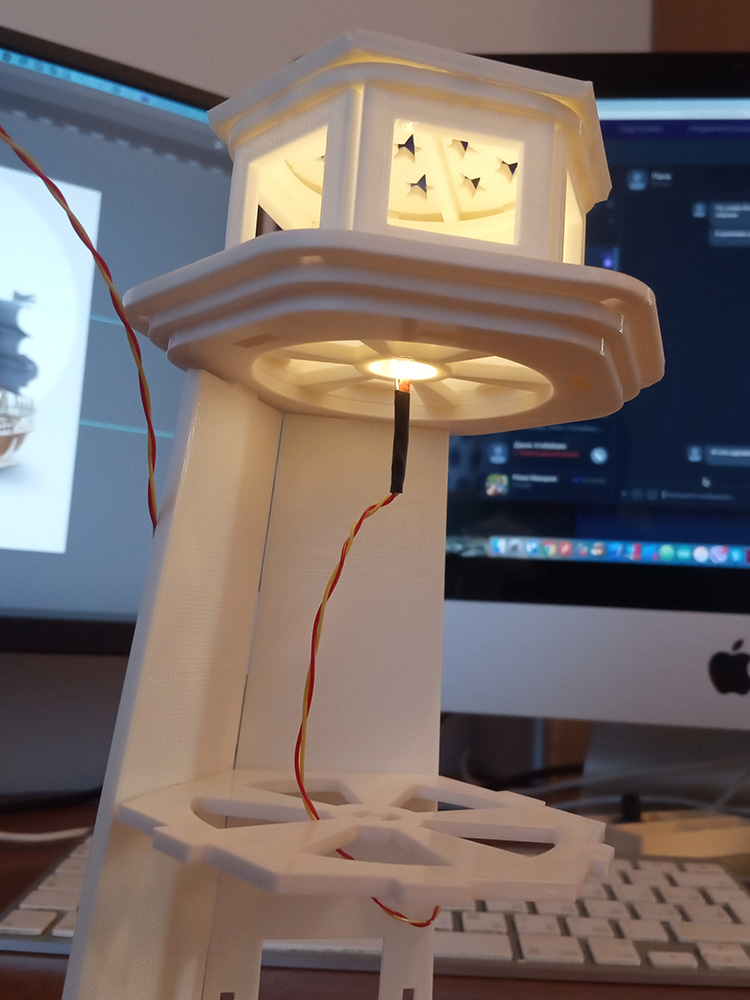
Actually, with this, the nuances arose. Classic LEDs, of which there are a huge number in any stores and in my bins, have a directional beam of ± 30 ° and in order for a shadow to be created, you need to lower the LED almost to the base of the lighthouse. But the lighthouse has a source of light at the top! Fortunately, I found another bunch of 3 mm LEDs with an angle of 120 ° and a warm white glow - this turned out to be the most suitable LED.
Then there was a trip to Kronstadt, because you cannot be imbued with the idea of creating a lighthouse if you have not seen and felt it. And in Kronstadt there are already 17 of them! The trip was excellent, we walked along the dam, but in the city itself we froze, we hardly found a place to buy something warm, and on the way back to the ring road, a wheel was punctured. But everything is definitely remembered!
Task 3 - design
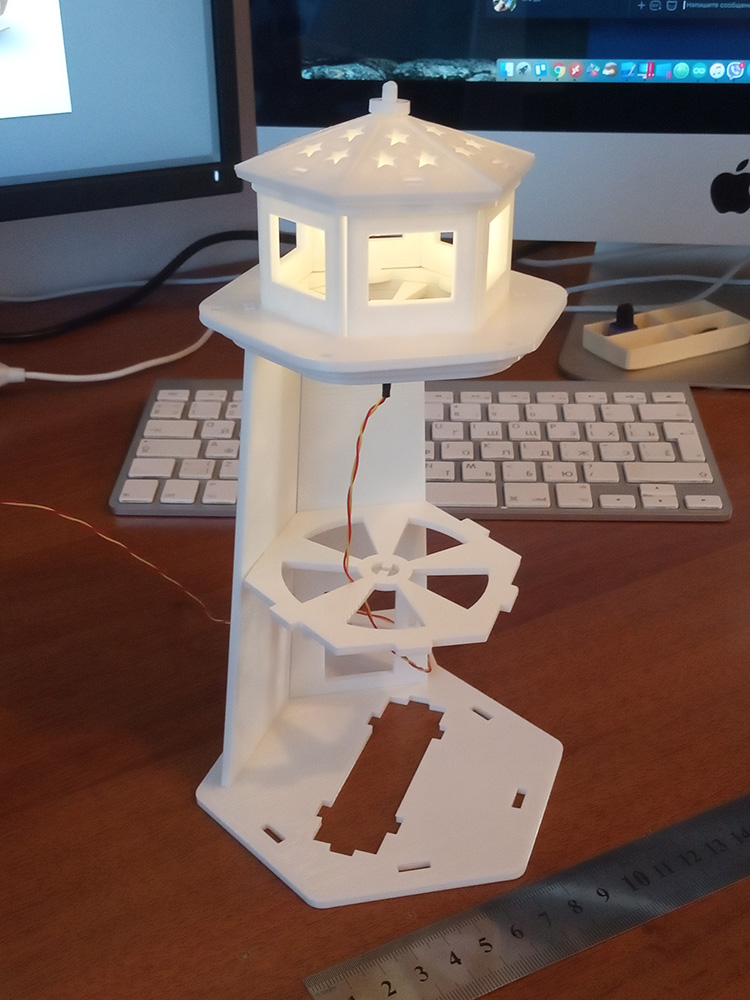
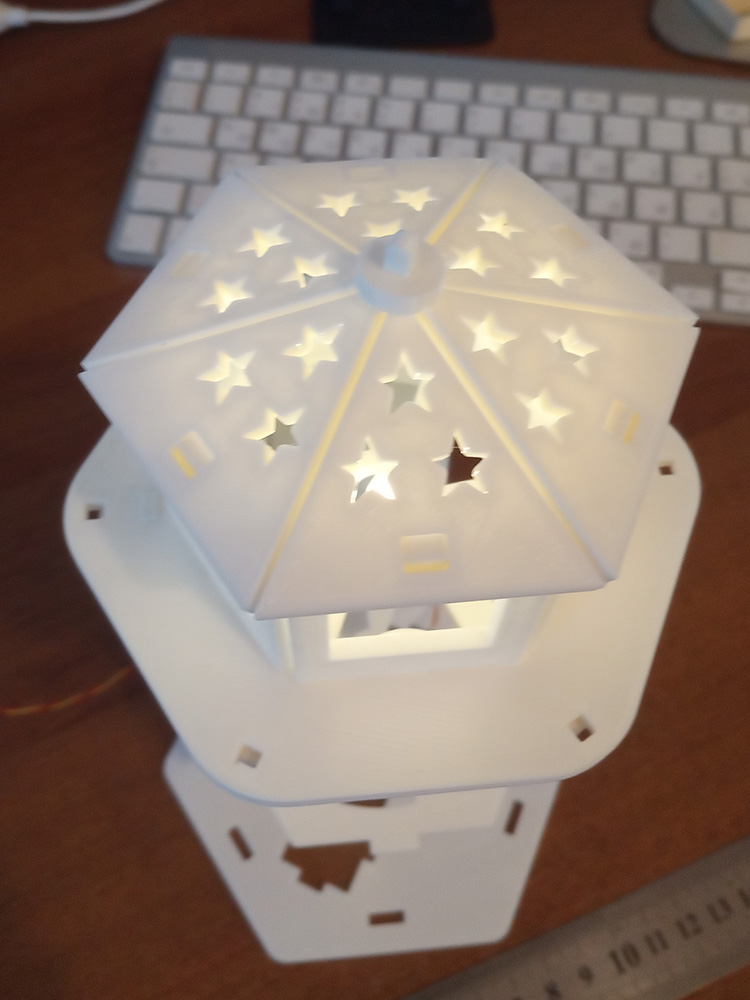
Well, here came the holidays and we started development. I sat in Solidworks and created the details, Julia sat next to me and advised :) We chose the optimal height, base width, and so on. The process was very fun. A total of 50 parts came out.

Everything, the layouts have been saved, and the printing of key details has begun. First, we needed the basic framing and roof details to take on the electronic part.
Assembly process of the first parts
Task 4 - electronic filling It
was decided to make the circuit as simple as possible - without transistors and any switches there. 2 ready-made modules - a lithium battery charging module and a "touch button", which we decided to hide under the roof of the entrance.
The scheme couldn't be simpler
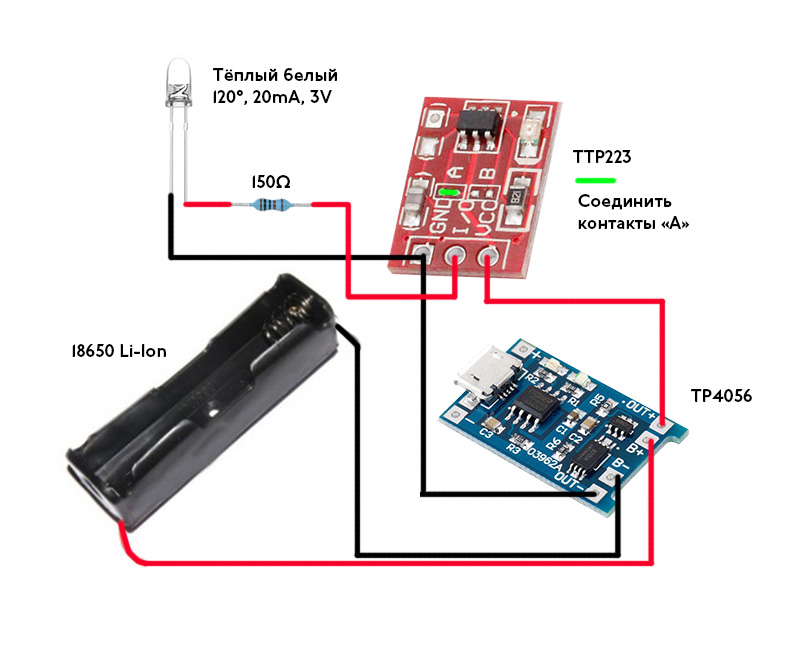
All this, with the exception of soldering, can be assembled by the child himself. As for the electronic part, I decided to solder only the "stubs", and then the daughter herself connected the elements to each other by twisting and the lighthouse came to life before her eyes! All modules are placed in the "vestibule" - the charging module is glued to the double-sided tape on the floor (there is a hole for the micro-usb connector in the back wall), and the switch to the roof.
Ceiling projection view from a distance of 2 meters. Exposure 4 seconds

STL layouts on thingiverse.com
Actually, we have come to the end of the story. We will be glad if you want to repeat our project, or maybe even paint or make the exterior and post photos in the comments.
All material is available for repetition and use for personal, non-commercial purposes.