Blobs are smooth, amorphous, jelly-like shapes that are usually whimsical and funny. They can be used as illustrations and background effects on the web.
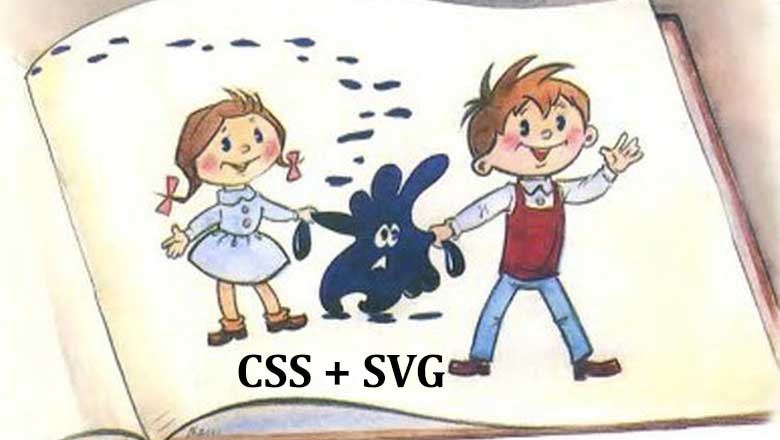
So how do they work? Of course, you can open some kind of graphics editor and make them, right? Of course it's cool. But we are writing here about CSS tricks, and it would be much more interesting to see the possibilities that CSS and SVG give us - two of our favorite ingredients!
. .
SVG
- . SVG - Illustrator, Sketch, Figma - , SVG.
<circle cx="100" cy="100" r="40" fill="red" />
SVG <circle>
:
cx
X .
cy
Y.
r
- .
fill
.
40px 100px X 100px Y. .
:
<svg height="300" width="300">
<circle cx="80" cy="80" r="40" fill="red" />
<circle cx="120" cy="80" r="40" fill="red" />
<circle cx="150" cy="80" r="40" fill="red" />
<circle cx="150" cy="120" r="40" fill="red" />
<circle cx="100" cy="100" r="40" fill="red" />
</svg>
<svg>
, . , . - SVG, .
... , <ellipse>
<circle>
:
<ellipse cx="200" cy="80" rx="100" ry="50" fill="red" />
, , (rx)
(ry)
. , , . <ellipse>
.
, - , , , CSS SVG. border-radius
.
.circle {
border-radius: 50%;
height: 50px;
width: 50px;
}
… .
SVG-
<path>
SVG . . , , , .
<path>
, :
M
–
L
–
C
–
Q
–
Z
–
(C)
. , M
Z
.

, , , Google Maps, . , , .
…
<svg xmlns="http://www.w3.org/2000/svg">
<path
fill="#24A148"
d=""
/>
</svg>
d
. , , , . :
<path d="M 10 10 C 20 20, 40 20, 50 10" stroke="black" fill="transparent"/>
, (10 10)
, M
. (C)
. , . «» : (20 20)
, (40 20)
.

.
, , , . , , , , , , d
<path>
, .
, , , . , , .
www.blobmaker.app
CSS SVG
SVG <path>
? , ( div) ? - . , , .
SVG, , .
–
, SVG. <filter>
HTML SVG, , <circle>
CSS .
circle {
filter: url("#id_of_filter");
}
<filter>
- , , , :
<feGaussianBlur>
<feImage>
<feMerge>
<feColorMatrix>
… .
, <feGaussianBlur>
<feColorMatrix>.
<feGaussianBlur>
, : . (stdDeviation) in
.
in
:
SourceGraphic
-
SourceAlpha
- - .
, <feGaussianBlur>
:
<feGaussianBlur in="SourceGraphic" stdDeviation="30" />
HTML , :
<!-- The SVG filter -->
<svg style="position: absolute; width: 0; height: 0;">
<filter id="goo">
<feGaussianBlur in="SourceGraphic" stdDeviation="30" />
</filter>
</svg>
<!-- The blob -->
<div class="hooks-main">
<div></div>
<div></div>
</div>
, . CSS :
, . , . . SVG, <feColorMatrix>
.
<feColorMatrix>
:
in
- , , <feGaussianBlur>
.
values
- .
values
. , . :
new pixel color value = ( values matrix ) × ( current pixel color value )
. :
[F-red1 F-green1 F-blue1 F-alpha1 F-constant1
F-red2 F-green2 F-blue2 F-alpha2 F-constant2
F-red3 F-green3 F-blue3 F-alpha3 F-constant3
F-red4 F-green4 F-blue4 F-alpha4 F-constant4]
F-red
0 1.
F-constant
- , ( ) .
…
RGBA rgba (214, 232, 250, 1). , .

:
<filter id="goo">
<feGaussianBlur in="SourceGraphic" stdDeviation="30" />
<feColorMatrix
in="blur"
values="1 0 0 0 0
0 1 0 0 0
0 0 1 0 0
0 0 0 30 -7"
/>
</filter>
, .
, , .
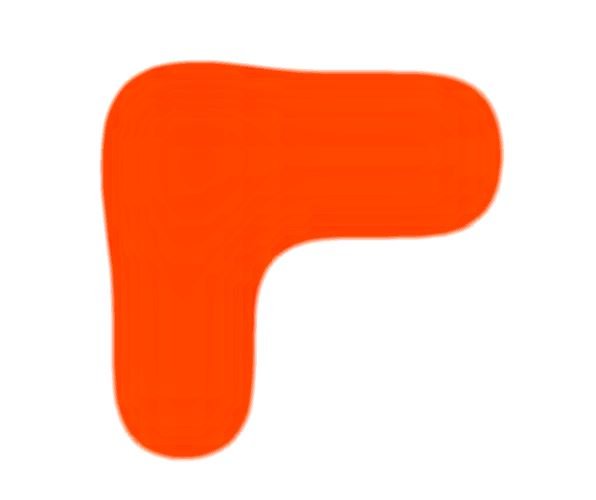
CSS border-radius
, CSS border-radius
. , , . , , . , .

, border-radius :
.rounded {
border-radius: 25%;
}
This is a good way to keep all angles consistent. But the blots are not so uniform. We want some corners to be more rounded than others so that some of them look sticky. This is why we choose constituent properties border-radius
, for example:
.element {
border-top-left-radius: 70% 60%;
border-top-right-radius: 30% 40%;
border-bottom-right-radius: 30% 60%;
border-bottom-left-radius: 70% 40%;
}
As you can see, each property takes two values. One for each edge of the corner, which gives us a lot of flexibility to bend the element into interesting shapes. We can then add a background color, fill it with a gradient, or even set a drop shadow on it to get a neat effect.