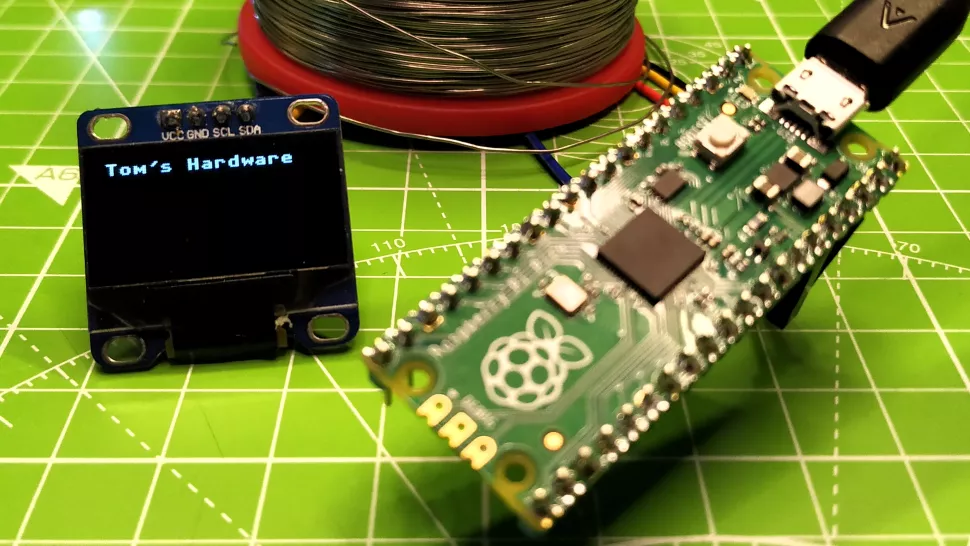
The Raspberry Pi Pico has several functional limitations, including the lack of a wireless module. But, overall, this is a great board for a wide variety of projects. One of its advantages is the ease of connecting the display. It allows you to work with Pico Display or Pico Explorer Base, but as it turns out, there are cheaper alternatives.
Under the cut - instructions for connecting an OLED screen with a diagonal of only 0.96 inches. To do this, you need to solder a little and write a small program in MicroPython. The shield is connected via the I2C interface. Everything is very simple: even a child can cope with the task. In general, this manual is for those who are just starting to get acquainted with the board. Experienced users already know what to do. If this post turns out to be in demand, then we will regularly publish simple guides of this kind. Well, let's get started.
What do you need to work?
- Raspberry Pi Pico with MicroPython.
- 4 Female to Female connecting wires.
- I2C OLED screen with 128 * 64 resolution
How to connect an OLED screen to a Malinka
The connection diagram is very simple.

- We connect the GND pin of the shield to the GND of the board.
- We connect VDD to VCC 3V3.
- We connect SCK / SCL and I2C0 SCL.
- We connect SDA to I2C0 SDA.
- We connect the board to the computer and open Thonny. Now we need to install the library so that Python can interact with the screen.
- Choose Tools> Manage Packages to access the Python libraries.
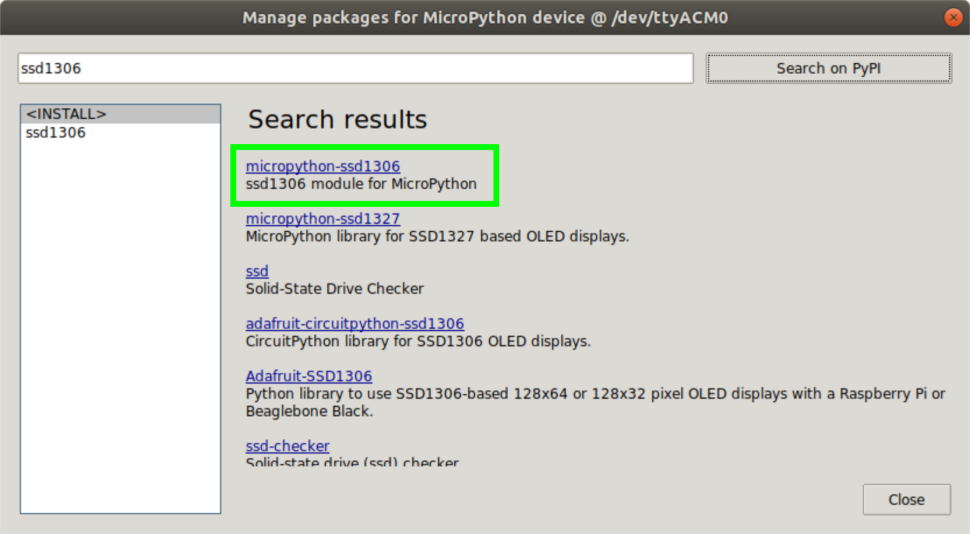
- We type ssd1306 in the search bar and search.
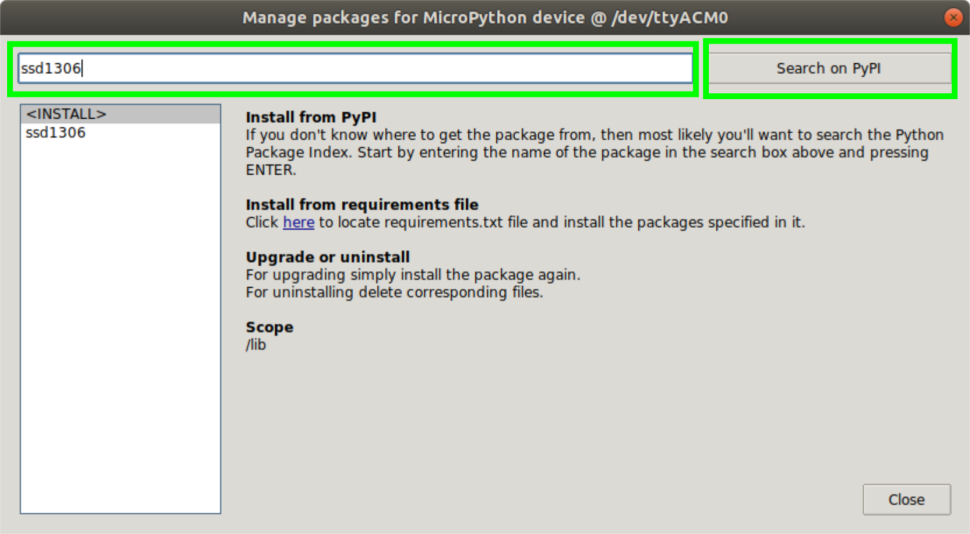
- We select the found module “micropython-ssd1306” in the list of results and install it, after which we return to the main interface.
Software connection of the OLED screen to the "Malinka"
In order to programmatically connect the screen, we need to write a few lines of code.
First, let's import the Pin and I2C classes. They are used to interact with the screen connected to the GPIO and Pico.
from machine import Pin, I2C
Importing the screen library
from ssd1306 import SSD1306_I2C
We create an object, i2c, to activate the l2C channel and set the connection frequency.
i2c=I2C(0,sda=Pin(0), scl=Pin(1), freq=400000)
Create another object, oled, to interact with the OLED screen. It has three parameters: height, screen width and l2C connection characteristics.
oled = SSD1306_I2C(128, 64, i2c)
We register the line that will be displayed on the screen. It can be anything.
oled.text("Tom's Hardware", 0, 0)
Finally, we use a short command to display the text.
oled.show()
As a result, our code should look like this:
from machine import Pin, I2C
from ssd1306 import SSD1306_I2C

i2c=I2C(0,sda=Pin(0), scl=Pin(1), freq=400000)
oled = SSD1306_I2C(128, 64, i2c)

oled.text("Tom's Hardware", 0, 0)
oled.show()
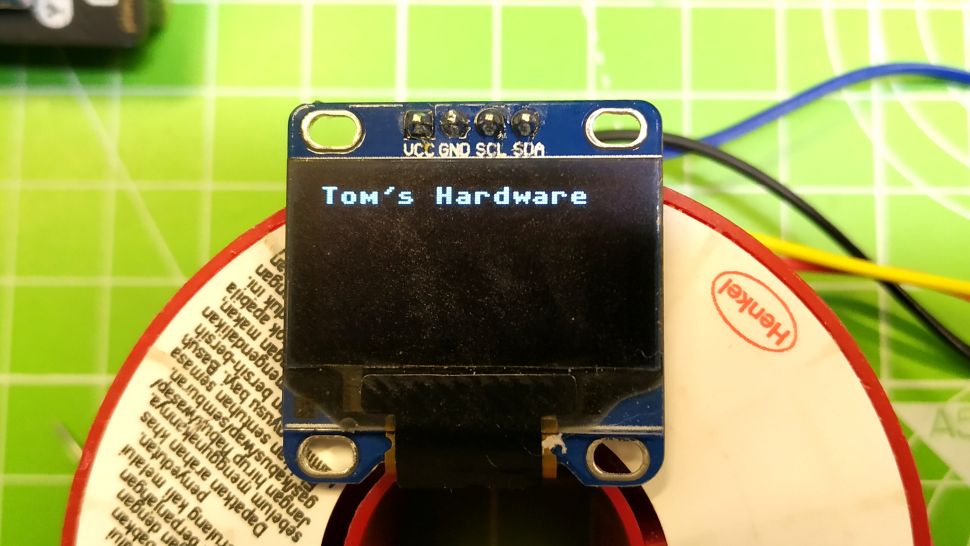
Now we save and run the code. This is done with File >> Save as usual. Once everything is ready, click on the start button and admire the text.
