Be sure to read this material to the end if you want to know how to start getting clients from Insta in half an hour, without a website / landing page / or any other landing page.
For your convenience, I have prepared a video. You can watch it. Or scroll below and read the text version.
So, before we start, I want to establish 2 key rules:
- In this article, we will only talk about attracting customers using targeted advertising on Instagram. There will not be an overview of free tools like mass following, guerrilla commentary, etc.
- We launch advertising campaigns on Instagram only through the Facebook advertising account. No traffic launches through the Instagram mobile application and the "Promote" button (this greatly narrows the targeting functionality and optimization possibilities that are present in the Facebook Ads Manager ad account).
Creation of an advertising campaign
After entering the advertising office - you need to click the "Create" button:

Next, we open a section with the settings of the goals of the advertising campaign.

Many do not pay attention to these settings and choose the standard "Coverage" or "Traffic". But let's stop at this stage and think: "What is the ultimate goal we pursue when launching advertising?"
I will say right away that what goals you need to choose here depends on your ultimate goals:
- if the goal is to maximize the reach of your advertisements, then choose the “Reach” goal;
- if you need to get the maximum number of clicks to your website / Instagram account, then choose the "Traffic" goal;
- if you need to get as many applications and customers as possible directly from advertising, then use the goals "Conversions" or "Generation of leads".
Since within the framework of this material we are discussing the issue of attracting customers, we will only consider the last 2 goals.
What is the difference between Conversion and Lead Generation goals?
In fact, everything is simple. We use the "Conversions" goal only when we have a landing page (website / landing page / quiz-survey / mini-landing page, etc.), to which you can drive traffic and on which you can install a Facebook pixel to collect events.
If there is no landing page, but the task is to get the flow of requests and customers as quickly as possible - in this case, you can use the Lead Generation goal. We will talk about it now.
So, select the goal "Lead Generation", set a name for the advertising campaign and click on the "Continue" button.
Next, we open the section for advertising campaign settings:

We are not configuring anything here. The only thing is to make sure once again that the goal "Generation of leads" is set. If everything is ok, then scroll down the page and click on the "Next" button.
Next, we go to the group settings page, where we need to set several settings:
- Daily budget settings
- Targeting settings
- Placement settings
Let's go in order.
Daily budget settings
In this section, we set up a daily budget. As you can see, I've set up to spend no more than RUB 400 per ad group every day.

Here you can set any amount that you are ready to invest in marketing.
Targeting settings
Okay, we sorted out the budgets. Scroll down the page and go to the Audience settings and targeting.

Here we set all the settings that correspond to the portrait of your target audience (by geography, by gender, by age, by interests).
Placement settings
We pass to the last block - to the placements or as they are also called: "Placements".

Here you need to set 2 settings:
- choose to install placements manually
- leave a tick only on Instagram
We sorted out the placements.
Scroll down below and come across the section "Optimization and Display" in which we propose to set a Control Price for a lead. At the initial stage, I do not recommend setting a reference price for a lead . in this case, Facebook's algorithms will have artificial limitations and you may not get the result.
Okay. We've sorted out the ad group setup page. Scroll down and click on the "Next" button in the lower right corner.
On the next page, we open the ad settings.
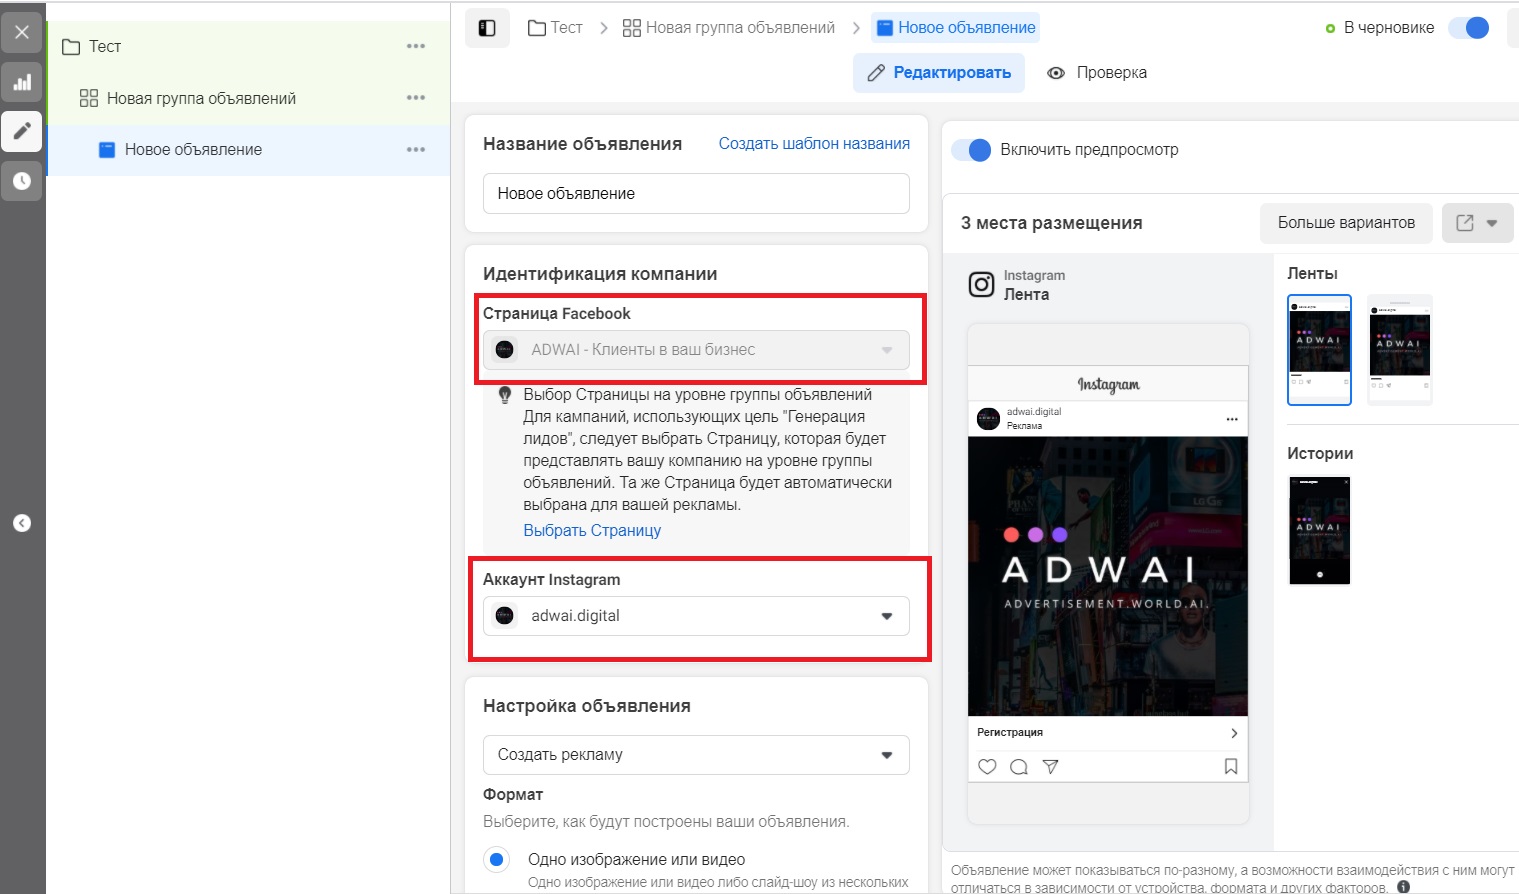
Here we need to select our public Facebook page, to which our Instagram account is linked.
We choose the sheets further. Next, we need to create an ad.

Here we upload advertising banners that we will use in promotion and write the text of the advertising post.
Scroll further and come to the key point: creating a lead form.

Check the box next to "Instant Form" and click "Create Form". Next, we will be prompted to set up an advertising form. In fact, there is nothing difficult here. You specify the description of the form in which you tell about your product / service and set up the fields, information from which you need to contact the client. Usually fields are used:
- Name
- Telephone
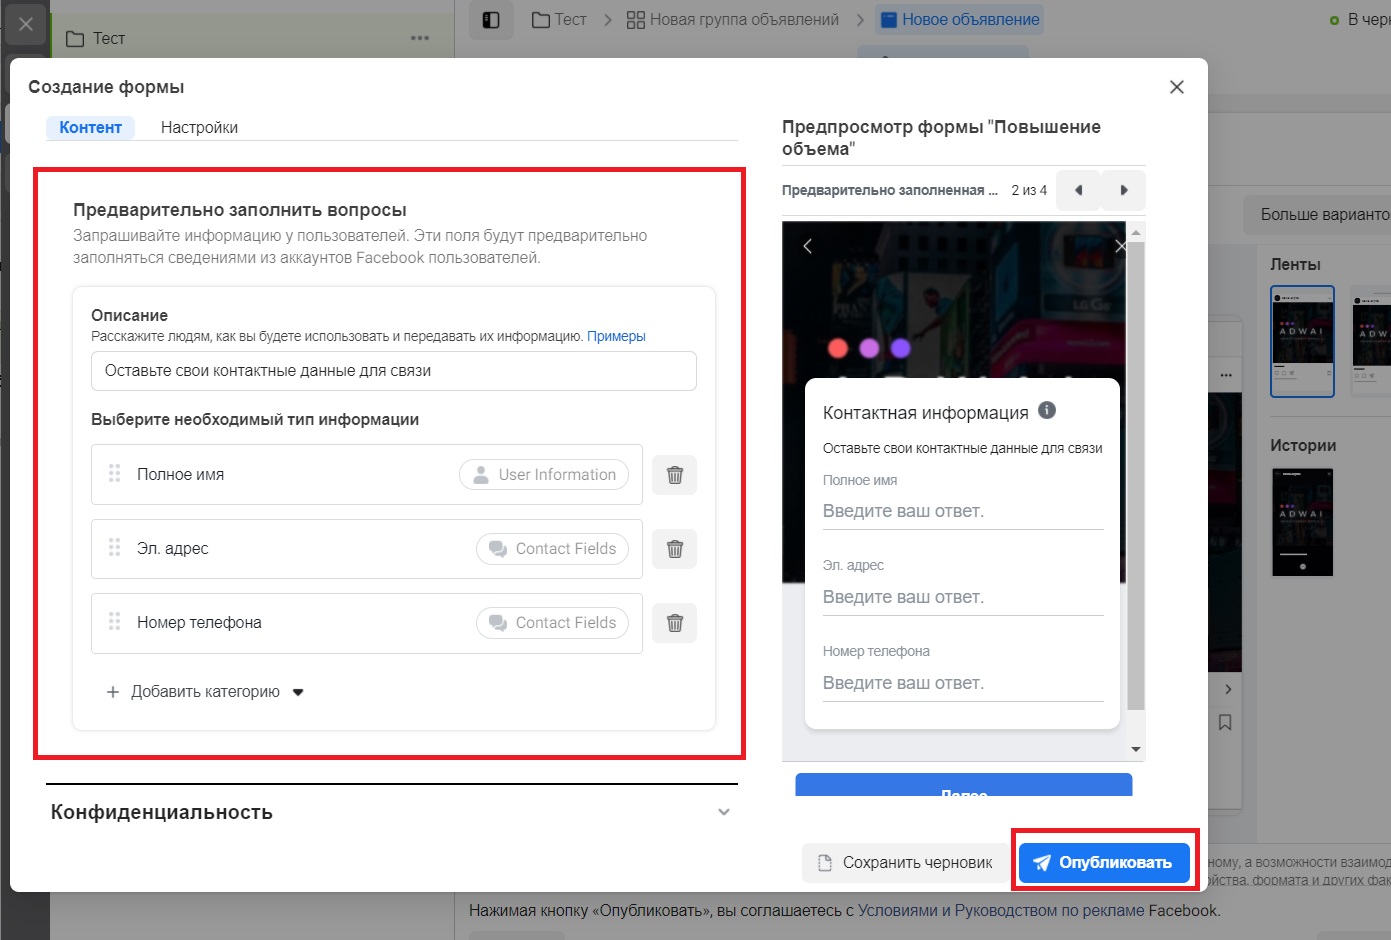
Set all the settings and click the "Publish" button. Fine! The lead form has been created, the announcements have been prepared. It remains to click the "Publish" button on the ad editing page and your ad will go to moderation, after which the promotion will begin and applications will be sent, which you can track in the ad account.
Another important nuance:
you can track all the received leads in your public page in Settings - section "Publishing tools" - "Forms library".

Here you can download all the leads that come from the ad campaign and contact them.
So, just in 20 minutes, we have set up a simple advertising campaign that can easily give 5-10-50-100 applications per day for your services / goods. If you have any questions, write in the comments here or on YouTube. Good luck in your business!