
Lawful interception
Lawful Interception, or interception of messages from a mailbox, allows you to automatically copy sent and received messages from a user to another mailbox and, therefore, monitor his correspondence. This feature can be used to investigate or monitor an employee during a trial period, and mail filters can be used to identify various employee disruptions.
You can enable this function for an account by changing its zimbraInterceptAddress parameter and specifying the mailbox to which the intercepted messages will be received. For example, the command zmprov ma user@example.ru zimbraInterceptAddress target@example.ru allows you to configure message interception in such a way that messages from user@example.ru will be duplicated in the mailbox to the user target@example.ru. This parameter can be configured for the whole Service Class using the zmprov mc default zimbraInterceptAddress target@example.ru command . In this case, all letters from users belonging to the default Service Class, in addition to direct recipients, will arrive in the mailbox of the target@example.ru user.

If necessary, you can increase the number of recipients of intercepted messages using the command zmprov ma user@example.ru + zimbraInterceptAddress target2@example.ru . You can configure the receipt of email headers only using the command zmprov ma user@example.ru zimbraInterceptSendHeadersOnly TRUE . In this case, the body of the message will not be sent to the mailbox for intercepting messages, but only its metadata. All of these settings can be used for Classes of Service as well.
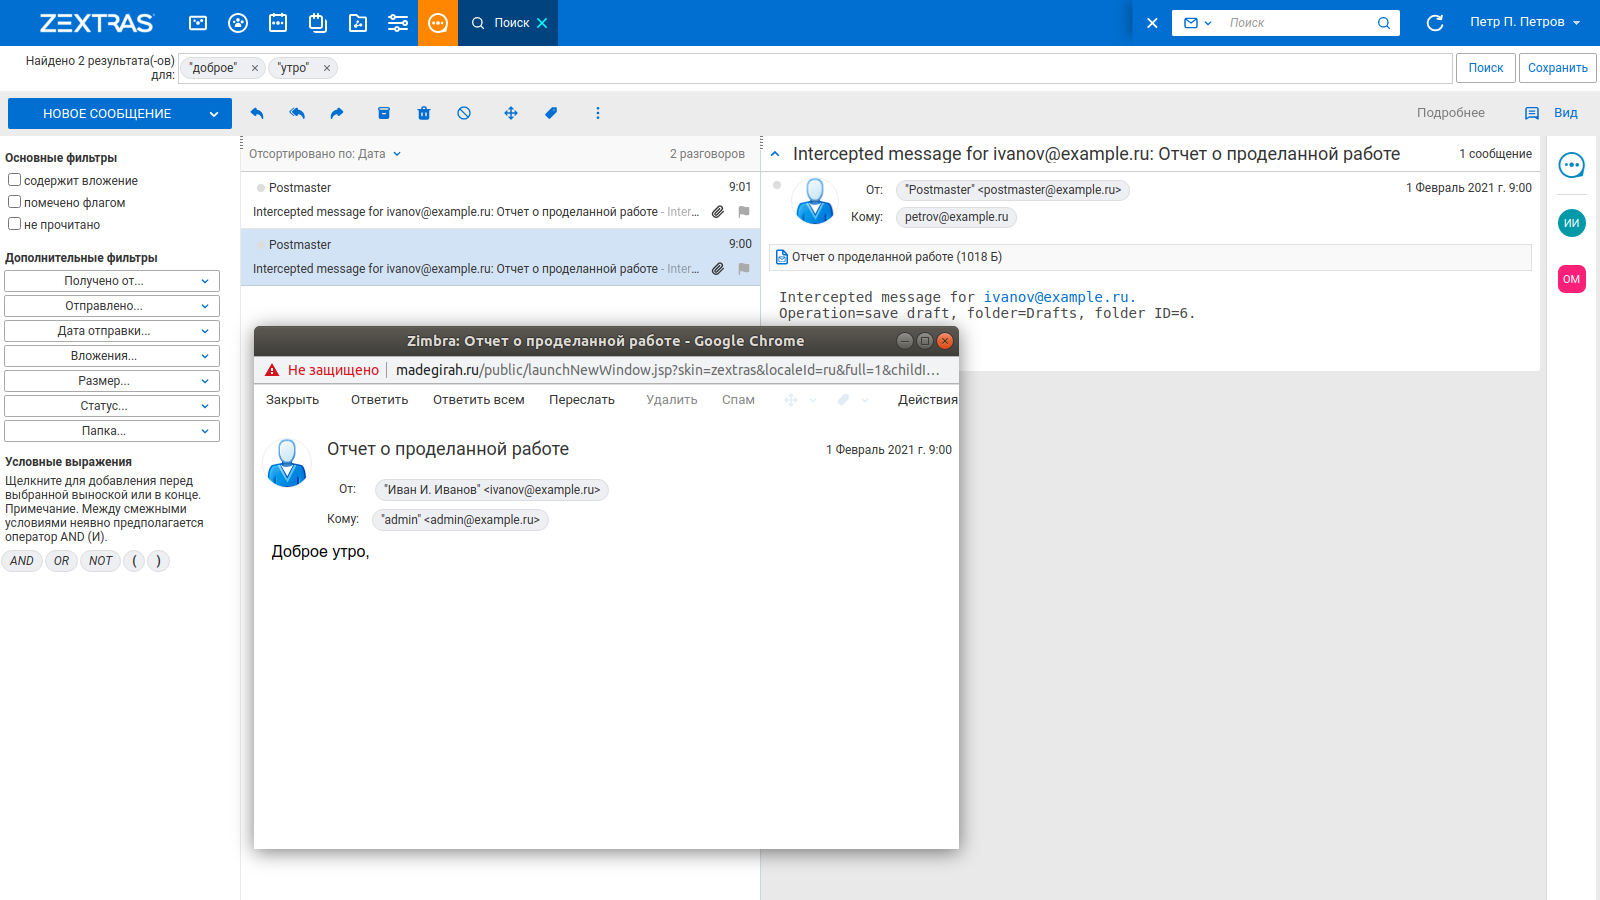
Intercepted messages will come in the form of text attachments, and the sender of messages arriving at the target mailbox is always Postmaster, and therefore their recipient can create a simple mail filter at any time that would redirect Lawful Interception messages to a separate folder.

Earlier we talked about how to implement this feature using Postfix BCC... Lawful Interception has several significant advantages over Postfix BCC. Lawful Interception allows you to intercept not only letters sent and received, but also drafts. Another disadvantage of BCC is that its settings are not backed up by the Zextras Backup add-on, which means that after migrating to a new server or after disaster recovery of your Zimbra OSE, intercepting letters using Postfix BCC will have to be configured again.
Nevertheless, Lawful Interception also has a significant drawback - letters that are sent via the SMTP protocol, bypassing the user's mail folders, are not intercepted. The simultaneous use of Postfix BCC and Lawful Interception allows you to intercept all user emails. For archiving email, Postfix BCC is much better suited because it does not change the "From:" and "To:" fields and message structure when forwarding email.
Search by attachments
Information received by e-mail is contained not only in the body of the letter, but also in attachments - text and pdf-files, tables and presentations. When using search in regular Zimbra OSE, users are faced with the fact that information from attachments does not appear in the search results. The thing is that Zimbra OSE does not have built-in parsers that would allow you to view files in attachments and index their contents. This problem is solved by the Zextras Powerstore extension included in Zextras Suite Pro.
In addition to hierarchical storage management and data deduplication, Zextras Powerstore adds parsers to Zimbra OSE to automatically view compatible files and index their contents. Thanks to this, emails with attachments, the content of which matches the search query, will begin to appear in the search results. In addition to regular files, archives not protected by passwords are also indexed.

All parsers are enabled by default and therefore all compatible attachments are indexed. The administrator can disable parsing of certain files. To do this, use the following commands:
- zxsuite config server set example.ru attribute pdfParsingEnabled value false - disables parsing of .pdf files
- zxsuite config server set example.ru attribute odfParsingEnabled value false - disables parsing of files saved in Open Document formats
- zxsuite config server set example.ru attribute archivesParsingEnabled value false - disables parsing of archives without passwords
- zxsuite config server set example.ru attribute microsoftParsingEnabled value false - disables parsing of text files saved in proprietary Microsoft formats
- zxsuite config server set example.ru attribute rtfParsingEnabled value false - disables parsing of text files saved in Rich Text format
To re-enable parsers, you must enter the same command with the value true.
Personalizing the Zimbra OSE web client authentication page
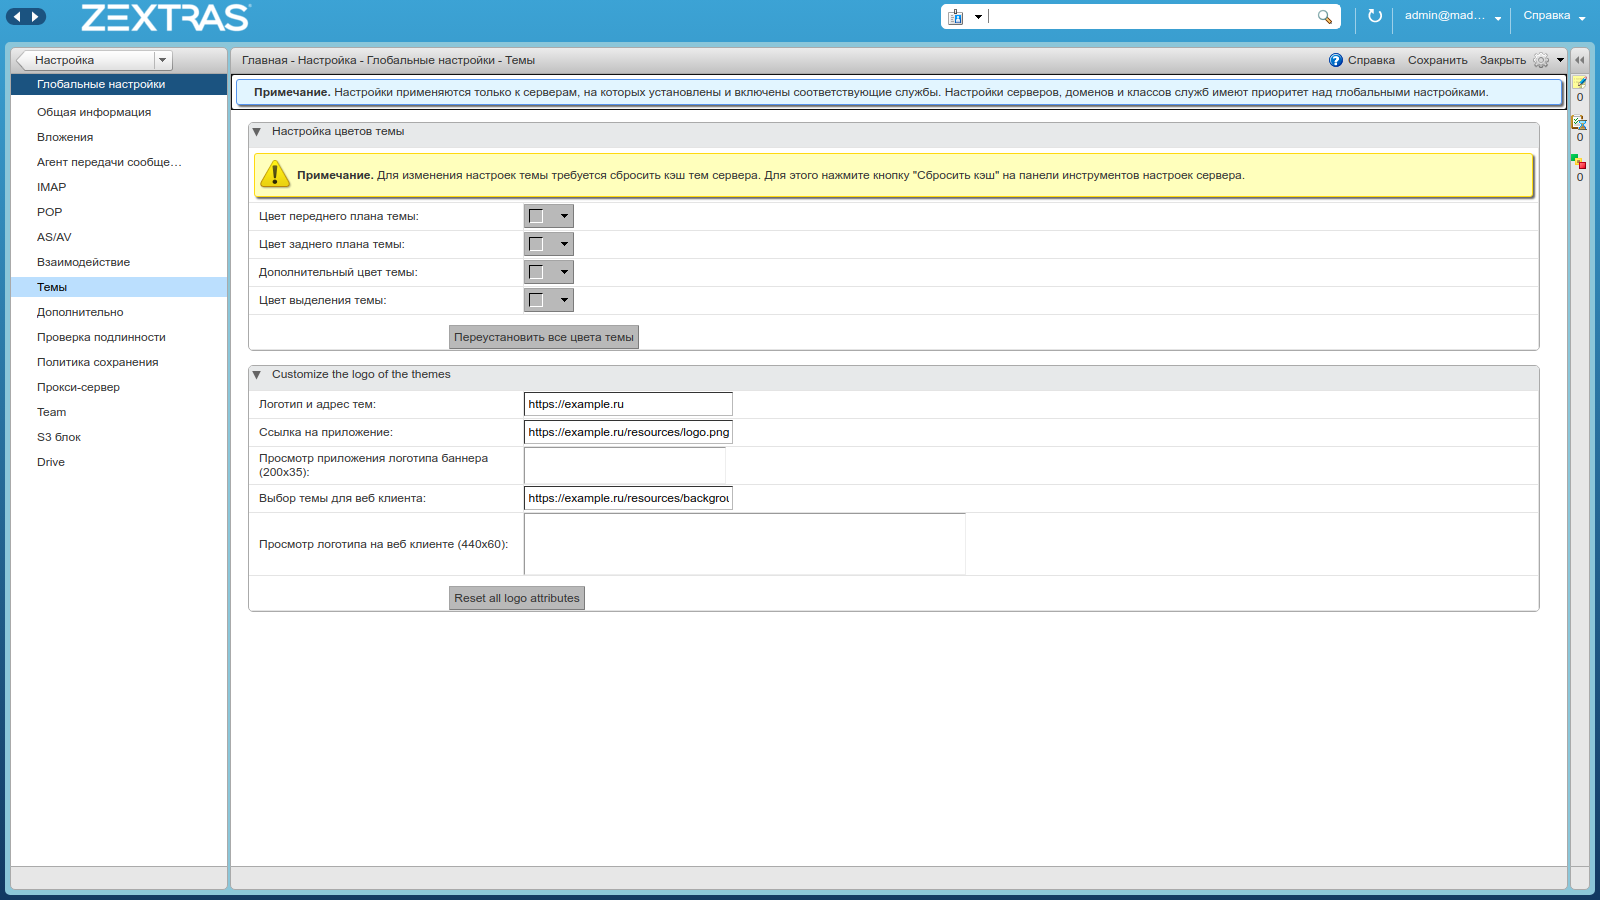
Replacing the standard Zimbra logo in the web client and on the Zimbra OSE authentication page with your enterprise logo is relevant for many companies. Initially, Zimbra OSE does not provide the ability to personalize the web client, such a function is available for those using Zextras Suite Pro. To change the logos, go to the Administrator Console and go to the "Settings - Global Settings" section. In the window that opens, select the "Themes" section and pay attention to the "Customize the logo of the themes" section. There are five parameters here, each with a specific function:
- Logo and theme address: Here you should specify the link that will open when you click on the logo
- : , 20035 ( PNG)
- : -
- -: , 44060 ( PNG)
- -:
You can also change logos for individual domains. To do this, go to the "Settings - Domains" section and double-click on the domain that you intend to brand. In the window that opens, select the "Themes" section and pay attention to the "Customize the logo of the themes" section. All settings in it repeat those described above.
Zextras Suite allows you to customize the Zimbra OSE authentication page itself for individual domains. This is done using the command line. For example, for the domain example.ru, the command will look like this:
zmprov md example.ru zimbraWebClientLoginURL /zx/login/page/?domain=example.ru
Please note that the parameters zimbraPublicServiceHostname and zimbraPublicServiceProtocol for your domain must be configured correctly, in addition, the path to the page currently does not support other query parameters except? domain =. Their support will be added in the future.
The authentication page is configured on the command line. It is currently possible to customize the background, page logo and favicon. To do this, you need to specify the location paths of the images used for them. Both local files and files located on remote servers are supported. For locally located files, the path is / opt / zimbra / jetty / webapps / zimbra /. For example, the path to the local file /public/logo.png specified during setup will actually look like /opt/zimbra/jetty/webapps/zimbra/public/logo.png
To set up the background, you need to use a picture with a resolution not lower than the resolution of monitors used by employees of the enterprise. When using a picture with a lower resolution, the authentication page will be displayed on them with vertical and / or horizontal stripes.
- To customize the background of the authentication page using a remote file, use the command zxsuite auth loginPage setBackgroundImage domain example.com " example.com/resources/background.png "
- To customize the background of the authentication page using a local file, use the command zxsuite auth loginPage setBackgroundImage domain example.com "/public/background.png"
It is recommended to use a picture with a resolution of 320x80 pixels as a logo. It is allowed to use other resolutions, however, due to stretching or reduction of the picture, its quality may suffer. The picture must have an aspect ratio of 4: 1.
- To customize the logo of the authentication page using a remote file, use the command zxsuite auth loginPage setLogo domain example.com " example.com/resources/logo.png "
- To customize the logo of the authentication page using a local file, use the command zxsuite auth loginPage setLogo domain example.com "/public/logo.png"

Favicon is a page icon that appears on a tab and when a page is bookmarked. It traditionally uses an icon file with an aspect ratio of 1: 1.
- To configure the authentication page favicon using a remote file, use the command zxsuite auth loginPage setFavicon domain example.com "/public/favicon.ico"
- To set up the authentication page favicon using a local file, use the command zxsuite auth loginPage setFavicon domain example.com " example.com/resources/favicon.ico "
You can view the current settings of the authentication page using the command zxsuite auth loginPage getConfig domain example.ru