We are publishing a translation of an article about Vanilla Stack - a new cloud-based open-source technology based on Kubernetes.
I recently came across the Vanilla Stack , which includes many open source components. In this article, we will take a quick look at the installation process and show you the different use cases.

Vanilla Stack at a glance
Vanilla Stack can be defined as a Kubernetes cluster with a lot of open-source components.
Among them:
- Rook - manages distributed storage (file system, block, object),
- OpenStack - Provides Infrastructure as a Service (IaaS),
- Cloud Foundry - Provides Platform as a Service (PaaS).
The following diagram from the official documentation illustrates the global stack architecture.
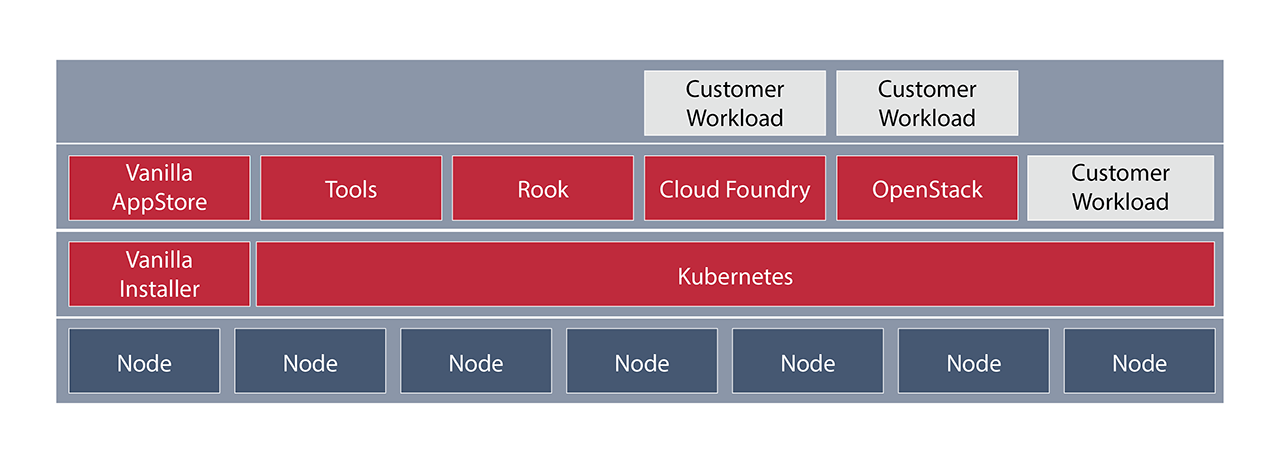
Note: All solutions that come with Vanilla Stack (Rook, Cloud Foundry, OpenStack and other tools) work as pods in the underlying Kubernetes cluster.
As we can see from the diagram above, users can:
- run applications in the basic Kubernetes cluster through the creation of deployments, services, Helm charts, etc.
- use Cloud Foundry to run your application from code (with a simple one
cf push
); - use OpenStack to create new infrastructures (virtual machines, software-defined networking, etc.).
Note: Hardware requirements depend on the components that will be installed in the stack.
The following diagram is more detailed, it contains a list of all the components, organized by category, that may come with the Vanilla Stack:
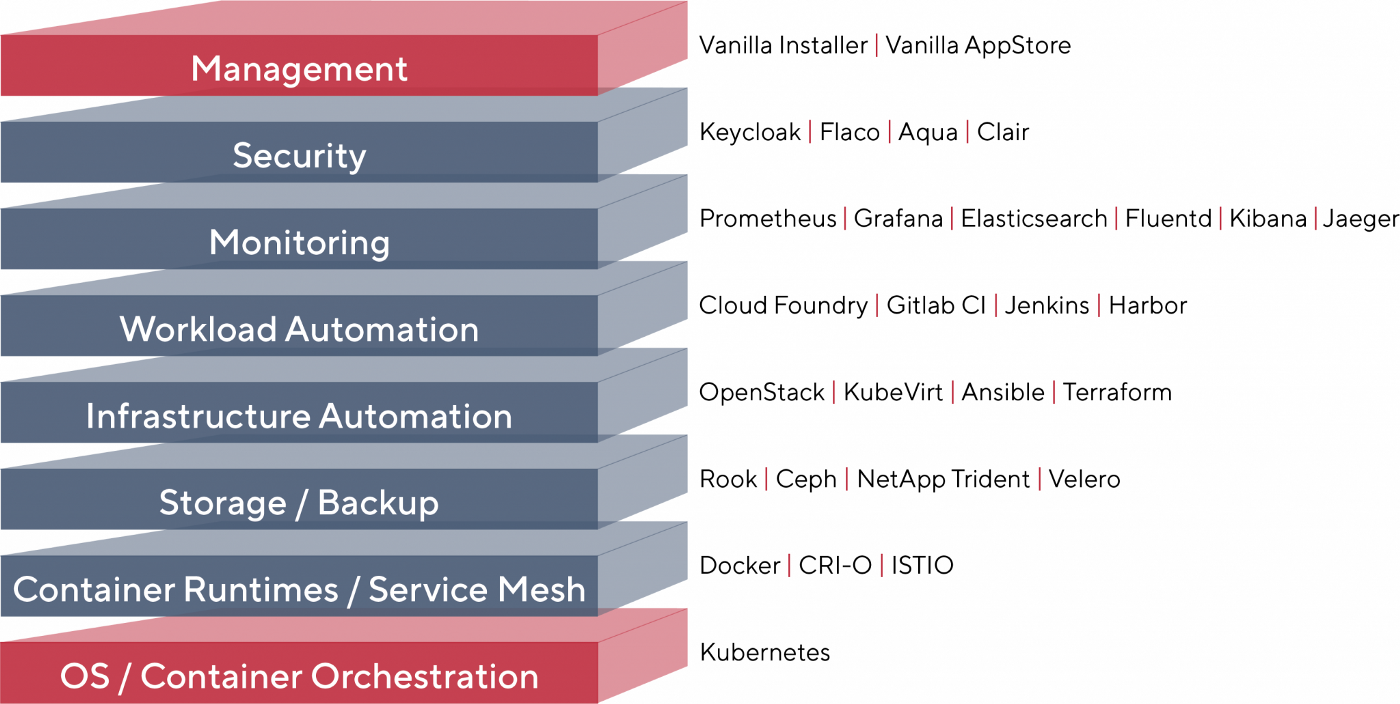
I think this diagram is pretty accurate. Some components are installed by default, others can be selected during installation.
In this article, we'll walk through the main steps in the installation process. To simplify the task, we will install Vanilla Stack on six virtual machines prepared by the hoster: three will act as the master Kubernetes nodes (master), and the rest will act as workers (workers).
Note:Cloud providers should be selected depending on the components that we want to install, as some of them may not meet the installation requirements. For example, to install Rook, we need an infrastructure provider that provides block storage.
We start the installation
There are two ways to install Vanilla Stack, they are described in the download section . We will be using a Docker installation which can be started with the following command:
$ docker run \
  --name VanillaStack-installer -d \
  -p 8080:8080 \
  harbor.vanillastack.io/vanillastack/installer:latest
The installer's web interface is accessible through port 8080. The installation can be completed in ten easy steps, which we will discuss next.
Requirements
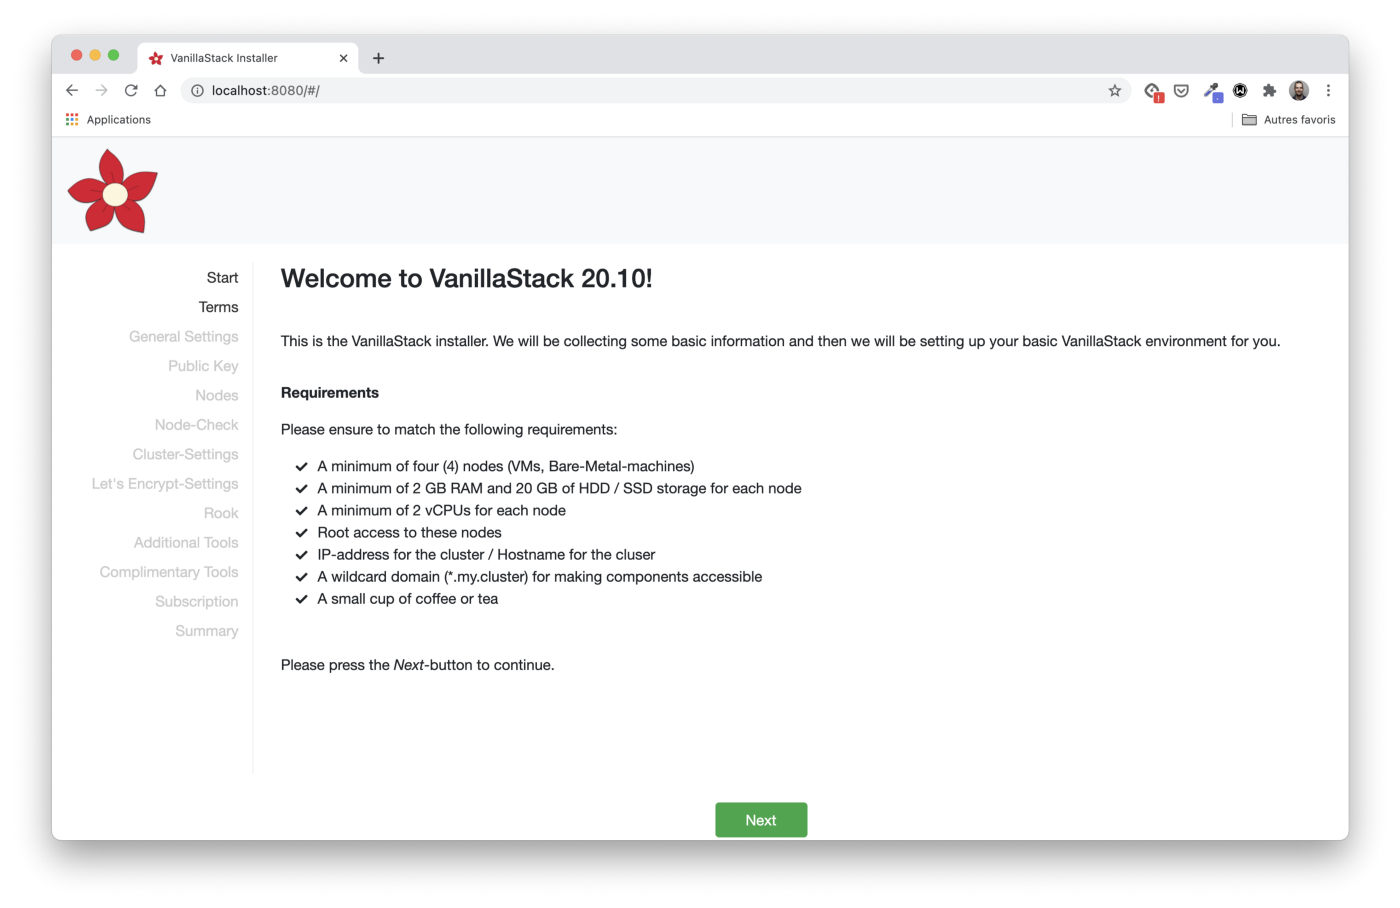
The first step, Start , defines the hardware and software requirements for the machines on which the stack will be installed. In our case, we will use six virtual machines. Each one runs Ubuntu 20.04 and has 4GB RAM / 2 CPUs.
As we wrote earlier, three virtual machines will act as the main Kubernetes nodes, and the rest will be working.
# IP addresses of the master nodes
master1 - 159.65.92.123
master2 - 178.62.32.212
master3 - 178.62.40.225

# IP addresses of the worker nodes
worker1 - 178.62.41.87
worker2 - 178.62.27.97
worker3 - 178.62.67.29
In addition, we need to set up a domain (and a couple of subdomains) to access the cluster. We will come back to this step later when configuring the load balancer.
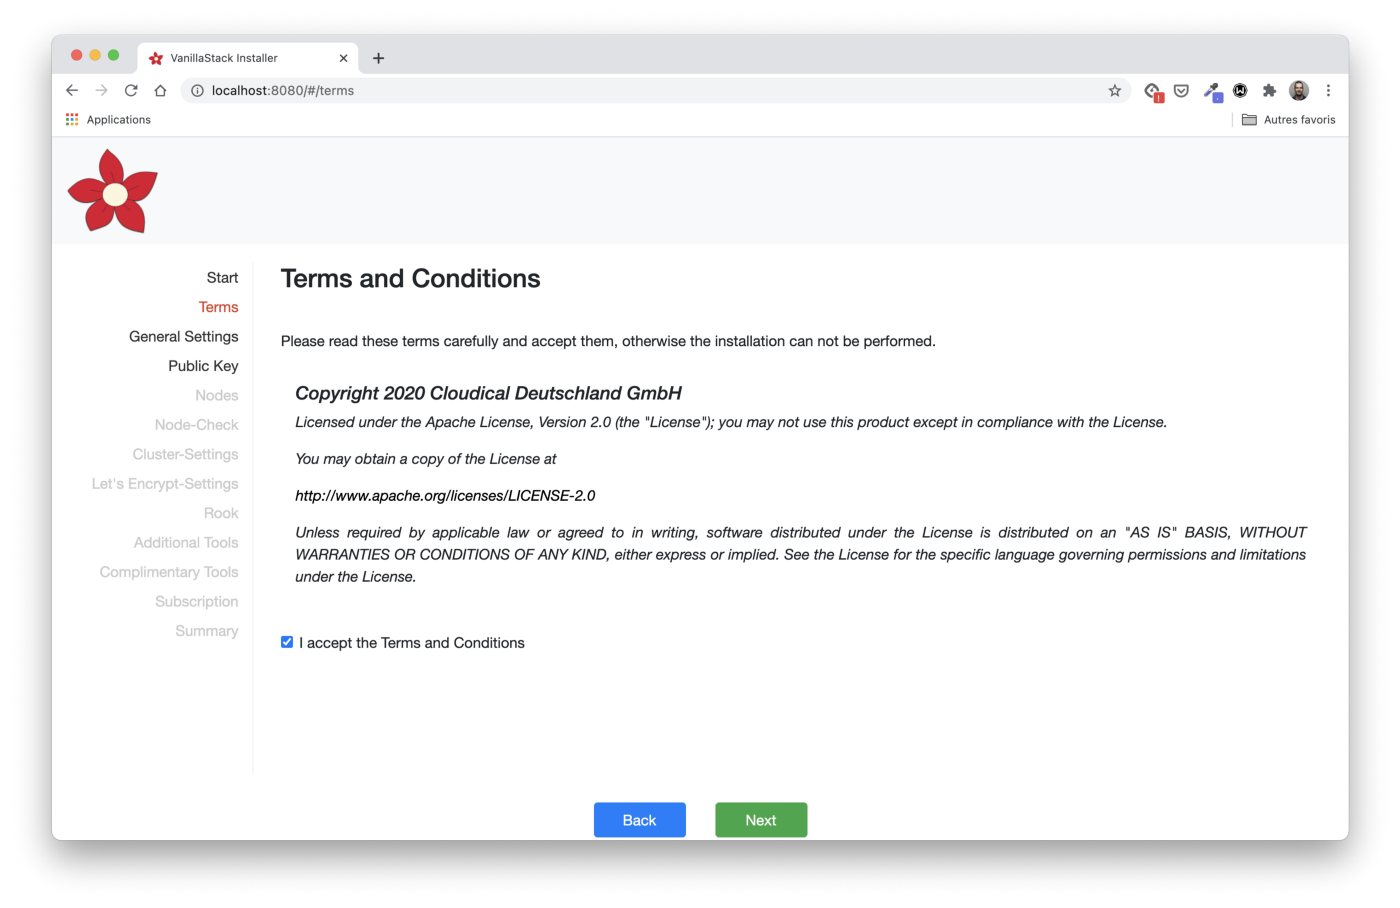
Terms and Conditions
Accepting the Terms is our second step. Be sure to read the specified license information.
General settings
Next comes the General Settings step . It is necessary to indicate the type of installation that suits us: the number of master and worker nodes and the initial load.
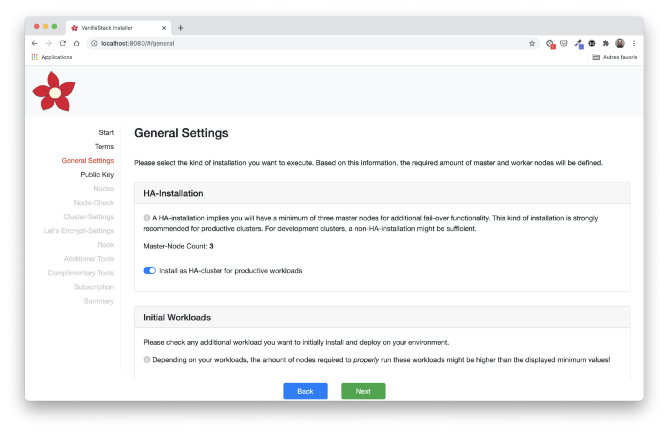
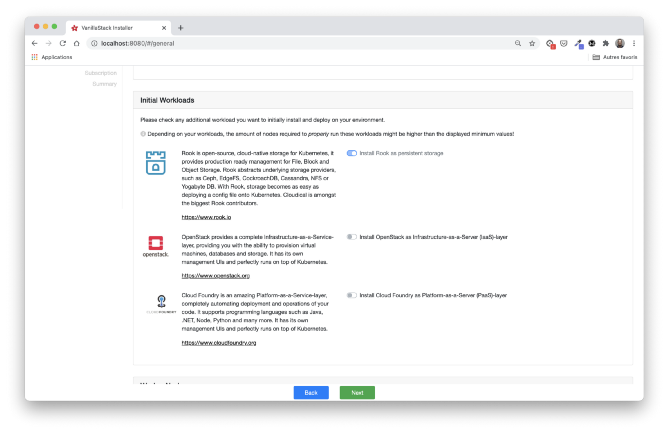
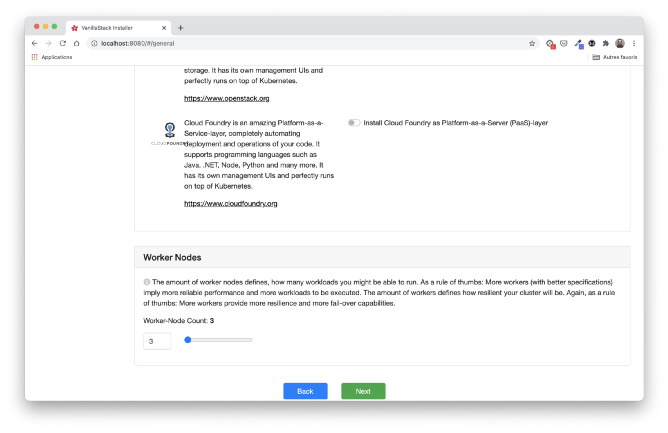
In our case, we will choose a HA installation with three master nodes, the three remaining nodes acting as workers. Rook is selected by default for repository installation. We are not using OpenStack or Cloud Foundry here. This could be a topic for another article.
Access to the virtual machine by SSH key
The Public Key section provides an RSA public key, it must be copied to each of the virtual machines. This step is required to allow the installation machine (which is running the installer) to run Ansible playbooks to configure each VM.
Note: Ansible is a configuration management system. It only runs commands on machines over an SSH connection. Ansible does not require an agent to be installed, unlike analogues such as Chef and Puppet .
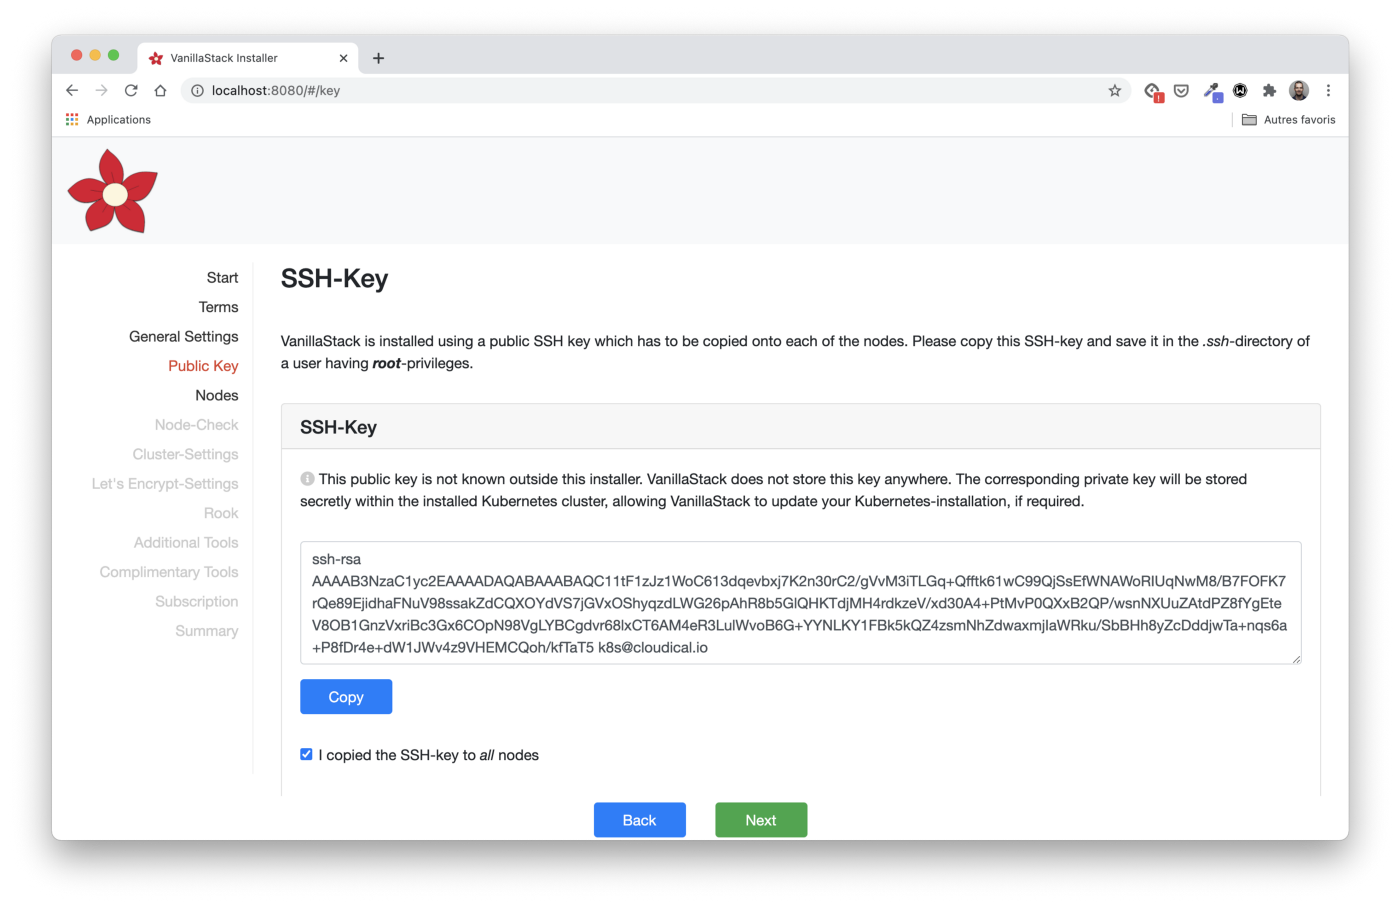
Instructions for copying the key are indicated in the installer:
- save the key in a file named
key.pub
. - copy the key to the target computer using
ssh-copy-id
:
ssh-copy-id -f -i key.pub <username>@<ip-address-of-node>
- repeat this with all the nodes.
For Windows, follow the instructions in this article , starting with Copy SSH Key to Remote Linux Device.
Define Node Information
In the Nodes stage, we need to define the IP addresses and user of each of the master and worker nodes.
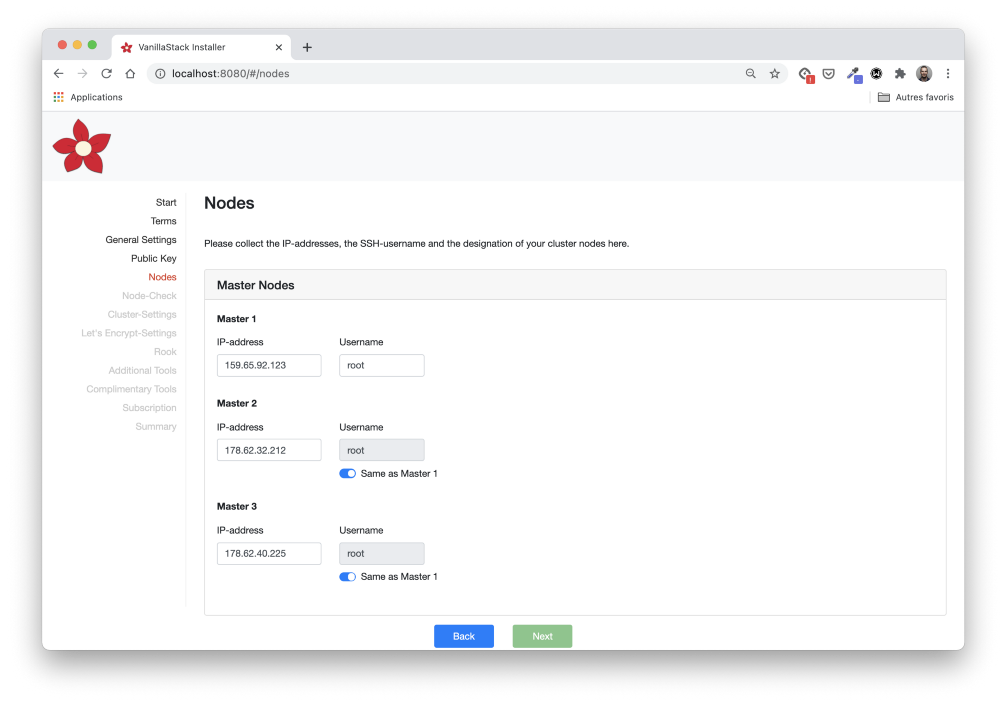
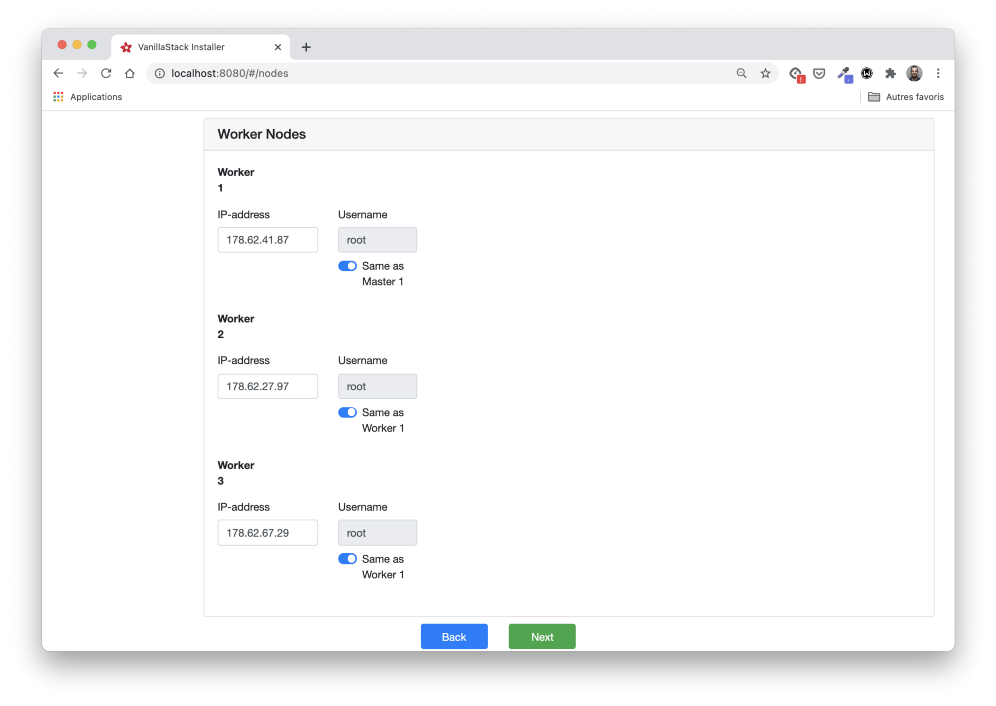
We also need to define the nodes that will launch the Rook Pods. According to the requirements, we use all three worker nodes.

Checking node configuration
In the Node-Check step, we check if all the nodes meet the requirements.
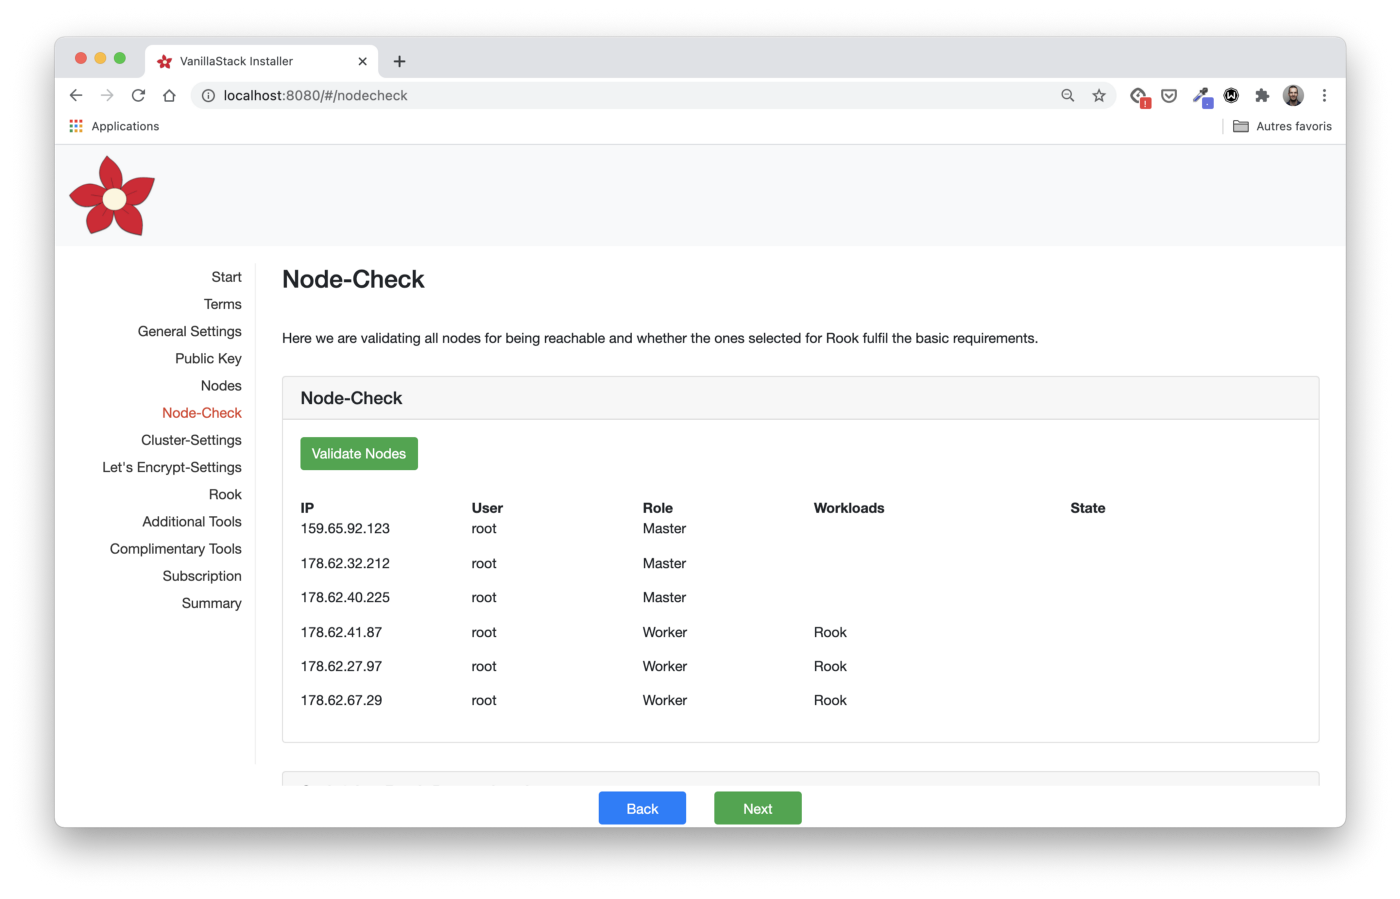
Before clicking on the Validates Nodes button, it is important to scroll all the way down and make sure that we are following the Rook rules: a raw block device must be connected to each node.

Using the command
lsblk -f
, we can check if everything is configured correctly.

By clicking the Validate Nodes button in the installer, we can make sure that all nodes are configured correctly.

Cluster settings
The first thing to configure in the Cluster-Settings step is Pod CIDR and Service CIDR (that is, the IP ranges that are used to provide pod IPs and service virtual IPs). In our case, we use the default values.

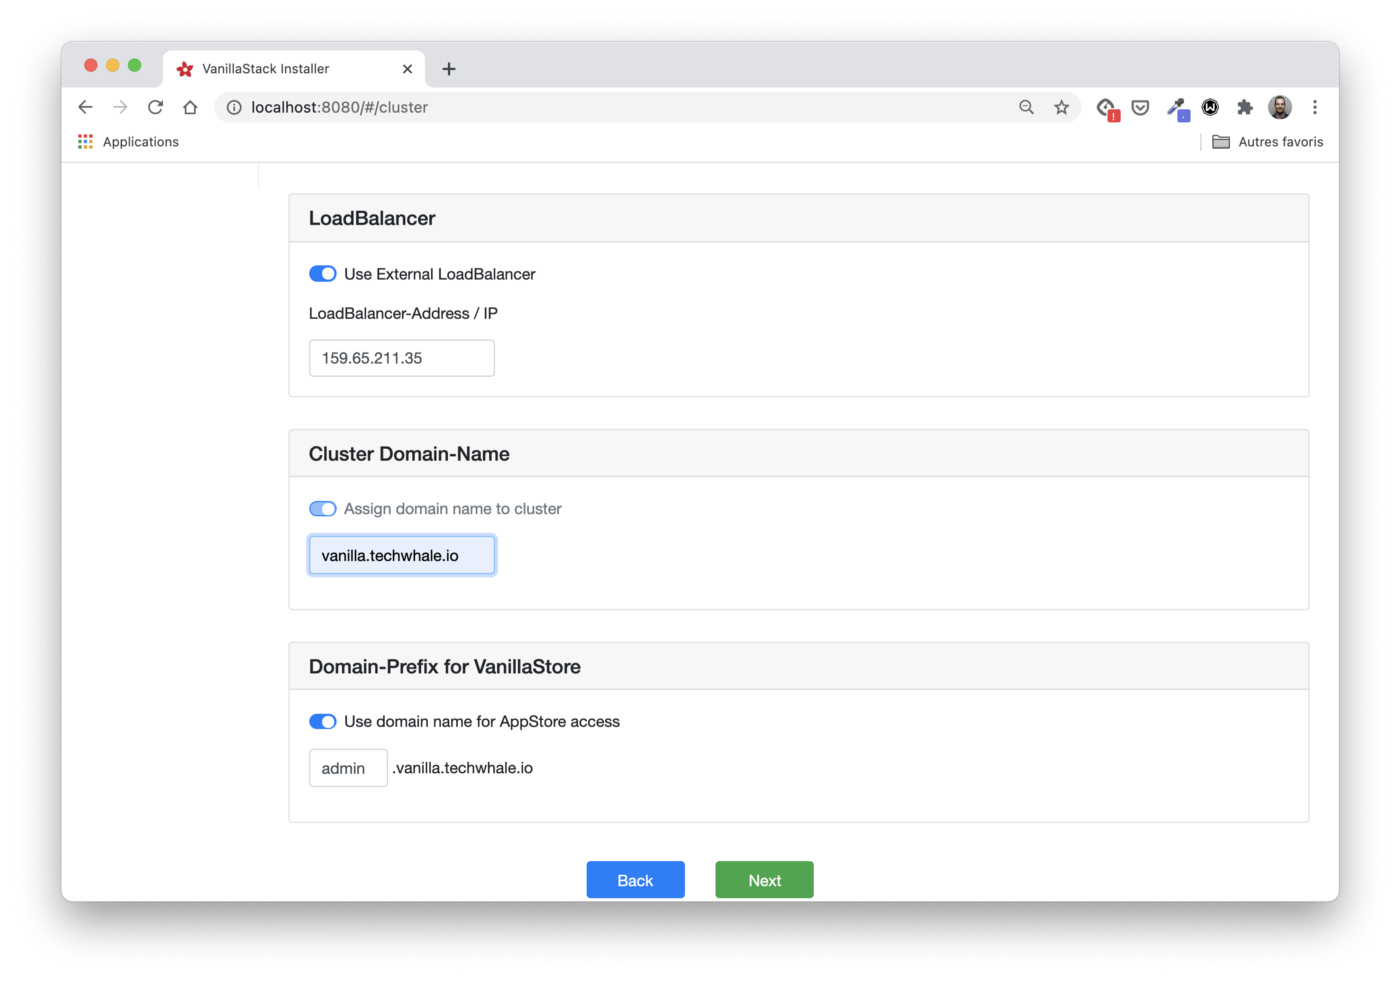
In addition, we need to create a load balancer to redirect traffic to the master or production node.
Due to the nature of the cloud provider you are using, you cannot use the same load balancer to redirect traffic to a different set of nodes.
Therefore, we will create two load balancers: in front of the master nodes
and in front of the workers.
Load balancer in front of main nodes
The first load balancer is required to access the cluster API server. It should be configured like this:
- redirect TCP traffic from port 6443 to the same port on master hosts;
- regularly check the operation of master nodes by sending TCP requests to port 6443.
In this case, the load balancer gets the IP address 159.65.211.35.
Load balancer in front of worker nodes
The second load balancer is required to provide access to the cluster ingress controller (the component that gives access to applications in the cluster). Its settings:
- redirect HTTP traffic (port 80) to port 30080 of worker nodes;
- redirect HTTPS traffic (port 443) to port 30443 of working nodes;
- regularly check the health of worker nodes sending TCP requests on port 30080.
In this case, the load balancer gets IP 46.101.64.165.
Configuring DNS entries
The load balancer IP address must be associated with the cluster domain name. In our article, we use
vanilla.techwhale.io
. Additional subdomains are required to access the API server and applications exposed through the ingress controller.

At this stage, we can only provide the IP address of one load balancer, but in the next releases of the installer there will be more options.
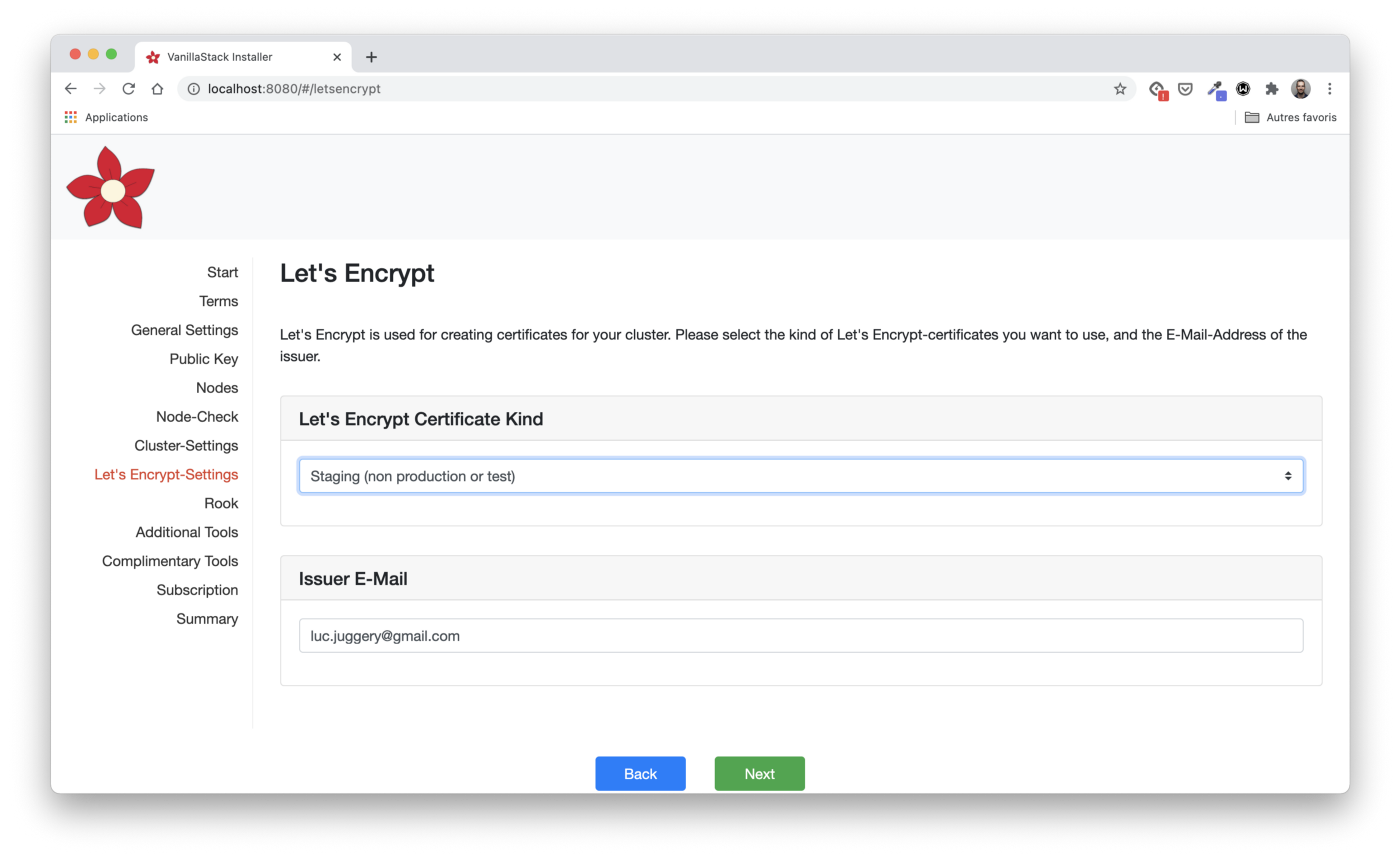
Let's Encrypt setup
Let's Encrypt is a widely used free certificate authority. It allows us to receive and automatically renew HTTPS certificates. Kubernetes Let's Encrypt is often used through Cert Manager , the default component on the Vanilla Stack. Cert Manager can obtain a certificate from Let's Encrypt (as well as several other sources) and make it available to the application through Kubernetes Secret.
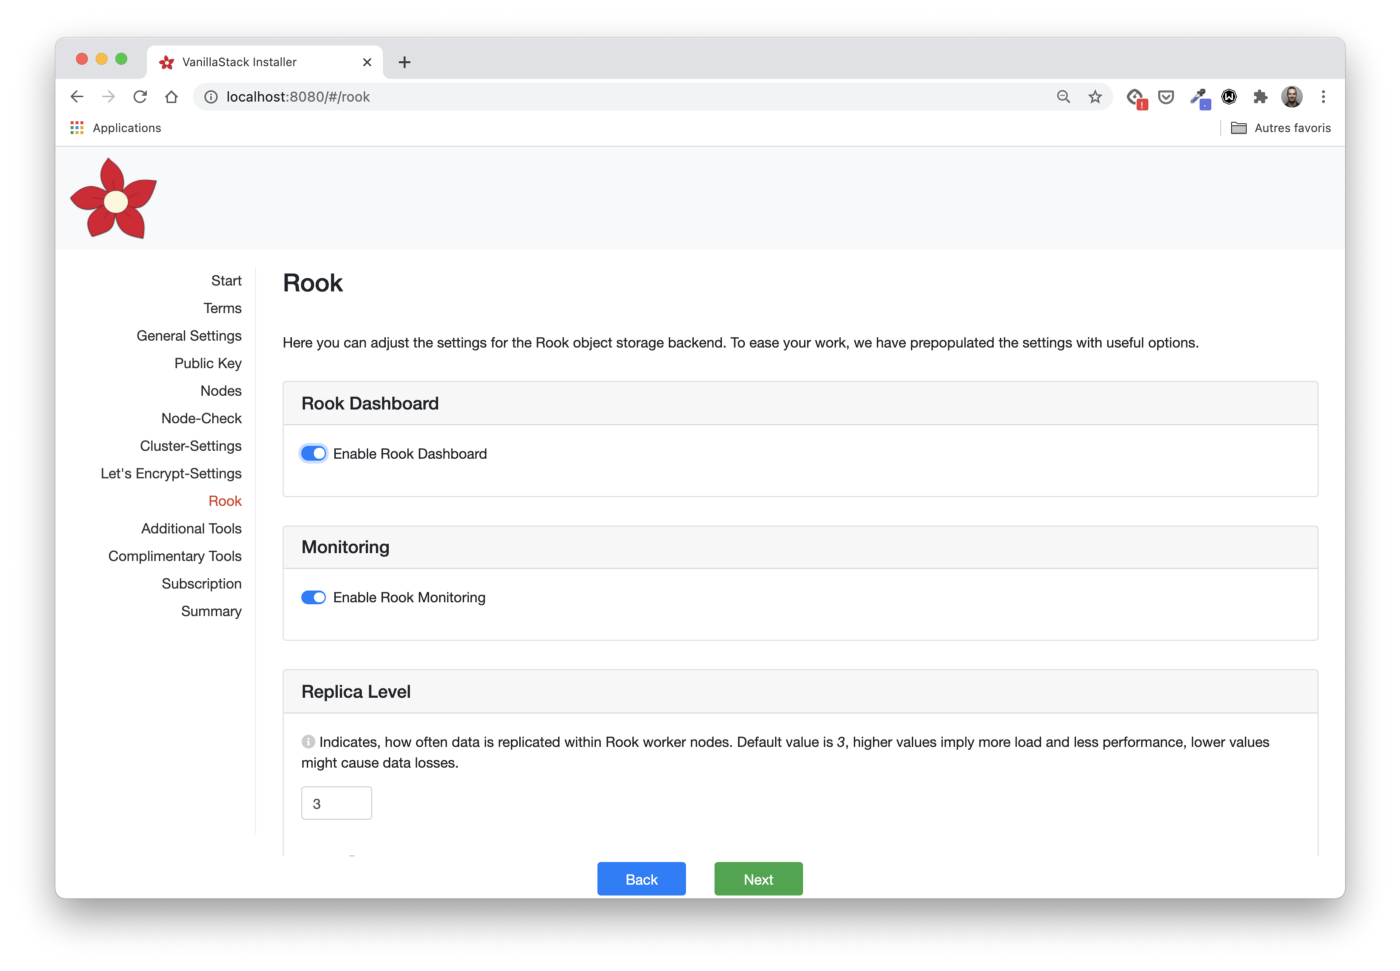
Rook Configuration
The following steps allow you to select the Rook components to be installed (in this case, the Rook control panel and monitoring), as well as the number of repetitions of one piece of data (replica level).
Installing additional tools
In the Additional Tools section, you can specify which components will be installed in the cluster.
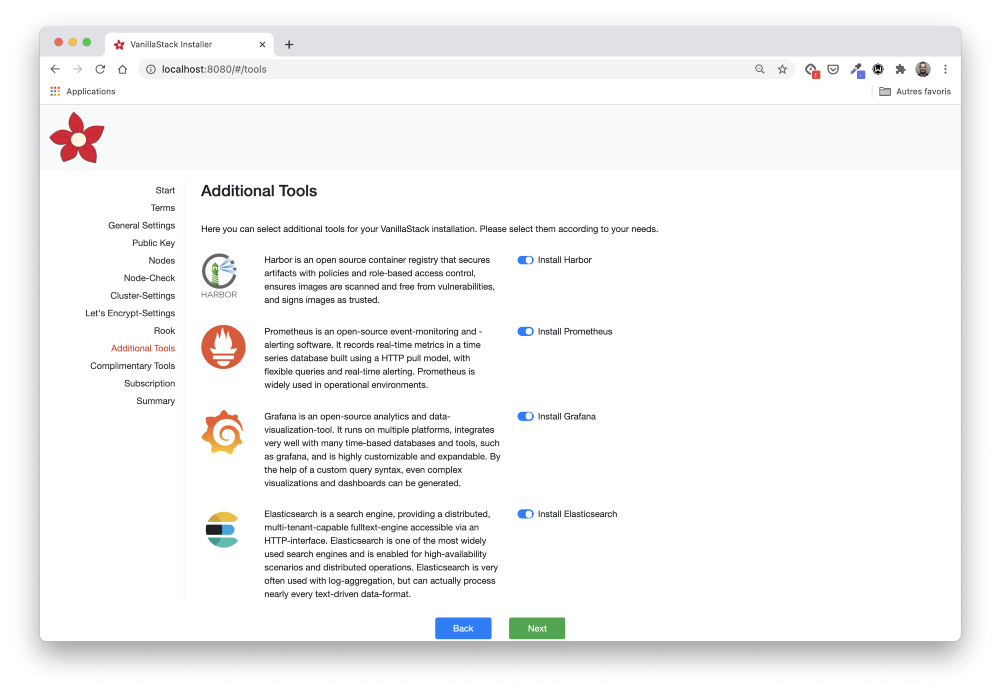

The tools listed here are pretty common. They fall into different categories:
- monitoring (Prometheus, Jeager);
- logging (fluentd, Elasticsearch, Grafana);
- container registry and Helm charts repository (Harbor);
- ingress controller (nginx).
This is a convenient way to install all components from one place. They can also be installed later if they are not selected at this stage.
Subscription
If we want to subscribe to commercial support, then at this step we can get all the necessary information.
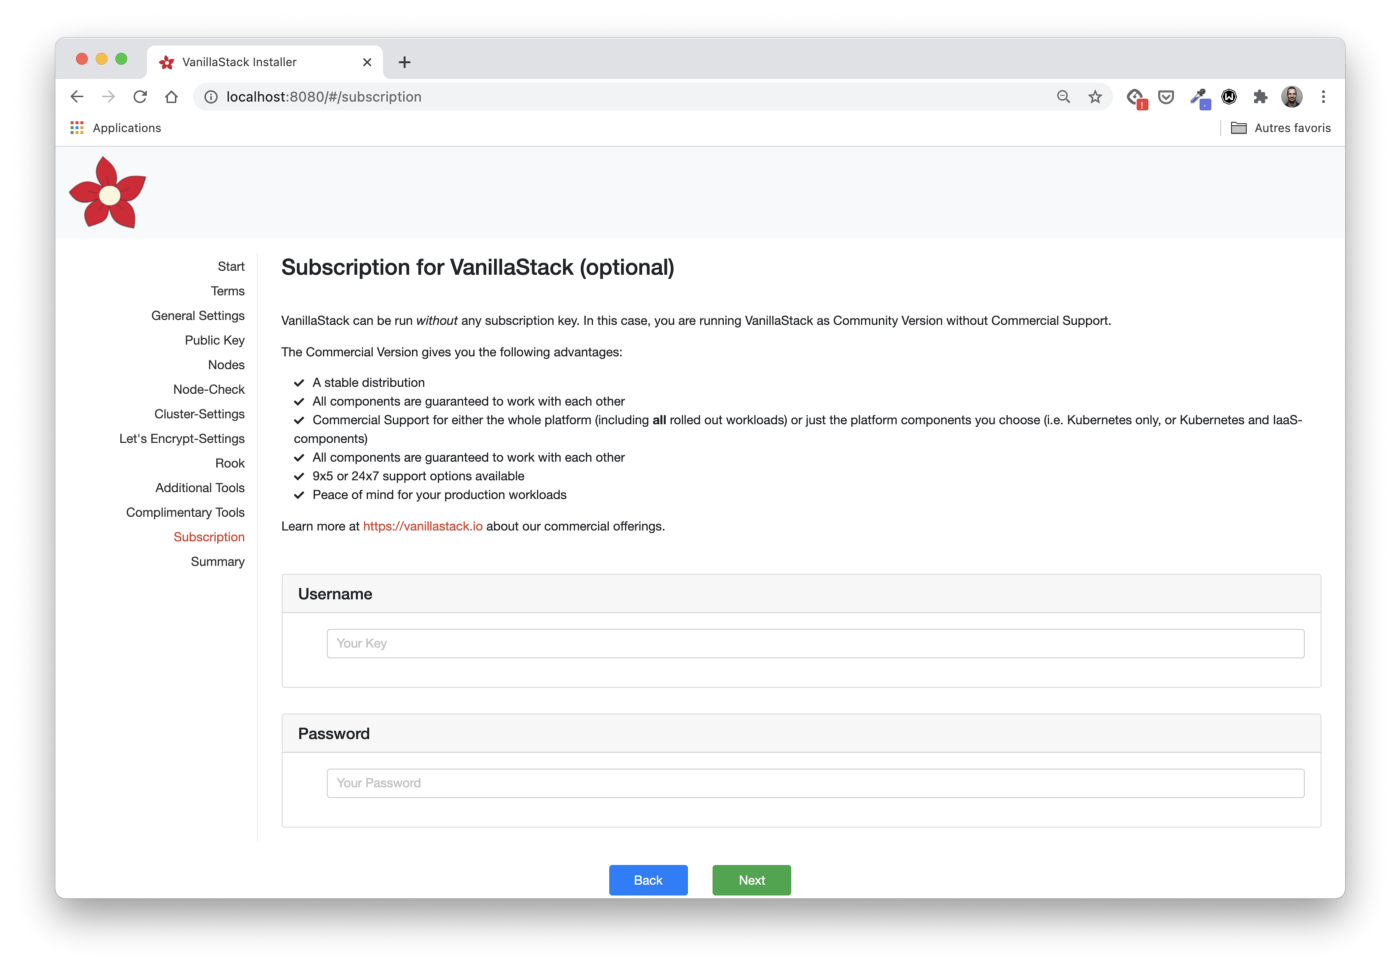
Support is provided by Cloudical . It supports Vanilla Stack and provides Vanilla Cloud , a new managed stack option.
Checking all steps
Here we can view and change (if necessary) the configuration parameters.
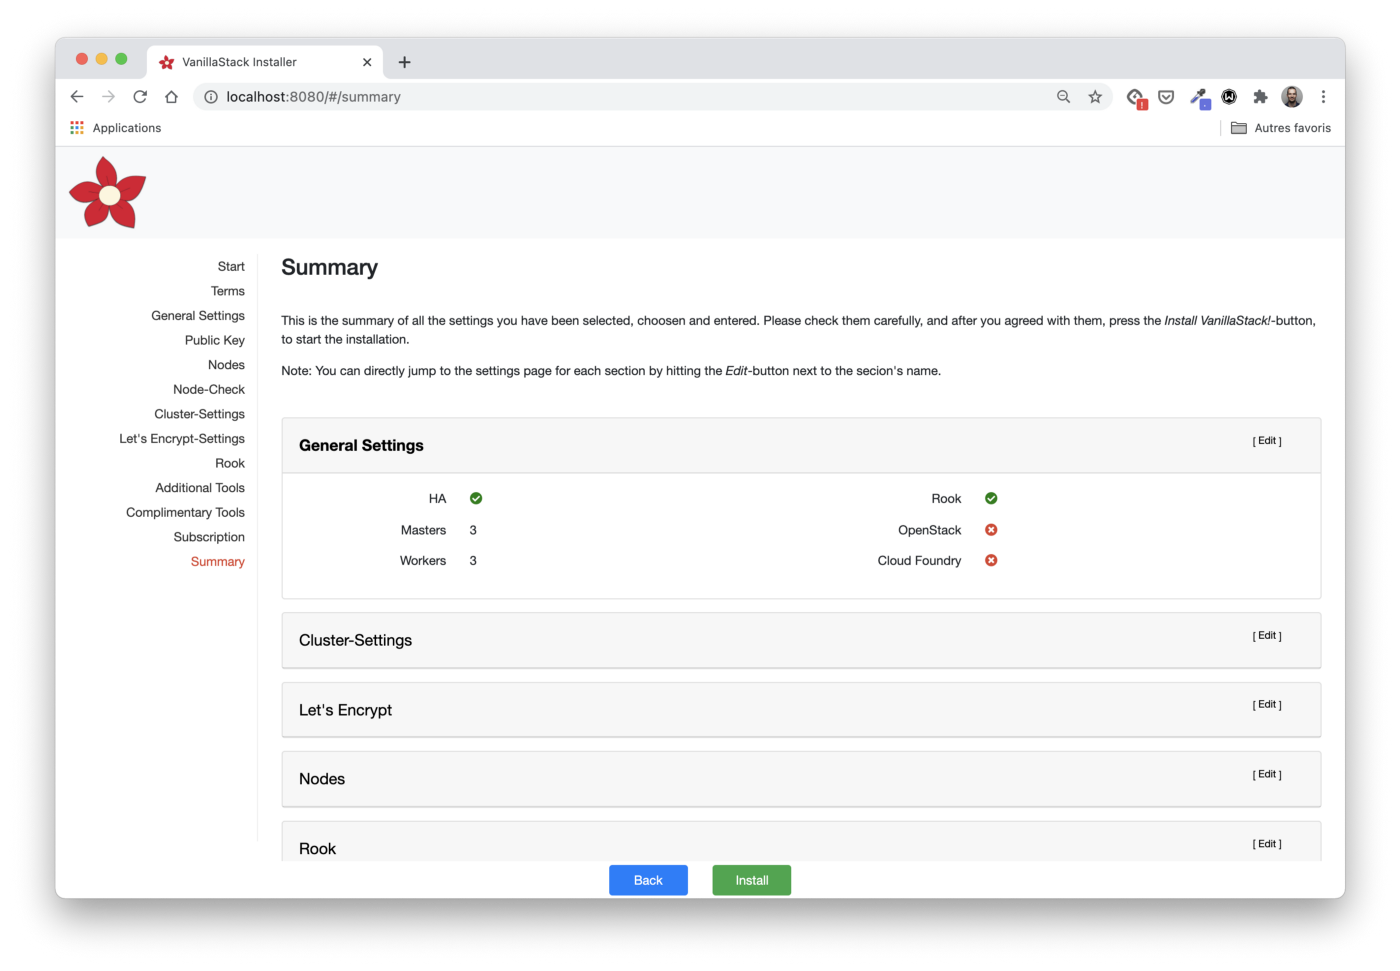
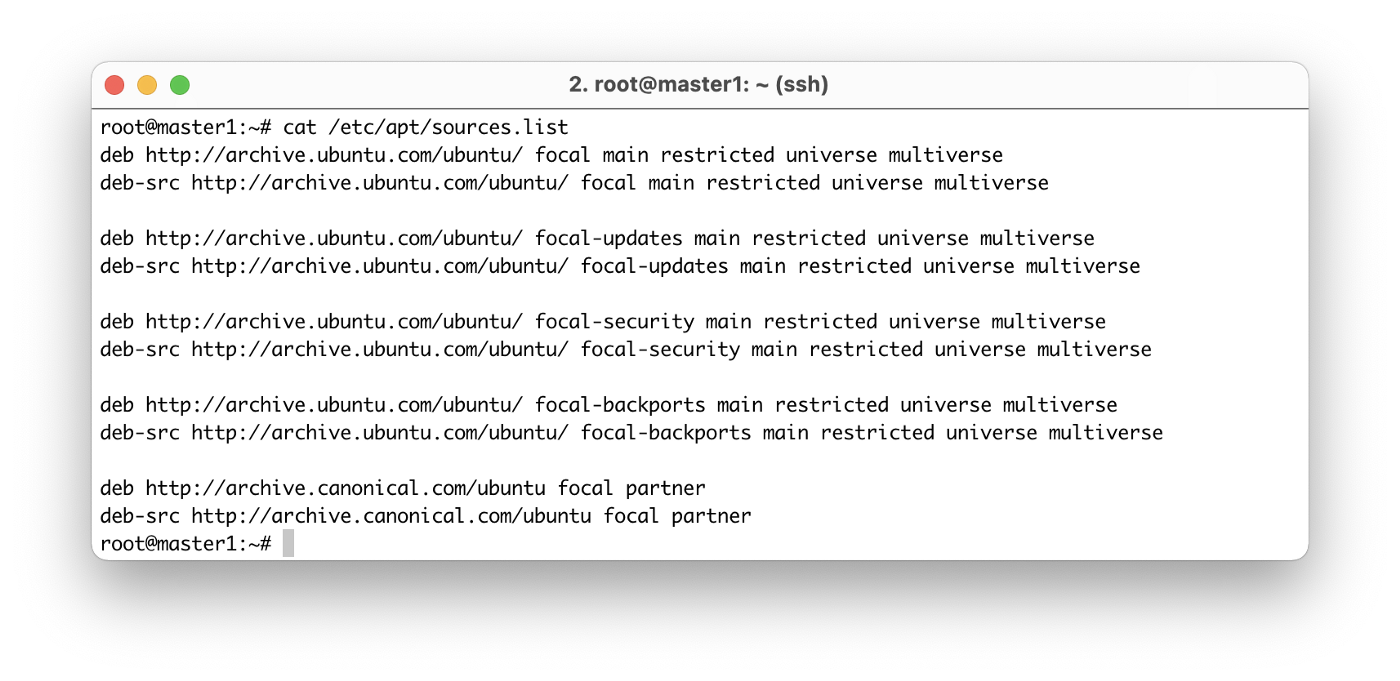
Before moving on to the next step and installing the entire stack, we need to make sure it is
/etc/apt/sources.list
properly configured on each node and directed to the official repositories.
Note: This step is necessary, for example, if Ansible is not available from the default repositories.
The easiest way to fix this is to replace the content with the
/etc/apt/sources.list
following instructions:
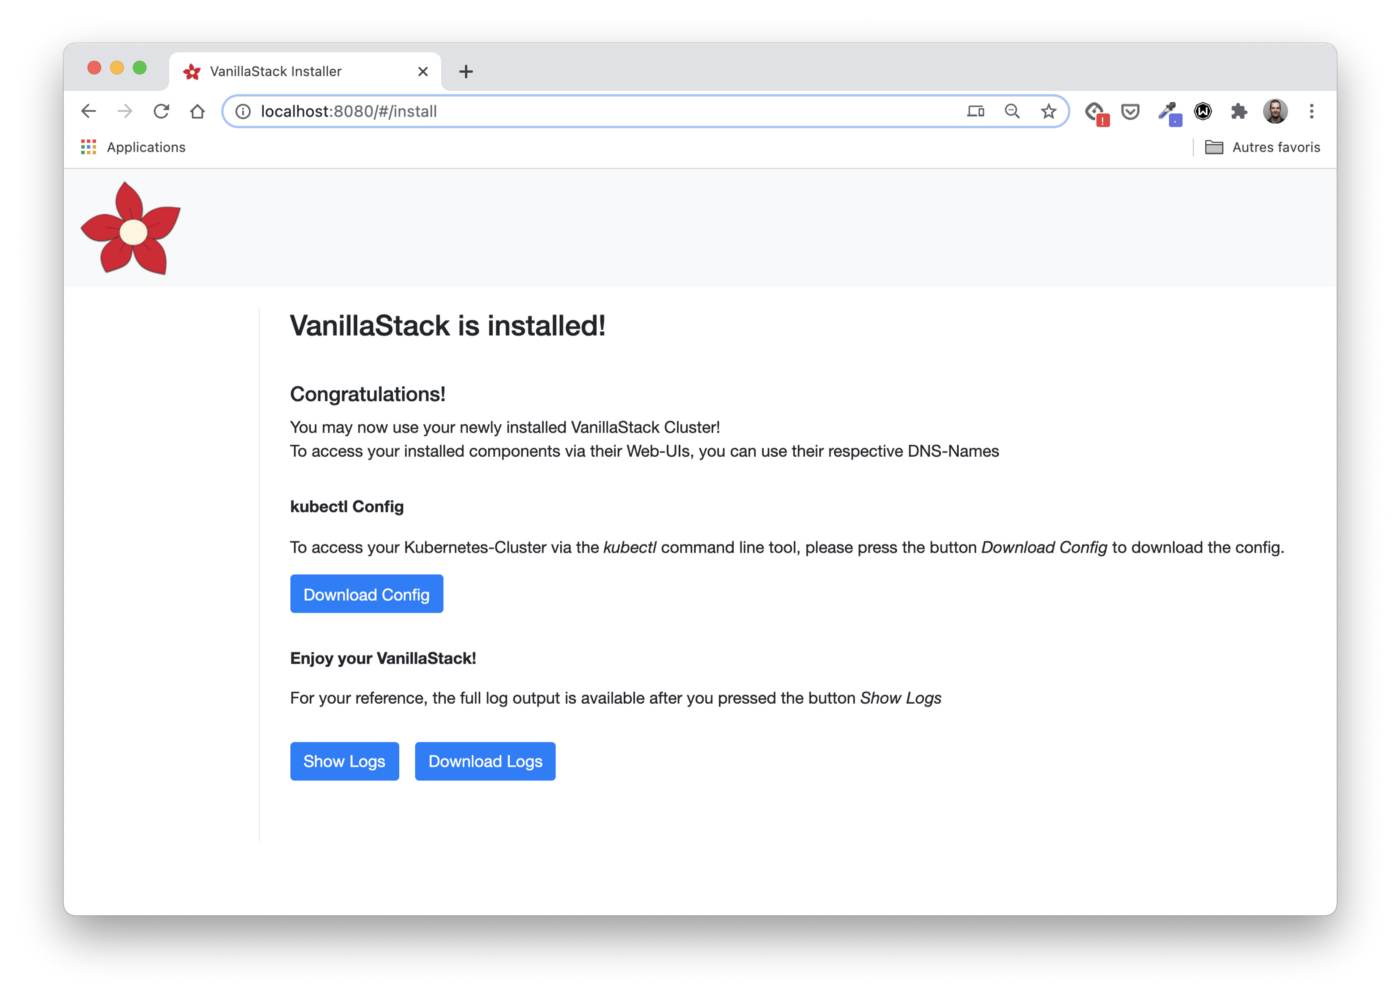
Installation
Now everything is ready and we can start the installation under a cup of tea.

In the installation logs, we will see Ansible playbooks applied to each VM in order to:
- install all required packages;
- set up a Kubernetes cluster (three main nodes / three workers);
- install Rook and all the tools selected above.
Installing the entire stack shouldn't take long.
Note: When installing the stack, I ran into a small problem due to the peculiarities of the cloud provider used: the load balancer redirects traffic to the internal (private) IP address of the host instead of the public one. The Ingress controller is mapped to the external (public) IP address of the nodes, so the worker nodes are marked as bad, which is wrong.
Cluster access
The file
kubeconfig
can be retrieved from
/etc/kubernetes/admin.conf file
.
# Get kubeconfig file
$ ssh root@master1 cat /etc/kubernetes/admin.conf > vanilla.cfg
# Configure local kubectl
$ export KUBECONFIG=$PWD/vanilla.cfg
As usual, we start by listing the nodes in our cluster:
$ kubectl get no
NAME      STATUS   ROLES    AGE   VERSION
master1   Ready    master   38m   v1.19.6
master2   Ready    master   37m   v1.19.6
master3   Ready    master   37m   v1.19.6
worker1   Ready    worker   37m   v1.19.6
worker2   Ready    worker   37m   v1.19.6
worker3   Ready    worker   37m   v1.19.6
In addition, we can check all the pods running in the cluster, as well as the services that provide them.
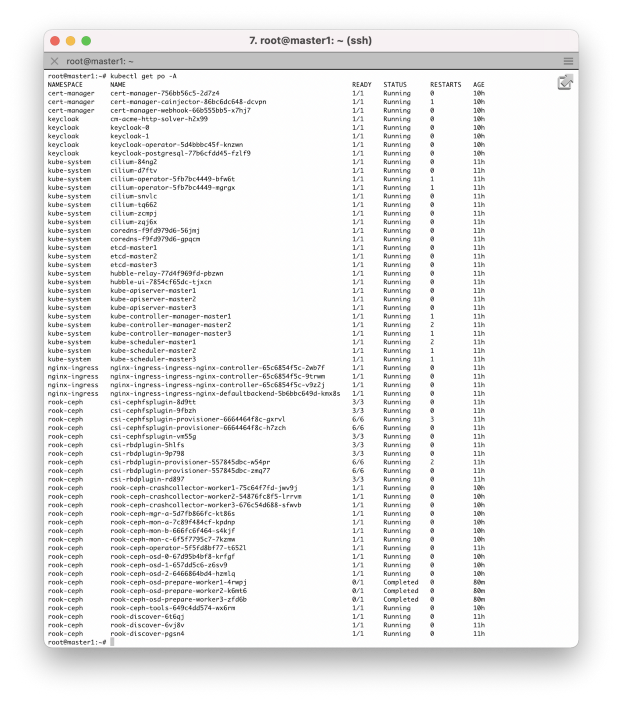

It looks like everything is working! The next step can be a test run, for example, a stateful application that:
- uses block storage provided by a Ceph cluster created through Rook;
- forwarded through the nginx ingress controller;
- uses a TLS certificate from Let's Encrypt CA, automatically generated by the Cert Manager.
Outcome
The Vanilla Stack setup was quick and the Docker installer is simple and straightforward. Additional parameters should be added soon for more convenience.
If you don't want to install Vanilla Stack, you can use the same stack directly from Vanilla Cloud . This new cloud offering launched in December 2020 and the first beta is now available.
I recommend taking a closer look at this stack as it is a great way to learn more about popular open source projects.