Hello everyone!
Today is an article about a proximity switch with a sound effect, which I made 9 years ago, or to be precise, in January 2012.
Since then, the switch has been working with me around the clock for 9 years. What is most interesting, during all this time, it did not fail and never even hung up, and it also never had false positives. In general, it has proven itself well and I can confidently recommend it to you for self-assembly.
If you are interested in details, then please, under cat.
I have 7 lamps mounted in the corridor.

And to achieve a beautiful visual effect, I used sequential switching of lamps, for this I needed to stretch a separate wire from each lighting point to the controller board.

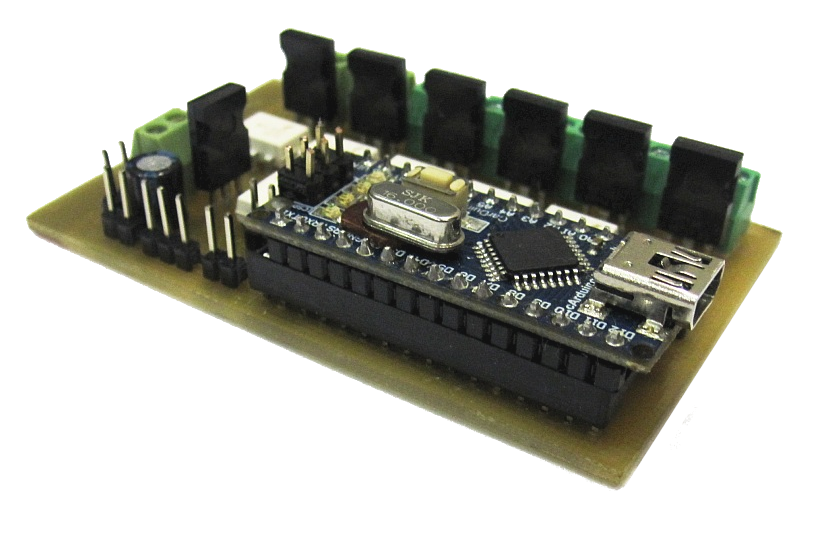
I hid the board itself in the space between the drywall and the ceiling, since there is more than enough space there.
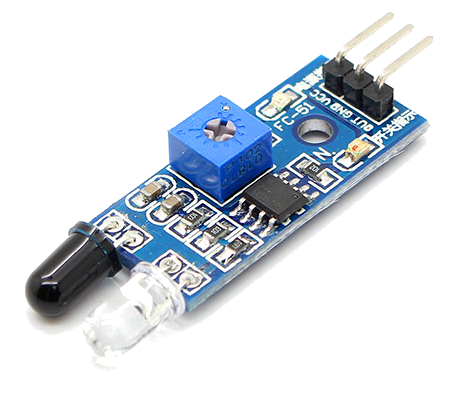
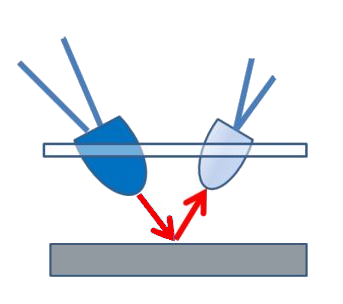
I placed the IR receiver and the LED in the socket. In order to avoid false alarms, they need to be isolated from each other, for this I used a shrink cambric. To connect this optical sensor to the controller board, I use the wires embedded in the wall.

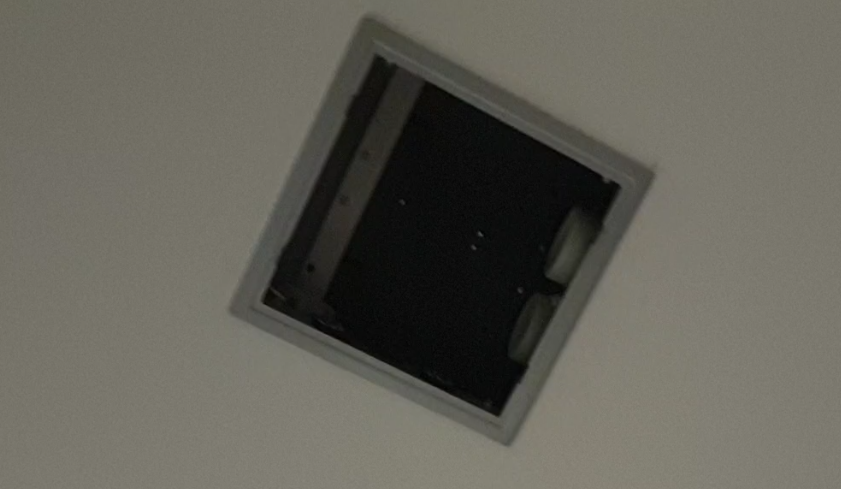
So that the design of the switch does not differ from other installed decorative overlays in the interior, I used a TV outlet from the same series, from which I threw out all the insides, and glued a round window cut out of purple acrylic into the hole.
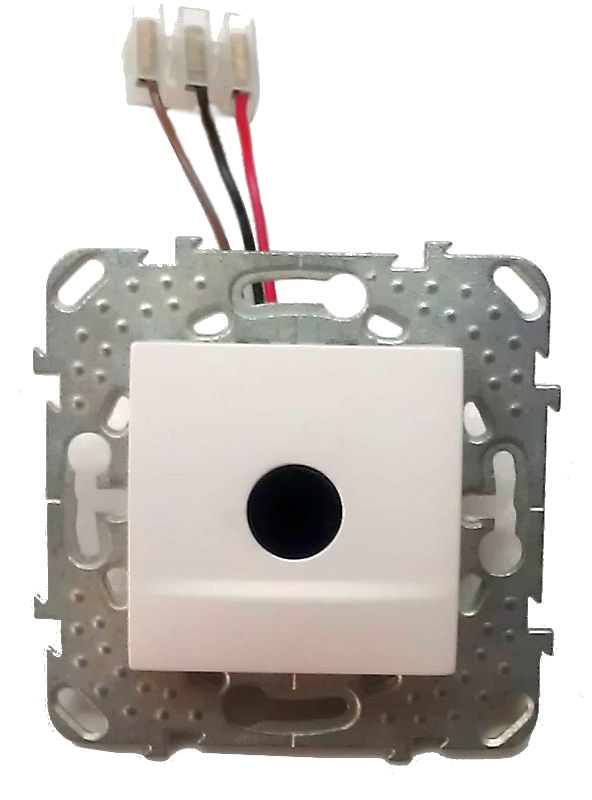
All components were placed on one board, on which screw connectors were also installed for connecting wires from the lamps.
I powered this board with a regular phone charger.

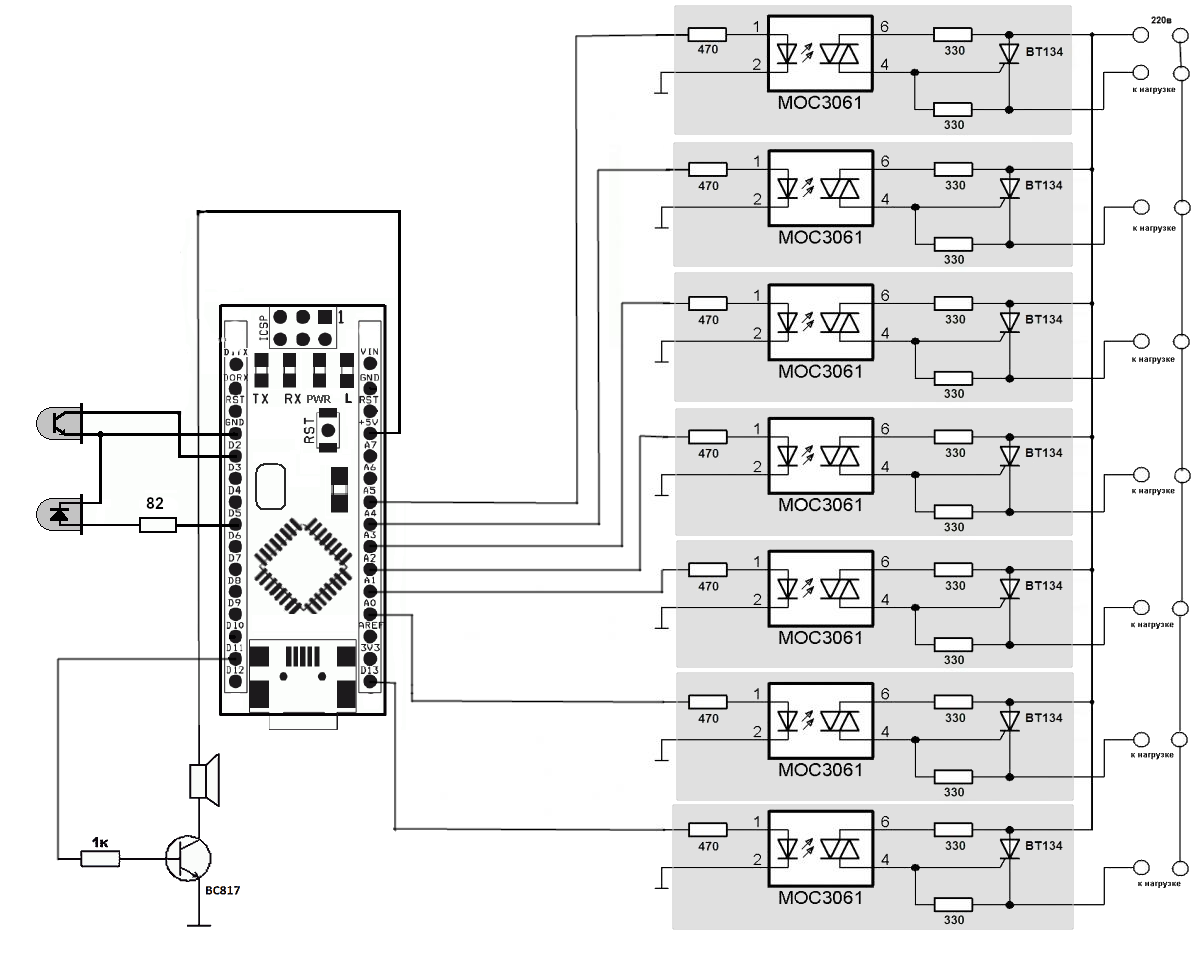
The basis of the whole device is the arduino Nano V.3 controller, but you can also use any other boards with the Atmega328 microcontroller.

An IR LED with a phototransistor can be taken from the obstacle sensor, but it is not necessary to solder them, it is enough to cut the extra tracks and solder 3 wires to them. If you already have these parts previously soldered out somewhere, then before using, it is better to first check them for operability. The infrared LED must be connected to a voltage of 5 V, through a 120 Ohm current-limiting resistor and look at it through the phone's camera, it should glow with a purple light. To test the phototransistor, you will need any tester with a conductor continuity function. We transfer the tester to the dialing mode, and connect the phototransistor leads to the tester probes. Then you need to bring any remote control from household appliances to it tightly and press any button. An intermittent squeaking sound will be heard in response.
9 years ago I did not find suitable solid state relays and I had to assemble them myself from radio components. But at the moment, it is easier to buy an 8 channel solid state relay module like in the picture than to waste time looking for these components.

The switch works as follows
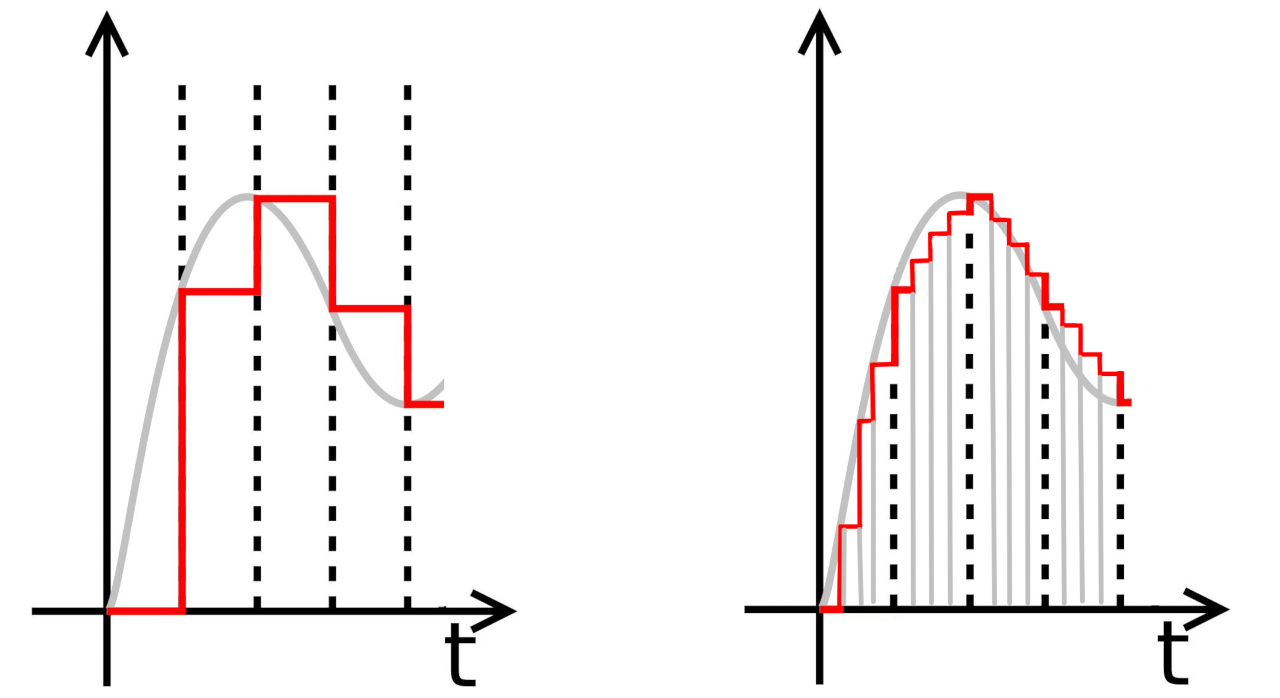
The Arduino outputs a constant PWM signal from the D5 output with a frequency of approximately 977 Hz. An LED that emits a signal in the infrared range is connected to this output through an 82 Ohm current-limiting resistor. The phototransistor connected to the D2 input detects the IR signal reflected from the hand and checks it for plausibility, and if a signal from 20 or more consecutive periods corresponds to a frequency of 977 Hz, then the controller turns on all 7 lamps in turn and starts playing a sound effect through the PWM output D11. All the same happens when you turn off.
Playing sounds
To reproduce sound effects, the uncompressed WAVE format is used, with a frequency of 16000 Hz and a depth of 8 bits, but when this format is played using PWM, an unpleasant hiss and hiss are observed in the audio path. Therefore, to improve the playback quality, I used linear interpolation in the code. In which, the sampling of samples occurs at a frequency of 62.5 kHz and between the original samples 3 additional samples are inserted, calculated by the method of linear interpolation. Thus, quantization noise is reduced at the output, whistling disappears, sound quality is improved, and additional RC filters are not required for playback.
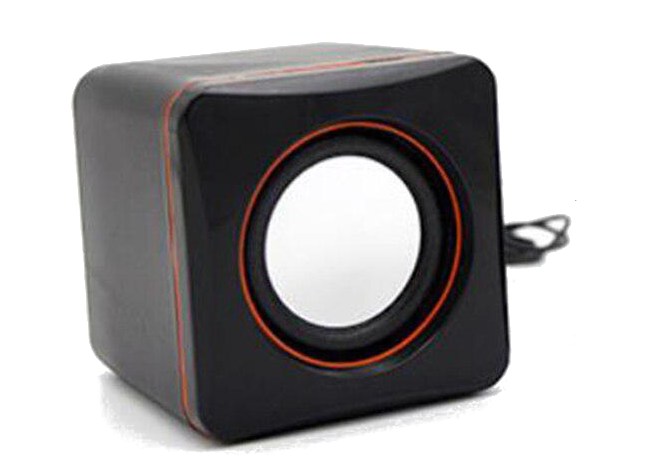
Instead of a speaker, I used an old, small computer speaker with no built-in amplifier.
To convert Wave files to C code, you can use an online converter .
Scheme
On the diagram, I marked solid-state relays with gray rectangles, and for those who want to get confused, they can assemble the circuit completely, just like I did in the distant past.
Components for assembly
1 - Arduino Nano V.3
2 - Obstacle sensor
3 - 8-channel relay module
4 - Resistors 82 Ohm and 1 kOhm
5 - Speaker 0.5 - 3 W
6 - Any NPN transistor with a permissible current of at least 500 mA
Arduino Code
Download all files in one archive
This time I decided to add all the libraries used to the folder with the sketch, and in the sketch itself I registered their local use. Now I hope newbies will have fewer questions for me about the errors they encounter when compiling.
The code contains several constants that can be changed before flashing.
The power_ir constant is responsible for the breaker operation distance; it can take values from a minimum of 20 to a maximum of 200. The value you require can be determined experimentally.
lamp_num - determines the number of lamps you are using. The minimum number of lamps cannot be less than 1, and the maximum is not more than 7. If you correct the code, you can increase it to 15.
lamp_delay is the delay between consecutive switching on of lamps, which is expressed in milliseconds and can start from 0 to 4 294 967 295 ms. Although I do not think that such huge delays will be needed by anyone.
Video
To view the video, click on the image.

Conclusion
In conclusion, I would like to add that I am very surprised that a microcontroller without WDT has never hung up for 9 years. For the same reason, I did not edit the code and add WDT to it, since Arduino with old bootloader cannot work with it.
Thanks for reading to the end!
If you liked my article, then support it with a like and a subscription.
If you have any questions, you can ask them in the comments.