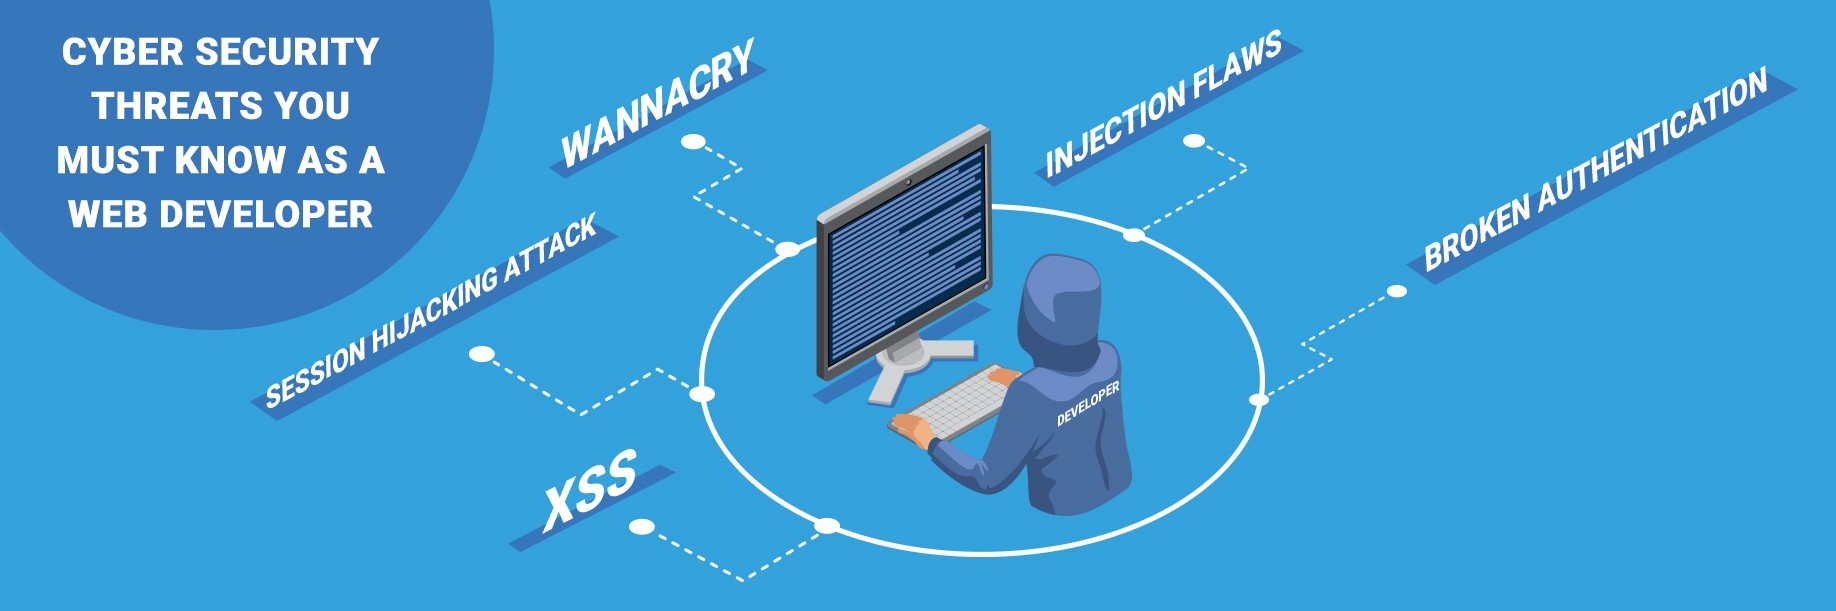
When developing or maintaining web applications, at some point in time you have to deal with the need to use WAF (Web Application Firewall). If you have no experience with this class of solution or are tired of the constant false positives, I will tell you how to simplify the task, as well as share tips and tricks. We will use Nemesida WAF Free as a tool - a free version of Nemesida WAF.
Visualization, or let's start at the end
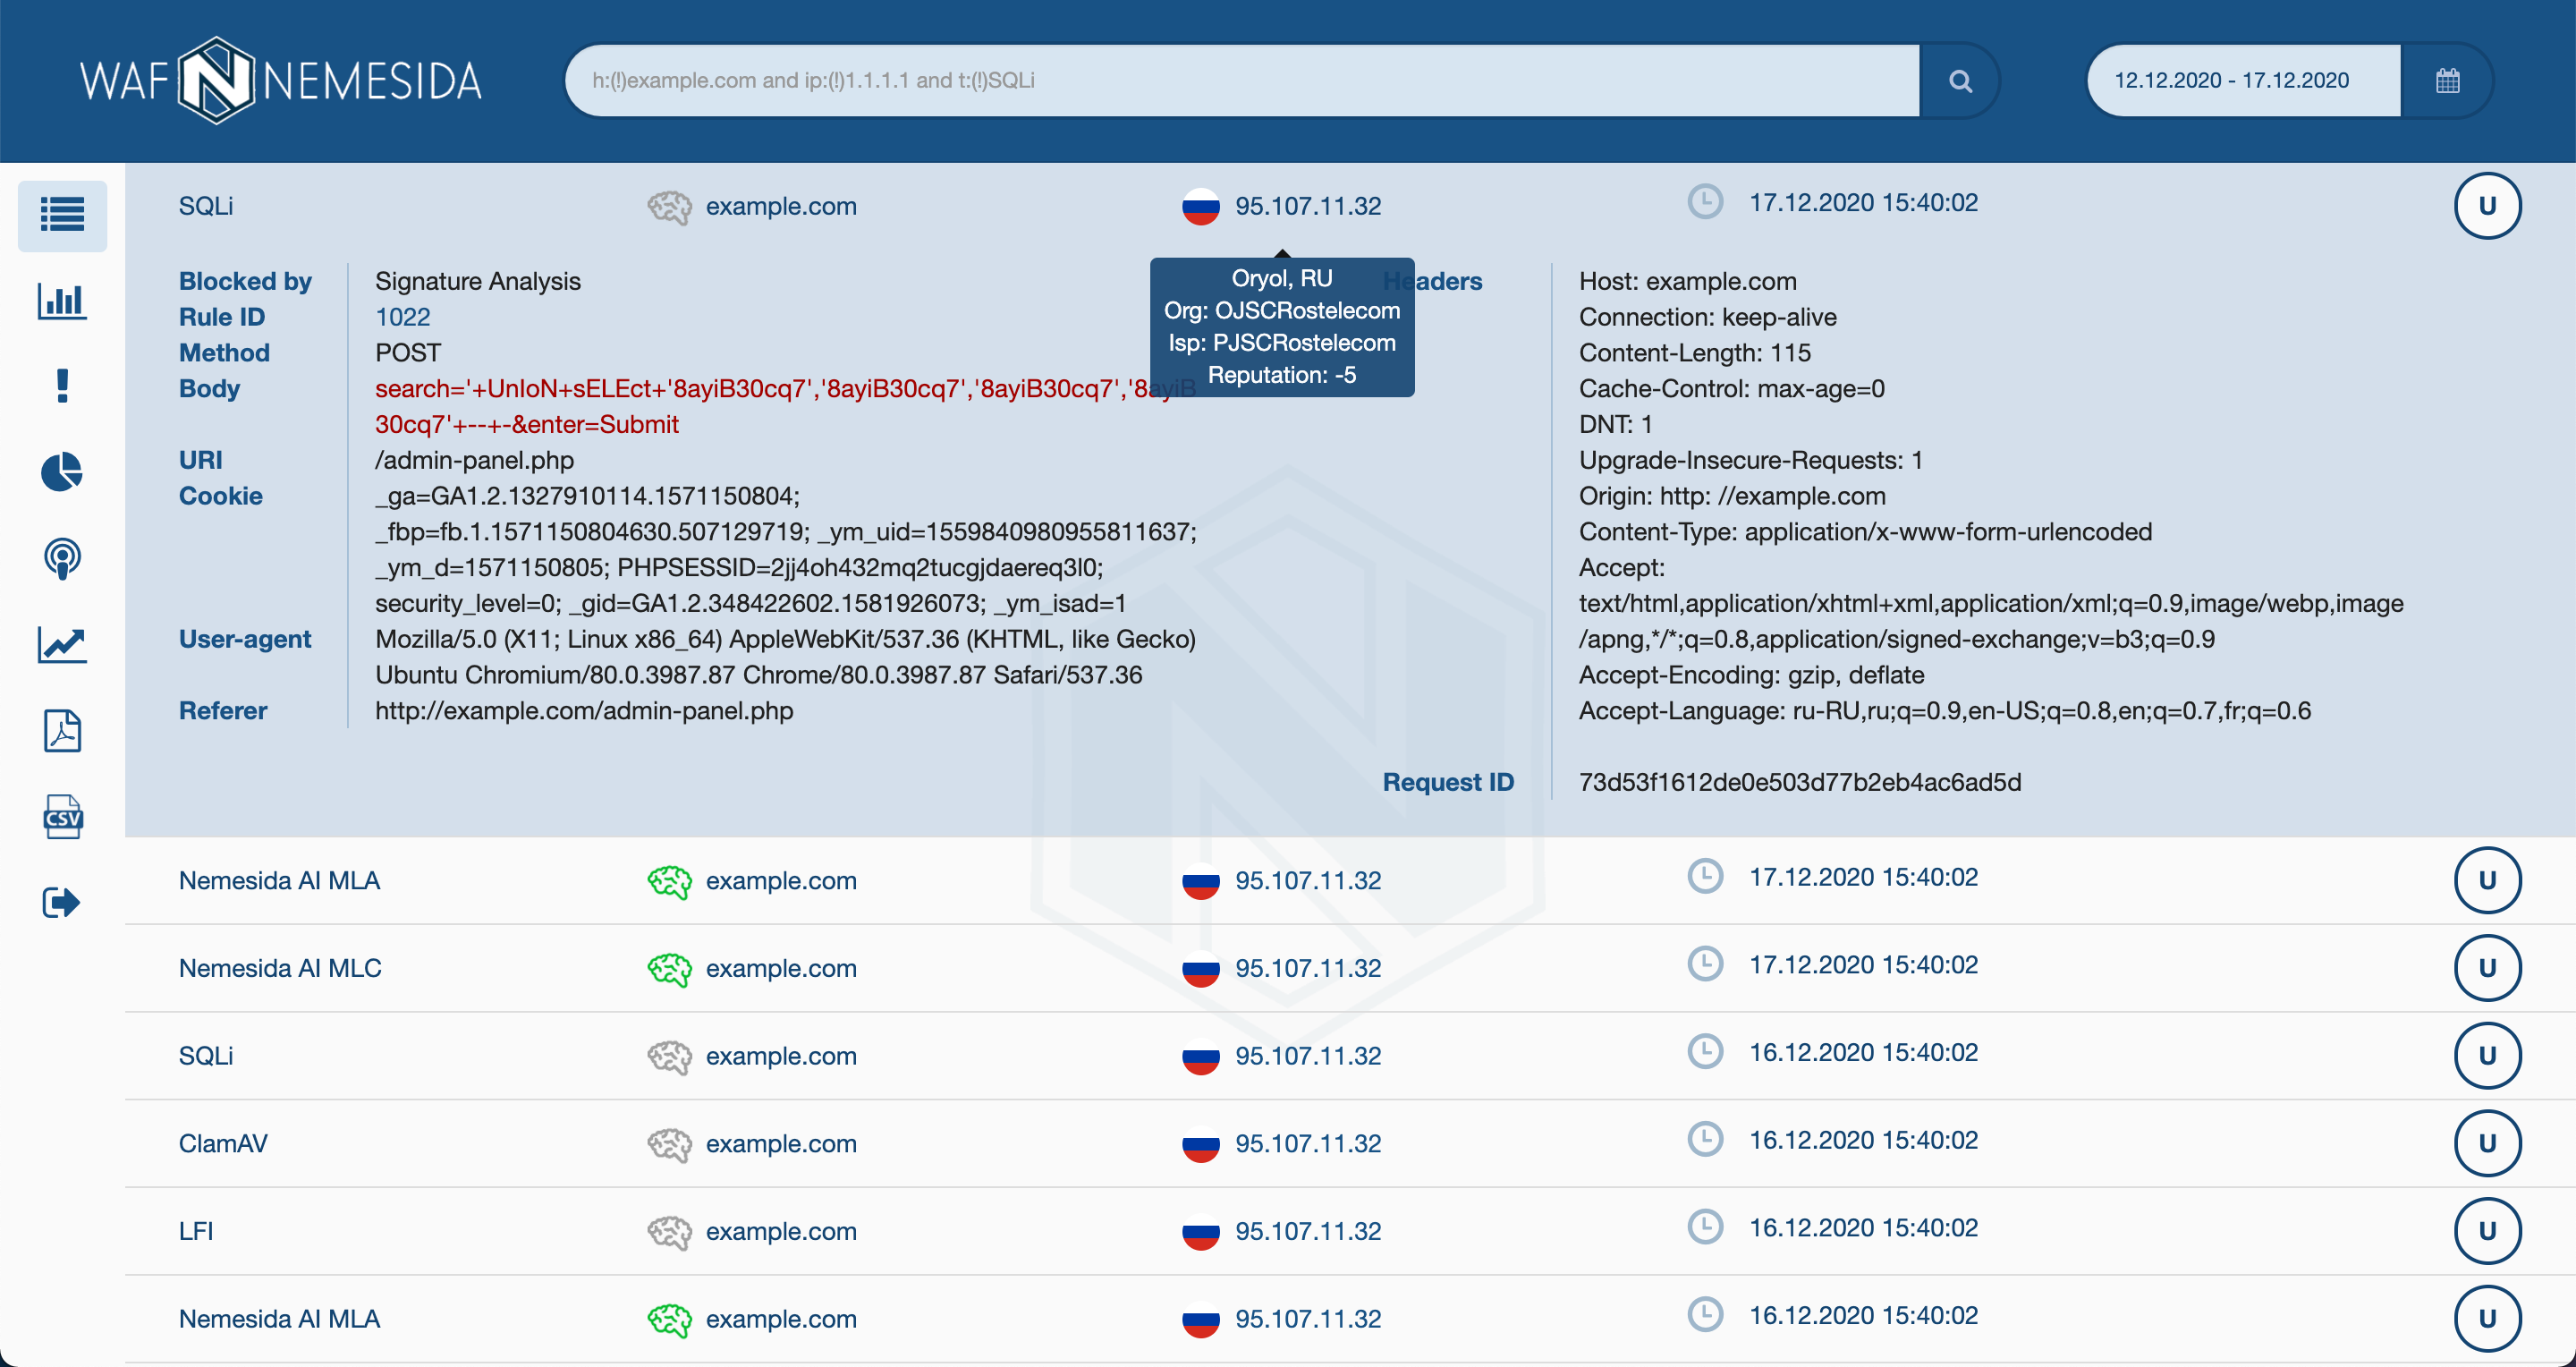
You can monitor the work of Nemesida WAF Free through a browser, so after a short setup of the system, we will get access to the web interface, where information on blocked attacks, reasons for blocking, information about IP addresses, etc. will be available. In addition, sections with summary statistics in the form of graphs, diagrams and data on traffic from the VTS module (if used) will appear.
Demonstration stand: demo.lk.nemesida-security.com (demo@pentestit.ru / pentestit)

Let's proceed with the installation.
Installing Nemesida WAF Free
Despite the fact that the free version is a fork of the full-fledged version, it contains a large set of capabilities for detecting, blocking and visualizing attacks on web applications. By a web application we mean everything that is built on the HTTP protocol: websites, personal accounts, online stores, training sites, APIs and everything else.
In the previous paragraph, I specifically divided the functionality of blocking attacks into detection and blocking, since there are 2 (even three) modes of operation of the product: IDS, IPS and PseudoIDS (LM mode).
IDS Mode
IDS mode allows using WAF on a traffic copy, detecting but not blocking attacks. This mode of operation is useful, for example, for initial start-up or for passive monitoring to avoid any blocking of requests or an increase, albeit negligible, in response time. For the example setup, we will use Nginx for the sending server (although you can use any other, for example, Apache2 or IIS).
Configuring the sending server:
location / {
    mirror /mirror;
    ...
}

location = /mirror {
    internal;
    proxy_pass http://192.168.0.1$request_uri;
}
After making changes and restarting the web server, requests coming to this server will be transmitted to the 192.168.0.1 server with Nemesida WAF installed (its configuration is simple and will be described below). This scheme of work allows you to monitor attacks without blocking them, but at the same time, without affecting the main server.
IPS mode and PseudoIDS
The remaining 2 modes of operation assume the use of WAF "inversely", while in the IPS mode, detected security incidents are blocked, in the PseudoIDS mode they are recorded, but not blocked. The last mode is convenient in that switching between these two modes is done using simple options: the ability to switch to PseudoIDS mode both by the server name (option
nwaf_host_lm
) and by the client's IP address (option
nwaf_ip_lm
).
In general, Nemesida WAF Free provides many parameters for “fine-tuning” the system: flexible functionality for creating your own blocking and exclusion rules, the ability to add a client's IP to the “list of exclusions”, the option to set up a ban for all and for each individual virtual host, etc. ... All of this economy can be controlled through the configuration file in the free version, and in the full-fledged version also through API calls.
Let's go back to the installation procedure. Nemesida WAF is presented in the form of several components:
- Dynamic module for Nginx
- Nemesida WAF API (accepts events from Nemesida WAF and places them in Postgres for subsequent display in the LC or integration with SIEM systems)
- Personal account (web interface for monitoring incidents)
- Nemesida AI machine learning module
- Vulnerability Scanner Nemesida WAF Scanner
- Nemesida WAF Signtest - web interface for managing a machine learning module
In Nemesida WAF Free, we only need the first three - the dynamic module itself, the Nemesida WAF API and the Personal Account. All components are available as installation distributions and allow you to connect Nemesida WAF to an already installed Nginx instance, starting from version 1.12 (Stable, Mainline and Plus versions of Nginx are supported).
Dynamic module Nemesida WAF
For those who are not installing the distribution kit for the first time, the process of installing and running the dynamic module takes about 5-10 minutes. The dynamic Nemesida WAF module can be connected to an already installed Nginx (or compiled from source with its own modules).
Nemesida WAF repositories are available for the following OS: Debian 9/10, Ubuntu 16.04 / 18.04 / 20.04, Centos 7/8. Video instructions for installing and configuring the components for the first time are published on the Youtube channel. We recommend that you familiarize yourself with one of them, but we recommend installing and configuring it according to the documentation on the main site, since some parameters may become outdated, others may be added.
Installing the dynamic module Nemesida WAF (video)
After Nginx is configured, connect the Nemesida WAF repository corresponding to your OS and proceed with the installation. The product is also updated from the repository. Installation instructions are available at: github.com/nemesida-waf/nemesida_waf_free .
Nemesida WAF API and Personal Account
After the dynamic module is installed and launched, it's time to move on to installing the remaining two components: Nemesida WAF API and Personal Account.
The Nemesida WAF API is presented in the form of an API written using Flask and is designed to receive events from Nemesida WAF, Nemesida WAF Scanner and Nemesida AI, and then place these events into the database. PostgreSQL is used as a DBMS. In the free version of Nemesida WAF, only information about blocked requests will be transmitted to the database.
After the Nemesida WAF API is configured and connected to PostgreSQL, it's time to start launching your Personal Account. According to the documentation, we install, configure, perform migration, specify the user and password to enter.
From experience, installing the last two components causes more difficulties (usually some steps are skipped, for example, they forget to migrate or allow connection to Postgres), so for a quick start, we prepared a Virtual Appliance (virtual disk with Debian 10 and Nemesida WAF components, 3GB to unpacking), and also made 2 Docker images : for the dynamic module and for the Nemesida WAF API / Personal Account.
Well, the most boring part is over, now we can check WAF in action.
First hack
To test the operation of an already configured WAF, it is not necessary to remember different attack variations. We have created a test signature that will check if Nemesida WAF is working and if blocked attacks are displayed in the LC. The current set of used signatures can always be viewed at rlinfo.nemesida-security.com .
We send a request (I did it through the console, but it's better to do it through the browser for clarity):
curl --noproxy '*' example.com/nwaftest
or, if you want something closer to reality:
curl --noproxy '*' example.com/?cmd=;+cat+/etc/passwd
In response, we receive a 403 response code:
<html>
<head><title>403 Forbidden</title></head>
<body>
<center><h1>403 Forbidden</h1></center>
<hr><center>nginx/1.18.0</center>
</body>
</html>
And in a few seconds an attack should appear in the LC:
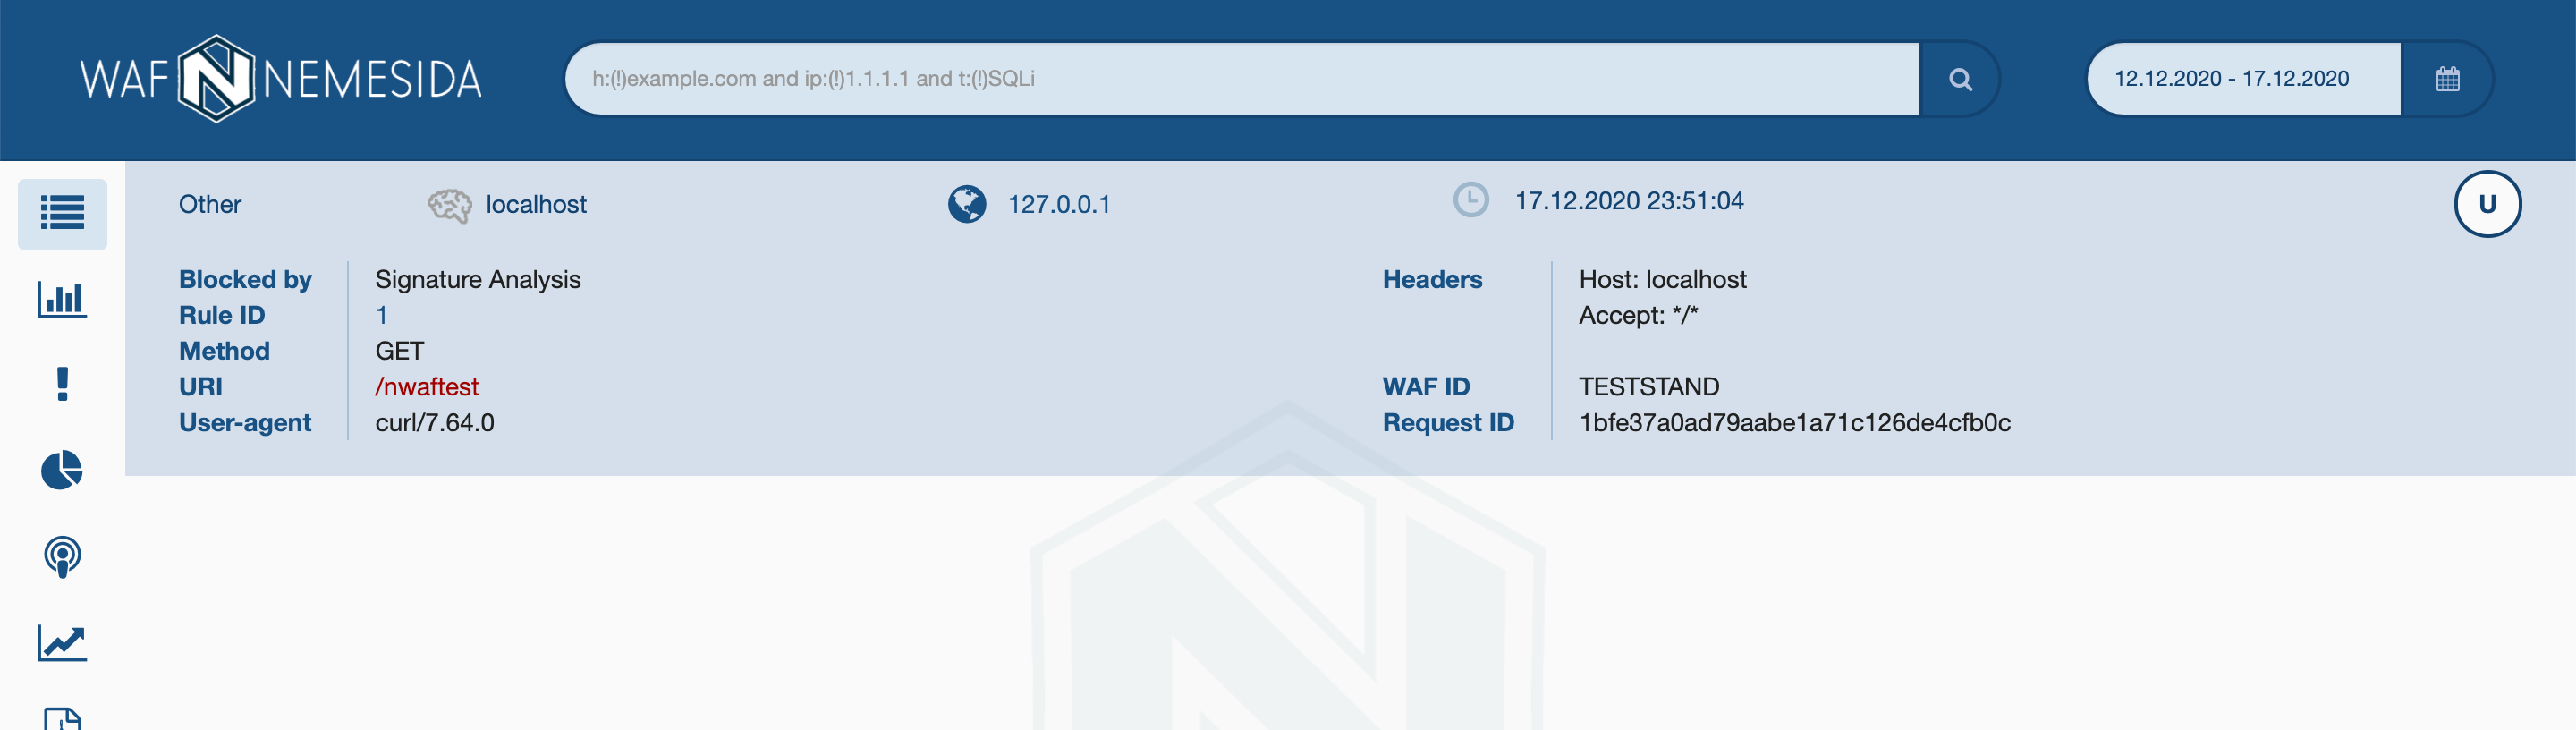
If the request is not blocked - WAF is incorrectly connected or configured (perhaps the address or host is added to WL / LM), if the request was blocked, but there is no information in the LC - check the correctness of the interaction with Nemesida WAF API and LC. In any case, you can always ask a question on the forum .
Custom 403 page
By default, 403 page (page with 403 response code) is unattractive and stingy with information. Nemesida WAF in conjunction with Nginx allows you to make it beautiful and more informative.
For your server to serve such a page, you must:
1. Create a configuration file for custom pages (for example, in
/etc/nginx/snippets/custom_pages.conf
);
Add required parameters to Nginx
— 222 403 405
;
( example.com/403.html — ), ID ($request_id), ($host), , IP ($remote_addr) ( ) Nemesida WAF ($nwaf_block_type). Nemesida WAF , , 1 2 — , 3 — , 4 — ..

## Error pages
error_page      403 405 = 222 /403.html;

## Locations
location /403.html {

        internal;
        root /var/www/custom_pages/;
        proxy_no_cache 1;
        proxy_cache_bypass 1;

        add_header X-Request-ID $request_id always;
        add_header Host $host always;
        add_header X-Remote-IP $remote_addr always;
        add_header NemesidaWAF-BT $nwaf_block_type always;

}
Description:
error_page 403 405 = 222 /403.html;
— 222 403 405
/403.html
;
/403.html
( example.com/403.html — ), ID ($request_id), ($host), , IP ($remote_addr) ( ) Nemesida WAF ($nwaf_block_type). Nemesida WAF , , 1 2 — , 3 — , 4 — ..
2. Connect the created file:
Connect the created file to the Nginx configuration
(,
):
/etc/nginx/conf.d/example.com.conf
):
server {
        ...
        ## Custom pages
        include                 snippets/custom_pages.conf;
       ....
}
3. Create a custom page (for example
/var/www/custom_pages/403.html
) with the following content (for example):
Example of a custom 403 page
<!DOCTYPE html PUBLIC "-//W3C//DTD XHTML 1.0 Transitional//EN" "http://www.w3.org/TR/xhtml1/DTD/xhtml1-transitional.dtd">
<html xmlns="http://www.w3.org/1999/xhtml" xml:lang="ru" lang="ru">

<head>
    <meta http-equiv="Content-Type" content="text/html; charset=UTF-8"/>
    <meta http-equiv="Cache-Control" content="no-cache">
    <meta http-equiv="refresh" content="7; URL=/" />
    <style type="text/css">
        .error {color:#000; font-family:Arial, sans-serif; text-align: center; position: absolute; top: 50%; left: 50%; -moz-transform: translateX(-50%) translateY(-50%); -webkit-transform: translateX(-50%) translateY(-50%); transform: translateX(-50%) translateY(-50%);}
        .error-fon {font-weight:bold; color:#d0e3f7;}
        .error-text-top {font-size:16px; color:#434141}
        hr { display: block; height: 10px; border: 0; border-top: 1px solid #ccc; margin: 1em 0; padding: 0; }
    </style>
    <title>403 Access denied</title>
</head>
<body>
<div class="error">
    <div class="error-fon">
        <font style="font-size:240px;">403</font>
        <br>
        <font style="font-size:40px;">ACCESS IS BLOCKED</font>
    </div>
    <br>
    <div class="error-text-wrap">
        <div class="error-text-top">
            <p>
            <hr>
            <p style="text-align: justify;">

              Suspicious activity. If the request is blocked by mistake, please email us at <a href="mailto:blocked@example.com">blocked@example.com</a> and  be sure to include technical information below (domain, IP, request ID), or try again in 5 minutes.

              <br><br>

               .     , ,    <a href="mailto:blocked@example.com">blocked@example.com</a>,      (domain, IP, request ID),     5 .

            </p>
	    <hr>
            <table style="text-align: left; margin: auto">
                <tr>
                    <td>
                        <code style="font-size:14px;"> Domain:</code>
                    </td>
                    <td>
                        <code style="font-size:14px;"> <span id="domain">-</span> </code>
                    </td>
                </tr>
                <tr>
                    <td>
                        <code style="font-size:14px;"> IP address:</code>
                    </td>
                    <td>
                        <code style="font-size:14px;"> <span id="ip">-</span> </code>
                    </td>
                </tr>
                <tr>
                    <td>
                        <code style="font-size:14px;"> Request ID:</code>
                    </td>
                    <td>
                        <code style="font-size:14px;"> <span id="id">-</span> </code>
                    </td>
                </tr>
            </table>
            </p>
        </div>
        <script type="application/javascript">
            function replace() {
                window.location.replace('/');
            }
            const req = new XMLHttpRequest();
            req.open('GET', document.location, false);
            req.send(null);
            const req_id = req.getResponseHeader('x-request-id');
            const req_domain = req.getResponseHeader('host');
            let req_ip = req.getResponseHeader('x-remote-ip');
            const req_bt = req.getResponseHeader('nemesidawaf-bt');
            if (req_bt == 6)
            {
                req_ip = req_ip  + " (banned)";
            }
            if (req_bt ==7)
            {
                req_ip = req_ip  + " (banned, bruteforce)";
            }
            document.getElementById('domain').innerHTML = req_domain;
            document.getElementById('ip').innerHTML = req_ip;
            document.getElementById('id').innerHTML = req_id;
            if (req_bt != 6 & req_bt !=7)
            {
                setTimeout(replace,3000);
            }
        </script>
    </div>
</div>
</body>
</html>
After restarting Nginx (with Nemesida WAF installed), all pages with response codes 403 and 405 will look like this:

In this case, the custom page will be refreshed every 7 seconds, and if the client's IP is not banned, the site's root page will return.
Automatic ban
You've probably heard or even use automatic ban systems like Fail2ban and you know their pros and cons. Nemesida WAF uses a built-in and easy-to-configure ban mechanism that allows you to set an arbitrary blocking period for virtual server hosts. Blocking occurs by IP address, and the following options are available for control:
- The number of IP attacks that lead to blocking;
- Blocking period;
- The virtual host to which the attacks are directed (optional).
The automatic blocking parameter is controlled by the parameter
nwaf_limit
available in the file
/etc/nginx/nwaf/conf/global/nwaf.conf
. The use of this parameter will be useful in cases when the site is being scanned for vulnerabilities or when trying to promote a detected vulnerability.
While lists
WAF's work is based on the principle of analyzing requests and responses coming to the server in cases where they contain signs of an attack or anomalies. The use of machine learning algorithms, coupled with improved normalization technology in the full version of Nemesida WAF, allows detecting such attacks accurately and with an ultra-minimum number of false positives (about 0.01%), but in the free version to reduce the number of false positives, we run into the limitations of the architecture signature analysis. Thus, the free version has more false positives, and you have to use exclusion lists (or "white lists") to solve this problem. Creation of exclusion rules is also available in Nemesida WAF.
Most often, false positives appear when the administrator / moderator of a web resource makes an update or change through the web interface, transmitting constructions that are atypical for the user in the request body: A legitimate request will be blocked because it contains a function entry , while such requests are not typical for ordinary visitors web resource. In cases where application administrators cannot interact with it bypassing WAF, you can add the IP address from which they access the resource to the list of exceptions, or switch the address to PseudoIDS mode (option ) to capture events without blocking. But you should always be careful enough with such actions.
...


     $html = curl_exec($ch);


     curl_close($ch);


     return json_decode($html,true);


     ...
json_decode()
nwaf_ip_lm
By the way, Nemesida WAF allows you to add not only IP addresses, but also subnets, if necessary.
Conclusion
Regardless of how well the code is written in your opinion, it uses input filtering functions and special frameworks like HTML Purifier, designed to remove if not all malicious code, then most of it, you need to use WAF to increase the level of security.
If you intend to use WAF for the first time, or you are tired of endless addition of exclusion rules, we recommend you try Nemesida WAF Free. For professional use (blocking complex attacks, brute force attacks, SMS flooding; searching for vulnerabilities; having a virtual patching system, etc.), a full version of Nemesida WAF with a machine learning module and a vulnerability scanner is required. Nevertheless, for most non-targeted attacks and bulk scans, Nemesida WAF Free will be a good and convenient tool.
In the article, I tried to reveal the situations that most often arise when using solutions of this class. I will be glad if you remember more in the comments.