
This article assumes that you are using Active Directory to authenticate users, Single Sign-On is performed using Kerberos, and users in Zimbra OSE correspond to those entered in AD. Recall that we previously wrote about how to set up automatic user creation in Zimbra OSE from AD.
Initial data: The server with Zimbra 9 is located on the madegirah.ru domain, it uses the AD authentication type. The AD server is located at MADEGIRAH.LOCAL.
The principle of configuring SSO in this case will be quite simple. Within the framework of it, we:
- Let's create a special user, the so-called "ticket taker", which will issue tickets to users for authentication
- Let's create a Keytab file in Kerberos
- Let's configure the SPNEGO utility and the Zimbra OSE server itself to work with Kerberos
- Let's configure browsers and email clients to work with SSO.
Please note that it is necessary to back up all files when making any changes to them.
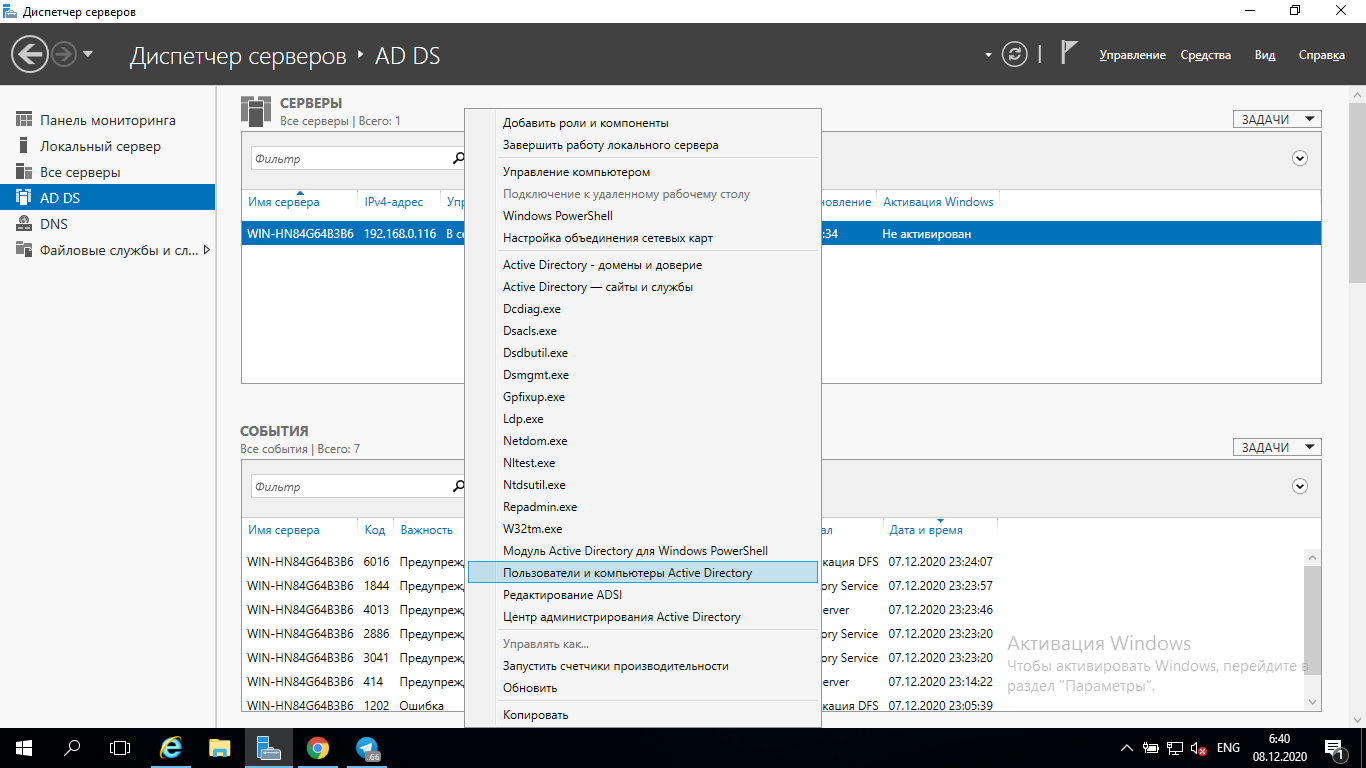
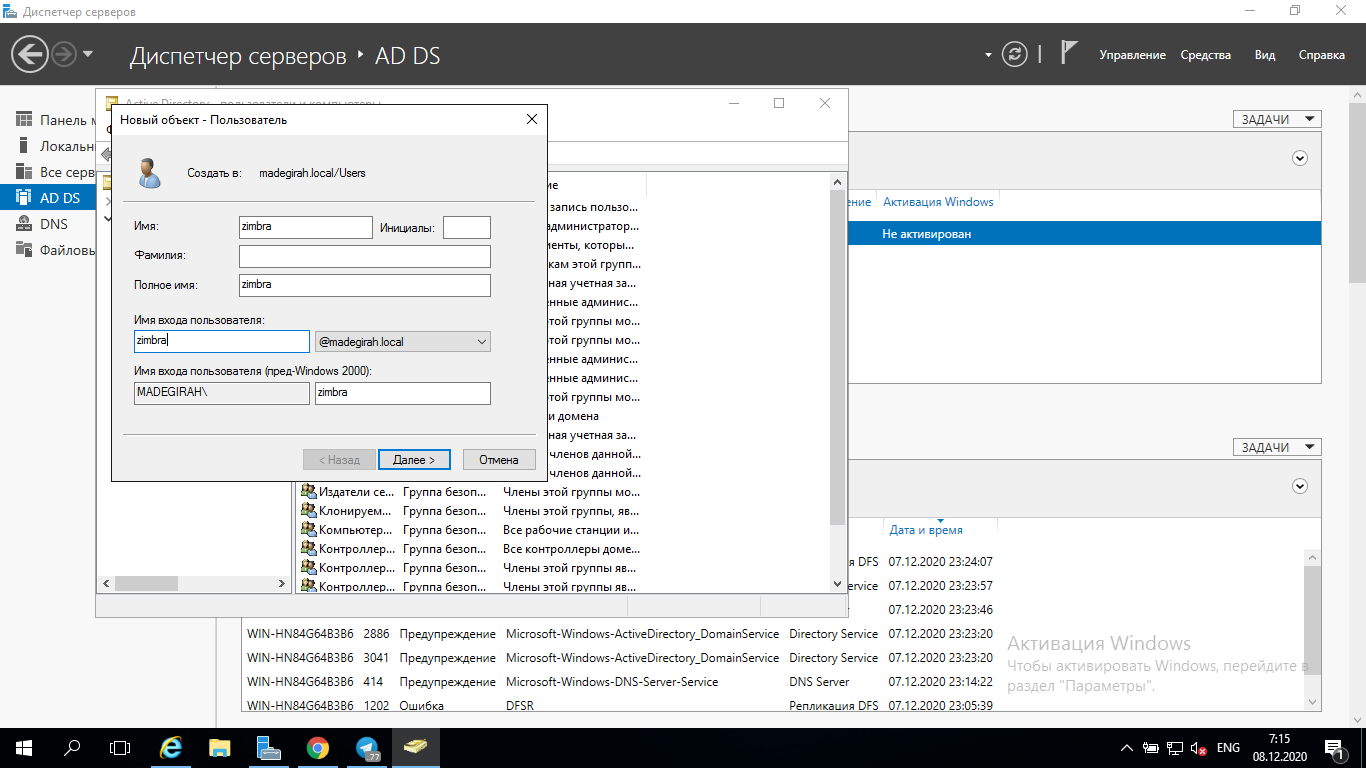
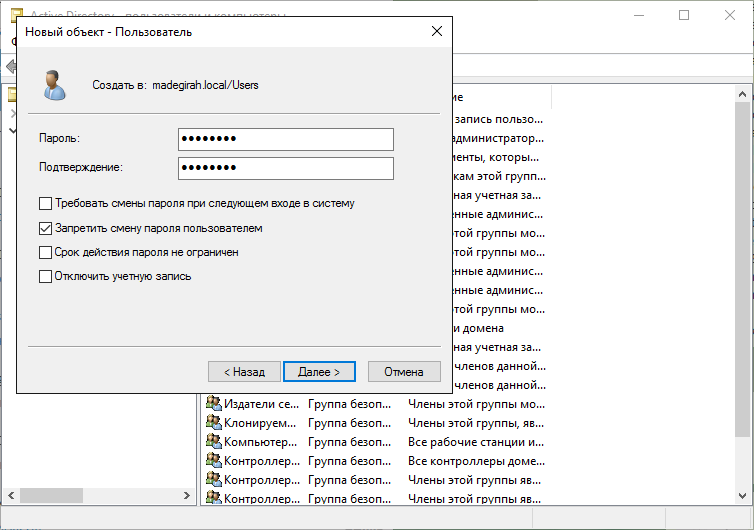
First of all, we need to create a new zimbra account in AD and prevent it from changing the password.
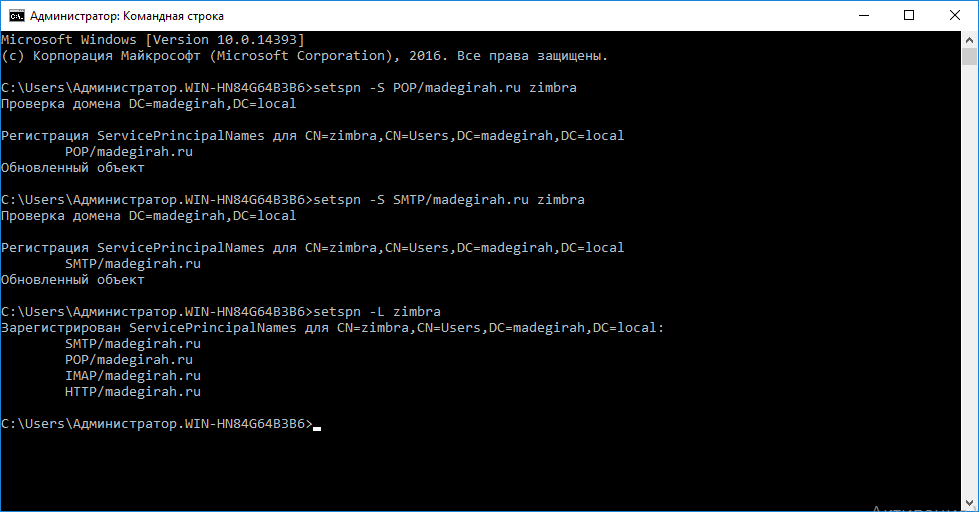
After that, on the domain controller, create a series of SPN records for it. In our case, these will be principals for the http, pop, imap and smtp protocols. To add them to your zimbra account, you need to run the commands one by one
- setspn -S HTTP / madegirah.ru zimbra
- setspn -S POP / madegirah.ru zimbra
- setspn -S IMAP / madegirah.ru zimbra
- setspn -S SMTP / madegirah.ru zimbra
After that, check that all required principals have been added to the user using the setspn –L zimbra command.
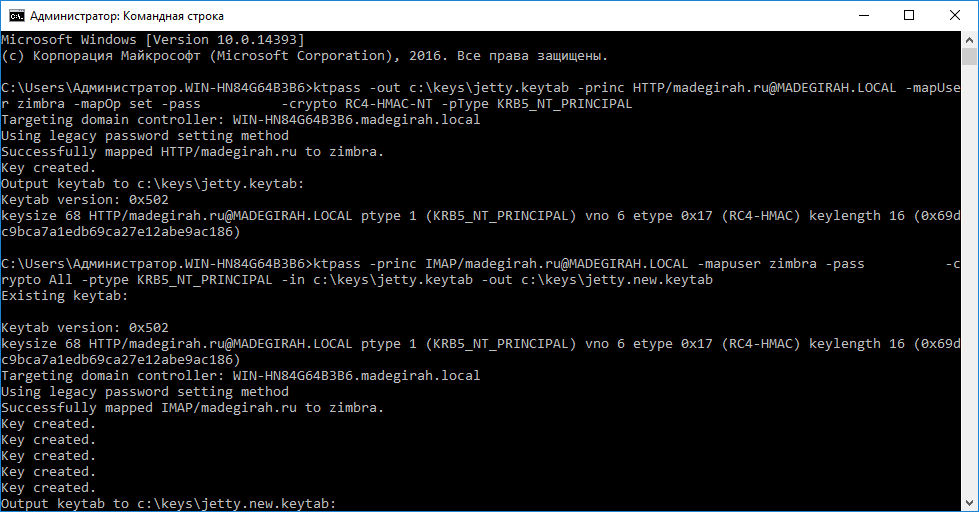
After that, create a C: \ keys folder on the domain controller, into which we will add the keytab files generated using Kerberos. Let's generate our first keytab using this command:
ktpass -out c: \ keys \ jetty.keytab -princ HTTP/madegirah.ru@MADEGIRAH.LOCAL -mapUser zimbra -mapOp set -pass ******** -crypto RC4 -HMAC-NT -pType KRB5_NT_PRINCIPAL Creates a single
principal keytab. Now we need to add 3 more principals to it. This is done using the following commands:
- ktpass -princ IMAP/madegirah.ru@MADEGIRAH.LOCAL -mapuser zimbra -pass ******** -crypto All -ptype KRB5_NT_PRINCIPAL -in c: \ keys \ jetty.keytab -out c: \ keys \ jetty. new.keytab
- ktpass -princ POP/madegirah.ru@MADEGIRAH.LOCAL -mapuser zimbra -pass ******** -crypto All -ptype KRB5_NT_PRINCIPAL -in c:\keys\jetty.new.keytab -out c:\keys\jetty.new1.keytab
- ktpass -princ SMTP/madegirah.ru@MADEGIRAH.LOCAL -mapuser zimbra -pass ******** -crypto All -ptype KRB5_NT_PRINCIPAL -in c:\keys\jetty.new1.keytab -out c:\keys\jetty.new2.keytab
As a result, the file c: \ keys \ jetty.new2.keytab will contain all the required principals. Let's delete all keytabs obtained during the execution of the instruction, except for jetty.new2.keytab. We will rename it jetty.keytab and copy it to the server with Zimbra OSE 9 in the / opt / zimbra / data / mailboxd / spnego / and / opt / zimbra / jetty / folders. Change the access rights to the keytab file using the
chown zimbra commands: zimbra /opt/zimbra/data/mailboxd/spnego/jetty.keytab
chown zimbra: zimbra /opt/zimbra/jetty/jetty.keytab
Now let's start configuring the built-in Zimbra Collaboration Suite of the SPNEGO utility, which will work with the previously created .keytab file. You can configure SPNEGO using the following commands:
sudo su - zimbra
zmprov mcf zimbraSpnegoAuthEnabled TRUE
mcf zimbraSpnegoAuthRealm MADEGIRAH.LOCAL zmprov
zmprov ms madegirah.ru zimbraSpnegoAuthTargetName the HTTP / madegirah.ru
zmprov ms madegirah.ru zimbraSpnegoAuthPrincipal the HTTP / madegirah.ru
zmprov ms madegirah.ru zimbraImapSaslGssapiEnabled to TRUE
zmprov ms madegirah.ru zimbraPop3SaslGssapiEnabled to TRUE
zmprov md madegirah.ru zimbraAuthKerberos5Realm MADEGIRAH. LOCAL
zmprov md madegirah.ru zimbraWebClientLoginURL '/ service / spnego'
zmprov md madegirah.ru zimbraWebClientLogoutURL '../?sso=1'
We draw your attention to the fact that SPNEGO tincture is global, which means that all domains on your server Zimbra must use the same Active Directory for authentication.
The next step is to convert the settings file /opt/zimbra/jetty/etc/krb5.ini into the following form:
[libdefaults]
default_realm = MADEGIRAH.local
dns_lookup_realm = no
dns_lookup_kdc = no
kdc_timesync = 1
ticket_lifetime = 24h
default_keytab_name = FILE:/opt/zimbra/data/mailboxd/spnego/jetty.keytab
default_tgs_enctypes = arcfour-rc4-md5 rc4-hmac des-cbc-crc des-cbc-md5
default_tkt_enctypes = arcfour-rc4-md5 rc4-hmac des-cbc-crc des-cbc-md5
permitted_enctypes = arcfour-rc4-md5 rc4-hmac des-cbc-crc des-cbc-md5
[realms]
MADEGIRAH.local = {
kdc = DC.MADEGIRAH.LOCAL
admin_server = DC.MADEGIRAH.LOCAL
default_domain = MADEGIRAH.LOCAL
}
[domain_realm]
madegirah.local = MADEGIRAH.LOCAL
.madegirah.local = MADEGIRAH.LOCAL
.local = MADEGIRAH.LOCAL
[appdefaults]
autologin = true
forwardable=true
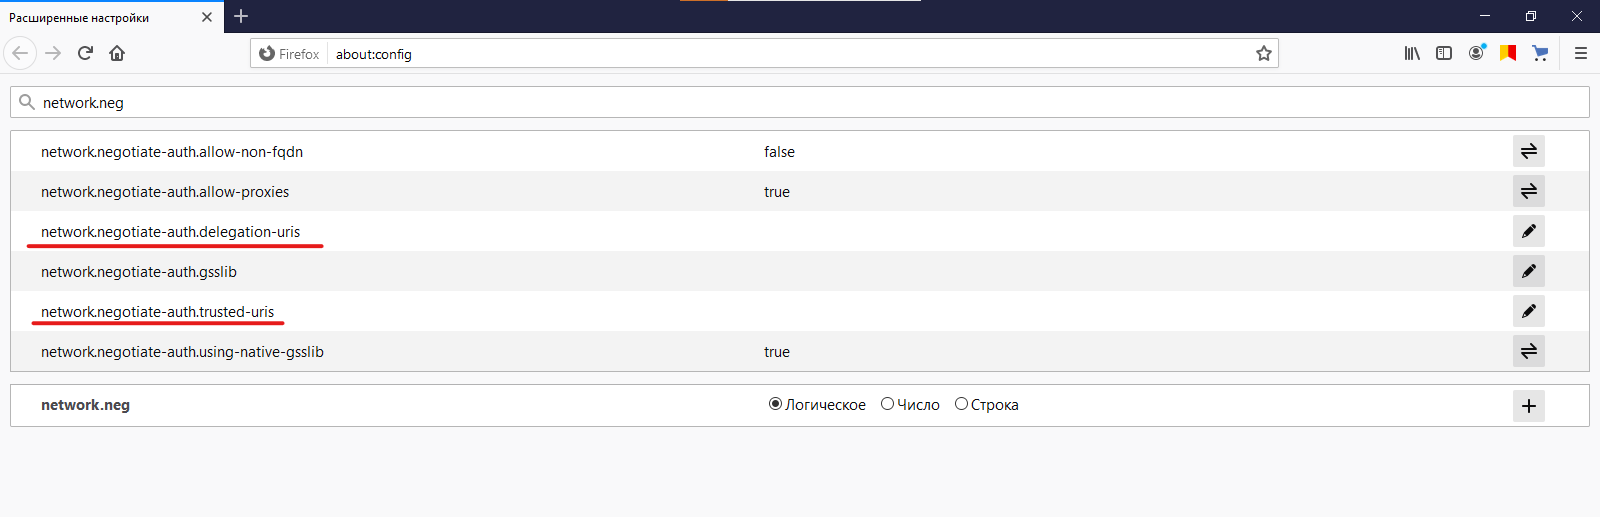
This completes the configuration of the server side and all that remains is to make some changes to the settings on the user side. In particular, browsers need to be configured to work with SPNEGO. For Firefox, enter about: config in the address bar and enter network.neg in the search box. In the displayed fields containing the word uris in the name, specify the value madegirah.ru, or
https://
.
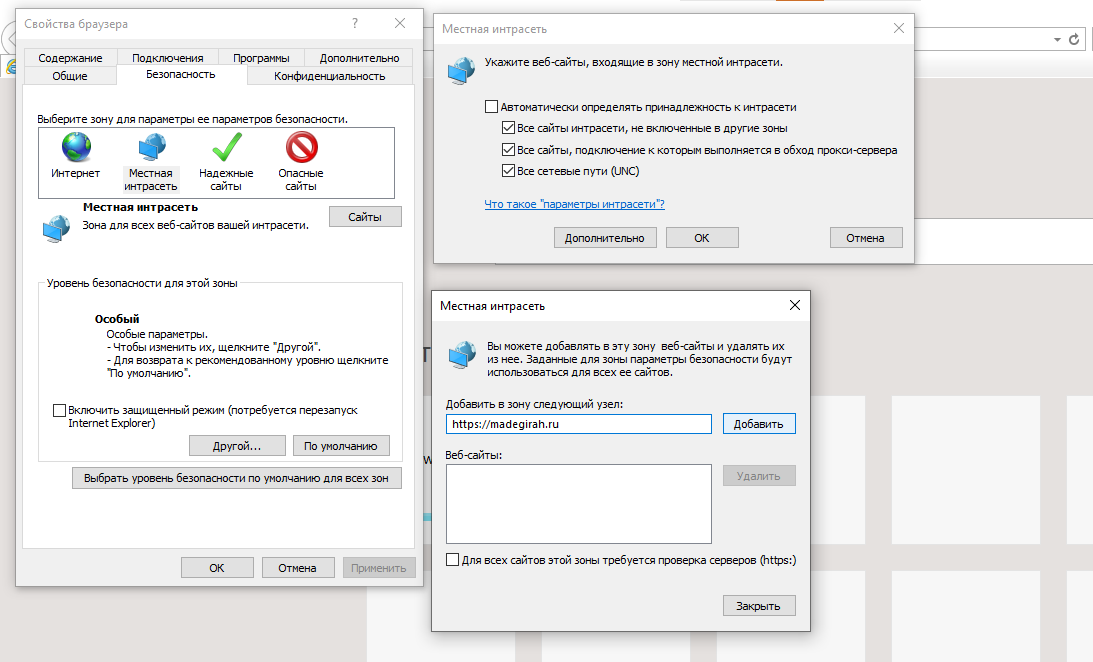
In the case of Internet Explorer, add madegirah.ru to the local intranet . You can also do this through group policies. Google Chrome picks up Internet Explorer settings.
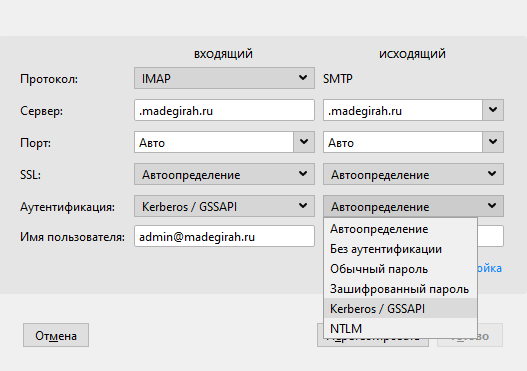
For SSO authentication in the Thunderbird mail client, you must specify the GSSAPI authentication type when setting up your account. It is in order for this to work that we previously added principals for IMAP, POP, and SMTP. Please note that Outlook does not support this type of authentication when using POP / IMAP and SMTP due to client restrictions.
Another unpleasant nuance can be a warning about an unsafe page when using a self-signed certificate in Zimbra OSE. This nuance is not critical, however, the regularly appearing warning contradicts the very principle of the convenience of Single Sign-On technology. In order to remove it, you need to install the Zimbra OSE certificate on the target machine.
In order to do this, the following commands are required on the Zimbra server:
sudo su
cd / opt / zimbra / ssl / zimbra / ca
openssl x509 -in ca.pem -outform DER -out ~ / zimbra.cer
After that, the received certificate must be transferred on the target machine and double-click on it. In the window that opens, you need to select "Install certificate" and import it in the Certificate Import Wizard. The only caveat when installing it is that when choosing a store for a certificate, you need to place it in the "Trusted Root Certification Authorities" store. In addition, you can install this certificate through Group Policy.
After this certificate is specified as trusted, the warning when entering the Zimbra OSE web client and when using Thunderbird will stop appearing.