
RPA is a form of business automation in which artificial intelligence performs repetitive tasks in order to reduce the load on real people and free up time to solve other tasks that require human attention. The essence of RPA is that you record a specific sequence of actions or operations that will be performed by an automated process in the future. For example, this can be automatic extraction and transmission of key information from received letters or documents to various services, performing a set of actions in a browser window, launching applications and transferring certain parameters to them. All these actions can be carried out completely without human participation, it is enough just to correctly train the RPA model.
Within the line of Microsoft 365 services, there is Power Automate, which allows you to create data interaction flows using connectors to a large number of sources. You can read more about this service in one of my previous articles here and here... In most of the latest updates to this service, Microsoft places considerable emphasis on robotization capabilities, in particular, a separate subtype of Power Automate flows called UI Flows is actively developing. This subtype of streams allows you to record user actions in a browser window and then play them back under certain conditions. But the matter is not limited only to UI Flows, and relatively recently the Power Automate Desktop service was released, which is a client application installed on a working machine. With Power Automate Desktop, you can record and replay many activities that are no longer associated with the web interface of various sites, but with client applications on the server. Automating repetitive actions is now even easier and more convenient.
How do I install Power Automate Desktop?
Go to the Power Automate service site and in the upper right corner we find the "Installation" item.
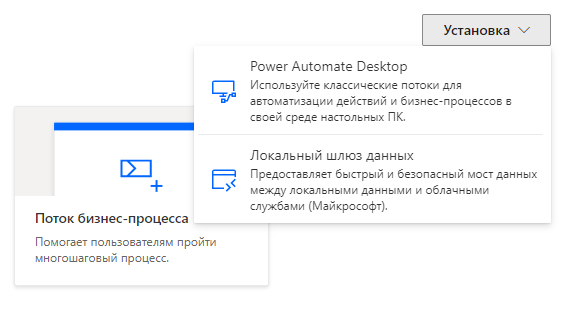
We select Power Automate Desktop, download and run the installation of the application. The installation itself is not difficult. We agree with the main points and click "Install".

After installation, we will be prompted to install additional Power Automate extensions for Chrome, Edge and Firefox browsers and proceed to launch the Power Automate Desktop application.
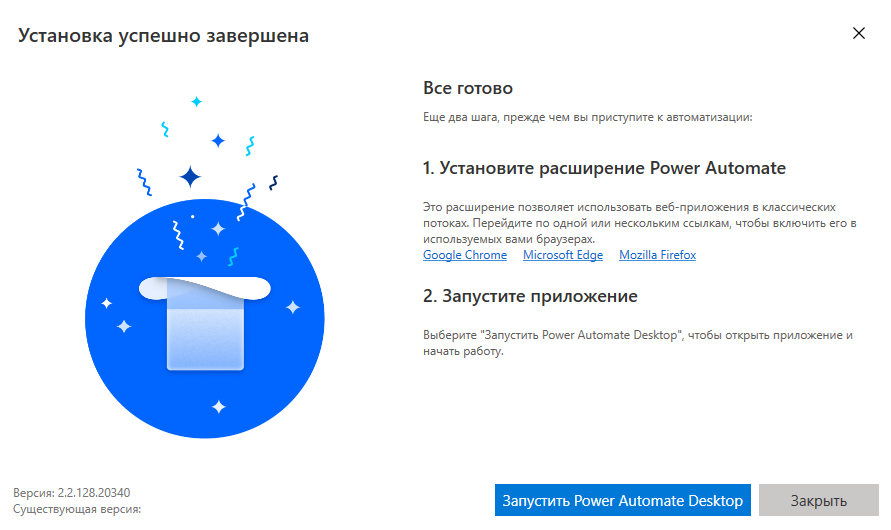
After starting the application, you need to specify an account to connect to Microsoft 365 and after successful authorization, you can proceed to create a new Power Automate Desktop flow.
How do I use Power Automate Desktop?
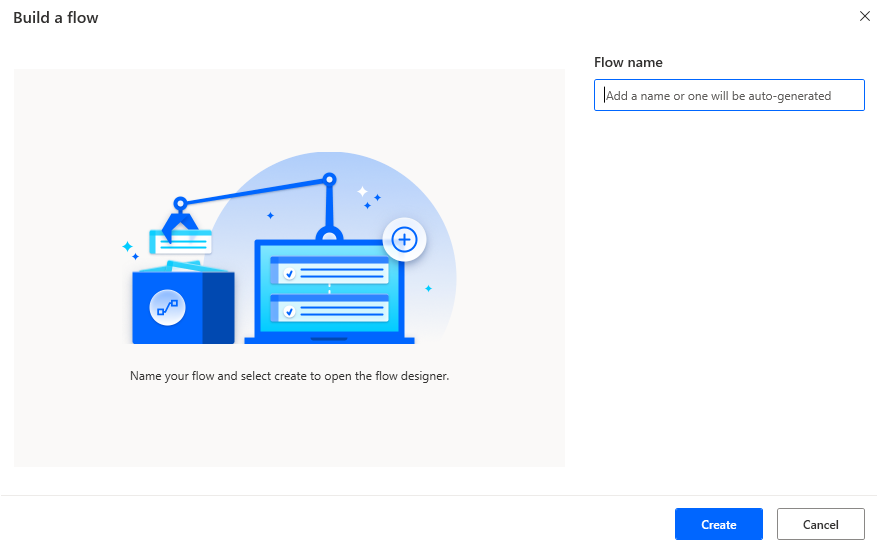
Let's try to create a new stream and see what opportunities are available to us. Create a flow named "Hello Flow".

After creating a new stream, a designer opens, which is visually divided into 4 main areas:
- Panel with available actions for using them in process automation
- Tape with actions to save, play and record actions within a stream
- Stream variables section
- The main canvas for placing actions
Open the "Message boxes" section, select the "Display Message" action and place it on the canvas, after which the settings window will automatically open. We write the title and text of the message.
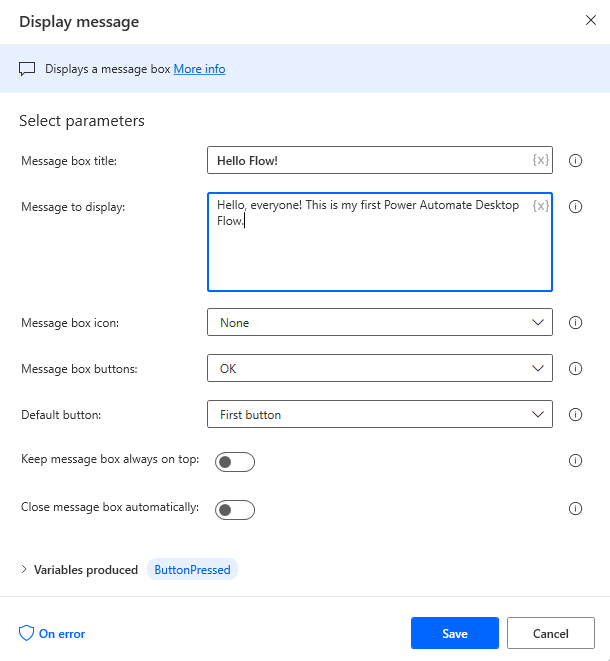
We save the action, save the flow, and press the execute button. Let's see what happened. Everything seems to be fine.

Conceptually, everything is similar to cloud-based Power Automate: there is a set of actions that must be placed on the canvas and configured to run. Let's try something a little more complicated and run an application and record the actions inside it.
Select the "Run application" action from the "System" section and place it on the canvas. We indicate the path to the application. Let it be a Windows calculator. We do not specify additional settings, we do not pass arguments.
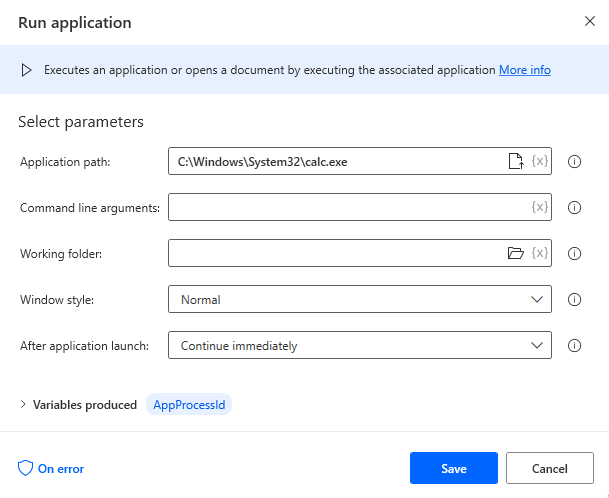
We start the stream. The calculator has started successfully.

Do not close the calculator, select an action from the "UI Automation" section - "Click UI element in window" and place it on the canvas after launching the application.
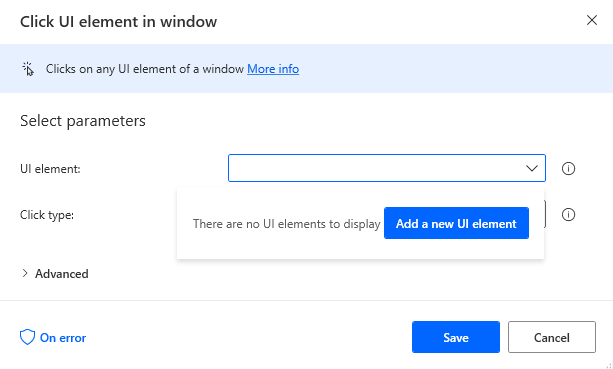
Select "Add a new UI element" and go to the open calculator application. We need to record the click on the buttons. Recording is performed when the Ctrl button on the keyboard is pressed. Let's record the click on number 2. Save the recorded action. Please note that you can simulate not only the left mouse button, but also the right, double click, and so on.
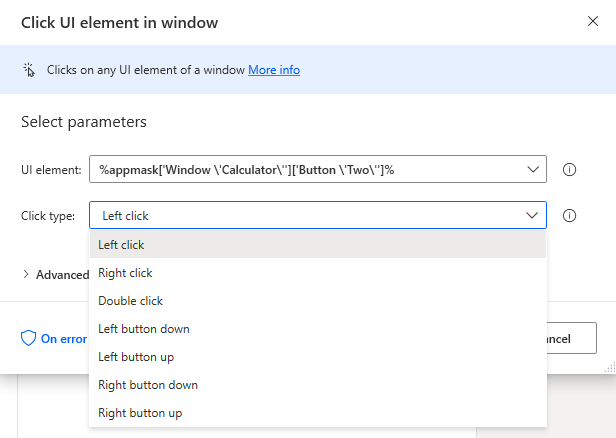
Now add a few more "Click UI element in window" actions to record button clicks. We need to get a click on the "2 + 2 =" buttons to get the result 4. So we will have 4 click actions.
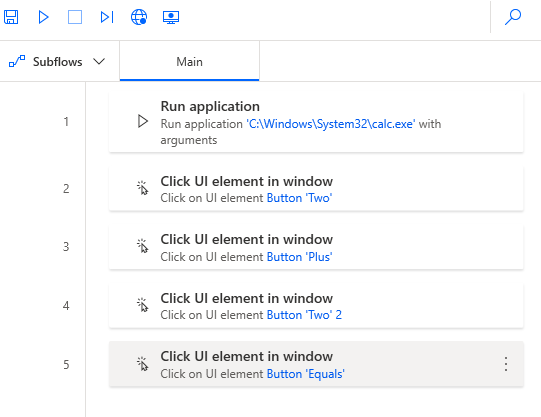
We save the stream and send it for execution.

Everything worked out, we "robotized" the calculation of a simple formula on a calculator.
Now let's do another scenario. When starting the cloud Power Automate flow, we will request input parameters and forward them to the “ground” Power Automate Desktop flow, which in turn will write them to an Excel file located in a separate folder on the hard disk. Let's take a 2ndfl help request as an example.
First, let's create a few variables in the Power Automate Desktop flow.

Let's make 4 variables - initiator mail, number of copies, year and additional information.

Let's create a simple Excel file that we will fill with a stream. There are 5 columns in the table.

Now go to the cloud Power Automate and install an on-premises data gateway between the ground and the cloud.
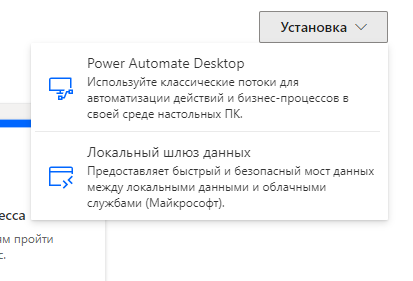
Install and configure the gateway, and then create an instant custom Power Automate flow, launched by the button with the Power Automate Desktop flow start cube.

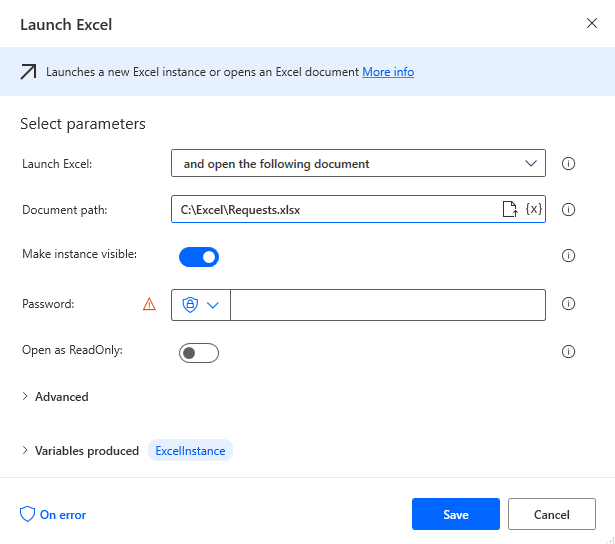
The cloud stream is ready. Now there is a bit of customization for the Power Automate Desktop ground flow. Add the action of launching the Excel file - "Launch Excel" and write the path to the file.
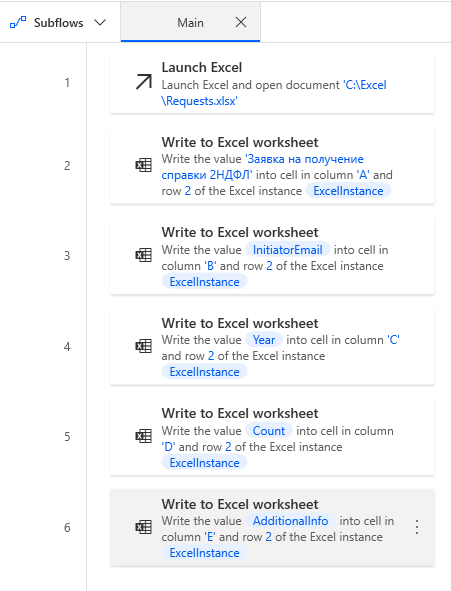
Now we add a few “Write to Excel worksheet” actions to populate the Excel file and specify the input variables that we define in the Power Automate cloud flow.
Go back to the Power Automate cloud stream and launch it. We specify the input parameters.

The result is not long in coming. Everything works perfectly.

In total, Power Automate Desktop is a client application integrated through an on-premises data gateway with the Power Automate cloud service. Power Automate Desktop lets you robotize many scenarios, from recording mouse clicks on objects, to creating accounts in Active Directory, submitting tickets to HelpDesk, interacting with Azure service components, and accessing web services. Almost any scenario that needs to be robotized is supported by the power of Power Automate Desktop. And due to the available options for collaboration with cloud services, the enormous potential of this application is revealed. Try installing Power Automate Desktop and explore its capabilities by automating your routine tasks as an example. I am sure that at leastsome of them can be transferred to the shoulders of the "robot". In the following articles, we will explore with you even more capabilities of Microsoft 365 and Azure services. Thank you for your attention, I hope it was interesting!