
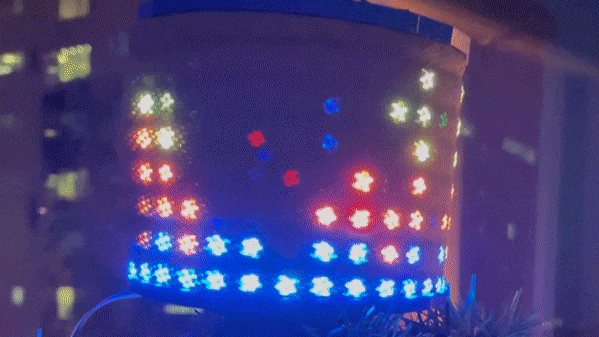
Under the cut - a gif with a demonstration of the work of this thing.
The basis of the design is the NeoPixel 32x8 LED flexible strip, Raspberry Pi and good mood. Well, yes, you need some Python code.
What you need to work
- Raspberry Pi 3, Raspberry Pi 4 or Raspberry Pi Zero W with GPIO connector.
- Power supply, mouse, monitor, keyboard and HDMI cable for Raspberry Pi
- Flexible Strip 32x8 NeoPixel RGB LED Matrix
- Jumper set (M-to-F, M-to-M and F-to-F)
- 5V power supply
- Capacitor 1000 µF
- You can also take a strip of fabric to diffuse the light of the LED strip.
- 3D printed base for the entire structure.
Part 1. Preparation of RGB-matrix
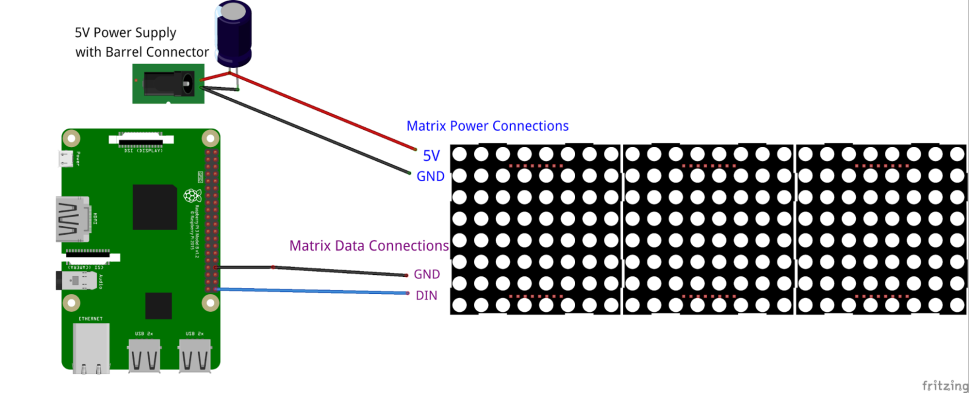
At this point, you will need to solder a pair of pins and use the sample code from Adafruit's NeoPixel Uberguide . For our project, we need two power sources - for the "raspberry" and the LED strip. For the latter, you will need to connect not only power, but also data. Everything is simple here.
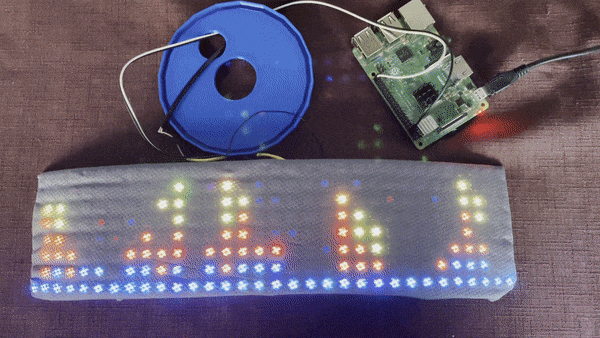
If desired, you can add another strip of fabric to diffuse the bright LED light. We
connect the data
Take any "ground" from the "raspberry" and connect it to the GND data line of the LED strip.

We connect the power supply
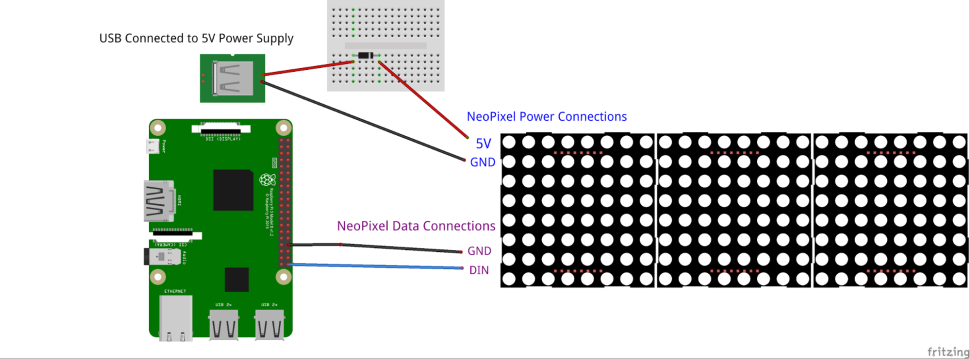
This can be done either using a regular cable, according to the scheme already shown above, or using a USB cable. In this case, you need to connect according to this scheme.
Now let's check the matrix by running the code from Adafruit.
Launch the "raspberry", connect the RGB matrix power, open the terminal and install the dependencies: Download the code from the author's repository: Select the scrollingTextMask folder: Run the fillMatrix.py test code:
sudo pip3 install rpi_ws281x adafruit-circuitpython-neopixel


sudo python3 -m pip install --force-reinstall adafruit-blinka
git clone https://github.com/carolinedunn/RGBTreeTopper
cd RGBTreeTopper
sudo python3 32-fillMatrix.py

If you get a rainbow, as in the gif above, everything works, you can move on to the next stage. If something went wrong, most likely some contacts are incorrectly connected.
Tips: If the system does not work with the raspberry pin 21 GPIO, try pins 10, 12, or 18. Then open 32-fillMatrix.py from the scrollingTextMask folder and update the GPIO pin. In this case, you will need to change the other project files accordingly.
Stop the script by pressing Ctrl + C.
Part 2. Light it up!
Now in the terminal, which is still open, we type the command:
sudo python3 treeTopper.py
In the folders we got from GitHub, there is a “fire” folder that contains 10 jpeg images. This is what the treeTopper.py code does:
Declares the libraries that are used in the code. Attention should be paid to PIL (Pillow Imaging Library), a library that adds image processing capabilities to the Python interpreter.
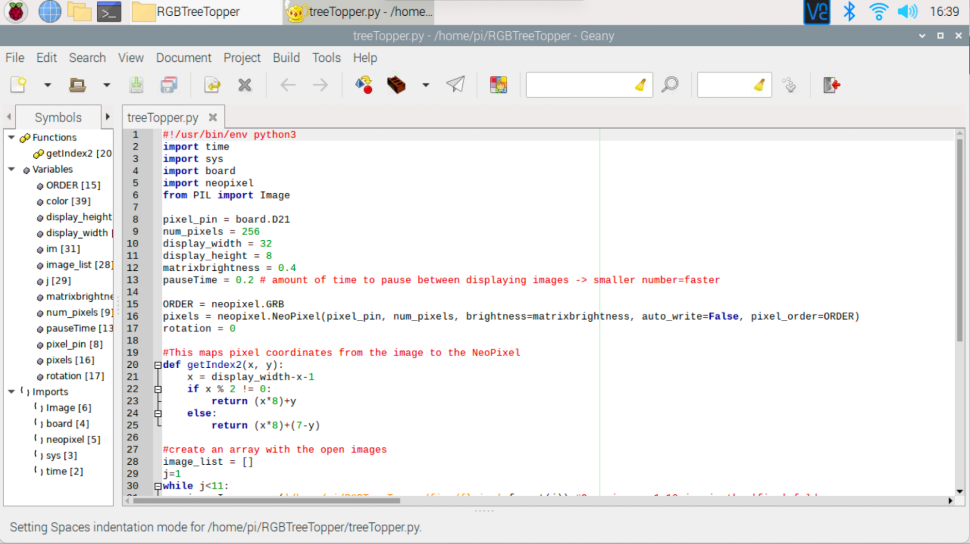
- Tells the Pi where to send data to the die by specifying the 21 GPIO pins (line 8).
- Specifies the parameters of the matrix, including size, brightness and pause time between showing each of the pictures (lines 9-13).
- Creates an array with the data of those 10 JPEG files in sequential order (lines 28-32).
- Analyzes image pixels and converts them to an RGB matrix with the image output to an RGB matrix (lines 35-41).
- Pauses 0.2 seconds, then repeats the process for the next image (line 42).
- The process is executed until the execution of the Ctrl + C combination.
And if you want your own pictures?
The parameters should be as follows:
- Format - JPEG.
- Width - 32 pixels.
- Height - 8 pixels.
Each file must be saved under the names 1-10.JPG in the appropriate folder.
To display pictures, you need to set a new path to pictures. If desired, you can change the sequence of their display.

Launch on Boot
Once we have all the images ready, use Python to run the script on boot. The best option is Crontab.
Open Crontab in the console: crontab -e
Enter 1 and press Enter.

This opens a new crontab file. Inside, go down and enter ->
sudo python3 /home/pi/RGBTreeTopper/treeTopper.py
@reboot sudo python3 /home/pi/RGBTreeTopper/treeTopper.py
Press Ctrl + X, and then crontab to save.
We turn off the "raspberry" and turn off everything that we have collected.
Part 3. Final assembly
At this step, you can already demonstrate a New Year's light at the top of no less than a Christmas tree.
- We print the body on a 3D printer.
- We pass the wires to the right places and fix them.
- We bend the LED matrix, you don't need to press hard.
- We put the structure on top of the Christmas tree. We turn on and rejoice.
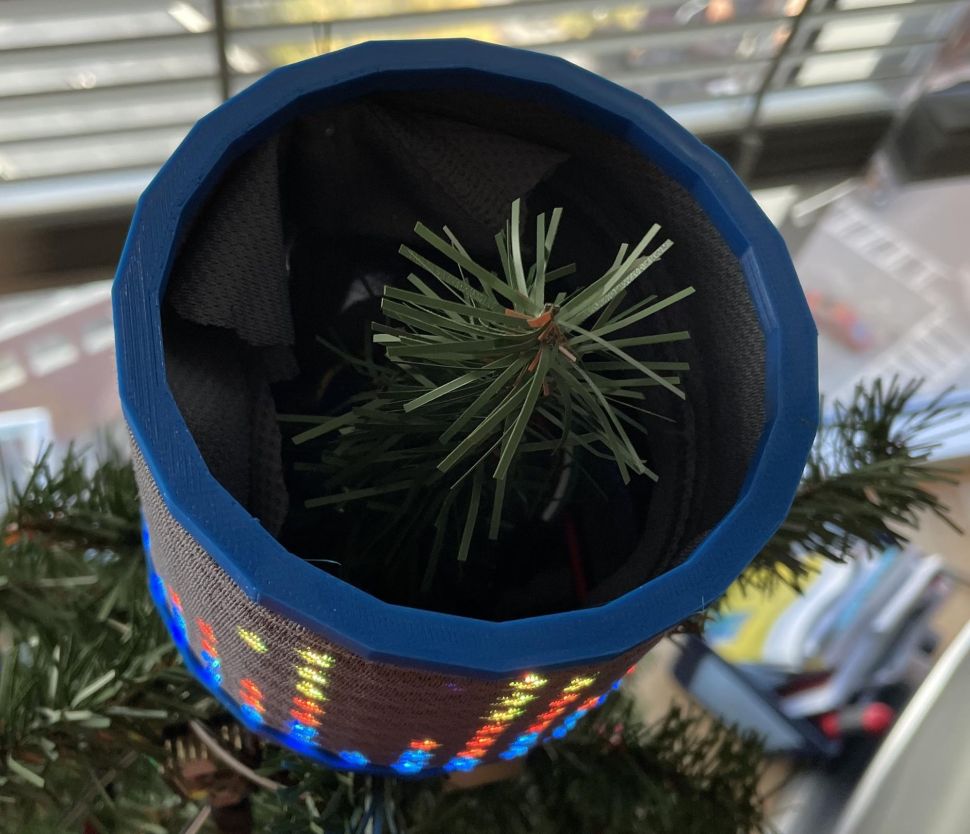
By the way, the author is aware that his invention is shaped like a roll of toilet paper.

She jokes that against the backdrop of what is happening in 2020, this is quite adequate. But in general it can be changed - the design can be easily modified, if desired, so that a roll of paper turns ... yes, into anything.
