Source
This article is about configuring readiness, health and startup probes to detect and work with unhealthy modules as translated by the Kubernetes aaS team .
Why are Kubernetes validations needed
One of the challenges with distributed systems and microservices architecture is the automatic detection of faulty applications, redirecting requests to other available systems, and repairing damaged components. Health checks are one way to solve this problem and ensure reliability. In Kubernetes, health checks are configured using probes to determine the status of each pod.
By default, Kubernetes monitors the lifecycle of a pod and starts routing traffic to the pod when containers transition from Pending to Succeeded. Kubelet also monitors for application crashes and restarts the module for recovery.
Many developers believe that this basic setup is sufficient, especially when the application inside the module is configured using process managers such as PM2 for Node.js.
However, because Kubernetes considers the module to be healthy and ready for requests, as soon as all containers are started, the application can start receiving traffic before it is actually ready. This can happen if the application needs to initialize some state, establish a database connection, or load data before processing the application logic.
This amount of time between the actual availability of the application and the moment when Kubernetes considers it to be ready becomes a problem when the deployment begins to scale and the unprepared applications receive traffic and send back a 500 error.
It is in these situations that Kubernetes probes are used to determine when the container is ready to accept traffic and when it should be restarted. Starting with Kubernetes 1.16, three types of probes are supported.
In this article, the author discusses different types of probes, as well as best practices and tools for detecting deployments with potential configuration problems.
Kubernetes probes
Kubernetes supports readiness and health probes for versions ≤ 1.15. Launch probes were added in 1.16 as an alpha feature and moved into beta in 1.18.
WARNING: In version 1.16, parts of the Kubernetes API have been deprecated. Use this migration guide to check compatibility.
All samples have the following parameters:
initialDelaySeconds
: ;periodSeconds
: ;timeoutSeconds
: - ( );successThreshold
: , ;failureThreshold
: . . , .
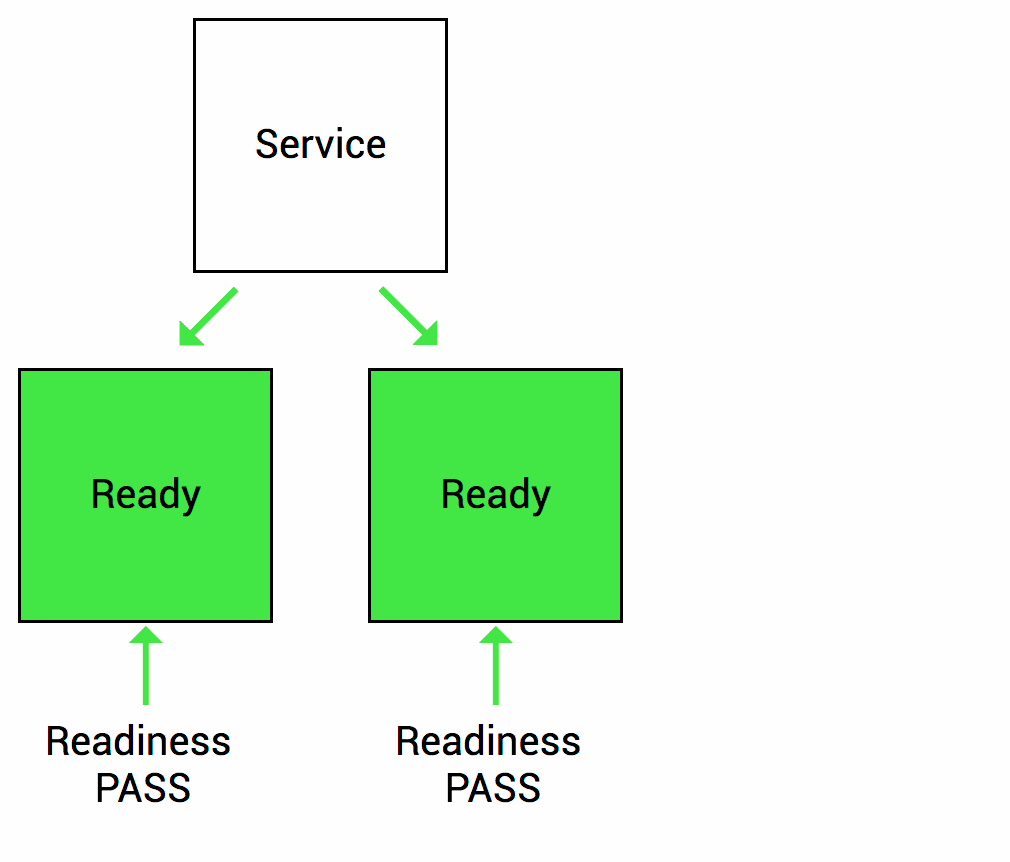
Readiness probes are used to tell the kubelet when the application is ready to accept new traffic. If your application takes some time to initialize after starting a process, set up a readiness probe to have Kubernetes wait before sending new traffic. The main use case for readiness probes is to direct traffic to deployments for services.
Source
It is important to remember that readiness probes work throughout the life of a module. This means that they will be launched not only at startup, but also again throughout the entire operating time of the module.
This is necessary for situations where the application is temporarily unavailable, such as loading big data or waiting for external connections. In this case, we do not want to kill the application, but wait until it is restored. Readiness probes are used to detect this scenario and do not send traffic to these modules until they pass the readiness check again.
Performance tests
Health probes are used to restart unhealthy containers. The Kubelet periodically invokes a health test, detects the health of the pod and kills it if it fails a health check.
A trial can help an application break out of a deadlock. Without health checks, Kubernetes considers locked under healthy as the main process continues to run from the Kubernetes perspective. By setting up a health probe, kubelet can detect that the application is in a bad state and will restart the pod to restore availability.

Source
Launch samples
Startup tests are similar to ready tests, but are performed only at startup. They are optimized for slow startup of containers or applications with unpredictable initialization processes. With readiness probes, we can tweak
initialDelaySeconds
to determine how long to wait before checking readiness.
Now consider an application that sometimes needs to load large amounts of data or perform a resource-intensive operation at the beginning of the process. Since it
initialDelaySeconds
is a static number, we are forced to always take the worst-case scenario (or increase the value
failureThreshold
, which may affect further behavior) and wait for a long time, even if this application does not need to perform long initialization.
Instead, using startup probes, we can configure
failureThreshold
and
periodSeconds
to better handle this uncertainty. For example, a setting
failureThreshold
of 15 and
periodSeconds
5 means the application will have 15 x 5 = 75 seconds to start before a failure is diagnosed.
Sample setup
Now that we understand the different types of samples, we can explore three different ways to set up each sample.
HTTP
Kubelet sends an HTTP GET request to the specified URL and checks for a 2xx or 3xx response. You can use an existing HTTP endpoint or set up a lightweight HTTP server for testing (for example, an Express server with an endpoint
/healthz
).
HTTP probes take additional parameters:
host
: hostname for connection (by default, this is the module's IP address);scheme
: Default HTTP or HTTPS;path
: path on the HTTP / S server;httpHeaders
: custom headers if you need header values for authentication, CORS settings, etc.port
: name or port number to access the server.
livenessProbe:
  httpGet:
    path: /healthz
    port: 8080
TCP
If you just need to check if a TCP connection can be established, use a TCP probe. A module is marked as healthy if it can establish a TCP connection. Using TCP probes can be useful for gRPC or FTP server where HTTP calls are not appropriate.
readinessProbe:
  tcpSocket:
    port: 21
Command
You can also configure the probe to run a shell command. The check passes if the command returns with exit code 0. Otherwise, the module is marked as faulty.
This type of validation can be useful if you don't want to open an HTTP server / port, or if it's easier to validate initialization steps using commands. For example, check if a config file was created or run a CLI command.
readinessProbe:
  exec:
    command: ["/bin/sh", "-ec", "vault status -tls-skip-verify"]
Best practices for sampling Kubernetes
The exact sample parameters depend on your application, but here are some general guidelines to get you started:
- For older (≤ 1.15) Kubernetes clusters, use an initial lag ready probe to handle the container startup phase. To do this, use the 99% percentile time. But make this check easy as the readiness test will run throughout the life of the module. We do not want the probe to time out because the readiness check takes a long time.
- (≥ 1.16) Kubernetes . (,
/healthz
), .failureThreshold
, , . . - , . , , , . .
- , . , , , . , .
In short, well-defined probes usually increase stability and availability. Be sure to monitor startup times and system behavior to adjust your sample settings as applications change.
Tools
Given the importance of Kubernetes probes, you can use Kubernetes resource analysis tools to find missing probes. These tools can be run on existing clusters or built into the CI / CD process to automatically fail from deploying workloads without properly configured resources:
- polaris is a resource analysis utility with a beautiful toolbar that can also be used as a validation webhook or command line tool.
- kube-score is a static code analysis tool that works with Helm, Kustomize, and standard YAML files.
- popeye is a utility tool (read-only) that scans Kubernetes clusters and reports potential configuration issues.
In these two Telegram channels, you will find news from our Kubernetes aaS and announcements of @Kubernetes meetup events .
What else to read:
- 90 tools for working with Kubernetes .
- How Kubernetes aaS works on the MCS platform .
- Five misses when deploying your first application to Kubernetes .