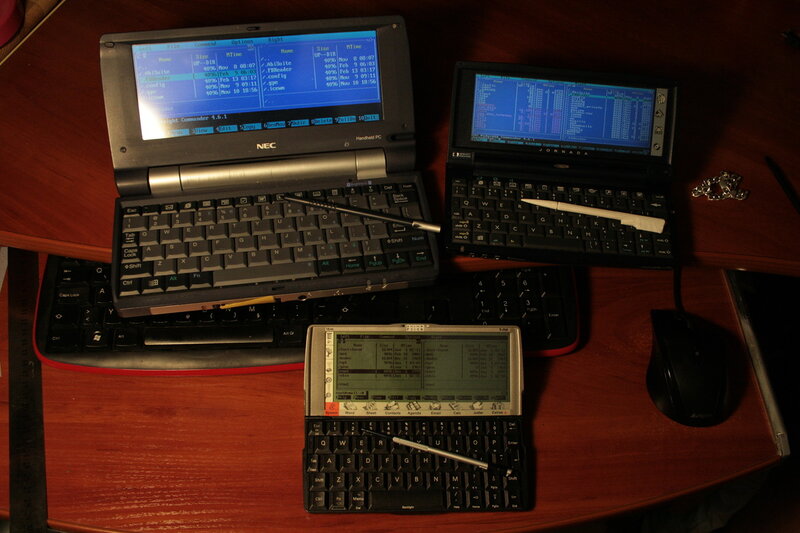
Linux on Psion 5mx, Jornada 720, NEC MobilePro 900c With
this article I would like to finish the series of articles about the PDA. A huge number of different pocket personal computers passed through my hands, but, IMHO, the most interesting and best among them is the Jornada 720. This is an impeccable PDA for its time, absorbing the best that was on the market at that time, and in fact became a full-fledged real pocket laptop , which could solve completely adult tasks, although it worked on an ARM 200 MHz processor. And after the enthusiasts ported Linux to it, this little thing became just the ultimate dream of every respectable geek. Read about all my experiments with this PDA, as well as a few words about NEC in this article.
Small spoiler
, , — . : , - .
How it all started and the first problems
As usual, it all starts with the fact that you see some thing, and you madly want it yourself. And my first acquaintance with this PDA, I began with a video on the channel of Kirill Leifer .
In order not to watch the entire video, I'll tell you about the characteristics of the PDA (information taken from the wiki ):
(handheld PC) Jornada 720 2000 . Intel StrongARM ( Jornada 820) 206 . Microsoft Handheld PC 2000 (Windows CE 3.0). 32 32 , USB 1.1 -. 3,5 . ( PCMCIA Compact Flash, ), , Jornada 690.
Keyboard, ARM, Linux support, usb, sound, PCMCIA, Compact Flash well, just a pulp. And then I realized, yes, I want it! I went to a well-known Western Internet auction, and it turned out that there were not so many offers on the topic, and the price tag was very inhumane. But nevertheless, I fit into one auction and won this beauty. She became me for that money, about two thousand rubles (which is very cheap).

Photo immediately after purchase.
Of course, the copy was cheap and not without a problem. There was no stylus, there was a dead battery, there was no docking station, but the main problem was with the keyboard: some of the keys simply did not work. And it was very difficult to achieve efficiency. But there was already a complete delight from owning such a device.
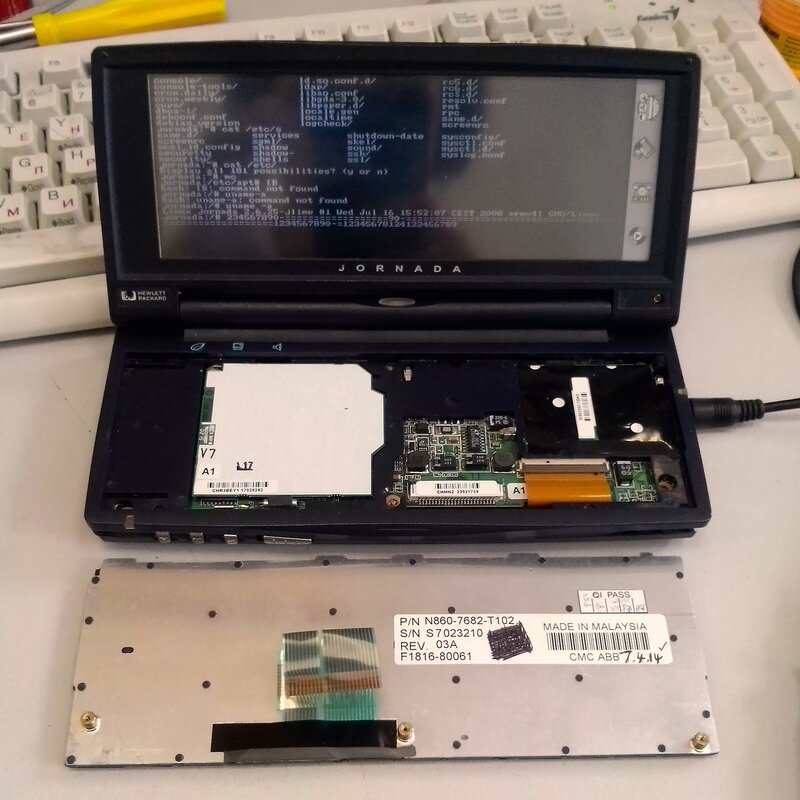
As a result, some chat repairmen were found who were engaged in repairing just such PDAs. As it turned out, non-working keyboards are a fairly common illness in this PDA. Disassembly revealed a problem area: the cable leading to the keyboard bends and goes between the aluminum substrate and the plastic of the keyboard directly to the film of the keyboard itself. And in this place there is a constant deflection of the keyboard substrate, and over time it cuts the keyboard loop. This problem cannot be corrected manually. If you knock on the keyboard, shake it, it works for a while. But experience has shown that this is very short-lived. Another curious thing was that this PDA was already after a screwdriver repair (without traces of soldering). All stickers covering the screws were removed, and the repair date was on the keyboard inside.
On the keypad, the date of repair is 7 (or 1?) 04.14. Under the daubed one reads handwritten like "Tested".
Apparently my copy was made purely to sell, and the keyboard is clearly not built to last. As a result, a keyboard was found at the same auction for only 160 rubles + delivery was 500 rubles.
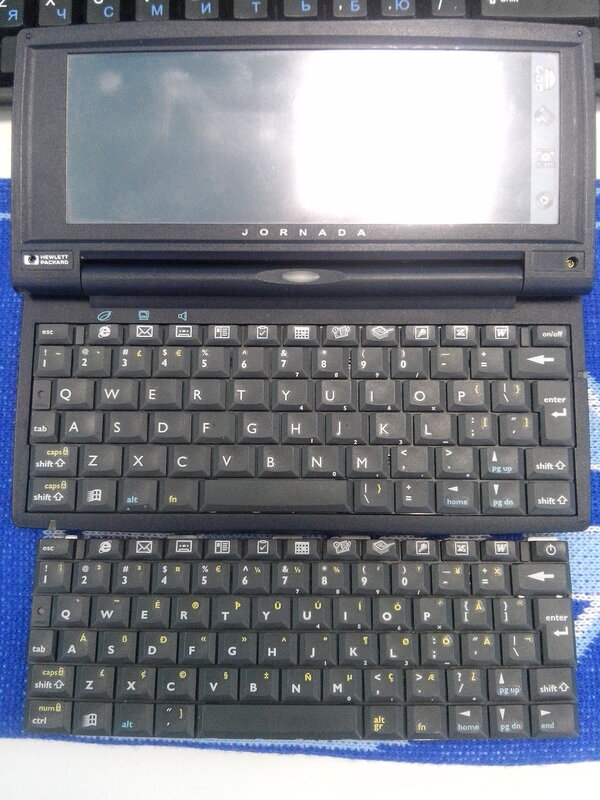
Another curious thing was that the keyboards were different.

Klava from ebei.
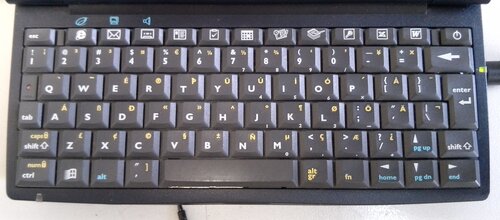
My keyboard.
Find ten differences? Five times I counted the number of keys in different rows ... Perhaps I don’t understand something in this life, but it is DIFFERENT!
As a result, a strong-willed decision was made and this keyboard was bought.
Also in Germany, with the help of my good friendaterentieva battery was found for this device. For which many thanks to him. He ordered for himself, then he sent it to me by mail. This is a great work and a bow to man! As a result, the Jornada 720 gained autonomy.
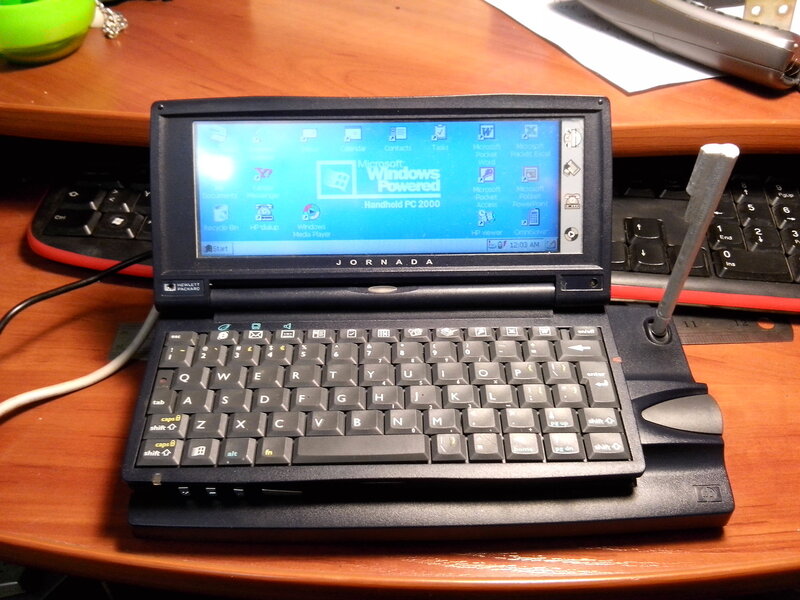
The keyboard also came with time, and despite the fact that it was slightly different in shape and number of keys, it still stood up like a native! And the new keyboard has a larger key size, and it turned out to be much more convenient to use.
New keyboard on Jornada, old removed.
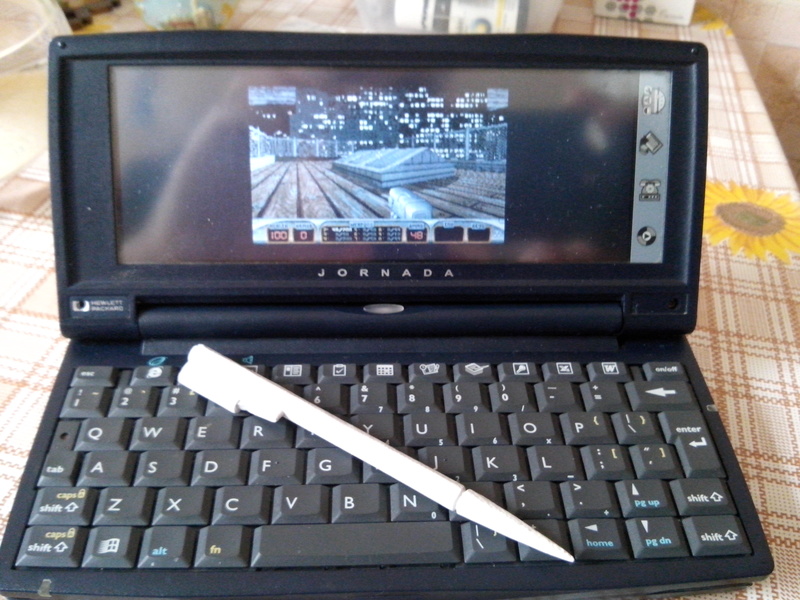
There were completely different feelings, due to the fact that the size of the key was larger, the operation became more comfortable. This keyboard did not play at all, the keys did not fall off. I even drove her on a freshly installed Doom - it was an incredibly cool feeling!
Stylus createatus or treatment of hard drinking from a photo
I have already said above that my PDA copy did not have a stylus. I looked for where to buy it, I realized that it was impossible to get it for a reasonable price. So I decided to do it myself. Initially I tried to make a pencil impression. To begin with, I measured the diameter of the hole (7mm), then estimated the depth and tried to make a fake out of a pencil, clamped it in a drill and grind it to that diameter. The most difficult thing is the correct shank shape. I tried to sculpt it from plaster. The result was something like this:
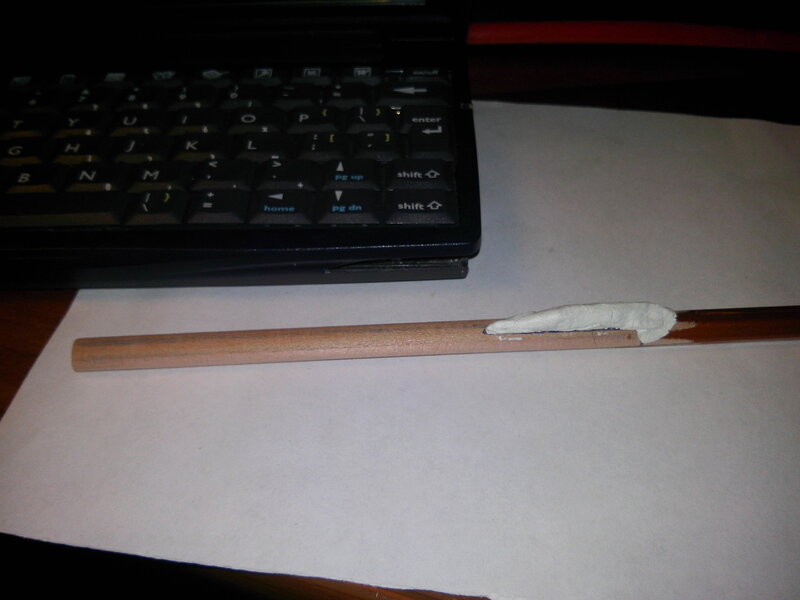
After these experiments, it became clear that it would not be possible to simulate the stylus in such a way. Firstly, I do not know its true length, and the length of the tip, as well as the exact shape of the tail. And secondly, I understand that it is better to take the dimensions from the original, and not invent a new stylus. But where can I get the original? If I didn’t even manage to find Jornada in Russia. As a result, I decided to contact Kirill Leifer himself, the author of the review, after which I bought this device. On habr, it is known asBOOtak... Cyril gladly answered me and was willing to help. He did not have such an ingenious invention as a caliper, so he sent me photographs on graph paper, and I already tried to guess the real dimensions from the photographs. But one size was accurate for me: diameter. I understand perfectly well that nobody will read this crap, so trololo, sneeze olololo, I'm a UFO driver.
I pointed out to Cyril exactly what dimensions I needed. This request looked like this.

A photo of the stylus sent by Kirill and my marks on what sizes and types to shoot.
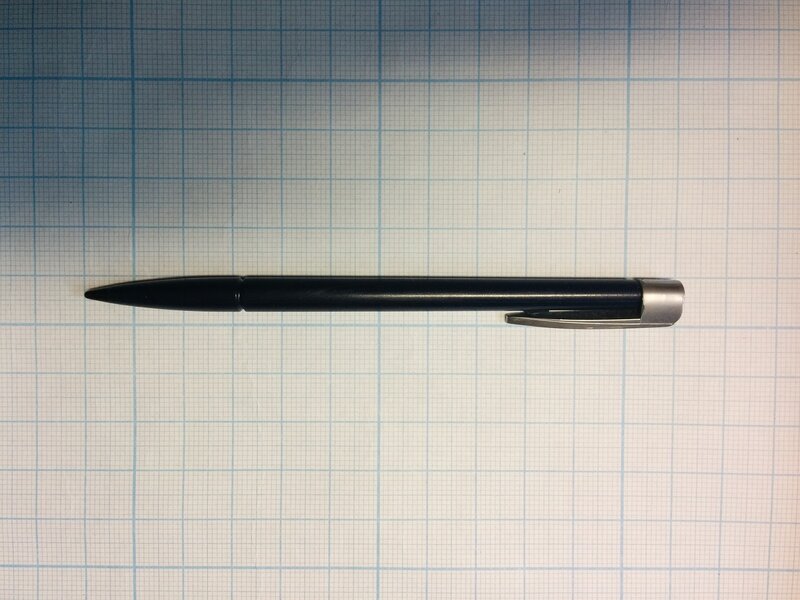
As a result, a few days later Kirill sent me photos of the stylus against the background of graph paper, and I began to draw.
We remove from the
must say that this is not the worst option and I am happy with what I have. The peculiarity of the original stylus is that it has a button on the shank and can be pulled out like a ballpoint pen (i.e. pressed - folded, pressed - unfolded). Made for easy removal. I do not need such frills, therefore I needed the dimensions when folded (pictured). And the most difficult place is the end of the handle. I can't imagine how to photograph it against the background of graph paper (or it would be even better to overlay a transparent graph paper on top), so I had to be content with this photo.

Styles created in an online scribe at www.tinkercad.com . Unfortunately, I work in linux, and I could not find anything intelligible and easy for drawing models for linux. Either it doesn't work, or it works through one place, or it's sooooo hard to learn. And for such simple purposes, it fit perfectly.

Stylus prototype.
After all the refinements and experiments, I settled on the next stylus model.

At that time at work, I had access to a 3D printer, and this was my first experience of interacting with this device. The printer was printing, frankly, terribly. But still I managed to make several models on it.
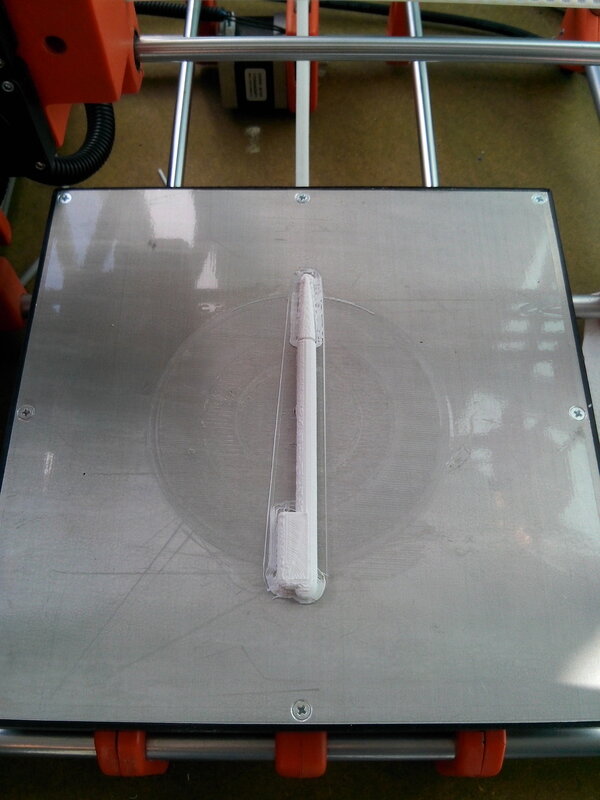
The most difficult thing was to find out exactly the size of the groove for the stylus lock. I did this with the same sharpened pencil. When you insert it to its full depth, the spring leaves a characteristic mark, and you can accurately determine its location. Consider a kind of hardware reverse of case products.


I was dissatisfied with neither the shape nor the workmanship of this stylus. Therefore, I made several more stylus options. I smoothed them out with 646 solvent and then did a fitting, then I corrected the model and printed a new one.
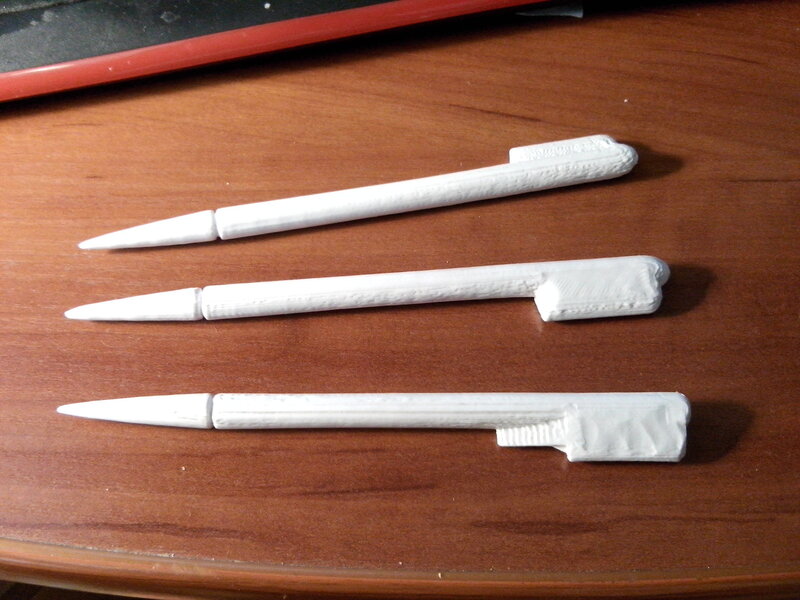
All stylus options.
The bottom one turned out to be the most successful, although visually it is clear that I even mechanically modified it a little. But as a result, I also used it.


In general, as a result, my PDA acquired its own stylus, albeit a homemade one, but quite usable and working. It's fun to look at the era of stylus today, but back then it was the only input to a PDA of that time.
Other hardware additions that were purchased after
I understand that listing all the stages, writing like this will tire the reader, so I will briefly go over the stages.
Wifi card
To begin with, I really wanted to bring this PDA to the Internet. Infrared is not our method. So I started looking for various 16-bit PCMCIA cards. It turned out that these are very rare animals (usually they are all 32-bit and do not work in this PDA). I managed to find modems, network cards for Ethernet, etc. I had such a straight drawer of cards, but a small number of them worked with this device. As a result, I managed to find Wifi cards that worked on this particular PDA (yes, only with old encryption systems).

Cards.
From the funny thing - there was no firewood on either one or the other in the standard Windows. However, I had no special illusions on this score. But there were those in Linux. And he even sees the network! I'll talk about Linux a little later. There is a list of supported WIFI cards .
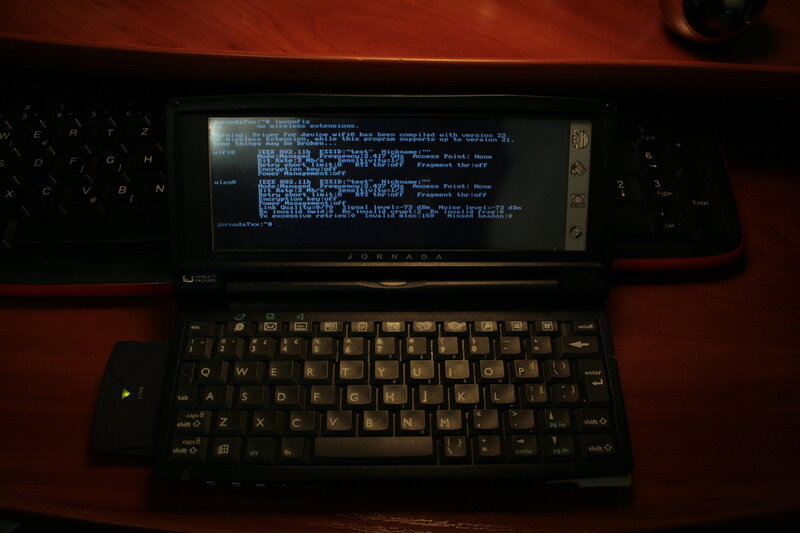
Wifi works.
Docking station for USB and COM port
Since I already made a reservation about linux, for normal debugging and operation I needed a hardware UART output, and also wanted to have access to USB. Well, I just wanted to have a completely finished device. Therefore, a strong-willed decision was made and a dock was purchased for this PDA.

Appearance of the dock without a PDA.
The PDA is removed by pressing the triangular button on the right. Most valuable are the spring-loaded contacts that lead to the bottom of the PDA. Initially, I even thought about making a homemade docking station, but as a result I managed to catch my own.
On the bottom, he has three connectors: power, USB and COM. The latter, unfortunately, is exactly the same as on Jornada herself, and it needs the same lace. USB with COM are closed alternately with a shutter.

USB and power.

COM port and power supply.
It is of course interesting to see how it will look assembled.
Interestingly, the stylus took its place of honor, which suggests that it was made very accurately.
Waste paper and COM-postings
In the end, I decided to push myself like a labor collector and bought the same waste paper that was put in the box for this Jornada. And there was also a COM-port lanyard, which was valuable to me.

Booklets, documentation, and most importantly a cable!
The most important thing, of course, is the cable. In general, because of him, everything was started. But along the way, more docks. I really love the documentation of those years. The older the computers, the simpler they were, the more complete the documentation was. I remember on the 286 laptop in the documentation there were even diagrams! Now it's not a cake ...

Description of how to sync with your computer.
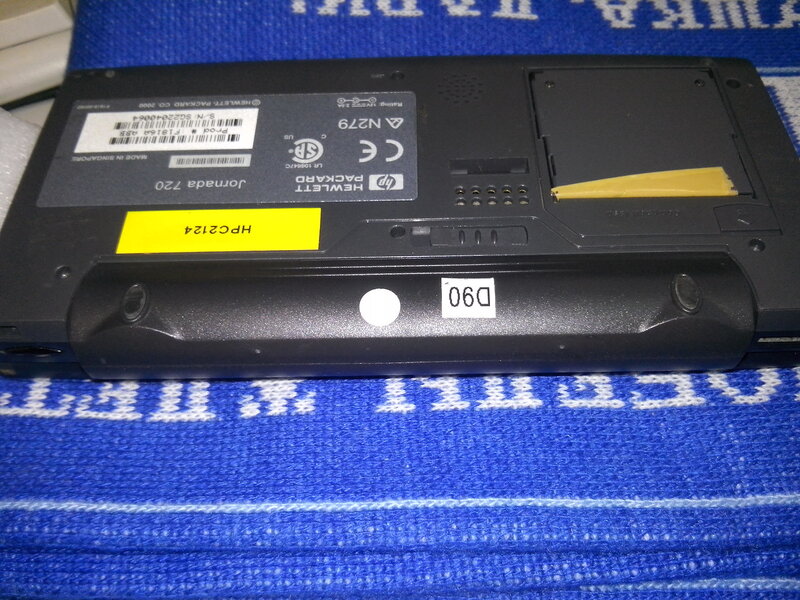
Curiously enough, one booklet even has a battery attached, and in my opinion (judging by the yellowness of the bag), it has been hanging there since "that very moment":
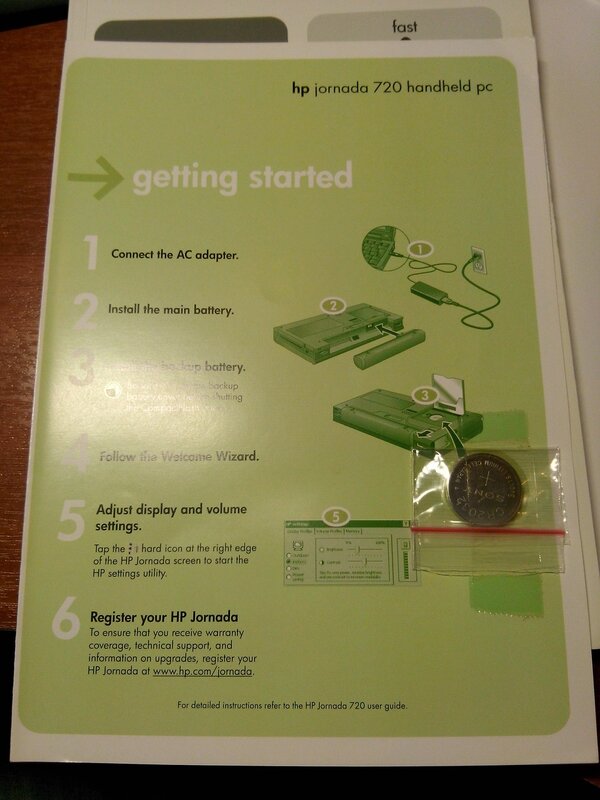
Battery and installation instructions.
I can’t spoil the thing, everything is very authentic. When the readers of my LiveJournal saw how I got stuck in the approach of building the Jornada 720, they said that I was gradually turning into Sergei Frolov.sfrolov...
Of the curious
There is that hardware that I could not get - this is a RAM and firmware ROM. In general, you can immediately cram Linux into this ROM, and it should work.

The only difference between Jornada 720 and 728 is this board. And there were such cards on sale that expanded the RAM to 64 MB and made it possible to get a cooler PDA.
Linux installation
I will not tell you much about Linux. Kirill Leifer akaBOOtakin your video. And with him I propose to start this chapter.
All information on development, linux installation and everything, everything, everything lived on the wonderful site jlime.com . Unfortunately, everything is dead ... But, fortunately, there is his mirror , in which you can still find a lot of useful and useful things.
As it turned out, not all CF cards are supported during installation, and fortunately I had a huge collection of different cards at home, so I was able to choose a working option.
But despite the fact that the official site was killed, something is still alive. Here is a complete instruction . I will not reprint it. As well as the necessary files for installation (you never know who wants to repeat).
- jlinexec.exe
- hp7xx-2.6.25-stable
- hp7xx-modules-2.6.25-stable.tar
- params.txt
- icewm-image-Mongo-08.07.08.tar
There is even a backup of the repository , so you can still work! Well, there is some useful wiki on the topic, I also recommend reading it.
I will briefly quote the installation procedure that I described in my LJ.
, ! , rootfs, , ! : hp7xx-2.6.25-stable () hp7xx-modules-2.6.25-stable.tar.gz (). rootfs tar xvfz //hp7xx-modules-2.6.25-stable.tar.gz zImage. ( ), .
The main problem with linux was that neither sound nor USB worked. In general, there were no drivers. Then I didn't have enough knowledge to finish the drivers, but today I wouldn't have enough motivation and time for such a feat.
But I really felt cool when I put Linux on this crumb, found the battery, replaced the keyboard, configured Duke Nukem 3D with great difficulty. One of the big problems was setting the screen resolution correctly.
Resolution problems.
Well, as usual, after a long RTFM, I managed to write a suitable config and get a working Duke Nukem under Linux on the arm of the Jornada 720 PDA. I can't even tell you how cool it was to go to the subway, get it out of the wide legs of the PDA on which there is linux, and start Duke in command mode.
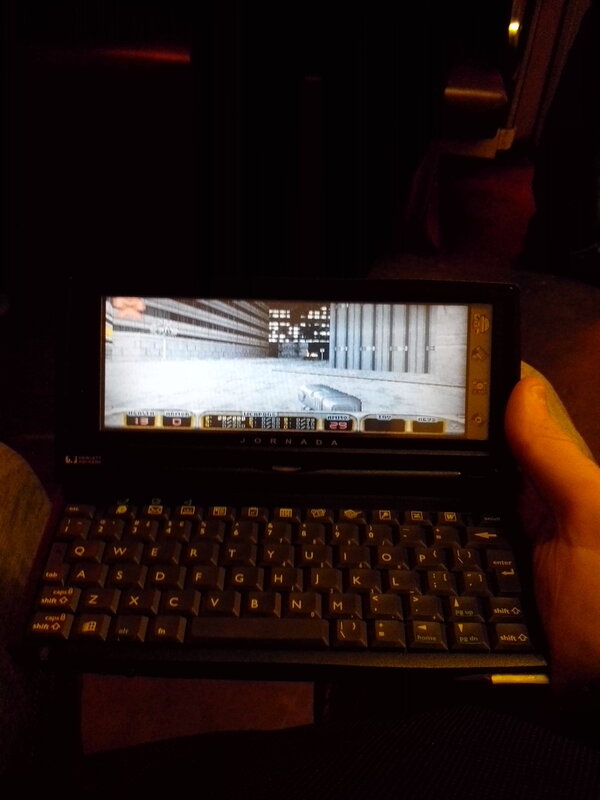
Duke Nukem 3D in the subway. This is really really cool!
It was just a childhood dream to do so, to play Duke Nukem on a small PDA in the subway.
Two words about the NEC MobilePro 900c
On the site jlime.com I learned about such a PDA as the NEC MobilePro 900c. Essentially a more redesigned version of the Jornada, and it looks more like a regular laptop. In the kit I had a case, a spare battery, and then also a Wifi card. I remember that it was somehow especially difficult to install linux on it, but I will not go into technical details (hardly anyone will repeat this, and if they do, they will find it in my LJ). But for some reason this device did not impress me as much as the Jornada, it was still not really pocketable.

How did it end
Psychologically, it was very hard from the realization that despite the fact that this is incredibly cool, nobody really cares about it. There was not even a second such enthusiast with whom you could share your work and it would be interesting to at least someone. People read my attempts in LJ, clicked with tongues, but I understand that this is a dead industry. Even on the jlime forum, no one answered my messages and questions, as the only person left on another planet. And if in my experiments with Psion there were other experimenters who somehow supported me and used my best practices, then with Jornada and Nec there were none at all. And it somehow broke me at some point that I sold all these PDAs for a song ...
As a result
I don’t want to finish the article on a sad note, I was not too lazy and looked, at well-known auctions you can find such a complete PDA, even version 728, for a very high price tag. But if you are ready to invest because of your love for art, then this is your way.