
post about hoverboard
, , , . , - , IT.
Just as the term laptop has disappeared from our communication, so from my way of working on a laptop at home, working on my knees has gradually disappeared. Over the years of using the laptop, the way of working has evolved into half-sitting / reclining, depending on the tasks being performed, keyboard-typing / viewing-reading.
According to wikipedia:
The lying position is the most energy-efficient.
The sitting position on a chair is convenient, for example, for office work, but in itself is a difficult test for the skeleton and internal organs of a person.
From personal feelings, these statements are close to reality.
At first, household items were used, such as a pillow on the stomach.
Next, we used the remains of building materials from the repair (nails and trims for door trims).
As time went on, with the increase in the number of laptops and the emergence of demand, stands appeared in stores. Being versatile, and considering the weight of laptops in those days, these stands were excessively massive and oversized.
They had plastic hinges that loosened up and cracked from household loads, despite the fact that these hinges were not used for their functional purpose. The corners were set once after the purchase and the functions of the transformer were no longer in demand, since the dimensions of my body did not change then. The repairs led to fouling with tape and wire, and badly affected aesthetics. At some point, I got tired of it all, and I decided to start designing my own bicycles. Fortunately, all the options were no longer preserved, since they did not represent any special know-how, but simply copied the store ones with “improvements”. But several versions, nevertheless, remained, demonstrating the evolution of not only the stands, but also the laptops themselves.
The desire not to invest much in materials, initially, led to the creation of a stand from what was.

The advantage of the stand was the ability to accommodate large and heavy laptops. The disadvantage was the four-point installation, which made it difficult to install on a pressed surface under body weight. The stand was constantly moved and installed on a surface of different flatness, which led to a change in the moment of force and its directions on the mounts. Thus, the use of screw fasteners constantly required their broaching. The same problems were experienced by the not preserved riveted stand.
Then I switched to a Macbook. At the same time, my skill in welding was growing)), by that time the shortcomings of the fastenings of all the tested stands had already worn me out and “in my hearts” I welded a steel stand with aluminum inserts. I painted it, but later the paint peeled off from the aluminum, and I have not yet mastered anodizing.

The laptop was inserted into the grooves on the sides and rested against the groove of the lower crossbar in front. At the same time, the connectors remained available for use, since the coverage was only half of the case.
Time did not stand still, and I once again changed my laptop. The new one has become even lighter and smaller by 0.5% and brighter by almost 1%. Well, in general, you understand what. The dimensions and weight of the old stand have already begun to weigh on (and the "hearts" have cooled down). In addition, the old stand had to be retrofitted with a crossbar, since the new laptop, which had lost at the waist, could not use the old concept of fastening by the sides.
In parallel, my DIY skill grew, and I already assembled a 3D printer. It was decided by all means to make an elegant design using 3D printing. So I created the models in Thinkercad, and printed them out.

The new design seemed so simple that there was simply nothing to go wrong with it ...
But no ... The tight fit of the tubes in the petg plastic gradually became ... loose due to constant torsional loads. I tried to substitute a "crutch" and screwed in the screws in the "invisible" places. Some of the screws loosened their seat in the plastic, and some just split the plastic.

Well, it never happened ...! And here again - everything dangles in the joints!
Meanwhile, my life did not consist only of fighting with laptop stands, and in parallel, my skill grew in cold forging (I made myself a monogram for the gate) and, accordingly, overgrown with the appropriate tools and devices. Then I came up with an "absolutely fresh" idea - to give up any joints in the structure at all.
Thus, the world was presented with the version of the Miracle Stand X.0. In which the supporting frame is made of a single piece of a 10x1 tube, 2 m long, worth 162 rubles, purchased from a network of green building stores. I had a crossbar from an H-profile in scraps, but its cost is about 100r / m. The crossbar was initially fixed to crimp around the tube, but in the end I screwed it down from the rear.
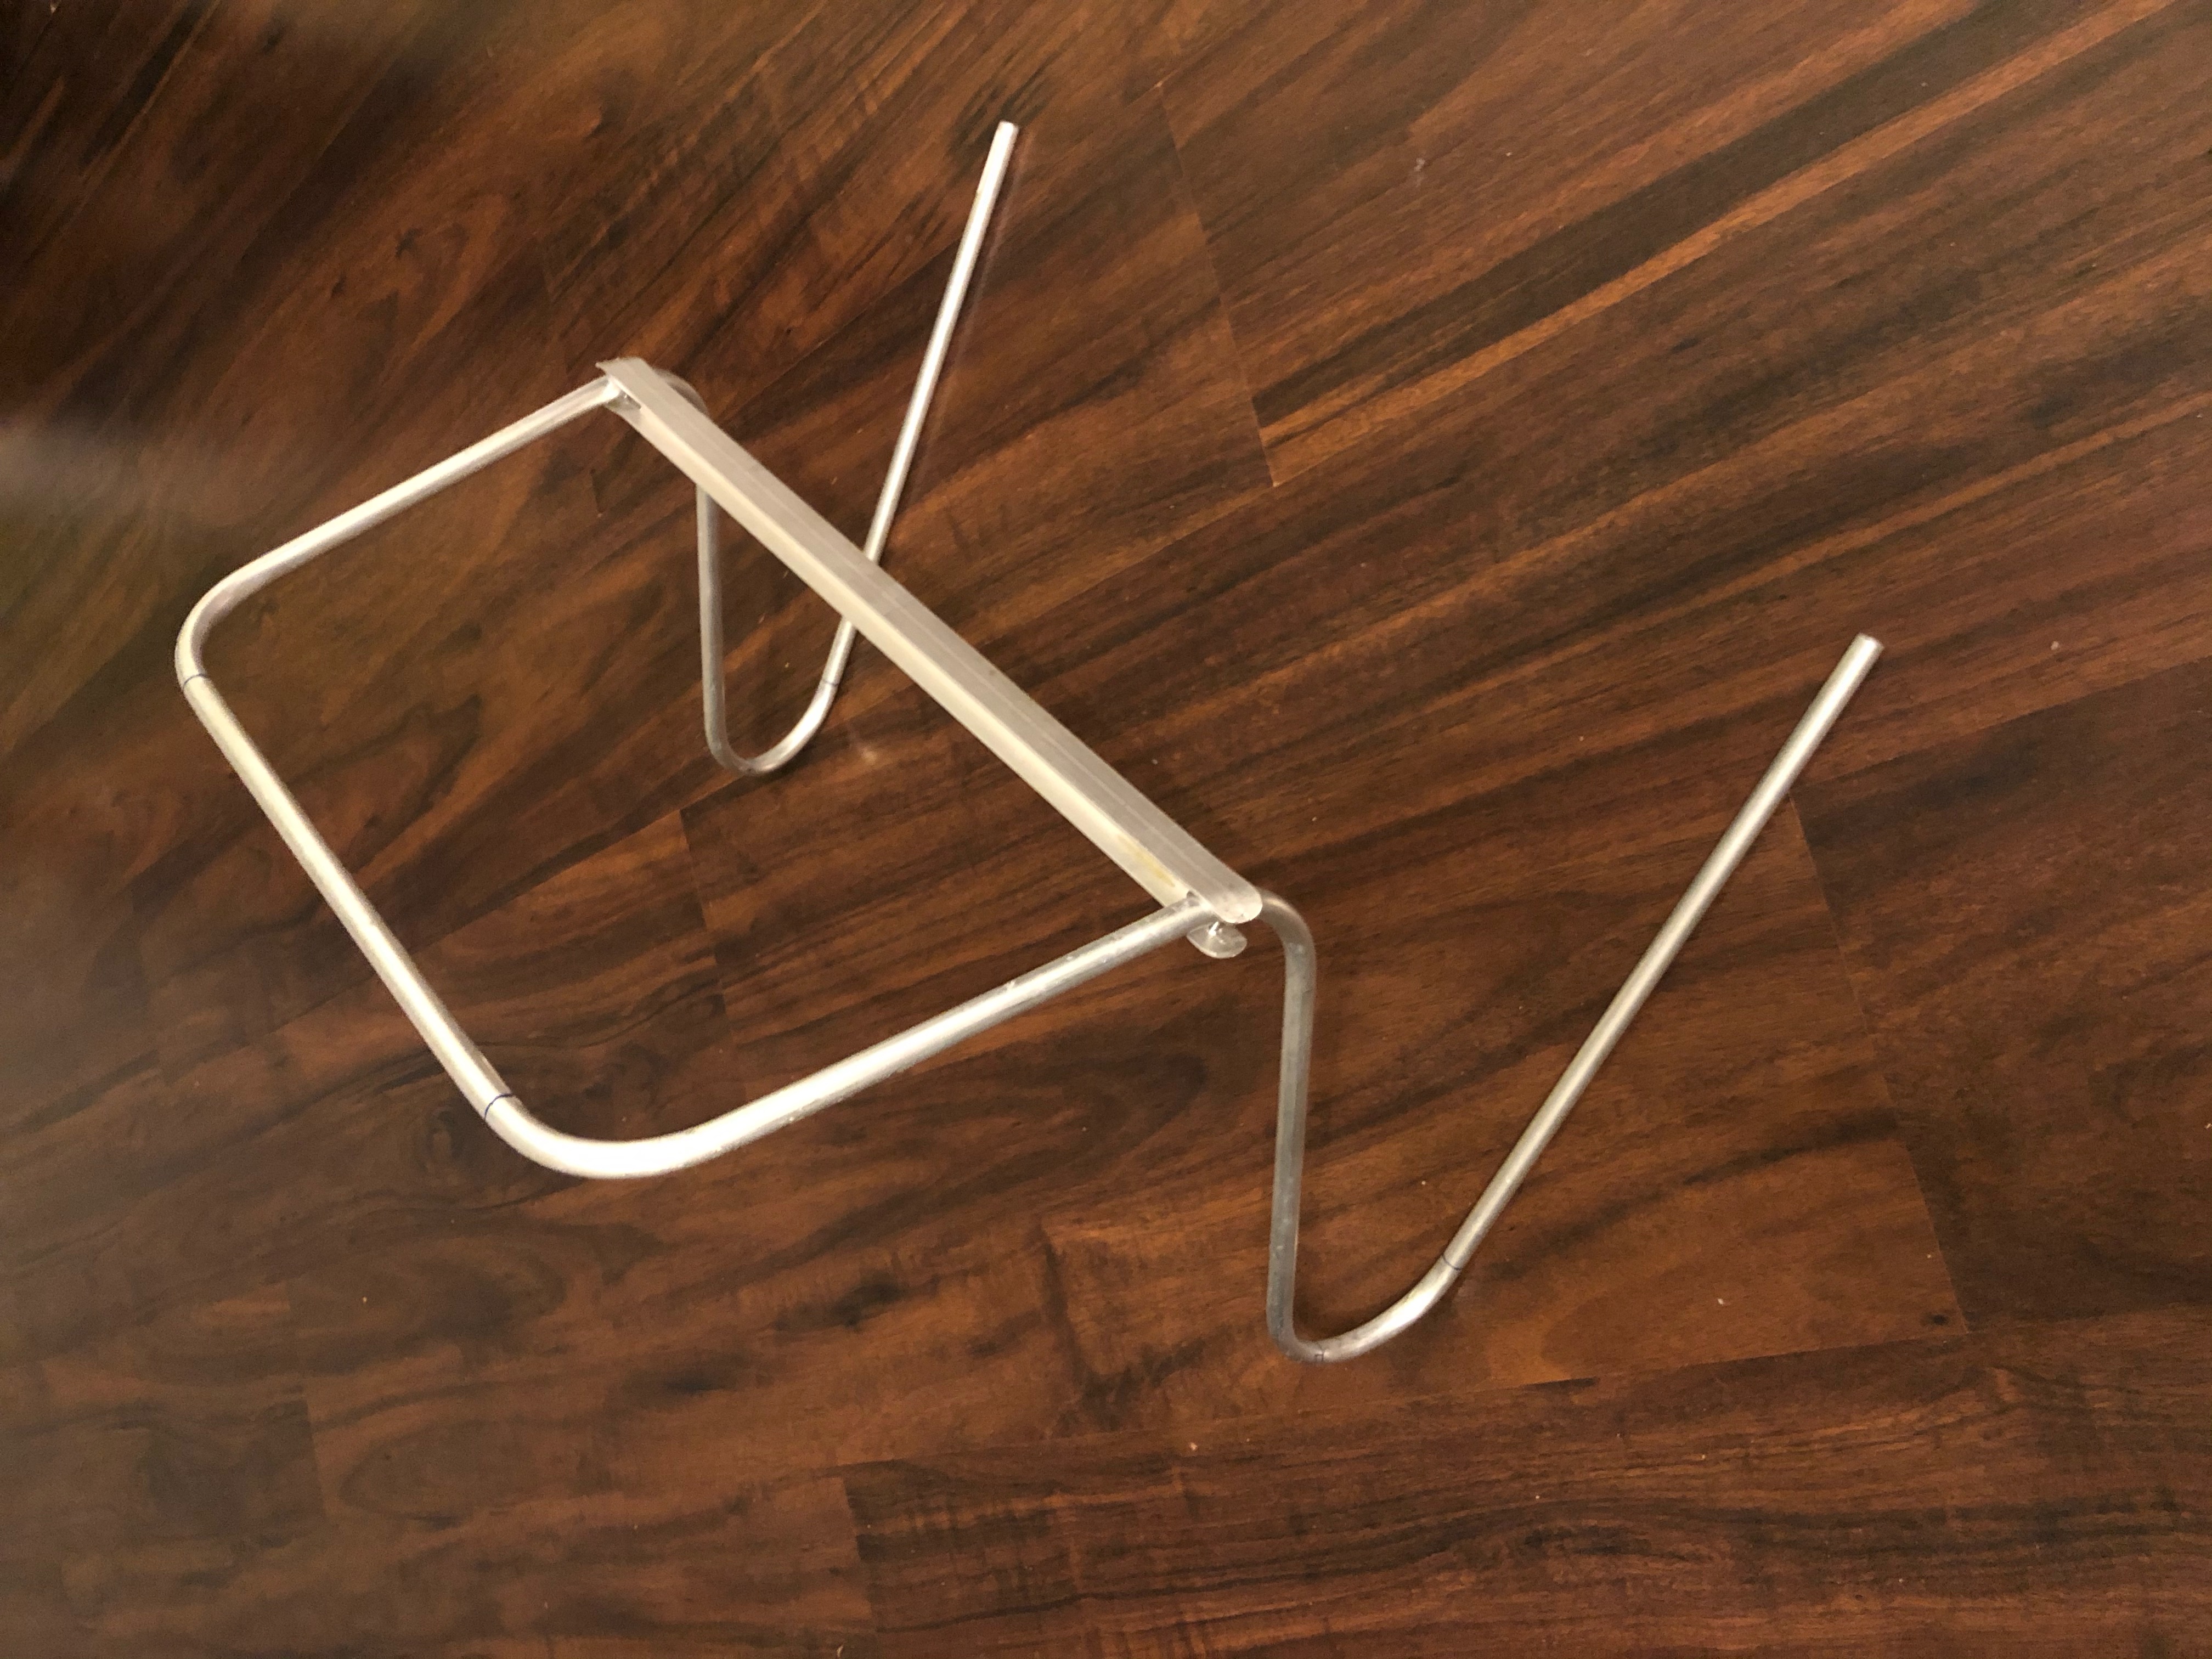
Transferred by two fingers in the assembly with a laptop.
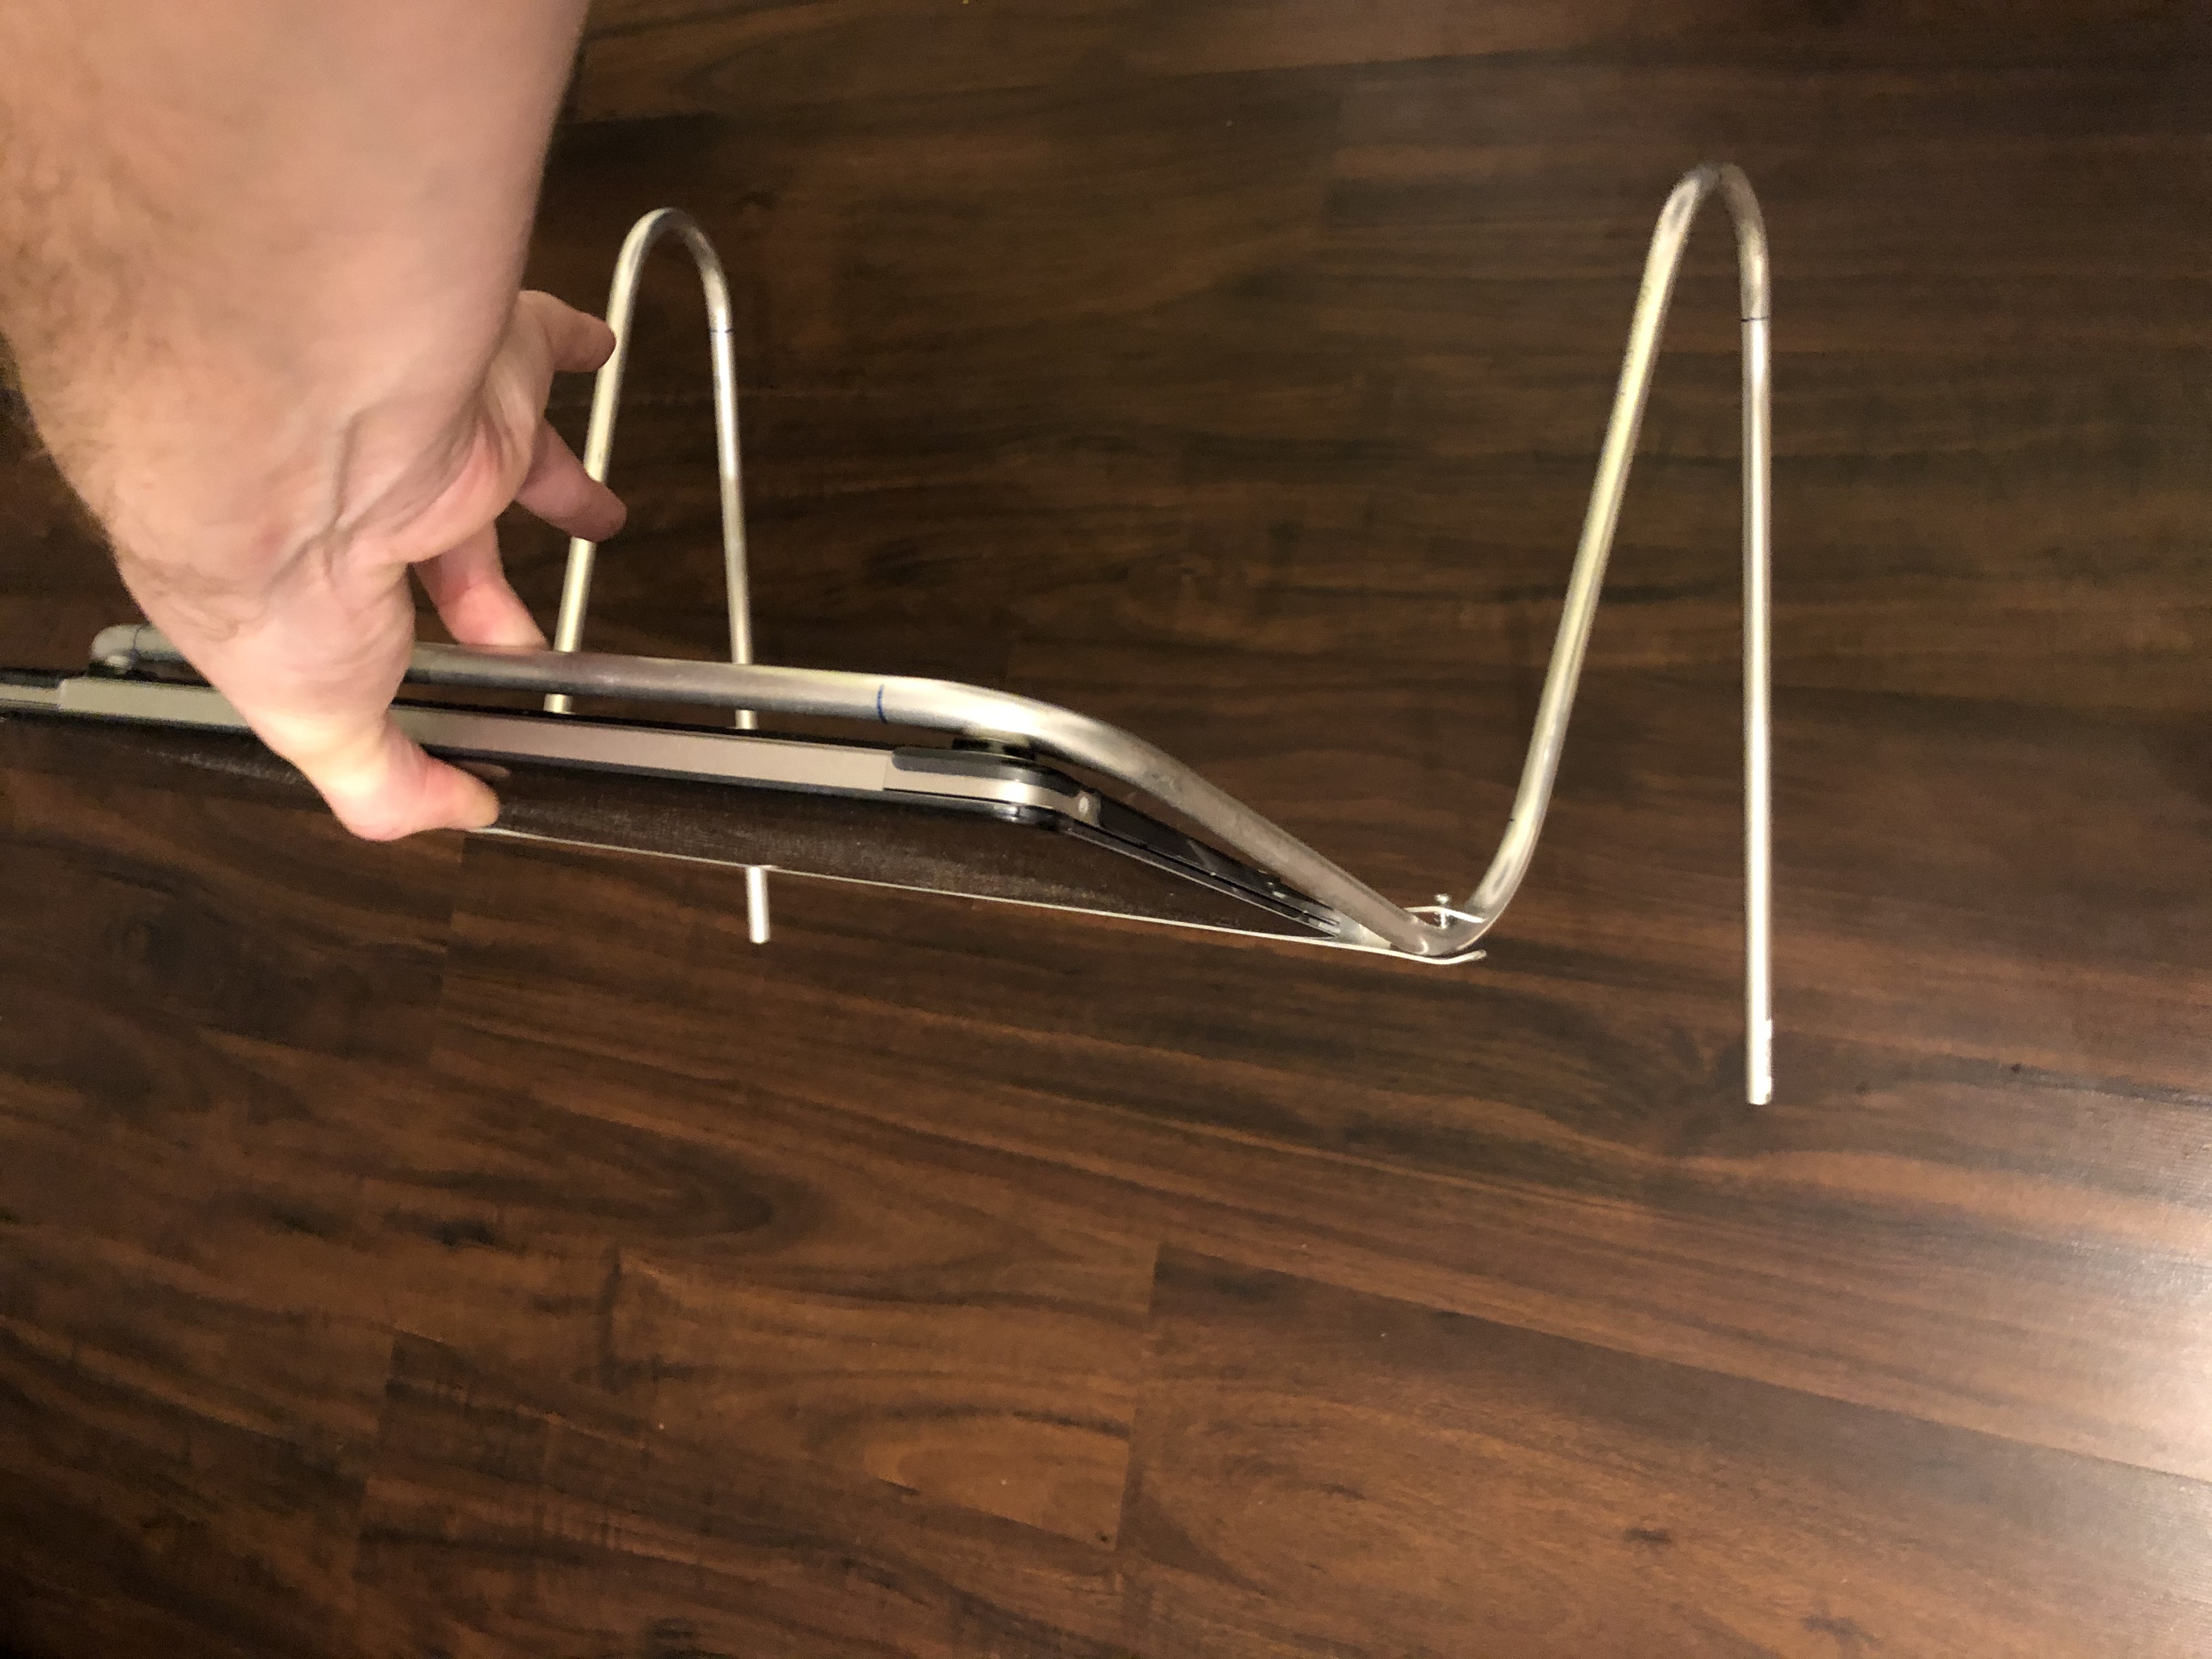

For bending pipes made of non-ferrous metals, hand-held pipe benders are sold in chain hardware stores, which is about 650 rubles. It is advisable to bend the tube with filling the inner cavity with something free-flowing, for example, sand or salt. Otherwise, due to the thinness, a break on the inside may result.
Despite the long evolutionary path that I and the coasters have traveled, I believe that I am still at the beginning of the path and would like to know about the experience of those who have passed on.
That's all. All good!