Introduction
Machine learning technology has evolved at an incredible pace over the past year. More and more companies are sharing their best practices, thereby opening up new possibilities for creating smart digital assistants.
As part of this article, I want to share my experience in implementing a voice assistant and offer you some ideas in order to make it even smarter and more useful.
?
| offline- | ||
| pip install PyAudio ( )
pip install pyttsx3 ( ) :
|
||
| pip install pyowm (OpenWeatherMap) | ||
| Google ( ) | pip install google | |
| YouTube | - | |
| Wikipedia c | pip install wikipedia-api | |
| Translate phrases from the target language into the user's native language and vice versa | Not supported | pip install googletrans (Google Translate) |
| Search for a person by first and last name on social networks | Not supported | - |
| "Flip a coin" | Supported | - |
| Greet and say goodbye (after goodbye, the application ends) | Supported | - |
| Change speech recognition and synthesis language settings on the go | Supported | - |
| TODO much more ... | ||
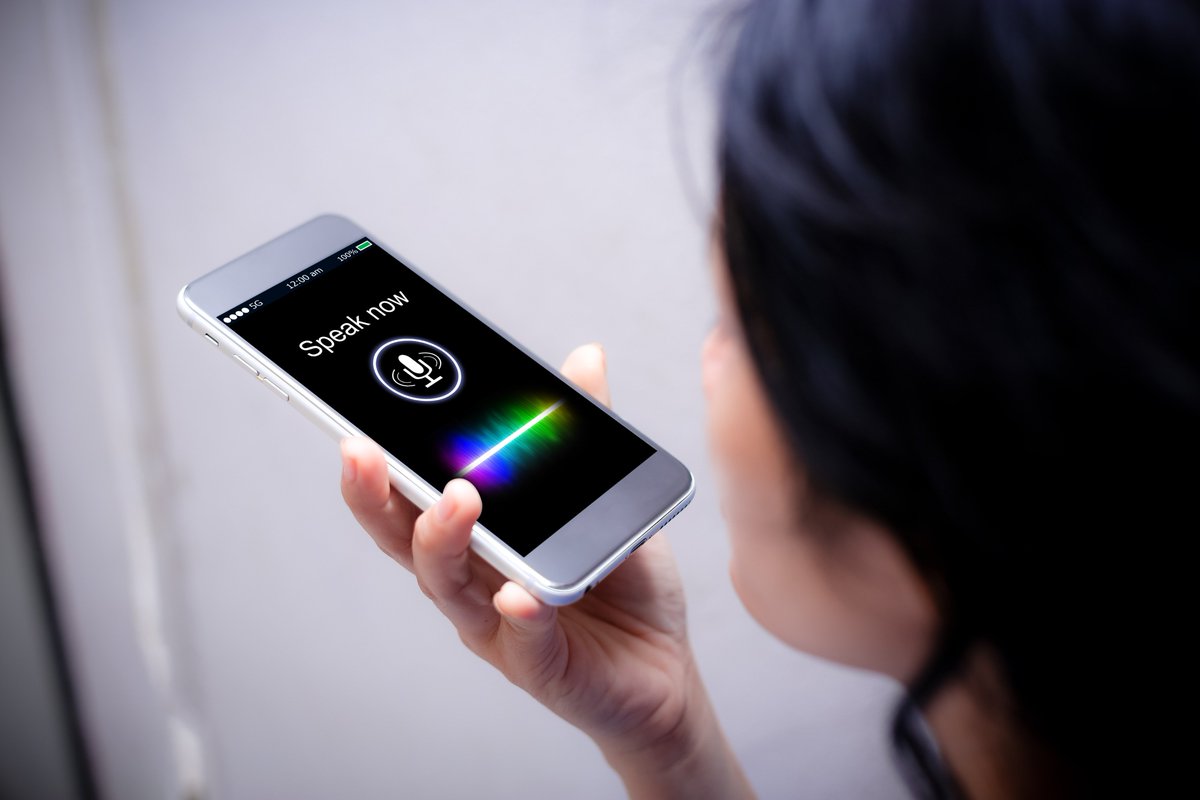
Step 1. Processing voice input
Let's start by learning how to handle voice input. We need a microphone and a couple of installed libraries: PyAudio and SpeechRecognition.
Let's prepare the basic tools for speech recognition:
import speech_recognition

if __name__ == "__main__":

    #
    recognizer = speech_recognition.Recognizer()
    microphone = speech_recognition.Microphone()

    while True:
        #
        voice_input = record_and_recognize_audio()
        print(voice_input)
Now let's create a function for recording and recognizing speech. For online recognition, we need Google, as it has high recognition quality in a large number of languages.
def record_and_recognize_audio(*args: tuple):
    """

    """
    with microphone:
        recognized_data = ""

        #
        recognizer.adjust_for_ambient_noise(microphone, duration=2)

        try:
            print("Listening...")
            audio = recognizer.listen(microphone, 5, 5)

        except speech_recognition.WaitTimeoutError:
            print("Can you check if your microphone is on, please?")
            return

        #  online-  Google
        try:
            print("Started recognition...")
            recognized_data = recognizer.recognize_google(audio, language="ru").lower()

        except speech_recognition.UnknownValueError:
            pass

        #
        except speech_recognition.RequestError:
            print("Check your Internet Connection, please")

        return recognized_data
What if there is no Internet access? You can use solutions for offline recognition. I personally really liked the Vosk project .
In fact, you don't need to implement the offline option if you don't need one. I just wanted to show both methods within the framework of the article, and you already choose based on your requirements for the system (for example, Google is undoubtedly the leader in the number of available recognition languages).Now, having implemented an offline solution and adding the necessary language models to the project, if there is no access to the network, we will automatically switch to offline recognition.
Note that in order not to have to repeat the same phrase twice, I decided to record audio from the microphone into a temporary wav file that will be deleted after each recognition.
Thus, the resulting code looks like this:
Complete code for speech recognition to work
from vosk import Model, KaldiRecognizer  # -  Vosk
import speech_recognition  #    (Speech-To-Text)
import wave  #      wav
import json  #   json-  json-
import os  #


def record_and_recognize_audio(*args: tuple):
    """

    """
    with microphone:
        recognized_data = ""

        #
        recognizer.adjust_for_ambient_noise(microphone, duration=2)

        try:
            print("Listening...")
            audio = recognizer.listen(microphone, 5, 5)

            with open("microphone-results.wav", "wb") as file:
                file.write(audio.get_wav_data())

        except speech_recognition.WaitTimeoutError:
            print("Can you check if your microphone is on, please?")
            return

        #  online-  Google
        try:
            print("Started recognition...")
            recognized_data = recognizer.recognize_google(audio, language="ru").lower()

        except speech_recognition.UnknownValueError:
            pass

        #
        #  offline-  Vosk
        except speech_recognition.RequestError:
            print("Trying to use offline recognition...")
            recognized_data = use_offline_recognition()

        return recognized_data


def use_offline_recognition():
    """
      -
    :return:
    """
    recognized_data = ""
    try:
        #
        if not os.path.exists("models/vosk-model-small-ru-0.4"):
            print("Please download the model from:\n"
                  "https://alphacephei.com/vosk/models and unpack as 'model' in the current folder.")
            exit(1)

        #      (   )
        wave_audio_file = wave.open("microphone-results.wav", "rb")
        model = Model("models/vosk-model-small-ru-0.4")
        offline_recognizer = KaldiRecognizer(model, wave_audio_file.getframerate())

        data = wave_audio_file.readframes(wave_audio_file.getnframes())
        if len(data) > 0:
            if offline_recognizer.AcceptWaveform(data):
                recognized_data = offline_recognizer.Result()

                #      JSON-
                # (      )
                recognized_data = json.loads(recognized_data)
                recognized_data = recognized_data["text"]
    except:
        print("Sorry, speech service is unavailable. Try again later")

    return recognized_data


if __name__ == "__main__":

    #
    recognizer = speech_recognition.Recognizer()
    microphone = speech_recognition.Microphone()

    while True:
        #
        #
        voice_input = record_and_recognize_audio()
        os.remove("microphone-results.wav")
        print(voice_input)
You might be asking "Why support offline capabilities?"
In my opinion, it is always worth considering that the user may be cut off from the network. In this case, the voice assistant can still be useful if you use it as a conversational bot or for solving a number of simple tasks, for example, counting something, recommending a movie, helping to choose a kitchen, playing a game, etc.
Step 2. Configuring the voice assistant
Since our voice assistant can have gender, language of speech, and, according to the classics, a name, let's allocate a separate class for this data, with which we will work in the future.
In order to set a voice for our assistant, we will use the pyttsx3 offline speech synthesis library. It will automatically find the voices available for synthesis on our computer, depending on the settings of the operating system (therefore, it is possible that you may have other voices available and you will need different indices).
We will also add to the main function the initialization of speech synthesis and a separate function for playing it. To make sure everything works, let's make a small check that the user has greeted us, and give him a return greeting from the assistant:
Complete code for voice assistant framework (speech synthesis and recognition)
from vosk import Model, KaldiRecognizer  # -  Vosk
import speech_recognition  #    (Speech-To-Text)
import pyttsx3  #   (Text-To-Speech)
import wave  #      wav
import json  #   json-  json-
import os  #


class VoiceAssistant:
    """
      ,  , ,
    """
    name = ""
    sex = ""
    speech_language = ""
    recognition_language = ""


def setup_assistant_voice():
    """
        (
        )
    """
    voices = ttsEngine.getProperty("voices")

    if assistant.speech_language == "en":
        assistant.recognition_language = "en-US"
        if assistant.sex == "female":
            # Microsoft Zira Desktop - English (United States)
            ttsEngine.setProperty("voice", voices[1].id)
        else:
            # Microsoft David Desktop - English (United States)
            ttsEngine.setProperty("voice", voices[2].id)
    else:
        assistant.recognition_language = "ru-RU"
        # Microsoft Irina Desktop - Russian
        ttsEngine.setProperty("voice", voices[0].id)


def play_voice_assistant_speech(text_to_speech):
    """
         (  )
    :param text_to_speech: ,
    """
    ttsEngine.say(str(text_to_speech))
    ttsEngine.runAndWait()


def record_and_recognize_audio(*args: tuple):
    """

    """
    with microphone:
        recognized_data = ""

        #
        recognizer.adjust_for_ambient_noise(microphone, duration=2)

        try:
            print("Listening...")
            audio = recognizer.listen(microphone, 5, 5)

            with open("microphone-results.wav", "wb") as file:
                file.write(audio.get_wav_data())

        except speech_recognition.WaitTimeoutError:
            print("Can you check if your microphone is on, please?")
            return

        #  online-  Google
        # (  )
        try:
            print("Started recognition...")
            recognized_data = recognizer.recognize_google(audio, language="ru").lower()

        except speech_recognition.UnknownValueError:
            pass

        #
        #   offline-  Vosk
        except speech_recognition.RequestError:
            print("Trying to use offline recognition...")
            recognized_data = use_offline_recognition()

        return recognized_data


def use_offline_recognition():
    """
      -
    :return:
    """
    recognized_data = ""
    try:
        #
        if not os.path.exists("models/vosk-model-small-ru-0.4"):
            print("Please download the model from:\n"
                  "https://alphacephei.com/vosk/models and unpack as 'model' in the current folder.")
            exit(1)

        #      (   )
        wave_audio_file = wave.open("microphone-results.wav", "rb")
        model = Model("models/vosk-model-small-ru-0.4")
        offline_recognizer = KaldiRecognizer(model, wave_audio_file.getframerate())

        data = wave_audio_file.readframes(wave_audio_file.getnframes())
        if len(data) > 0:
            if offline_recognizer.AcceptWaveform(data):
                recognized_data = offline_recognizer.Result()

                #      JSON-
                # (      )
                recognized_data = json.loads(recognized_data)
                recognized_data = recognized_data["text"]
    except:
        print("Sorry, speech service is unavailable. Try again later")

    return recognized_data


if __name__ == "__main__":

    #
    recognizer = speech_recognition.Recognizer()
    microphone = speech_recognition.Microphone()

    #
    ttsEngine = pyttsx3.init()

    #
    assistant = VoiceAssistant()
    assistant.name = "Alice"
    assistant.sex = "female"
    assistant.speech_language = "ru"

    #
    setup_assistant_voice()

    while True:
        #
        #
        voice_input = record_and_recognize_audio()
        os.remove("microphone-results.wav")
        print(voice_input)

        #      ()
        voice_input = voice_input.split(" ")
        command = voice_input[0]

        if command == "":
            play_voice_assistant_speech("")
In fact, here I would like to learn how to write a speech synthesizer on my own, but my knowledge here will not be enough. If you can suggest good literature, a course or an interesting documented solution that will help you understand this topic deeply, please write in the comments.
Step 3. Command processing
Now that we have "learned" to recognize and synthesize speech with the help of the simply divine developments of our colleagues, we can begin to reinvent our wheel for processing the user's speech commands: D
In my case, I use multilingual options for storing commands, since I do not have so many events, and I am satisfied with the accuracy of the definition of one or another command. However, for large projects, I recommend separating configurations by language.
I can offer two ways to store commands.
1 way
You can use an excellent JSON-like object in which to store intentions, development scenarios, responses in case of failed attempts (these are often used for chat bots). It looks something like this:
config = {
    "intents": {
        "greeting": {
            "examples": ["", "", " ",
                         "hello", "good morning"],
            "responses": play_greetings
        },
        "farewell": {
            "examples": ["", " ", "", " ",
                         "goodbye", "bye", "see you soon"],
            "responses": play_farewell_and_quit
        },
        "google_search": {
            "examples": ["  ",
                         "search on google", "google", "find on google"],
            "responses": search_for_term_on_google
        },
    },
    "failure_phrases": play_failure_phrase
}
This option is suitable for those who want to train an assistant to respond to difficult phrases. Moreover, here you can apply the NLU approach and create the ability to predict the user's intent by checking them against those already in the configuration.
We will consider this method in detail at step 5 of this article. In the meantime, I will draw your attention to a simpler option.
2 way
You can take a simplified dictionary, which will have a hashable type tuple as keys (since dictionaries use hashes to quickly store and retrieve elements), and the names of functions that will be executed will be in the form of values. For short commands, the following option is suitable:
commands = {
    ("hello", "hi", "morning", ""): play_greetings,
    ("bye", "goodbye", "quit", "exit", "stop", ""): play_farewell_and_quit,
    ("search", "google", "find", ""): search_for_term_on_google,
    ("video", "youtube", "watch", ""): search_for_video_on_youtube,
    ("wikipedia", "definition", "about", "", ""): search_for_definition_on_wikipedia,
    ("translate", "interpretation", "translation", "", "", ""): get_translation,
    ("language", ""): change_language,
    ("weather", "forecast", "", ""): get_weather_forecast,
}
To process it, we need to add the code as follows:
def execute_command_with_name(command_name: str, *args: list):
    """

    :param command_name:
    :param args: ,
    :return:
    """
    for key in commands.keys():
        if command_name in key:
            commands[key](*args)
        else:
            pass  # print("Command not found")


if __name__ == "__main__":

    #
    recognizer = speech_recognition.Recognizer()
    microphone = speech_recognition.Microphone()

    while True:
        #
        #
        voice_input = record_and_recognize_audio()
        os.remove("microphone-results.wav")
        print(voice_input)

        #      ()
        voice_input = voice_input.split(" ")
        command = voice_input[0]
        command_options = [str(input_part) for input_part in voice_input[1:len(voice_input)]]
        execute_command_with_name(command, command_options)
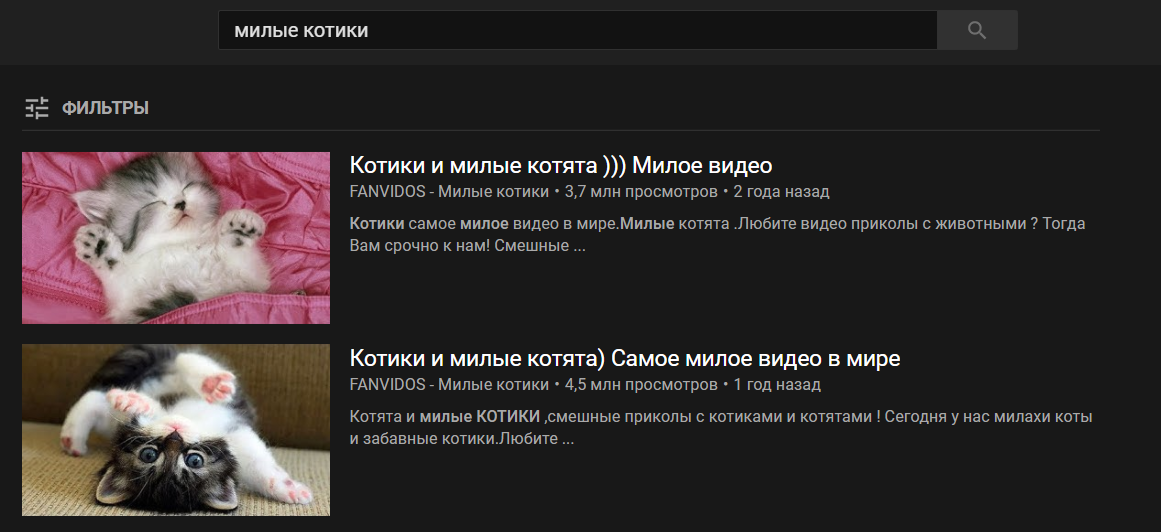
Additional arguments will be passed to the function after the command word. That is, if you say the phrase " video cute cats ", the command " video " will call the search_for_video_on_youtube () function with the argument " cute cats " and will give the following result:
An example of such a function with processing incoming arguments:
def search_for_video_on_youtube(*args: tuple):
    """
       YouTube
    :param args:
    """
    if not args[0]: return
    search_term = " ".join(args[0])
    url = "https://www.youtube.com/results?search_query=" + search_term
    webbrowser.get().open(url)

    #
    #  ,      JSON-
    play_voice_assistant_speech("Here is what I found for " + search_term + "on youtube")
That's it! The main functionality of the bot is ready. Then you can endlessly improve it in various ways. My implementation with detailed comments is available on my GitHub .
Below we will look at a number of improvements to make our assistant even smarter.
Step 4. Adding multilingualism
To teach our assistant to work with several language models, it will be most convenient to organize a small JSON file with a simple structure:
{
  "Can you check if your microphone is on, please?": {
    "ru": ", ,   ",
    "en": "Can you check if your microphone is on, please?"
  },
  "What did you say again?": {
    "ru": ", ",
    "en": "What did you say again?"
  },
}
In my case, I use switching between Russian and English, since models for speech recognition and voice for speech synthesis are available to me for this. The language will be selected depending on the language of the speech of the voice assistant itself.
In order to receive the translation, we can create a separate class with a method that will return us a string with the translation:
class Translation:
    """


    """
    with open("translations.json", "r", encoding="UTF-8") as file:
        translations = json.load(file)


    def get(self, text: str):
        """
                (  )
        :param text: ,
        :return:
        """
        if text in self.translations:
            return self.translations[text][assistant.speech_language]
        else:
            #
            #
            print(colored("Not translated phrase: {}".format(text), "red"))
            return text
In the main function, before the loop, we declare our translator as follows: translator = Translation ()
Now, when playing the assistant's speech, we can get the translation as follows:
play_voice_assistant_speech(translator.get(
    "Here is what I found for {} on Wikipedia").format(search_term))
As you can see from the example above, this works even for those lines that require additional arguments to be inserted. Thus, you can translate the "standard" sets of phrases for your assistants.
Step 5. A little machine learning
Now let's return to the JSON object for storing multi-word commands, which is typical for most chatbots, which I mentioned in paragraph 3. It is suitable for those who do not want to use strict commands and plan to expand their understanding of user intent using NLU -methods.
Roughly speaking, in this case, the phrases " good afternoon ", " good evening " and " good morning " will be considered equivalent. The assistant will understand that in all three cases, the user's intention was to greet their voice assistant.
Using this method, you can also create a conversational bot for chats or a conversational mode for your voice assistant (for cases when you need an interlocutor).
To implement such a possibility, we will need to add a couple of functions:
def prepare_corpus():
    """

    """
    corpus = []
    target_vector = []
    for intent_name, intent_data in config["intents"].items():
        for example in intent_data["examples"]:
            corpus.append(example)
            target_vector.append(intent_name)

    training_vector = vectorizer.fit_transform(corpus)
    classifier_probability.fit(training_vector, target_vector)
    classifier.fit(training_vector, target_vector)


def get_intent(request):
    """

    :param request:
    :return:
    """
    best_intent = classifier.predict(vectorizer.transform([request]))[0]

    index_of_best_intent = list(classifier_probability.classes_).index(best_intent)
    probabilities = classifier_probability.predict_proba(vectorizer.transform([request]))[0]

    best_intent_probability = probabilities[index_of_best_intent]

    #
    if best_intent_probability > 0.57:
        return best_intent
And also slightly modify the main function by adding initialization of variables to prepare the model and changing the loop to the version corresponding to the new configuration:
#
# ( )
vectorizer = TfidfVectorizer(analyzer="char", ngram_range=(2, 3))
classifier_probability = LogisticRegression()
classifier = LinearSVC()
prepare_corpus()

while True:
    #
    #
    voice_input = record_and_recognize_audio()

    if os.path.exists("microphone-results.wav"):
        os.remove("microphone-results.wav")

    print(colored(voice_input, "blue"))

    #      ()
    if voice_input:
        voice_input_parts = voice_input.split(" ")

        #      -
        #
        if len(voice_input_parts) == 1:
            intent = get_intent(voice_input)
            if intent:
                config["intents"][intent]["responses"]()
            else:
                config["failure_phrases"]()

        #     -
        #     ,
        #
        if len(voice_input_parts) > 1:
            for guess in range(len(voice_input_parts)):
                intent = get_intent((" ".join(voice_input_parts[0:guess])).strip())
                if intent:
                    command_options = [voice_input_parts[guess:len(voice_input_parts)]]
                    config["intents"][intent]["responses"](*command_options)
                    break
                if not intent and guess == len(voice_input_parts)-1:
                    config["failure_phrases"]()
However, this method is more difficult to control: it requires constant verification that this or that phrase is still correctly identified by the system as part of a particular intention. Therefore, this method should be used with care (or experiment with the model itself).
Conclusion
This concludes my little tutorial.
I will be pleased if you share with me in the comments open-source solutions you know that can be implemented in this project, as well as your ideas on what other online and offline functions can be implemented.
The documented sources of my voice assistant in two versions can be found here .
PS: Solution works on Windows, Linux and MacOS with minor differences when installing PyAudio and Google libraries.