In the middle of July this year, we announced that a beta version of Proxmox Backup Server (PBS) was presented . On Singles Day, 11/11/2020 at 11:11 am, Proxmox Server Solutions GmbH published the release of version 1.0.1, which did not go unnoticed. Let's take a closer look at how to use PBS and what it is for.
The main emphasis when creating PBS was placed on compatibility and usability with Proxmox VE (PVE). The developers tried to simplify the integration process as much as possible and to make all the interface elements and the approach to backup management intuitive for PVE users.
A short but capacious introductory video about the capabilities of Proxmox Backup Server:
First of all, let's install Proxmox Backup Server. Since the beta version was released, the installer has remained exactly the same.
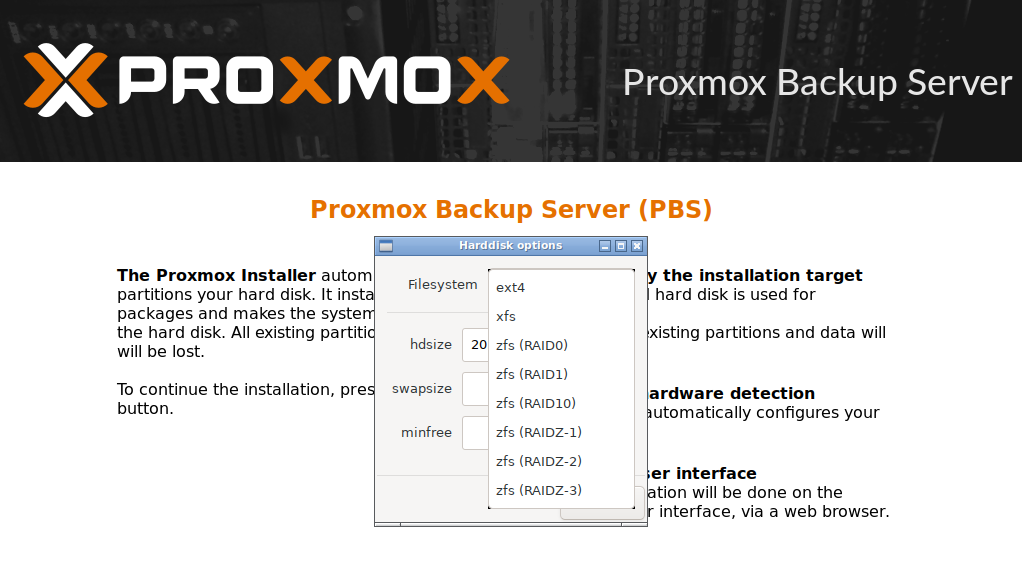
It is noteworthy that the system itself can assemble a ZFS array and install immediately on it. The traditional Linux EXT4 file system is also available for selection.
The XFS option is not recommended because it has a number of significant drawbacks, such as the inability to reduce the size of the existing file system, and the complexity of data recovery in the event of failures.After installation and reboot, it becomes possible to enter the PBS web management interface. Note that not all actions can be performed directly from it, some will have to be performed through the CLI. Probably, with the development of the product, the situation will radically change.
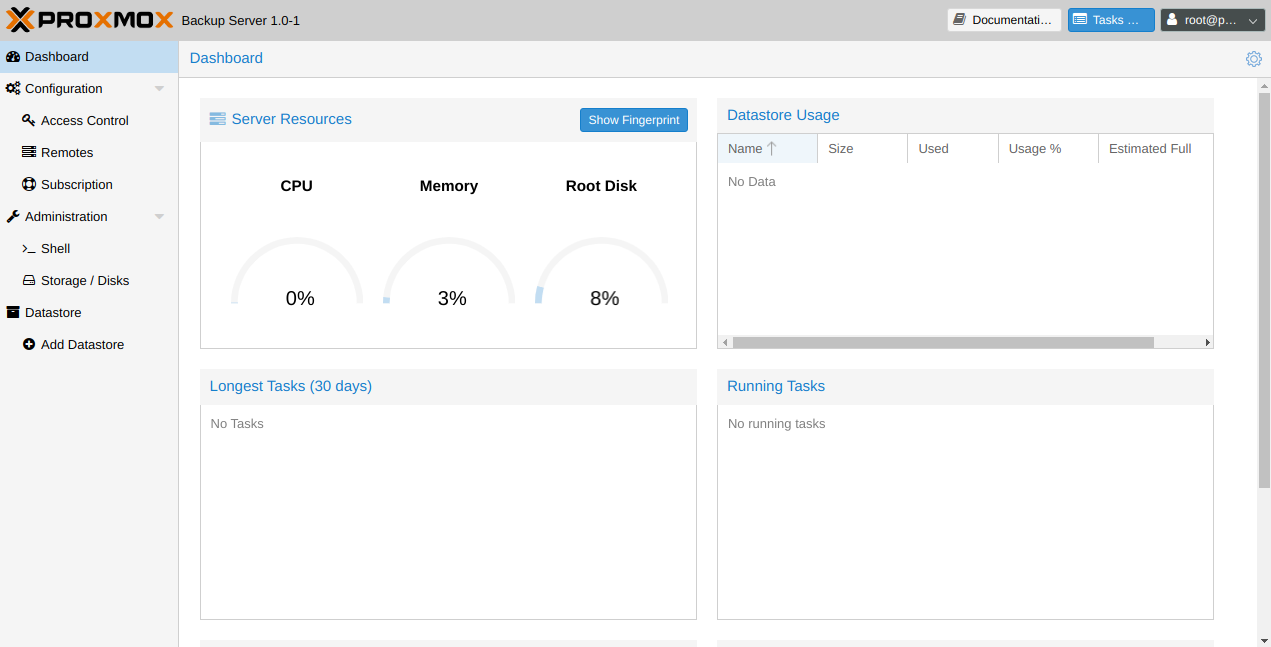
main page is quite informative. Convenient indicators that show in real time the load on the server, data on the occupied disk space, the longest operations in the last month, as well as running backups.
The main thing is not to forget the updates
So that later it would not be excruciatingly painful to receive errors like HTTP Error 404 Not Found: Path '/ fixed_index' not found when creating backup jobs, you should take care of updating the PVE and PBS servers to the latest versions. If you have a paid subscription to the Enterprise repository, then simply update the distributions with the command:
apt update && apt full-upgradeIf you don't have a subscription, that's okay. Let's add a repository to the no-subscription system and update from it.
nano /etc/apt/sources.list.d/pve-enterprise.listLet's comment out the line of the paid repository with the # symbol and add the following line.
For Proxmox Backup Server:
deb http://download.proxmox.com/debian/pbs buster pbs-no-subscriptionFor Proxmox Virtual Environment:
deb http://download.proxmox.com/debian/pve buster pve-no-subscriptionExit Ctrl + X and answer y . You can now update the packages with the above command and start integrating PBS.
Adding PBS Server to Proxmox VE
Before adding a backup server to the Proxmox VE virtualization environment, you will need to perform a number of preliminary steps directly on the Proxmox Backup Server.
User creation
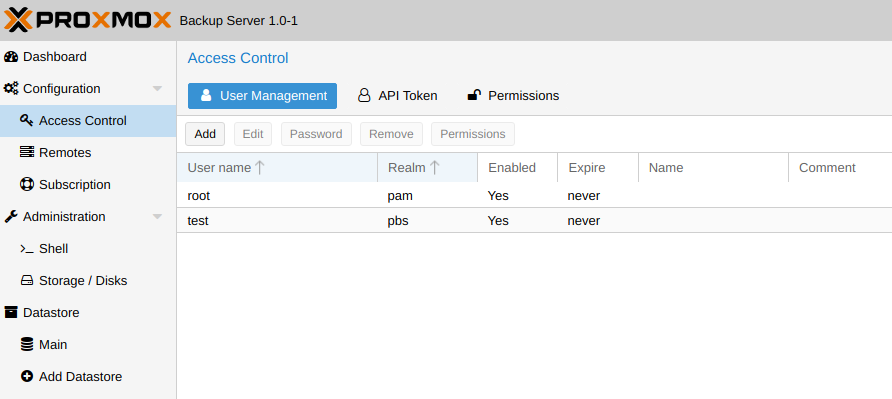
Before proceeding to backups, the first step is to configure access. We advise you to go directly to Configuration - Access Control and create users for the store. For demonstration purposes, we initially created a user test @ pbs that we will use to connect. Please note that when entering a username, the '@pbs' part is required, otherwise an error about incorrect data will be generated .
Now let's move on to creating the required repositories (Datastore in PBS terminology). This makes it possible to clearly distribute backups according to the criteria necessary for the system administrator, as well as distribute access rights. To create it, we need a directory located on one of the mounted disks.
Creating a Datastore and specifying access rights
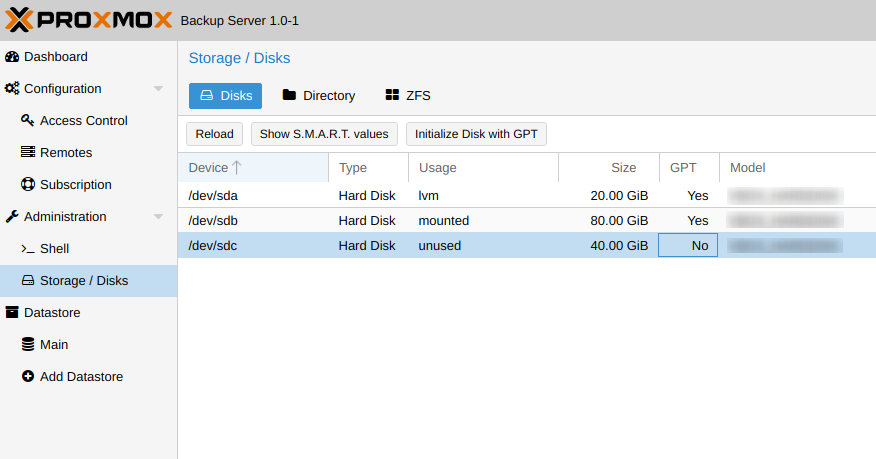
Go to the Administration - Storage / Disks section. Select the required disk and initialize it by clicking the Initialize Disk with GPT button. Now go to the Directory - Create: Directory sectionand create a directory for storing data. Here we specify the name of the repository and the absolute path to the created directory. If you check the Add as Datastore checkbox , then the new repository will be immediately connected as an entity for storing data.

It remains only to specify the users who have the right to use this repository and their access level. To do this, click on the name of the created repository, go to the Permissions section and click the Add - User Permission button . We select the desired user and his role, then confirm by clicking Add . This completes the preliminary preparation.
Saving the server's fingerprint
By default, PBS comes with a self-signed SSL certificate. In order to establish a trusted connection between the client and the PBS server in the future, its fingerprint should be read and saved for later use.
Go to Administration - Shell and take the server's "fingerprint":
proxmox-backup-manager cert info | grep FingerprintThe response to the command will be a line of the form:
Fingerprint (sha256):
bb:fb:13:0f:f7:59:df:32:f0:bf:70:38:22:f8:22:93:05:2f:22:80:bc:71:07:cc:8d:1f:6e:f8:0f:da:bf:73
In the future, we will use this fingerprint to establish a connection.
Adding a Server as a Storage Role
You can add storage either directly from the Proxmox VE web interface ( Datacenter - Storage - Add ) or manually. We will use the console and go through the following steps. Add our Datastore with the command:
pvesm add pbs PVE_STORAGE_NAME --server PBS_SERVER_ADDRESS --datastore STORAGE_NAMELet's take a look at what this command does:
- pvesm add pbs - add storage (Storage in PVE terminology);
- PVE_STORAGE_NAME - this name will be displayed in the PVE web interface and may differ from the storage name;
- --server PBS_SERVER_ADDRESS - specify the hostname or IP address of the PBS server (if necessary, you can specify another connection port via --port);
- --datastore STORAGE_NAME - here we specify the name of an existing datastore on the PBS server.
pvesm set PVE_STORAGE_NAME --username test@pbs --password PASSWORDEverything is also logical here. We need to specify the details for connecting to the storage. That is why we previously created a user and distributed access rights. It remains only to register the "fingerprint" of the server to establish a trusted connection.
pvesm set PVE_STORAGE_NAME --fingerprint
bb:fb:13:0f:f7:59:df:32:f0:bf:70:38:22:f8:22:93:05:2f:22:80:bc:71:07:cc:8d:1f:6e:f8:0f:da:bf:73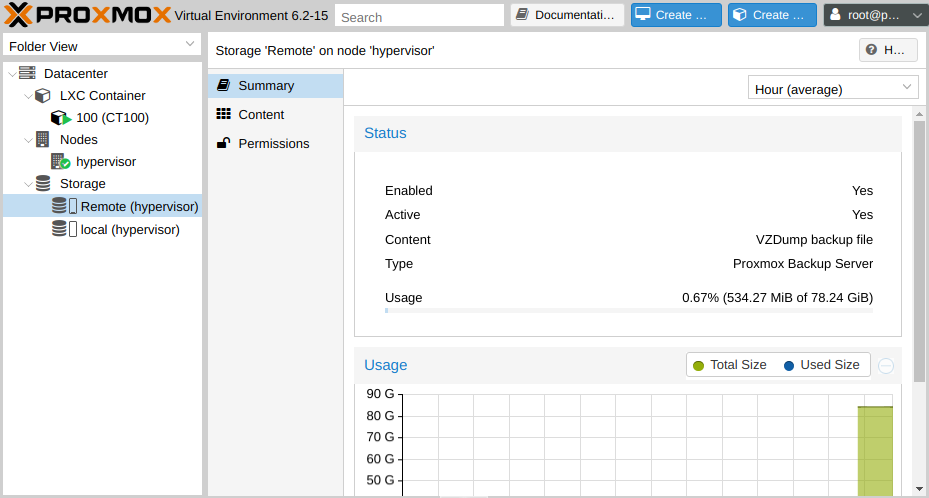
After the completed steps, we will see our storage in the list of available backups of virtual machines and containers for storing data, as well as statistics of fullness. It's time to make your first backup.
LXC container backup
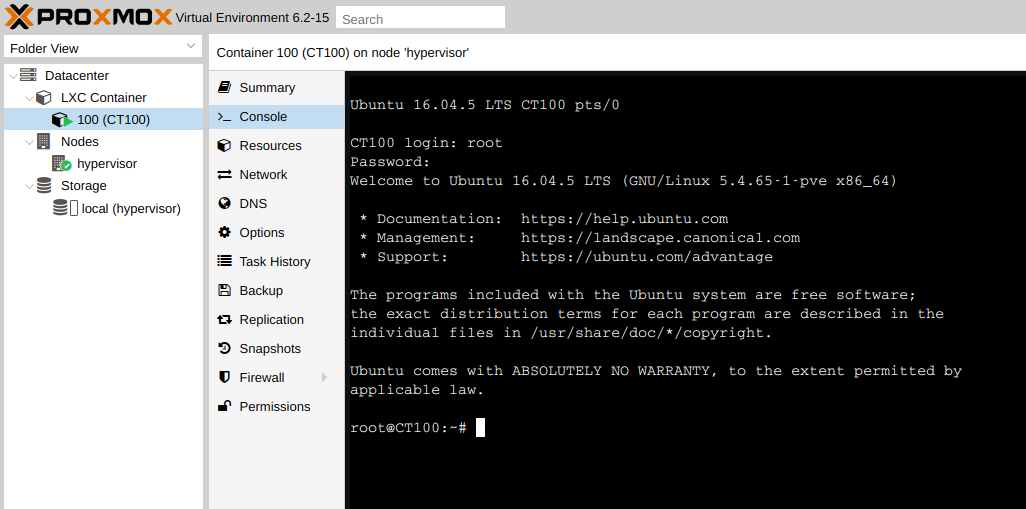
For the test, we created and launched the CT100 container from the standard template with the Ubuntu 16.04 operating system running inside. Now go to the Backup section, select the desired Storage and click the Backup Now button. We select the type of backup (you can read about this in detail in one of the previous articles ) and perform the backup.

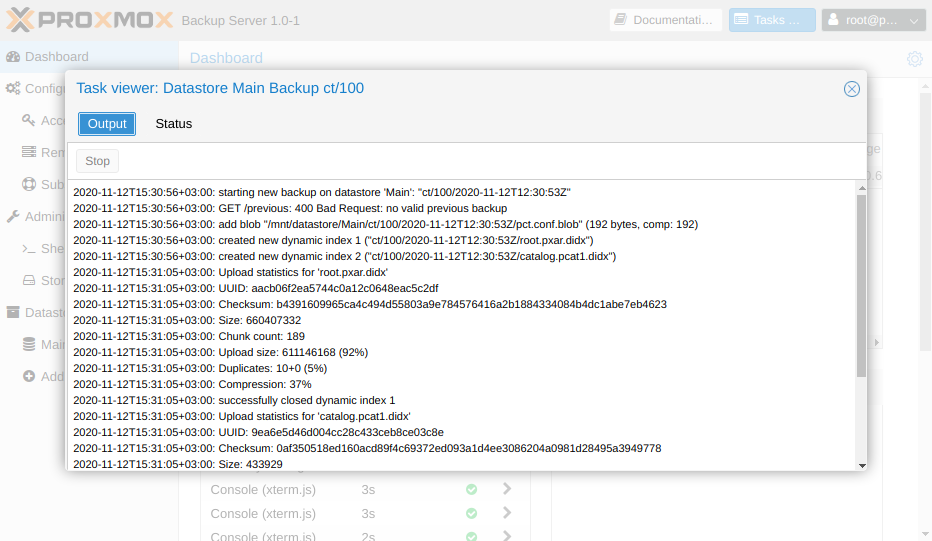
After logging into the PBS server, we will also see that we now have information about the completed backup task.
Container recovery
Making a backup is only half the battle. It is much more important to recover from it. We remove our LXC container from Ubuntu and try to perform the recovery procedure. To do this, in the PVE web interface, go to our Storage in the Content section and select the backup file.

For the restored container, select the location, the new ID (the default will be the one that was at the time of the backup), as well as the speed limit for reading data. This will prevent overloading the incoming channel of the virtualization server. Click Restore and launch our container.
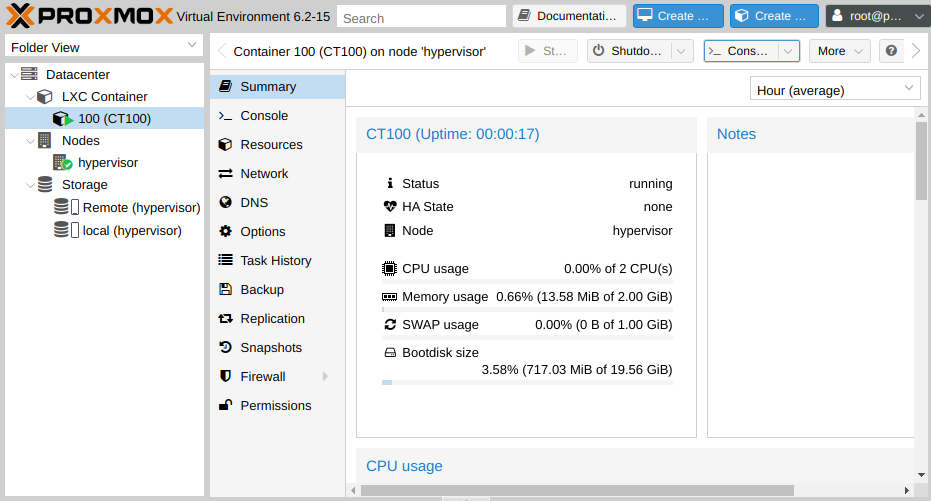
container has been successfully restored. On our test bench, the backup procedure took just over 9 seconds and recovered in 14. The speed will depend both on the options chosen and on the characteristics of both servers.
Virtual machine backup
The procedure for backing up a full-fledged virtual machine is no different from the procedure for backing up a container, except that it takes more time. For the test, we created a machine with ID 100 and deployed Ubuntu 16.04 on it, after which we performed a backup.

From the side of Proxmox Backup Server, it looked like this:
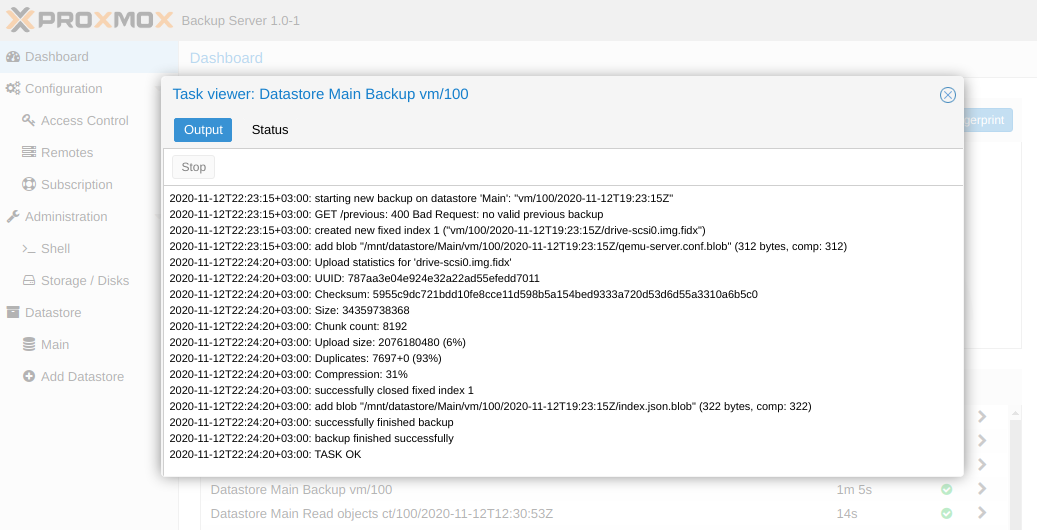
As with the container, the restore procedure is simple and trivial. We indicate which backup, where to deploy and whether we will turn on the machine after the procedure is completed.
Backup data from any Linux host
In addition to virtual machines and containers, it is stated that Proxmox Backup Server allows you to back up any entire Linux hosts. Let's check this in practice. The same PBS server will be used. For correct execution, we will need to perform a number of additional steps on the backed up host to install an agent called proxmox-backup-client . As a test machine, we will have a computer with the same Ubuntu 16.04.
There is no proxmox-backup-client utility in the Ubuntu repositories, so first let's add 3 repositories. Two of them are needed to resolve utility dependencies, and another contains the client we need:
sudo nano /etc/apt/sources.listAdd the following lines to the end:
deb http://ftp.debian.org/debian buster main contrib
deb http://ftp.debian.org/debian buster-updates main contrib
deb http://download.proxmox.com/debian/pbs buster pbs-no-subscription
Exit the editor Ctrl + X and answer y to the question about saving data. We pull and install the keys of the repositories:
sudo apt-key adv --recv-keys --keyserver keyserver.ubuntu.com 7BF2812E8A6E88E0sudo apt-key adv --recv-keys --keyserver keyserver.ubuntu.com 04EE7237B7D453ECsudo apt-key adv --recv-keys --keyserver keyserver.ubuntu.com DCC9EFBF77E11517Updating the list of application sources:
sudo apt updateInstalling the backup client:
sudo apt install proxmox-backup-clientIt remains only to perform a backup. For example, we will back up the root directory of our test machine:
sudo proxmox-backup-client backup root.pxar:/ --repository PBS_IP_ADDRESS:DATASTORE_NAME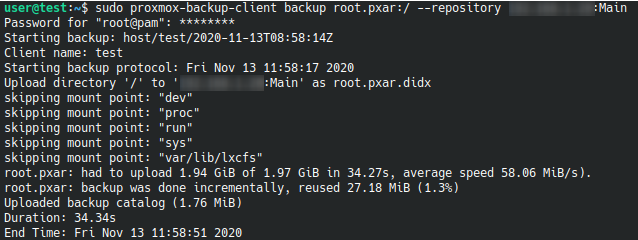
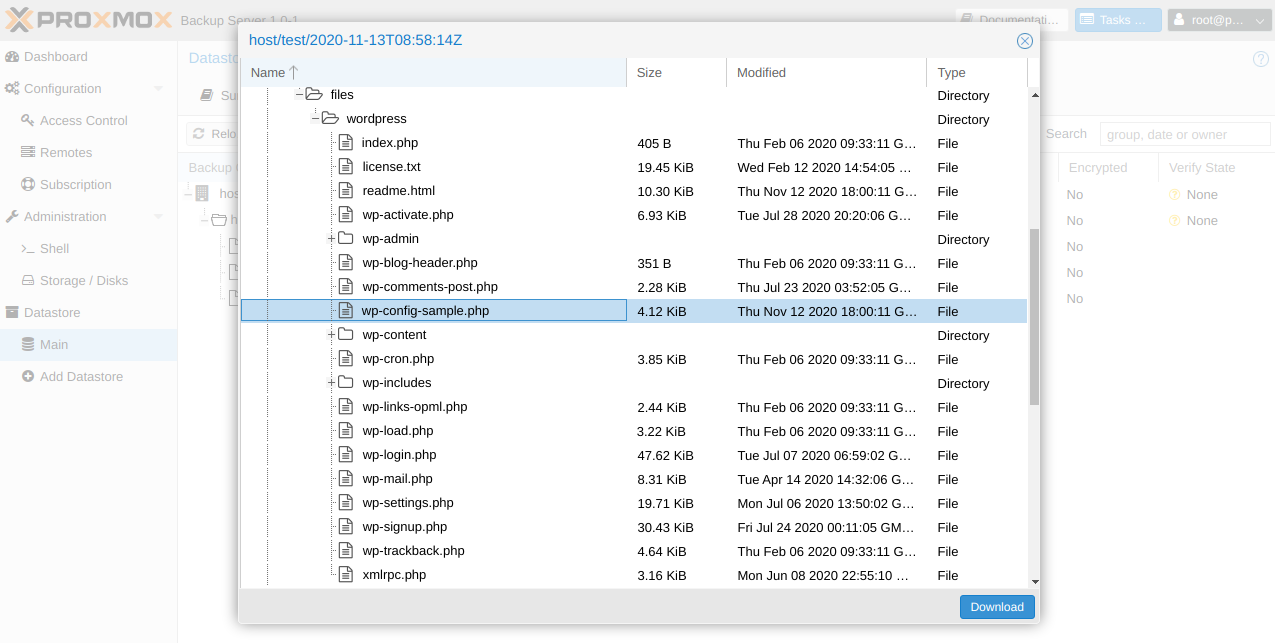
Restoring individual files from a backup
It often happens that you do not need to restore the entire data, you just need to pull out a specific file or directory. You can do this in two clicks directly from the PBS web interface:
Conclusion
Proxmox Backup Server was the piece of the puzzle that was missing for a complete Enterprise-grade virtualization environment. Once you have configured scheduled backups, you will not have to worry that virtual machines or containers will disappear, for example, if storage media fail. To restore them now is a trivial task that practically does not require any unnecessary gestures. We picked up a new host, added a repository and started recovery.
We add to this that developers are actively expanding the capabilities of their software and do not leave users to their fate, compiling competent documentation and helping in the community forum .
