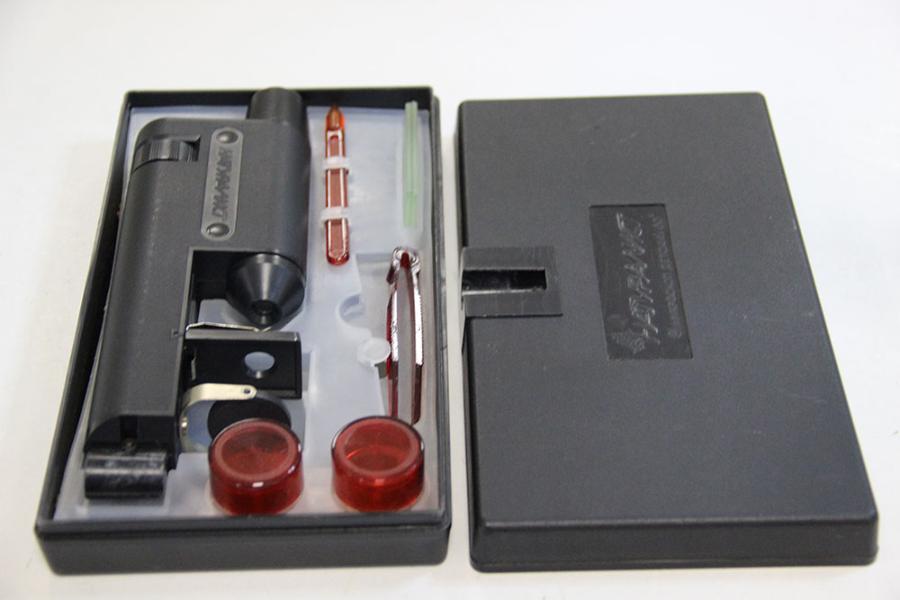
Fig. 1. Children's microscope "Naturalist" (for lack of a better - a photo from the trading platform)
More than thirty years have passed since then, but I have not forgotten about my childhood hobby. And then one day, under the influence of a fit of nostalgia, I decided to buy myself the same toy, only a little more modern. But the very first glance at the corresponding section of the Internet site showed that I do not understand something in this life. The abundance of various devices described by the same word "microscope" simply dazzled the eyes. And now, instead of a couple of quick clicks of the mouse, I had to sit tight and understand at least the very basics of modern microscopy. The results are below.
Warning: this review is not intended to be an exhaustive description and is intended for amateur enthusiasts interested in a subject for themselves or for children. The article does not contain any theory related to optics; it is abundant in other materials.
Types of microscopes
There are many different tasks in which it is necessary to examine in detail the smallest details of objects - from precious stones and coins to the insides of a living cell. The methods used strongly depend on what and how we need to see. Let's leave behind the scenes the smallest objects like viruses or the molecular structure of a substance and focus on larger objects ranging in size from bacteria and above. Optical devices used for such tasks are divided into two large classes: biological (compound) and stereomicroscopes.
We will not dwell on stereomicroscopes in detail. I will only note that, contrary to subconscious expectations from the name, this class of devices is not intended for creating stereo images. Stereomicroscopes are used to examine relatively large opaque objects in reflected light: microcircuits, stones, insects, etc. They differ in relatively low optical magnification (40-60-80x, although the most advanced ones can even have 200x) and are often equipped with built-in monitors or digital interfaces. The light source is above the sample. Sizes - from handheld devices to solid stationary installations.
Some stereomicroscopes for industrial purposes even lack an optical eyepiece and are exclusively intended for connection to a computer / smartphone via USB / WiFi (“digital microscopes”). These microscopes are relatively cheap. If you need to get a good look at a cockroach, a diamond, or the soldering of elements on a board, this type of device is for you. Just remember that super-magnifications like 1600x, which can often be found in the descriptions of even the cheapest devices, refer to digital magnification and do not even come close to real optical magnification. What is it like? And who knows, manufacturers do not condescend to such details.
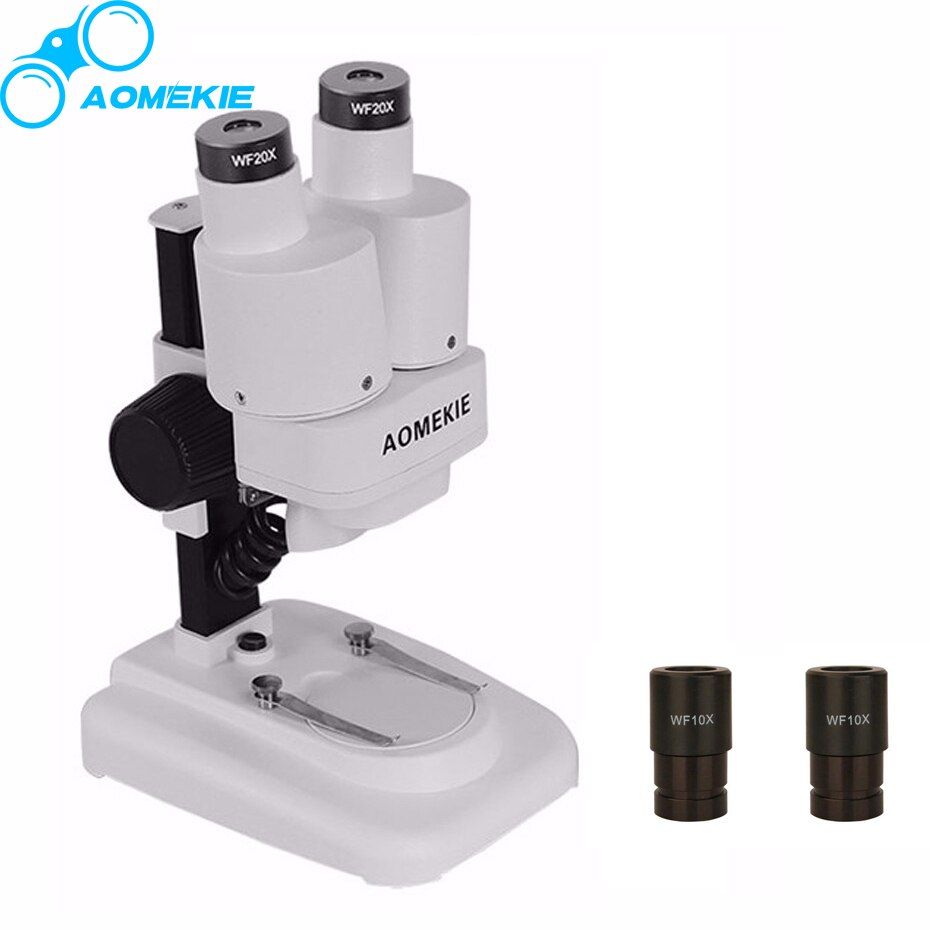
Figure: 2. Aomekie stereo microscope with 20x / 40x magnification (manufacturer's photo)
Biological microscopes
The main class of devices on which we will focus is what is called a biological microscope, in English terminology "compound" (compound, from compound). It is intended for viewing thin transparent samples (tissue sections, bacteria, microorganisms, etc.) in transmitted light. The sample is prepared on a slide that fits on the working platform, the light source is below the sample.
It should be understood that it is difficult to shove the same cockroach under a biological microscope: for powerful optics, where the distance between the lens and the drug is literally a tenth of a millimeter, the drug must be very thin, flat and transparent, specially prepared and possibly colored. This is usually a drop or thin film placed between a microscope slide and a cover slip. A cockroach will fit under a low-power lens (their focal length is from several millimeters to several centimeters). However, you should take care of a good external light source and do not rely on a high depth of field: at any given time, you can clearly see only a certain layer of the image.
A typical biological microscope consists of three parts: a mechanical platform (base, stage, aiming and focusing devices), illumination, and an optical system.
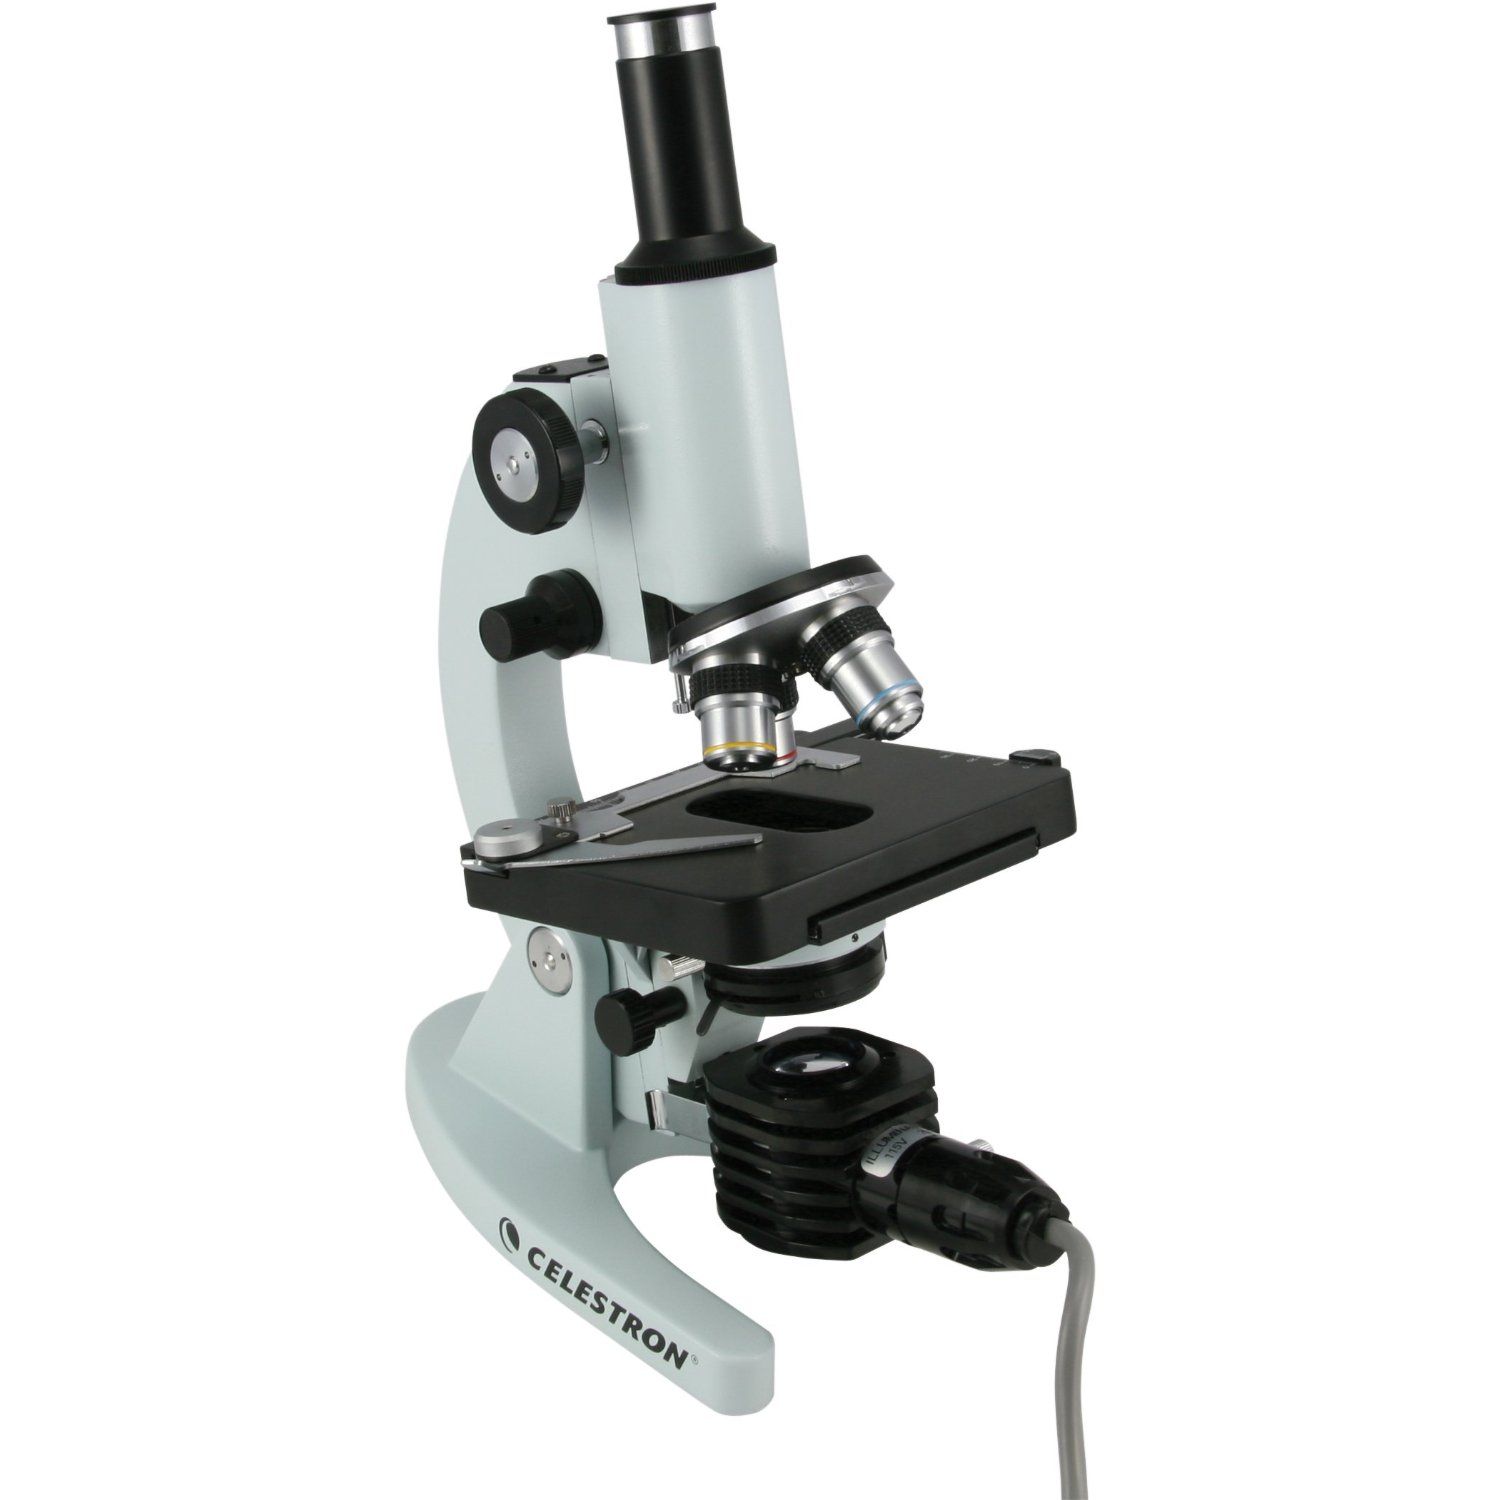
Figure: 3. Celestron microscope (manufacturer's photo)
Mechanical platform
The mechanical part consists of a base on which all other components are mounted, and a stage on which the sample fits. A very important part of mechanics is the system responsible for moving the stage in three dimensions - this is how the sample is brought to the focal point of a fixed objective. There are models in which the lens moves, but this is a rare exotic. In entry-level devices, the mechanics are the most primitive. Height adjustment (focusing) is only coarse, moving the sample in the plane - with your fingers.
In more complex models, in addition to coarse focusing, a fine one appears, as well as a clamp that moves the slide in the horizontal plane (its movable side has a characteristic crescent shape, it can be clearly seen on device images). In the simplest microscopes, the vertical movement is regulated by different screws / handles, in more advanced microscopes they are aligned on the same axis. In microscopes without fine focusing, there is a real danger of crushing both the slide and the objective lens due to awkward hand movement.
Case material - plastic or metal. Plastic is lighter but also more fragile. It is usually used in mobile models designed for children or field laboratories where it is important to minimize weight. For stationary microscopes, metal is used: it is not only stronger, but also less susceptible to vibrations, which become critical at high magnifications. The weight of a metal microscope is 3-4 kilograms.
Historically, the base of the microscope consisted of a fixed base and a movable arm that allowed the microscope to be reoriented relative to the vertical. This was necessary not only for the comfort of work, but also for obtaining high-quality backlighting. However, modern microscopes have a monolithic base with a fixed angle of inclination of the eye tubes, which is not always convenient. Keep in mind that the comfort of your neck during work directly depends on this angle, so choose the device with an angle that suits you.
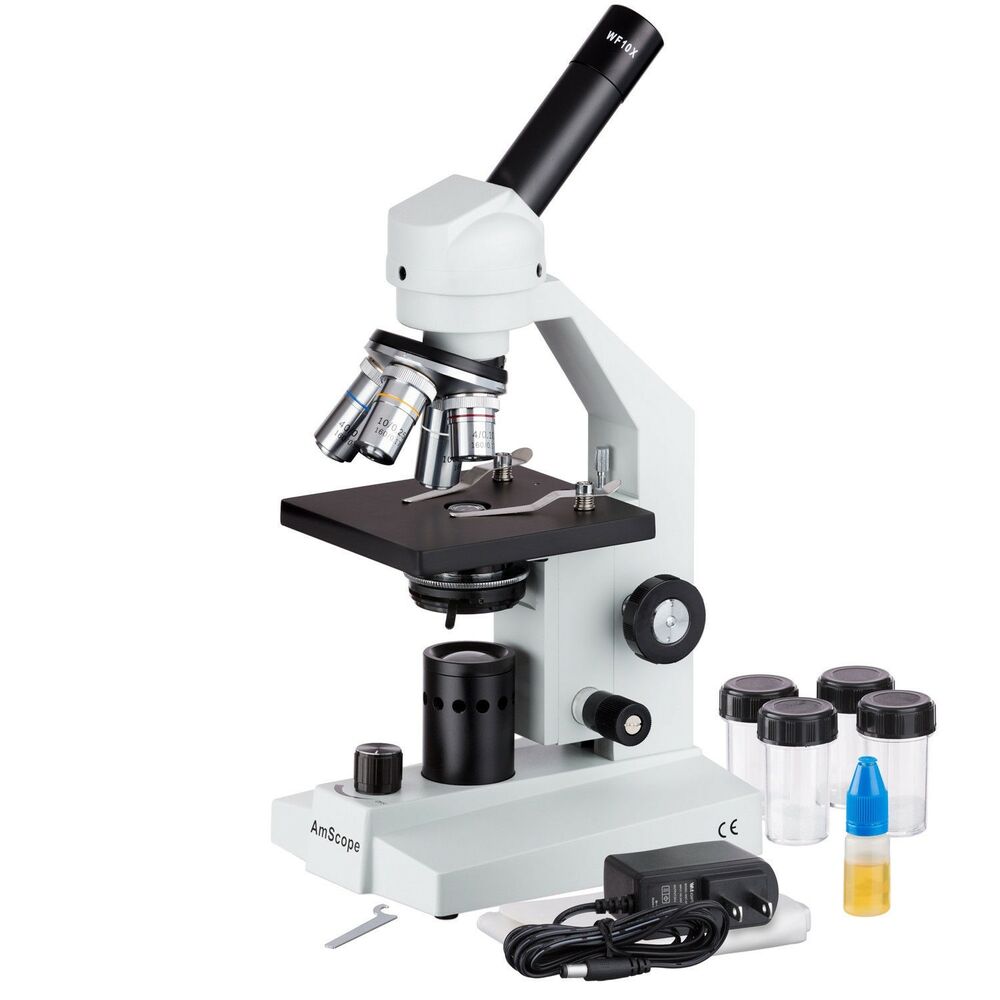
Figure: 4. AmScope M500 with the simplest stage without moving in the plane (manufacturer's photo)
Electrical components
It is not enough to bring the sample to the focal point; it must also be correctly illuminated. Poor backlighting will result in an image that is too dark or overexposed and unreadable, as well as uneven field illumination.
Historically, a concave mirror was used for illumination, located under a hole in the table. However, with its help it is difficult to achieve high-quality uniform illumination of the field of view, which is critical at high magnifications. It also imposes very serious restrictions on the placement of the microscope in relation to the light source, as well as on the source itself. Such a mirror today remains only in the most primitive devices, usually in field microscopes or children's microscopes, as in the "Naturalist" shown at the beginning of the article. Sometimes, however, it can be supplied as an additional option, replacing the main light source.
Today, different types of lamps built into the base are used for illumination. Until relatively recently, halogen or incandescent lamps were used, but they had their own problems. First of all, this is due to the fact that the light was generated by a thin thread, and it was projected onto a round field, which, again, creates problems with uniformity. However, in modern conditions, the industry widely uses LED light sources, which removed the problem.
The backlight is powered either by batteries (such microscopes are especially good for children, since they can be carried everywhere with them), or by a wire from the outlet. If you order a wired device abroad, remember about the plug adapters.
The illumination is controlled both by the intensity of the lamp and by the light condenser under the work table, which has a diaphragm and a lens for focusing light on the sample. In inexpensive models, the most common Abbe condenser or its modifications, this name can often be seen in the description of the microscope. For amateur activities, illumination of the "bright field" type is usually used (in the sense, transparent objects are viewed against a bright white background), although there are other types: "dark field", which gives an inverted image, fluorescent illumination, etc. The condenser can be replaceable, allowing different types of illumination to be obtained in the same microscope.
There are also models with additional upper illumination, as in the picture below (a kind of hybrid of a biological and a stereomicroscope), but usually this is the lot of amateur devices and low magnifications: powerful lenses, practically sticking into the cover glass, simply block the upper light. In practice, already a forty-fold lens, even with good external illumination, sees almost nothing, and a hundred-fold shows complete darkness.
By the way, pay attention: the microscope in the picture does not have a full-fledged condenser; instead, only a light source and a diaphragm. On the table there are only the most primitive clamps-clips for a glass slide, moving the specimen in the plane - with your fingers.
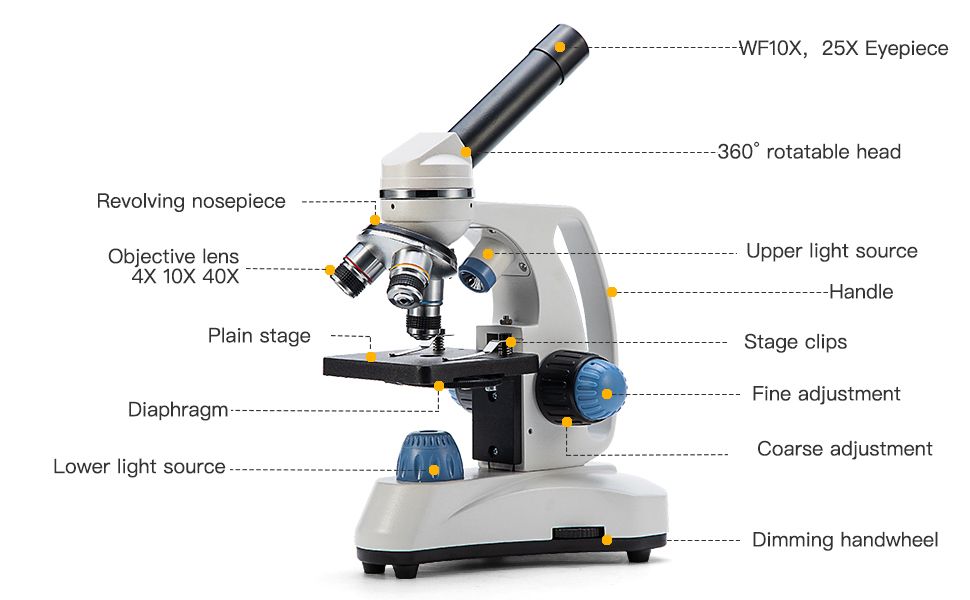
Figure: 5. Amateur microscope Swift SW150 of the input level with additional upper illumination (manufacturer's photo)
Optical system - lenses
The optical system consists of objectives (looking directly at the sample) and eyepieces (eyepiece).
Objectives directly viewing the sample are mounted on a revolving disc for quick change. At present, they have four typical magnification ranges: 4-5x (a scanning lens, usually for coarse aiming), 10-15x (low-power lenses), 40-60x (high-power) and 90-100x and higher (super-power). Objectives with a magnification higher than 100x are rare and certainly not in amateur microscopes.
The first three types ("dry") are usually standard for all models, even for children. The latter type of lens is found in more advanced models and in order to obtain a high-quality image, it requires a special technique of use - immersion. The bottom line is that the refractive indices of air and glass are different for different wavelengths (this is the basis for the decomposition of white into a spectrum). If there is air between the sample and the lens, severe chromatic aberration appears at 100x magnification, reducing sharpness to the point of being completely illegible.
Therefore, for strong (ninety-fold and higher) lenses, the technique of immersion (immersion) of the front lens of the objective in a special oil having the same refractive index as glass is usually used. A drop of oil is applied to the cover glass, into which the objective is directly lowered. After examination, the oil is washed off the lens. These lenses are usually marked with the word oil. They can be used dry, but it is impossible to achieve high sharpness in this case. The oil is included in the starter kit of a microscope with such objectives, and can also be purchased separately (cedar nut oil is ideal from natural oils). Oil immersion should not be used with less powerful lenses for which it is not explicitly mentioned.
Interestingly, even 50x lenses were immersed in the middle of the last century, but since then the technique has made significant progress. Historically, the first immersion liquid was ordinary water (the technique was invented at the beginning of the 19th century), a suitable oil was first picked up towards the end of the same century.
Also, 100-fold objectives can directly abut against the cover glass of the preparation. Front lens protection is usually done with a special spring frame (the word spring in the lens description). Several times in the descriptions I also came across the word feather instead of spring, although I could not find a definition. For amateur research, such lenses are redundant both in terms of an additional considerable price and in terms of the effort expended. They do not represent much additional value at home.
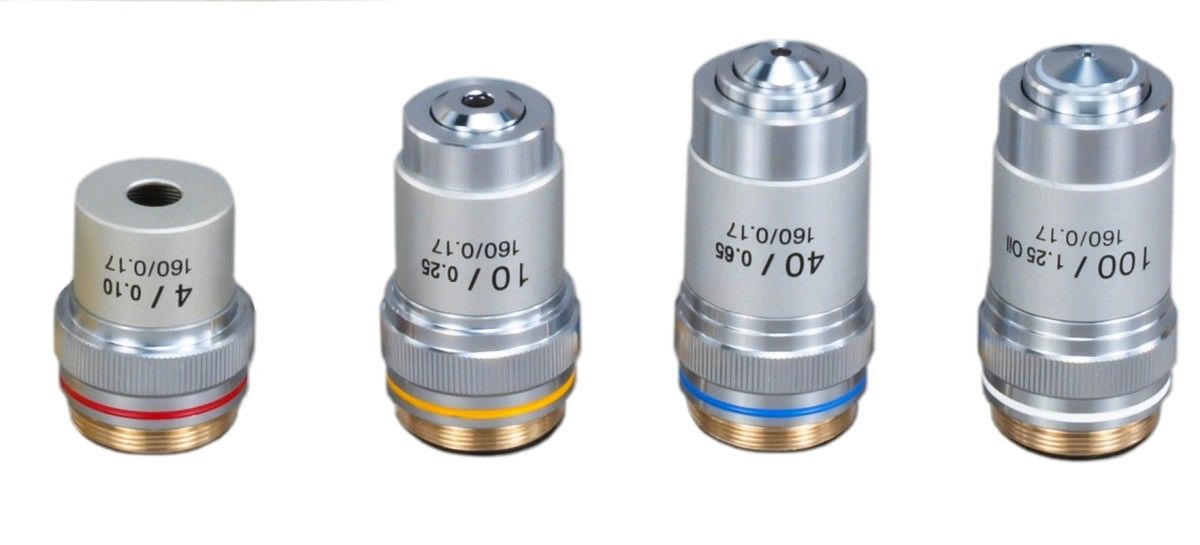
Figure: 6. A set of achromatic lenses from OMAX with typical powers of 4x, 10x, 40x and 100x (manufacturer's photo). Spring frame is clearly visible on 100x lens
Optical system - eyepieces
Replaceable eyepieces are inserted into the tubes at the top of the microscope and have their own fixed magnification, for example 10x, 16x, 25x. The higher the magnification, the shorter the eyepiece. Spectacles like me need to keep in mind that, unlike a camera, working with a microscope eyepiece with glasses is extremely difficult: the eyepiece should practically be pressed against the eye. The eye relief for ordinary eyepieces is 7-13 mm, with glasses you need special eyepieces with a high offset (15-20 mm). However, this is not a particular problem. In any case, the sharpness in the microscope is adjusted to the eye individually. Even with the highest myopia, a sharp image can be seen in the microscope. The only disadvantage is that you have to take off and put on your glasses all the time.
Eyepieces can be wide-focus (marked with the letters WF, wide focus). This eyepiece has a wide field of view, which makes it much easier to work with wide preparations.
Also worth mentioning is the Barlow lens. This is an additional three-layer lens that fits into the tube of the optical device in front of the eyepiece and gives a small additional magnification. As a rule, 2x Barlow lenses can be found in the scope of delivery of the microscope. This is a commonplace marketing gimmick. Cheap achromatic glass (or even, God forbid, plastic) lenses noticeably deteriorate the image quality, and therefore are meaningless with powerful magnification. At low and medium, the combination of lens and eyepiece is sufficient.
According to the number of eyepieces, microscopes are divided into classic monocular (one eyepiece), binocular (two eyepieces to look with both eyes) and trinocular (the third tube / port is usually mounted vertically and serves to connect a photo or video camera).
The most easy to use monocular. It is very easy to get used to it, and it creates the only problem - a strong load on one eye with a relaxed other. With prolonged use, this can result in unpleasant consequences for the eyesight.
Binocular microscopes are used for both eyes at once and create a stereo image. They allow you to adjust the distance between the eyepieces to fit your pupils. Also, one of the binoculars' tubes contains an adjustment to compensate for the difference in diopters between the eyes. It should be borne in mind, however, that creating a solid image with a binocular is much more difficult than with a monocular, and it takes some getting used to. In addition, the adjustment has its own limitations on the distance between the pupils, so that adjustment for the child may not be possible. A monocular microscope should be taken for children, and binoculars are not particularly useful for occasional amateur exercises.
Trinocular devices look effective and convenient when it comes to broadcasting an image outside simultaneously with work. However, it should be borne in mind that not always all three ports can be used simultaneously. There are solutions in which, for example, you have to choose between one of the eye tubes and a third port.
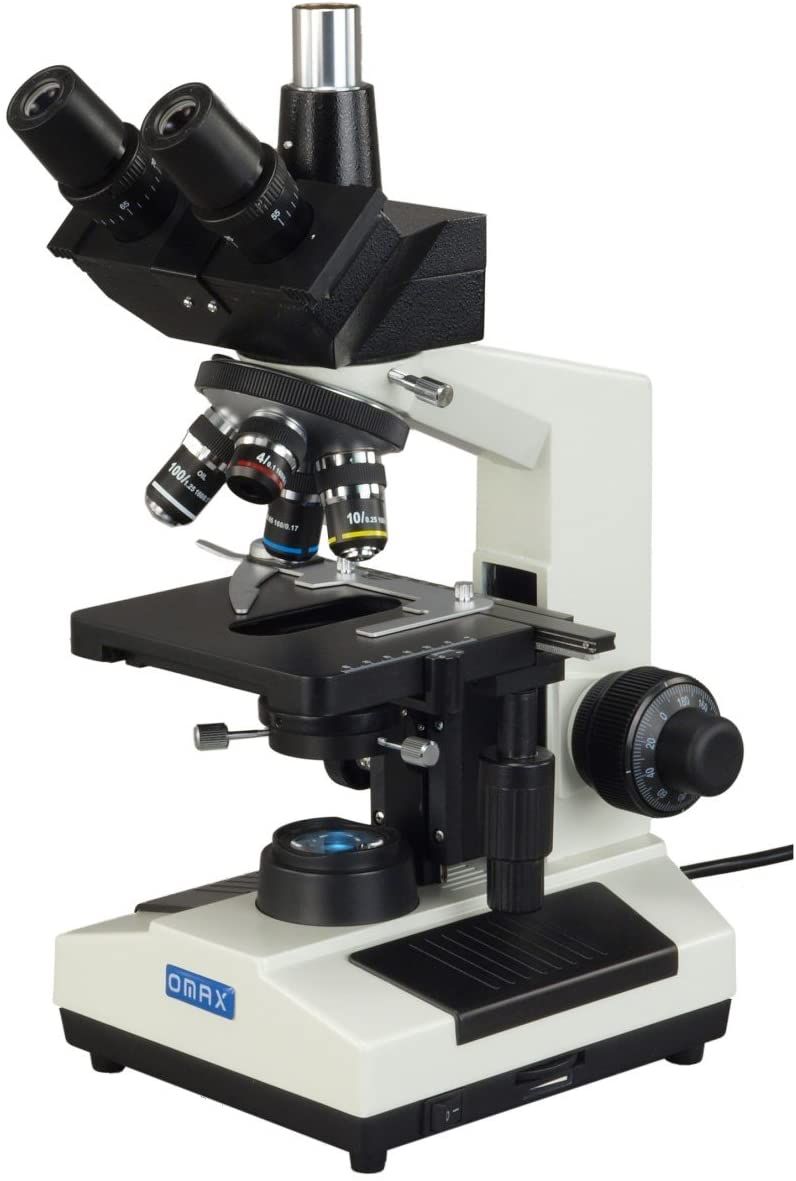
Figure: 7. Trinocular Omax M837ZL with vertical port for the camera (photo of the manufacturer)
Optical system - conclusion
The total power of a biological microscope is calculated as the product of the eyepiece and objective magnifications. For example, with a 40x objective lens and a 10x eyepiece, the total magnification is 400x. However, it should be borne in mind that for standard achromatic lenses, it is almost impossible to achieve a clear image at ultra-powerful magnification due to the laws of optics. From a certain point on, the lenses will only enlarge the already visible details, not add new ones. The maximum effective optical magnification is about 1500x, or even less, at home 1000x is a practical ceiling. For higher resolutions, expensive apochromatic lenses or electron microscopes are used, which is a completely different story.
Is 1000x a lot or a little? The size of Staphylococcus aureus is about 1 micron (1/1000 mm), amoeba is 200-600 microns, unicellular alga is about 40 microns. A thousandfold magnification is enough to see all this in detail. So do not pay too much attention to the marketing figures of the maximum magnification of 2500-3000x, obtained by blunt multiplication of the maximum powers of the lenses and eyepieces. To install, you will install it, only as a result it will turn out like in the song "Lilac fog floats under the lens ..."
Correct installation of the condenser diaphragm is also important when handling preparations. A narrow aperture increases contrast and sharpness, but darkens the image. A wide aperture lets in more light, but can make an image look overexposed and low-contrast, hiding details and even entire objects. The selection of the diaphragm for each drug is performed individually.
In the picture below, notice the rotating microscope head, which allows you to orient the eyepieces in the desired direction. This design is convenient when working with several people. However, everyone will still have to adjust the sharpness to suit their eyes individually.
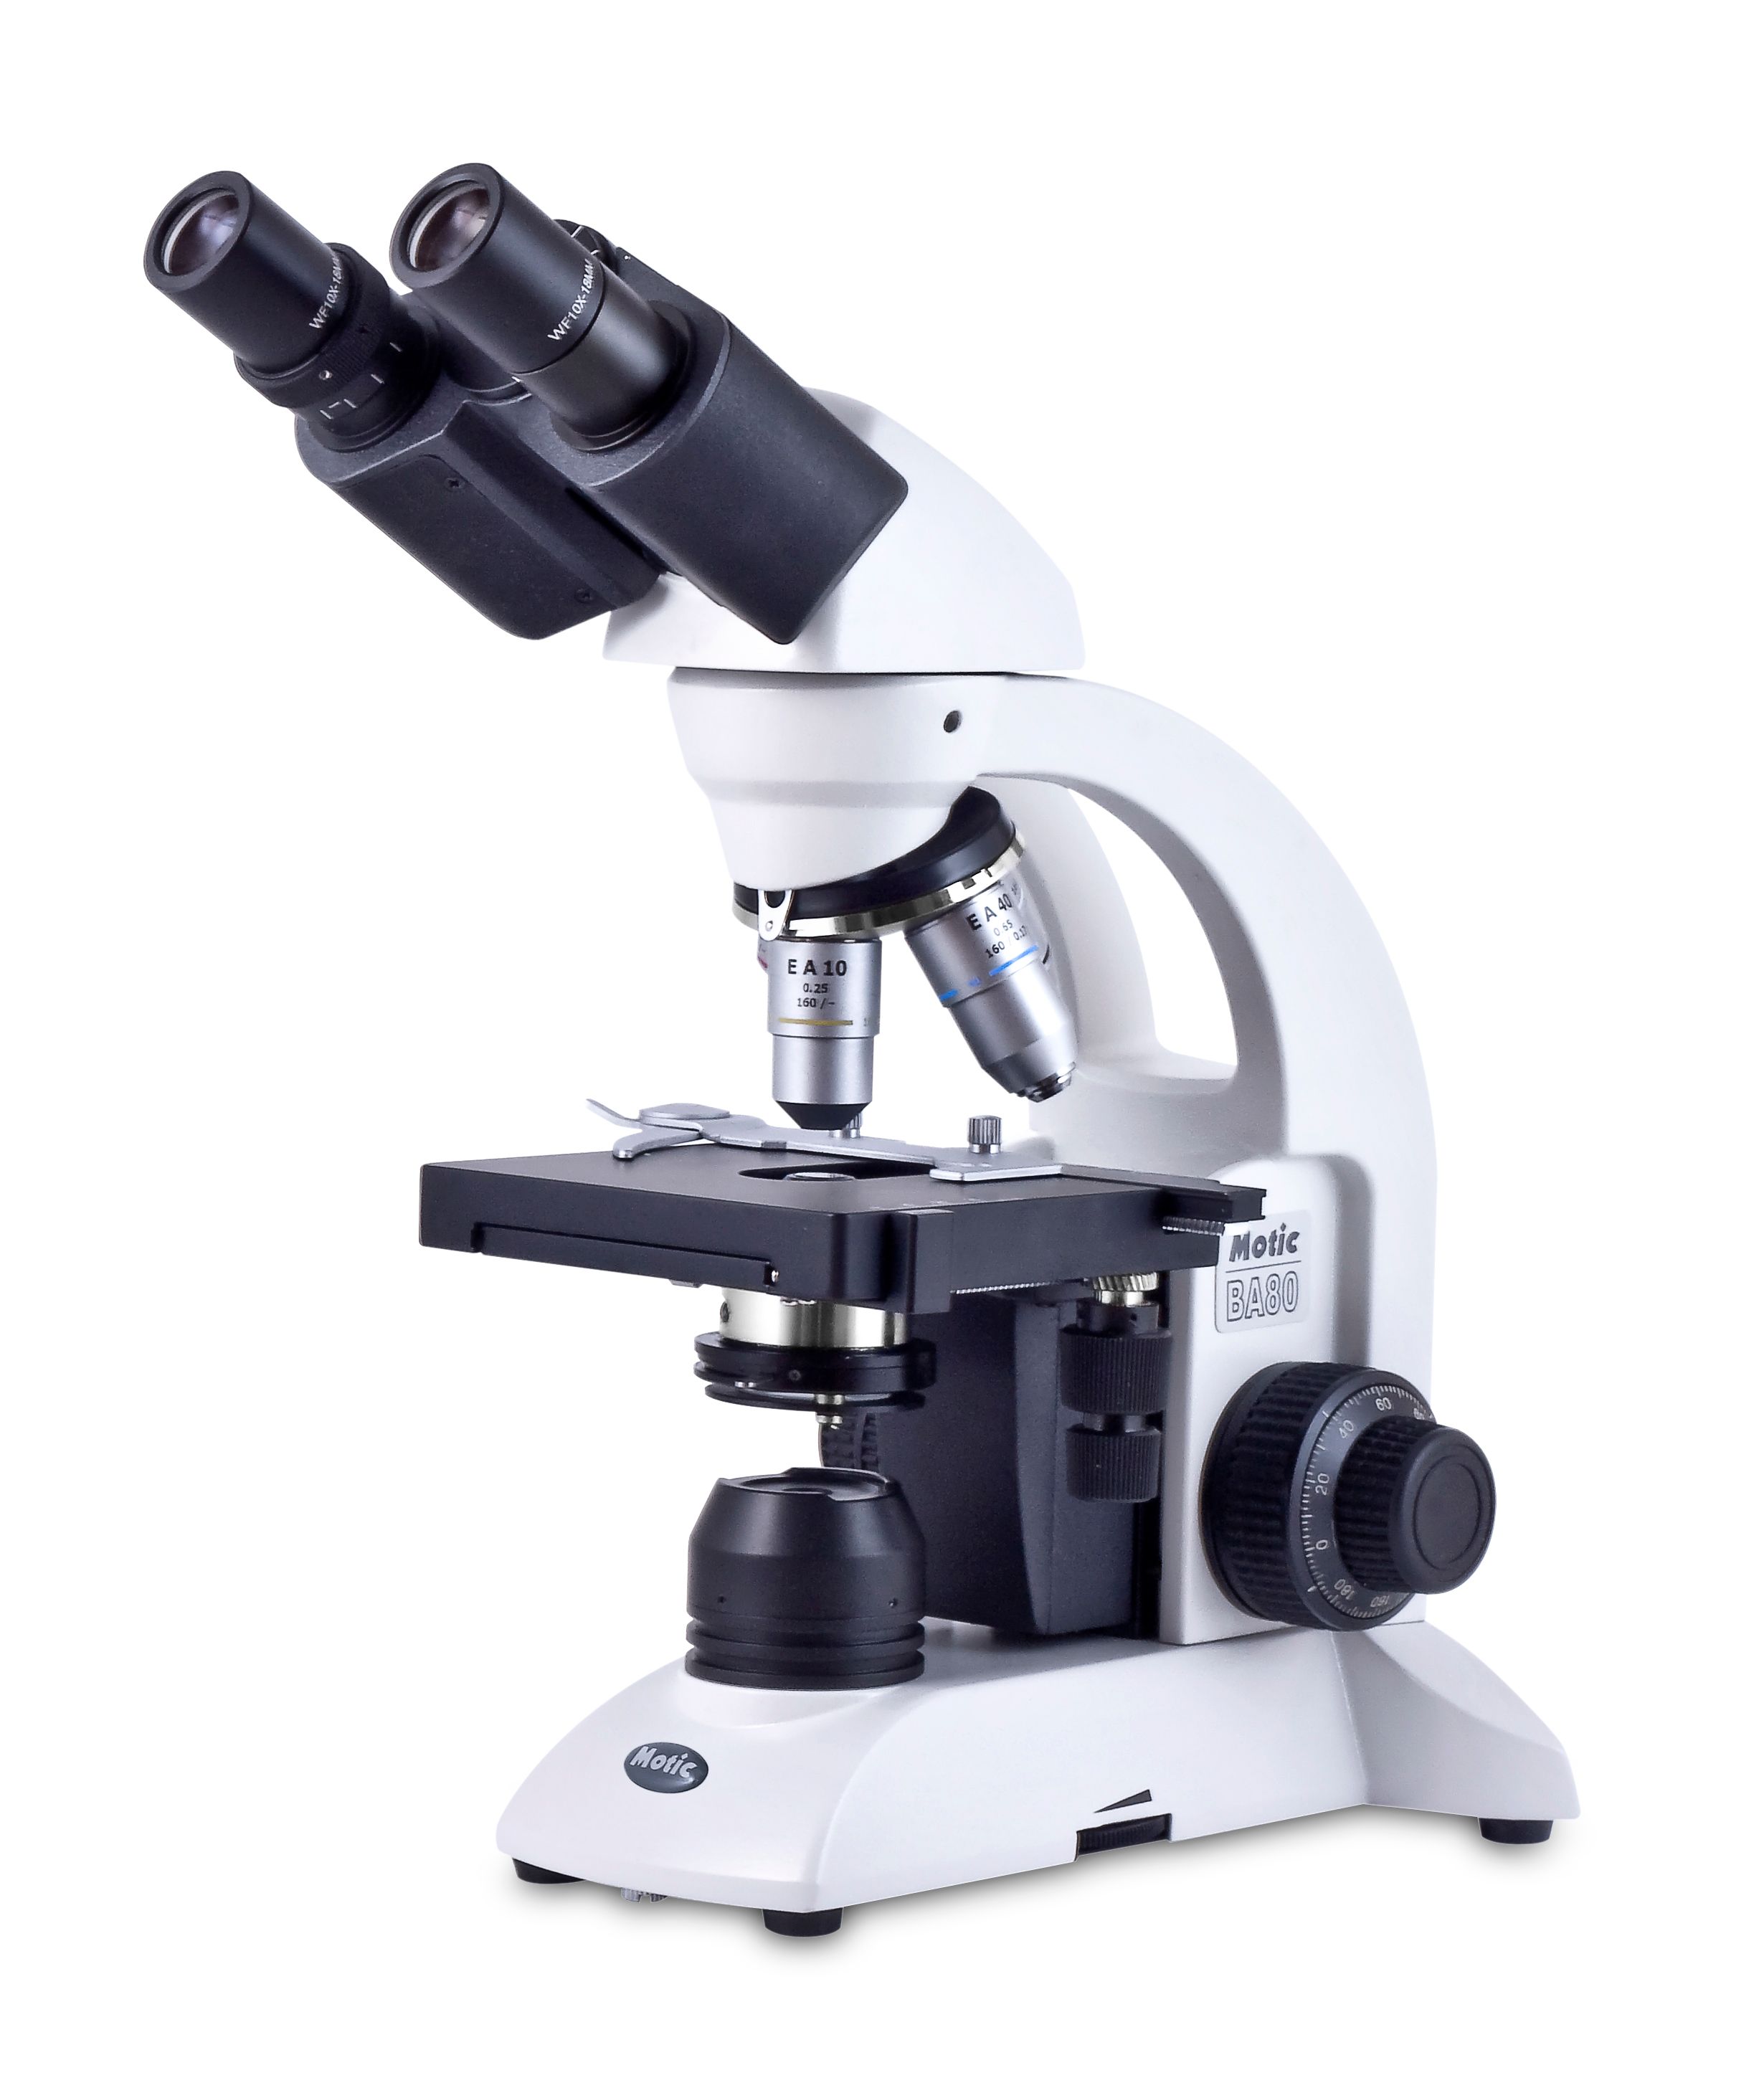
Fig 8. Binocular microscope Motic BA80 (manufacturer's photo). The condenser is clearly visible under the table in the center, on the table there is a month-shaped clip for a glass slide
Optical system - pairing the microscope with a computer
Connecting the microscope to external devices such as a monitor or computer is performed by installing a special video camera * instead of * an eyepiece or into a dedicated trinocular port. It should be borne in mind that in this case the magnification given by the eyepiece is lost, only the magnification of the objective and non-adjustable camera lenses remains. The camera parameters usually indicate only the capacity of its matrix (3, 5, 10 and more megapixels), optical magnification remains a secret behind seven seals. In addition, the camera's field of view is substantially narrower than that of the human eye.
The camera itself may not be recognized by standard Windows tools and applications (and it is not necessary - it is completely blind without a microscope), so manufacturers attach specialized software to it. It allows you to both take photos and record videos. There are different types of cameras on the market - from old ones with a resolution of 640x480 to modern ones with a resolution of up to 20 megapixels. They also differ in interfaces, which affects the video recording capabilities in the first place (it will be difficult to receive a video stream with high FPS and resolution via USB 2.0). Also, cameras can be connected directly to a monitor or other device via HDMI, have a WiFi interface, etc.
Many manufacturers also offer cameras for their microscopes, but no one bothers to buy a camera from another vendor. It should only be borne in mind that the diameter of the tube may differ from one microscopes to another, so you should make sure that this camera is suitable for this tube. Well, or use adapters, which are also sold. The standard diameter for the eyepiece of a biological microscope is 23.2 mm, for a stereomicroscope - 30 and 30.5 mm.
There are also relatively cheap attachments that allow you to redirect the optical flow from the eyepiece to the smartphone camera lens. The advantage of such a device is the preservation of the original magnification, since they are mounted over the eyepiece. The downside is that the possibilities for obtaining and saving images are limited by the limited capabilities of a smartphone. Well, the field of view of such a camera is still narrower than that of the eye.

Figure: 9. Digital camera for the Puls Life Science DCM-310 microscope (manufacturer's photo)
Prices and manufacturers
Prices for biomicroscopes can be found very different. Those that are positioned for children come across for 30-40 euros, however, one should remember about possible limitations such as a fixed 10x eyepiece that does not support camera installation, no condenser, or even a backlight in general, a primitive stage, etc. In Europe, you can buy monocular microscopes with three lenses, designed for enthusiasts and students, their price range starts from 100 euros. A camera for a microscope - from 50 euros (and further into space: a 20 megapixel camera can cost seven hundred). More professional microscopes - bi- and trinoculars with 100-fold objectives - start at 250 euros. Finally, many vendors offer kits specifically designed for kids, students and enthusiasts. They can include an input level monocular, a simple video camera,basic set of instruments and specimen slides, etc. Prices for such kits start from one and a half hundred euros.
It is imperative to add to the purchase at least one set of specimen and cover slips (from 8-10 euros - note that this is a consumable), as well as, if desired, a set of pre-prepared preparations (wings, legs, tails, leaves and similar simple preparations for entry into the topic). Well, and then - scalpels, tweezers, microtomes, Petri dishes, test tubes, preparation needles and so on, and the like, depending on your hobbies. Also, be sure to buy isopropyl alcohol (the higher the concentration, the better), brushes, blowers, microfiber cloths, etc. - optics tend to get dirty and dusty, and even individual dust particles on the microscope lenses will be beaten off by spots on the image.
Keep in mind that the prices for the same goods on the American, English and German Amazons, not to mention eBay, can differ very significantly, so after choosing a model, you should rummage through different sites in search of lower prices. You can also search for microscopes on Aliexpress. However, although prices there are noticeably lower than in Europe, the delivery price turns out to be comparable to the price of the microscope itself, which completely deprives the idea of any sense.
Which brand should you choose? Since optics for microscopes is critically important, large world manufacturers associated with optics - Olympus, Zeiss, Leica, Nikon, and so on - have entered this market. However, the prices for their devices, even at the entry level, are not encouraging, to put it mildly, and they may simply not work at retail. So an amateur should take a closer look at more democratic vendors such as Swift, Bresser, Omax or AmScope. You can also purchase separate lenses and eyepieces, including those made in China (there are quite good ones, judging by the reviews), but in this case you need to make sure that they are compatible with the microscope. The European standard for threads and other mechanical and optical parameters is called DIN.
A little practice. A toy in reality
After a month of painful thoughts in which a childish "I want!" I fought desperately with adult stinginess and rationalism, I settled on the Swift 350B binoculars. Why? Nothing fancy: Swift microscopes are reasonably priced and of quality suitable even for laboratory conditions. Plus, at the autumn sale on the English Amazon, this model was sold for only 160 pounds. To avoid getting up twice, the second component of the purchase was the £ 80 Swift, a 3MP camera.
The scope of delivery of the microscope looks like this:

Four objectives (4x, 10x, 40x and 100x) are already installed in the revolving ring, eyepiece sets (10x and 25x) are included separately. Pay attention to the empty vertical notch above the head and two empty slots - the packaging is universal and is designed for trinoculars as well. Power cord / socket - C13 / C14, power supply integrated in base. The kit includes a simple plastic cover a la "ordinary trash bag".
Assembled and connected to a PC it looks like this (on the monitor - an image of a bee's leg transmitted from a microscope):

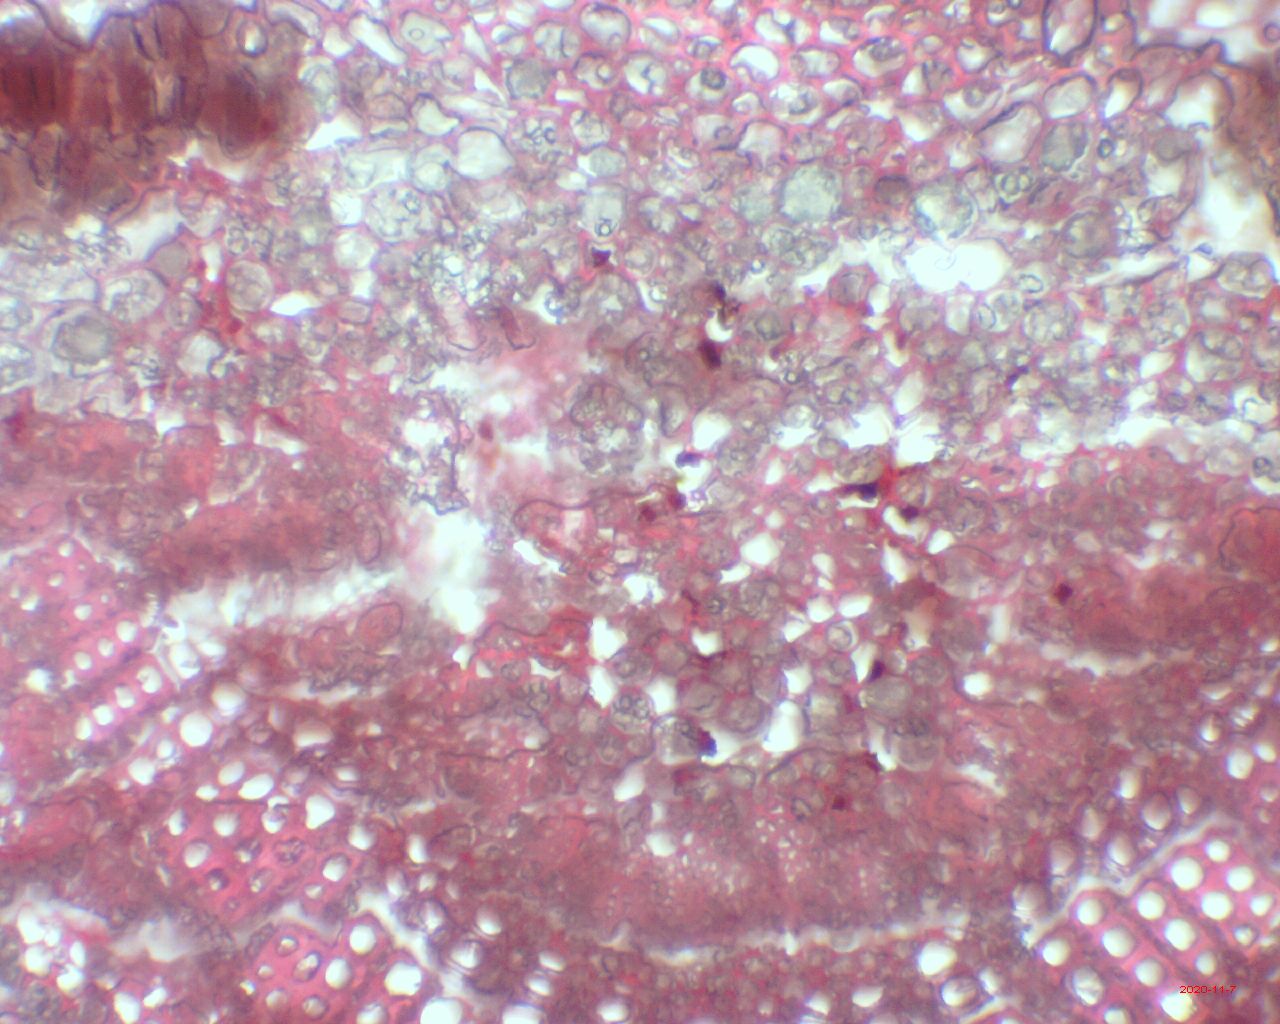
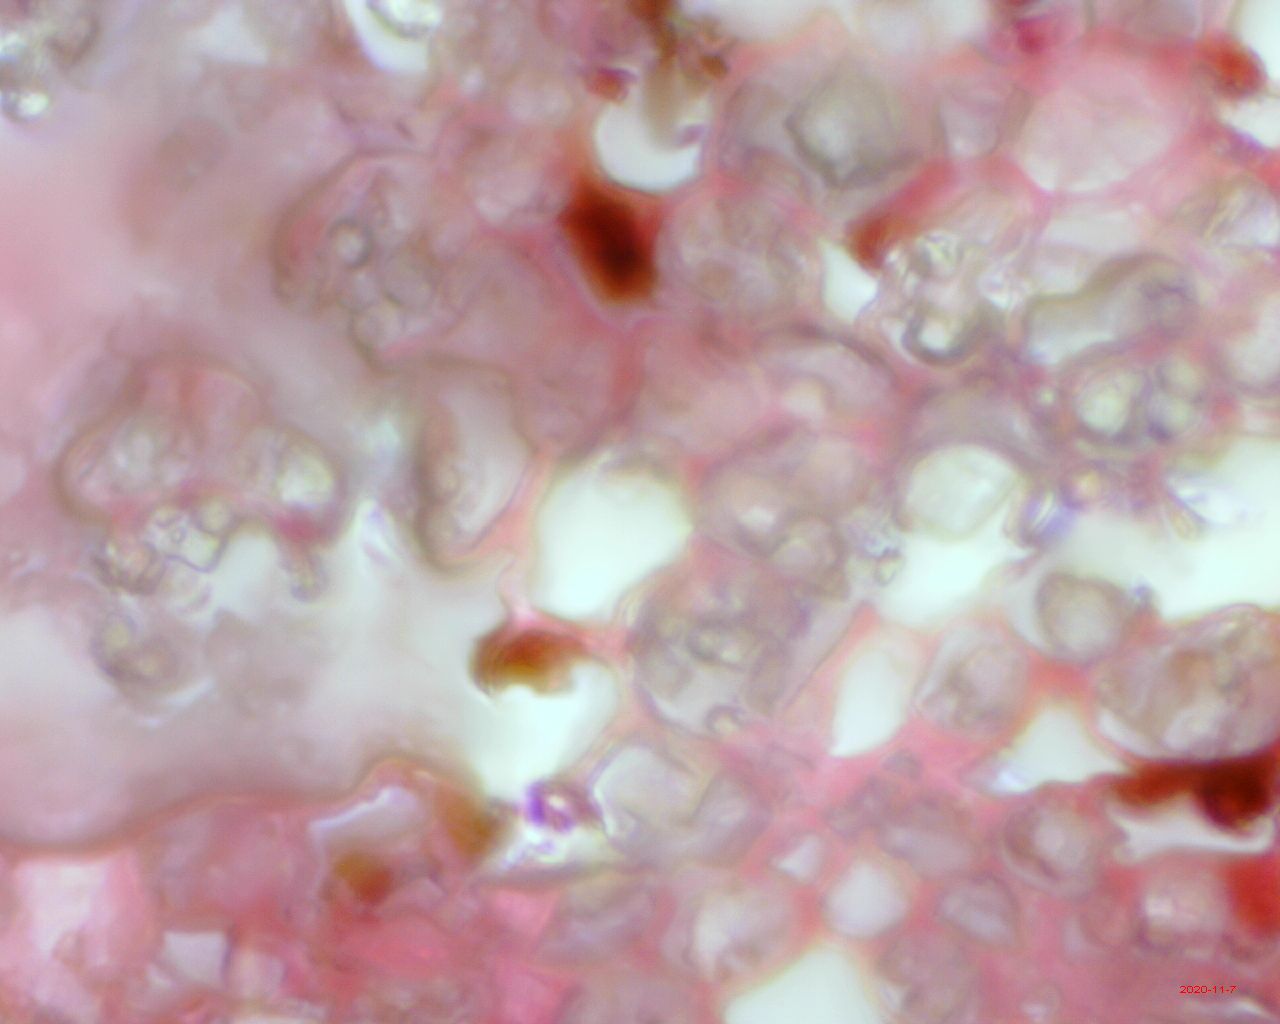
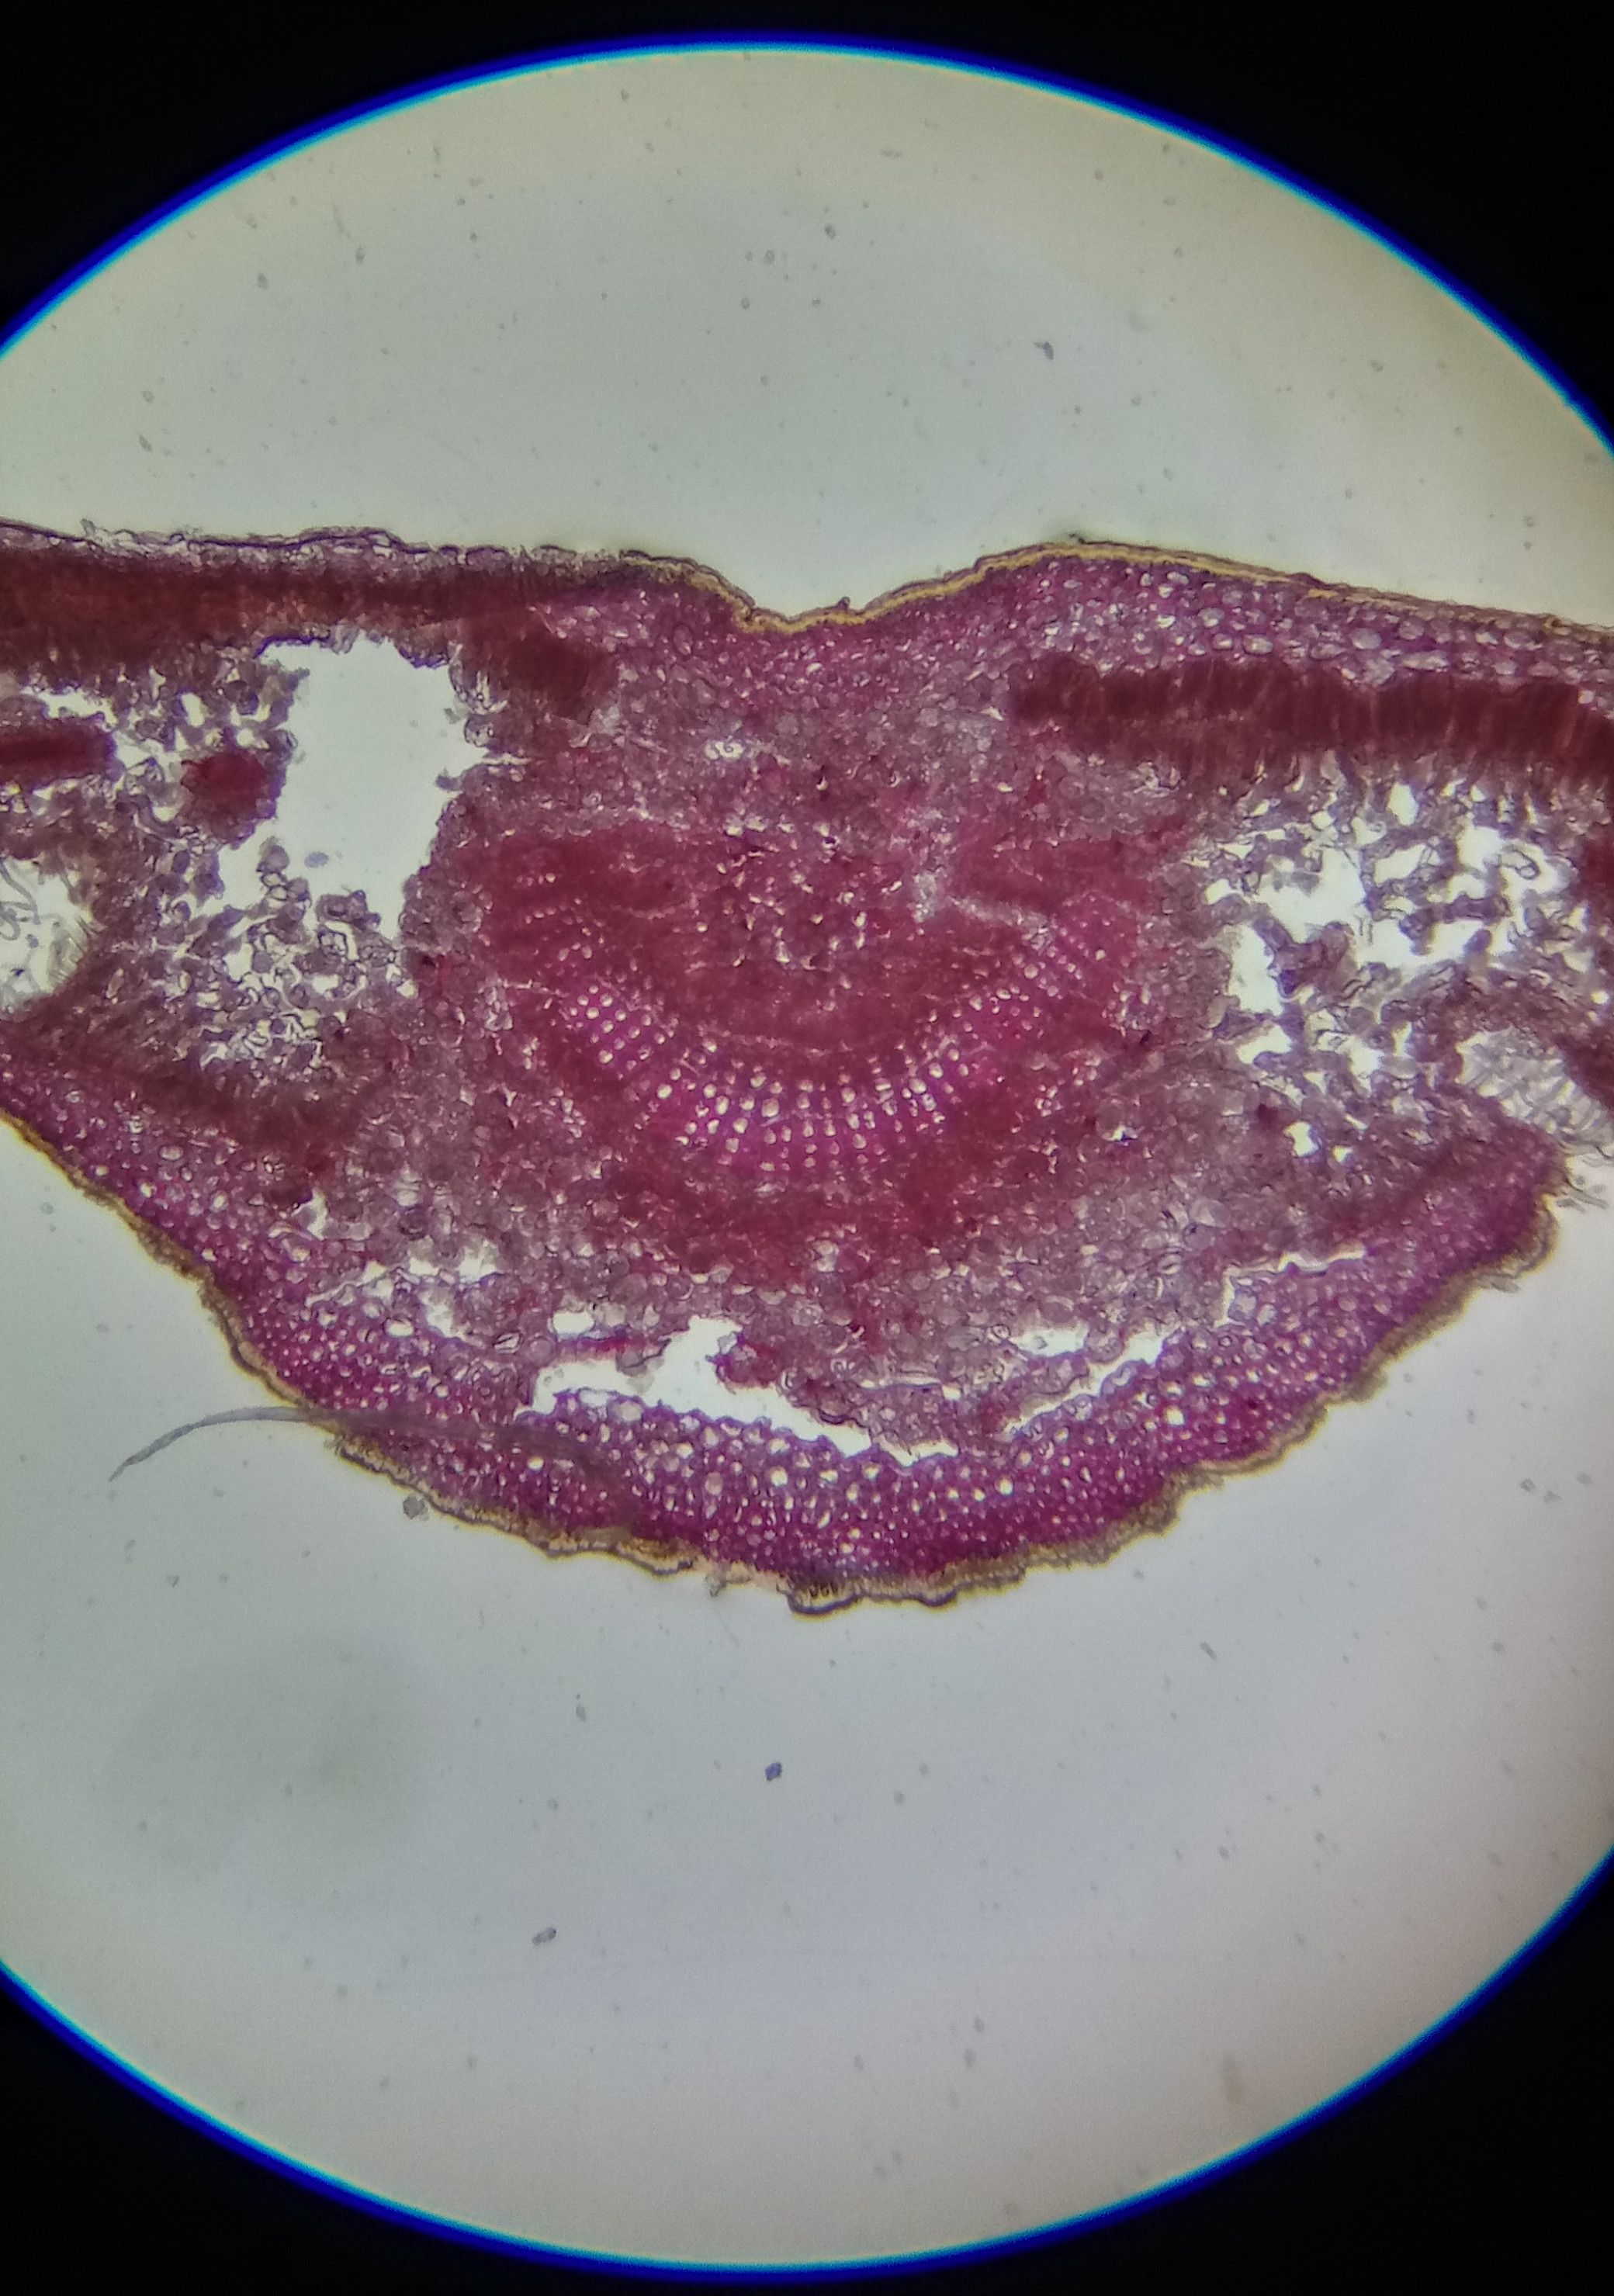
Now let's see how the samples look with different magnifications when broadcast from the camera. Let's start with a phlox leaf preparation (cross section) from a commercially available sample kit. Lenses used are 4x, 10x, 40x and 100x (no oil).

(4x)
(10x)
(40x)

(100x)
As you can see, a hundredfold lens does not show anything intelligible without immersion. The 40-fold shows, but because of the shallow depth of field, you have to choose which layer of the preparation to consider. Since the camera optics are used instead of the eyepiece, I find it difficult to determine the final optical magnification. For comparison: the picture below is what the cell phone camera sees through a 25x eyepiece and a 4x lens (total magnification 100x). It was removed from the hands, since I did not buy a holder for the phone, hence the cut on the sides.
It can be assumed that the camera gives a magnification of 20-25x, but it is difficult to determine what part of it is optical and what is digital.
The second drug is made by yourself. Just a drop of water from the kitchen sink under the coverslip without any preparation. The lenses are the same: 4x, 10x, 40x.
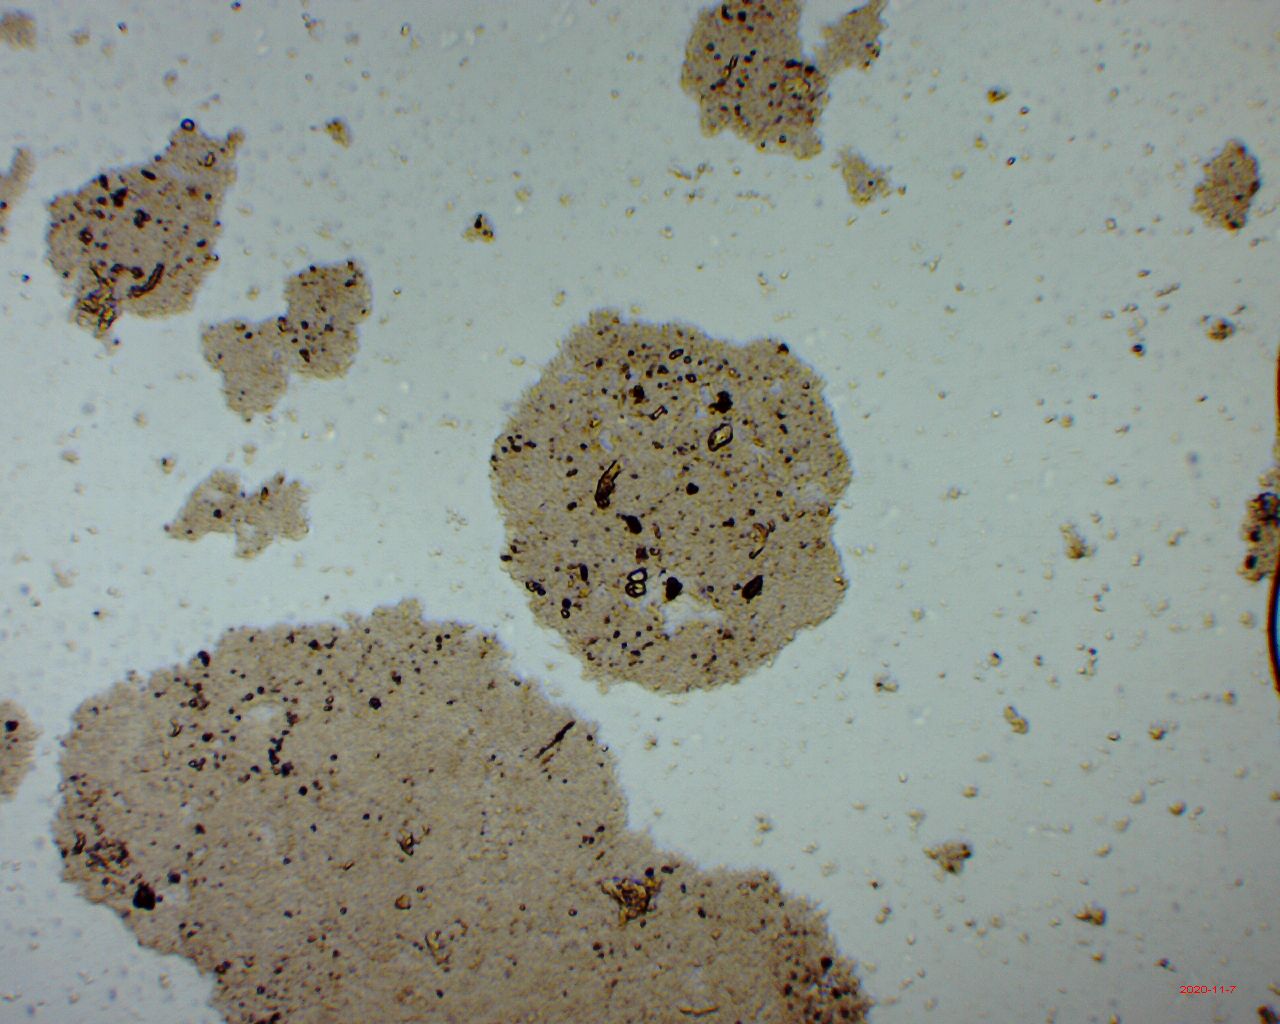
(4x)

(10x)
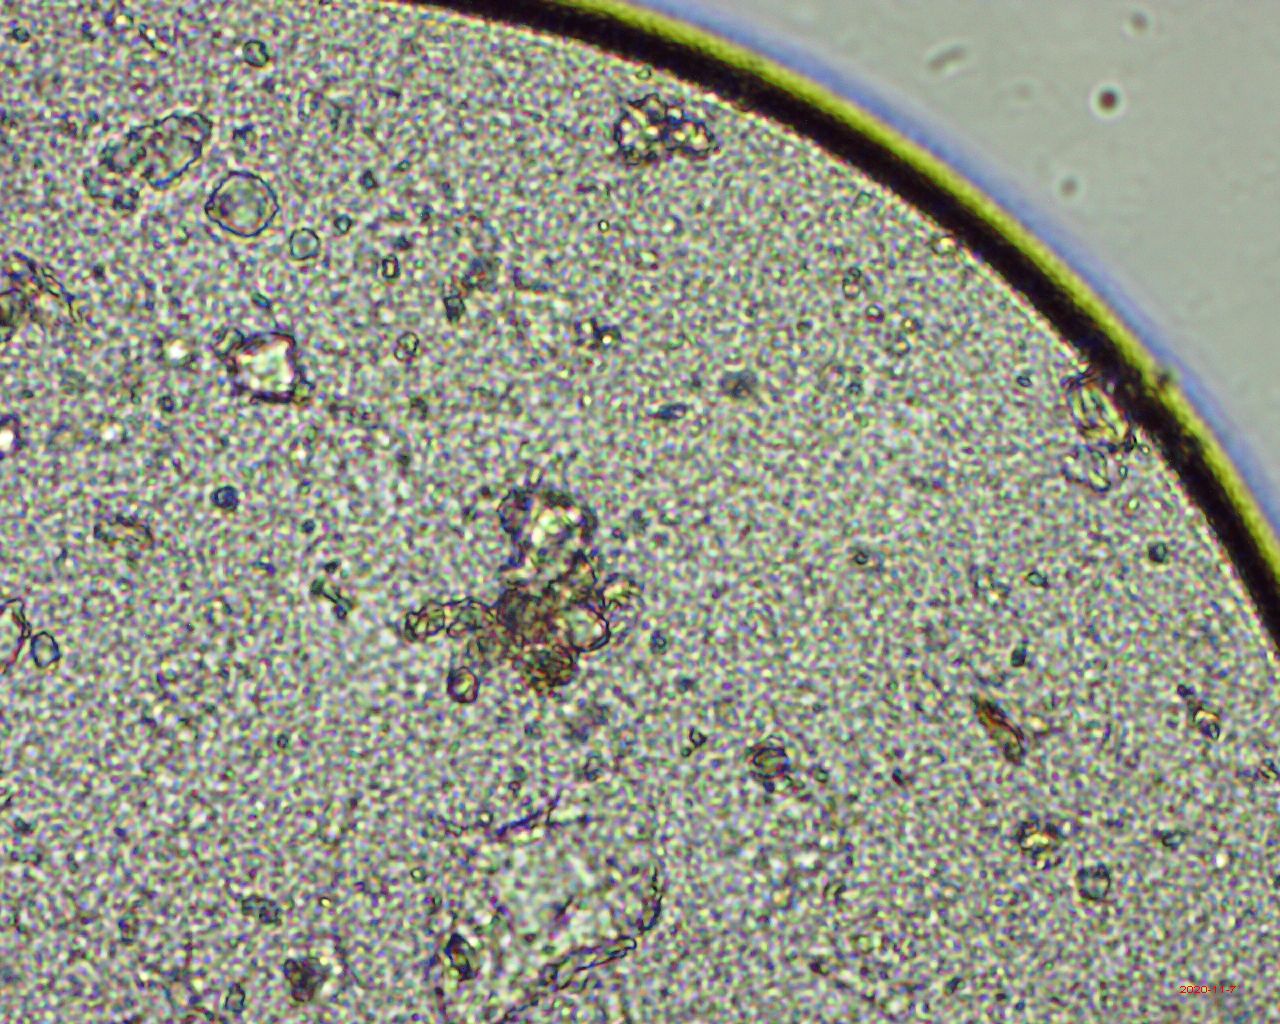
(40x)
Notice the rainbow border around the droplet border (arched black line in the second and third shots). If no aberrations are visible at 4x, then at 10x there is already a slight color distortion at the boundaries of objects. At 40x, the rainbow becomes so noticeable that it is clearly visible even in the camera image and noticeably worsens sharpness. It is to eliminate this effect that 100-fold lenses are immersed in oil.
For comparison: what the smartphone camera sees through the eyepiece with a 4x * 25x combination:

Finally, a few words about glasses. The preparation, in addition to the observed object, consists of a thick slide and a thin coverslip. The slide is placed on the table, the coverslip is facing the eyepiece. You should be extremely careful when working with cover glasses: with a thickness of 0.13-0.17 mm, they have very sharp edges, even despite their special processing. If handled carelessly, they can easily spread your finger, or even break in the wound. In no case do not allow small children to work with them, and adolescents should also be monitored at the initial stage.
At the end of work with the drug, you should either properly clean and degrease the glass. Residual fat and oil will cause the drop not to spread over the glass, but break into even smaller drops, making viewing difficult. Different methods of degreasing are used in laboratories, but they are unsafe and require special chemicals, often poisonous, and equipment such as hoods. At home, the simplest way is isopropyl alcohol or a half-hour boiling over low heat in a solution of 2-5% baking soda solution (approximately one teaspoon per 100 ml). A dirty cover slip is rather easier to throw away - it is too fragile and breaks easily. And you shouldn't hold onto the slides either - it's a cheap consumable. Oil can be removed from immersion lenses in the same way as any other optics:isopropyl alcohol on microfiber.
This concludes the introduction to the basics of optical microscopy. Good luck in independent swimming.