Often they ask us the question: "Is it possible to install Router OS (MikroTik) in your cloud" - the first thing that arises in our head when we see this question: "Why?" - however, there are a number of logical and compelling reasons for using software-defined routers other than those provided by a cloud provider (VMware NSX Edge). Let's think about what the reasons could be.
- – , , , . - – , .
- – , . , , .
- – , – , , pre shared key(PSK) IPsec VPN , , , . , , .
- – , — , . .
- – , ? , Router OS , (VPN, ) , .
So, what's the best way to get started with deploying Router OS on VMware infrastructure using vCloud Director 10? The easiest way to do this is by contacting the support team of the cloud provider - this will save the user from the possibility of problems during the deployment stage of the solution.
The first thing to start with by downloading the Cloud Hosted Router image from the official site (image in .ova format) is to check the hash of the file. You can check the hash sum using standard Windows OS tools: console command:
certutil -hashfile " " MD5Once you have verified that the hash sums match, you can continue to deploy the software solution.
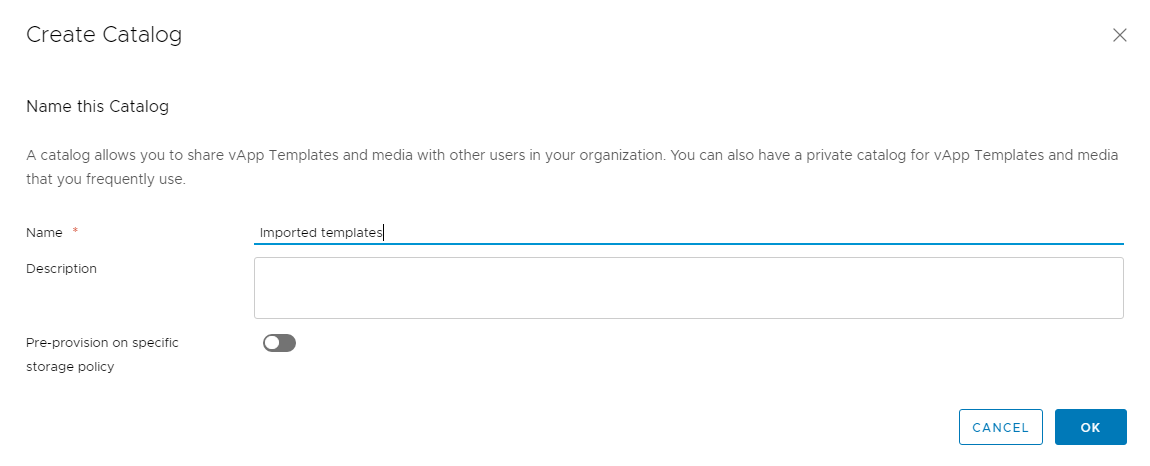
To upload your own image to the cloud, you need to create a personal directory: in the top panel, select
Libraries -> Content Libraries -> Catalogs -> New

Enter the name of the new directory, you can, if necessary, specify the necessary storage policy for this directory.
After creating a new user directory, we can already load our .ova image into virtual machine templates:
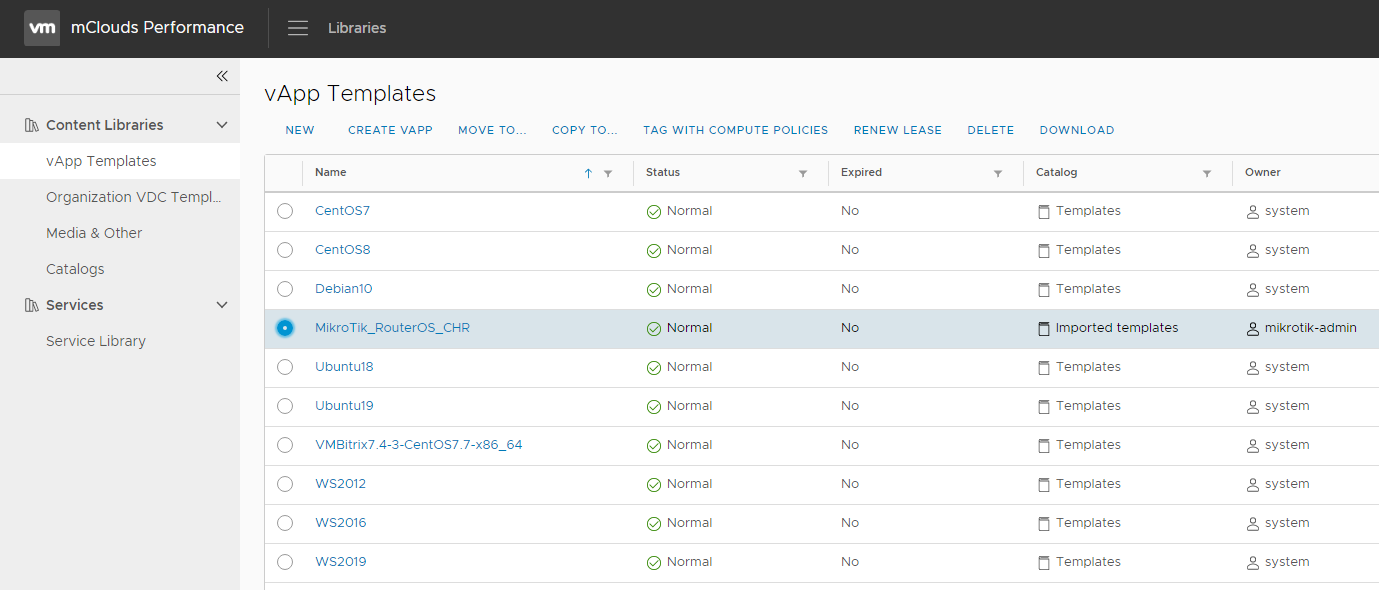
Libraries -> Content Libraries -> vApp Templates -> New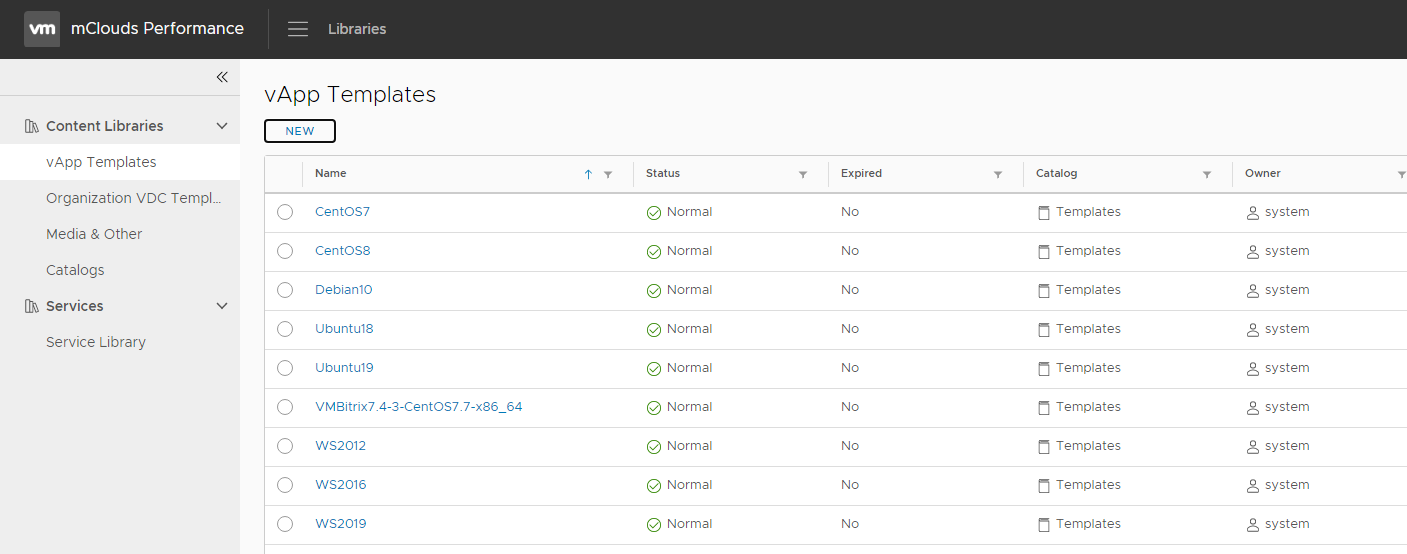
Click the Browse button and select our virtual machine in the .ova format.
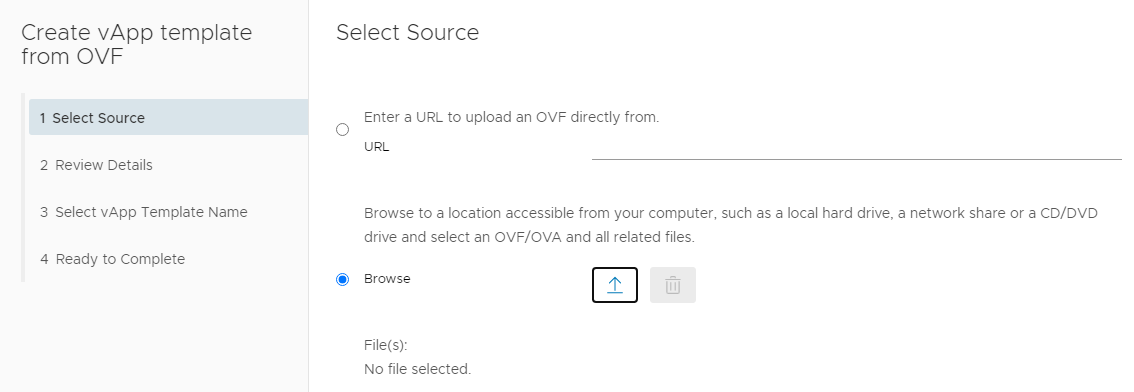
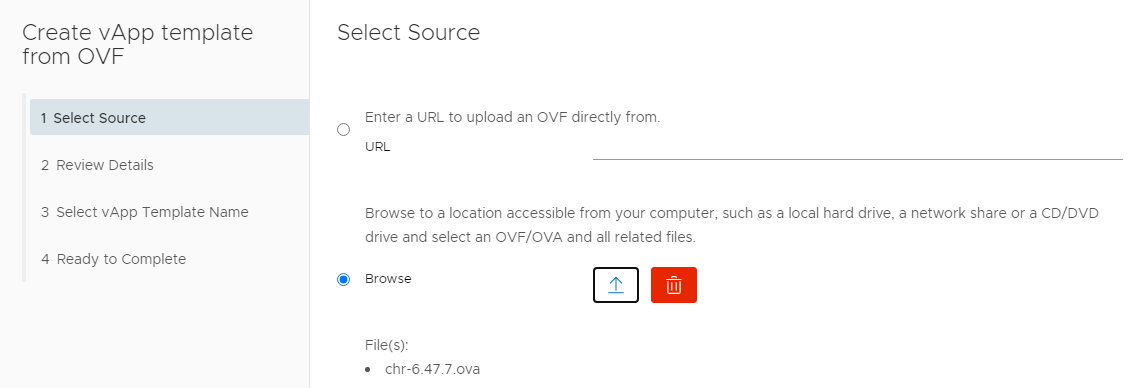
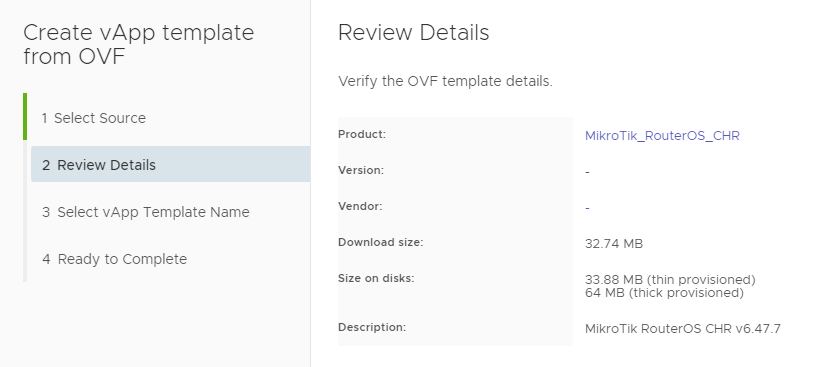
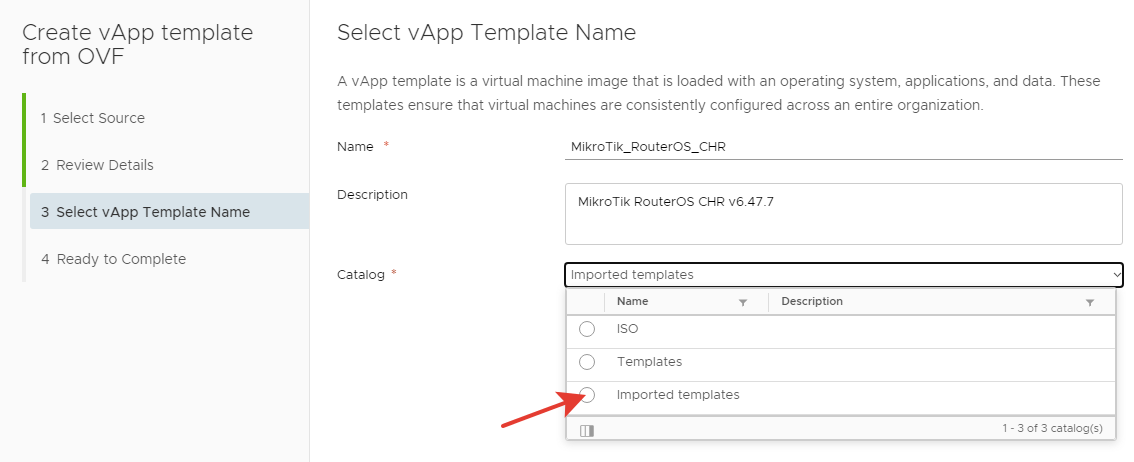
Check the correctness of the information about the image and import the image into the directory we created earlier.

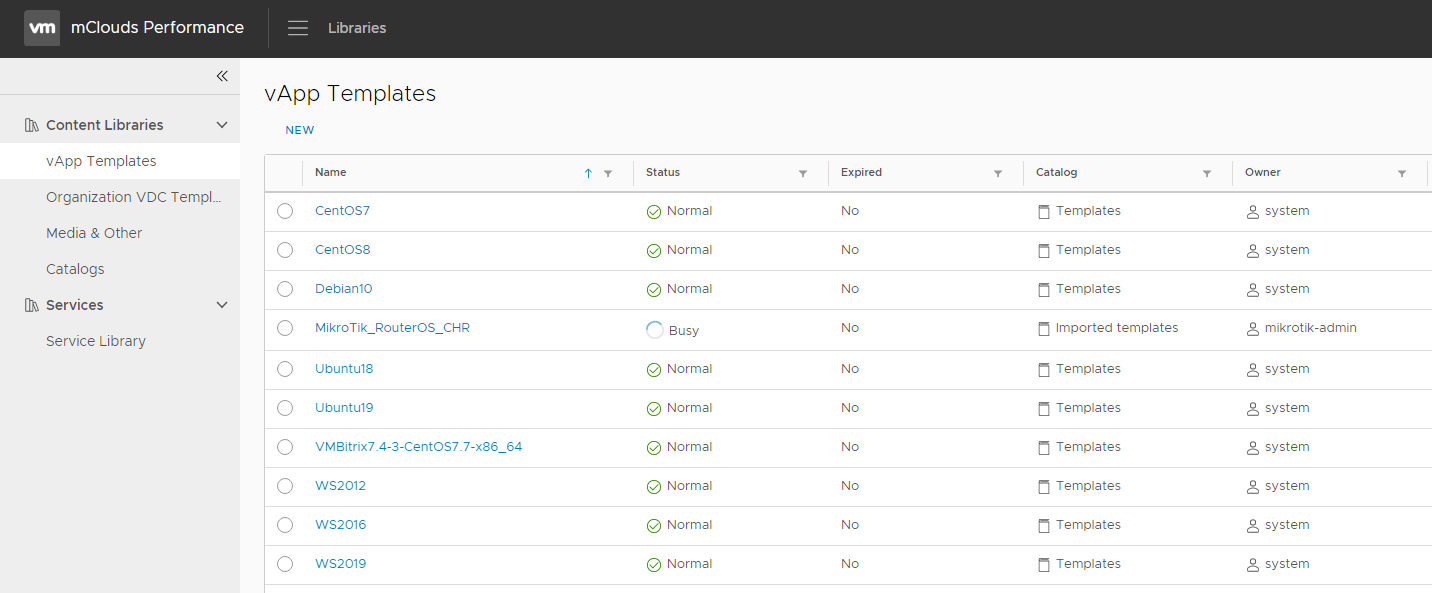
After clicking on the Finish button, we will see that the image download has started. Once the status of the template goes to Normal, we can deploy this template to a new vApp.
The panel Libraries -> Content Libraries -> vApp Templates , select the downloaded our template and click on the Create vApp
Select the appropriate our needs the name of the new vApp
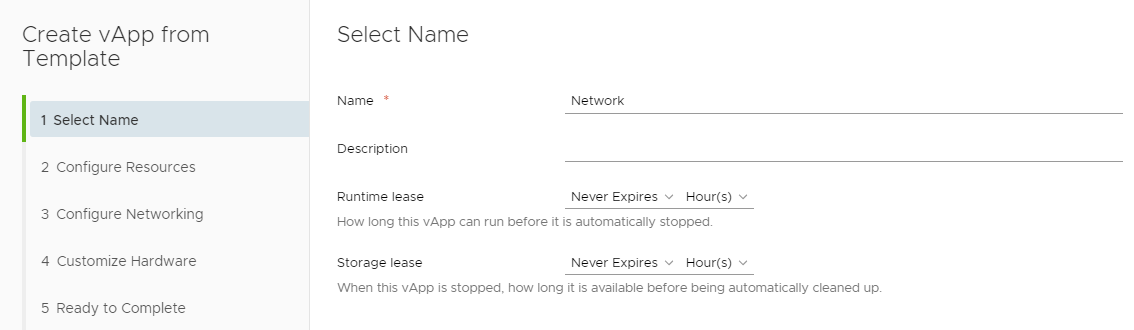
Select the retention policy for the deployment template
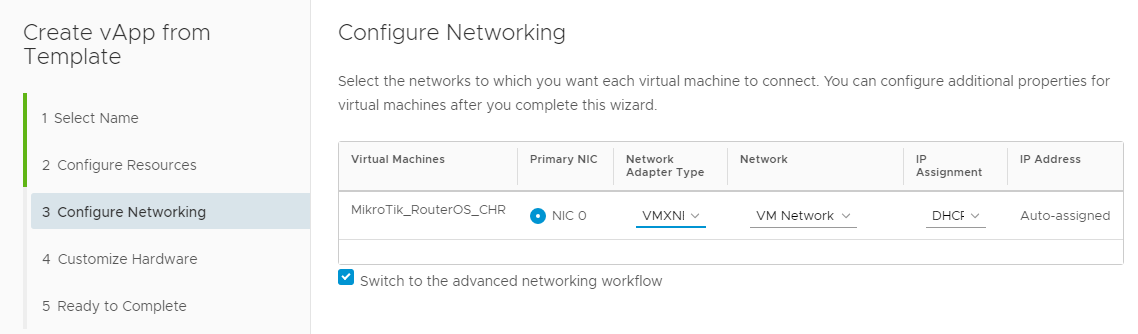
in the Configure Networking to check the network adapter selected type VMXNET3 (for this you need to select checkbox Switch to the advanced networking workflow)
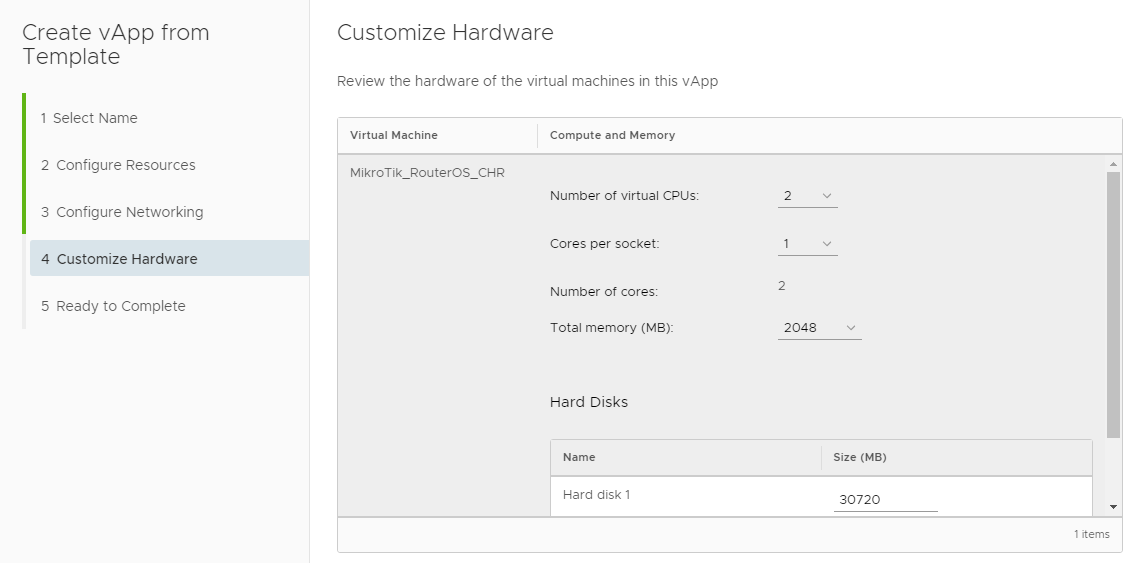
After that, it remains only to select the resources allocated to the virtual machine and click Finish.As a
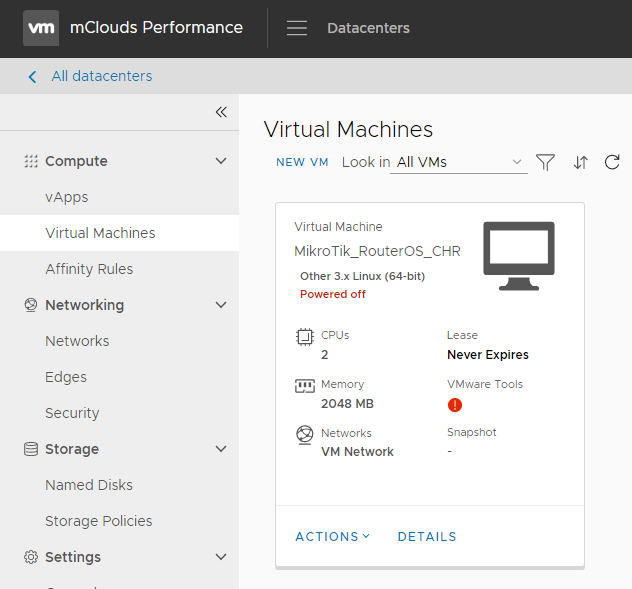
result of the successful deployment of the template, we will have a new vApp with a new virtual machine with Router OS in the Powered Off status
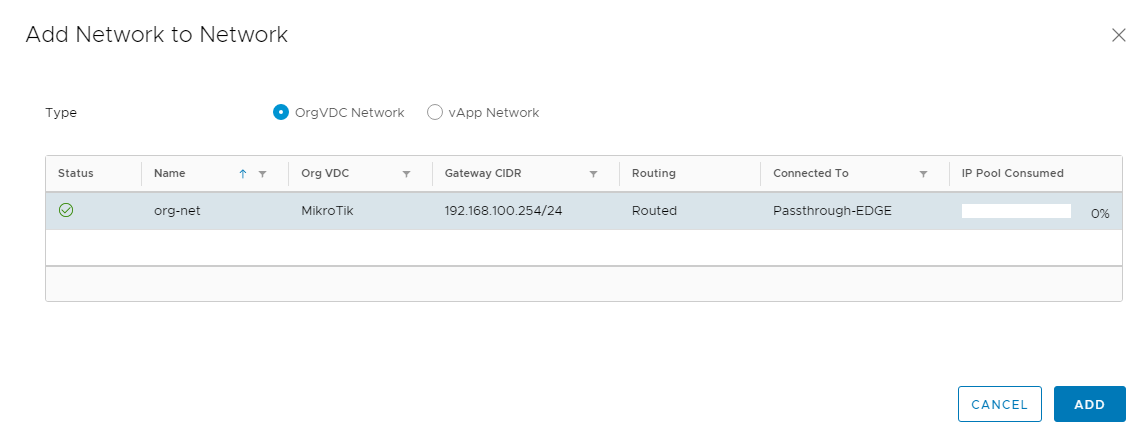
To connect a virtual machine to the organization's network, add this network to the vApp:
Compute -> vApps -> Details -> Networks -> Newand select our network in the OrgVDC Network field

In the virtual machine settings, change the network connected to the network adapter:
Compute -> Virtual Machines -> Details -> Hardware -> NICs -> Network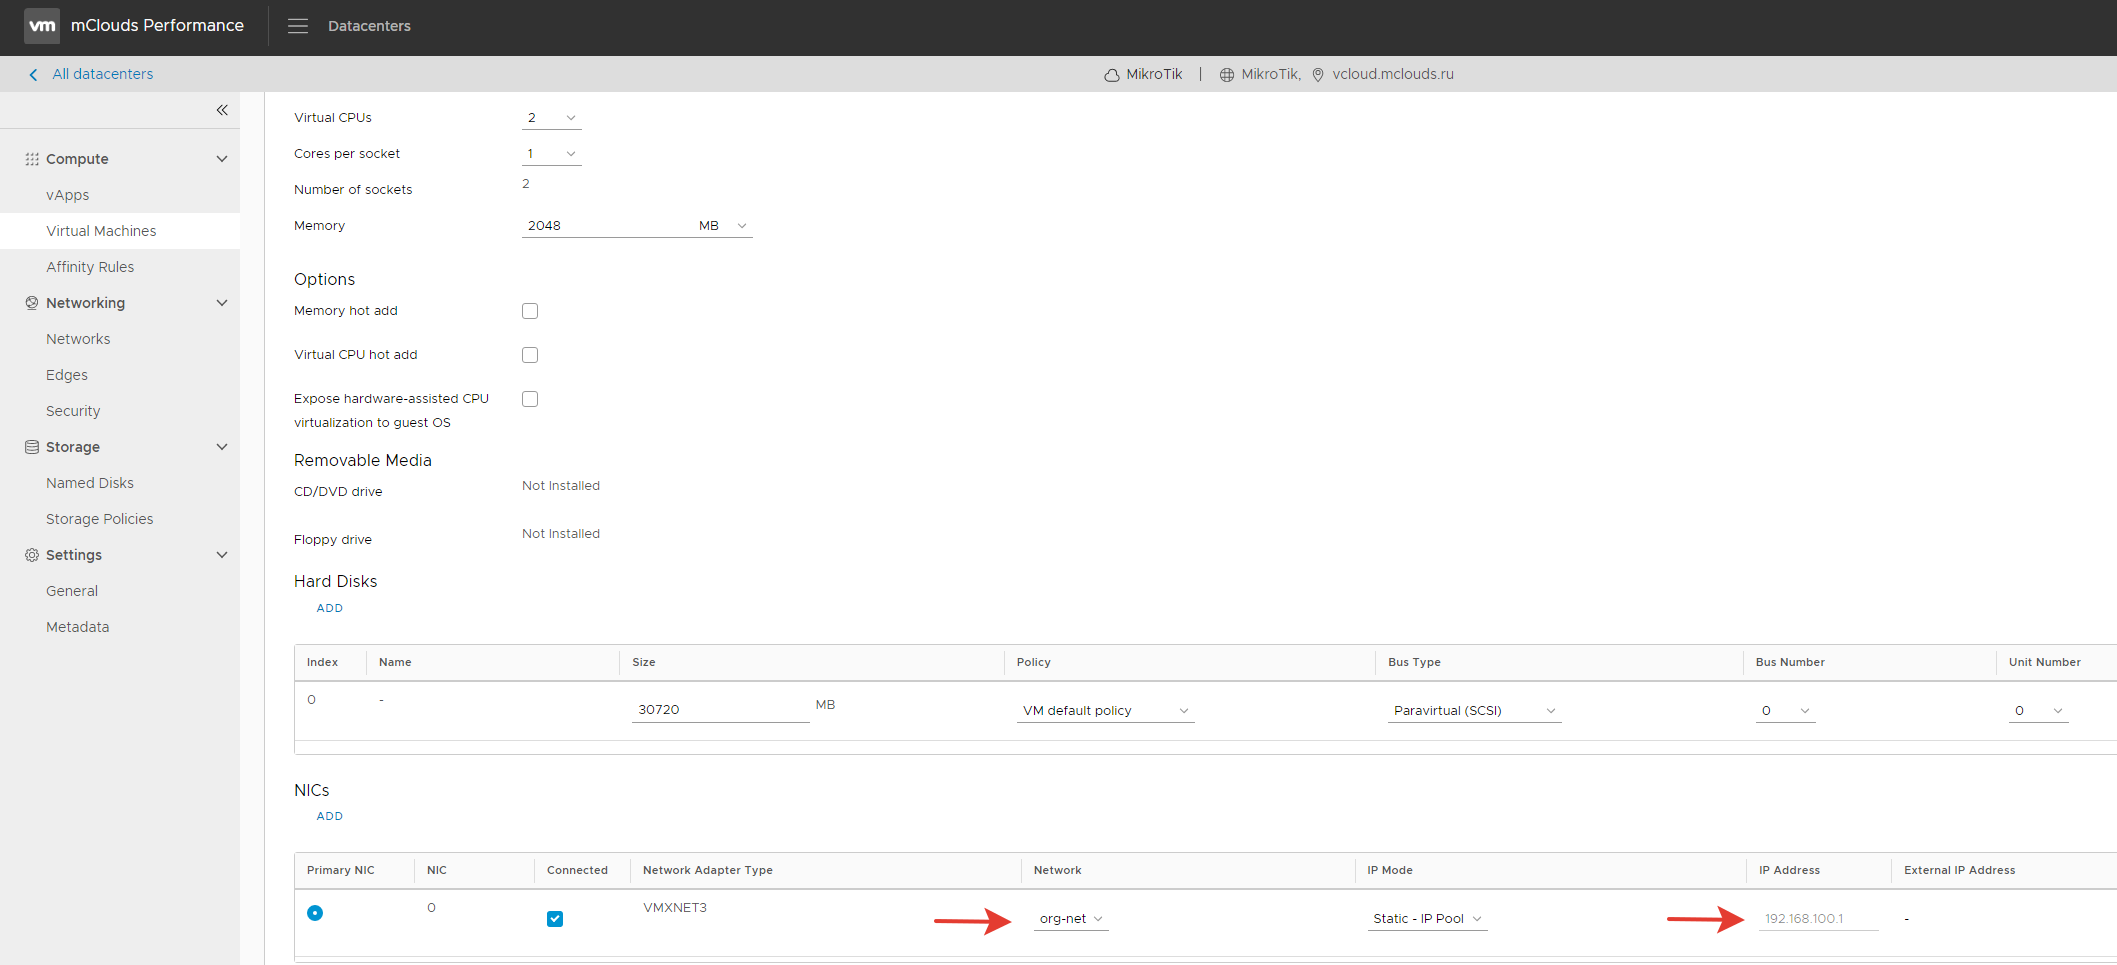
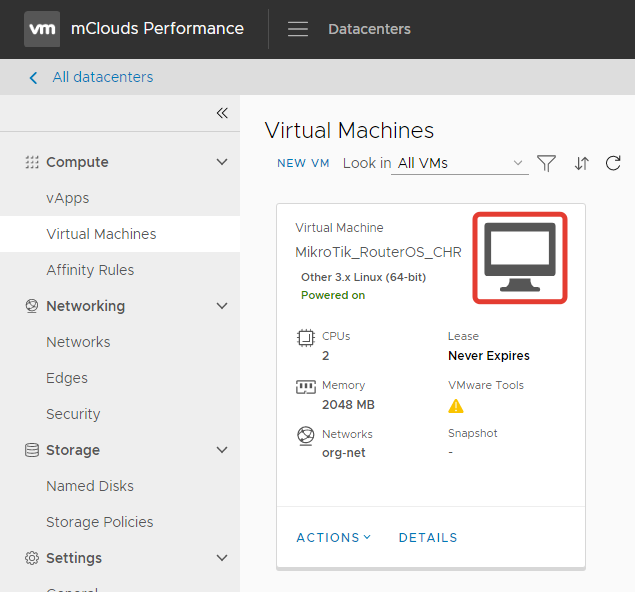
To connect to the virtual machine console in the vCloud Director management environment, click on the monitor image in the Compute -> Virtual Machines tab
Do not forget to change the virtual machine administrator password before connecting the machine to the network (default login information: admin without password), for this in the console type the following command to display all users.
/user printAfter that, you can change the password of the corresponding user.
/user set 0 password=«»
Next, we need to configure the external interface of the router and the default route to be able to use the solution.
To display all network interfaces available to the OS, enter the command:
/interface ethernet printAfter that, add the network address and the maximum subnet to this interface with the command:
/ip address add interface=” ” address=”ip ” netmask=” ”Check if the data is entered correctly with the output of the command:
/ip address printFor the router to work correctly, you need to add a default route:
/ip route add gateway=”ip   ” dst-address=0.0.0.0/0 distance=1
/ip route print
After changing the OS administrator password and setting the default route, we can enable Firewall and NAT rules for seamless port forwarding to MikroTik:
Networking -> Edges -> Services -> Firewall NAT
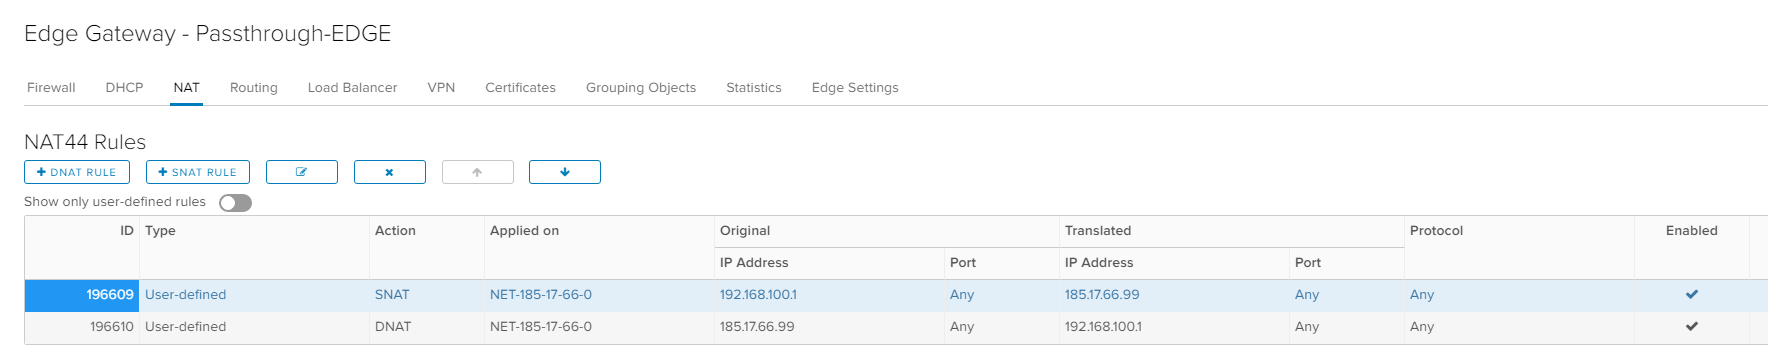
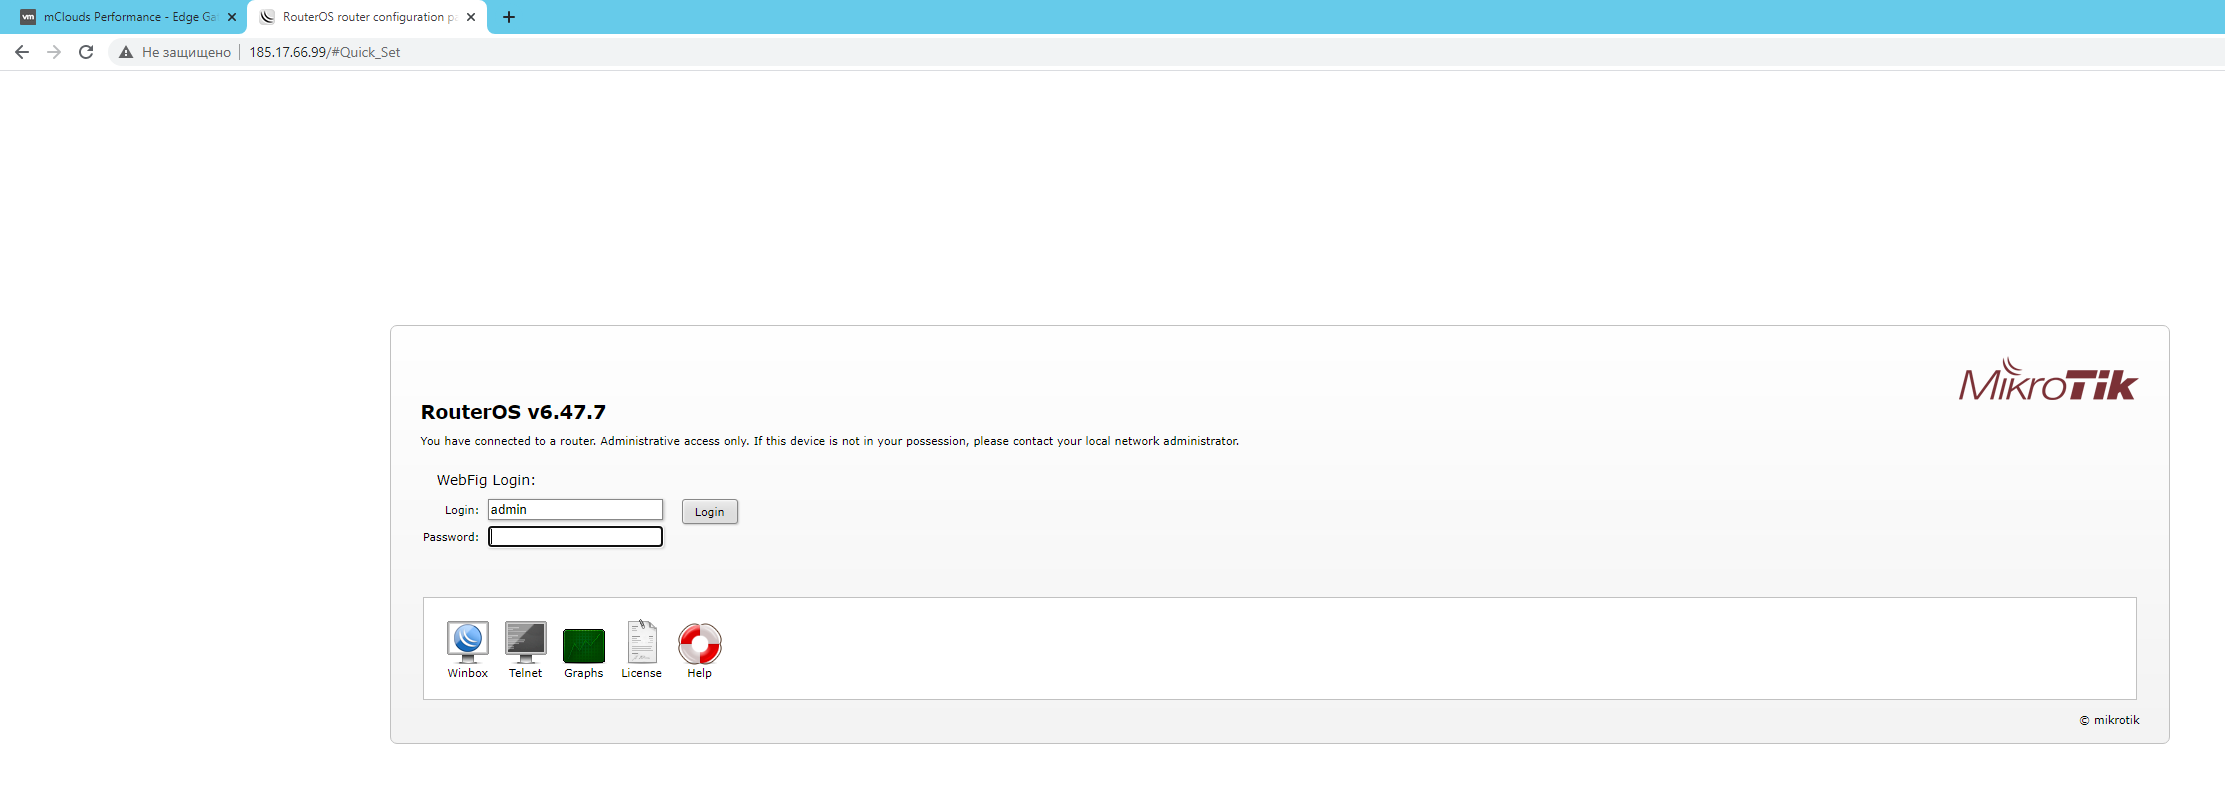
After completing all the actions on the external IP address, the MikroTik configuration interface should be available for further administration.
Do not forget that without proper licensing, the data transfer rate through the Cloud Hosted Router will be limited.
You can talk as much as you like about the pros and cons of a particular software solution for traffic routing, but it all depends on the tasks and timing of implementation. You should never neglect knowledge that can come in handy in the most unexpected situation.