Note: Let me remind you that QBS was developed by the Qt Company , which later abandoned the development of this product and gave it to the community. At the moment, QBS is actively developing and new releases are coming out. This is me in case there are no "stupid" comments on this score. So to speak, dotting the I.
Until recently, the QBS build system was supported only in the QtCreator IDE . But now there is an opportunity to use this wonderful build system (I will not describe why it is wonderful here) with the open source editor of Visual Studio Code .
Literally, a little more than a month ago, the guys from the QBS-community threw up an idea: "why not actually create a plugin for Visual Studio Code ?" Hmm, indeed, Visual Studio Code itself is widespread among a certain part of humanity, and QBS has a specially designed JSON-like API to simplify integration with any IDE . And ... work began to boil.
As a result of this work, the QBS extension for Visual Studio Code was born , which already has the following features:
- Open directory with project files.
- Select the required project for building (if there are several files in the directory).
- Select a profile for assembly (analogue of a kit with compilers).
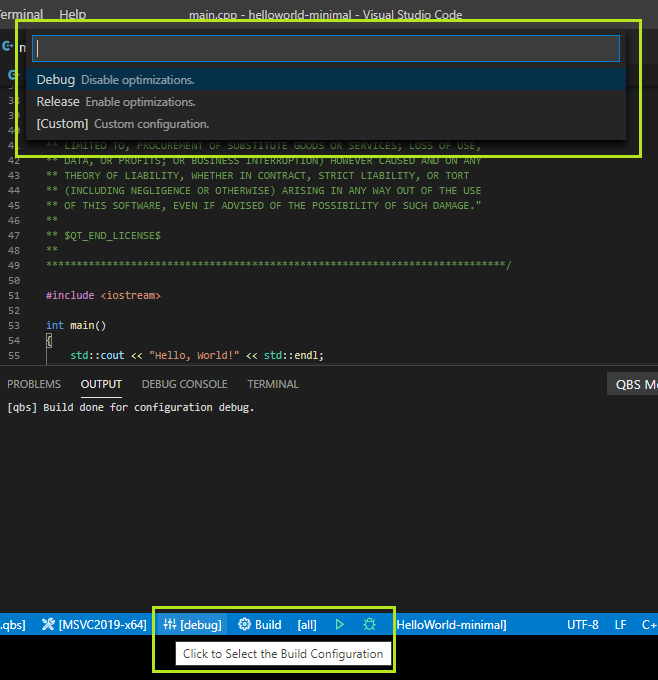
- Select build configuration ( debug / release ).
- Select a specific product to build (or all products).
- Select a specific product to run in the terminal.
- Select a specific product to debug.
- Automatic "intelligent" highlighting of C / C ++ code works.
- Basic highlighting for * .qbs files works .
- A project tree with all artifacts is being built.
Note: At the moment, this extension has not yet been published in the Visual Studio Code market . some time is still needed for revision.
So, let's take a closer look at how to use this extension.
Installing dependencies
It describes the basic installation process for QBS and Visual Studio Code .
- First you need to download or install QBS itself , version 1.16 or higher. To do this, you can use the official repository , or install it from the repositories.
Note: I will not describe the installation process for QBS here .
- Next, you need to configure the profiles with which QBS will compile projects. How to do this is described in detail in the documentation .
For a quick setup, you can ask QBS to automatically detect all installed compilers and create profiles:
qbs setup-toolchains --detect
UI config-ui, :
qbs config --list profiles
: , PATH.
- , QBS .
: *.vsix
- , Visual Studio Code, QBS , ctrl+ shift + p «Extensions: Install from VSIX...» *.vsix .
Now you need to configure the installed extension for QBS to work. To do this, you need to open the settings of this extension by selecting "File -> Preferences -> Extensions" . Then select "QBS" , click on the "Manage" button and select "Extension Settings" .
- Next, you need to specify the path to the QBS executable file in the "QBS Path" field , for example:
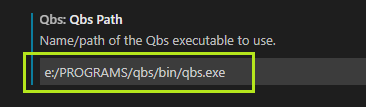
Note: Use the forward slash / as path separators .
- The rest of the parameters can be left "as is" for now.
Opening a project
To open a project, you must select the directory where the project file * .qbs is located . To do this, select "File -> Open Folder" and select the desired directory.
Note: This seems to be such a feature of this editor.
After the directory is selected, the QBS extension is automatically activated and starts the QBS session. The current session status will be displayed at the bottom of the "QBS: started" button on the editor toolbar:

Next, the extension will list all available project files * .qbsin this directory and will set the first project it comes across as the default project. The file name of the currently active project will be displayed at the bottom of the corresponding button on the editor toolbar:

Note: The user can click on this button and select another project file from this directory in the drop-down list.
Further, the extension will install by default the first available profile, set the build configuration to debug , and start automatic scanning of the project to build the build graph.
The progress of the scan (progress in percent) will be displayed in a pop-up notification at the bottom right of the screen:
Note: All progress of operations such as scan, build, cleanup will be displayed in these pop-up messages.
In addition, the extension creates two "exit" windows for viewing current messages:
- QBS Compile Output - Displays messages from basic scan, build and cleanup operations:

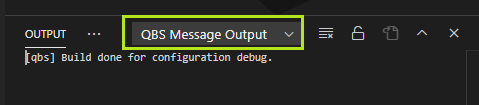
- QBS Message Output - displays "service" messages (for example, from JS code from QBS modules):
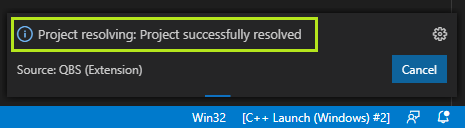
After the scanning of the project is successfully completed, you can switch to the project tree provided by the extension. To do this, click on the "QBS" button on the left panel of the editor:

Note: In this case, the project tree displays all sub-projects, products, groups and artifacts provided by QBS after scanning the project.
Note: The editor also displays the full directory of the project after opening it, but this is not the tree provided by this extension, it is a built-in function of the editor itself.
Build the project
To build a project, you must select the desired profile, configuration and product to build.
- Selecting a profile is reduced to clicking the corresponding button at the bottom of the editor toolbar and selecting the desired item from the list of available profiles:
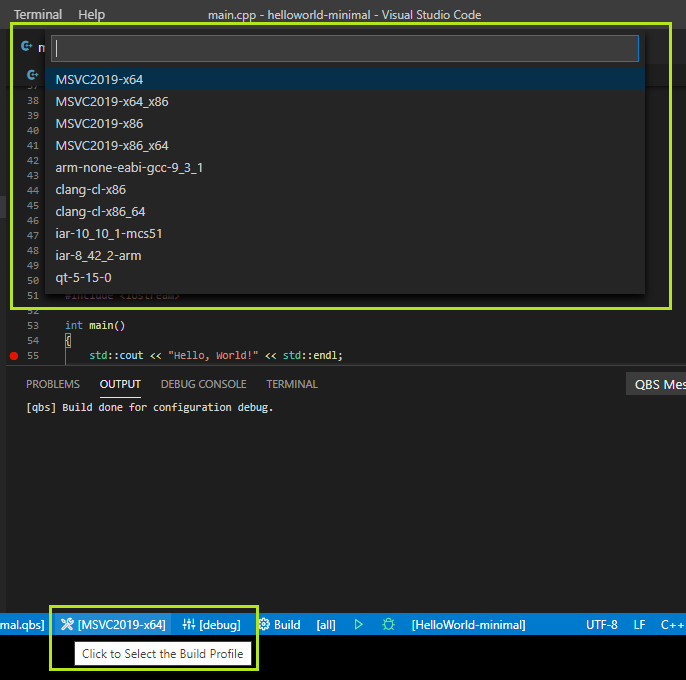
- Selecting a configuration is reduced to clicking the appropriate button at the bottom of the editor toolbar and selecting the desired item from the list of available configurations:
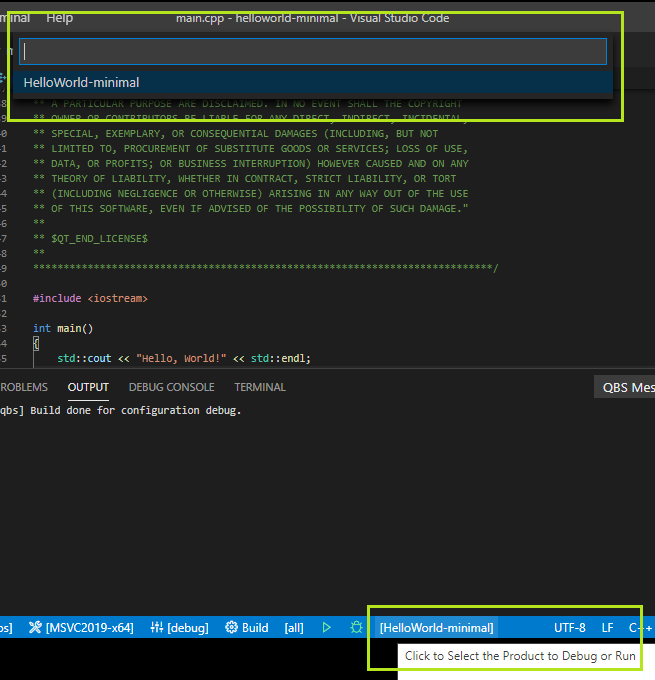
- Selecting a product is reduced to clicking the appropriate button at the bottom of the editor toolbar and selecting the desired item from the list of available products:

Note: The user can select [all] to build all products in the project.
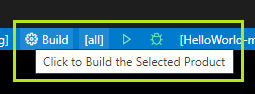
To start the build itself, the user can click on the "Build" button at the bottom of the editor toolbar:
Note: The build process will be displayed both in the drop-down notification and in the "output" message window.
Choosing a product to run or debug
To run or debug a product, you must first select it. To do this, click on the corresponding button at the bottom of the editor toolbar and select the desired product from the list of available ones:
In this case, if the product is already compiled and its executable file exists, then the Run and Debug buttons will be colored green:
In addition, when hovering over the product being launched, a tooltip will be displayed containing the full path to the product executable file:

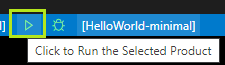
Launching the selected product
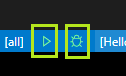
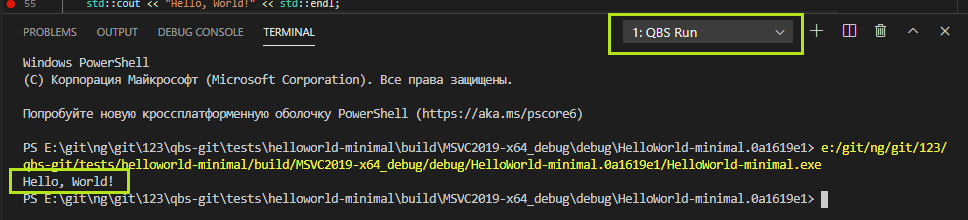
To start the product, just click on the "Run" button at the bottom of the editor toolbar:
The product will be launched in the "QBS Run" terminal , which will display all debug messages of the running application:
Debug the selected product
Before debugging the product, you need to create a debugger configuration, which must be stored in the launch.json file .
Note: More information about the format of this file can be found in the official documentation of the editor.
By default, the current QBS extension expects this file in the .vscode / directory in the root of the open project. But this path to launch.json file can be changed by user in plugin settings.
For example, when using the MSVC debugger, this file might contain the following content:
{
    "version": "0.2.0",
    "configurations": [
        {
            "name": "C++ Debugger (Windows)",
            "type": "cppvsdbg",
            "request": "launch",
            "externalConsole": false
        }
    ]
}
Note: The externalConsole property must be set to false if we want to see application debug messages in the debugger window.
Note: This file can have multiple configurations for the same or different debuggers (such as MSVC, GDB, LLDB).
After the launch.json file is created and copied to the desired location, you need to select the desired debugger from the list by clicking on the corresponding button at the bottom right on the editor toolbar:
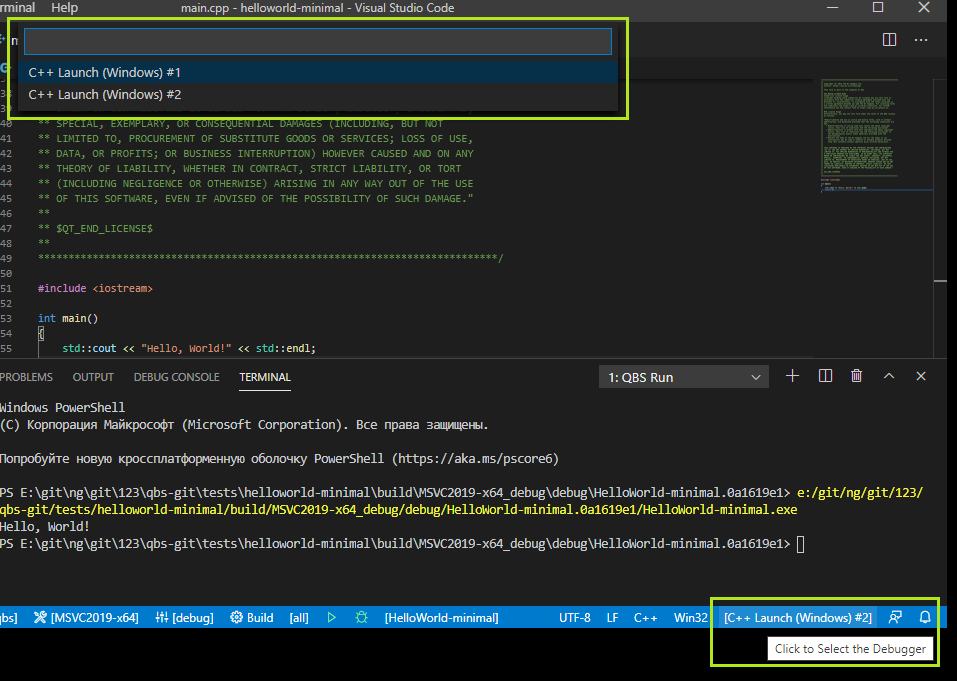
Now you can set a breakpoint in the source code of the selected product and click on the "Debug" button at the bottom of the editor toolbar:

After that you can enjoy debugging:

Conclusion
Of course, this review does not cover some other aspects of working with the editor (for example, working through commands), and also does not provide an explanation for the QBS configuration options . You can learn more about this by reading the documentation that comes with the extension and / or the QBS documentation :
- QBS Documentation : doc.qt.io/qbs/index.html
- Extension documentation: github.com/denis-shienkov/vscode-qbs/tree/master/docs
- Extension source code: github.com/denis-shienkov/vscode-qbs
- Extension releases: github.com/denis-shienkov/vscode-qbs/releases
- Extension tracker bug: github.com/denis-shienkov/vscode-qbs/issues
In conclusion, I want to say a big thank you to everyone who helped me test this extension and suggested new ideas.
Also, we urge you to send all errors, suggestions, corrections to the bug tracker .