The idea was born to make a budget web camera using available ingredients. It is desirable that it has a ready-made web interface so that it can be controlled remotely, rotating in different directions, so that you can change the settings, to take photo / video, download recorded, motion detection so that ...
The idea was born a long time ago, implemented and tested as a watchdog in a vehicle ... Well, this is when you get out of the car under the sign of evacuation for 5 minutes and are afraid that you will be taken away by a tow truck, while you are choosing glasses in the store, and the webcam guards and sends letters to the phone. But this is so, by the way. In this article we will show you how to make such a camera, how it works, how to set it up, etc.
Since the camera is going to be budgetary, rather even superbudgetary, then the components are appropriate:
- raspberry pi zero w (, wifi, wifi ) 1,5 .;
- -500 .
- sg-90 — 2. — 200 .
- , -100 .
- — 1000 .;
- , raspberry pi-.
: 3300 .
!


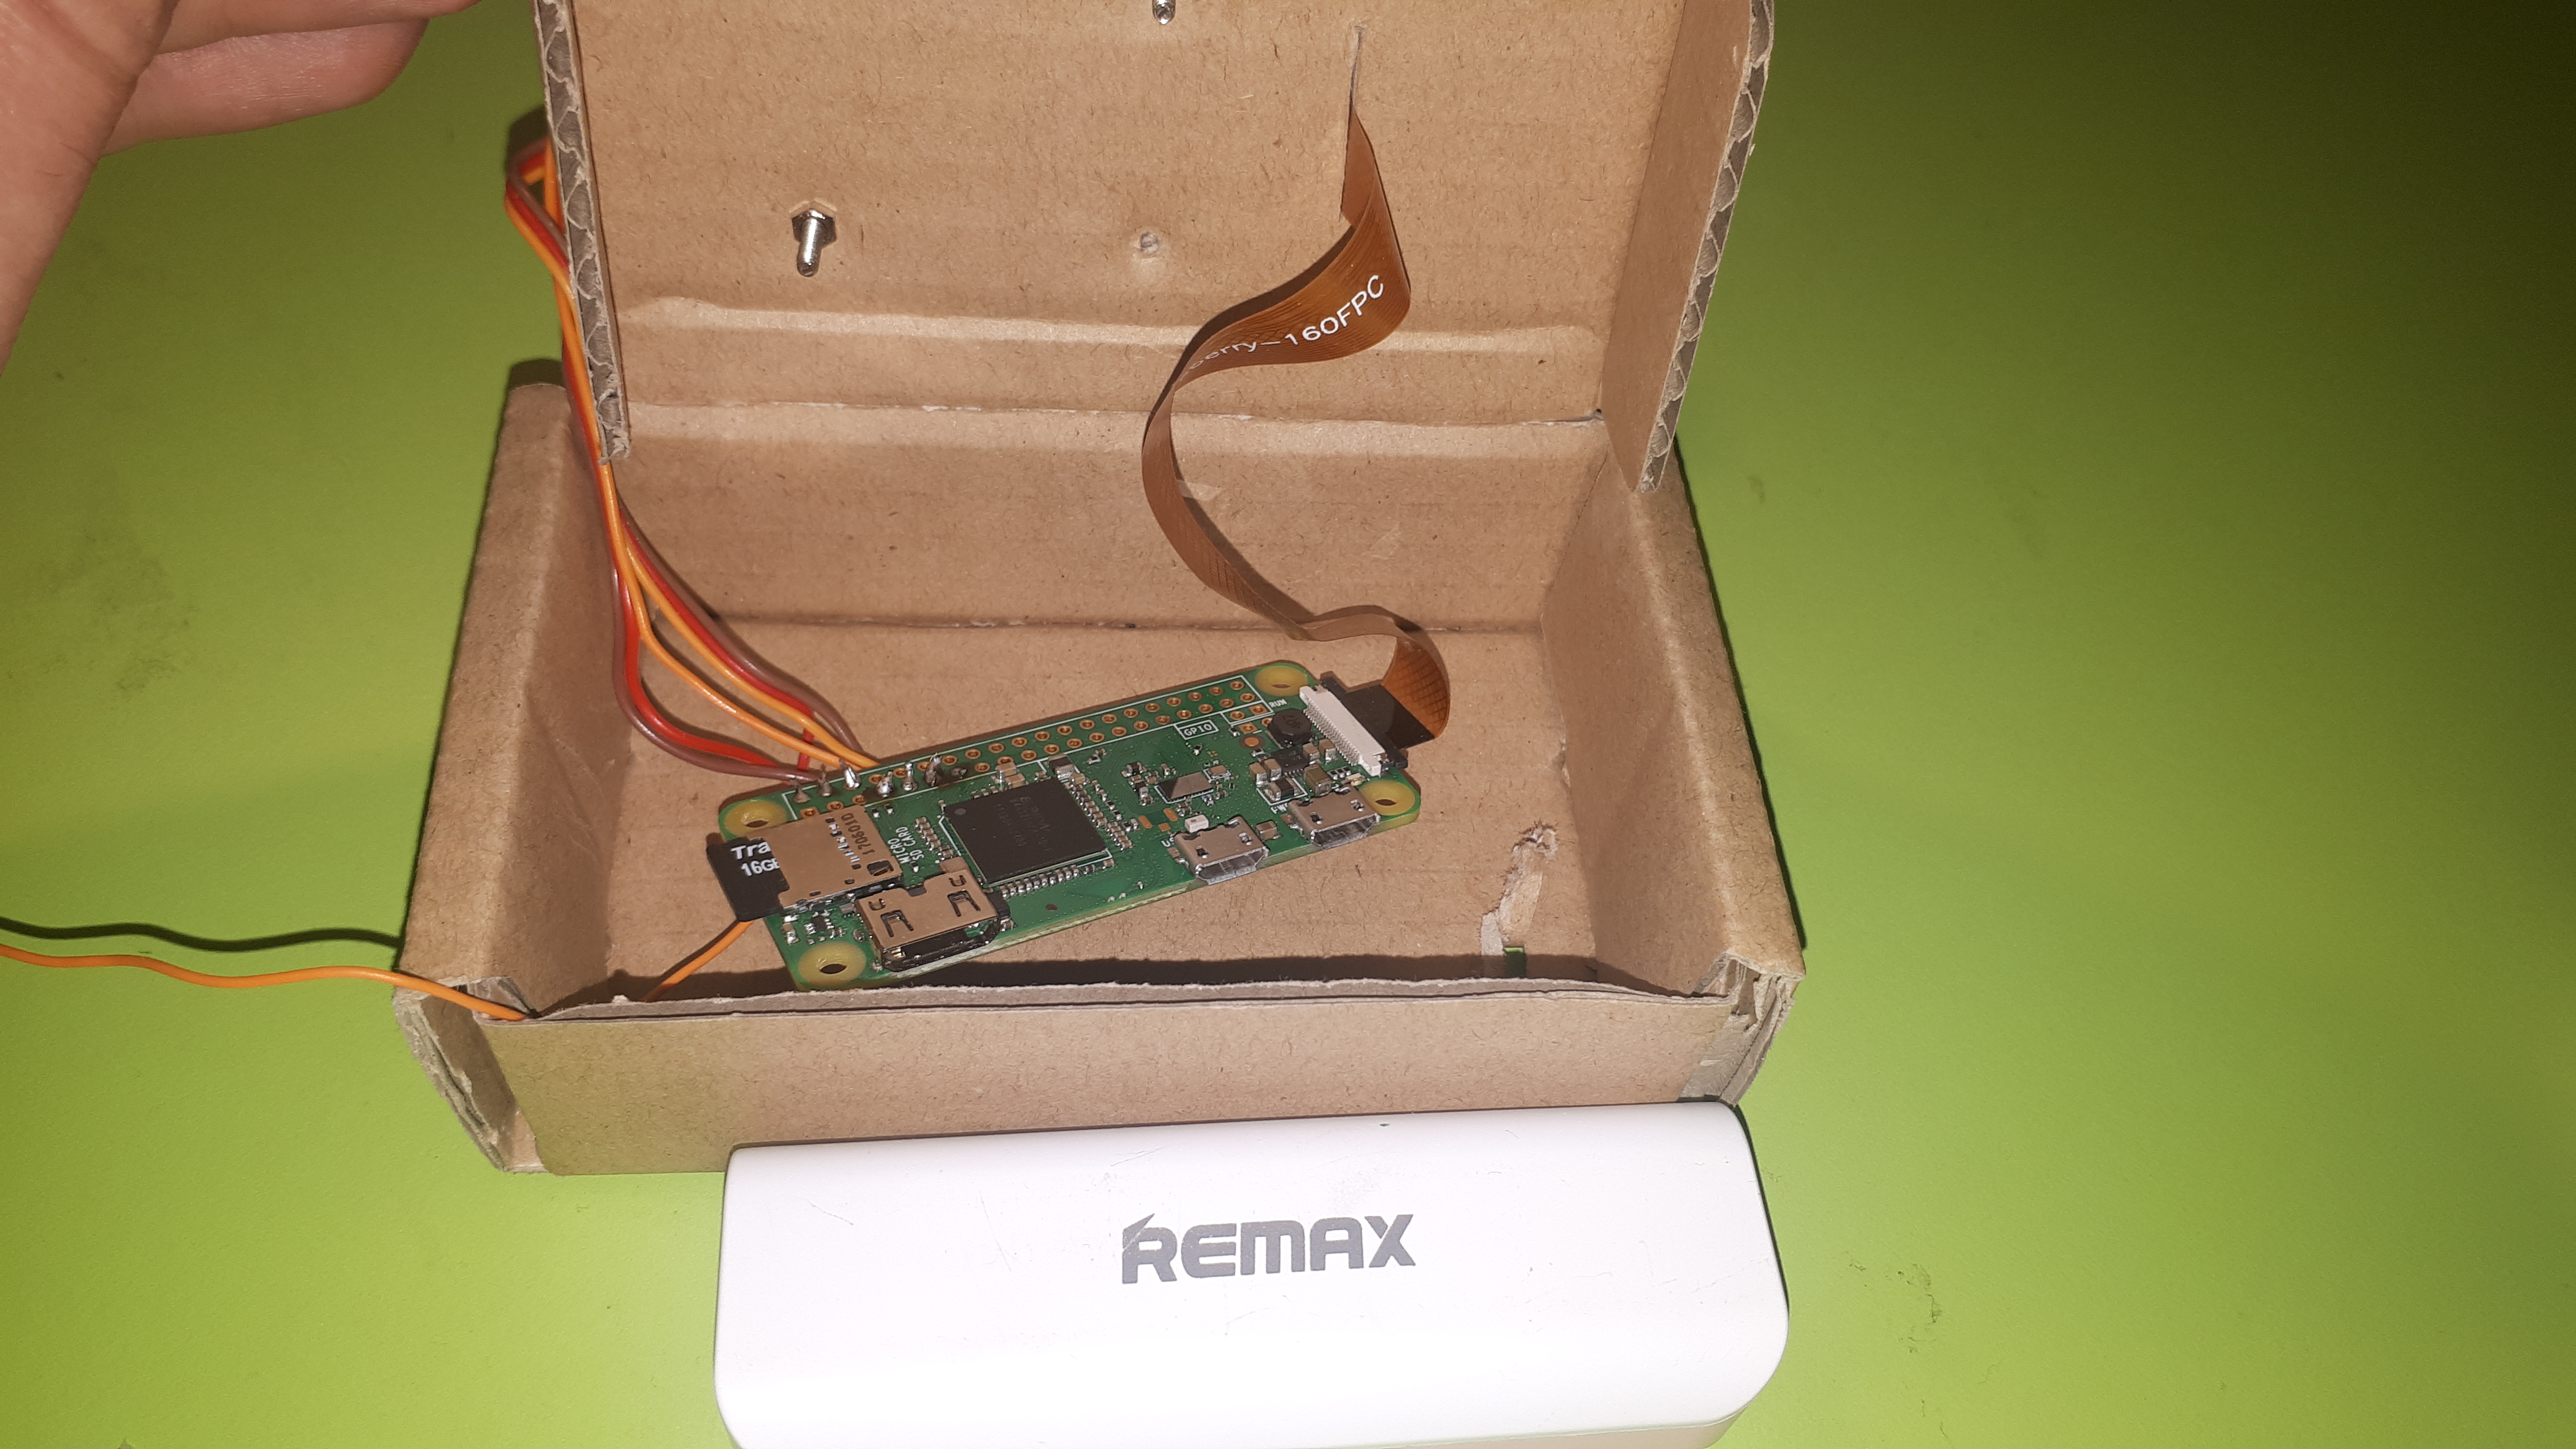
The software part is built around the Rpi web cam interface , in which everything works essentially out of the box. It remains only to add the actual control buttons on the page, scripts and connect the servos.
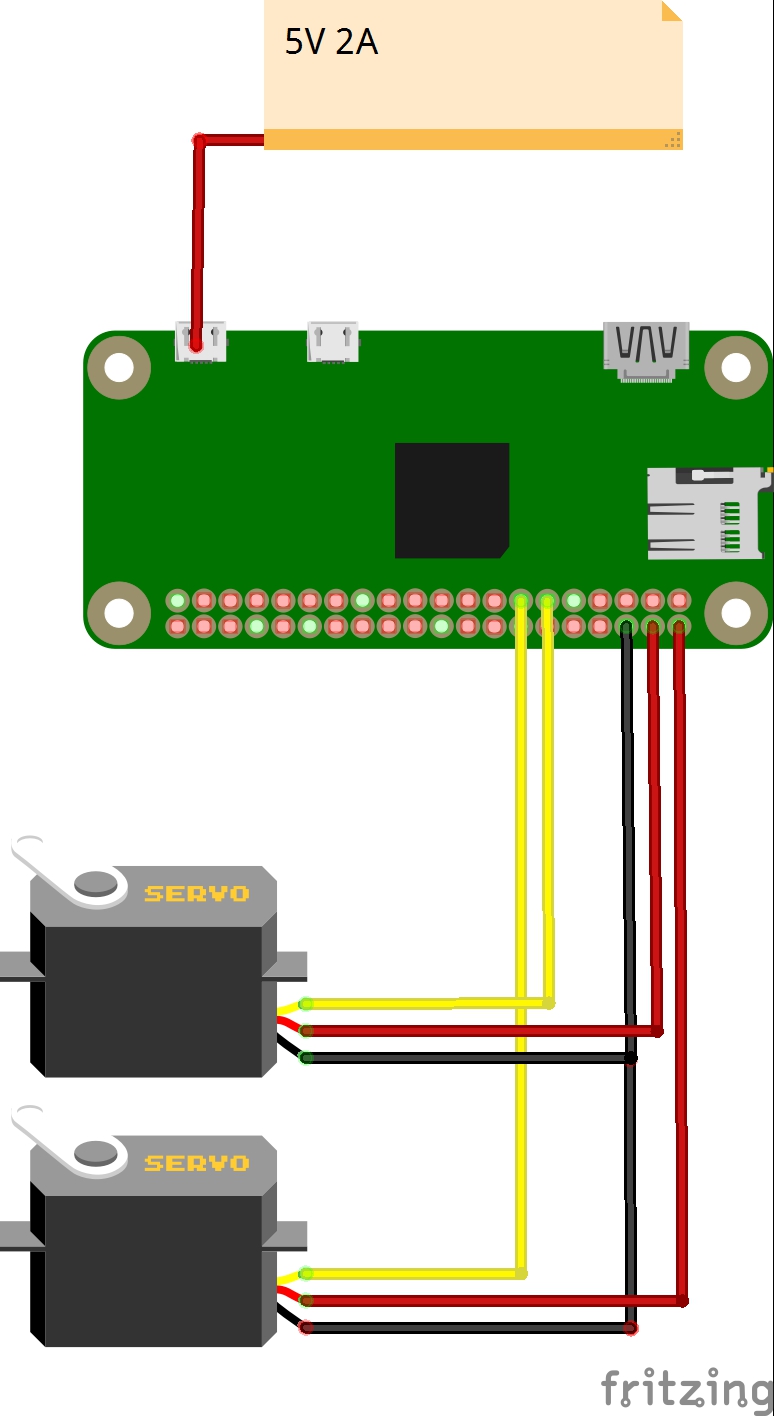
First, let's connect the suspension. We will not discuss how to collect it, since everything is intuitively simple there - where and how to insert the sg-90 servos. Connecting servos to the raspberry pi is also not complicated, the red wires go to power from the raspberry (5V), the black ones go to Gnd, the orange ones go to the gpio raspberry (gpio17, gpio27):
Schemes

* ( ).
* ( ).
Launching
The raspberry pi itself will look for a boss wifi access point with a password 1234554321, you will have to create this point.
On the raspberry itself, no special settings are required, and immediately after uploading to the raspberry and downloading the image, the rpi web interface is available at: 192.168.1.104 : 8080 / html
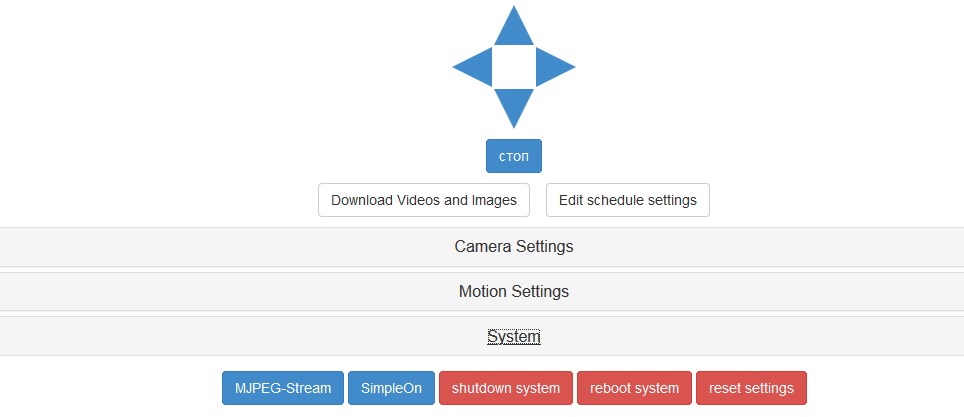
You can move the camera by clicking on the arrows on the page, and you can also take a screenshot, record a video etc., options for every taste and color:
At the same time, the video transmission speed is quite vigorous, without freezes.
How can I change the gimbal control scripts if the servos move in different directions?
Having connected to the raspberry pi via wifi ("boss", "1234554321") via vnc ("pi", "raspberry"),
start mc and follow the path:
mc
cd /var/www/html
Find up.sh, down.sh, left.sh, right.sh there and swap them as needed. For example left.sh in right.sh and vice versa if the gimbal moves to the right instead of to the left.
The scripts were created when installing the servoblaster package and it is he who is responsible for working with gpio.
You can read how to install it (although this is not necessary here) on the Internet, there is also an instruction in the image file.
How to add / remove buttons in Rpi Web interface?
Having connected to the raspberry pi via wifi ("boss", "1234554321") via vnc ("pi", "raspberry"), you need to run mc with the sudo mc command.
Next, follow the path and fix the userbuttons file:
sudo mc
cd /var/www/html
nano userbuttons
Comment out unnecessary buttons:

After refreshing the browser page, they will disappear:

Why are these buttons needed at all? To add control options directly from the web interface.
By throwing gpio control scripts into / var / www / html / macros, you can make yourself a working tank.
You can also turn off all this economy through the web interface on the appropriate tab:
Enthusiasts added a notification in the telegram to the Rpi web interface project if necessary, but a year ago it stopped working. Instructions on how to configure this option are also on the image.
Will the raspberry pi zero also handle streaming audio?
An attempt was made to tune using the sox (?) Package, but was successful in recording short audio clips, and streaming video suffered greatly. Therefore, this option had to be abandoned.
Image - download .