Introduction
This article is intended for the attention of system administrators who prepare typical workplaces on computers running Windows 10, including software developers.
It should be noted that there is a certain problem related to the inability to integrate software obtained from the on-line Microsoft Store for use in a custom image of Windows 10. Without going into details, I will clarify that this problem is due to the fact that programs installed from the Microsoft Store are linked with the Administrator service account, and when the utility completes creating a custom image
sysprep, errors due to this circumstance occur.
The method discussed in this article to avoid such a problem when preparing an image of Windows 10 with a pre-configured WSL2 subsystem, as well as with a pre-prepared and configured image of Ubuntu 20.04 with the KDE Plasma GUI, which in turn may have its own set of custom software.
On the Internet there are a large number of examples and guides for configuring WSL subsystems (i.e. WSL1 and the relatively new WSL2), with configuring the GUI interface for linux systems based on OS starting from Ubuntu 16.04 and ending with Ubuntu 20.04, but mostly it concerned desktops based on the so-called. "Lightweight" xfce4, which has understandable limitations in user settings. But as far as the KDE Plasma GUI for Ubuntu 20.04 is concerned, there was no substantial information on the net. But it is this option that provides the end user with an almost unlimited set of settings for both the appearance of the system and the hardware settings, of course, taking into account the current integration capabilities of linux systems implemented in the WSL2 subsystem.
Installing the required software suite and configuring WSL2
We check the current version of Windows, for this, in the Windows search bar, enter the command
winverand get something like the following:

It is important that the OS has version 1903 or 1909 (the specified OS versions must be with cumulative update KB4566116 installed), or 2004 (build number not less than 19041), the rest of the information does not matter. If the version number is lower, then it is recommended to update to the latest version of Windows to correctly repeat the results presented in this article.
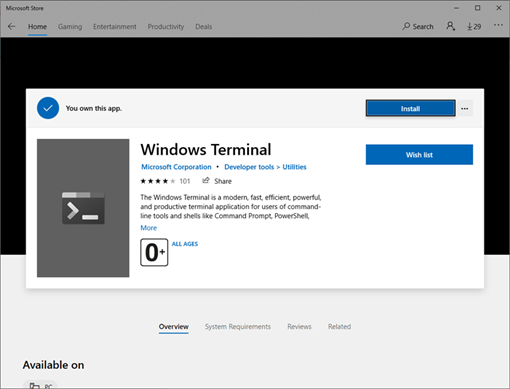
For the convenience of further actions, install the free Windows Terminal using the Microsoft Store (there is also the possibility of downloading from other sources):
We install X Server X410 through the same Microsoft Store, this software is paid, but there is a free period of 15 days, which is quite enough for various tests.

As a free alternative to X410, download and install the VcXsrv X server.
In any convenient place on the disk, create a directory in which we will store our files. Let's create a directory as an example
C:\wsl.
Download and install the Ubuntu 20.04 offline installer, unpack the resulting file using an archiver (for example 7-zip). We rename the unpacked directory with a long name
Ubuntu_2004.2020.424.0_x64to something more acceptable, for example, Ubuntu-20.04and copy it to the directory C:\wsl(hereinafter simply \wsl).
Download and unpack the
\wslPulseAudio v.1.1 cross-platform sound server into the directory , and also make corrections to its configuration files.
In the file
\wsl\pulseaudio-1.1\etc\pulse\default.paunderLoad audio drivers statically edit the line:
load-module module-waveout sink_name=output source_name=input record=0and in the section,
Network accessedit the line:
load-module module-native-protocol-tcp auth-ip-acl=127.0.0.1 auth-anonymous=1In the file,
\wsl\pulseaudio-1.1\etc\pulse\daemon.confuncomment and change the line
exit-idle-time = -1We configure the WSL2 subsystem in accordance with the Microsoft documentation . The only note is that we have already downloaded the Ubuntu distribution, and we will install it in the next step. Basically, the configuration boils down to enabling additional components "Windows Subsystem for Linux" and "Virtual Machine Platform", and then rebooting to apply changes to the computer settings:

If necessary, download and install the update package for the Linux kernel in WSL2.
Launch Windows Terminal and select Command Prompt mode by pressing the keys
Ctrl+Shift+2.
First of all, we set the WSL2 operating mode, for this we enter the command:
wsl --set-default-version 2Go to the directory with the offline bootloader Ubuntu 20.04, in my case, this is
\wsl\Ubuntu-20.04and run the file ubuntu2004.exe. When prompted for a username, I specify a name engineer(you can enter any other name), enter your password and confirm the entered password for the specified account:

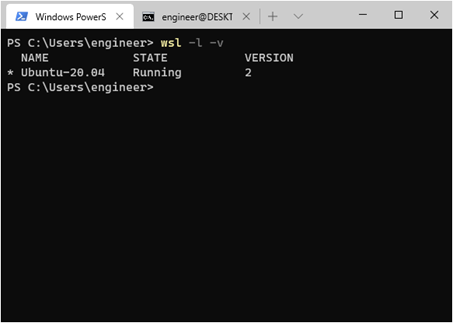
A terminal prompt appears, Ubuntu 20.04 kernel is installed. Let's check the correctness of the WSL2 mode setting, for this, in the Windows Terminal, select the Windows PowerShell tab and enter the command:
wsl -l -vthe result of execution should be like this:
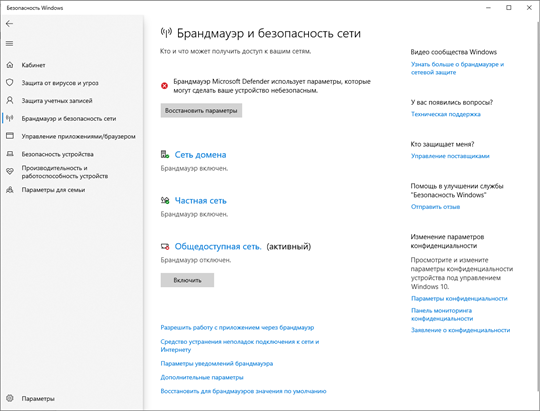
We configure the Microsoft Defender firewall, i.e. disable it for the public network:

Setting up Ubuntu 20.04
In Windows Terminal, select the Command Prompt tab again and install updates for Ubuntu 20.04. To do this, on the command line, enter:
sudo apt update && sudo apt upgrade –yInstalling the KDE Plasma desktop:
sudo apt install kubuntu-desktop -yinstallation takes up to 30 minutes, depending on the performance of the computer and the bandwidth of the Internet access channel, when the installer's request appears, we confirm
OK.
Installing Russian localization and dictionaries Ubuntu 20.04. To do this, on the command line, enter:
sudo apt install language-pack-ru language-pack-kde-ru -y
sudo apt install libreoffice-l10n-ru libreoffice-help-ru -y
sudo apt install hunspell-ru mueller7-dict -y
sudo update-locale LANG=ru_RU.UTF-8
sudo dpkg-reconfigure locales # :  ru_RU.UTF-8 UTF-8, .  .
sudo apt-get install --reinstall locales

Add the latest version of the KDE Plasma desktop:
sudo add-apt-repository ppa:kubuntu-ppa/backports
sudo apt update && sudo apt full-upgrade -y
Adding a set of console applications, for example
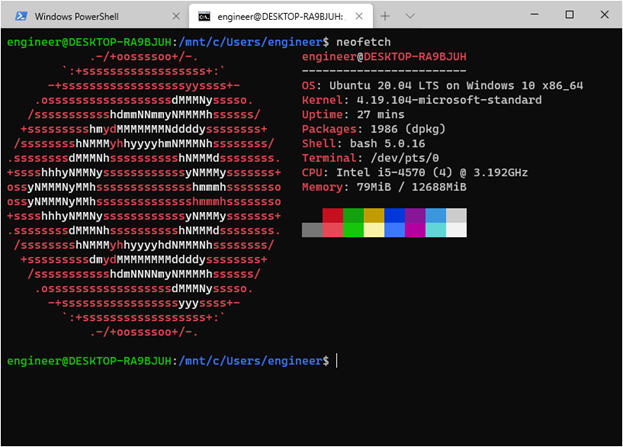
mc, and neofetch:
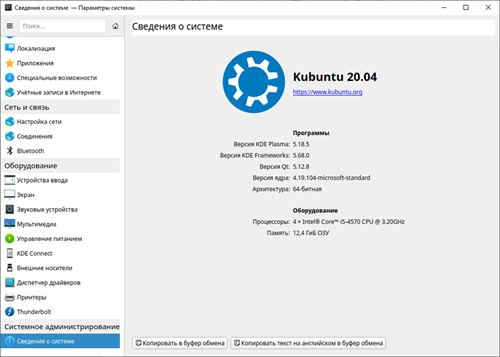
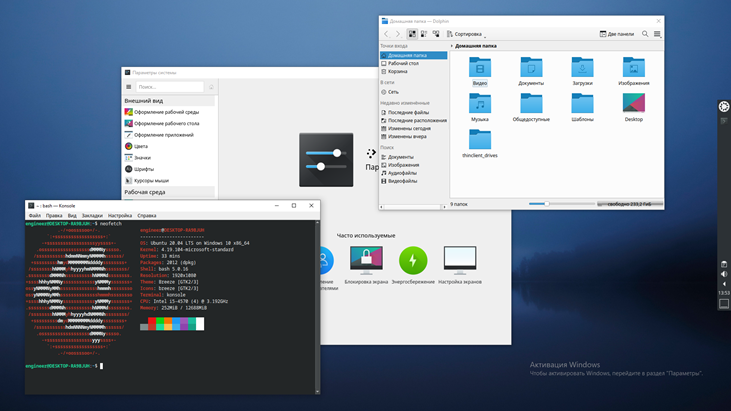
sudo apt install mc neofetch -yWe check what happened, enter it into the command line
neofetch, see screenshot:
Editing the WSL configuration file
/etc/wsl.conf:
sudo nano /etc/wsl.confcopy the text into the opened empty text editor window:
[automount]
enabled = true
root = /mnt
options = «metadata,umask=22,fmask=11»
mountFsTab = true
[network]
generateHosts = true
generateResolvConf = true
[interop]
enabled = true
appendWindowsPath = true
save the changes (
Ctrl+O), confirm the operation and exit the text editor ( Ctrl+X).
We export the customized Ubuntu-20.04 image to the directory we created
\wsl. To do this, in Windows Terminal, select the Windows PowerShell tab again and enter the command:
wsl --export Ubuntu-20.04 c:\wsl\Ubuntu-plasma-desktopthe created image will help us automate the start / reinstall operations of the configured Ubuntu 20.04, if necessary, it will allow us to easily transfer it to another computer.
Preparing bat files and shortcuts to the Windows desktop
Using the Notepad ++ editor, create bat-files (mandatory in the OEM-866 encoding for the correct display of Cyrillic characters):
File
Install-Ubuntu-20.04-plasma-desktop.bat- designed to automate the initial installation of the created Ubuntu 20.04 image on a computer with a WSL2 subsystem and an X server already configured. If the username and password differ from those specified in the example, then you need to make the appropriate changes to this bat file:
@echo off
wsl --set-default-version 2
cls
echo     Ubuntu-20.04...
wsl --import Ubuntu-20.04 c:\wsl c:\wsl\Ubuntu-plasma-desktop
wsl -s Ubuntu-20.04
cls
echo  Ubuntu-20.04  !
echo        «root»     ,
echo      «engineer», : «password».
pause
File
Reinstall-Ubuntu-20.04-plasma-desktop.bat- intended for reinstalling the prepared Ubuntu 20.04 image on the computer.
@echo off
wsl --unregister Ubuntu-20.04
wsl --set-default-version 2
cls
echo     Ubuntu-20.04...
wsl --import Ubuntu-20.04 c:\wsl c:\wsl\Ubuntu-plasma-desktop
wsl -s Ubuntu-20.04
cls
echo  Ubuntu-20.04  !
pause
File
Set-default-user.bat- to set the "default" user.
@echo off
set /p answer=     Ubuntu (engineer):
c:\wsl\Ubuntu-20.04\ubuntu2004.exe config --default-user %answer%
cls
echo    %answer%  Ubuntu-20.04   !
pause
The file
Start-Ubuntu-20.04-plasma-desktop.batis the actual launch of the KDE Plasma desktop.
@echo off
echo ===================================== ! ============================================
echo     GUI Ubuntu 20.04  WSL2   X Server.
echo  :    VcXsrv Windows X Server
echo     Start-Ubuntu-20.04-plasma-desktop.bat,  "config.xlaunch"
echo  "vcxsrv.exe",    ,  "x410".
echo ============================================================================================
rem start "" /B "c:\wsl\vcxsrv\config.xlaunch" > nul
start "" /B x410.exe /wm /public > nul
start "" /B "c:\wsl\pulseaudio-1.1\bin\pulseaudio.exe" --use-pid-file=false -D > nul
c:\wsl\Ubuntu-20.04\Ubuntu2004.exe run "if [ -z \"$(pidof plasmashell)\" ]; then cd ~ ; export DISPLAY=$(awk '/nameserver / {print $2; exit}' /etc/resolv.conf 2>/dev/null):0 ; setxkbmap us,ru -option grp:ctrl_shift_toggle ; export LIBGL_ALWAYS_INDIRECT=1 ; export PULSE_SERVER=tcp:$(grep nameserver /etc/resolv.conf | awk '{print $2}') ; sudo /etc/init.d/dbus start &> /dev/null ; sudo service ssh start ; sudo service xrdp start ; plasmashell ; pkill '(gpg|ssh)-agent' ; fi;"
rem taskkill.exe /F /T /IM vcxsrv.exe > nul
taskkill.exe /F /T /IM x410.exe > nul
taskkill.exe /F /IM pulseaudio.exe > nul
File
Start-Ubuntu-20.04-terminal.bat- launches a graphical terminal without the KDE Plasma desktop.
@echo off
echo ===================================== ! ============================================
echo     GUI Ubuntu 20.04  WSL2   X Server.
echo  :    VcXsrv Windows X Server
echo     Start-Ubuntu-20.04-plasma-desktop.bat,  "config.xlaunch"
echo  "vcxsrv.exe",    ,  "x410".
echo ============================================================================================
rem start "" /B "c:\wsl\vcxsrv\config.xlaunch" > nul
start "" /B x410.exe /wm /public > nul
start "" /B "c:\wsl\pulseaudio-1.1\bin\pulseaudio.exe" --use-pid-file=false -D > nul
c:\wsl\Ubuntu-20.04\Ubuntu2004.exe run "cd ~ ; export DISPLAY=$(awk '/nameserver / {print $2; exit}' /etc/resolv.conf 2>/dev/null):0 ; export LIBGL_ALWAYS_INDIRECT=1 ; setxkbmap us,ru -option grp:ctrl_shift_toggle ; export PULSE_SERVER=tcp:$(grep nameserver /etc/resolv.conf | awk '{print $2}') ; sudo /etc/init.d/dbus start &> /dev/null ; sudo service ssh start ; sudo service xrdp start ; konsole ; pkill '(gpg|ssh)-agent' ;"
taskkill.exe /F /T /IM x410.exe > nul
rem taskkill.exe /F /T /IM vcxsrv.exe > nul
taskkill.exe /F /IM pulseaudio.exe > nul
Also, for ease of use, we
\wslprepare shortcuts in the directory pointing to the corresponding bat files. After that, the contents of the directory \wsllooks like this:

Launching the KDE Plasma Desktop
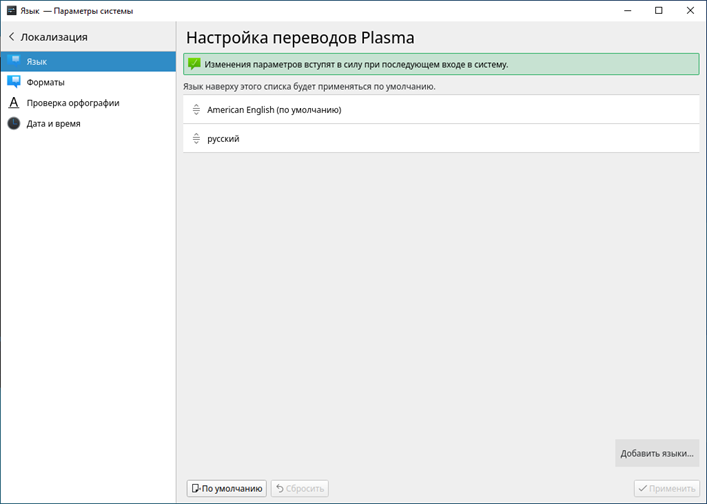
We check that all the preparatory actions have been completed, we try to launch the shortcut
Plasma-desktop. A password request appears, enter the password for the account and ... the window closes. It's ok the first time. Trying again, we see the familiar KDE Plasma taskbar. We configure the required appearance of the taskbar, for example, for ease of use, the panel is moved to the right side of the screen and centered. We check the localization settings, if necessary, add the Russian language:
If necessary, put shortcuts for installed linux applications on the KDE Plasma taskbar.
If Ubuntu 20.04 requires you to log out of the user account to apply the changes to the settings, or you need to restart the OS, to do this, enter the command in Windows Terminal:
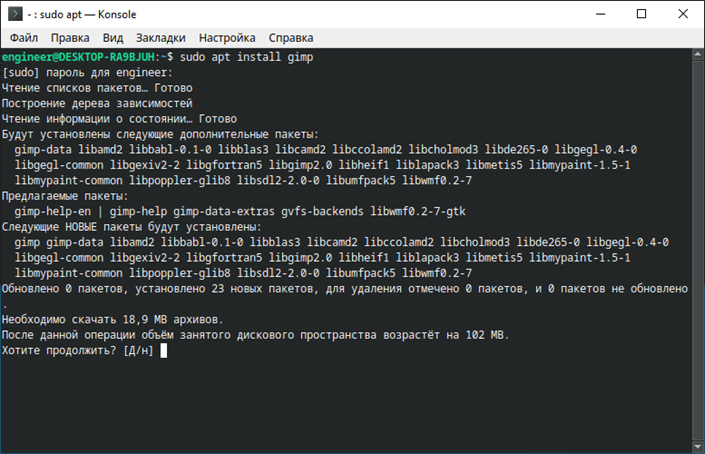
wsl -d Ubuntu20.04 --shutdownUsing the shortcut
Plasma-desktopor, Konsoleyou can launch the KDE Plasma Ubuntu 20.04 GUI. For example, let's install using the KonsoleGIMP graphics editor:
After the installation is complete, run the
KonsoleGIMP graphic editor from the graphics editor:
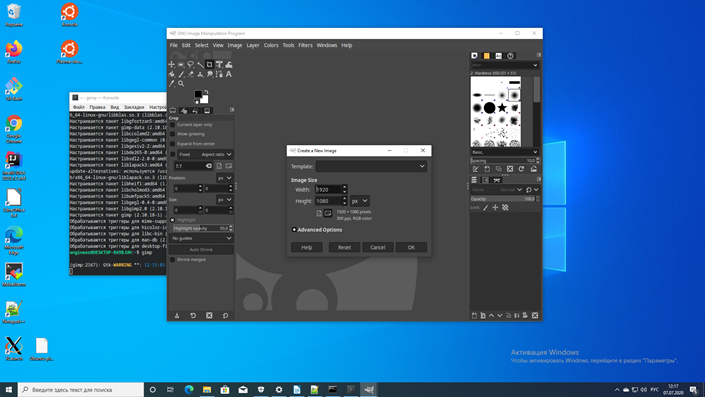
The GIMP works, which is what you wanted to check.
And here's how the various linux applications work in KDE Plasma in WSL2:
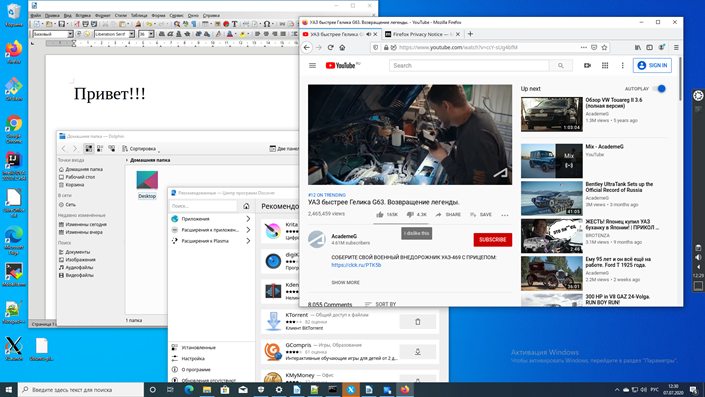
the customized KDE Plasma taskbar is on the right side of the screen. and the video in the Firefox window plays with sound.
If necessary, you can configure access to Ubuntu20.04 by
SSHand RDP, for this you need to install the appropriate services with the command:
sudo apt install ssh xrdp -ynote: to enable password access by software,
SSHyou need to edit the file /etc/ssh/sshd_config, namely, the parameter PasswordAuthentication nomust be set to value PasswordAuthentication yes, save the changes and restart Ubuntu20.04.
Each time you start Ubuntu20.04, the internal ip-address changes, before configuring remote access, you need to specify the current ip-address using the command
ip a:

Accordingly, the ip-address is required in the session setup
SSHand RDPbefore starting.
This is how remote
SSHsoftware access looks like using MobaXterm:

And this is how remote access looks like
RDP:

Using vcxsrv X server instead of x410
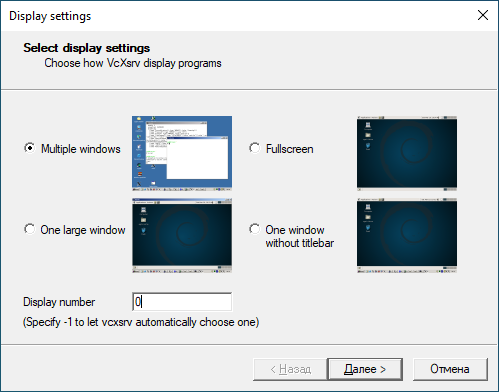
Launch and configure
vcxsrv, carefully check the appropriate boxes:

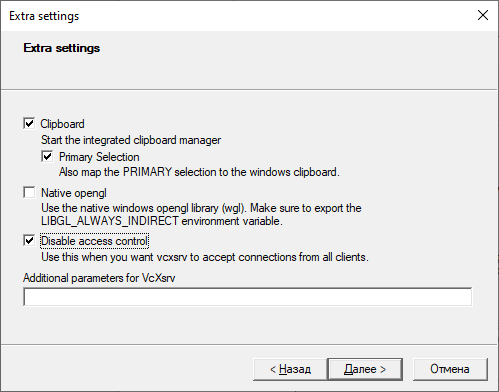

We save the configured configuration in a directory
\wsl\vcxsrvwith a standard name config.xlaunch.
We edit bat-files
Start-Ubuntu-20.04-plasma-desktop.batand Start-Ubuntu-20.04-terminal.batin accordance with the instructions available in them.
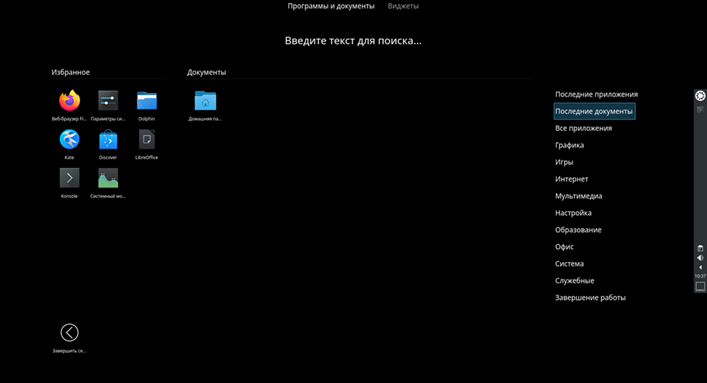
We launch the shortcut
Plasma-desktop, and this is what we get:
The KDE Plasma desktop completely closes the Windows desktop, we use a well-known key combination to switch between windows of linux and windows applications
Alt+Tab, which is not very convenient.
In addition, an unpleasant feature of the X-server was revealed
vcxsrv- it crashes when launching some applications, in particular the same GIMP or LibreOffice Writer. Perhaps you should wait for the developers to remove the noticed "bugs", but this is not certain ... So for obtaining acceptable results it is better to use Microsoft X Server x410.
Conclusion
Still, we must pay tribute to Microsoft, the WSL2 product turned out to be quite working, and, in my unsophisticated opinion, very successful. And as far as I know, the developers continue to work hard to "finish" it, and perhaps - in a year or two, this subsystem will appear in all its functional completeness.