
Hello!
I think many who are interested in a smart home or simply a technological arrangement of their home, thought about the "atmospheric" and non-standard lighting system.
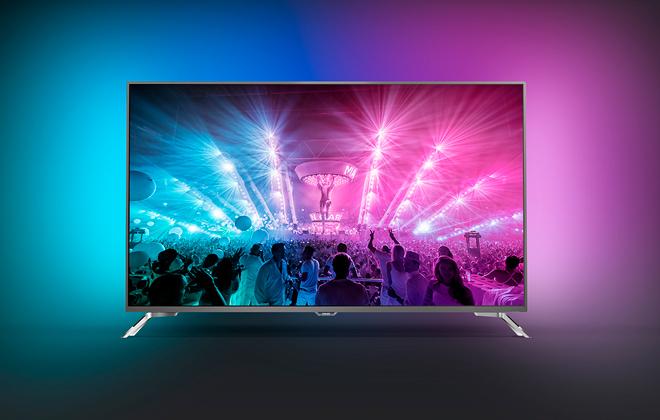
One way to light up a room in such a "unusual" way while watching movies is offered by Philips with Ambilight technology built into the brand's
In this article, you will discover the implementation of Ambilight with Xiaomi Yeelight smart bulbs!
About Ambilight
Who does not know - Ambilight technology is a backlight built into TVs, which analyzes the color picture of the frame on the TV screen and reproduces the diffused light around the perimeter of the TV.
Pros of Ambilight:
- , ;
- ;
- , .
In general, Ambilight is quite an interesting technology, and the confirmation of this fact is the presence of a large number of various options for its "artisanal" implementation, presented on the Internet. However, they are overwhelmingly based on the use of an addressable LED strip glued to the back of the TV / monitor / laptop cover. For such an implementation, it is necessary to have at least a physical external controller responsible for controlling the LEDs. This requires specific knowledge from a person who wants to install such a system. Therefore, as an alternative, I propose the most "proger" and rather simple version of such a backlight using smart lamps.
What are these smart lamps?
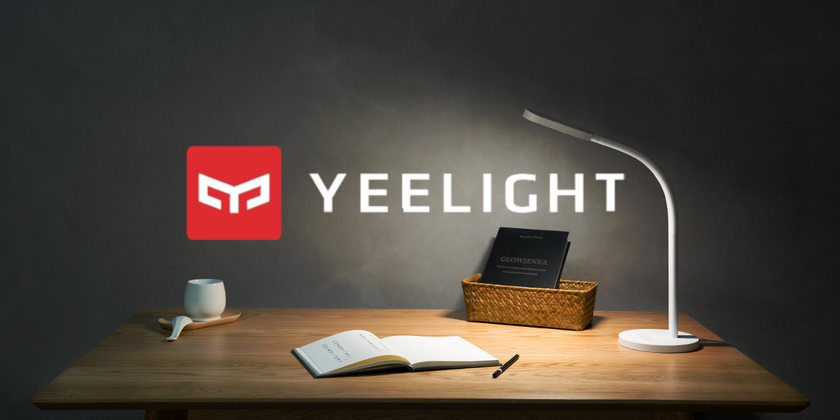
To create this illumination option, you will need any Yeelight brand lighting device (a subsidiary of Xiaomi) or Xiaomi (but only those that mention Yeelight in the name). This means that the device is embedded in the Xiaomi smart home ecosystem and is controlled through the Yeelight app.
In my opinion, adaptive backlighting is not a feature for which someone will run to buy a Xiaomi smart lamp (for a substantial amount of money, by the way). However, as for me, this is a good opportunity to expand the functionality of an existing lamp at home. In any case, as the owner of two Xiaomi lamps, I can say that after two months of using them, I have only pleasant impressions.
The Yeelight application plays an important role in the implementation of this project, since it has one useful parameter - Developer mode .

In the latest updates, it was renamed to "LAN Control"
The modern smart home ecosystem is based on the exchange of data between devices via the wi-fi protocol. Each smart device has a built-in wi-fi module that allows you to connect to a local wireless network. Thanks to this, the device is controlled through the cloud service of the smart home. However, Developer mode allows you to communicate with the device directly by sending requests to the IP address allocated to the device (the device address can be found in the Yeelight app in the device information). This mode guarantees the reception of data from devices that are in the same local network as the smart lamp. The Yeelight website has a small demo of the developer mode functionality.
Thanks to this option, it is possible to implement the function of adaptive lighting and embed it in the open source player.
Functional definition
A further post will be devoted to what difficulties (and ways to solve them) an engineer may face when he is thinking of designing such a thing, as well as the general progress in the implementation of the plan.
If you are interested exclusively in a ready-made program, then you can go directly to the item "For those who just want to use a ready-made player."
First of all, let's decide on the tasks that the project being developed should solve. The main points of the TOR for this project:
- It is necessary to develop functionality that allows you to dynamically change the parameters (color or brightness / temperature of the light in the case of using a device without rgb LEDs) of the smart lamp, depending on the current image in the media player window.
- .
- , «» .
- .
- .
,
, jar Before you start README .
The initial stage of project development will be the definition of a player for embedding a function and a library for communication with a smart lamp.
My choice fell on the vlcj player and the Yapi library , written in Java . Maven was used as a build tool .
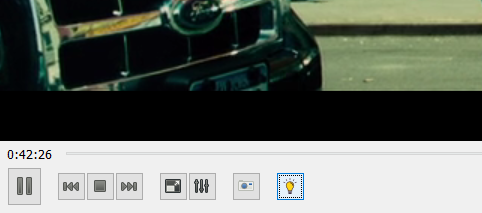
Vlcj is a framework that allows you to embed a native VLC player into a Java application, as well as manage the player's life cycle through java code. The author of the framework also has a demo version of the player , which almost completely repeats the interface and functionality of the VLC player. The most stable version of the player at the moment is version 3. It will be used in the project.

Vlcj player interface with open additional windows
Advantages of vlcj player:
- a huge number of supported video formats, which is a long-standing feature of the VLC player;
- Java as a PL, which allows you to open the player on a large number of operating systems (in this case, we are limited only by the implementation of the VLC player, which is inextricably linked with a java application).
Disadvantages:
- outdated design of the player, which is solved by its own implementation of the interface;
- Before using the program, you need to install a VLC player and Java version 8 or higher, which is definitely a drawback.
The use of Yapi as a library for connecting with smart Yeelight gadgets can be justified primarily by simplicity, and secondly, by the scarcity of ready-made solutions. At the moment, there are not many third-party tools for controlling smart lamps, especially in the Java language.
The main disadvantage of the Yapi library is that none of its versions are present in the Maven repository, so before compiling the project code, you need to manually install Yapi to the local repository (the entire installation is described in the README file in the repository).
Image analysis algorithm
The principle of dynamic lighting will be based on periodic color analysis of the current frame.
As a result of the trial and error stage, the following principle of image analysis was developed:
At the specified frequency, the program takes a screenshot of the media player and receives an object of the BufferedImage class. Next, with the fastest built-in algorithm, the original image is resized to 20x20 pixels.
This is necessary for the speed of the algorithm, for the sake of which we can sacrifice some accuracy in determining the color. It is also necessary in order to minimize the dependence of the image processing time on the resolution of the current media file.
Next, the algorithm splits the resulting image into four "base" zones (top left, bottom left, etc.) 10x10 pixels in size.

"Basic" zones
This mechanism is implemented to provide an independent analysis of different image zones, which allows you to put the lighting device in a certain place in the room in the future and indicate which image zone it needs to "track". When used with a multi-lamp program, this functionality makes dynamic lighting much more atmospheric.
Then, for each area of the image, an average color is calculated by calculating the arithmetic mean separately for the three color components (red, green, blue) of each pixel and arranging the resulting data into a single color value.
Thanks to the four resulting values, we can:
- 5 : , , , ( «» );
- :
r, g, b – // -
For an efficient and scalable mechanics of calculating image parameters, all additional data (not "base" zones, temperature and color brightness) are calculated "lazily", i.e. as needed.
All the image processing code fits into one ImageHandler class:
public class ImageHandler {
    private static List<ScreenArea> mainAreas = Arrays.asList(ScreenArea.TOP_LEFT, ScreenArea.TOP_RIGHT, ScreenArea.BOTTOM_LEFT, ScreenArea.BOTTOM_RIGHT);
    private static int scaledWidth = 20;
    private static int scaledHeight = 20;
    private static int scaledWidthCenter = scaledWidth / 2;
    private static int scaledHeightCenter = scaledHeight / 2;
    private Map<ScreenArea, Integer> screenData;
    private LightConfig config;

    //
    private int[] getDimensions(ScreenArea area) {
        int[] dimensions = new int[4];
        if (!mainAreas.contains(area)) {
            return dimensions;
        }
        String name = area.name().toLowerCase();
        dimensions[0] = (name.contains("left")) ? 0 : scaledWidthCenter;
        dimensions[1] = (name.contains("top")) ? 0 : scaledHeightCenter;
        dimensions[2] = scaledWidthCenter;
        dimensions[3] = scaledHeightCenter;
        return dimensions;
    }

    //
    private BufferedImage getScaledImage(BufferedImage image, int width, int height) {
        Image tmp = image.getScaledInstance(width, height, Image.SCALE_FAST);
        BufferedImage scaledImage = new BufferedImage(width, height, BufferedImage.TYPE_INT_ARGB);

        Graphics2D g2d = scaledImage.createGraphics();
        g2d.drawImage(tmp, 0, 0, null);
        g2d.dispose();
        return scaledImage;
    }

    // ,   ,   ,
    private void proceedImage(BufferedImage image) {
        BufferedImage scaledImage = getScaledImage(image, scaledWidth, scaledHeight);

        screenData = new HashMap<>();
        mainAreas.forEach(area -> {
            int[] dimensions = getDimensions(area);
            BufferedImage subImage = scaledImage.getSubimage(dimensions[0], dimensions[1], dimensions[2], dimensions[3]);

            int average = IntStream.range(0, dimensions[3])
                    .flatMap(row -> IntStream.range(0, dimensions[2]).map(col -> subImage.getRGB(col, row))).boxed()
                    .reduce(new ColorAveragerer(), (t, u) -> {
                        t.accept(u);
                        return t;
                    }, (t, u) -> {
                        t.combine(u);
                        return t;
                    }).average();

            screenData.put(area, average);
        });
    }

    public ImageHandler(BufferedImage image, LightConfig config) {
        this.config = config;
        proceedImage(image);
    }

    //       ,  considerRate   (    )
    public int getValue(ScreenArea area, Feature feature, Boolean considerRate) {
        Integer intValue = screenData.get(area);
        if (intValue != null) {
            Color color = new Color(intValue);
            if (feature == Feature.COLOR) {
                return color.getRGB();
            } else if (feature == Feature.BRIGHTNESS || feature == Feature.TEMPERATURE) {
                int value = (feature == Feature.BRIGHTNESS) ? getBrightness(color) : getTemperature(color);
                double rate = (feature == Feature.BRIGHTNESS) ? config.getBrightnessRate() : config.getTemperatureRate();
                value = (value < 0) ? 0 : value;
                if (considerRate) {
                    value = 10 + (int) (value * rate);
                }
                return (value > 100) ? 100 : value;
            } else {
                return 0;
            }
        } else {
            calculateArea(area);
            return getValue(area, feature, considerRate);
        }
    }

    //
    private int getBrightness(Color color) {
        return (int) ((color.getRed() * 0.2126f + color.getGreen() * 0.7152f + color.getBlue() * 0.0722f) / 255 * 100);
    }

    //
    private int getTemperature(Color color) {
        return (int) ((float) (color.getRed() - color.getBlue()) / 255 * 100);
    }

    //   ""
    private void calculateArea(ScreenArea area) {
        int value = 0;
        switch (area) {
            case TOP:
                value = getAverage(ScreenArea.TOP_LEFT, ScreenArea.TOP_RIGHT);
                break;
            case BOTTOM:
                value = getAverage(ScreenArea.BOTTOM_LEFT, ScreenArea.BOTTOM_RIGHT);
                break;
            case LEFT:
                value = getAverage(ScreenArea.BOTTOM_LEFT, ScreenArea.TOP_LEFT);
                break;
            case RIGHT:
                value = getAverage(ScreenArea.BOTTOM_RIGHT, ScreenArea.TOP_RIGHT);
                break;
            case WHOLE_SCREEN:
                value = getAverage(mainAreas.toArray(new ScreenArea[0]));
                break;
        }
        screenData.put(area, value);
    }

    //
    private int getAverage(ScreenArea... areas) {
        return Arrays.stream(areas).map(color -> screenData.get(color))
                .reduce(new ColorAveragerer(), (t, u) -> {
                    t.accept(u);
                    return t;
                }, (t, u) -> {
                    t.combine(u);
                    return t;
                }).average();
    }

    //  rgb  int-
    public static int[] getRgbArray(int color) {
        int[] rgb = new int[3];
        rgb[0] = (color >>> 16) & 0xFF;
        rgb[1] = (color >>> 8) & 0xFF;
        rgb[2] = (color >>> 0) & 0xFF;
        return rgb;
    }

    // int-     rgb
    public static int getRgbInt(int[] pixel) {
        int value = ((255 & 0xFF) << 24) |
                ((pixel[0] & 0xFF) << 16) |
                ((pixel[1] & 0xFF) << 8) |
                ((pixel[2] & 0xFF) << 0);
        return value;
    }

   //         stream API
    private class ColorAveragerer {
        private int[] total = new int[]{0, 0, 0};
        private int count = 0;

        private ColorAveragerer() {
        }

        private int average() {
            int[] rgb = new int[3];
            for (int it = 0; it < total.length; it++) {
                rgb[it] = total[it] / count;
            }

            return count > 0 ? getRgbInt(rgb) : 0;
        }

        private void accept(int i) {
            int[] rgb = getRgbArray(i);
            for (int it = 0; it < total.length; it++) {
                total[it] += rgb[it];
            }
            count++;
        }

        private void combine(ColorAveragerer other) {
            for (int it = 0; it < total.length; it++) {
                total[it] += other.total[it];
            }
            count += other.count;
        }
    }
}
In order to prevent the frequent flickering of the lamp from irritating the eye, a threshold for changing the parameters was introduced. For example, the lamp will change the brightness value only if the current scene in the movie is more than 10 percent brighter than the previous one.
Comparison with another analysis method
You might ask, "Why not just scale down the image to 2x2 pixels and count the resulting values?" ...
The answer would be: “Based on my experiments, the algorithm for determining the average color by reducing the size of the image (or its zones) proved to be less stable and less reliable (especially when analyzing dark areas of the image) than the algorithm based on determining the arithmetic mean of all pixels " .
Several methods have been tried to resize images. It was possible to use the openCV library for more serious work with the image, but I considered this to be over-engineering for this task. For comparison, below is an example of defining a color using the built-in fast scaling of the BufferedImage class and calculating the arithmetic mean. I think comments are unnecessary.

Configuring
At the moment, the program is configured using a json file. JSON.simple was used as a library for parsing the configuration file .
The json file must be named "config.json" and placed in the same folder with the program for automatic configuration detection, otherwise, when the adaptive brightness function is enabled, the program will prompt you to specify the configuration file yourself by opening the file selection window. In the file, you must specify the ip addresses of the lighting devices, the "monitored" image zones for each device, the brightness and color temperature coefficients, or the period of their automatic installation (which will be described in the next paragraph). The rules for filling the json file are described in the README file of the project.
All changes in the interface (light button). When the button is pressed, the available configuration file will be applied or a window for its selection will open.
The coefficients are necessary for a more precise setting of the image analysis, for example, to make the lamp a little darker or, conversely, lighter. All of these parameters are optional. The only required parameter here is the ip address of the lighting fixtures.
Automatic setting of odds
The program also implements the function of automatic adjustment of the coefficients depending on the current illumination of the room. It happens like this: your laptop's webcam takes a snapshot of the environment at a selected frequency, analyzes its brightness using the algorithms already described, and then sets the coefficient according to the formula:
where x is the current room brightness as a percentage.
This function is enabled by writing a special tag in the configuration file.
Functional example
Conclusion
As a result of solving the problem, a functionality was developed that allows you to use Yeelight smart lamps as adaptive backlighting of media files. Additionally, the function of analyzing the current room illumination has been implemented. All source code is available from a link in my github repository .
Thank you all for your attention!
PS I will be glad to any additions, remarks and indications of mistakes.