Due to the transition to telecommuting in small companies, telephone communication problems often arise. Typically, such firms sit in rented offices, and a business center provides telephony services. You will have to take care of connecting employees from home: the most inexpensive way to do this is to deploy the free open source VoIP server Asterisk in a virtual machine. In the article, we used Ubuntu 20.04 as an example, but this recipe is also suitable for other versions of the popular distribution - 18.04 and 18.10, as well as (in theory, we have not tested) for the current versions of Debian.
Asterisk + Ubuntu + VDS = IP-PBX
There are other VoIP servers available, and some commercial products are free to use for a limited time. They are considered to be much easier to configure, but require Windows to run or install from your own Linux distribution. This immediately cuts off the majority of inexpensive VDS, and your own hardware with a data transmission channel or renting a dedicated hardware server is more expensive. Free Asterisk can be deployed on any virtual machine, and it's not that difficult to implement. This does not even require assembly from source. With the help of Asterisk, it is easy to establish a telephone connection between IP-phones (hardware and software), and if you connect to an external VoIP provider, then for a small amount of money you will get a full-fledged IP PBX (IP-PBX). If the need for her disappearsYou can refuse at any time - rent is more profitable than investments in hardware and software.
Installing Asterisk
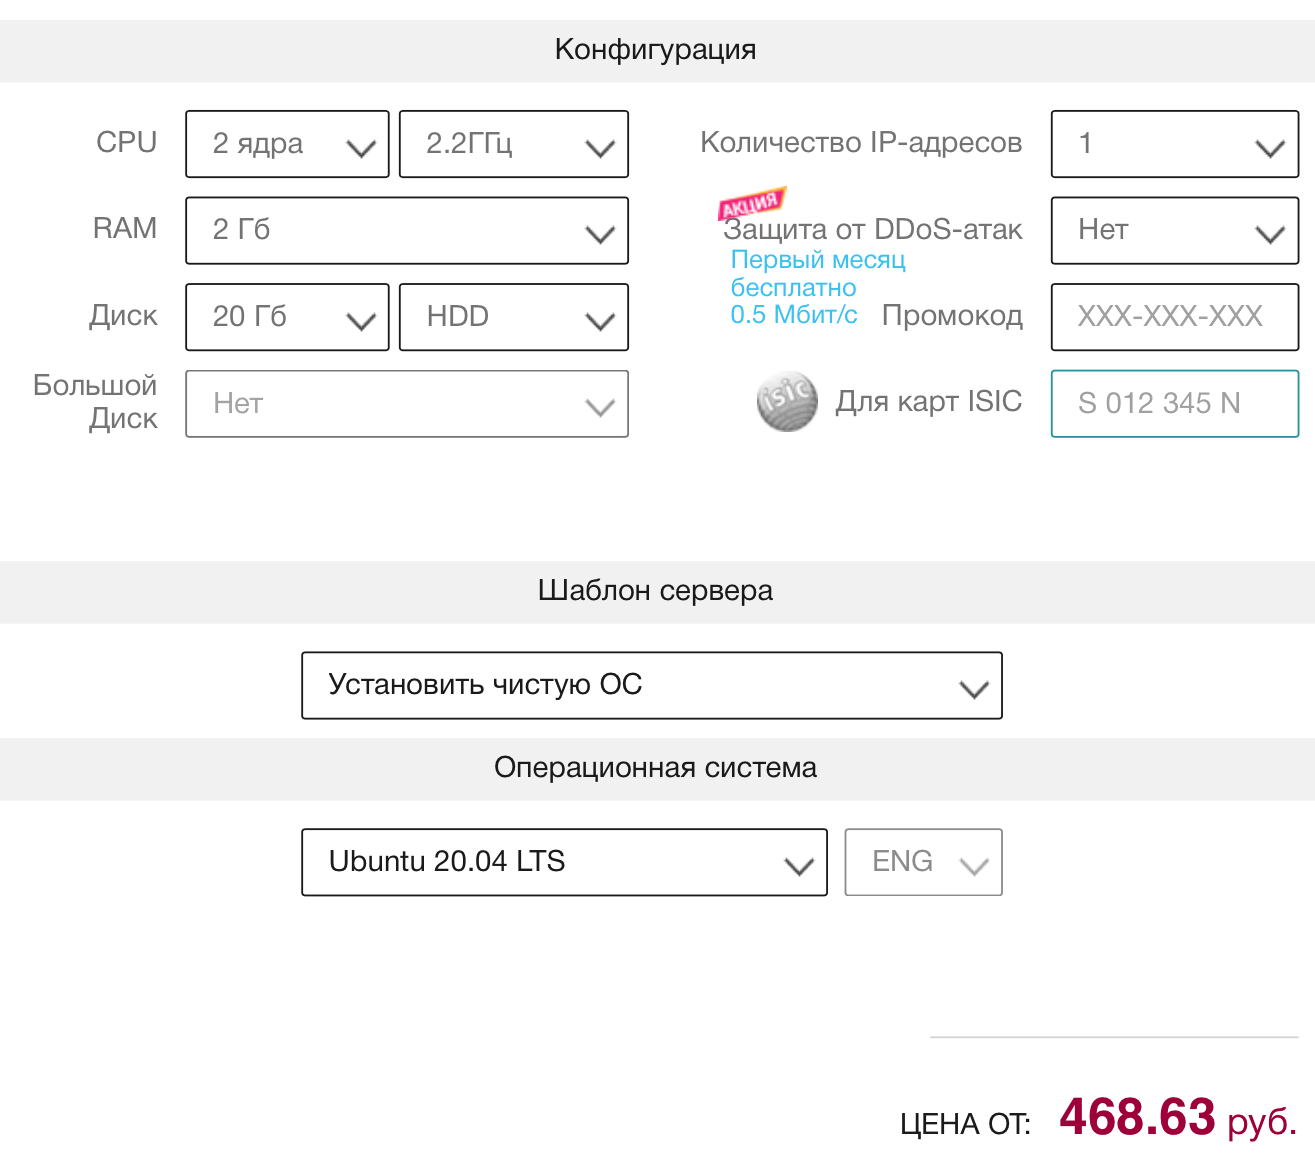
For the tests, we took an inexpensive virtual machine , but the combat configuration depends on the customer's needs. This is where the main advantage of VDS is manifested: resources can be ordered at a minimum, and then added if there is such a need. Usually, for the full-fledged operation of a PBX, you need at least 2 GB of RAM, but if there are a lot of them, it is not difficult to give up unnecessary resources.
Installing a VoIP server on Ubuntu 20.04 is the easiest part of the quest. The required packages are in the official distribution repository and are added to the system with a couple of commands. In Ubuntu we use the sudo privilege escalation mechanism, but in Debian we probably won't need it, since interactive sessions with root privileges are practiced there:
sudo apt-get update
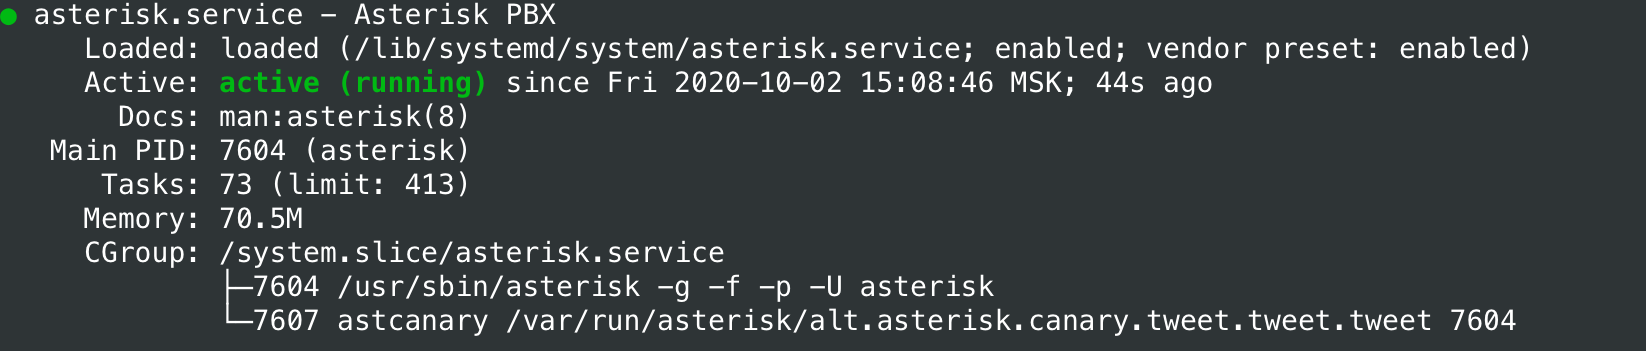
sudo apt-get install asterisk asterisk-dahdiThe Asterisk service is started and stopped through systemd, and you can view its status after installation using the command
systemctl:
sudo systemctl status asteriskIf everything went well, the result will be something like this:
To start / stop / restart (for example, after changing configuration files) of the service in manual mode, use the following commands:
sudo systemctl start asterisk
sudo systemctl stop asterisk
sudo systemctl restart asterisk
So far, everything is standard, but the most exciting part of our adventure lies ahead. The VoIP server needs to be configured.
Configuring Asterisk
The configuration files are located in the / etc / asterisk directory, and there are a huge number of them there.
ls /etc/asterisk
The product is very flexible and has a lot of possibilities, but we won't need most of them for solving simple tasks. In this article, we will limit ourselves to editing two configuration files: /etc/asterisk/sip.conf and /etc/asterisk/extensions.conf. You should first make backups of them:
sudo mv /etc/asterisk/sip.conf /etc/asterisk/sip.conf.b
sudo mv /etc/asterisk/extensions.conf /etc/asterisk/extensions.conf.b
Let's move on to editing the new configuration files (the most curious can study the distribution backups, there are many interesting things):
sudo nano /etc/asterisk/sip.confYou need to add at least two users (internal subscribers) with numbers 1001 and 1002 to the file, and also set passwords for them (the secret parameter). On your server, the internal numbers and passwords will be different: Similarly, we make a new extensions.conf:
[general]


context=default


allowoverlap=no


udpbindaddr=0.0.0.0


tcpenable=no


tcpbindaddr=0.0.0.0


transport=udp


srvlookup=yes


[1001]


type=friend


host=dynamic


secret=1234


[1002]


type=friend


host=dynamic


secret=5678
sudo nano /etc/asterisk/extensions.confIts content will be as follows: Change the owner and access rights to files, since there are, in particular, the passwords of users of our PBX
[general]


static=yes


writeprotect=no


priorityjumping=no


autofallthrough=yes


clearglobalvars=no


[default]


exten => 1001,1,Dial(SIP/1001,10)


exten => 1002,1,Dial(SIP/1002,10)
sudo chown asterisk:asterisk /etc/asterisk/sip.conf /etc/asterisk/extensions.conf
sudo chmod 640 /etc/asterisk/sip.conf /etc/asterisk/extensions.conf
Now we just have to restart the service and check its performance:
sudo systemctl restart asterisk
sudo systemctl status asterisk
This completes the IP PBX configuration with the possibility of telephone communication between internal subscribers. Let's move on to checking its performance.
Subscriber connection
Most often, soft phones for desktop and mobile operating systems are used to connect to a virtual PBX. There are a great many of them, for tests we took the free Linphone for iOS and Android . At the first start, you will need to select the "USE SIP USER" option, and then specify the login and password in the IP settings of our server. You don't need to create a Linphone service account, we have our own.

After connecting to our PBX, clients are ready to communicate with each other. On a Linux workstation with a graphical environment, you can use the same Linphone available in the official distribution repository:
sudo apt-get install linphoneIt is configured in about the same way. We now have a virtual PBX providing communication between internal subscribers. Not God knows what an achievement, but labor costs for its implementation are also low. In the next article, we will learn how to connect to a SIP provider, call through it to mobile and cable telephone networks, receive incoming external calls, as well as make forwarding and other interesting things.