Part 2. About "a little IT" at the bottom of the article. About the organization of video surveillance of our house. Tyts
The YouTube platform has become the main source of information on repair. A huge number of talented people share their experience absolutely free of charge, teach, show, put everything in their mouths practically chewed. They need recognition and a desire to share, and viewers need answers to everyday problems.
The downside of profile videos on YouTube is that I began to doubt people (YouTube deformation) if they do not watch YouTube in their specialty profile. The new saying goes like this: tell me what you are subscribed to, and I will tell you who you are.
I cannot refuse the result seen on the monitor if it is technically more perfect and theoretically achievable for the same money. After watching the videos, I threw a cry on one well-known platform for finding performers with a full description of my task - sex replacement. None of the 5 respondents offered me what I wanted. And I wanted a screed about a professional sheet, as they do according to Peter in old houses!
I knew better what I want and how I want, and no one can help me with this. I was poisoned by the much-praised likes and video views. Tormented by doubts, I made the only wrong decision in this situation - to do everything myself. I was slowly turning into a YouTube solo ...
One of the most difficult types of repair is overhaul, and even worse - overhaul in the stalinka. I know that many males experience feelings of discomfort from the social belief "what kind of guy you are, you can't fix a socket." Don't be afraid, man! I will not teach you about outlets, but you will learn about major repairs from me!
The house was built in 1940 just before the war. Some of the apartments on the ground floor were not residential: there was a sewing workshop, the walled entrance of which can still be seen from the outside of the building.
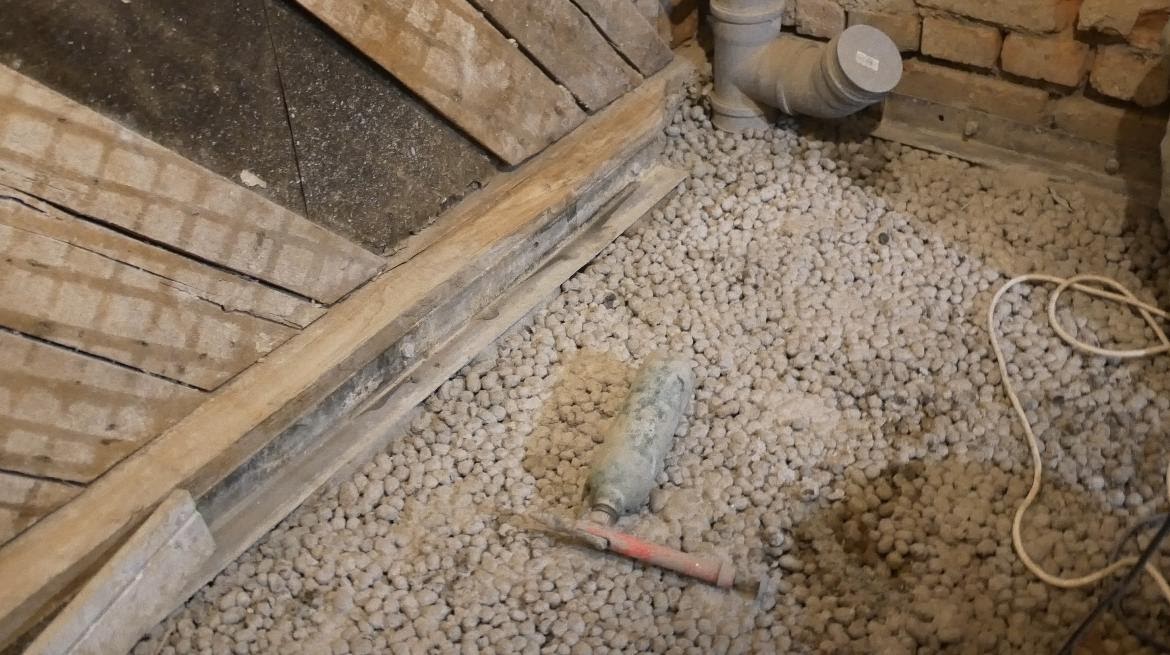
In the same place, among a couple of dead cats and heaps of garbage, pipes, two toilets and two showers were literally dug. Lamp, 41 years old, from Voroshilovgrad. This is rather unusual for a basement, but it seems to be quite natural for the Stalinists. Especially if there is a workshop on top. I think these structures are explained by a simple quote from the 1939 film "Great Citizen" in the uncensored version.
“Eh, 20 years after a good war, go out and take a look at the Soviet Union of republics from 30-40. The devil knows how good it is! "
www.youtube.com/watch?v=8QZDMew3V5o&t=9860s
That is, for a country that is going to start a war, toilets can be made with showers right in the basement so that you don't have to go far to work.
The basement haunted me. Peace came with the complete removal of garbage and subsequent measurement of the radon level. I left the most affordable device on the market in the basement for a couple of days and it gave me a radon curve from 250BK / m3 to 650BK / m3. What is not good. Since according to the norms, the level of radon is allowed up to 200 Bq for houses built before 1999, and 100BK after. The measurements in the apartment were very pleasing. The sensor did not pick up values below its 30BK minimum limit.
This is a graph from the device:

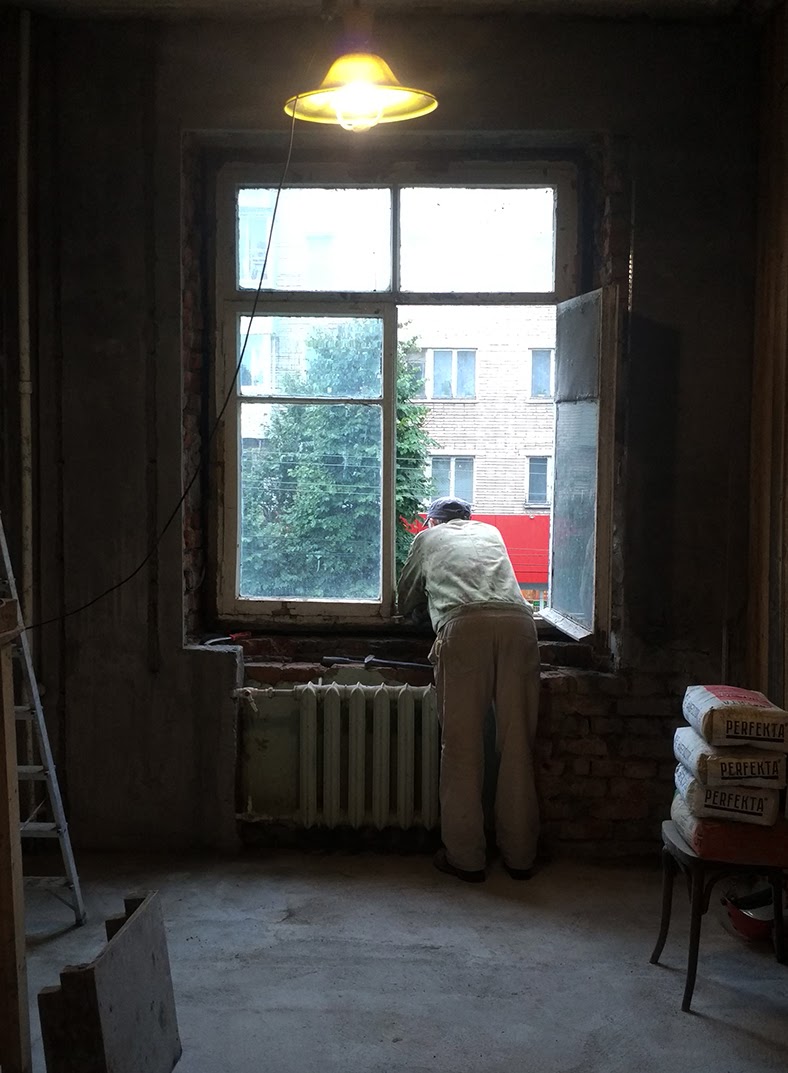
So. To the apartment.
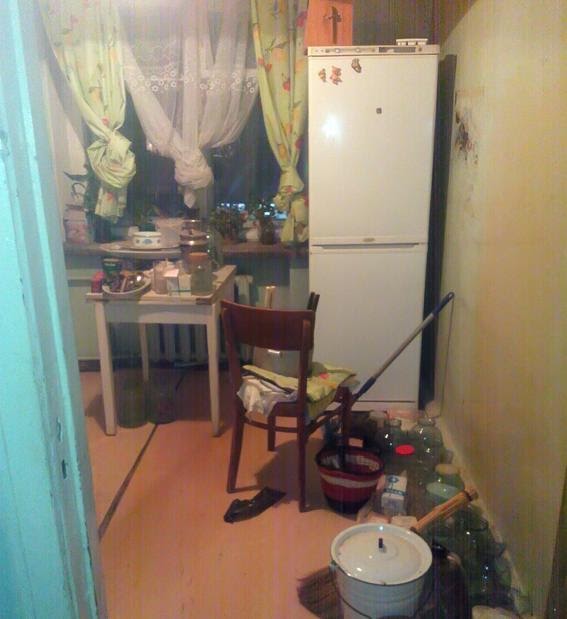
Ceilings 3.3m. All floors are wooden, except for the bathroom with toilet and kitchen area. In the bathroom and toilet, there is some kind of crumbs and a screed that has been walking underfoot for a long time. All this is a great great sadness. What is your first thought when you find it? That's right - you need to get rid of sadness. But, as they say, the main thing is not to cry.
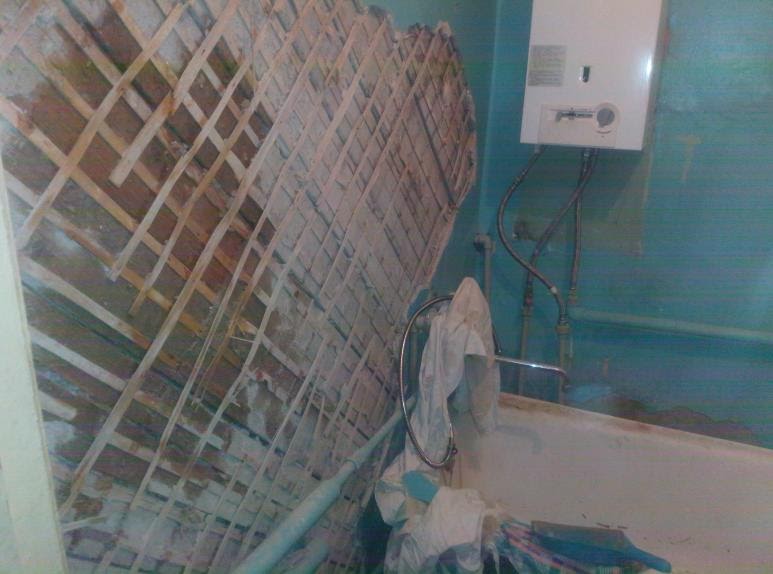
Dismantling of plaster and partitions
Tools: Pick and crowbar, reciprocating saw.
Dismantling the plaster led to the understanding that there is no such state when it is necessary to say - "now we are enough to repair it back". Under the skirting boards in the kitchen, I found a document from the previous owner of the apartment, Mr. Zhidkov. He was invited to the next meeting of the party. The invitation could not be dated. But this is the interval between 50-60 years. But when removing the plaster in the bathroom in the cracks, I immediately found ... the husk of pine nuts. Of course, as a respectable citizen, I immediately thought about pine nuts, but I decided to check myself in Google, and made sure that these were shells from a former colony of cockroaches.
How to make walls out of this? Close all with plasterboard ... falls ...
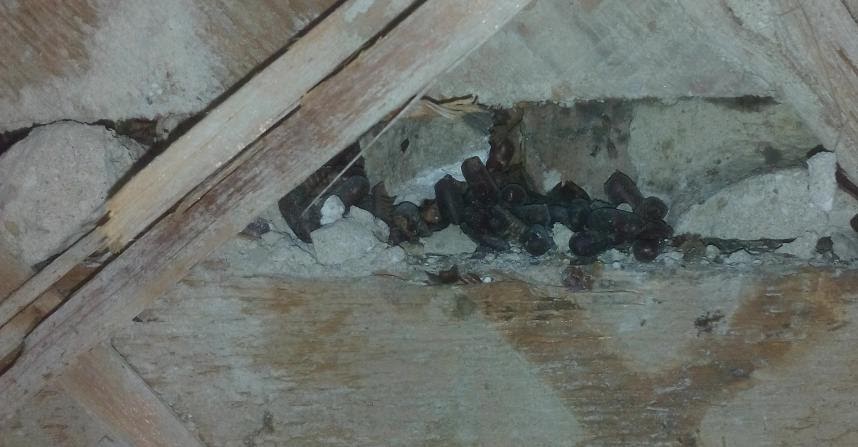
But do I want to do the floor too? We need to see what's wrong with the floor. Having disassembled the screed at the foot of the partitions under the long-painted baseboards, organic matter such as moss was discovered. Hmm ... and it lived under 4 coats of paint? The source of the damp smell became clear. In the trash. My tension grew as the dismantling continued. It seemed that below you can find some kind of monster.

I started to open the parquet floor. Layers of some kind of dry, small, terrible worms were found, disguised as heaps of sawdust. Lord, what an abomination! All this was ruthlessly packed into bags with a shovel. The parquet has been sawn and taken out. The structure of the floor began to clear up. Here it is the central steel beam, these wooden logs on which the floor and partitions rest, here on a brick, here on wedges ....
The task at which it would be required to restore the current floor could not even form in the head. Why tie the floor, if the floor ... NO
Gender selection
The old floor was on logs that rested on wedges next to the walls. This skill of the ancient builders frightened me. I cannot repeat this trick without my sawmill. And this is not practical. My renovation coincided with the cap. repairing the house and we just finished changing the sewer riser-cast iron.
I decided to completely remove the old sewer pipe, as it interfered with me, like something after eating corn in my teeth. Above the head of each resident is a pipe with a neighbor's feces. It was probably more of a technological necessity than a teaching about the structure of society. I did not know then the exact thickness of the ceiling, until one successful chiselling did not bring down the remains of the pipe down to a neighbor with the appropriate sound:
The first thought was, oh, the neighbor has the same tile. When I went down to him with a vacuum cleaner, I threw an extension cord into this hole. Historical moment: dismantling of a sewer riser, like a comet that flies by once every 100 years. You cannot belittle such significant events for the building. So I was able to measure the thickness of the overlap 12cm. Based on this, it is impossible to call it full-fledged floor slabs.
Suitable solutions for similar sufferers:
- KNAUF superpol
- Wooden floors. Logs and stacking of thick plywood staggered in two layers. (It is possible to pour over the self-leveling floor)
- Screed
KNAUF superpol . These are such slabs that are placed on a plane leveled with a fine fraction (about 5 mm) with expanded clay.
Wooden floor. Okay, how am I going to make the bathroom and toilet? You can't make a tree for a tile. The wood will dry out and my tiles will walk over time.
Screed. But how can I put a screed everywhere if it is impossible to load the plates? How was it done? Separate areas for screed and wood?
Screed on the profiled sheet.
I probably reviewed all the screed videos on the professional sheet. I saw how objects are being handed over using this technology, which was also confirmed by engineers from the St. Petersburg BTI. In addition, in terms of loads, this solution is approved even for wooden logs. More precisely ... wooden logs are even preferable, since they do not deform under weight like iron ones.
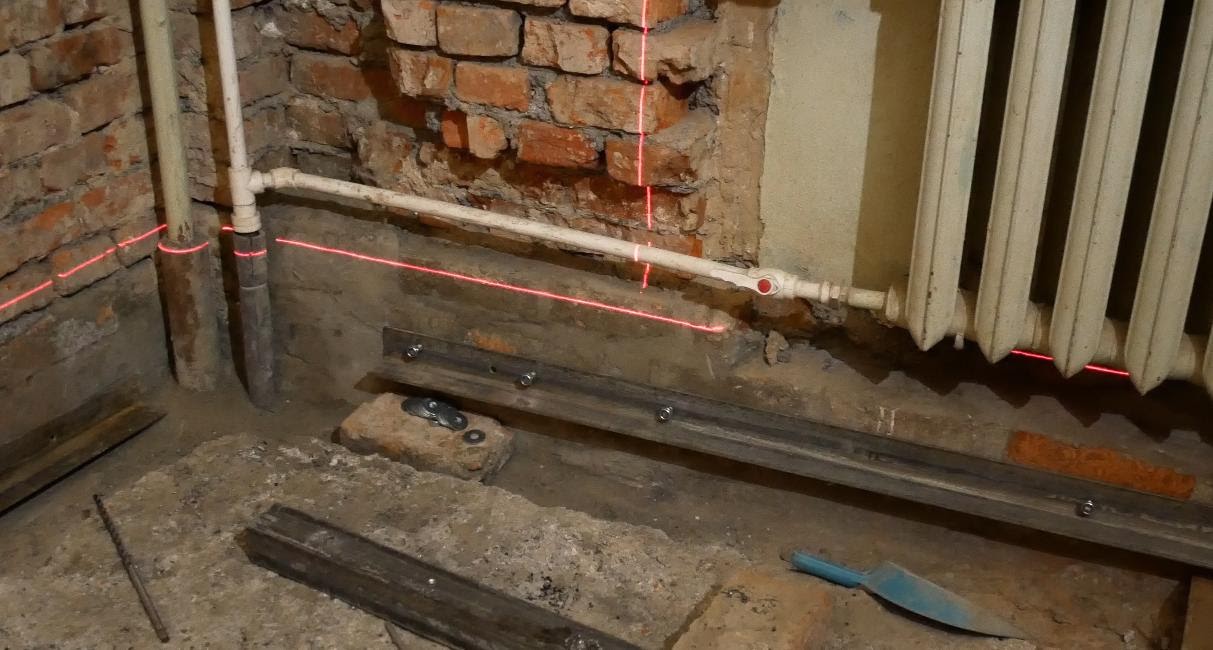
In my case, I put the profiled sheet on metal beams. But here's the trouble, the side wall of the room without support for the profiled sheet. I needed a consultation. And I got it! Channel Dmitry, which floods the screeds on its own, turned out to be very friendly. He told me that “when there is no support on the logs near the walls, go and buy 75 corner. Drill it every 20cm and plant it on a hairpin and a chemical anchor. The usual anchors got me. " Excellent!
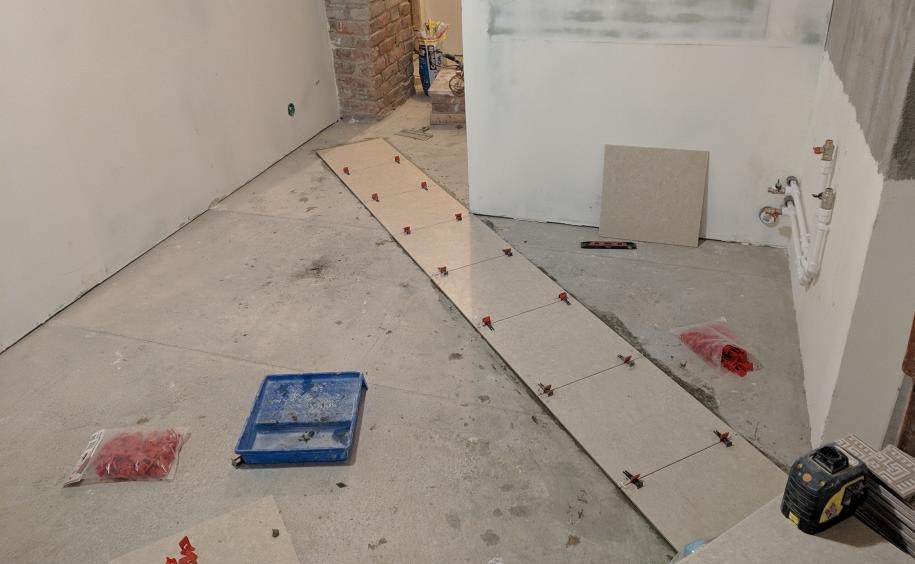
Looking for 0
The first step is to beat off the plane with the level and find the zero point (highest or lowest) from which you will calculate the height of your floor. In my case, it was found near the toilet and the deviation at the diametrically located window was only 4.5 cm. It is very good. The drops are 15cm. It is necessary to put the profiled sheet as flat as possible. To compensate for differences with a screed is an extra load. Therefore, the height difference was compensated for by the boards drilled to the beams.
But from the side of the toilet, I border on my neighbor through a wooden partition, which stands on a common wooden beam. In it, I fastened the corner on a 10x180 plumbing screw with a preliminary reaming of the seat. In the photo below, a wooden beam is visible on the left. The hole in the floor to the neighbor downstairs is gone.
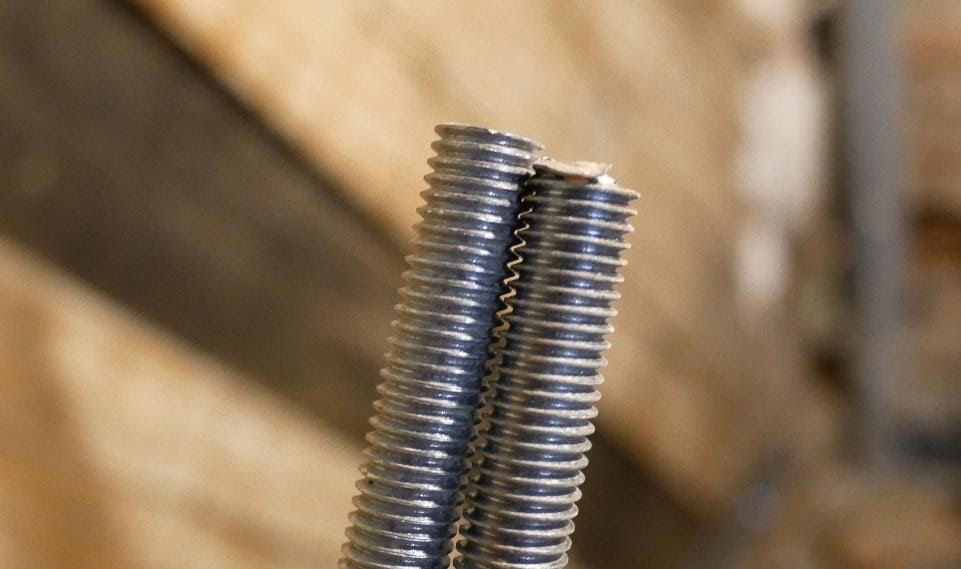
Please note that the stores sell studs with both fine thread and normal triangular. I don’t know what kind of guests fine thread is made, but I bought those pins that were called "reinforced", that is, with a normal triangular thread. This phenomenon of marketing or unknown guests has remained a secret.
And here I have already finished and filled the cavities with expanded clay with cps. I don't want to keep the air under the floor.
Life hack: while the resin is not frozen in a disposable chemical anchor mixer, it is rinsed well with a stream of cold water. Man, 15 rubles are not superfluous!
The use of a chemical anchor requires good cleaning of the hole from dust, a big minus - it dubs in 7-15 minutes. The hairpin is 12mm, and the holes in the corner are bored with a 14mm drill. I did not find a larger drill on my drill. I wanted to pour the anchor into the holes, screw in the pins and plant a corner right away so that I could immediately center them, but alas! Solidification is logarithmic. At first you won't understand if it freezes, and then the bam has already frozen. I had to bend some of the pins with a hammer after mounting. But the fastening turned out to be technically perfect.
Please note that the expiration dates of chemical anchors are important. Already after the repair when fixing the installation in the toilet, I decided to put the studs in the wall in the same way on the chemical. anchor. He began to squeeze it out, fill the hole, as it immediately hardened. I was scared that I messed up the hole. He immediately took a drill and began to drill it. A few seconds later there was a clap and a drill with a drill squeezed gases out of the hole - Cool! I thought. I pressed the drill again and cotton again! So I drilled out the remains.
Materials
So, for laying the profiled sheet you need:
- Laser level
- A metal corner with holes every 15-20cm if there is no support on the logs near the walls.
- 12mm hairpin, sawn at 15cm. Nuts.
- Chemical anchor.
- Brush for cleaning holes after drilling. Sold in the same place in the chemistry section. anchors.
- ( , )
- — .
- ()
- .
- 0.7 .
- 6 .
- 10x10 4
-
-
-
-
- , ( )
-
-
-
-
-
- .
True, I did not buy sand concrete, a fiber-layer screed, which sets in 6 hours. This is very inconvenient for scrubbing with a rule after pouring to level the floor and when you need to remove blemishes from the walls. But at this moment, explanatory videos on YouTube have not yet been released. My inner viewer was not to blame. Now I know that you can take ordinary sand concrete.
Before laying the profiled sheet, you need to set marks on the wall by which you can restore the position of the beam, since you will not see it again, but you will still need to drill into its edges.
Suddenly, the gall bladder ached wildly, pains from which you cannot sit still.
Operation. Filming grandfather in the hospital:
https://youtu.be/hwDwtpSZNGI
Return to repair.
Laying the profiled sheet
Usually they take a 35th profiled sheet, 0.7 thick. There are 57 more professional sheets but it is not used in the vast majority of cases. Its length is specified when ordering, but trimming has to be done on site. Lord, how dad vibrated on the profiled sheet, when with his weight lying on it he compensated for the vibration from the jigsaw with which I cut the profiled sheet. How loud it was. I should have cut everything with a grinder. It would be much easier. But then I was still afraid of her.
The layout of the beams and profiled sheet in my room. The far side is at the corners set on hairpins and chemical. anchor.
The profile sheet is laid with overlapping one unit and is attached to self-tapping screws with a reinforced drill.
These are just freaky self-tapping screws that drill 5mm metal beams and angles without problems. In places where the profiled sheet rested on the boards, it was necessary to drill separately holes to the metal, since there are no long screws with a reinforced drill, and ordinary roofing screws for metal cannot cope and break.
After laying, it is necessary to fill the cavities of the profiled sheet with expanded clay mixed with sand concrete 50 to 50. Then you will get an approximate plane for pouring the main screed and the ability to calculate the required number of bags of dry mix.
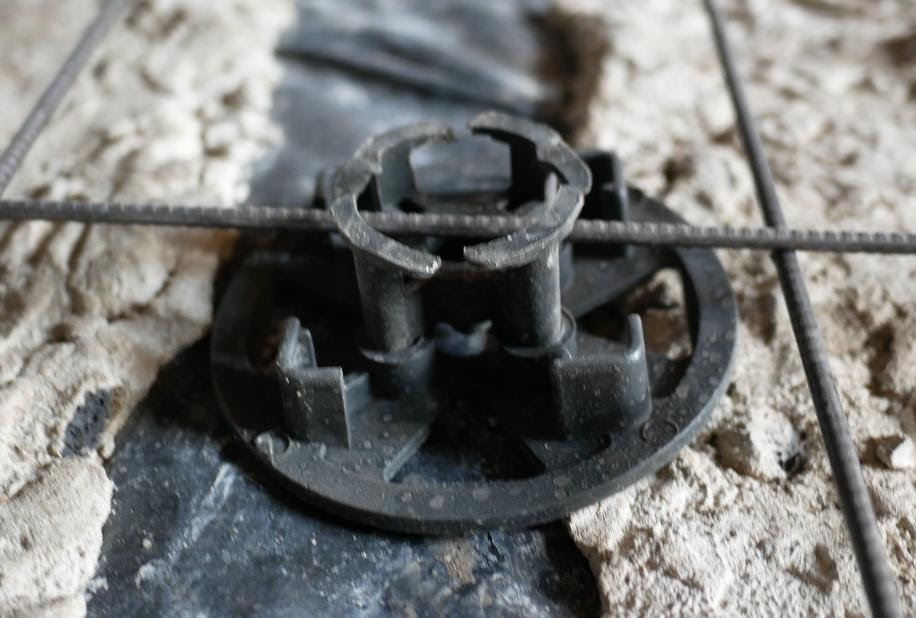
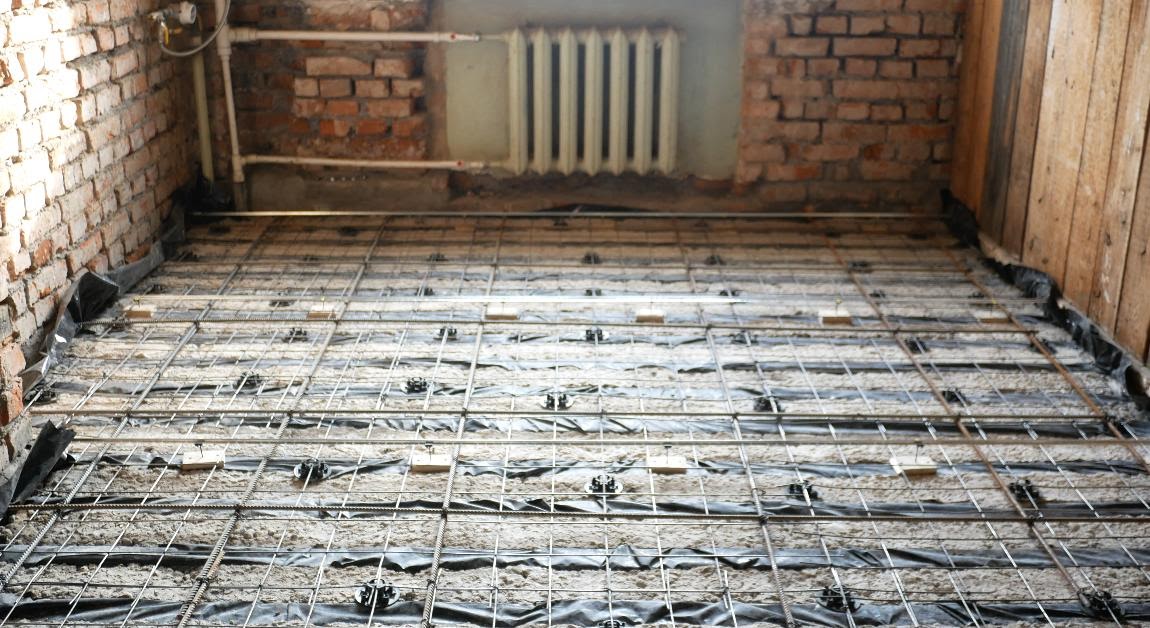
Mesh and reinforcement
The screed itself tends to crack over time, so that's okay if you have mesh and rebar. 4mm mesh with 10cm cells is filled over the entire plane of the profiled sheet and should be in the lower third of your screed, where it experiences maximum tensile loads. Therefore, it is placed on the reinforcement stands.
6 mm reinforcement is laid with an overlap meter by meter and inserted into the walls. In especially weak places, I put 8 mm reinforcement, also with a factory, into the wall. Perhaps I would not take metal now, but would take fiberglass, it is lighter. But not the point: the metal has been tested for decades.

After that, you need to tie all the metal with wire. Rebar knitting lessons are also available on YouTube :-). So we gave rigidity to the entire structure and inside the screed the slightest loads will be distributed throughout its entire mass.
Small clarification. In my photos there is a film under the screed. It is optional. The water from it still has nowhere to flow. But this moment has not yet appeared on YouTube and my inner viewer apologizes to me.
Beacons
Beacons are needed to pull rule kneaded mass of sand to cement exactly in the plane and at the desired height. To do this, I sawed boards of centimeter thickness into rectangles and planted them on self-tapping screws on a profiled sheet every 80 cm. The distance for the rule between the lighthouses was one and a half meters.
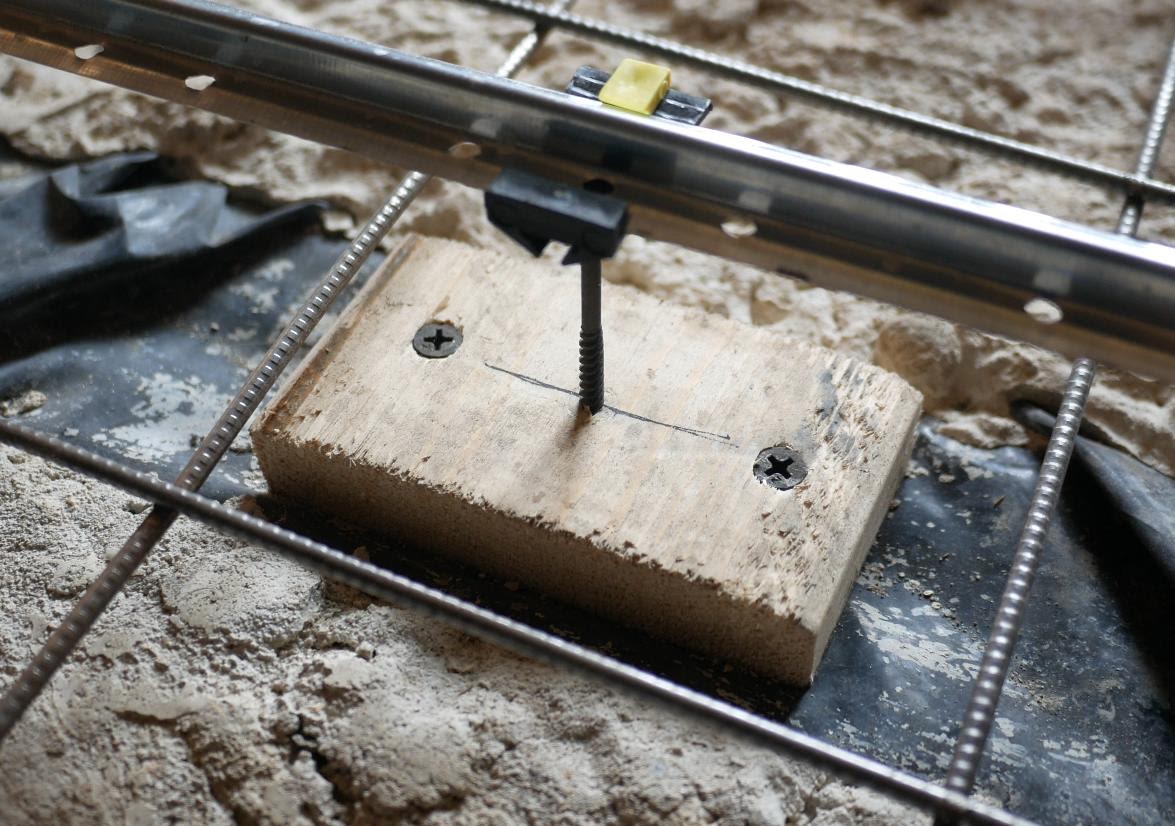
The height of the metal beacon is 6mm. Together with the fasteners for the beacon, it will turn out to be 1cm. With a minimum tie of 6cm, I need to screw the screws into wooden squares exactly along the laser to a height of 5cm. The beacons were mounted on self-tapping screws from 75mm to 95mm in length.
Calculation of bags
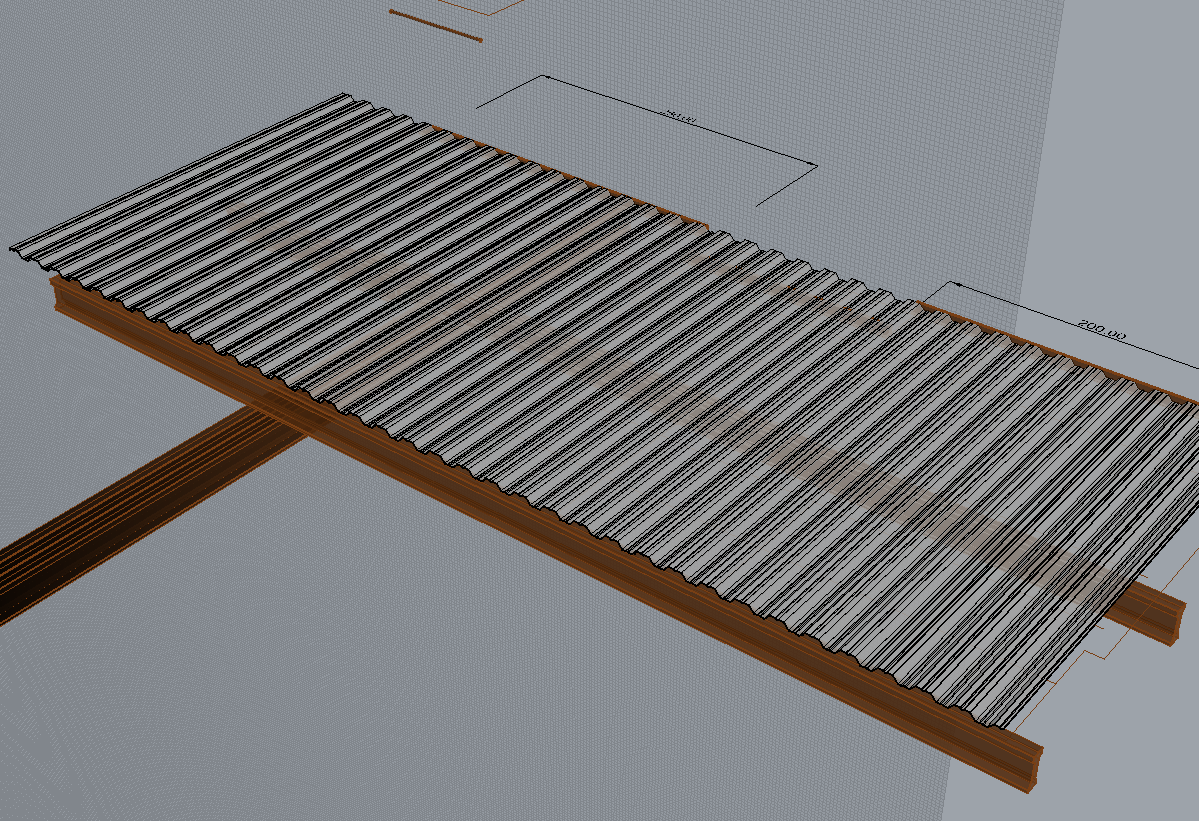
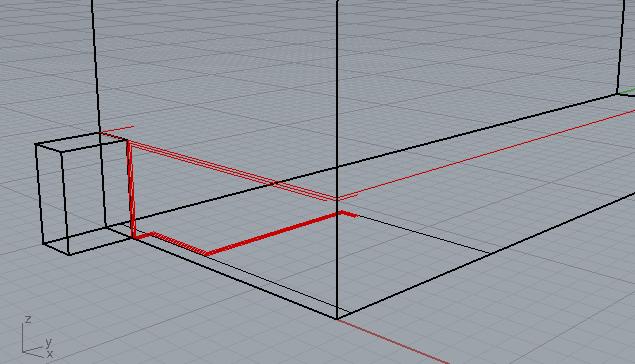
I need to calculate the volume of space above the profiled sheet to the laser line and convert it into bags of dry mix. I made myself a 3D project, where I measured the deviation of the plane on each square meter. A plane came out with the following deviation:

The image shows a thick underlay - this is a theoretical ideal screed of 6 cm, and on top, an additional adjustment layer. He took it, because it is impossible to lay the profiled sheet accurately and will always run 1 cm. The layer descends to 0 at its farthest point. Modeling like mine is not necessary at all. I counted the approximate volume of the floor into bags on some calculator on the Internet and received 110 bags of mixture of 25 kg each.
In total, my floor will weigh 2750kg. And with an area of 18 square meters, this is 150 kg per square meter, excluding reinforcement and mesh. In some guide to a professional sheet, similar to my scheme of fastening, the maximum weight is 400 kg per square. That is, everything is fine in terms of loads.
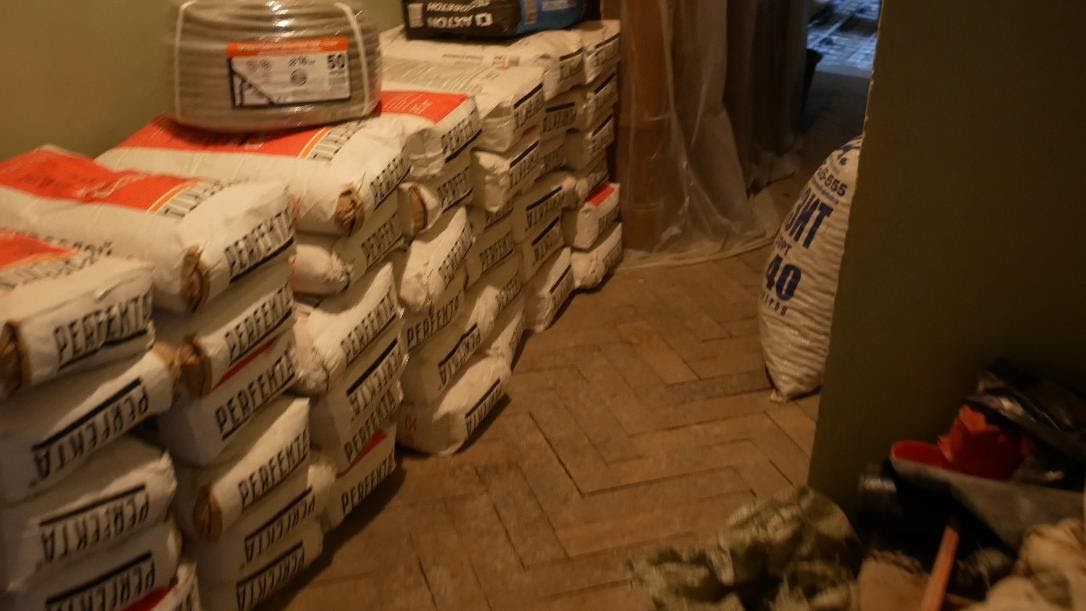
And now for the money. A bag of fibrous layer costs 200-250r. That is, the screed will cost about 25,000 rubles. Delivery and lifting to the third floor from Leroy comes in the same amount! I had to stretch the process in a private car, 5 bags every evening in Leroy, then a bag on my hump, on the third floor, it became almost a family tradition.
For these works, any cps of 150 brands is perfect, as I wrote above. For reliability, 2% of cement grade 500 is added to it. That is, 2 kg of cement is added to 4 bags (100 kg). If more, the setting occurs too quickly and after 12 hours. it will be hard to clean up the flaws.
But it's still more difficult. One and the same manufacturer can issue different compositions according to their properties. It so happens that when ordering, the central heating unit arrives warm i.e. pre-packaged straight from the factory and the movers burn their backs. The quality of the kneading and subsequent grasping also depends on this.
Screed

Fill in, pull with the rule ... I did not have time with the batya during the day, the transition seam fell on the strongest part of the floor. For professionals, pouring 70 squares per day into one mug is not a big problem. For some reason, I mixed the solution in the bucket with a 350-watt screwdriver or a 600-watt drill. The batch was not quick. After the screed has set, you need to walk along the abutments to the walls, remove plaques and other debris. Fibrasta grabbed the next day incredibly tight. I hit it with a trowel and got sparks. It was already impossible to take out the beacons without good hammering. I buried them in a screed and there is nothing wrong with that. Everyone bury them. Fill everything with water and cover with cellophane. The longer you keep the screed wet, the better.
I primed CT-17 twice. (The primer is, roughly speaking, ordinary pva glue with water). It is needed to clog pores and dust. Water absorption will decrease (cement compositions will hold stronger) and adhesion to any adhesives will be better. Irregularities, which I did not notice immediately, had to be ground with a diamond cup (grinder attachment) already when laying the tiles.
Think the problems are over?
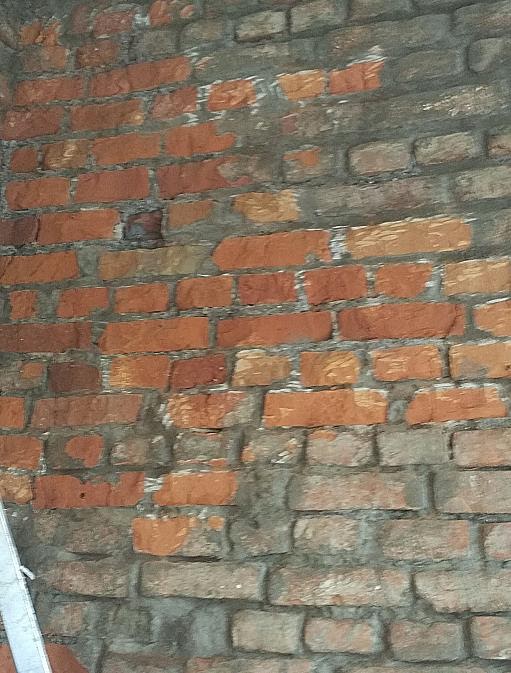
The laying of the old mine
It was necessary to resolve the issue with the old mine from the water pipes to the left of the window. I decided to lay it with bricks, as I was advised on one forum. But it is extremely important to restore holes with bricks with reference to the bulk of the house.
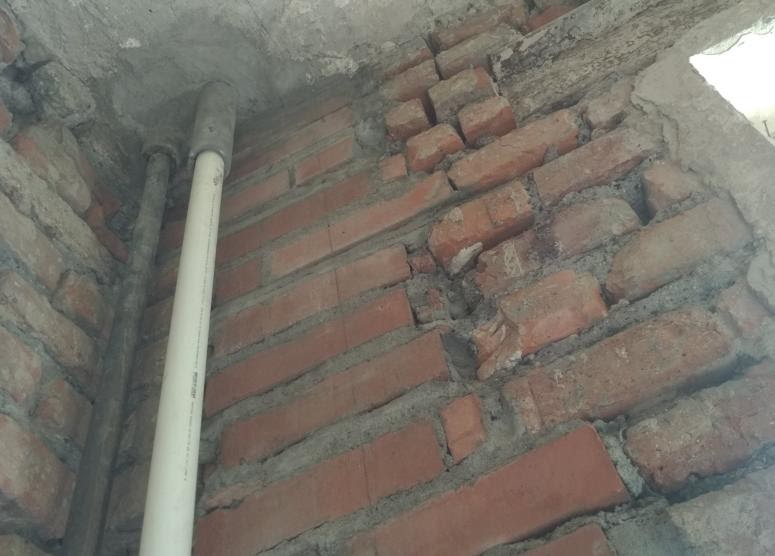
I bought the longest screws for concrete, and practically through every brick, the new masonry was connected to the old masonry.
Plaster
Cement plaster on a brick wall
Since the load-bearing wall protrudes from my chimneys, I wanted to make each plane parallel to each other. To do this, I placed the laser as parallel as possible to the common plane in the center of the room.
I make marks on the ceiling with a pencil, so that later I do not have to repeat the procedure.
Oh ... now you need to measure the differences along all the walls to make the minimum layer of plaster at the point of the greatest bulging of the wall. The drop was 4cm as I thought. Ha ha!
After I began to mount and tighten the screws for the beacons under the general laser line, I noticed that the measurements with the tape measure were wrong. Literally because of one square meter protruding on the wall by 1 cm, I will have to impose this centimeter on the rest of the area. And the drops in some places were already 7cm! That's a lot!
All walls had to be pre-leveled. If you do not have a special casing for a grinder with connection to a vacuum cleaner, do not even try to grind a brick! ..
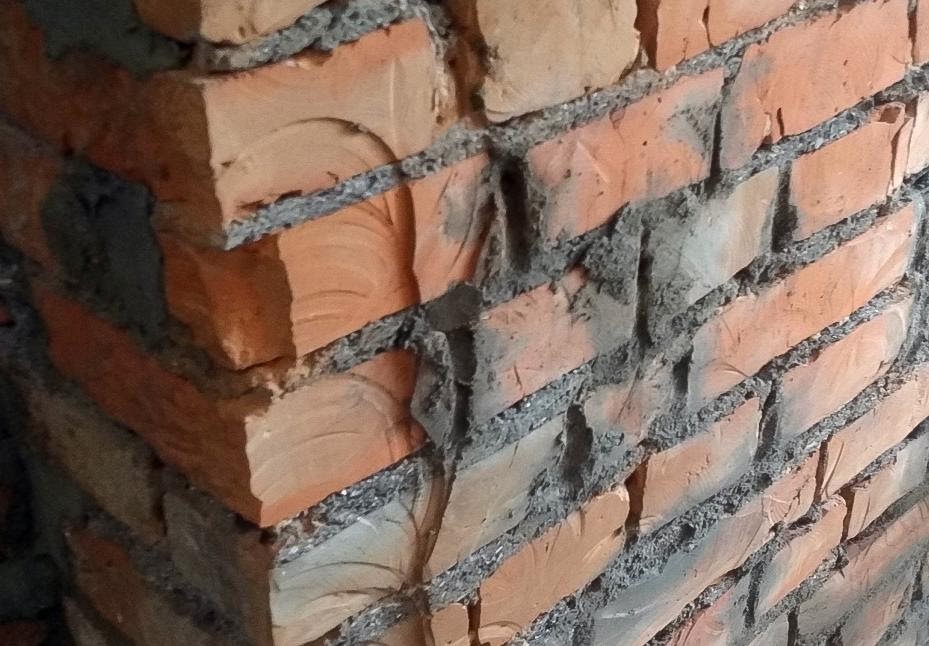
After 10 minutes of cleaning bricks, I ended up on Mars!
The sun was beating through the window, but I could not see the window, but only a dusty reddish landscape. Everything that could be covered with dust was covered. And this is because of a plot of no more than 1 square! Cleaning took a day! After that, I do not use the diamond cup for no good reason.
The rest of the alignment of the brick wall I made with a pick and chisel with a hammer. I scored a couple of bags of hammering. If there were no hardened bricks, the work would have been easier. But hammering a burnt brick is just some kind of horror! The darkest bricks are burnt.
Beacons on the walls
After that, you still had to install the beacons here and there on longer screws than came with the fasteners.
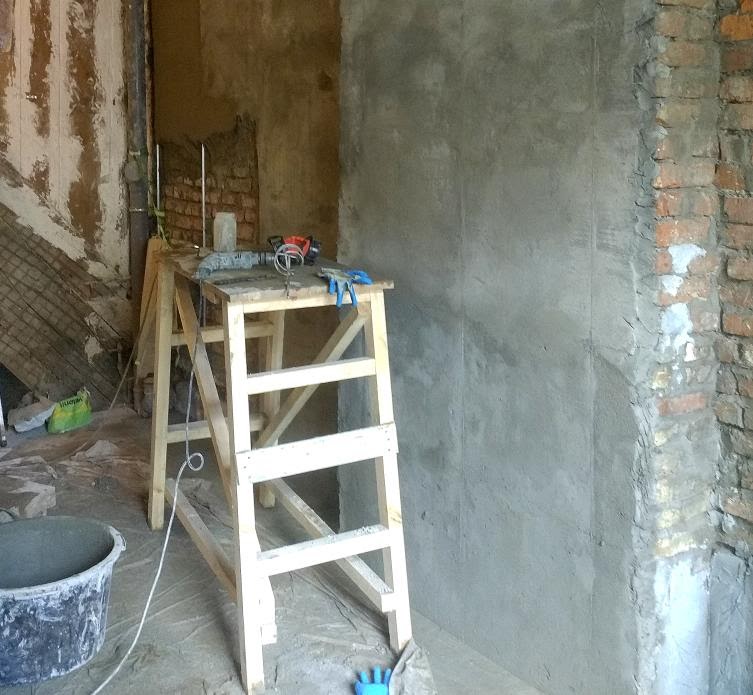
The plaster was taken by weber.vetonit TT40. 40-50 bags are gone. Horrible! A sketch is not given just like that, you still need to smear the brick with pens so that everything sticks to it confidently. As the solution grabbed in half, I spill the wall with water and cover it with cellophane. The slower the water leaves, the fewer cracks.
After grabbing, I began to scrape the walls with the rule and, a little sand got into my eyes from the wall. The right one seemed to be stronger. I blinked well and everything seems to be okay. Although he felt that he had not blinked to the end. Gloved hands, dirty. In the evening, the eyes began to itch badly and the next day the redness did not subside the next and the next. I went to the doctor.
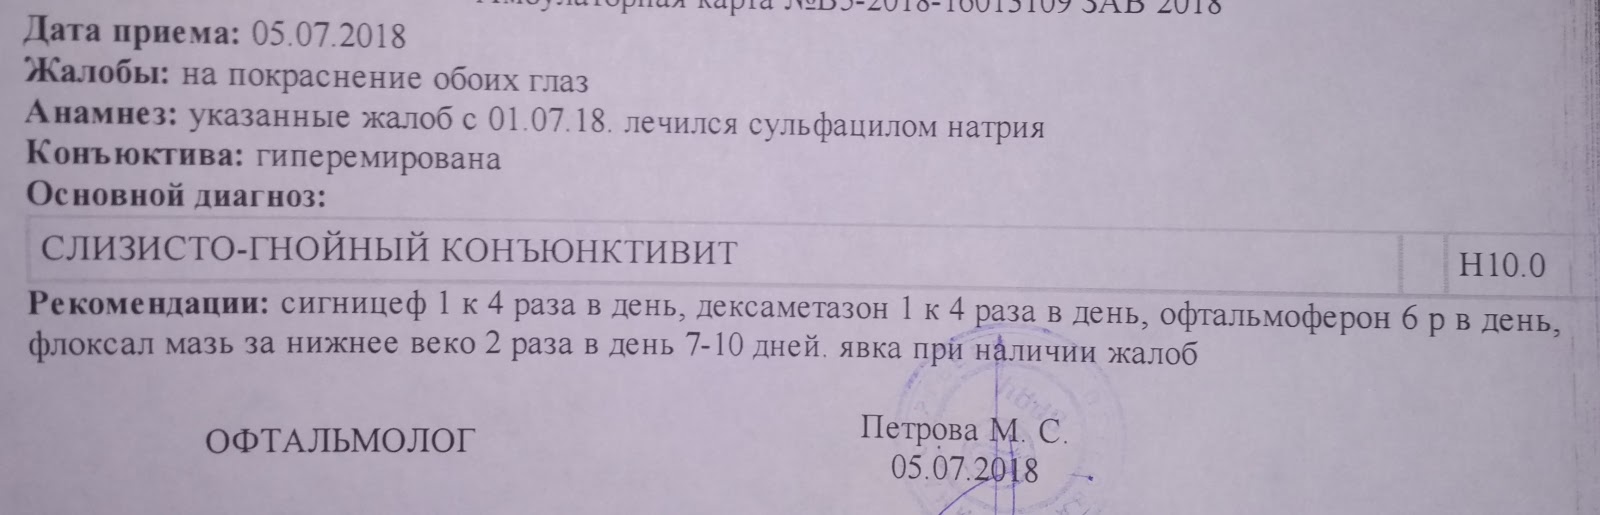
I think this is due precisely to the ingress of cement plaster in the eyes. Although, after a reaction with water, the cement should have stopped being svolo ... alkaline as soon as a day. Below, Dad shows his face for the first time.
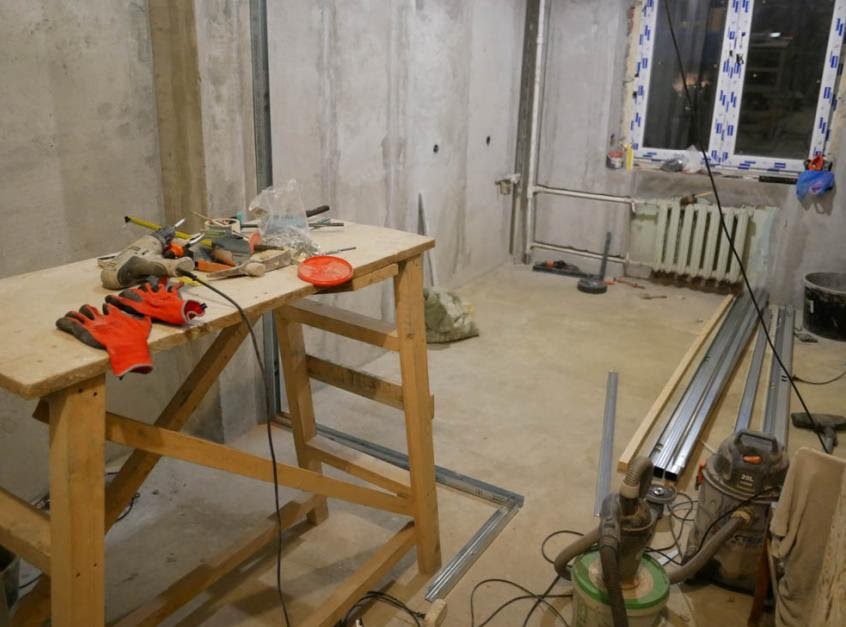
The wet works are finished !!! Further cleaning!
Partitions and walls
Dear Paul! You are so wonderful that I didn't want to do anything more with you! Sorry about the tiles and partitions, but you were created for this!
What to make partitions from?
- The brick does not pass by weight absolutely.
- Foam blocks. The ones that I pierce with my finger? No thanks, but you can if you want.
- Tongue slabs? - heavy and very sound permeable.
- Wood? Will lead over time 100%. Why then did I break the old everything?
- Drywall. It will go. 15mm thick from Giprok in one layer will suit.
Tools:
- Profile stapler
- - .
-
-
-
- .
- .
-
- .
In stalinkas, practically nothing can be used except for gypsum boards due to problems with the load.
Plasterboard is attached to a metal profile structure. The main step of 60 cm is to observe and use a stitching device for profiles, otherwise the self-tapping screws can interfere with tightly pressing the gk sheet. In general, at this stage it would not be bad to already have an accurate sketch of your bathroom, toilet or kitchen. I didn’t immediately make it accurate, I figured this way and now I am experiencing certain inconveniences: an extra 10 cm to the left of the sink to the bathroom.
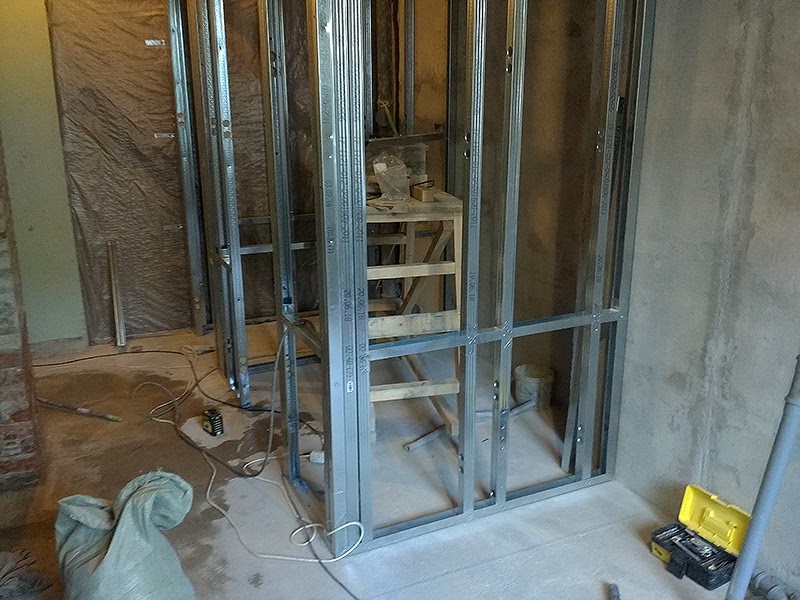
There are two types of profiles: rack and rail. First, we draw a diagram on the floor and fix the profile guides along the floor, walls and ceilings.
I used a 50mm profile for the partitions. In transferring marks from floor to ceiling, it is very convenient to use a laser axial plotter. It projects a point from the floor to the ceiling easily. Yes, where the door frames will be - be sure to put wooden blocks there.
We glue the sealing knauf dhbhsgdgkhmbud some kind of tape on the contact points on the metal profile.
Dear reader, do you remember the figure for the ceiling height of 3.3 meters? Do you know that in 98% of cases only 3-meter profiles are sold? This means that I had to increase each profile by 28cm. How this is done is also shown on YouTube.
The electrical circuit has already been developed by a batey electrician, I will not describe it. There is a socket, here are switches, there is a junction box. Without him, I would not have mastered it.
, , . , - . … . , , … , , , - 300 , … , . , . – , 4 .
, , , , . , , , , , , . , , . , . , -
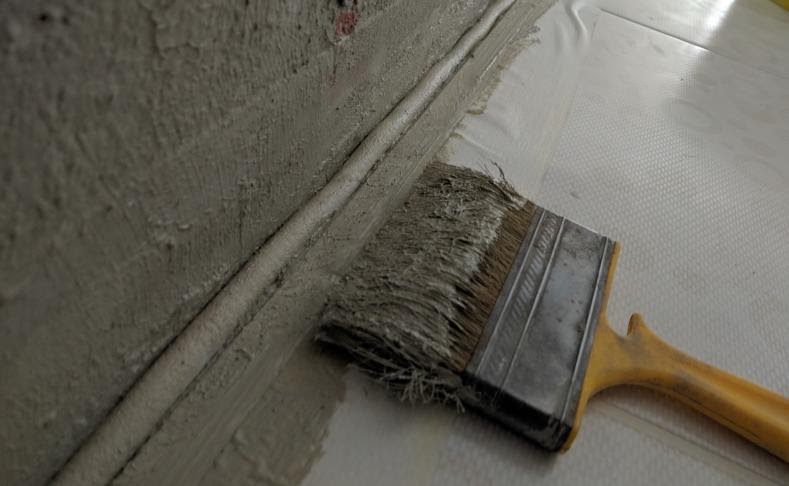
It can be made of cement, cement with potable approval, bitumen for foundations and latex. For interior work, you need a latex one, which smells good. Not cheap. I bought Weber.Tec 822 because the technologist Alexander Cherkassin from Weber is awesome, he has amazingly educational videos about Weber products. Waterproofing is usually sold as two two-color buckets. This is so that when you reapply it, you can visually understand where the unpainted is located. I smeared it all over the bathroom with floors before laying the tiles. Well, I don't know, the second layer, that is, the bucket is clearly superfluous. Waterproofing came out with a margin of 500%. As if I'm going to do a bath. The corners on the floor were also planted on a special flexible tape on this very waterproofing. If the room will walk with time - then please. At least 2 cm. The tape stretches well.
This is what the floor abutment looks like now.
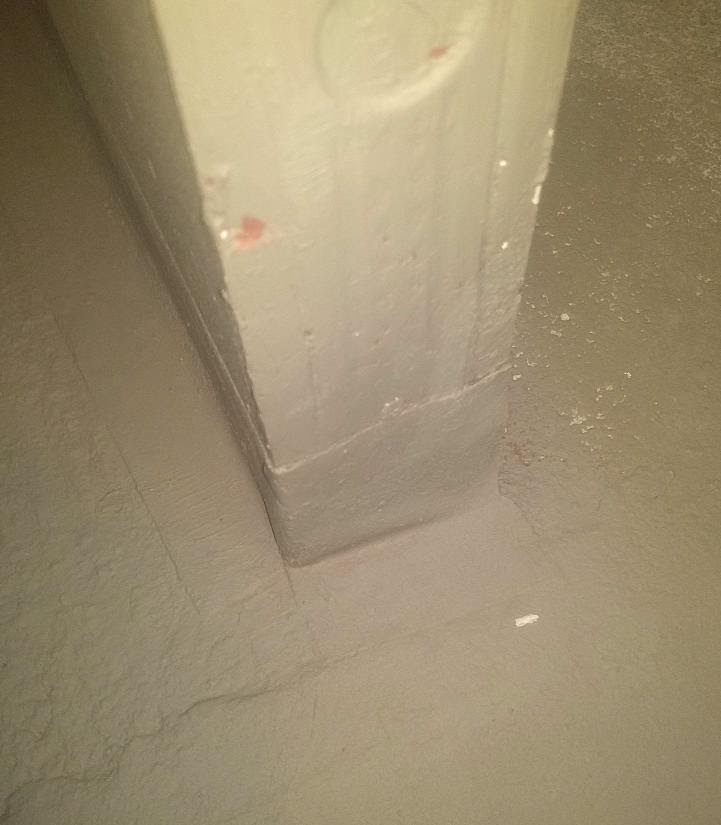
Leaks to neighbors are excluded. At least pour the pool! However, after laying the tiles on the floor, a groove remained against the wall. It can potentially store flowing water (I know in advance that the bathroom will not be installed hermetically against the wall) So I took a thick flexible white crap for the cracks and covered it in the groove twice. The photo shows only the first layer of application.
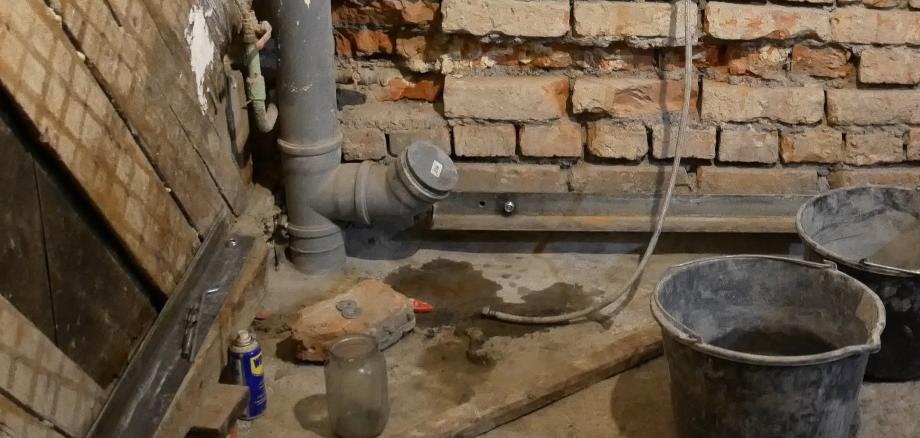
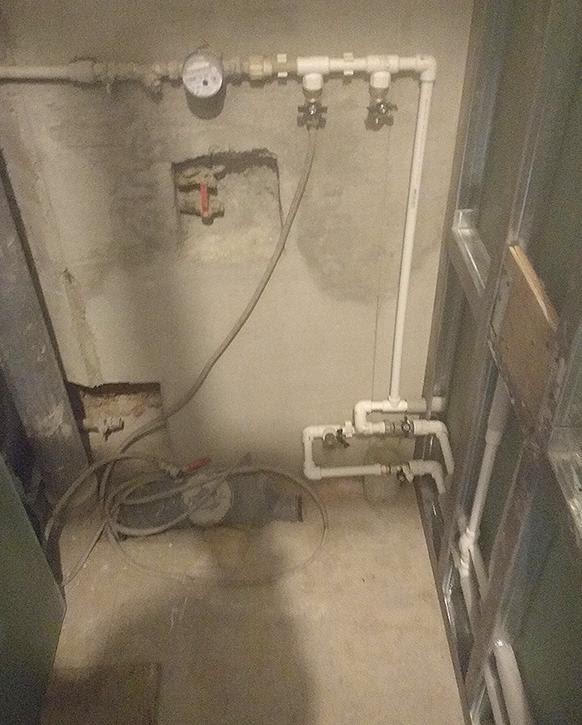
Pipeline
All normal guys do it in copper or sewn polyethylene. I would have been a tough kid, but I didn’t like copper in terms of its characteristics and the complexity of soldering, and I somehow didn’t want to spend money in 50k for a tool for a one-time assembly of pipes made of XLPE. It's not true for a single YouTube. So I bought a soldering iron for PP and PP pipe. Everything is budgetary and very reliable. I am satisfied. However, if you had cross-linked polyethylene, this is a flexible tube, measured, cut off, pressed in the fitting. Much faster!
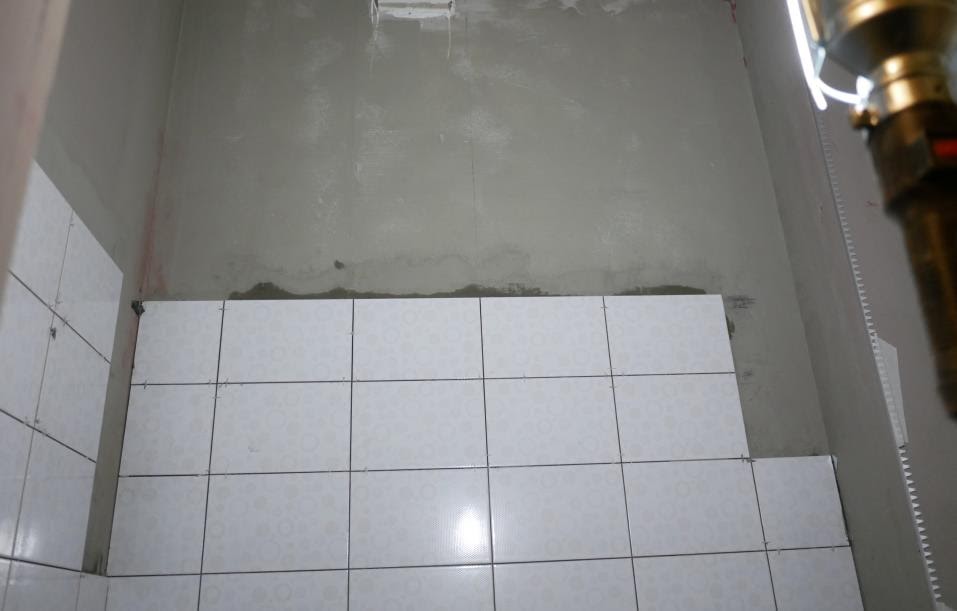
Bathroom tiles

The main rule is to lay the tiles under the bathroom. If you have an old cast iron, that's one thing. If you have a new bathroom with an almost square rim, you need to make a floor, cover it from dirt, place the bathroom close to the wall and lay the tiles so that they lie on the bathroom with a 2mm gap for the sealant. Forget those hellish plastic corners and other nonsense that molds and leaks over time!
So, the entire tile layout begins with the bathroom. And I have chugunin! I laid it out so that the first row of tiles from the floor was not cut. I still haven't solved the question of how can I seal the joints! Think I'll do it with epoxy white grout.
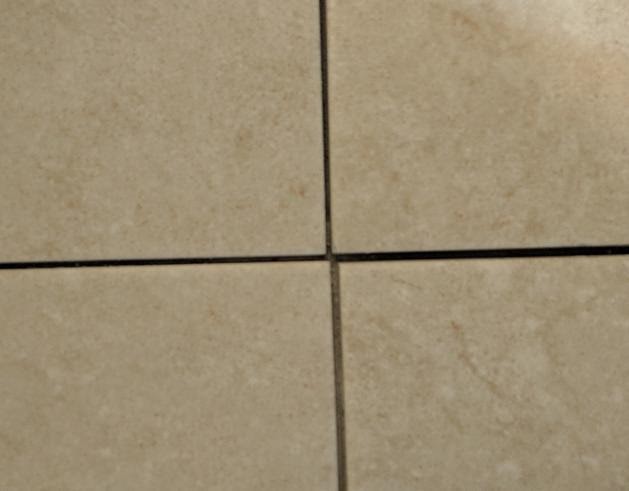
Second rule.Better use natural textures and the largest size. Laying is easier. I do not recommend these bubbles of mine, and my size is 20x15 with a damn decor for 150r each! I JUST SWIMMED HER POTION FROM THE FIRST TIME IT'S DIFFICULT. CURSED, SMALL TILES.
I did not use SPV (about it below) because the walls were perfect. We put a tile with glue, with a comb, press down, tap gently. It is better, of course, to whip it around the wall, or even apply a contact layer to the wall so that it sucks, but this depends on the fluidity of the glue. Fillet welds, I'm a bastard, forgot to coat with sealant instead of grout. Due to the deformations of the building, it is recommended to use a sealant at the junction of the planes.
In fact, there is a harmony between the size of the tiles and the area of the room. I couldn’t feel it to the end, because damn tile glue sticks to wet hands and tingles when you still don’t know how to lay tiles clean and always clean up the trash.
Third rule: no asymmetrical trimming of tiles at the corners. Guide the tile from the center. And trim the corners symmetrically. Note that in Obi or Leroy, the choice of tiles is ridiculous.
Tile cutters ... oh ... about electric will be lower, and manual ... leuashnye so-so. They have a cutting mechanism! This is tin. That is, a 3mm cut runs off from different sides due to backlash under load!
As for the width of the seams. The thinner the better, but harder. Please note that when grouting, the joints are visually twice as large. I took 1.5mm crosses and had to put them in different places of the tile, since the sizes all walk, and the step of the rows must be kept exactly.
Oh yes. Never flush cement down the toilet. Let the debris settle in the bucket for at least 3 hours and drain off only translucent water. Now it is much easier to take out the remnants of the batch in the trash.
Grout
It's simple. There is cement with dye, there is epoxy with painted sand. Only the latter can be called grout. She is beautiful. Well, yes, it is difficult the first time, but then! Resistant to acids, household chemicals, dirt, water. She is beautiful! The tile will crack - the grout will remain intact! You can water it with ink, dyes, nothing will happen to it. I took the cheapest one at 1.2kg. At 20 degrees, the grout is alive for forty minutes. Then slowly grabs.
Cement grout is only needed if you don't care about the result and resistance to dirt is not important. Well, or if there is no money at all! The white grout on the floor will rust from the water in a week. Of course, I can restore the color with the help of phosphoric acid, and then, with the help of neomid anti-rust concentrate. But not for long. Acid etch the grout and then put my beloved on top! This is my plan!
Kitchen
Kitchen floor tiles - granite tiles. I had no idea that porcelain stoneware is an incredible state of matter. Wonderful natural drawings, relief! Resistant to physical impact, dirt, cleaning. I was just amazed at the sheer number of variations! I went shopping for several months (fortunately there are 3-4 of them and everything is nearby) and only touched and looked, felt and looked closely. It turns out that this is an immortal beauty. The temporary physical decomposition of sand baked under high temperature is enormous. This thing that will outlive me and which captures the beauty of surfaces. Only I'm not talking about cheap poop, the raster from the printer is visible to the naked eye. Bue. There are patinated, glossy and non-polished ones. I really love zheskach, so that it is embossed, so that the soles tore, uh But patinated (polished,not to full gloss) are very practical. You will rub the gloss all your life after styling, and patinated, it is very natural and straight good to the touch.
What about Italian or Spanish porcelain stoneware? Men who grew up on the poetry of Petrarch, the philosophy of Savonarola, paintings by Michelangelo work in the factories. And on such an evening from work, the happy tiler Paolo walks past the local carnival, anticipating that on this hot Italian evening he will be able to cool down only between the cool breasts of his Mariangela. She, in turn, gathered grapes all day, so her name is even sweeter to the lips of Paolo. And now, waking up in the arms of the aromas of love, Paolo comes to mind to draw a certain pattern for porcelain stoneware in a slightly different way, as does Margarita Stepanovna, senior technologist of the first category. Her husband, although he was not devoid of romance, however, for some reason did not smell of grapes from him. Grapes do not grow in Chelyabinsk.
Of course, I chose porcelain stoneware in the Ob without the revelations described (came) above (from above). But I still had to think about whether to do it at an angle of 45 degrees or to spank stupidly in a straight line. This stems from Mariangela, ugh, harmony. The tile is at an angle because, according to my calculations, it is the most harmonious. Do you think? no problems? The manufacturer doesn't lie about the size? Ha!
First, I came across a burnt porcelain stoneware that refused to obey a manual tile cutter! He always broke crooked. I had to buy a water cutter for 5k. I removed the orange casing from it, which covers the disc and does not allow water to water the room, because you can't see a damn thing with it. I put a stepladder with a sheet (it is tucked into an empty bucket) and just add water to the tile cutter!

Why do all the tile cutters, which need to move the tile towards the blade, BREAK EDGE. You drive a tile on the disk, everything is okay and then at the end BATS 3mm-5mm and on your side oh tyzh beast !!! Why can't you break into a cut-off part! Why are you breaking into the finishing part !!!
I sold it nafig how I cut everything! True, it was not dusty because of the water, but it splashed heavily. Now, if anything, I’m better with a grinder in a radon basement ...
Second, all different sizes of porcelain stoneware right in one box! Do not believe the inscriptions on the 42cm box. Somewhere 41.8mm somewhere 42.2mm With the seams in the 1.5mm I have chosen, you think you can not see the difference TWICE? All right, the seams! So your styling step runs away! First you need to lay out the ideally longest trunk, from which you then start laying on the rest of the surface.
Well, I posted it. Otakot!
Okay. As Dad used to tell me all the time about every joint: "A fool won't notice, a smart one will keep silent."
After discovering a violation of the step of the tile, we had to go through all of it. I measured all sides, wrote the size of each with a pencil and made a grouping. So I managed to compensate for the difference in size more or less.
Unfortunately, I somehow can't figure out an algorithm that would give me the best layout for different tiles.
It seems, of course, to arrange each tile as an array of 4 numbers, and then sort the arrays 4 times, for each value, and take 90% each time. In total, anomalies will be eliminated, but how to assemble an algorithm smarter ... I can't figure it out.
Okay, there is some good news. It is a tile leveling system. Roughly speaking, plastic latches that connect the tiles to each other in one plane and do not allow spoiling the installation even if you accidentally step on a fresh one. After hardening, you knock down the latches with your feet and they break somewhere in the depths of the seam. The sole is buried, but it is completely invisible. The main rule is not to smear the tiles with glue closer to 1 cm to the edges. Otherwise there will be dirt and nerves. This is an incredibly cool invention that allows you to achieve amazing results in the quality of installation of tiles of any size.
Wallpaper, kitchen assembly, ceilings. Installing a gas column. Oven. All of this is endless, just like the songs about Marianjel. Of course, I can tell you how I mastered the profession of an electrician on YouTube and how I argued against an electrician dad when I drilled a supply wire. (I bought the KBT PK-16M pliers, tinned sleeves and heat shrink so that the connection was without air access) but from the last I will tell you about the kitchen apron.
I really liked the Surface Steel 60x120 porcelain stoneware from Italon. But in fact it is 5mm less than stated. That is 115 by 55. And it differs noticeably in glossiness from the size 60x60 of the same collection. At least give it back!
And all my dimensions of the joints between porcelain stoneware had to be doubled and used an anthracite epoxy grout twice.

The outer corner would ideally be cut at 45 degrees, but the dimensions are absolutely inappropriate!
Therefore, it came out more or less well. The main thing is that it is hermetically sealed and you can rub even with acid.

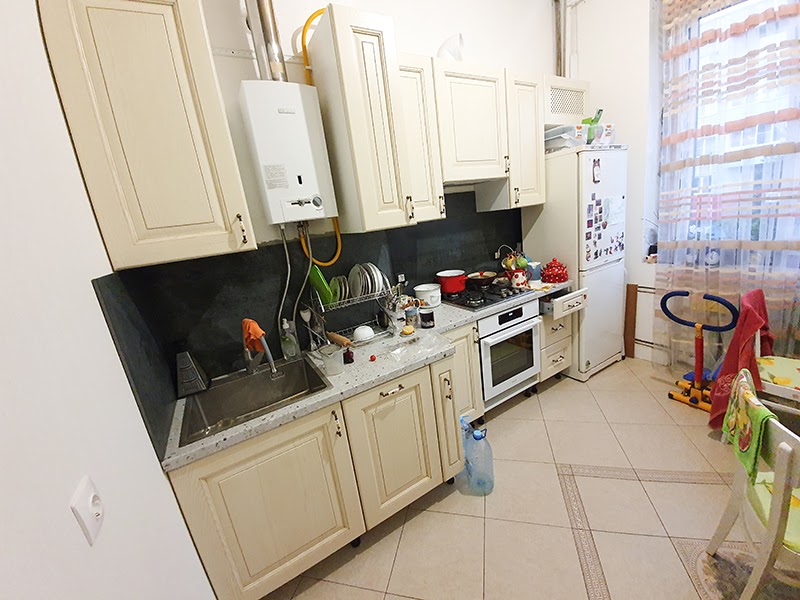
As a result, the kitchenette looks like this:
I hope some of you will clarify some issues with the renovation.
CCTV

This camera captures even one habra company, but it does not know it yet. For inquisitive minds, I'll give you a hint: Glenn Fleshler. And if your associative array coincides with mine, the secret will not remain so for a long time.
At the request of women in love and enthusiastic men, I will continue the theme of repair, to be more precise - the theme of the very basement with radon, for organizing video surveillance of the yard.
So it turned out that our yard raised money for video surveillance. Little money. According to the price list from the local organization, it became clear to me that we would have some kind of antediluvian 2mpx cameras, plus they would also squeeze out money for the installation, which was clearly hidden in the price list. It struck me later, because if you do video surveillance, then not with such a budget and not with such equipment.
Well ... as usual, if you don't feel sorry for the time and yourself, well ... help the court. Therefore, I decided to analyze alik and YouTube. I wasn't looking for cameras for a long time, because according to my impressions many brands simply sell almost the same filling. Remember what Mp3 players the Chinese used to have ?
Tons of players, on one chip. And I have a suspicion that the same is happening with the ip camera market. Working consumer goods in different variations.
It was important for me to see how much user experience had accumulated so that I could find a technically competent review, and decide whether to buy a thing or not. I easily found the flooded samples.
I will not make secrets. I bought Reolink with 8 channel recorder and 4 Reolink RLC-410 cameras with POE support from the same company. PoE is powering the camera over a coiled cable. It is very convenient not to drag both the signal and power cable in parallel. For a year of operation, I found three minuses.
1. glands do not know how to encode video in h265. As far as I know, for this it is necessary to unfasten a rather large royalty to the patent holder. Anyway. This is not so important. h264 yes motion recording also saves space on the hard disk. But now I think I would buy something else.
2.Reolink does not sell cameras with different focal lengths. That is, the Reolink RLC-410 comes with a lens with a focal length of 2.0, and if you have already mapped out the cozy places for the camera attachment, then this is pointless until you personally see the picture from it. You can’t guess with the attachment point. Of course, there are options for varifocal 4K cameras, but for a different price.
Therefore, when the camera arrives, we take a ladder, a smartphone and see where to place the camera so that the picture suits us. Other manufacturers have different lens modifications for the same camera. It is more comfortable. I don't really like the idea of pulling the cable 5 meters further just because the camera has such a viewing angle.
3.The direct reason for the budget cost is the performance of the recorder interface. Well, it's just agony to look for something, especially if you have 4 camera streams dumped to the disk in parallel.
Have you noticed the nonsense why a lot of videos from CCTV cameras were filmed with smartphones? Yes, because it is a pain to dump the desired section of the video on a USB flash drive! It's easier to reach your phone and remove your monitor.
When I was caught "stealing" in Leroy, they showed a film with my participation, how I "steal" some kind of attachment for 40 rubles. I removed the plastic of the store from the attachment to make sure that everything was okay with the seat and put it back in. And they just lost a similar thing 3 hours before me. The fact that I bought a piece that I was considering did not convince them ... in general, they brought me a video on my phone, taken from a monitor.
But, not everything is so sad.
Do not buy network wires and spare parts for the RJ-45 hermetic seal from the reolink. They have some wildly horse prices. Buy stupidly from others 3 times cheaper at once 10 pieces. These waterproof caps gag like cockroaches. As soon as he falls out of his hands, he climbs right under your sneaker to crunch. And you don’t have one anymore, and tomorrow it will rain, and with alik the spare part takes a long time, and the contact is oxidized, and how do you sleep with that?
As far as I understand, Reolink does not have a hard wanderlock. The recorder understands other people's cameras (emnip) and the cameras are read openly. How to access the camera through its protocol is described on the off-site and I easily succeeded in the hacking operation from the book "How to calculate by ip". I started the camera from my computer just straight into VLC.
That is, you can easily add it to your application. This is for me the criterion for any long-lived iron. If the manufacturer suddenly dies, the community will pull it out. The yard will remain under control. An alcoholic will not pass (more on that at the end)
In general, I did not get the impression that this is a typical Chinese style. Solid camera. In fact, many manufacturers of Chinese ip cameras have been on the market for 15 years and all large jambs have long been patched up. I was really surprised, it bang and works without a tambourine.
And so, in order to figure out where to keep the recorder, I need to find a place where the length of the twisted pair for each of the 4 cameras would be minimal.

Local residents actively resisted resettlement and I studied their underground passages for another half a year using an ip camera. It turns out that they pass underground under the road from the basement of a neighboring house!
I’ll take the cable out into the street, so I bought 300 meters of good copper (I’m 40 meters POE! Suddenly copper-plated aluminum will not cope? Admin, report how many POE finishes on the copper?) Wires, with steel wire inside, in black insulation against space radiation and appetite of rodents.
The algorithm is as follows.
1. Take a tape measure and a brick.
2. Unwind the tape and measure out 5 meters from the beginning.
3. We put the brick in place of 5 meters.
4. Repeat to the end of the building from step 2.
We get the perimeter of the house, make the markup in the 3D editor.
We calculate the length of the twisted pair. Well, as we think, select and ask to name the length of the curves.

160 meters. Okay. 300 meters is enough.
The choice of objects of video surveillance is very simple. Viewing two entrances, the courtyard and the entrance to the gate, where you can see both people and cars.
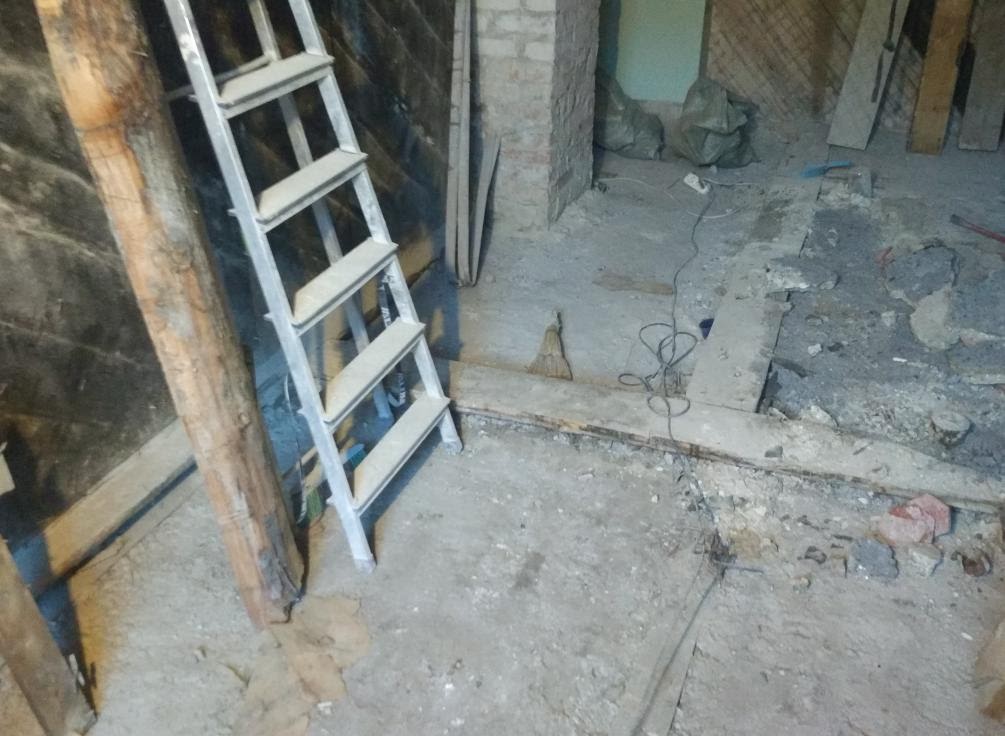
An important criterion: you need to find a compromise on the installation height. Ideally, cameras should be placed at the height of human growth, because the whole world around was created from this angle and all events at this level usually take place. But we need protection from a drunken brawler with a stick, so the camera had to be hung at a psychological distance so that we would not want to "shake" it.
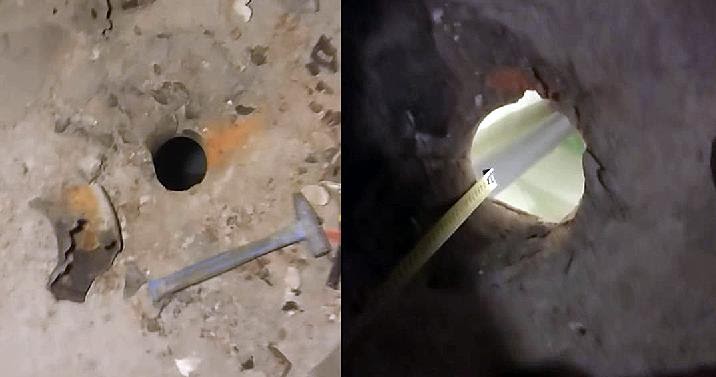
Second problem. The cameras can be taken out of the basement through a brick wall 1 meter thick. The diameter of the hole for the metal hose (I'm not going to bring out the twisted pair, which can be chipped with a knife) needs about 2.5 cm. On Avito I was offered 3tr for a hole. But I did it more cunningly. In green, I bought two drills. 16mm drill for 1 meter and 25 drill for 600mm. Guys, everything is very simple. 7 minutes with a break for the drill to cool down and the hole came out into the basement from the yard. Now I install a 600mm drill and expand the hole from the outside and from the inside.
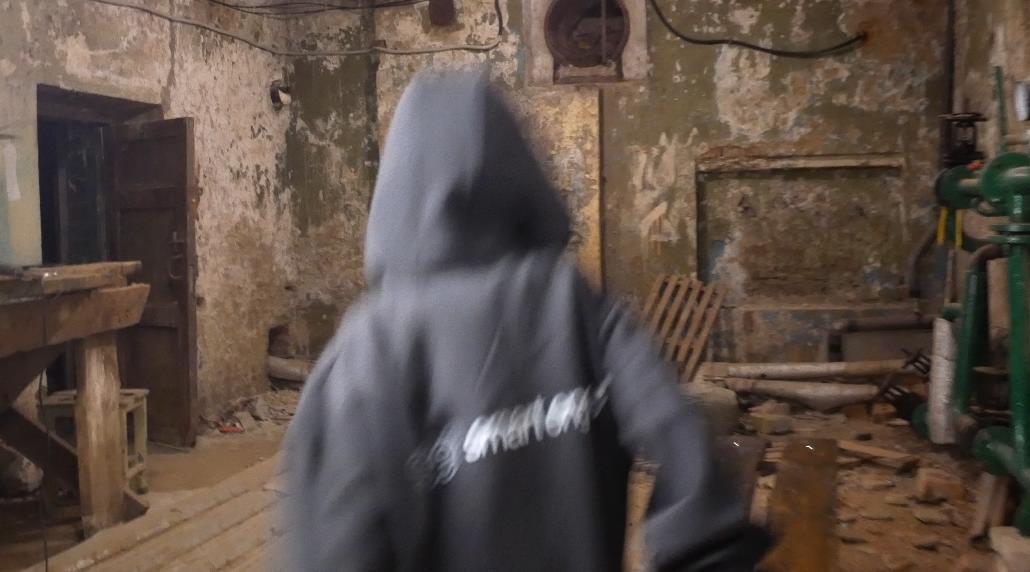
The photo is not very good, but it is atmospheric.

From the wall protrude not yet stretched metal arms. And I illuminate it all with a lantern in complete darkness. On a good shot in the light, you can see two cables on the wall above. Sorry, this is a still from a children's home clip. I already said that after measuring radon, I don't really want to go down there again. And in the photo there is an Easter egg for the local habra company.
(who would guess that the prize: I wrote it in a personal tune)
And the output is outside. Ignore the large hole. The neighbor decided to help with his big drill (khe-khe)), reached halfway and burned the puncher.

Let's go back to the basement and the atmosphere of the game. This box now contains the recorder. It is locked and bolted to the wall. The simplest uninterruptible power supply also fits there. By the way, there are a dime a dozen of them on Avito, only all with dead batteries. Access to the video is organized as via wifi with an official. reolink applications and a key from the door. I brought Monique there too.

There is nothing special about the art of laying cables through a building other than the fear of breaking your head if you fall. Fortunately, the mass of communications that the telecom does not remove, act as a support for the twisted pair. I cannot drill at this height of the cable. The cradle is needed. The other two cameras are powered through the cable outlet from the entrance through the old telecom hole. There is a bunch of long-cut wires in the entrance. Look at which one is thicker and throw it away. (I wound up 10 meters of TPPep cable there. Who needs it?)
(An attentive reader will notice the wiring, because the power circuit of the cameras on the screenshots above does not match my words. Well, I must keep some kind of security!)
Bugs
The most difficult thing in all this is to crimp the cable. Neither the setting nor the 3D noise reduction checkbox that makes the wow cause problems. Over the course of a year, one camera began to turn off in the morning and turn on in the evening. Well, how is the familiar bug? Reader, is this how you will catch him? Furthermore! There is a context!
The day before, I climbed a tree near our garages with my child. Well, there is nowhere for the child to climb, I showed him how to put his foot on which branch, and so, a couple of residents came up and worried that again someone was climbing through their precious garage with a rusty lock. And the next day someone cut down our branch! I went to look at the cameras and at that moment when the branch was cut down the camera did not work!
What will be your thought, dear reader? Of course, this is a direct connection, someone wanted to go unnoticed! Therefore, I thought there was some kind of sabotage!
But I still decided to act on the path of eliminating problems with my minimum energy loss. I do one action and wait for the problem to be reproduced. No changes? I increase the level of energy consumption. First, I switched this camera to a different port on the recorder.
We are waiting for the day, we are waiting for the problem. Has not disappeared. Now the camera died at 14 o'clock in the afternoon and turned on after the rain. Well ... well, how is that possible? The camera is buggy! Here are the Chinese! Slag trading as usual! I have already begun to remember all the sayings about the stingy and so on. But! I did find the problem. I put RJ-45 at the camera in a hermetic connector from the street and the problem disappeared and for half a year everything is ok.
Ah, and the story about the alcoholic remains. This was actually a love story. Once the gate to the courtyard ... broke. The piece of iron came off and the automation no longer worked.
"The gate doesn't break just like that!" Their supplier assured us, “Look for a rowdy! You have cameras there! "
I looked through the cameras (fortunately, they are with sound) and found out that in order to go to the woman I loved and shout in the yard (% Woman's name%, I love you, why don't you love me ?!) my uncle broke the gate in a good degree, forgetting the code to the gate. Then, sitting on a bench with his friend already under another cell, he told him a heartbreaking story ... okay, I won't lie. He didn't say anything especially about love, he threw the snowballs out the window and left. But he was punished with a ruble for the gate. Video surveillance works!