We all observe such a tendency that the development of various Internet resources is constantly becoming easier and more accessible to users.
For example, if we talk about websites, then we can remember the time when the price of a simple landing page started from several thousand dollars. Today you can download a ready-made template for almost any site for free. Or use one of the popular constructors. And yes, “create a website in 5 minutes” is exactly what most customers need.
A similar trend is observed in the mobile application market. There are tons of free templates for them too. Simple constructors are quite suitable for self-development.
And today we decided to talk about a project that has every chance to open a new round of development in this area. Startup Glide has garnered attention for its ability to create Google Sheets-based apps for any mobile OS. In this case, the "developer" does not need to have knowledge of the code and experience in programming.
Glide idea
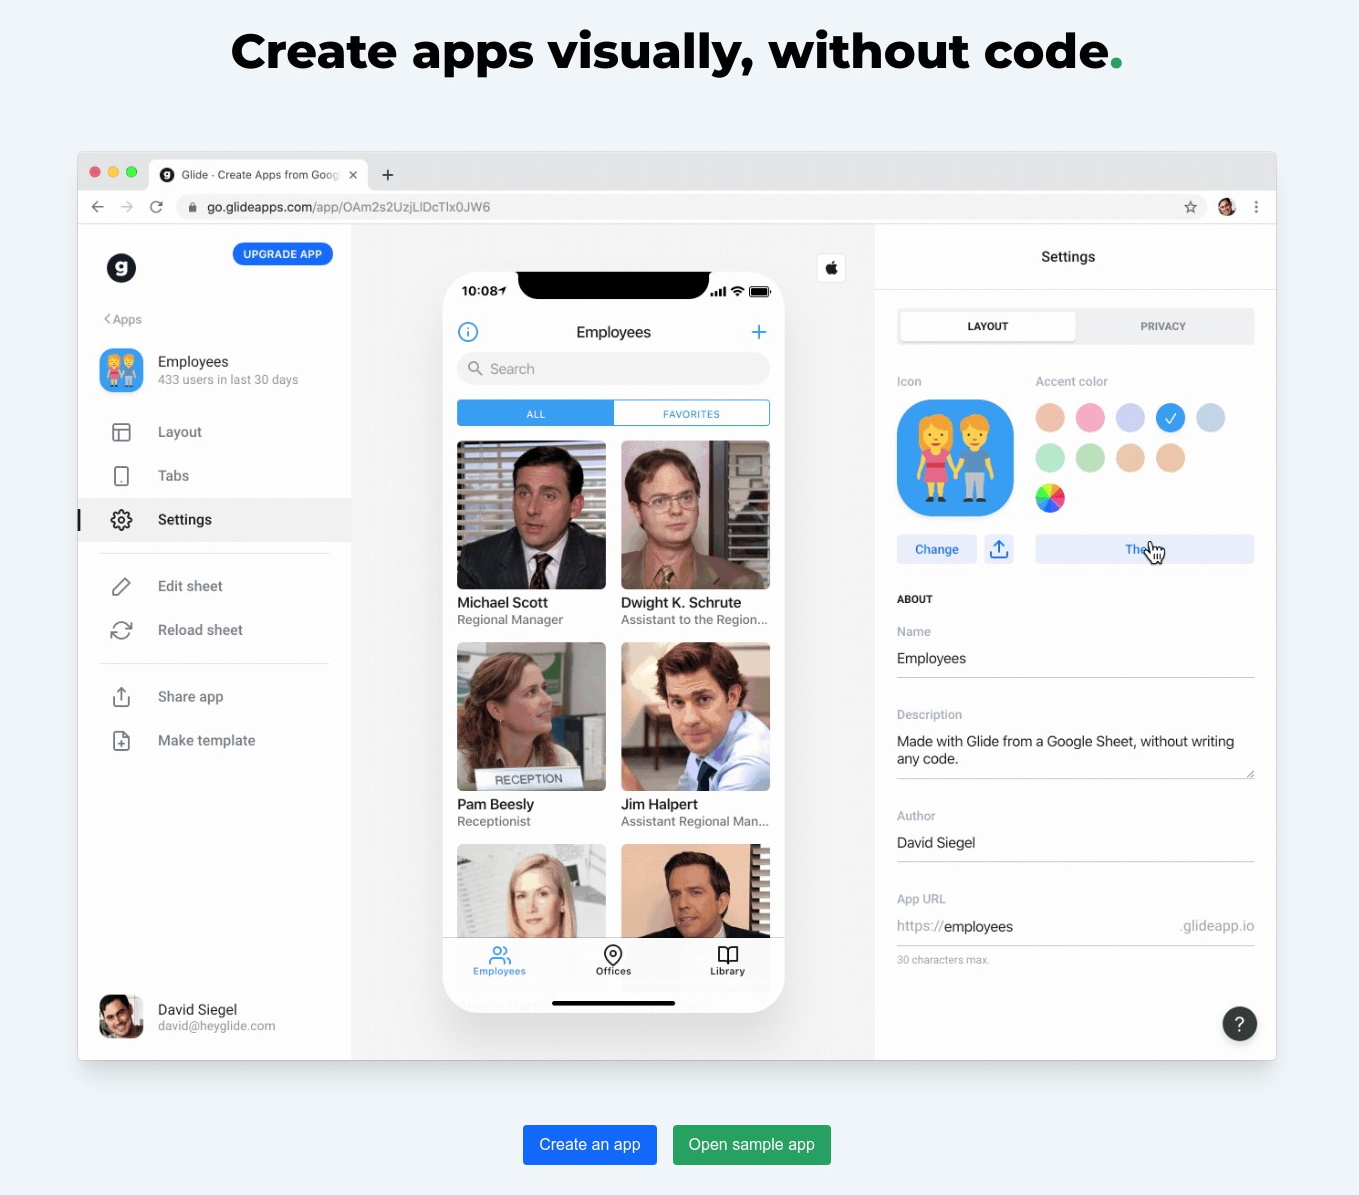
The Glide service was developed and launched by former Microsoft employees. According to the head of the project David Siegel, he and his partners wanted to make the process of creating mobile programs accessible to everyone. Thanks to the new service, now every user can optimize their work with spreadsheets. And based on them, create convenient mobile applications.
On the startup sitepresents ready-made tools with which you can simply create universal software for mobile devices. Glide also allows you to easily edit the information displayed by an already created application, you just need to change the data in the Google table. And through the web interface, customers can customize any pages and application blocks, getting the desired design and the necessary functionality. The creators claim that it takes only 7 seconds to launch an application based on a template.
All these capabilities are available to any network user. It is noteworthy that the startup itself also uses its own mechanisms of the Glide platform and Google tables in its work.
Software features
When creating an application, the Glide platform itself allows you to assemble a suitable visual component. A google table is used to fill in the necessary information, that is, it acts as a database.
All applications created in this service are cross-platform, that is, they can be used in any OS and on all devices. They are also progressive web applications. In case someone is not in the know, progressive web app (PWA) is a technology that visually and functionally transforms a website into a mobile application right in the browser.
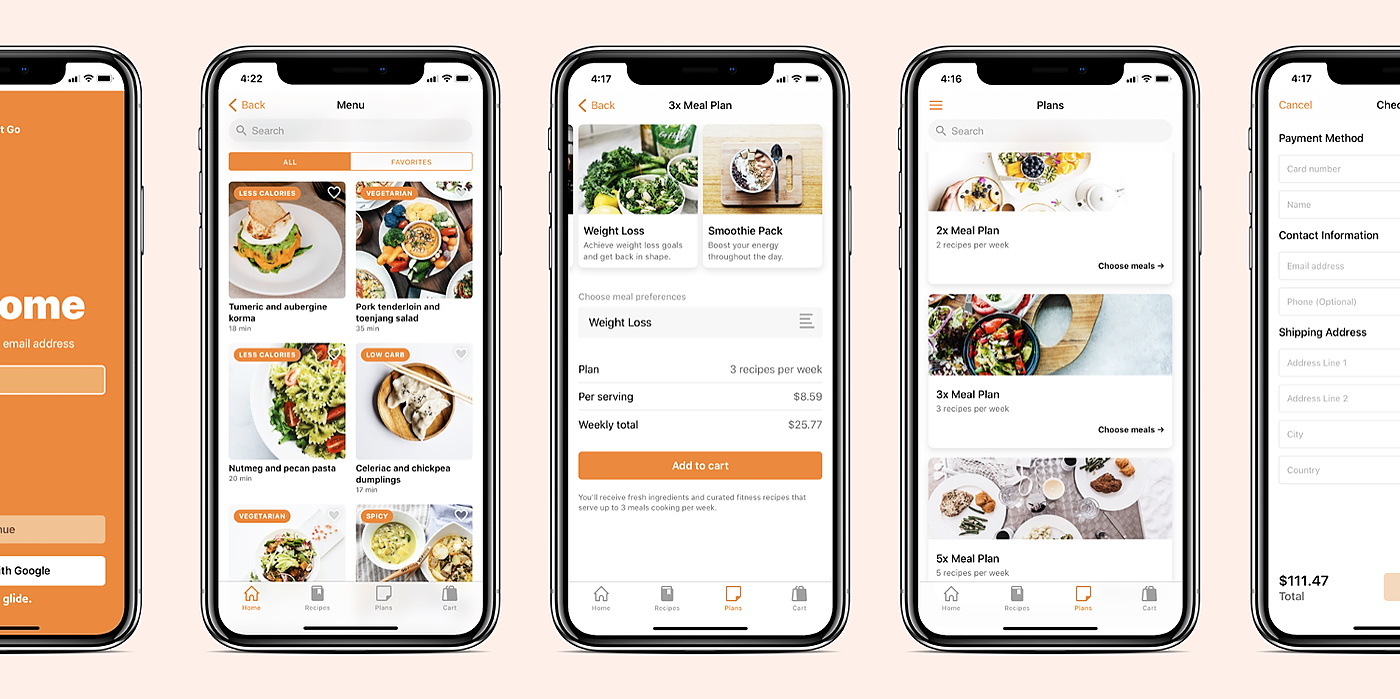
Despite the relatively simple principle of the Glide service, its use opens up great opportunities for users who need certain applications. On the basis of loaded or template Google tables, you can create, for example, a mobile storefront. If necessary, the user can easily get an application for managing expenses or a task manager.
Each of these software options will sync with Google's spreadsheet and update quickly. Again, to edit information, you just need to make edits in the tables. And using the Glide platform, you can always change the visual design.
Working with the application - creating an idea
The structure and functions of the finished application are determined by its purpose. One example of an idea is organizing virtual events (webinars). To do this, users must be able to:
- quickly get access to information about the event and its schedule;
- buy tickets online.
For these tasks to be performed, it is necessary to form several sections of the interface in the application:
- an overview of the event and all the details;
- types of tickets, their cost and payment methods;
- speakers, their short biography and high-quality photos;
- schedule of events within the framework of the general event: time and topic of the speech;
- a list of recurring questions;
- support contacts.
If you need to create an application for other purposes, its structure can be formed using examples of the best competitors in the segment. Many of these templates are available on the Glide website.
Examples of successful cases
An example of a successful use of the service is an Android application for working with an employee database. It was created using the ready-made Glide template.
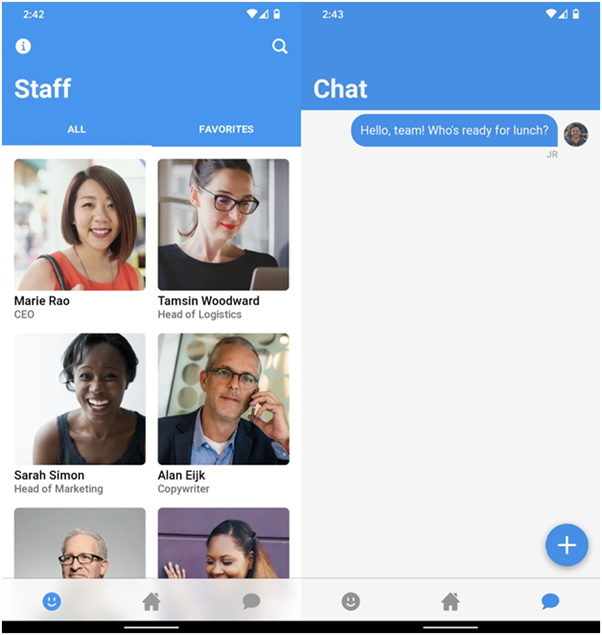
This application has a built-in full-fledged search system and a convenient messenger. In fact, this is a kind of analogue of your own CRM system. But the structure of the program is assembled on the basis of a regular Google spreadsheet, which contains records of the names and positions of employees, as well as a set of links necessary for work.

Another good example is a podcast listening app.

Here, the Glide service has automatically integrated the player because the system found links to audio files in the table. The created application is launched by clicking on the link in any browser, including mobile. If you open the link on your smartphone, you will be prompted to add it to your browser for quick access.
On a PC, you can use these programs using a special smartphone screen emulator. Of course, this is not very convenient. But if the user takes a paid package, he will be able to open the tablet version of the application through the computer.
Working conditions
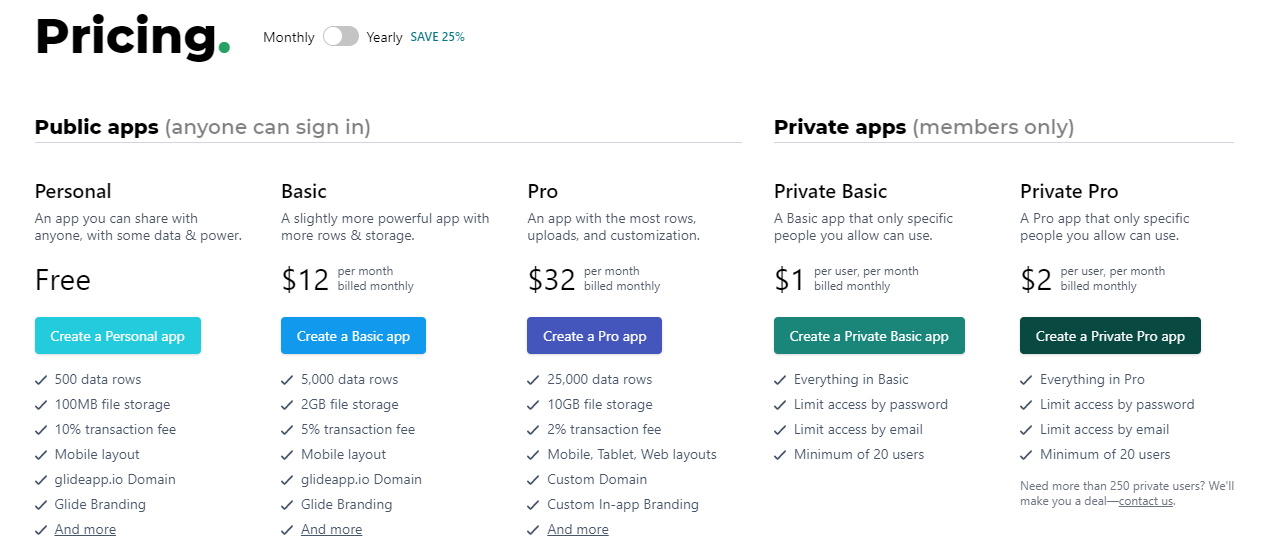
For personal use, the service is available absolutely free. But the Personal version has the following restrictions:
- up to 100 megabytes of storage;
- up to 500 lines of information;
- up to 1000 table changes within a month.
These features can be expanded by subscribing to the paid Basic version for $ 12:
- storage - 2 GB;
- 5000 lines of data;
- 10,000 sheet changes within a month.
The even more advanced Pro version opens up the following possibilities:
- storage - 10 GB;
- data lines - 25 thousand;
- the number of changes is not limited.
Pro subscription for a month costs $ 32, and if you pay immediately for a year, the tariff is reduced to $ 24.
It should be borne in mind that in the Personal and Basic modes, there is an advertisement for the Glide brand in the interface, which can be removed in the Pro version. There is also a Glide Pro subscription for corporate use and small team work.
Regardless of the payment option, the user can choose any domain as the application URL. If necessary, the program can be made private, that is, available only to those who have passed the registration.
Instructions for creating an application
For those who are interested in the Glide platform, we have prepared a step-by-step guide. Using it, you can create your own application even before you finish reading this article.
To get started, you need to go to the site . It is available only in English, but the interface is quite friendly, so there should be no problems with registration and work. To get started, you can use the "Sign Up" button in the upper right corner, or the blue "Get Started" button, just below the header.

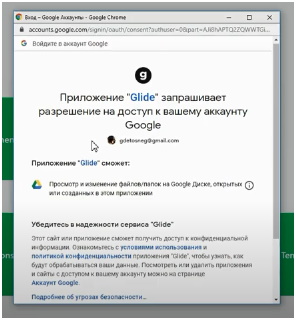
In the window that opens, you will need to select your Google account for authorization in the system. After clicking the blue "Allow" button, access to the service will open.
The personal account contains four main menu tabs:
- My Apps - here you can manage your own apps.
- Learn - this section contains video instructions in English.
- Templates - a page with ready-made templates (paid and free).
- Add organization - here corporate clients can add information about their company.
Setting up the structure
There are two ways to start creating an application:
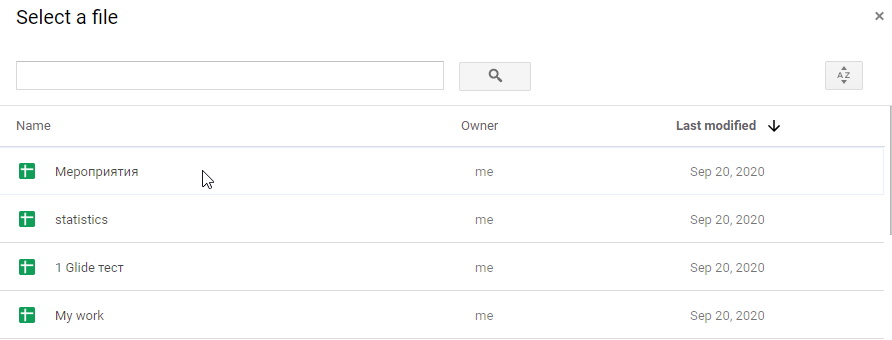
- From Google Sheet… - from adding a table;
- From Template… - from template selection.

It is better to start by choosing the first option, as a result, a list of tables on your google drive will open. For example, if you need to create an application for working with events, you need to click on the corresponding table (which was prepared in advance).
After these actions, the application template in the basic version will appear in the service interface. In this case, the table is fully integrated with the designer. That is, you can change the information in the table, and it will automatically be displayed in the constructor. And if you make changes in the constructor itself, they will immediately appear in the table.
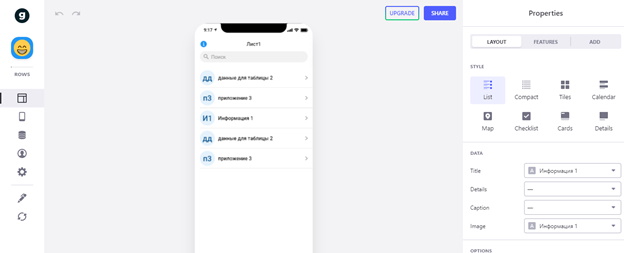
You can immediately compare the data that the Glide service displays with the information in the table.
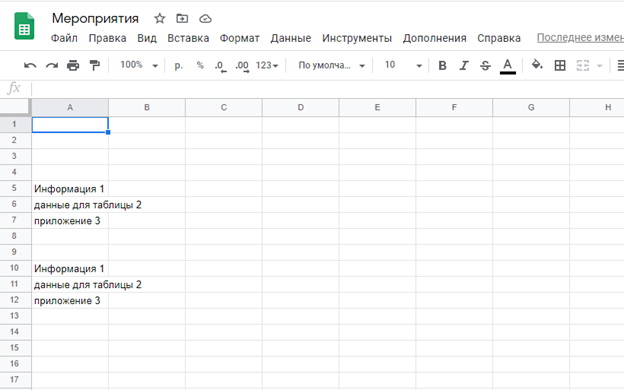
It is important to give the table a correct name in advance, as it is used as the name of the application. It is also advisable to register the names of the columns in the table, they will subsequently pop up in the application.
In the menu, you can select the function of displaying the date of the event and other options. For example, when several events are created, you can click on "Date" so that the days of the event are displayed under their names.

If you need to insert a photo, you can add it directly to the table opposite a separate line. A simpler option is to drag and drop files with the mouse directly into the designer interface.
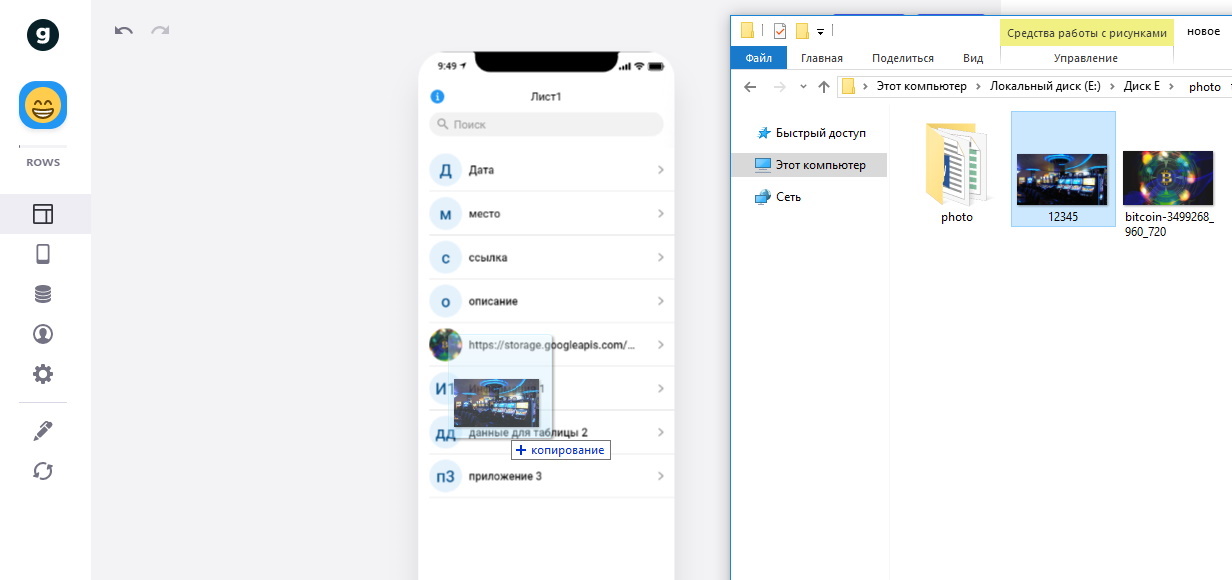
The system will automatically crop. The image will be displayed in the desired format and in the line where it was dragged. Also, the service itself uploads the file with the image to the cloud and adds a link to it in the table itself.
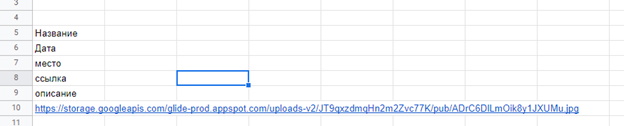
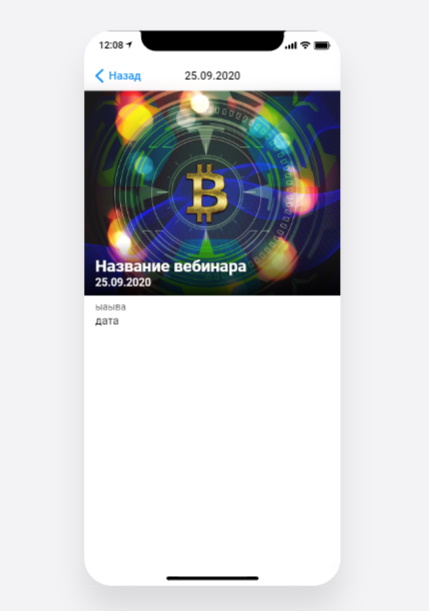
When you click on the line of an individual event, a window with a larger photo and more detailed information will appear. The ability to navigate to the event is provided by an active link located in the application window.
Menu operation
You can make changes to the page structure using the side menu of the designer.

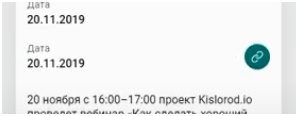
You can change, for example, the topmost row, which serves as a title. The date is easily set instead of the webinar title.

Any item from the "Source column" menu list can be placed in this line.
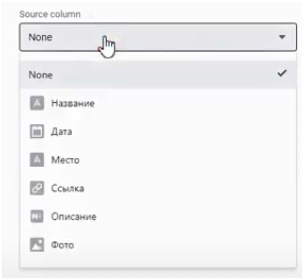
In the same way, work is done with other blocks that are displayed in the application.
When the user hovers over a specific section of the customization, a green ball appears in front of the element to be edited. This helps to understand exactly where the change will take place.

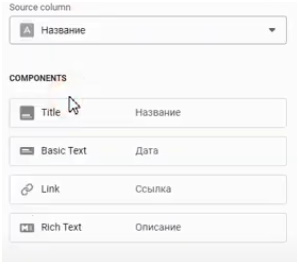
Each section of the menu has its own additional settings. If you go to the "link" section, you can see several fields for changing this part of the application.
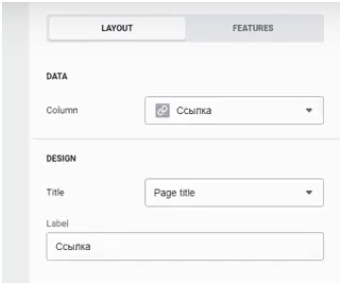
In the bottommost field "Label" additional information is entered, which is displayed above the link. If you write in it "more details on the link", then these words will appear in the event window.
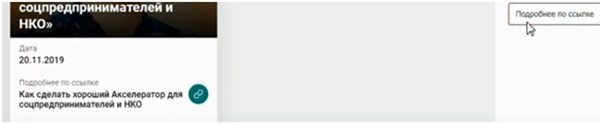
In the "Column" field, you can see options for displaying the link itself. When you click on the link, you will be redirected to the event website.
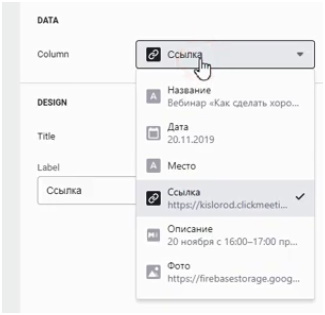
If you select, for example, a date, then it will appear instead of the text.
Section "Title" allows you to change the appearance of the link, there are 4 options for visual presentation. The full URL can be displayed instead of the title, or just the name of the event.

In the same way, you can set any format for displaying information in one or another part of the application. It is also possible to change the placement of application components. To do this, you need to drag them up or down with the mouse. For example, an active link easily goes up to the photo, and the date line goes down to the very bottom.
If it becomes necessary to change the form of submission and receipt of information, then you need to click on the white cross in the blue circle. It's located at the top right of the menu.

After clicking, a window will open with a choice of templates for the design of the application.

There are even markup elements here. If you click on any icon, the function it displays will appear in the side menu of the service. For example, you can choose a dividing line.
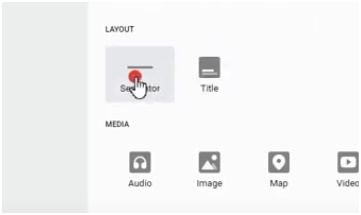
After clicking on the icon, a separator block will appear in the menu, and the dividing line will become visible in the application. Its vertical position can be changed with the mouse.

When organizing events, it makes sense to add comments for feedback from visitors.
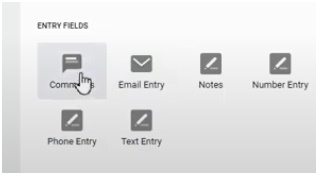
After clicking on the corresponding icon, this function will appear in the side menu and in the application window. You can check the new item and click on the active line "Add comment". As a result, a field for writing text will open.
If you need to add a ticket list or support contacts, you must click on the top plus and select the appropriate functions.
These settings allow you to choose the most convenient visual format for the target audience. And in the absence of some sections in the menu, they can be registered in the table. The service will consider the changes and add new elements to the application.
Final debugging
If you add or remove a row from the table, then it appears or disappears in the application. To see the new prescribed rows of the table in the form of application elements, you must click the refresh icon in the left part of the working window.

The Glide service can "pick up" not only columns in a Google table, but also new sheets. To do this, fill in at least two lines on a new sheet. When writing one, the service will not commit the changes.
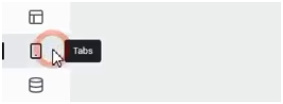
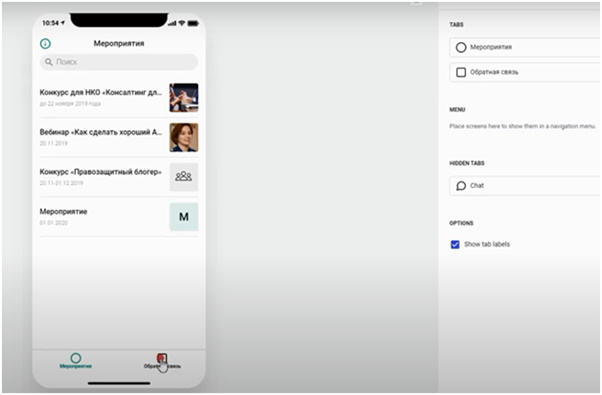
In this way, the structure of the application can be expanded to include new sections. But there is one caveat - after adding another sheet in the table, new sections may not be displayed in the interface, even when you click on the refresh icon. To make it work, you need to click on "Tabs" in the left side menu.
After that, such a menu will appear on the right side of the interface.
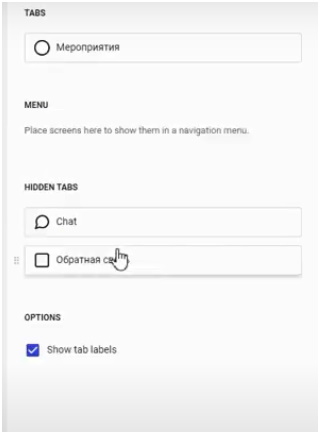
New items are in the "Hidden Tabs" section. That is, in hidden tabs. As long as new sections remain here, they will be invisible to view. They need to be moved to the top "Tabs" with the mouse.
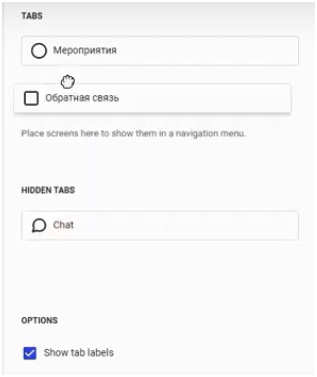
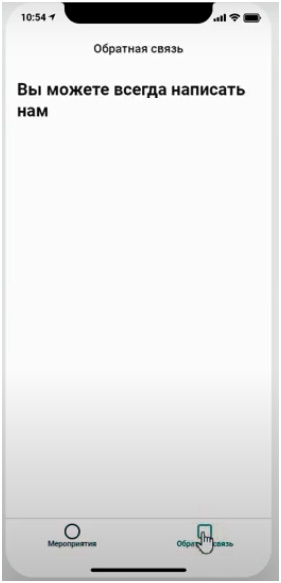
If you update the application after these steps, a new Feedback item appears at the bottom of the window. Other elements are added in the same way.
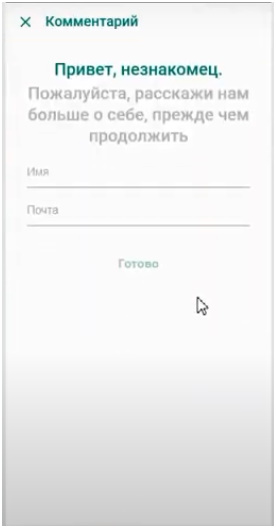
To create additional functions within the application section, you will need to click on the desired element (for example, on "Feedback"). As a result, a window will open, which does not yet contain additional functions - only the introductory text written in the table.
To add comments, you need to click on the cross in the blue circle.

In the side menu that opens, select the comment icon and click on it.
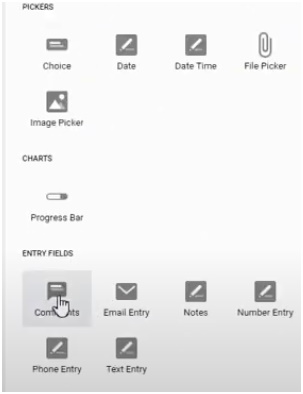
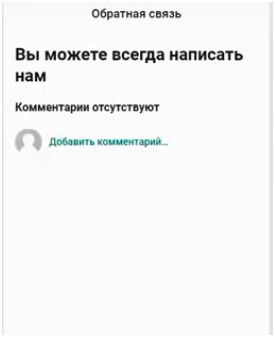
After these steps, the comment function will be displayed inside the "Feedback" section.
Let's say you need to add more information about the organization and photos. In this case, you need to select the appropriate icon in the side menu and click on it. Again, the photo can be dragged with the mouse directly into the constructor.
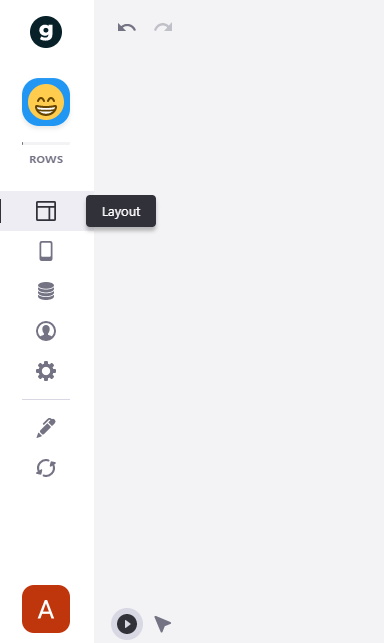
The left sidebar structure is fairly simple:
- The top "layout" icon is used to navigate to the layout of the application.
- Below is "tabs". It is needed to work with bookmarks.
- "Data" - a section that allows you to enter the database. By clicking on it, you can see the table that the application is using.
- The setting section contains general settings.
- By clicking on "edit sheet", you go to the tables on the google drive. Here you can make the necessary changes and additions.
- Next is the refresh icon to download new sections.
And the very bottom item of this menu is used to publish the application.
Thanks to such a simple algorithm for working with the service, the user can create a mobile application in a few minutes.
Advertising
Fast servers for any purpose - that's about our epic servers . The maximum configuration is 128 CPU cores, 512 GB RAM, 4000 GB NVMe.