In the first part (the article was published in the Yandex Clouds blog), the installation of the SAP Netweaver ABAP AS platform, which is the basis for most SAP systems, was considered. In this post, we will move from the application server to the database tier.
Initially, SAP Netweaver worked on a wide range of databases, including both SAP-owned (SAP MaxDB, SAP ASE) and third-party databases (DB2, Oracle and MS SQL Server). The situation began to change dramatically in 2015 with the release of SAP HANA (High-performance Analytic Appliance). This database was positioned by SAP as a revolutionary product for the market:
- all requests are processed exclusively in RAM
- combination of row and column data storage
- built-in PAL (Predictive Analytics Library), BFL (Business Function Library), Text Analysis, SAP HANA SQLScript and other tools for preparing data on the database side and thus reducing data exchange with the application server.
To maximize the potential of the new database, SAP is reworking its flagship ERP system, which will be released in 2015 under the name S / 4HANA and already runs exclusively on the basis of SAP HANA. Subsequently, deeply reworked HANA versions appear in other popular BW (Business Warehouse) data warehouse products - the solution enters the market under the name SAP BW / 4HANA and for the CRM system - the solution enters the market under the name SAP C / 4HANA.
The rest of SAP ABAP and JAVA systems, for example, the SAP Process Orchestration data bus can now use SAP HANA as one of the databases available for installation, along with Oracle, DB2 and others.
Since SAP HANA is a multi-container database, a typical enterprise SAP landscape looks like this:

in this screenshot, each tenant is an isolated database of a SAP system (SAP Process Orhestration, SAP EWM, SAP ATTP, SAP S / 4HANA, etc.) within one SAP HANA installation.
Over time, SAP also has commercial products that are a bundle of web application + SAP HANA database.
For example, SAP Medical Research Insights. This system should help doctors develop the right treatment plan based on a huge amount of data, including on genetic research.

Another important point is the presence of an embedded web server (SAP HANA Extended Application Service) in the SAP HANA architecture. This server has privileged access to the database and allows you to run applications in Java, Python, Node.js, and many other programming languages. The Advanced Model (XSA) version of the SAP HANA landscape adds features such as a web-based integrated development environment (SAP WEB IDE), Codereview (Gerrit) building planner (SAP XS JOB SCHEDULER), and much more.
SAP HANA XSA Architecture:

The emergence and continuous development of SAP HANA requires new knowledge from administrators and application developers. The ability to install and experiment with your own base and development environment in the cloud is far from superfluous in this case.
However, SAP HANA will be interesting not only in the Enterprise environment, and not only among SAP developers. Thanks to a flexible licensing policy, this product can be installed and used for free, including for commercial purposes (the size in this case is limited to 32 GB) Perhaps the installation and use example below will give an idea of where the SAP HANA and SAP HANA database can take Extended Application Service in your project.
Step 1. Download the SAP HANA installation files
We go to the download page for SAP HANA, express edition and if you do not have an account in SAP, you need to go through a simple registration

Download and run SAP HANA Express Edition Download Manager

In the Download Manager, we will indicate the following download options
Platform - Linux / x86 - 64
Image - Binary Installer
Package - Applications *

* - Applications means SAP HANA database, application server and development environment SAP HANA Extended Application Services, Advanced Model (XSA)
Step 2. Create a virtual machine in Yandex Cloud
At this step, we need the following free software:
- PuTTY is an SSH client.
- PuTTYgen - Public / Private Key Generator.
- WinSCP is an SFTP client.
As an alternative for these applications, you can also consider the MobaXTerm application.
Create a Public-Private key pairing using PuTTYgen.

We register / go to Yandex Cloud (https://cloud.yandex.ru/). Go to the Compute Cloud section and start creating a virtual machine.
Virtual machine name: saphana2
Let's set the appropriate characteristics of the VM. In the installation guide for SAP HANA Express Edition (Server + Application), we see the following recommended parameters:

Let's set them when creating our virtual machine.
vCPU - 2,
RAM - 32GB,
15 GB + 150 GB, where
15 GB (boot disk - SSD)
150 GB (data - * HDD)
* - since SAP HANA conducts all operations in RAM as a medium for a snapshot of data, we can choose a slower HDD
As an operating system, we will select the latest stable OpenSUSE OS, at the time of this writing, this is the OpenSUSE OS version 42.3.

We will indicate the Login and Public SSH key generated from using PuTTYgen

Step 3. Preparing the virtual machine for installing SAP HANA XSA
Find the Public IPv4 address in the settings:

Connect to the created VM using the Putty client, specifying the public IPv4 in the connection, the specified login and the path to the Private key.

Prepare the file structure for installation.
lsblk
vda - boot disk, vdb - disk created for data.

SAP recommends the following file structure:

/ usr / sap + / usr / sap / distr - 35 GB
/ hana / shared / data - 60 GB
/ hana / shared / log - 10 GB
/ hana / shared –40 GB
Implement this structure using fdisk utilities:
fdisk /dev/vdb`
Let's check the structure again and create an ext4 filesystem on all created partitions:
lsblk
mkfs.ext4 /dev/vdb1
mkfs.ext4 /dev/vdb2
mkfs.ext4 /dev/vdb3
mkfs.ext4 /dev/vdb4
Let's create directories for distributions and a SAP HANA database, and also mount the sections created in the previous step to them. We will also update the / etc / fstab file so that the mount is restored on reboot:
mkdir /usr/sap
mkdir /hana
mkdir /hana/shared
mkdir /hana/shared/data
mkdir /hana/shared/log

mount /dev/vdb1 /usr/sap
mount /dev/vdb2 /hana/shared/data
mount /dev/vdb3 /hana/shared/log
mount /dev/vdb4 /hana/shared
mkdir /usr/sap/distr

vi /etc/fstab

Set the permission for the folder with the SAP installation files:
chmod -R 777 /usr/sap/distrWe import settings from Putty into WinSCP. Connect to the VM and upload the archives of SAP HANA Server (hxe.tgz), SAP HANA Extended Application Services –XSA (hxeesa.tgz) and shine.tgz (Training content) to / usr / sap / distr.

Unpack the archives:
cd /usr/sap/distr
tar -xvzf hxe.tgz
tar -xvzf hxexsa.tgz
tar -xvzf shine.tgz
Let's add a repository:
sudo zypper ar -c https://download.opensuse.org/tumbleweed/repo/oss/ openSUSE-Tumbleweed-Oss-HTTPSInstall the libstdc ++, libnuma1, libatomic and libgcc_s1 libraries required for operation:
zypper install libstdc++6
zypper install libatomic1
zypper install libgcc_s1
zypper install libnuma1
Step 4. Install SAP HANA XS
The first thing to start with the installation is by defining the concept of SID
SID (SAP System Identifier) - is a combination of three characters and must be unique within the landscape. As part of the SAP HANA Express Edition installation, the default SID is HXE. It is assumed that we will not choose something else as the SID.
Run the installation script as root user:
cd /usr/sap/distr
./setup_hxe.sh
In the installation menu, you need to press Enter several times.
Thus, we will set the proposed default values:
Distributions are in / distr / HANA_EXPRESS_20
SID - HXE Instance
number - 90
Installing all components - all *
* - In this case, this means that we will install a set of Application Function Library (AFL) libraries, where includes Predictive Analysis Library (PAL), Business Function Library (BFL), Optimization Function Library (OFL).
The SAP HANA EPM – MDS plugin is designed to retrieve data from various OLAP sources, while the Extended Services (XS) subsystem is an embedded web server and a set of various components that have privileged access to the database.

We specify the master password for users that are created during the installation of SAP HANA.
Since we chose the SID - HXE, adm - the user at the operating system level will be hxeadm. The specified master password will also apply to the SYSTEM user at the database level.

During the installation of XSA, you will also need to set a master password for users XSA_ADMIN, XSA_DEV, TEL_ADMIN Installation
process.

SAP HANA Express Edition base is installed.
Step 5. Verify SAP HANA XSA is working
Let's check that the SAP HANA database is installed and working:
su – hxeadm
HDB info
An example of services that will be launched:

Let's pass authorization in SAP HANA Extended Application Services, Advanced Model:
xs-admin-loginUser: XSA_ADMIN
Password: Master password that we set during installation
Check the version of SAP HANA Extended Application Services, Advanced Model:
xs -v
Step 6. Post-installation steps
In order to use the SAP HANA XSA web development and administration tools, you need to edit the hosts file on the local Windows machine.
1. Open the notepad on behalf of the Administrator
2. Open the file C: \ Windows \ System32 \ drivers \ etc \ hosts in the notepad
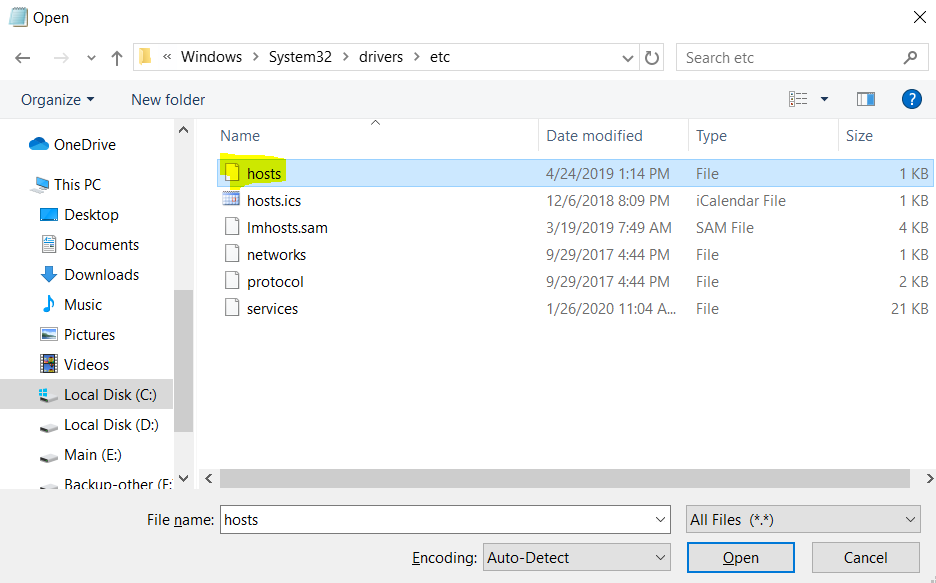
3. Enter the following line:
<external ip-address>

Step 7. Getting started
There are several ways of administration and development for SAP HANA XSA
Administration: SAP HANA Cockpit. Currently SAP is positioning it as the main database management tool. It is also possible to manage the database from Eclipse (Perspective - SAP HANA Administration Console)

Development: Via the web interface, via the SAP Web IDE tool or via Eclipse (Perspective - SAP HANA Development)
Since HANA Cockpit and WebIDE were installed during the installation process, they as means of management and administration we will consider.
Let's get the url for the xsa-cockpit, webide and cockpit-web-app applications we are interested in:

xs app xsa-cockpit --urls
xs app webide --urls
xs app cockpit-web-app --urls
Let's copy the https address and open it in a browser for each of these applications.
XSA Cockpit
XSA Cockpit is a browser-based application server management system SAP HANA Extended Application Services, Advanced Model.
XSA Cockpit lets you manage users and roles, organizations and spaces.
In the User Management section, you can check and, if necessary, assign the roles DEVX_ADMINISTRATOR, DEVX_DEVELOPER for the XSA_DEV user.
In the Tenant Databases section, you can extend the XSA capabilities to a new tenant, in our case, HXE, and link the development space to it


HANA Cockpit
HANA Cockpit is a SAP HANA database management system.
Cockpit can be used to manage users and roles at the database level, to create backups, monitor performance, diagnose performance issues at the database level, and many other administrative tasks.
The script for registering database resources in HANA Cockpit is executed during installation, if the script for some reason has not been executed, it must be run manually before the first use by Cockpit.
su – hxeadm
/usr/sap/distr/HANA_EXPRESS_20/register_cockpit.sh

WebIDE
WebIDE is a browser-based development environment integrated with GitHub.
In the Development section, you can develop, test and publish modules in NodeJS, Java, HTML5.
In the Database Explorer section, you can create and manage objects at the database level (tables, views, stored procedures, etc.).
Connection to tenant and overview of objects in it:


Step 8. First Node.js Application
Let's open WebIDE and create a simple UI5 / Node.js application “Hello World!”
To do this, we will select
Workspace - Git - Clone Repository
As a repository, we will specify - Repository - github.com/basisteam-io/SAPHANAXS_helloworld.git
Thus, we will get a copy of a simple Hello world! Application, which will not be difficult to understand or modify.
Let's set the space where this application will be deployed.
In our case, this space is development.
Let's build the application and the project in sequence.
The result of the build will be a .mtar file in the mta_archives folder, which is located at the top of the menu with the project hierarchy.
It is necessary to select the file contained in the .mtar folder and perform the operation "Deploy to XS Advanced" for it.


Let's go back to the command line and switch to the development space:
xs target -o HANAExpress -s developmentLet's list all running applications in this space:
xs apps

Let's open our application in a browser:

Conclusion
Installing a SAP HANA database with an application server HANA Extended Application Services, Advanced Model and writing your first application was not difficult. In the next article, we will look at a more complex example involving interacting with a SAP HANA database.
Roman Gorbenko, SAP EWM / SAP BASIS consultant