1. Using multiple cursors
It may happen that a programmer needs to enter the same text in several places at the same time.
For example, in the following code, you add an attribute
class=«odd»to the first, third, and fifth elements <li>. And to the second, fourth and sixth elements you need to add an attribute class=«even».
<ul>
  <li>Lorem, ipsum dolor.</li>
  <li>Lorem, ipsum dolor.</li>
  <li>Lorem, ipsum dolor.</li>
  <li>Lorem, ipsum dolor.</li>
  <li>Lorem, ipsum dolor.</li>
  <li>Lorem, ipsum dolor.</li>
</ul>
This is how what should look like in the editor.

Code in the editor
How to solve this problem? I used to do it like this: I entered something like text
class=«odd»in one place, and then copied it to the clipboard and pasted it wherever I needed it. However, after I learned about the ability to work with multiple cursors in VS Code, I stopped doing that. This has greatly increased the efficiency of my work.
In particular, we are talking about the following. To add multiple cursors to the text, you need to hold down a key
Alton the keyboard (in macOS - the keyOption) and click on the places where the cursors should appear. After that, everything that is entered from the keyboard will simultaneously appear wherever there are cursors.
Using multiple cursors
Let me remind you that we are talking about the following keyboard shortcuts:
- The Windows:
Alt+. - MacOS:
Option+.
2. Renaming entities and the Rename Symbol command
Now let's learn another simple trick.
When entering a code or text of a document, you may encounter an error in the spelling of a word. Or maybe you need to apply a new entity naming convention in your code. In situations like this, it becomes necessary to process multiple lines at the same time.
Let's imagine we have a code similar to the one below. We need to replace all occurrences
foowith bar. How to do it?
function foo(){
  // ...
}
foo();
foo();
foo();
If you manually change each line, then this approach has a couple of disadvantages:
- Too much manual labor.
- High probability of errors.
To solve this problem, you can use the context menu command
Rename Symbol.

Using the Rename Symbol
menu command This menu is invoked when you right-click on the selected text. Another way to invoke this command is to press
F2after selecting the text to be edited.
3. Move selected lines up and down
Sometimes you need to move some kind of program code or plain text up or down in the document. This problem can be solved like this:
- Select the text.
- On Windows, we'll use a keyboard shortcut
Alt+to move the text up. To move the text down, respectively, use the keyboard shortcutAlt+. - On macOS, the key
Altis a keyOptions.
This is what it looks like.
Move text up and down
With this approach, you can quickly and easily change the order of text.
4. Snippets
As we write code, we constantly have to enter the same repetitive constructs from the keyboard.
For example, HTML5 files always contain the following basic document structure:
<!DOCTYPE html>
<html lang="en">
<head>
  <title></title>
</head>
<body>
</body>
</html>
And when writing for loops in JavaScript, we always enter the following code snippets:
for(let i = 0; i < ; i++){

}
There are many more similar examples. If you had to enter these pieces of code manually, doing so whenever you need them, it would be very inefficient.
Fortunately, VS Code provides us with a configurable auto-completion mechanism. This is what it looks like.
Autocompletion
Let's talk about how to set up VS Code and acquire what is shown in the previous figure.
▍Creating a config file
To set up autocompletion in VS Code, you must first create an appropriate configuration file. The editor reads this file using the appropriate mechanisms. In order to create this file, you need to go to the menu, as shown in the following figure
Code > Preferences > User Snippets.
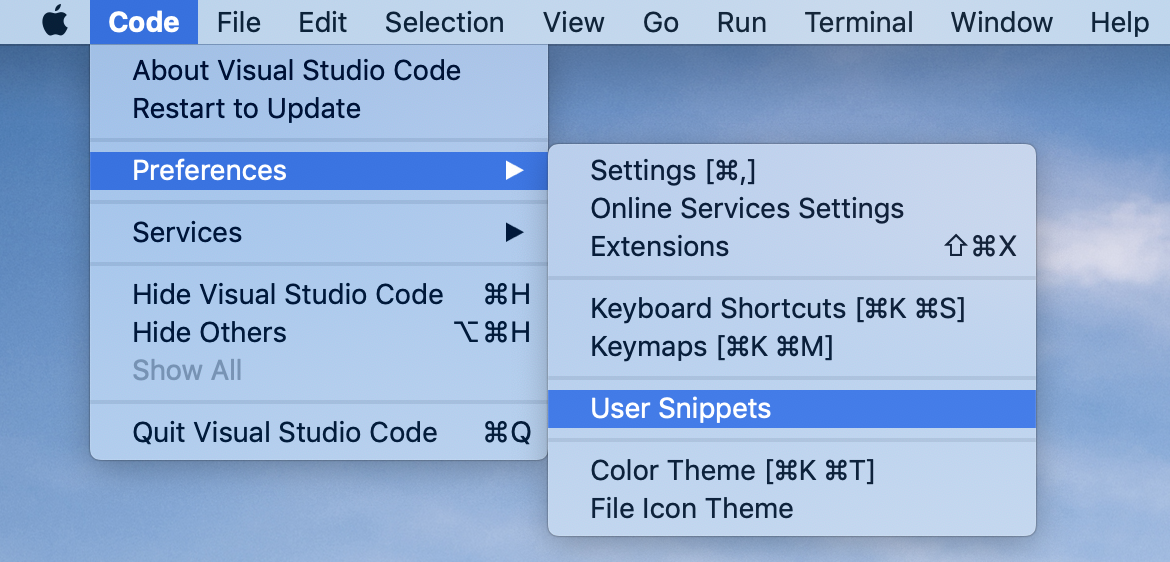
User Snippets Menu Command The
following panel will appear.
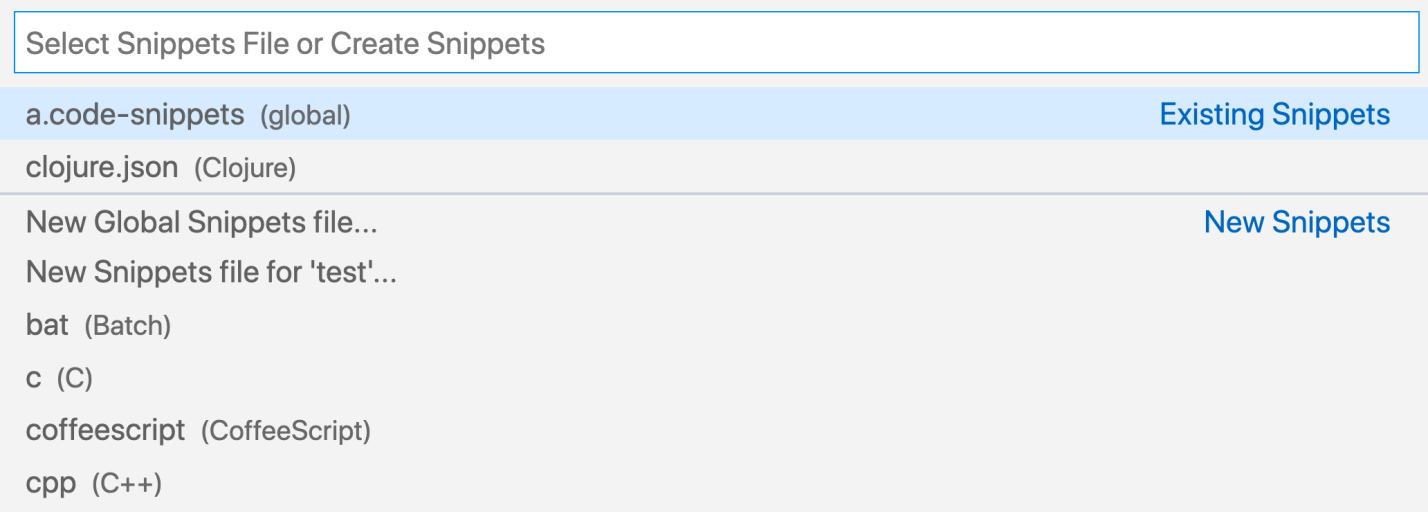
Panel for working with snippets
Here you can select existing configuration files and edit them. You can also create a new configuration file here. We are going to do just that.
Selecting a command here
New Global Snippets filewill create a config file that is globally available. If you select the view commandNew Snippets file for 'test', a file will be created that is available locally in the current workspace.
We will create a local file.
After selecting the command, the
New Snippets file for 'test'system will ask for the file name.

Entering the name of the new
file We have created a configuration file, but so far it is empty.

New empty config file
For your convenience, I have recorded the entire process described above and presented it here as an animated gif file.
Creating a new config file
▍Creating snippets
The config file stores data in JSON format. Here is an example of its content.

Contents of the configuration file
Here is the same, but in plain text:
{
 "html5 autocomplete": {
  "prefix": "html5",
  "body": [
   "<!DOCTYPE html>",
      "<html lang=\"en\">",
      "<head>",
      "  <title></title>",
      "</head>",
      "<body>",
      "</body>",
      "</html>"
  ]
 }
}
First, let's take a look at the field
«html5 autocomplete». The meaning of this field is only to inform the programmer about the purpose of the snippet. You can add anything here.
Let's deal with the field now
«prefix»: «html5». It is intended to describe the abbreviation we set, which the editor expands into a code fragment. When we enter text in the editor html5, the editor automatically replaces it with what is specified in the element «body».
Element
«body»: […]contains the code that the editor should insert into the document instead of the prefix we entered. Since this code can consist of many lines, this field is represented by an array. Each element in the array is one line of code. If we "translate" the construction that we have just considered into the language of ordinary HTML-code, then it turns out that it is equivalent to the following:
<!DOCTYPE html>
<html lang="en">
<head>
  <title></title>
</head>
<body>
</body>
</html>
Now that we have a simple configuration file at our disposal, let's test it.
Testing the configuration file
▍Scope snippets
We made sure that our config file allowed for auto-completion. But it has one drawback. The fact is that the construction represented by the prefix
html5is used only in HTML files. We don't need this construct in JavaScript files.
In such cases, the ability to specify the scope of snippets is very useful. Namely, we are talking about a field
«scope»: «html»that needs to be added to the snippet description.

Limiting the scope of a snippet to HTML files
Let's try our system again. Let's try the prefix
html5in the HTML file and in the JS file.
Testing the snippet in the HTML and JS file
In the JS file, as you can see, the input
html5does not lead to anything special. And this is exactly what we need.
▍Cursor
Let's try the autocompletion again based on the file we created. Let's take a closer look at it. Are there any flaws in it?

Investigation of auto-completion of input You
can see that after inserting a block of code into the editor, the cursor automatically enters the end of this block. But the block of code that is automatically inserted into the document is just a blank that still needs to be worked on. In particular, you need to enter the content of the tag
<title>.
It would be much more convenient to use our input completion mechanism if the cursor was automatically positioned between the opening and closing parts of the tag
<title>.
To do this, we can use a special construction in the configuration file
$0. This is what it looks like.
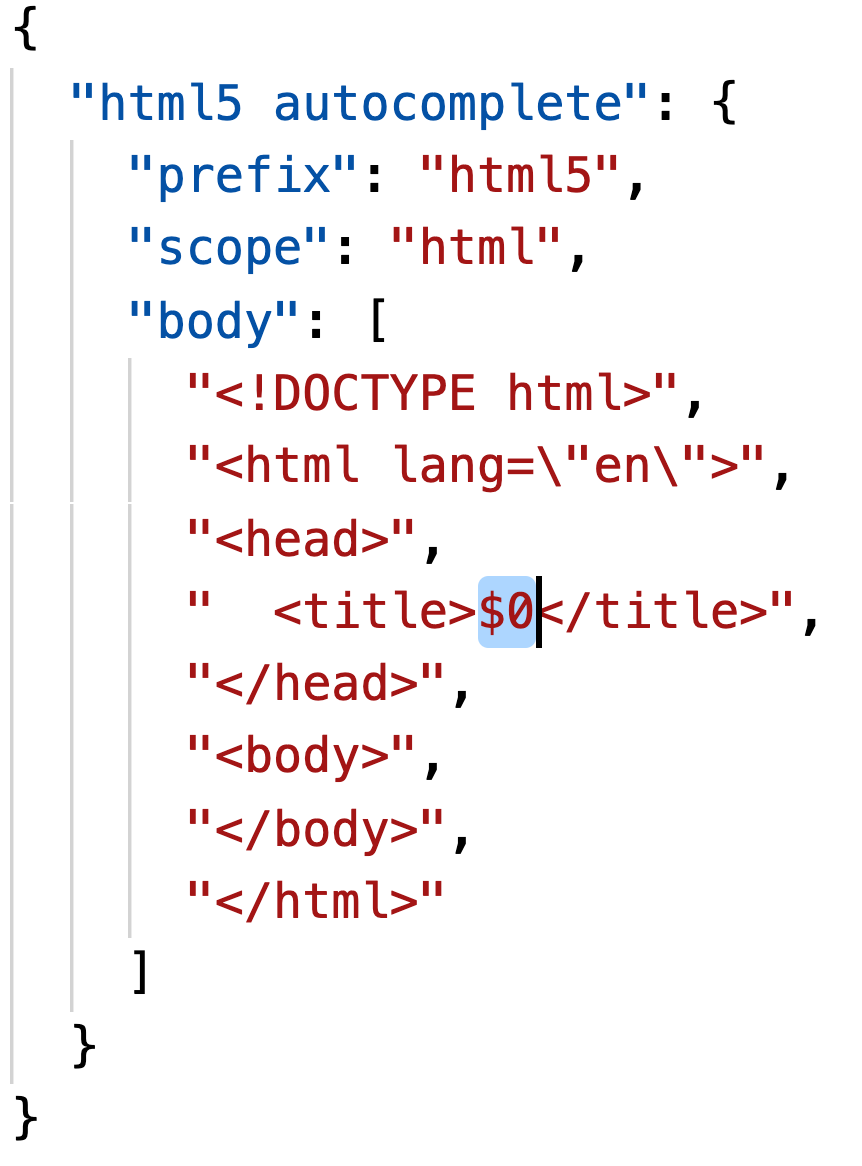
Setting the cursor location
Now, after the code is in the document, the cursor is automatically positioned where it is in the configuration file
$0.

The cursor is positioned at the desired location
▍ Example
Now, to reinforce what we've just learned, let's look at a new example.
We would
forilike the following construction to appear automatically after entering text in a JavaScript or TypeScript file :
for(let i = 0; i < ; i++){
}
And also - so that the cursor would be automatically positioned after
i <.
You don't have to look at the solution to this problem for now. Try to solve it yourself.
In general, the solution to this problem can be represented by the following configuration file:
{
 "for-i loop": {
    "prefix": "fori",
    "scope": "javascript, typescript",
    "body": [
      "for(let i = 0; i < $0; i++){",
      "}"
    ]
 }
}
Here's a demo.
Using the fori snippet
Snippets are used this way. I've talked a lot about this since snippets are one of my favorite features of VS Code. I think it will be useful to you too. Previously, when I came across duplicate pieces of code, I had to copy them from files that already had them. It is a slow process and error prone. And now, thanks to the ability to design such code snippets, the task of entering repeated code fragments has become much easier.
What features does VS Code have to help you in your day to day work?