I think that everyone on Habré probably knows how to set up a site on a VPS using a terminal and an SSH connection. But what if you only have an old tablet at hand and need to deploy a landing page here and now? Is it possible to raise a site simply by clicking in the web interface in ISPmanager Lite? Does it threaten the appearance of gray hair?
We decided to run a stress test and deploy a landing page using iPad 3 and ISPmanager. Details about what came out of this and many, many screenshots under the cut.
Imagine a situation: I am sitting like this on the seaside on a well-deserved vacation after the partial opening of the borders,
Let's assume that I went light, so from the technology I grabbed only an old iPad 3 to read the news and watch movies. Let's try to quickly roll out a one-page site in the field and without a terminal at hand.
Input data, task and first steps to solve it
ISPmanager - web server control panel. It allows you to create and manage an unlimited number of users (user templates). Also create and manage web domains: you can select the php operating mode, install an SSL certificate, quickly install popular cms on a domain, configure redirects and ssl redirects. With ISPmanager, you can manage DNS and databases, edit files directly from the panel, just set access rights, manage the firewall. We did a detailed review of ISPmanager and its capabilities last year.
But we drove to solve the problem, for a start we will order a VPS .
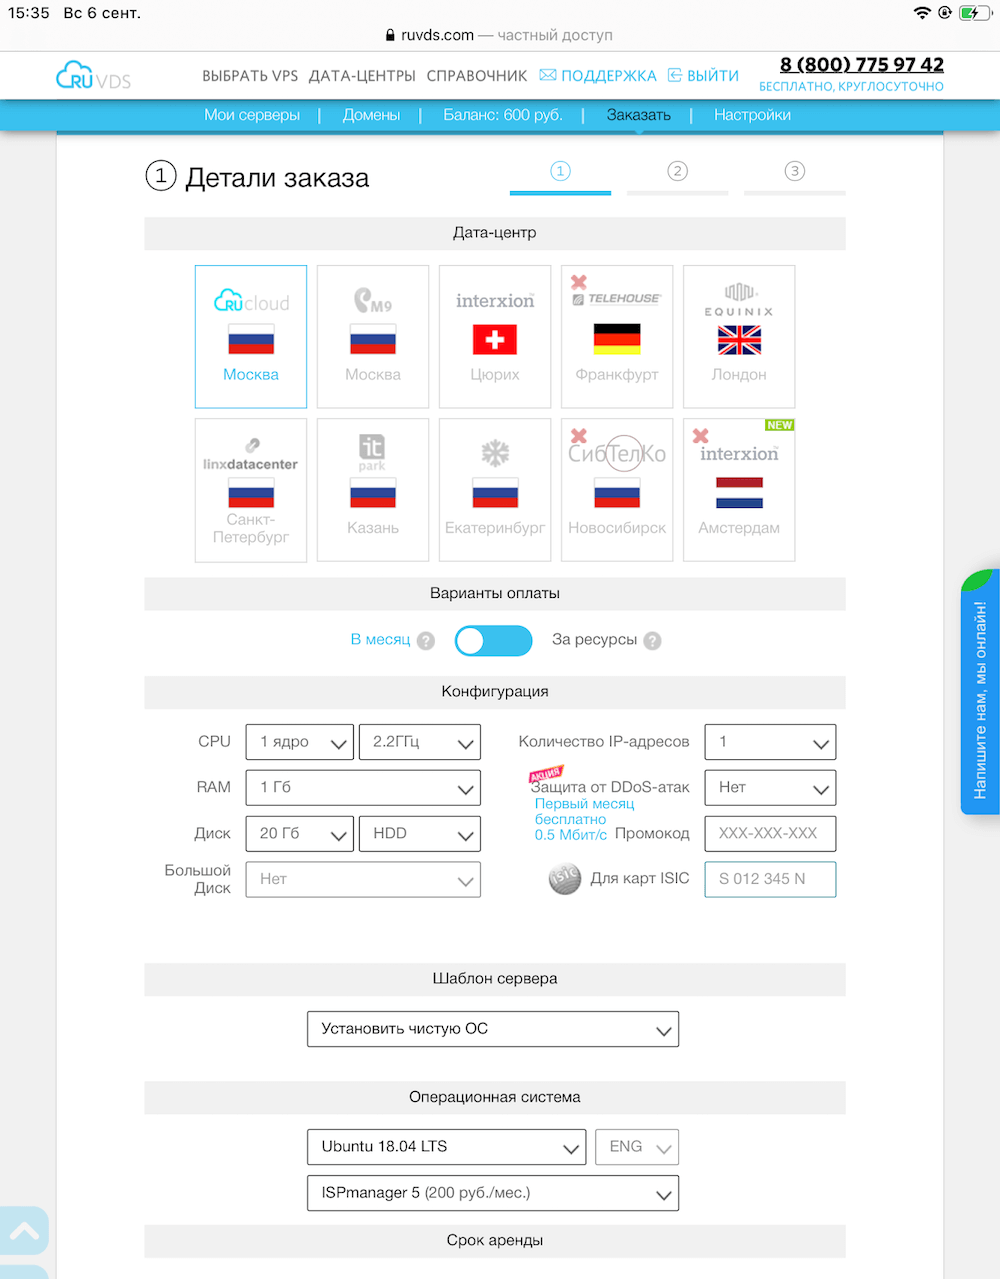
Choosing a data center. There are 2 payment options, a monthly payment suits me to pay for the resources consumed. Putting together our configuration, installation template with ISPmanager and OS.

Now go to the ISPmanager panel.
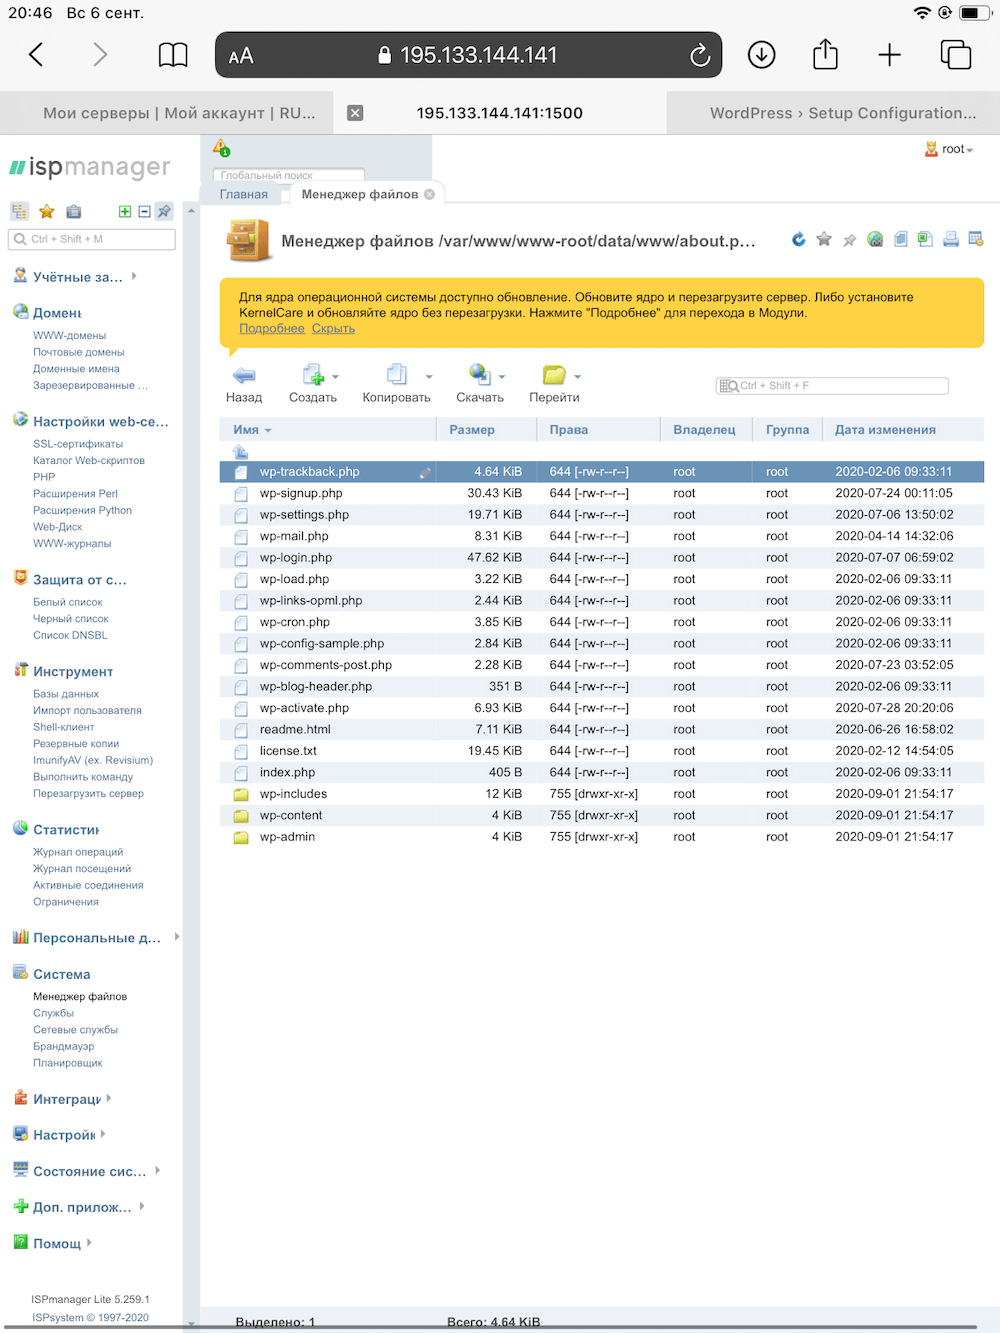
We pass the authorization and agree to the terms of the license. And now we add the WWW-domain, in our case - about.pudng.com. The domain had to be bought in advance and an A-record with the value of the IP address of our VPS server in the DNS editor to which the domain was delegated was added. It's a good sign if an active domain appears in the WWW-domains tab and a directory is created where you will need to upload a web page in the future. Next, check for the presence of the www / about.pudng.com directory in the File Manager tab. In the directory, we will find an HTML page that ISPmanager generated for us.
Go to our domain about.pudng.com and see this:

Note: If your domain does not open, then first of all check the presence of an A-record on the name servers and the correctness of the entered IP-address. If everything is correct, rest assured, DNS records can be updated for up to two days, but for now you can access the IP address directly.
Now, referring to the domain name or IP address, we see the test page that the Apache HTTP server gives us.
Installing WordPress
Let's install WordPress and consider two methods that are convenient to use in the ISPmanager panel.
We create a database for WordPress.
We give the name of the database. We choose the MySQL database server and the encoding, and to avoid problems with encodings in the future, it is better to choose UTF-8. ISPmanager can generate passwords, so click on generation, remember, click "OK" and go to the next step. We have created a database.

Open the "WWW-domains" tab, click on the "Scripts" button, the directory of Web-scripts will open.

In our case, select WordPress and click on the "Install" button. The installation has started.
Step 1. Setting up a working directory and selecting a database server.

Step 2. Confirmation of the license agreement.
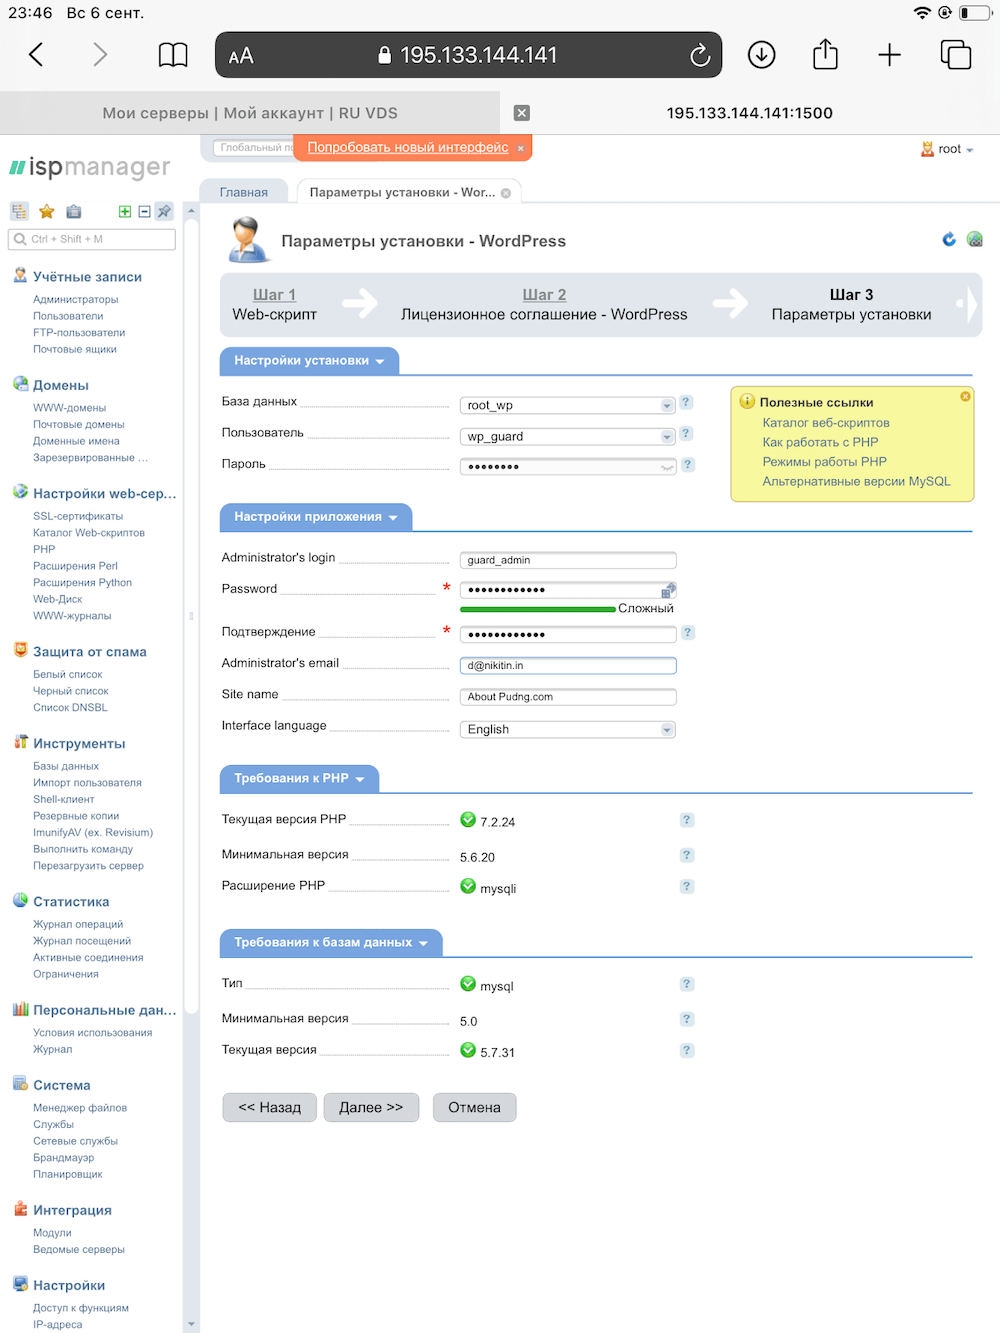
Step 3. In the "Installation settings" section, fill in the data that you entered at the stage of creating a database for WordPress.
Data from the "Application settings" section are intended for further authorization in the WordPress admin panel. Click "Next".
Done. WordPress is installed.
Bonus. Installing WordPress. Method 2
We also create a database as in the first method. And now we will install WordPress completely through the "File Manager".
Download the latest version of WordPress from the official website or copy the download link from the button. Paste the URL or download from a local device. Unpack the archive to the root of the directory.
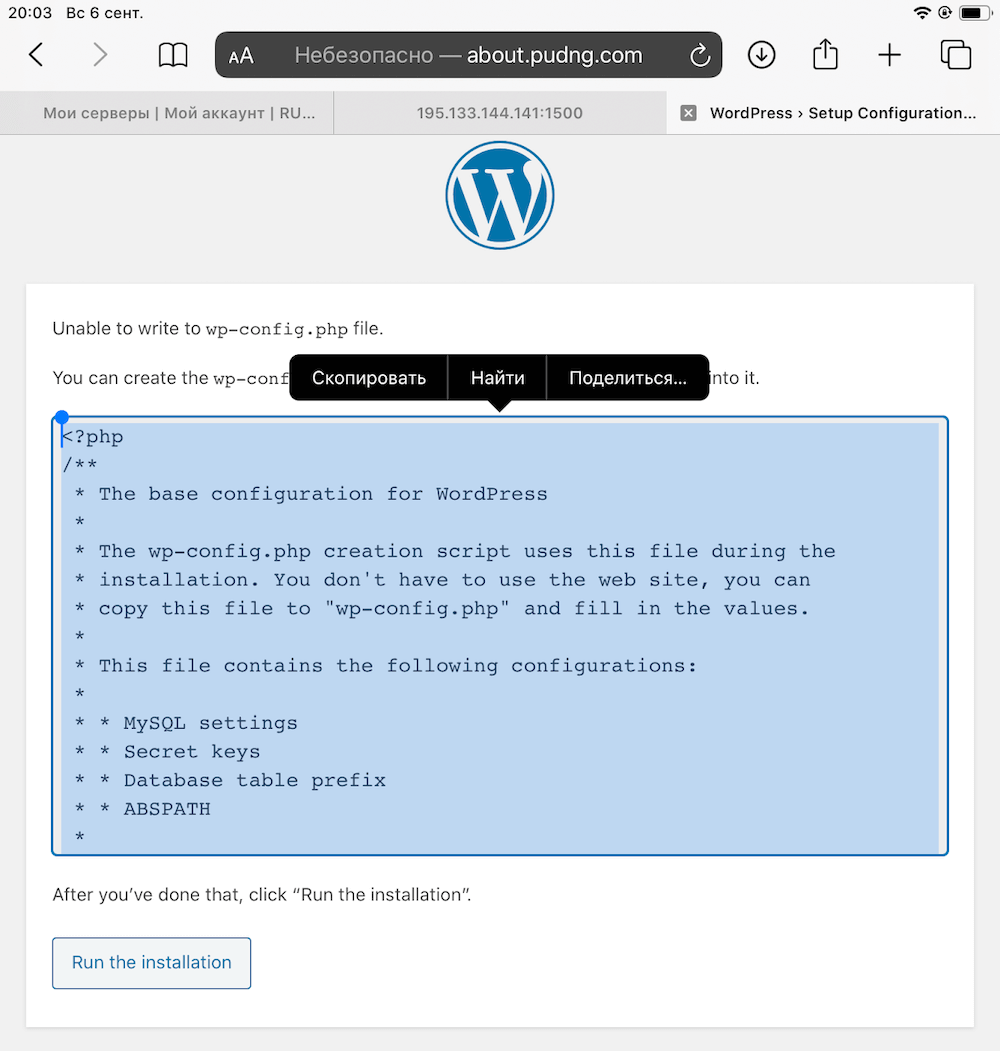
Here, a small blunt happened to me, maybe the sea or drinks affected, or maybe my brain relaxed on vacation. The archive contains the "wordpress" folder, so after unzipping it will be in the root of the directory. You might think you just need to open about.pudng.com/wordpress and set everything up there. Spoiler alert: don't do this.
Such a maneuver leads to the fact that you have to create wp-config.php with handles and add the proposed configurations for connecting to the database there (screen below). Let's say we did so and now our site is configured at about.pudng.com/wordpress/. But we need to see the site referring to the root url. We take and copy all the content from the wordpress directory to the root. And it's not so simple, you need to kill the root directory in the WordPress configurations. So, it is better to stop at this and forget everything, like a bad dream, we went in the wrong direction.
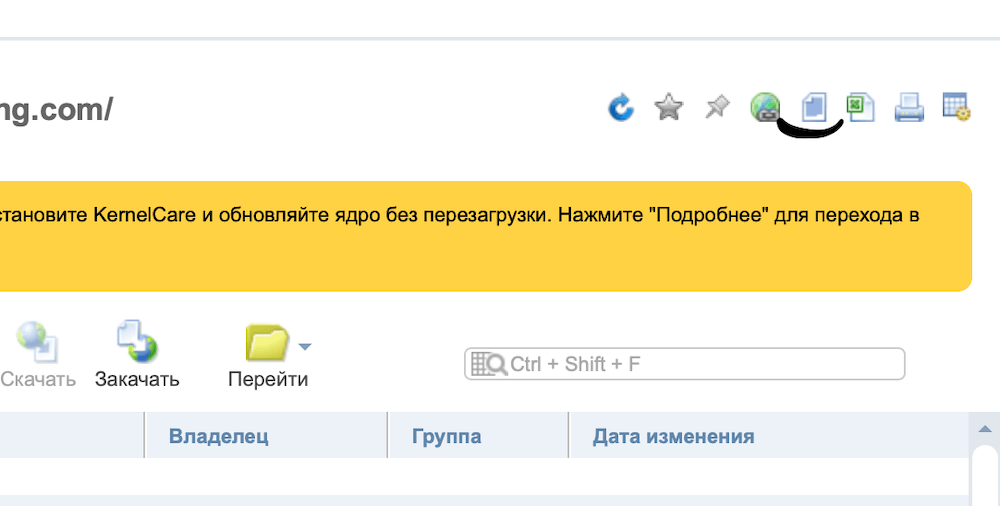
There is a faster and easier way: copy the contents of the "wordpress" directory and paste it into the root. In order not to copy files one by one, there is a tiny "select all" button, which I was looking for for about five minutes.
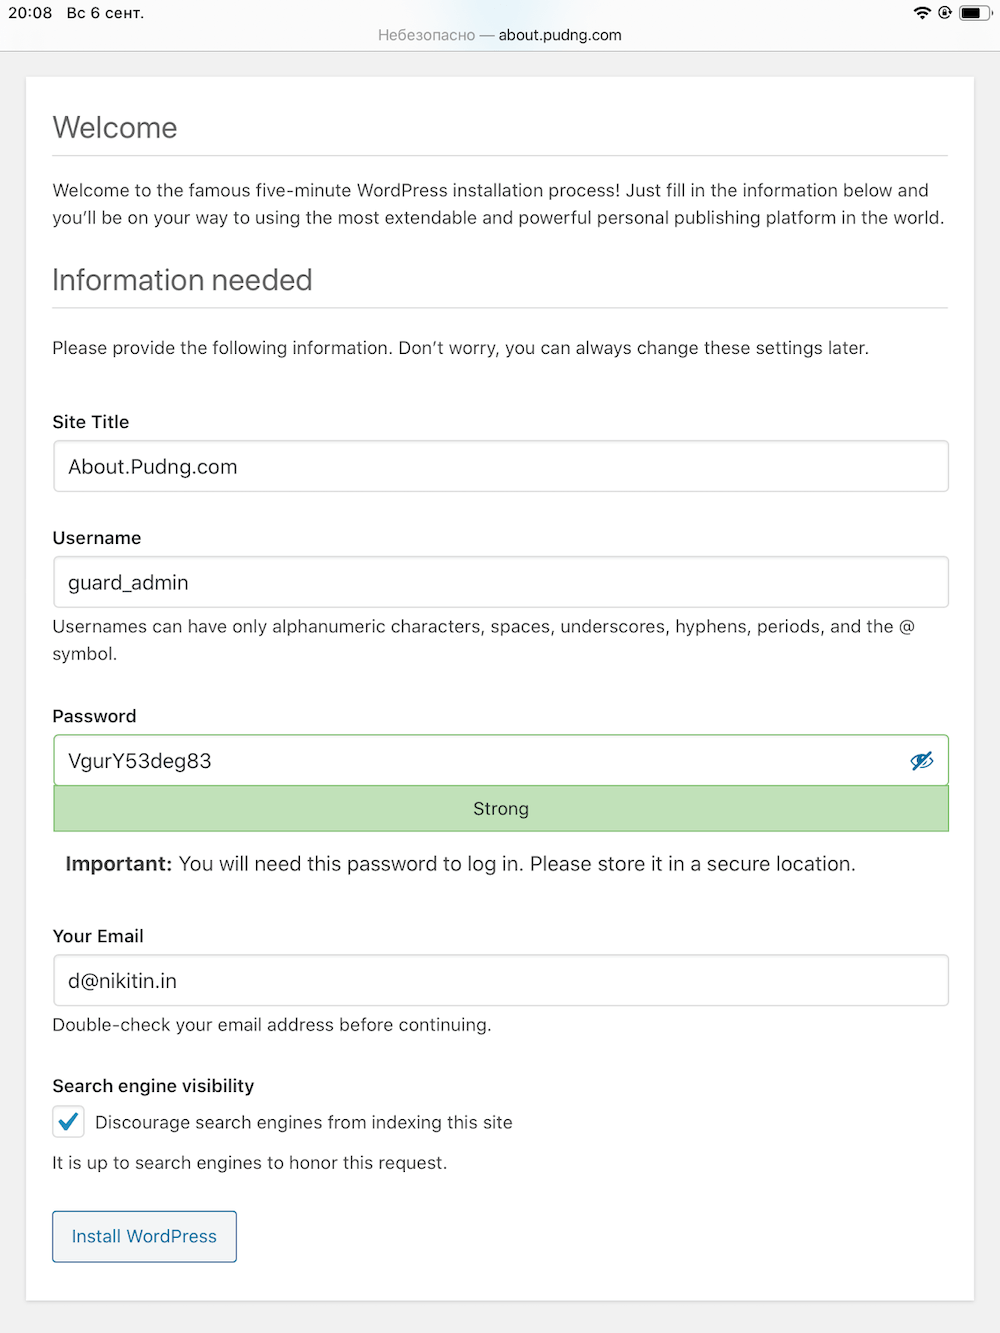
Next, open about.pudng.com and continue setting up in the WordPress interface.
Just like in the first method, we specify the database data and data for authorization as a site administrator.

We also upload the site through the "File Manager" and can administer it through <domain> /wp-login.php.
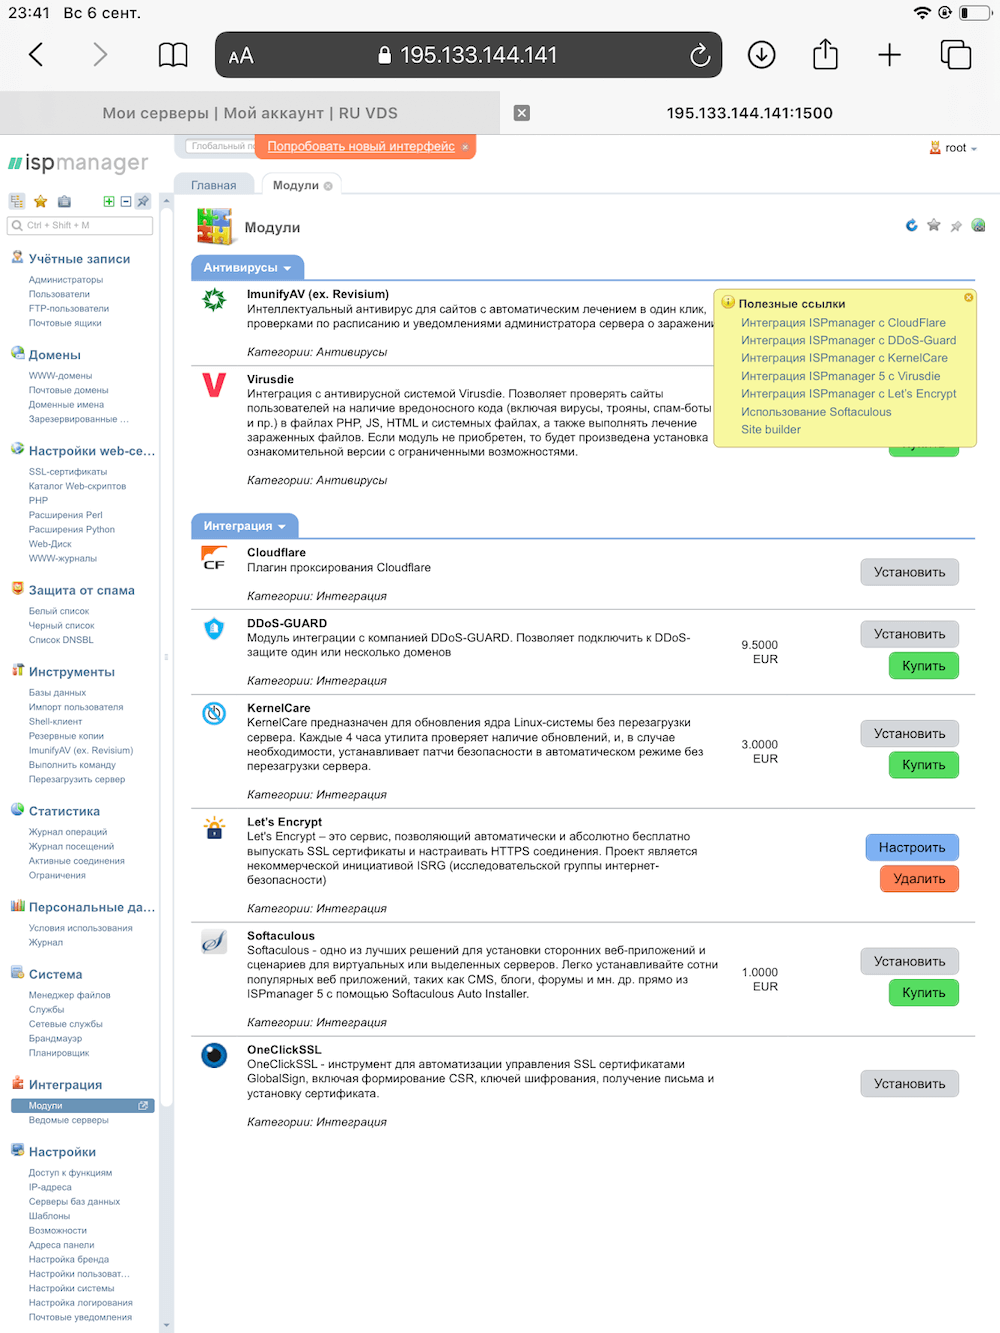
For the site to be accessible via https, you need to connect Let's Encrypt. It is connected in the "Integration / Modules" tab, but this is already a topic for a separate article.
The final stage: deploying the landing page
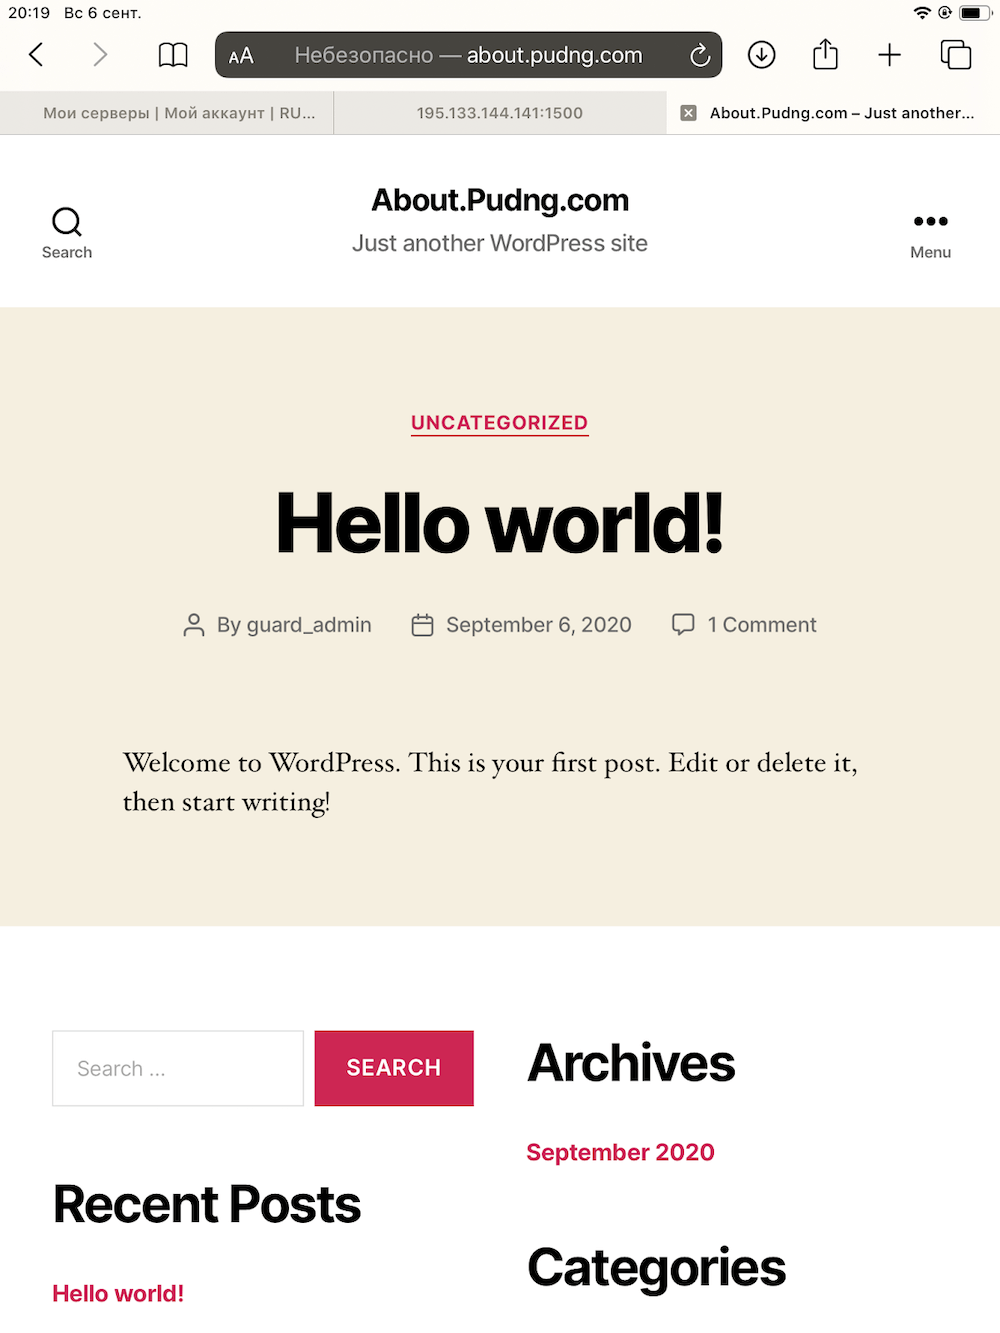
Go to about.pudng.com and see that WordPress has already created a "Hello world!" Page for us.
Domain connected, WordPress installed in less than 10 minutes. It remains to add the one-page site that the developers sent. To do this, we will use the "File Manager".
And voila, this is what we wanted to see! The development landing page is now available at about.pudng.com

PS: The new ISPmanager interface is already available and it looks prettier without losing a good user experience.

Outcome
The iPad 3 in this story came out not so useless device and I have full confidence that even a mobile phone would cope with this task as soon as possible. As a result, I did my little stress test. ISPmanager helped me out and turned out to be a rather convenient tool, despite the fact that the support said that there was no mobile version and it was better to work from a computer.
We at RUVDS are launching a special offer again: a license for ISPmanager Lite as a gift for three months when creating a new server. The promotion will last from September 7 to November 30, all this time you can use the panel for free. In three months, the panel will cost 200 rubles - 150 rubles cheaper than buying directly from ISPsystems.
Having solved a trivial task for an administrator in a non-trivial way, I enjoyed it and hope that my experience will be useful to you. PS From now on, colleagues, do not be afraid to take tablets and old equipment with you on vacation.