In this article I will try to describe in general terms the path of creating a device from idea to implementation of a usable prototype.
My name is Dmitry Dudarev. I am engaged in the development of electronics and really love to create various portable devices. I also love music. Six months ago I borrowed an acoustic guitar from a friend to try to learn how to play it from YouTube lessons and tablatures. It was hard. Either I did something wrong, or I tried badly, or in the society of my ancestors, fine motor skills harmed reproduction. In any case, nothing but the sounds of rattling strings came out for me. My indignation was intensified by the constant detuning of the strings. And people around me for the thousandth time, listening to my curve of Nothing else matters did not give pleasure.
But in these agony, I did not forget about the main rule of the electronics engineer. If something exists, then you can insert a microcontroller there. Or at least make a portable electronic modification.
Idea
The structure of the digital guitar began to emerge in my head.
First of all, I made a list of requirements for the device:
- The device should simulate a guitar with 6 strings and 12 frets on the fretboard
- Should be compact, ideally foldable so you can take it with you wherever you go
- Should connect to all popular axes - Android, IOS, Windows, Linux, MacOS and be defined there as a MIDI device without any drivers
- Battery operation
- The connection should be made wirelessly (but since there will be a USB connector for charging, then let it also be connected via the wire)
- ,
- , ,
- : hummer on, pull off, slide, vibrato
- midi 10
Of course, for mobile platforms, you will need to write an application in which you can select tablature for teaching with LEDs, select an instrument (acoustics, classical, electric guitar with various filter presets, etc.), and play sounds.
In theory, you should get a compact instrument that can be played like a guitar, devoid of analog flaws and equipped with a visual training system.
Sounds realizable.
Analogs
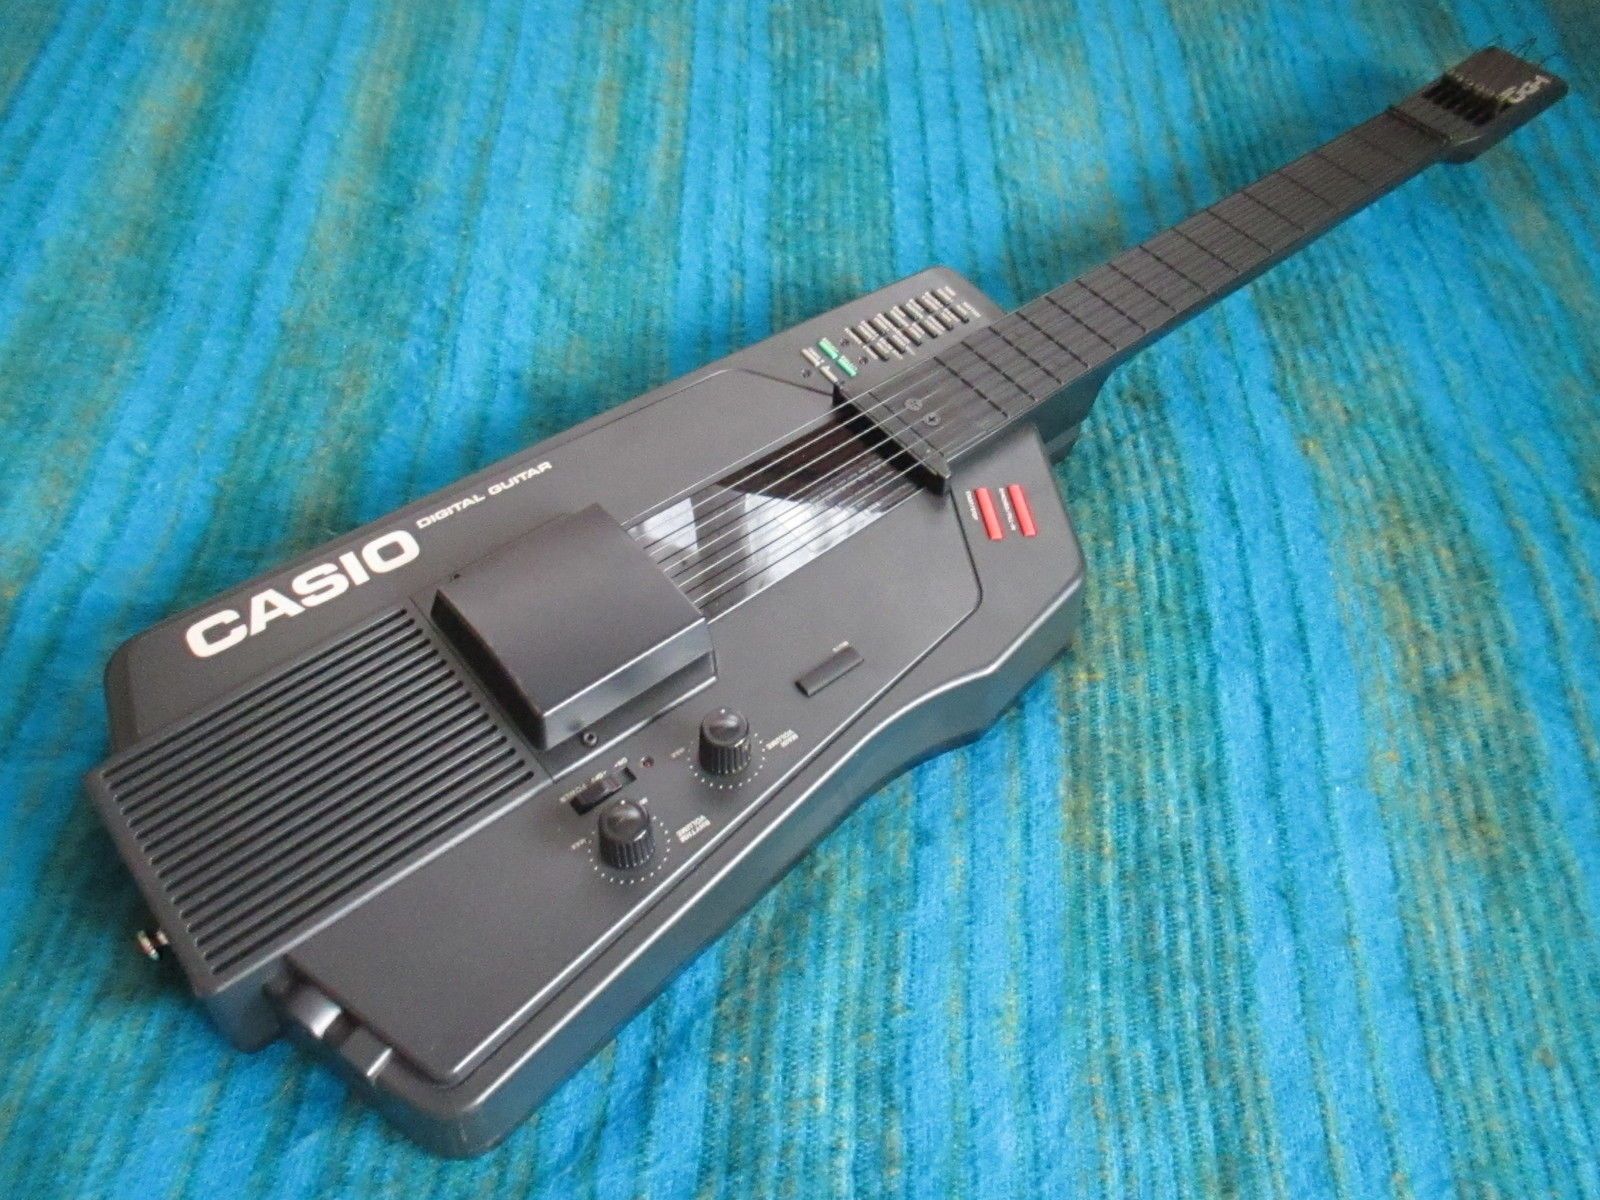
So, first of all, armed with the thought that nowadays it is almost impossible to come up with something new and someone has already done it, I go google. Indeed, it turned out that the first digital guitar was created back in 1981, but due to limited functionality it was not widely used.
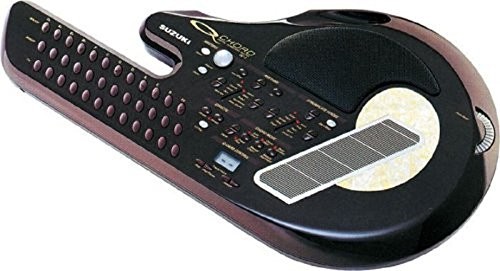
Modern compact midi guitars also exist, but are designed for a more professional target audience, expensive and, most importantly, without the "push the light" mode. There are even exotic options with an iPad instead of strings, or resembling a clam.

So you can start.
Proof of concept
I decided to start with a proof of concept. A minimal prototype in a hurry.
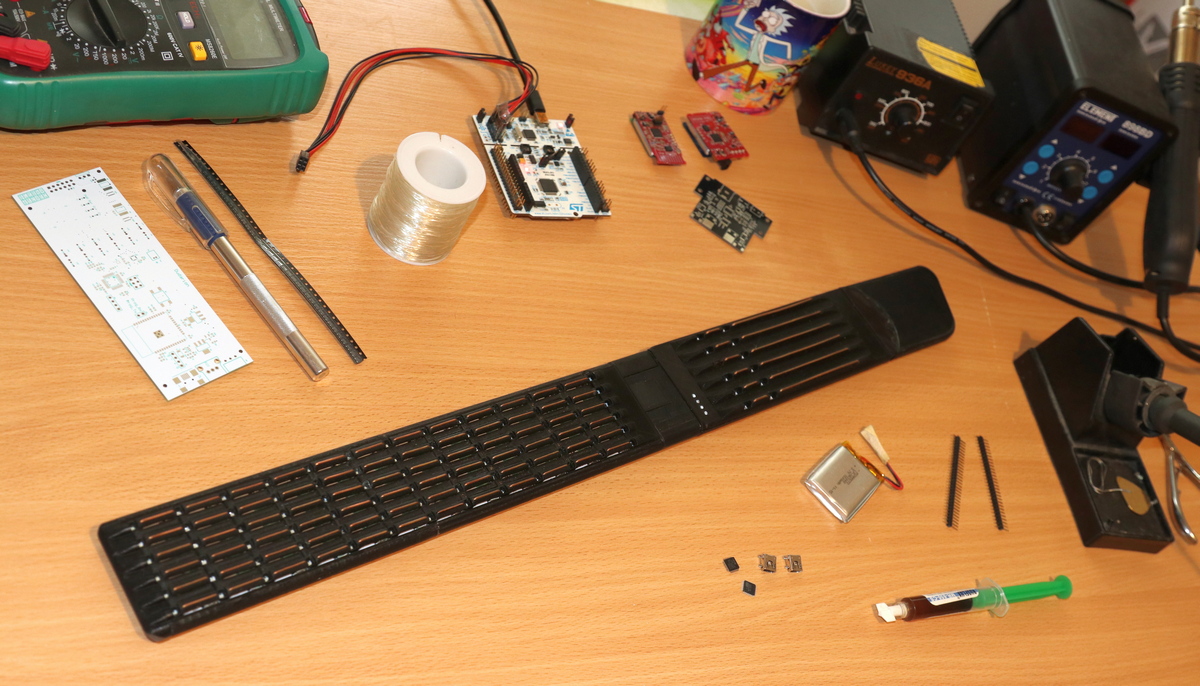
First you need to decide on the element base.
Controller
In my projects I mostly use STM32. They are powerful, cheap, affordable. Chose STM32F042. It has a USB (and, with a special internal 48MHz oscillator so as not to hang up an external quartz), a 32-bit core, and all the necessary peripherals. And all this for less than a dollar.
I decided to leave the wireless connection for the next iteration.
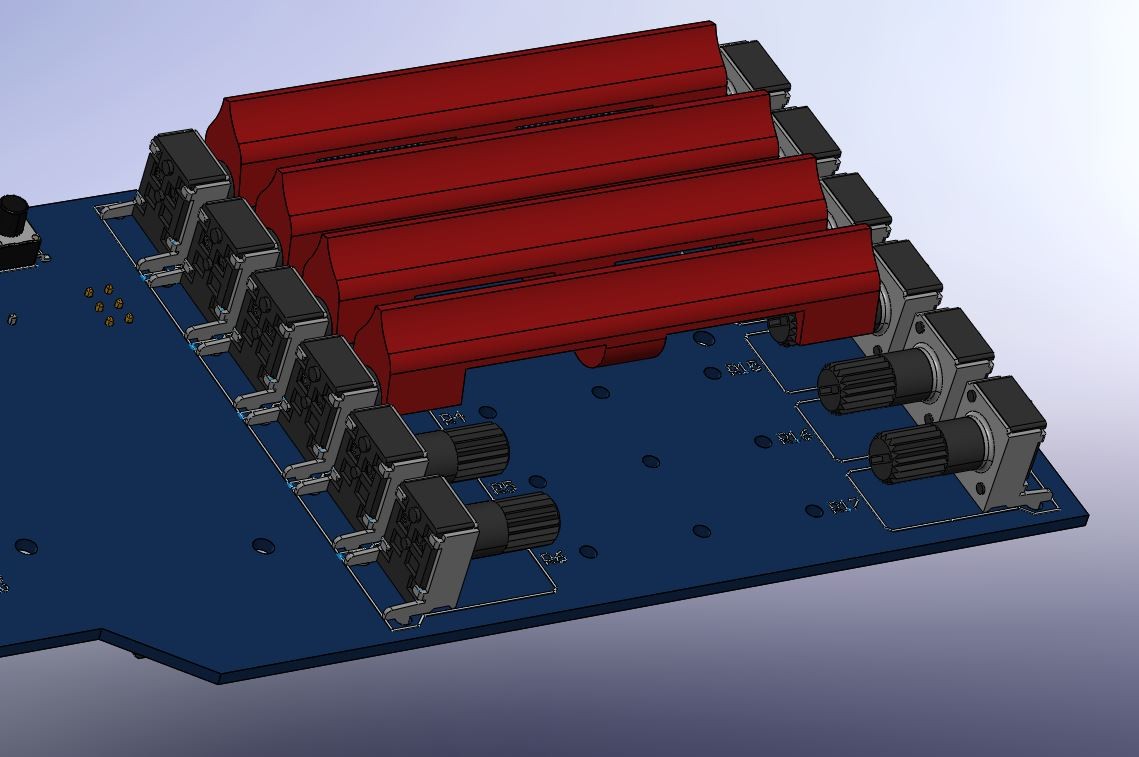
Strings on the deck
As strings I decided to print plastic reeds, fix them on potentiometers with springs and measure the deflection angles.
Modeled in solid and printed to evaluate ergonomics.

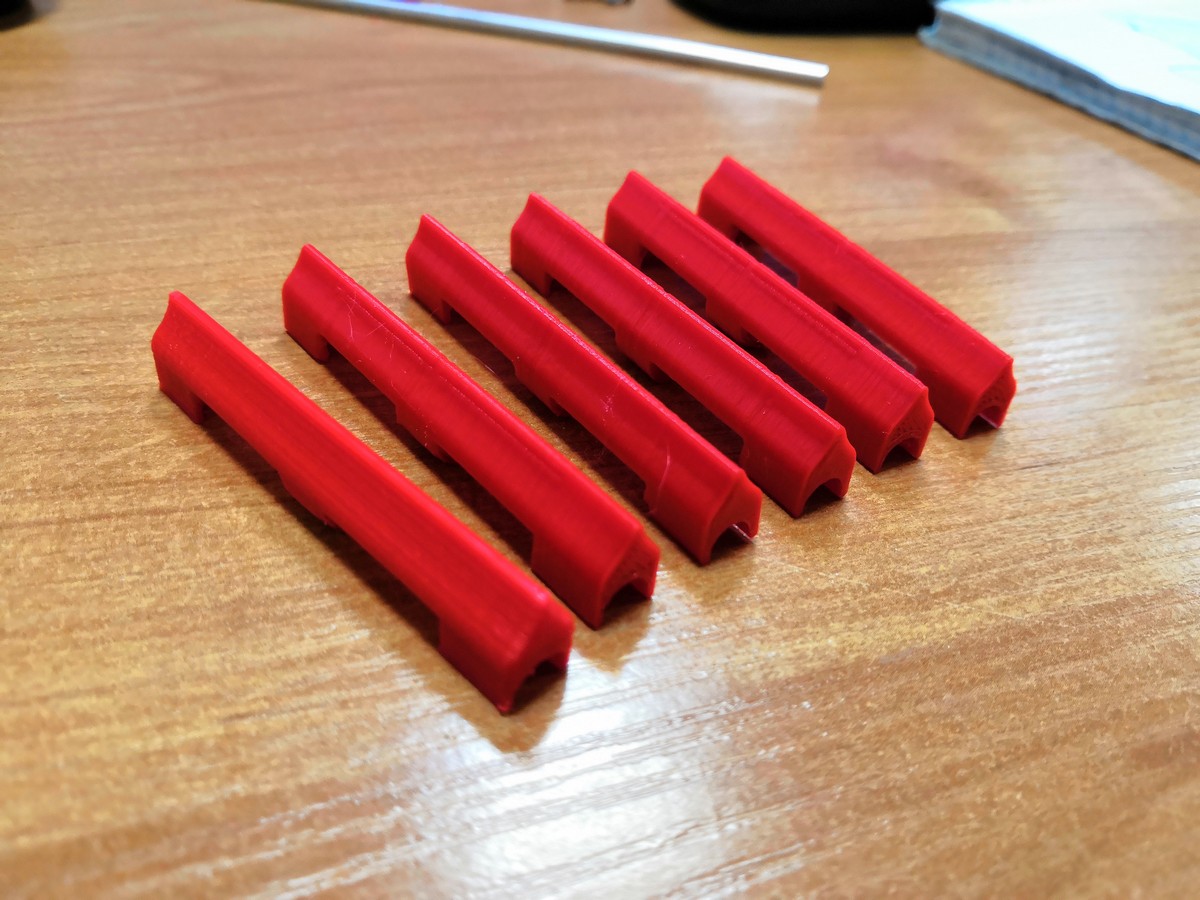
It turned out quite nice to the touch. Should work.
Neck Sensors
The guitar is supposed to have 6 strings and 12 frets. This is a total of 72 sensors on the neck and 6 more on the deck. It would be possible to use a tick button on each element, but, firstly, they click, and secondly, it will not work to implement techniques like slide or vibrato. I would also like to determine the pressing force.
It seems that strain gauges are best suited for this task. They change their resistance depending on the pressure on the working area.
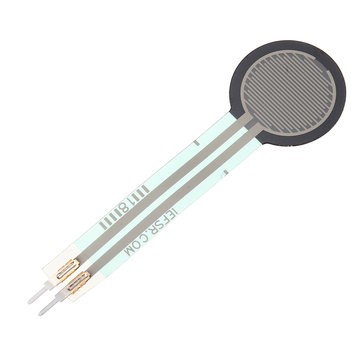
It turned out to be very difficult to find them on sale in the right quantity, and they cost a lot. I had to order on Ali.
ADC
An ADC is needed to read the state of each sensor. There are only a few of them in STM, so you will need something else to poll 78 sensors. External multichannel ADC chips could be used, but they are too expensive. Therefore, I decided to install 5 cheap 16-channel analog multiplexers CD74HC4067 and connect one STM ADC channel to each one.
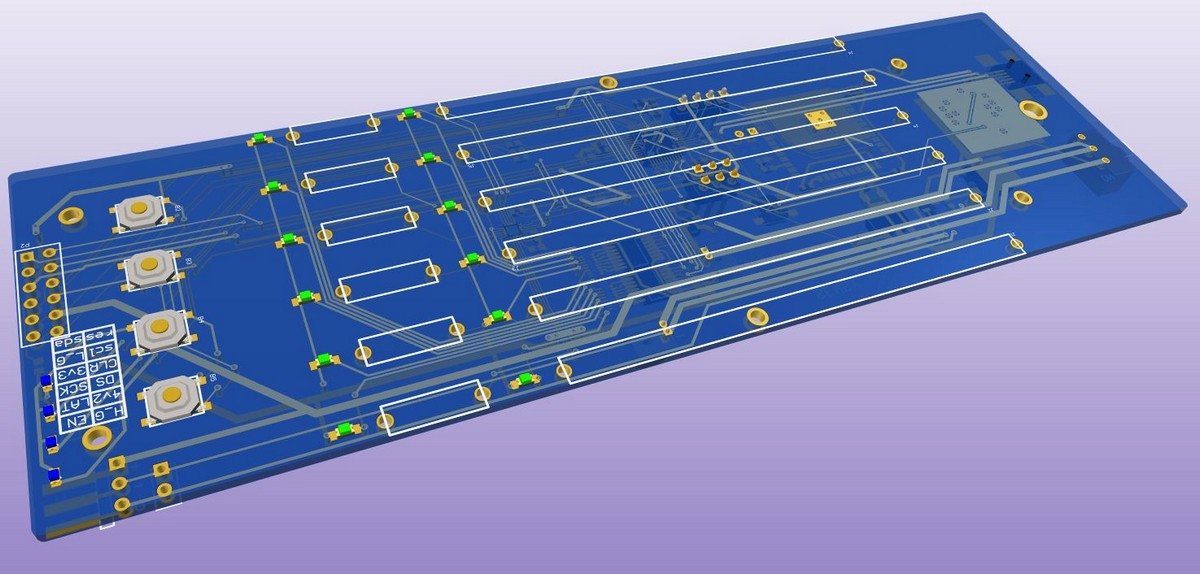
Fee
Until go gages, start wiring board. The sensor leads are long, so we had to overlap them.

Before ordering the printed circuit board, I decided to wait for the strain gages. And, as it turned out, not in vain.
Of the 80 sensors, only a few were working, and then with different parameters.
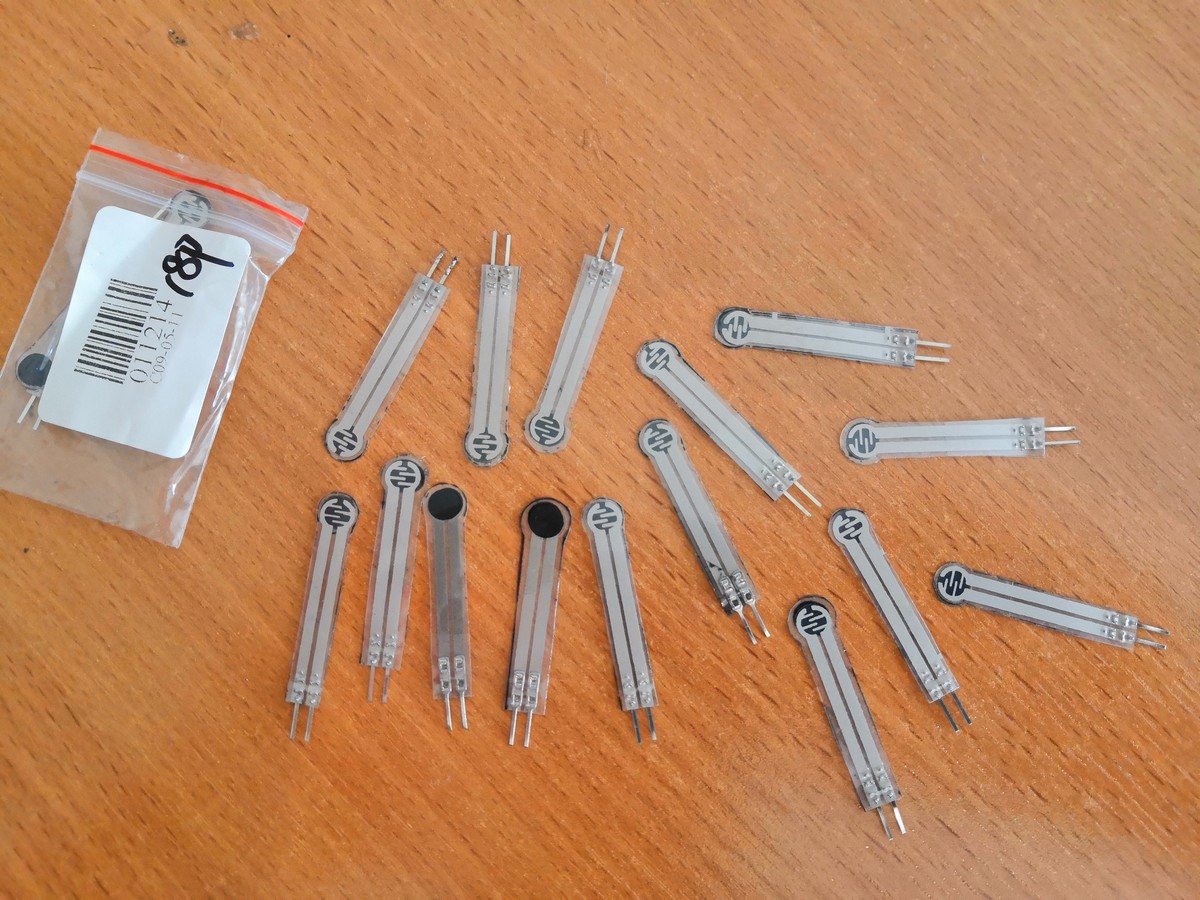
They differ from the image on the seller's website noticeably for the worse.
And what did I expect when buying electronics on Ali? ..
And then it dawned on me.
After all, you can apply another method of detection - capacitance measurement as in touch sensors. It is much cheaper and more affordable. And if you design the mechanics correctly, then you can determine the effort.
Well. I delete everything that was done.

Starting over
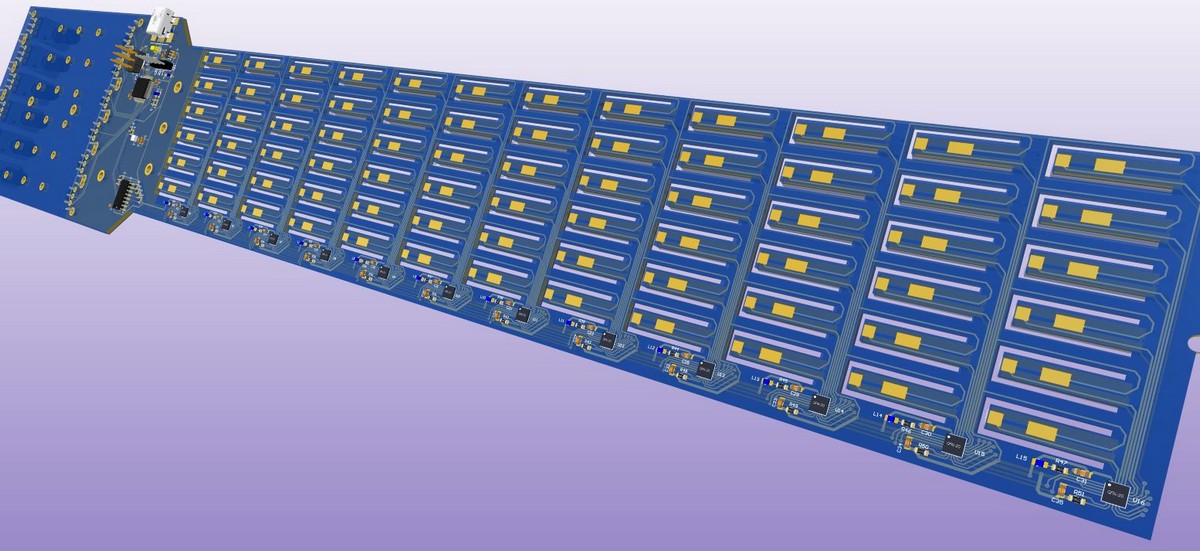
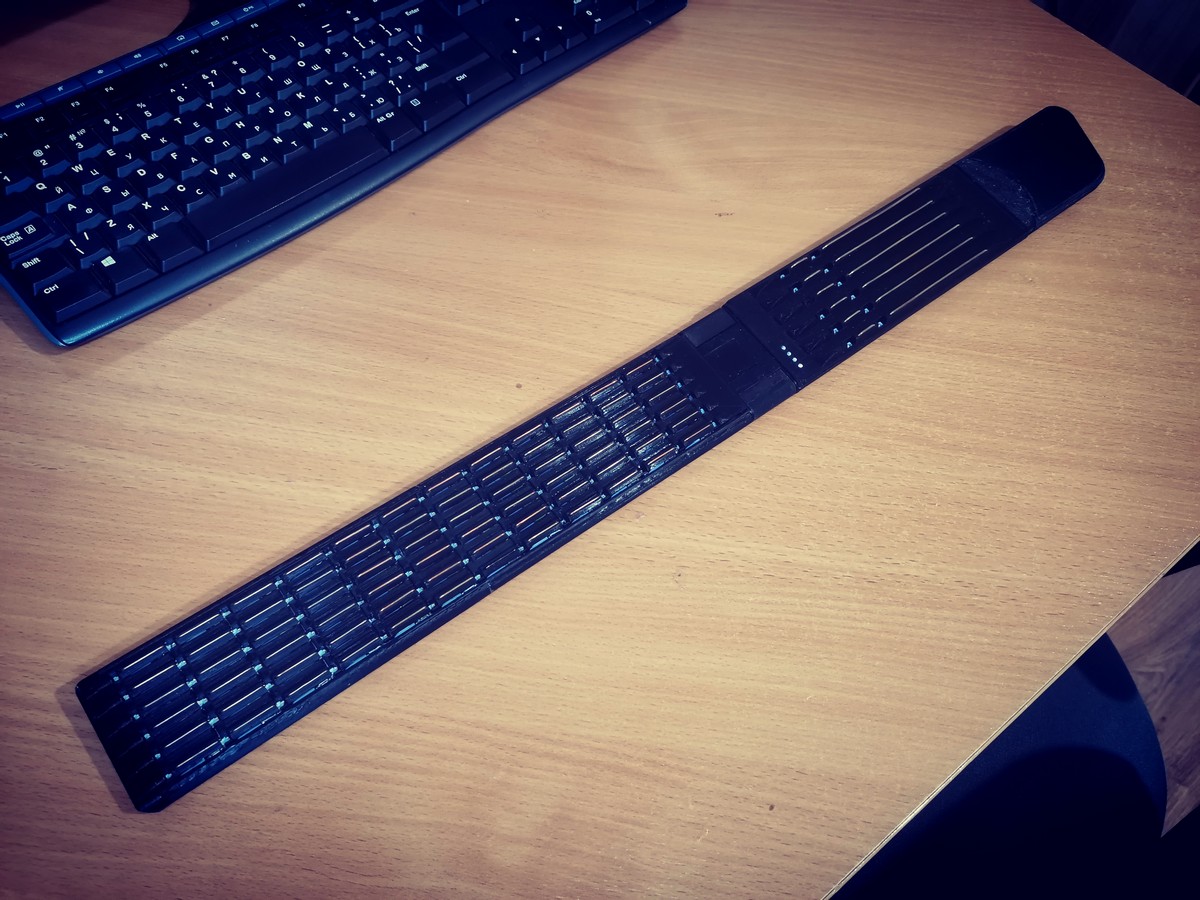
In the new version of the minimalistic proof of concept, I chose cylinders sawn from a 4mm copper rod and soldered to the board as sensor elements.
Now we need to figure out how to measure 78 containers.
Survey of sensors
A little googling, I found out that there are many microcircuits - controllers of touch keyboards. Among them we managed to find a cheap 12-channel general purpose capacitance meter. It measures capacitance on the scale of picofarad units, which should be sufficient for the force measurement circuit that I plan to implement in the next modifications.
In addition, just in case, I hung a seat for a button or something like that on each neck element. And he made cutouts in the board so that you could not only touch the cylinder, but also squeeze it inside. You can experiment with different playing techniques.
The microcircuit is connected via I2C interface and has 2 configuration pins that set the address. Accordingly, a maximum of 4 microcircuits can be hung on one bus. And I need 12. No problem, I distribute them into three groups and connect them to the STM bus through a multiplexer.
Boards
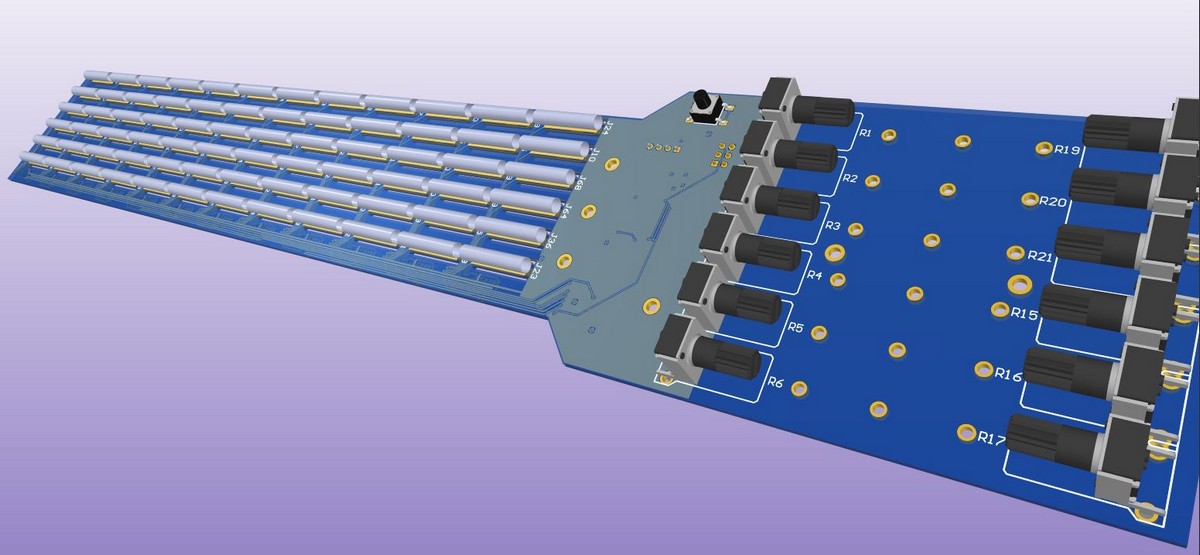
This time we managed to order the board and even wait for its production.
After sealing the kit, copper cylinders and potentiometers, I realized that the design with plastic strings is too complicated. Therefore, for now, I decided to hang the same sensor cylinders on the deck, but more authentic. In order not to alter the entire board, I made a small overlay and connected it to the second I2C STM bus.

The piece of iron is ready. The next task is to make her play.
Software
The plan is as follows:
- Download a virtual synthesizer that can work with MIDI devices and produce guitar sounds.
- Write a firmware that will poll the sensors and transfer the results to the computer via the USB custom HID interface about 100 times per second.
- Write a python program that will receive this data, emulate a virtual MIDI device, generate MIDI packets and send them to a virtual synthesizer.
I decided to figure out how to immediately pretend to be a MIDI device a little later.
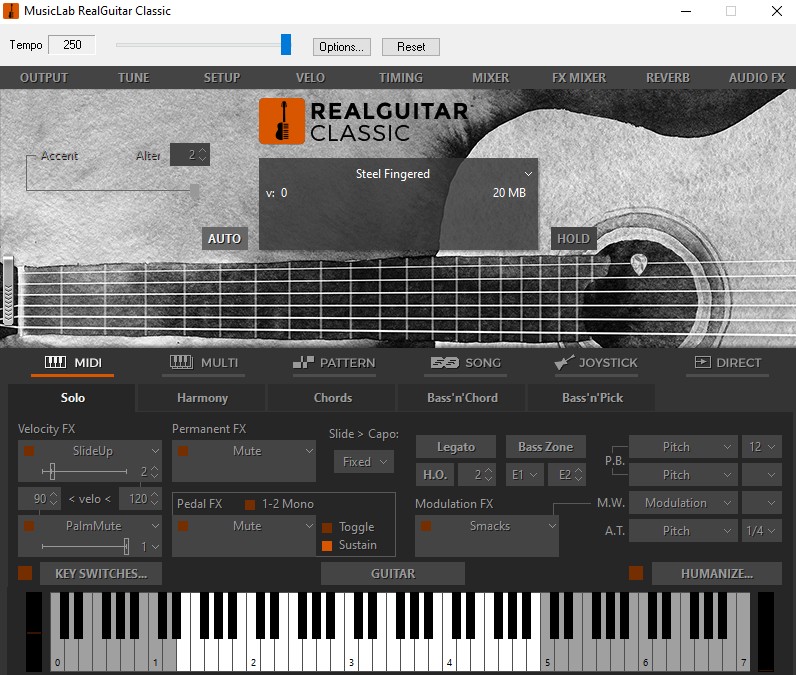
How to reproduce sound?
There are quite a few virtual synthesizers for Windows with MIDI support. I tried Ableton live, RealGuitar, FL studio, Kontakt. I stopped at RealGuitar because of its simplicity and precision for the guitar. He even knows how to imitate the imperfections of human playing - the sliding of fingers over the strings, the randomized parameters of the notes.
Connecting to a virtual synthesizer
For python, we managed to find a mido library that can emulate a virtual midi port, which can be connected to the input of a virtual synthesizer through an external emulator of the “loopmidi” midi cable.

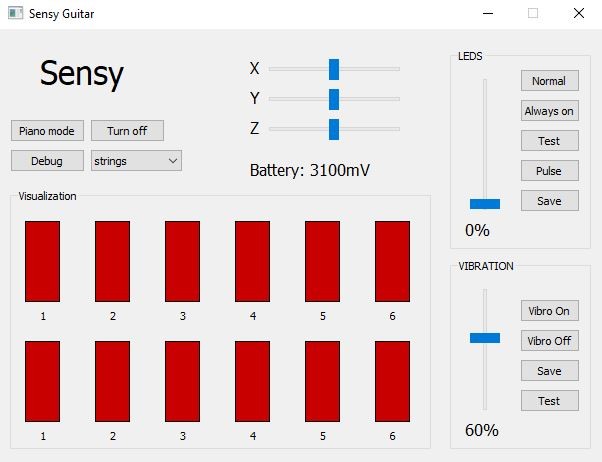
In the program interface, I made a graphical display of the measured capacitance level for each sensor to simplify filter adjustment. Also, for the future, I added controls for LEDs, a vibration motor (I don't know why yet, but it will also be in the guitar), visualization of the accelerometer and the battery charge level.
In order for hitting the guitar strings to trigger the correct notes, all 72 sensors on the fretboard must be mapped to the appropriate note.
It turned out that out of 72 elements at 12 frets, only 37 are unique notes. They are arranged according to a certain structure, so instead of building a large table, it was possible to derive a simple equation, which gives the number of the corresponding note by the sensor number.

Test
It looks like everything is ready for the first test. I was too lazy to saw the rods and solder all 12 frets, so I limited myself to the 8th. Moment of Truth:
IT'S ALIVE! The viability of the concept has been confirmed. Fortunately, there was no limit! But you can't relax.
The next step is to add LEDs, accelerometer, vibration motor, battery, wireless, case and the ability to work without drivers or midi emulation programs on all popular platforms.
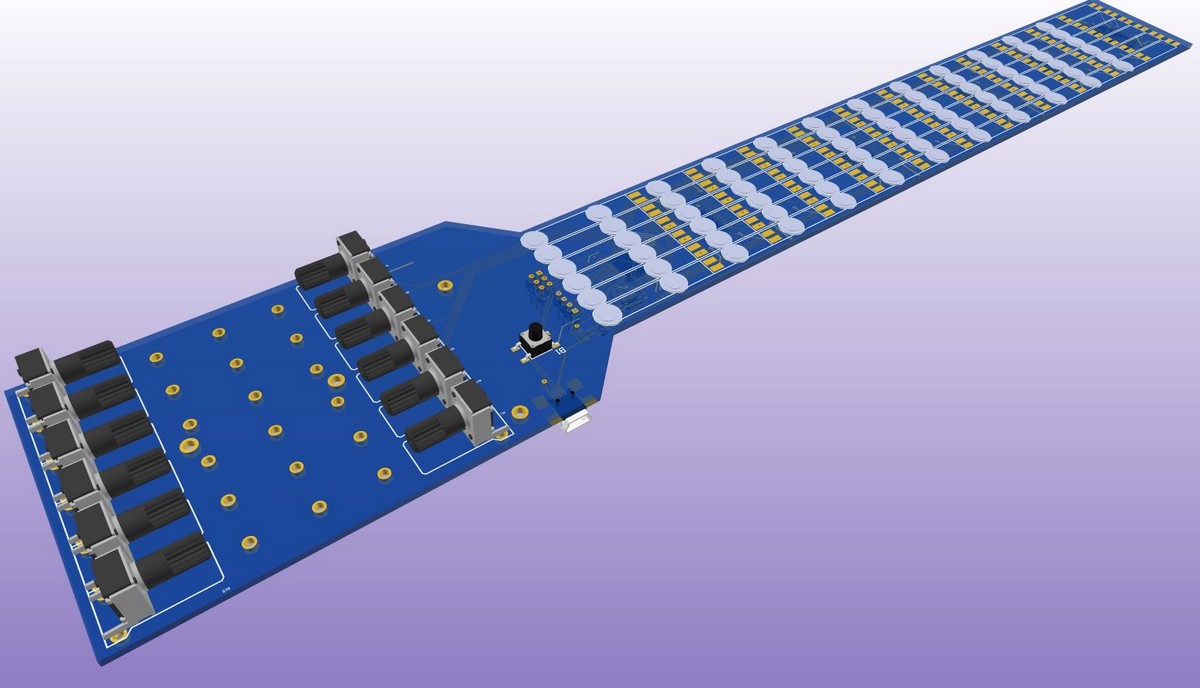
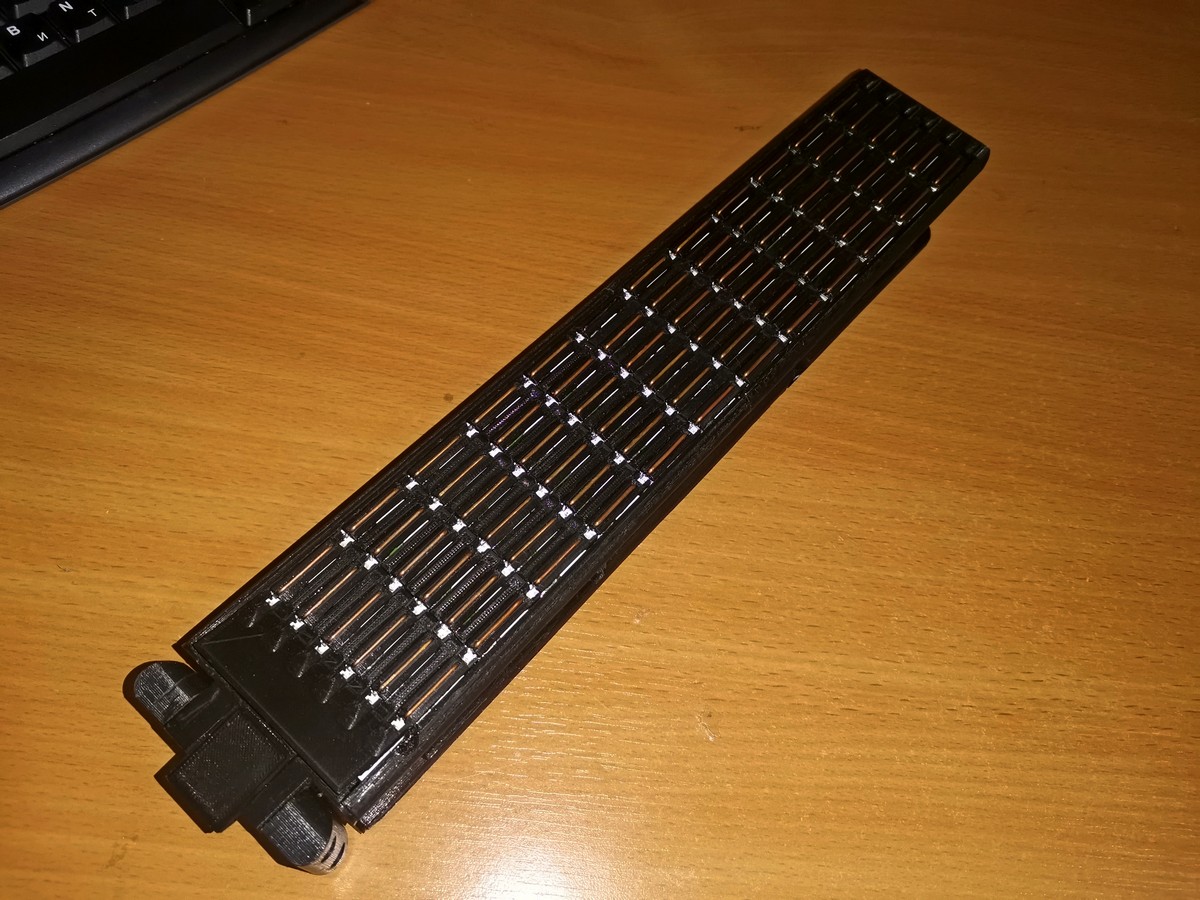
LEDs
To connect 84 LEDs, I chose the simplest daisy chain of 14 8-bit shift registers. It is convenient to connect them to the SPI MOSI pin of the STM and send a data array via DMA without the participation of the kernel.
Accelerometer
I didn't have any special requirements for the accelerometer, so I took the simplest LIS3D. With it, the guitar will determine its tilt relative to the horizon, which will allow modulating various sound filters as you play with your hand movements.
Wireless
For wireless data transmission I decided to put ESP32. It supports various Bluetooth and WI-FI protocols, there will be something to experiment with (at that time I did not know yet that in my case there was only one correct way to connect).
Body The
body must be foldable, so the electronics of the deck and neck must be split into two boards and connected with a ribbon cable.
The power will be turned on when the body is opened due to the proximity of the magnet on the neck to the Hall sensor on the deck board.
Getting started
Much work has been done experimenting with various tactile neck designs and LED diffusers. I wanted the entire surface of the element to shine evenly, while maintaining the ability to detect touch and press buttons.

I turned to a friend who is professionally engaged in industrial design. We came up with the design of the guitar bending unit, after which he designed and printed a prototype body.

It seems that everything is thought out, you can start wiring the board.


MIDI device
In the new version, first of all, I wanted the guitar to be detected as a MIDI device without any extra programs when connected via USB.
It turned out that this is not so difficult to do, all the specifications are on the official website usb.org. But all the algorithms that were executed on the side of the Python application had to be rewritten in C in the controller.
I was surprised that it immediately worked on all devices. Windows 10, MacOS, Debian 9, Android (via USB adapter). Just plug in the wire and a MIDI device named "Sensy" appears in the system and is recognized by all synthesizers. I have not been able to test with an iPhone yet. no adapter. But it should work the same way.

Wireless interface
The next challenge is to get things done wirelessly.
I was too lazy to google right away, so I spent several days testing various wireless interfaces. I dismissed BLE right away, because in my head "Low energy" was strongly associated with low packet rate. Tried WI-FI in client mode, WI-FI in hotspot mode, Bluetooth in SPP mode, etc. Everywhere there was the same problem - a huge delay (more than 100ms per eye) and uneven packet arrival in time. This made the game impossible.
I was about to give up and make a separate dongle that would stick into the USB of a mobile phone or computer and receive data from a guitar via a custom radio.
But then I accidentally stumbled upon the specifications of the new versions of the BLE protocol and saw that the minimum connection interval is 7.5ms, which fits perfectly into my requirements.
Moreover, it turned out that there is a BLE MIDI protocol, which is supported by all new operating systems and works without any drivers just like USB MIDI.
The only problem was that such a low connection interval and BLE MIDI in general are only supported by relatively new platforms. The details remain to be seen, but tests with the devices available to me were successful.
Some new iPhones even come with a pre-installed virtual Garage Band synthesizer capable of producing quality guitar sounds (if not, you can download it from the App Store for free).
Firmware
Having written all the minimum necessary functionality, I rested exactly on the size of the STM flash. Only 168 bytes remain free. Obviously, the silicon gods favored me, so I am going in the right direction.

It would be possible to go deeper into optimizing the code and significantly reduce the amount of memory occupied, but it will be easier in the next version to use a thicker controller, which costs 5 cents more and does not waste time. Moreover, you never know what other features you want to add.
But the minimum functionality is not enough, you still need to work with the techniques of the game. First of all, I want to implement slide. This is when you start to play a note with a certain clamped fret and slide your hand along the neck, jumping from fret to fret.
I've already had some fun with USB, so you can comment out all the code associated with it and free memory. You can also test wirelessly:
With all LEDs on, the guitar can be used if you get lost in a dark cave.
What are the disadvantages of this design?
- On the sensors, pressure is not measured anywhere. This entails three problems:
- There are constant random strikes of adjacent strings on both the deck and fretboard. This makes the game very challenging.
- All notes played are played at the same volume. Most of the subjects do not notice this, but I would like to play more close to a real guitar.
- Inability to use hammer on, pull off and vibrato techniques
- Single color LEDs. This limits the clarity when playing tablature. I would like to be able to indicate different methods of the game in different colors.
- . – . , , , .
- . , , , .
- . , .
.
I am moving to the STM32F07 series controller. It already has 128KB of flash - that's enough for any functionality. And even for Easter eggs.
Using ESP32 in the final version of the guitar would be too bold, so I went looking for something more Orthodox. The choice fell on NRF52 in terms of accessibility, availability of documentation and site adequacy.
Of course, three major innovations will also be implemented:
- LEDs are now RGB,
- there will be force measurement on each sensor of the bar (tact buttons are no longer needed),
- the strings on the soundboard will move.
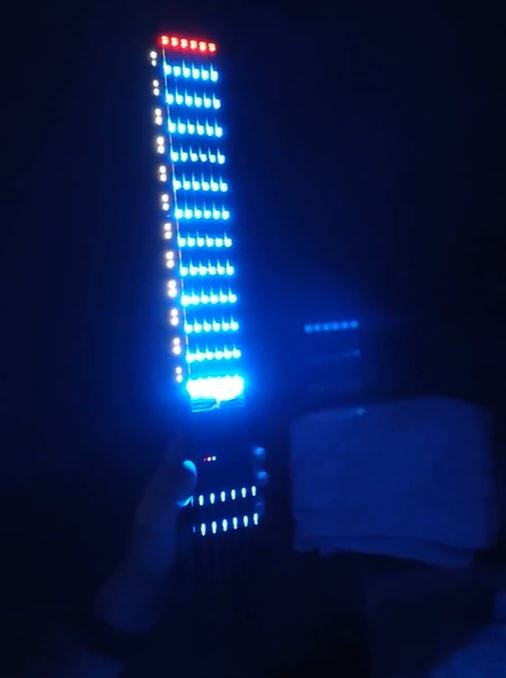
At the moment, the deck board looks like this (I left the ESP footprint just in case):
The project is called Sensy and is currently in active development. There is already complete confidence that all the planned functionality will be implemented, so a decision was made on further development.
We are in St. Petersburg, now the team consists of two people: I deal with the technical part, my partner - marketing, finance, legal issues.
If among the readers there are Jedi in the field of hull design or mobile development who want to join the project - please write to me wherever and whenever you want.
Who is interested in following the news of the project - leave mail in the form on the site and subscribe to social networks.
I really hope for feedback from the Habrasocommunity with comments and suggestions!
A funny episode from the development process
NRF52, UART. . , , , .
– «N» ascii. 0x4E, . – «O». . baud rate? , – «N». , «NON GENUINE DEVICE FOUND».
NRF- ? . , ? - . , NON GENUINE DEVICE?
, , ftdi , USB-UART , . , . , .
.
– «N» ascii. 0x4E, . – «O». . baud rate? , – «N». , «NON GENUINE DEVICE FOUND».
NRF- ? . , ? - . , NON GENUINE DEVICE?
, , ftdi , USB-UART , . , . , .
.
Thank you for attention!