
Hello dear friends! Today I will tell and show you how a sinus lift is performed with one-stage implantation.
ATTENTION! -Uwaga! -Pažnju! -Attention! -Achtung! -Attenzione! -WARNING! -Uwaga! -Pažnju!
Below will be presented photos taken during the operation! With types of teeth, gums, blood anddissection. For the faint of heart, please refuse to read this article.
Consultation and examination
In addition to visual examination, it is necessary to make an X-ray of the jaws. In this case, a simple OPTG (Panoramic dental image) will not be enough. You will need a CBCT (Cone Beam Computed Tomography).
What is the difference?
OPTG (Orthopantomogram) - an overview image of the dentition. It is planar, which means that each detail of the image is superimposed layer by layer on top of each other. Therefore, it is impossible to consider the object of research (in particular, the place of the planned operation) in all planes (at a different angle or other projection).
CBCT (Cone Beam Computed Tomography) - a 3D volumetric image, on the contrary, gives us this opportunity.

Below is a classic example of a long-term absence of the sixth tooth in the upper jaw on the left:
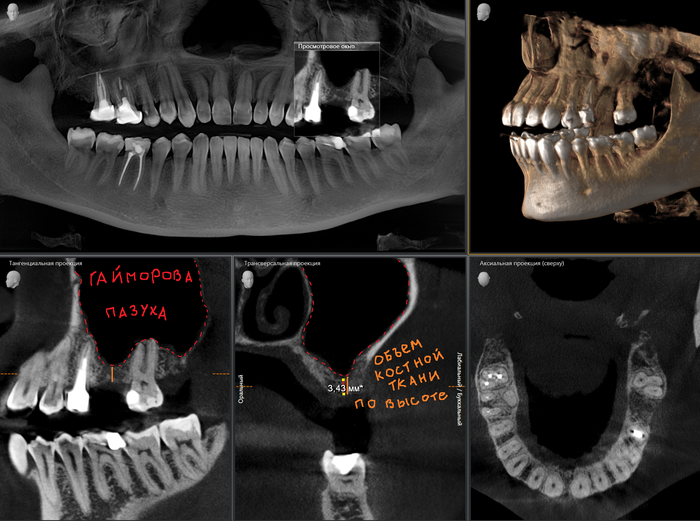
Often the conditions allow for sinus lifting and implant placement in one visit. The main thing is to carefully remove the causative tooth, preserving the surrounding bone tissue as much as possible. I am often asked: "Can I have a tooth removed in the clinic / under insurance (underline the necessary), and then come to you for implantation?" Of course you can! But here's the bad luck: the tooth can be removed carefully, as I wrote above, or you can unpack everything so that later no bone grafting will help. Disinterested doctors working on the stream, who do not care whether you will have an implantation or not, no matter how it sounds, do not stand on ceremony. Their goal is to remove a tooth and shout "next." Like you, another 50 people are sitting in the corridor and waiting for their turn to be "ripped out". Of course, there are a lot of those who will do everything carefully, but take risks in order to save 3 kopecks, well, tacoe ...
In the case of single-rooted teeth, the implant is installed bluntly into the socket of the extracted tooth, and in the case of multi-rooted teeth, the installation is performed in the center, into the partition between the roots.
Example with a three-root tooth:
As we can see, the septum in this area is about 3 mm. This volume is not enough for the placement of the implant of the optimal length for the chewing tooth, therefore, it must be increased.

I never offer "ultra-short" implants in order to avoid a 20 minute sinus lift.
Because:
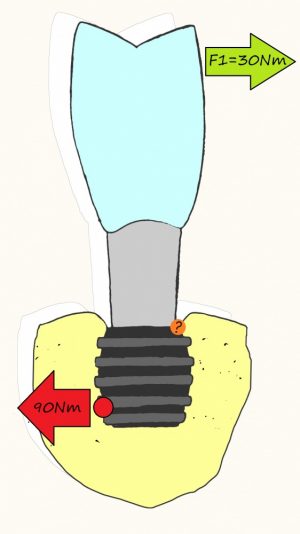
A - I am adequate
B - you should never forget about Archimedes and his "rule of leverage": A
load of 30 N applied to the crown at point A, at point B will be equal to 90 N, provided that the implant / suprastructure ratio is like 1: 3:
But this is a completely different story and a serious topic for a full-fledged article.
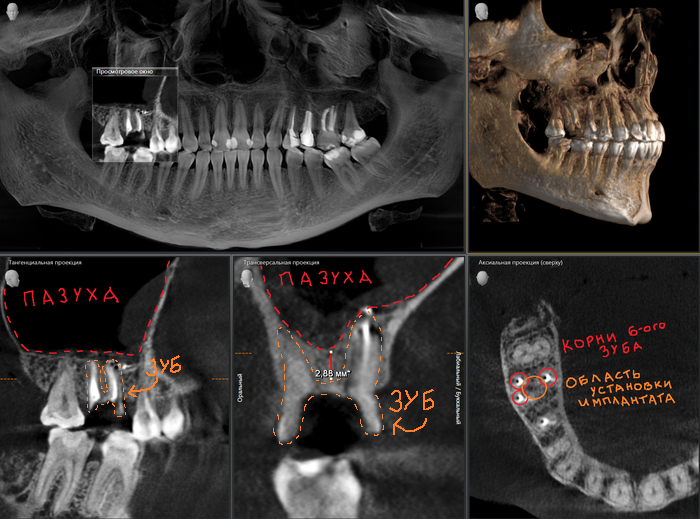
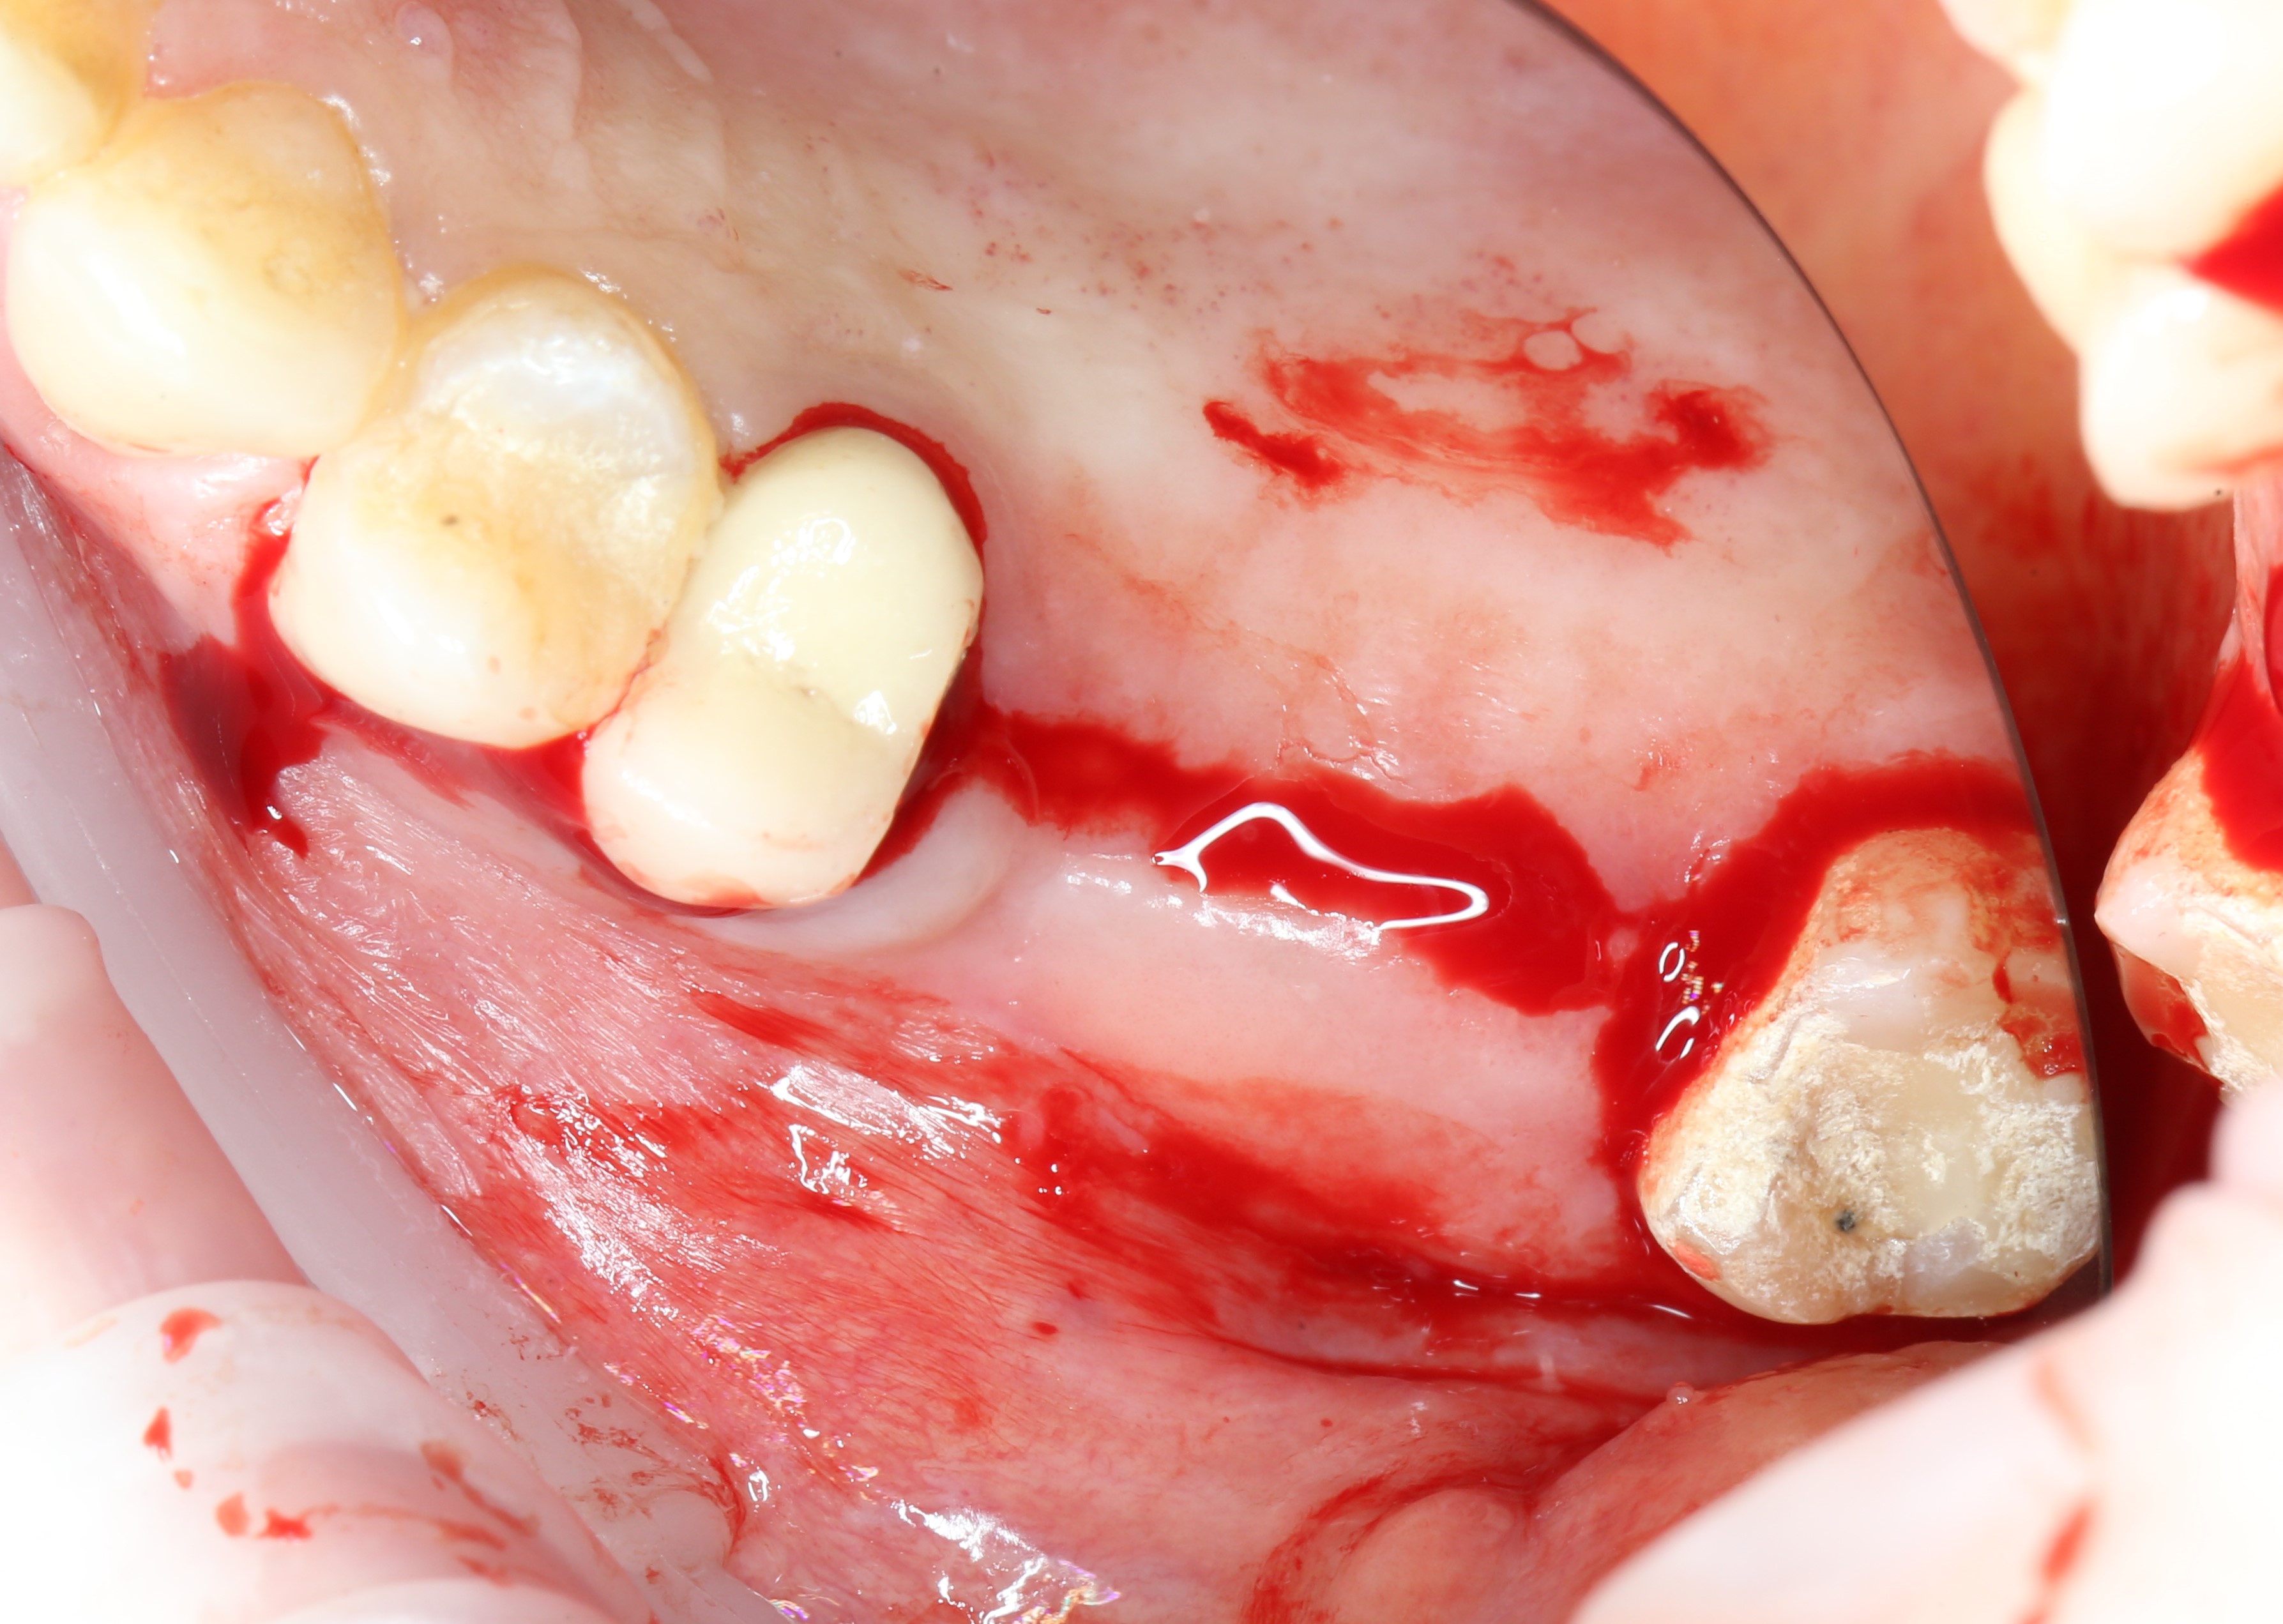
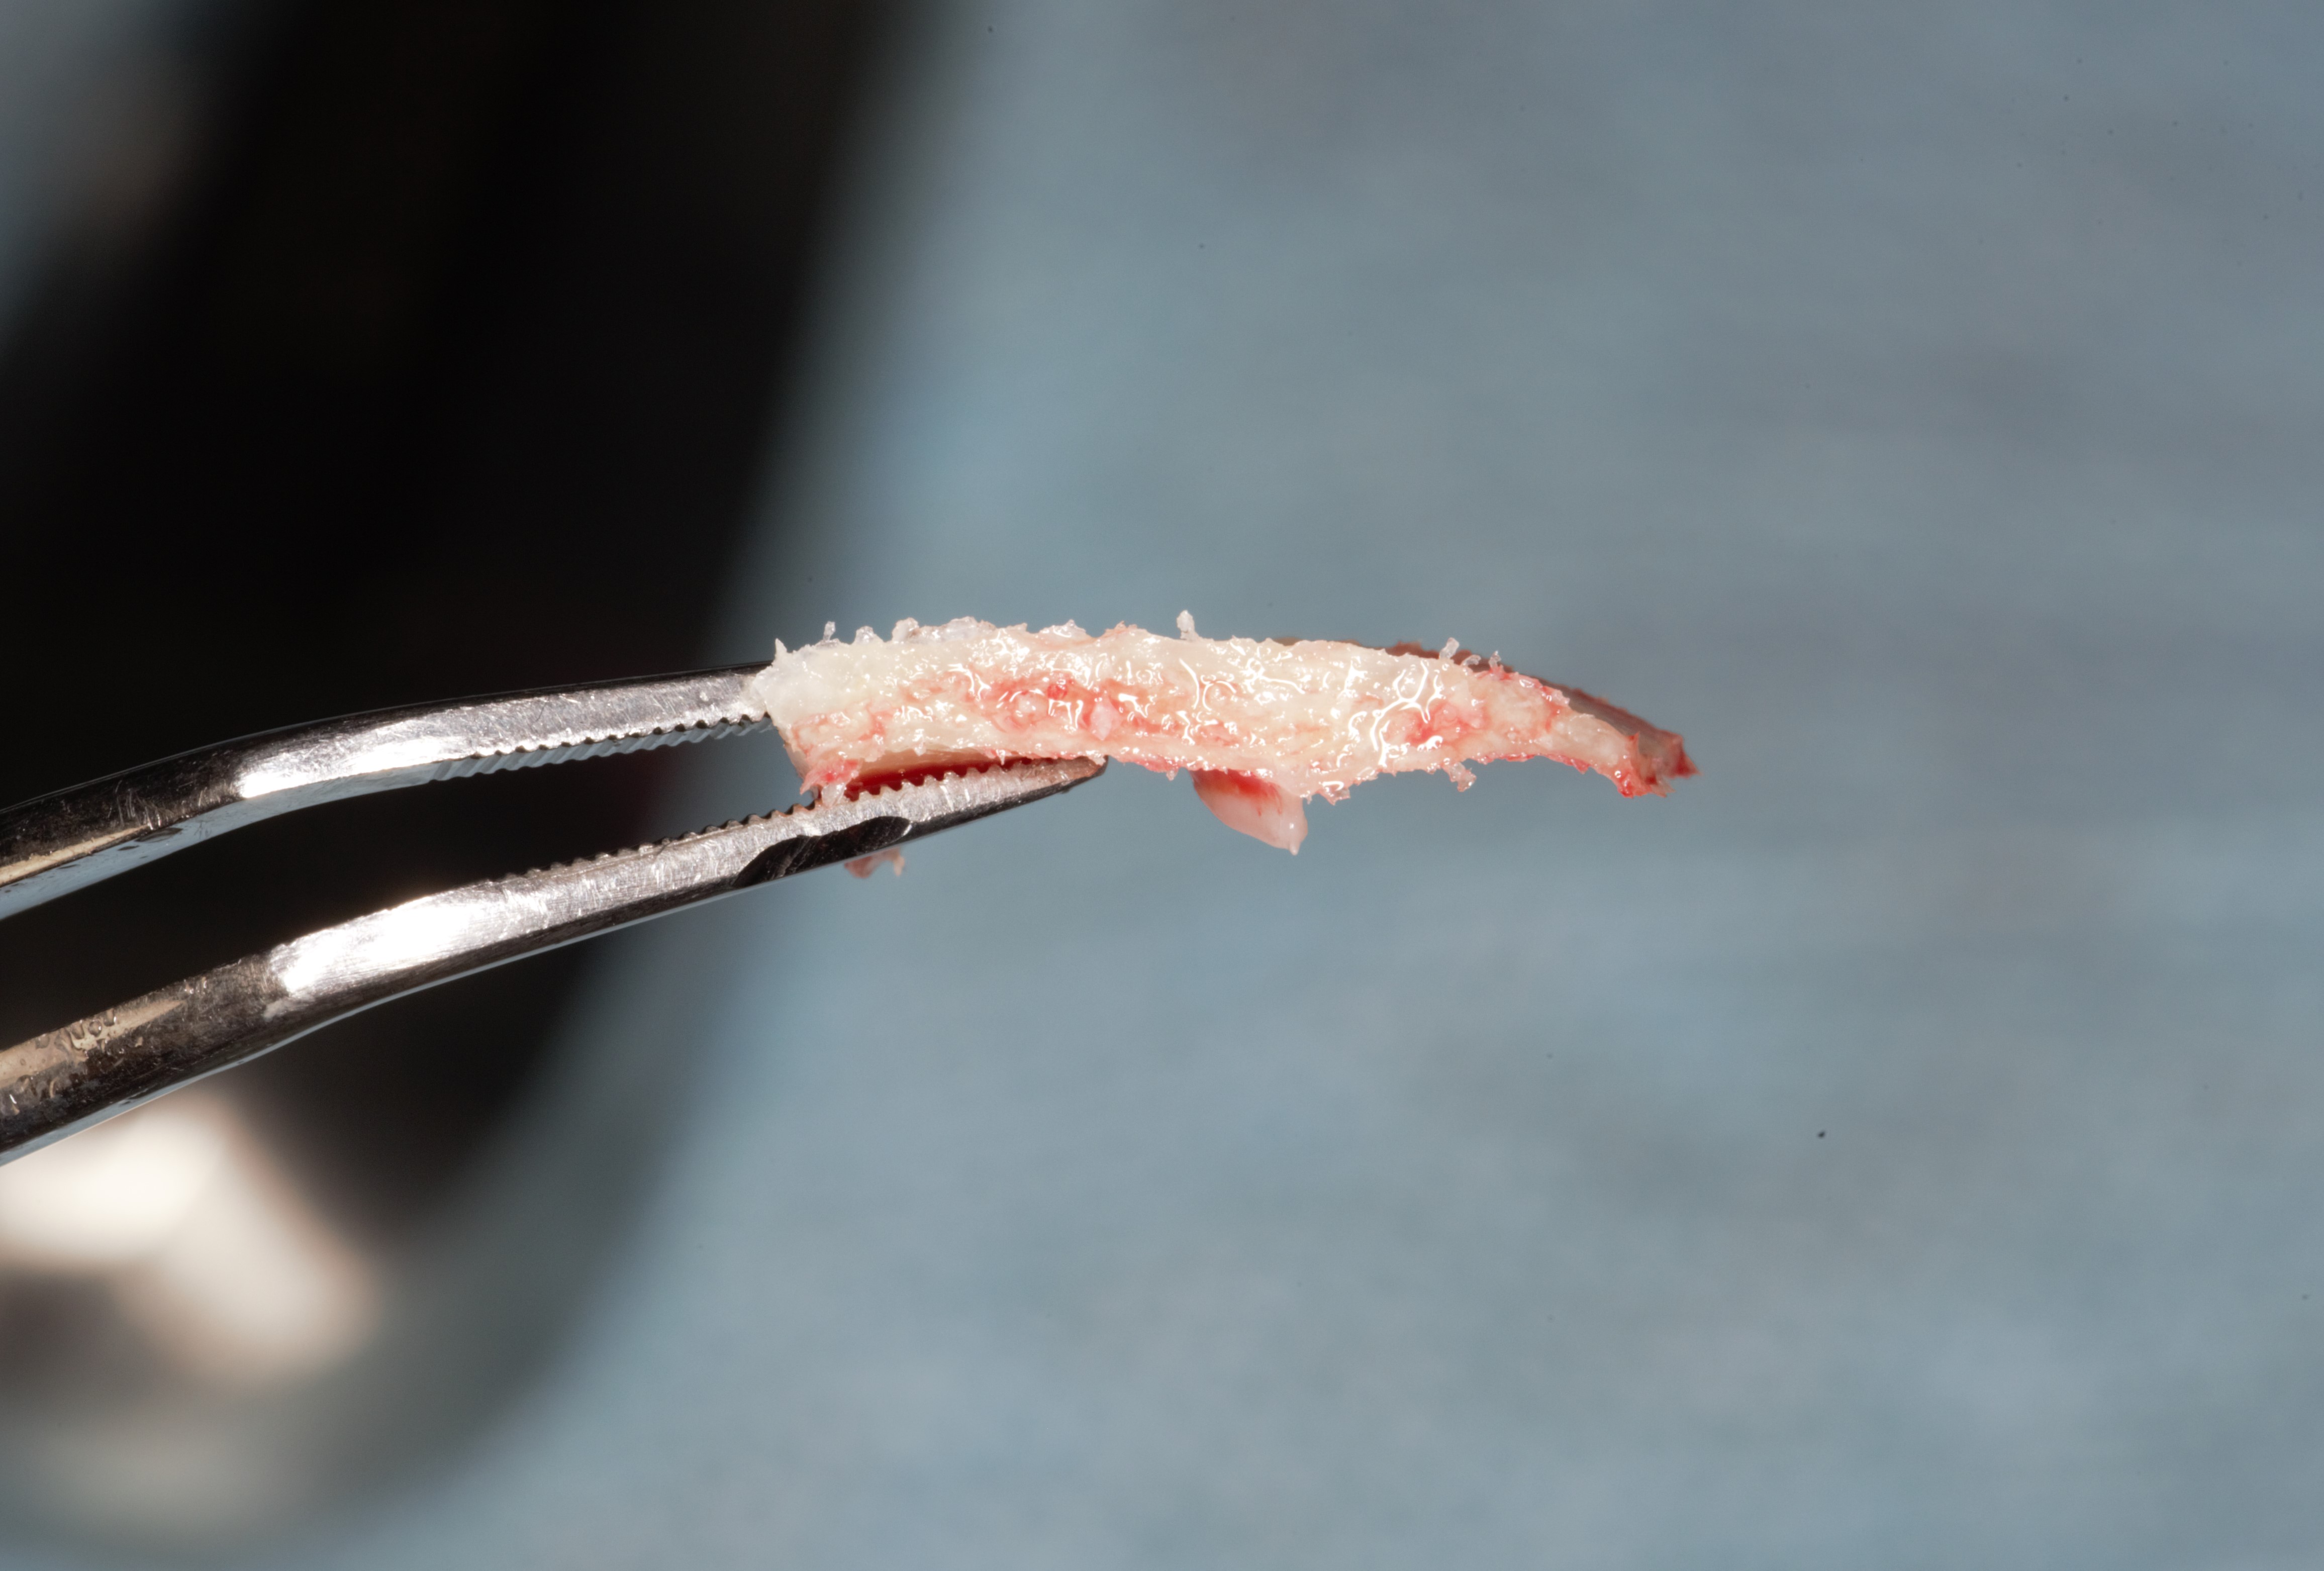
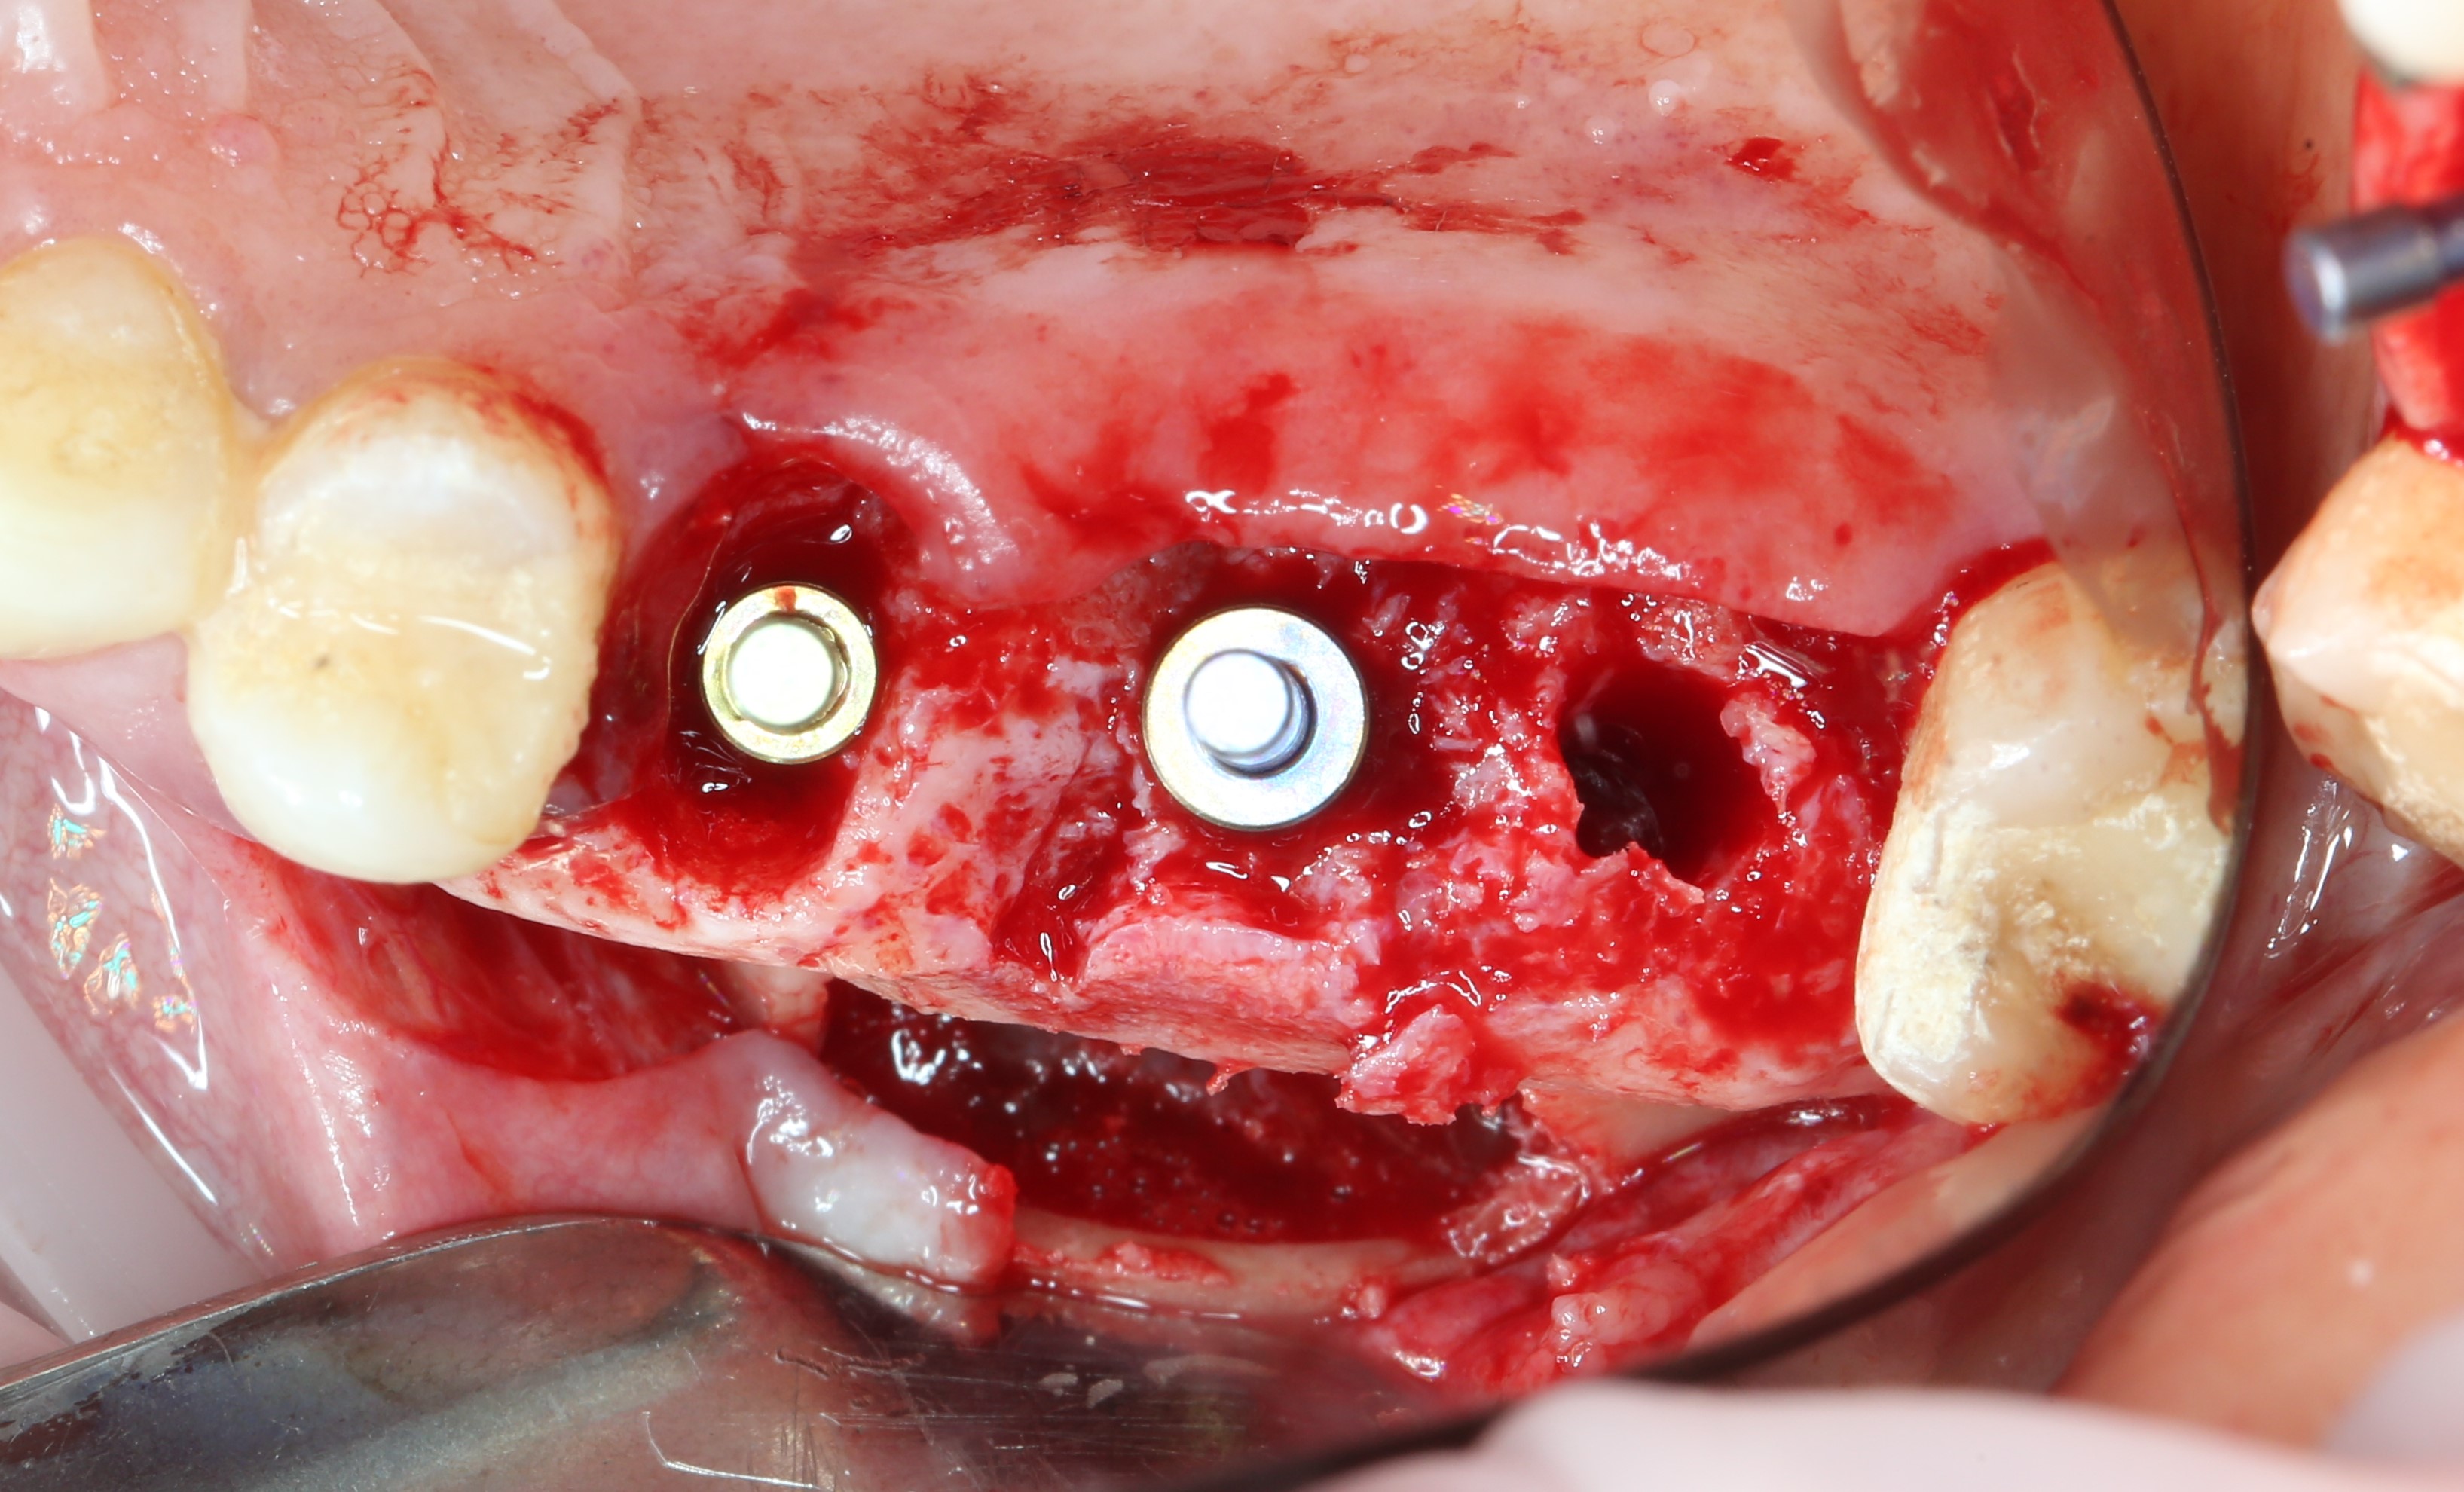
Example with a two-rooted tooth:
To the left and right of the implant, the image clearly shows the sockets from the newly extracted tooth. Blood runs up in them, a clot forms, and everything heals in the same way as if the implant was not installed.

Well, stocked chips and foam, comes the
How is this notorious sinus lifting done and what tools and materials are used for this?
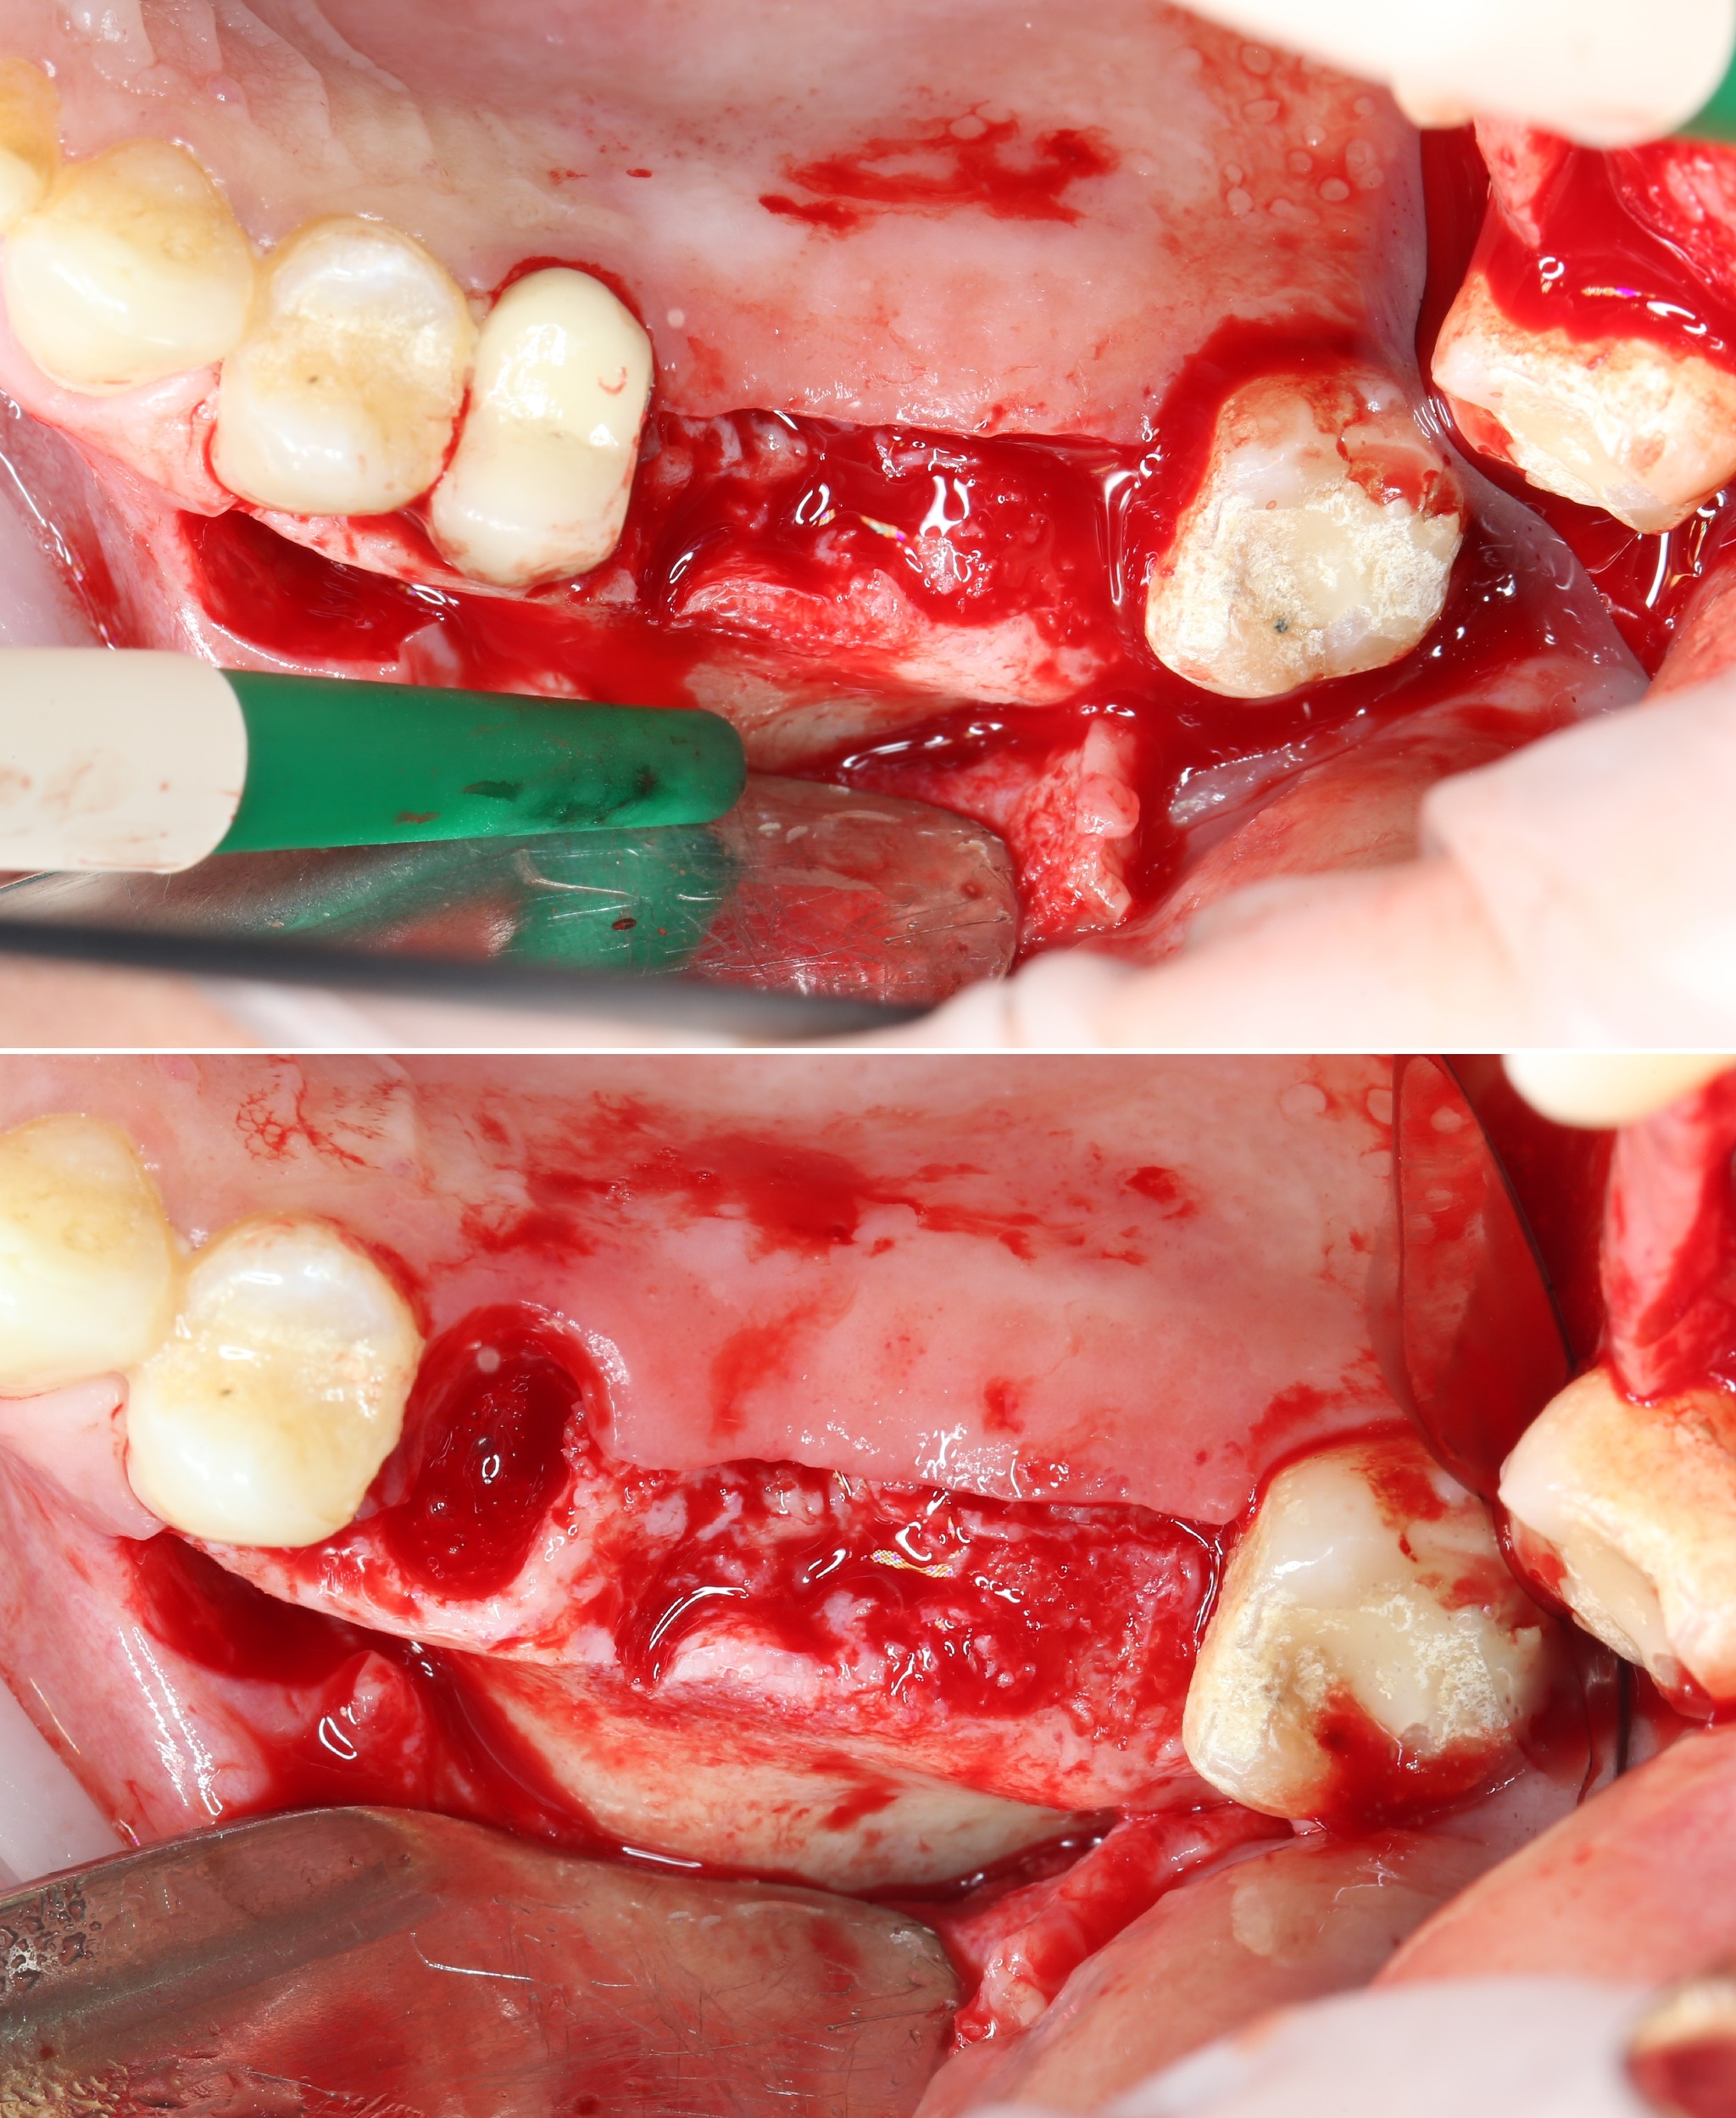
The patient has no teeth 6 and 7 on the upper jaw on the left (some photos were taken with mirrors, so the viewing angle may change):

Like any other surgical manipulation in the oral cavity, it all starts with anesthesia. After all, no one wants to experience all the delights of dental pain and anguish.
In order to minimize all the unpleasant sensations associated with the injection, the so-called application anesthesia is used:
Gel - paste based on polyethylene glycol and benzocaine.
The gums were “lubricated” - it was slightly numb. And now you can proceed to the injection ( infiltration anesthesia ).
In modern dentistry, the main, but not the only active ingredient of the anesthetic is " Articaine " - in one concentration or another.
The photo below shows a reusable cartridge syringe, two disposable needles of different lengths and two cartridges with an anesthetic.
In this case, Ultracain is represented . The ratio of adrenaline and active substance ( Articaine ) in the blue carpool is 1: 100,000 (1 mg of adrenaline per 100 ml), and in the green one - 1: 200,000 (0.5 mg of adrenaline per 100 ml). Consequently, the anesthetic in the blue carpool lasts a little longer than in the green one. I rarely use this dosage, only when a more prolonged effect of anesthesia is needed or in acute purulent inflammation.
After the anesthesia has worked, an incision is made with a scalpel , and the bone is skeletonized with a raspator.(separation of the periosteum from the compact bone substance).
Incision:
Bone skeletonization:

I and the orthopedist made a decision to remove the fifth tooth, because, unfortunately, it will not be possible to treat it.
Extraction of teeth, as a rule, is carried out using a special tool - an elevator , and not forceps , as many think.
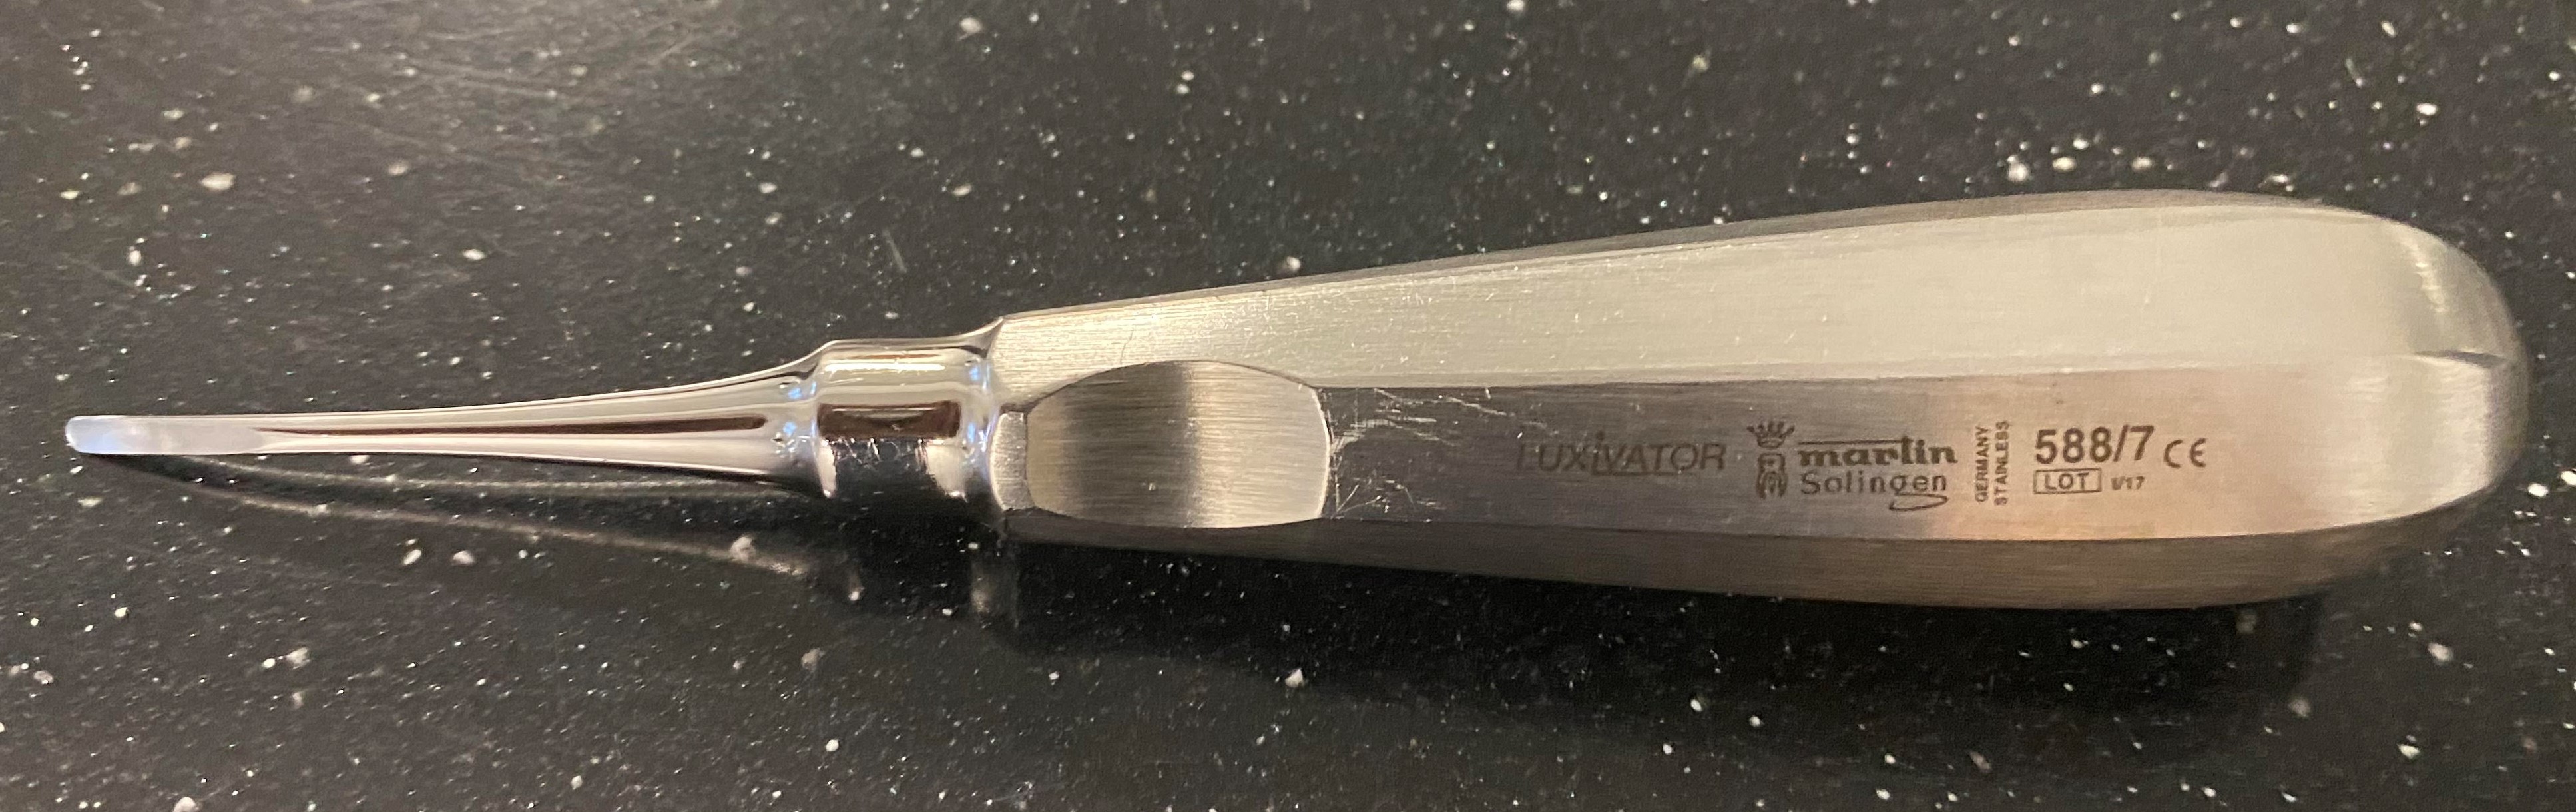
Of course, forceps are also used, but often you can do without them.
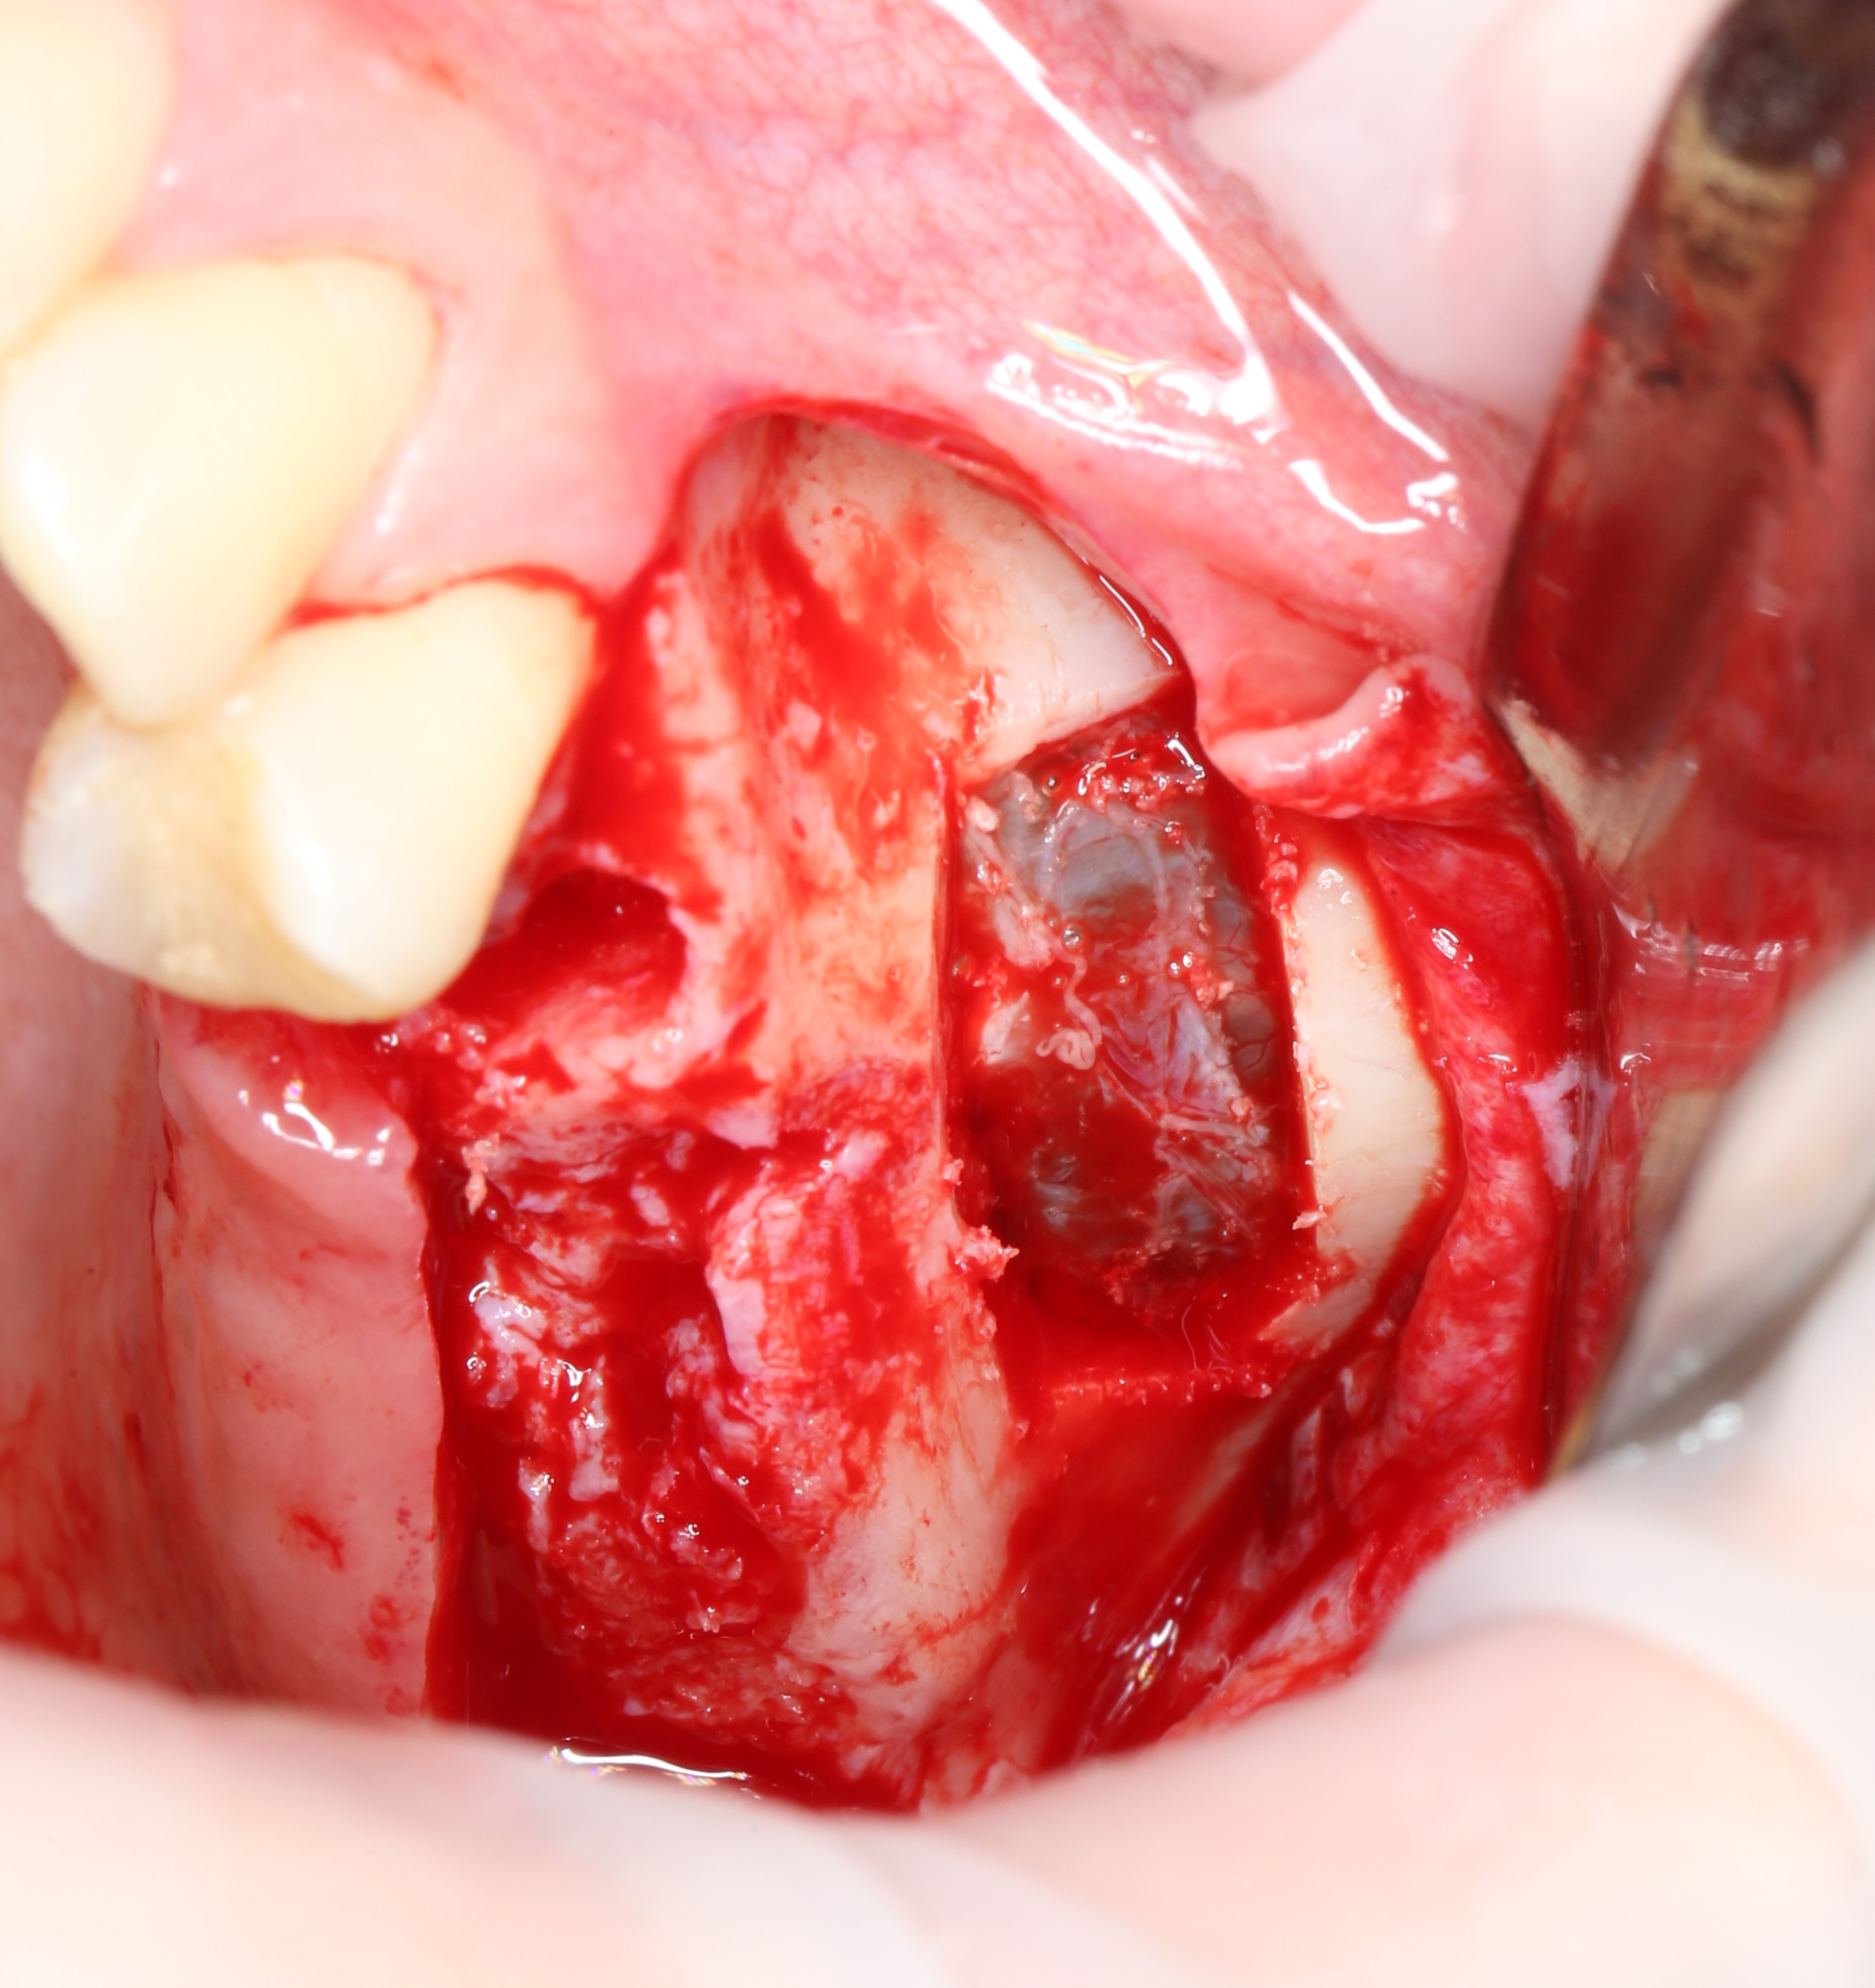
"Vzhuh": The
well is instantly filled with a blood clot.
And this is how a piezo - surgical (ultrasonic) device looks like , with the help of which a "bone window" is formed during sinus lifting:

And this is a working nozzle near:

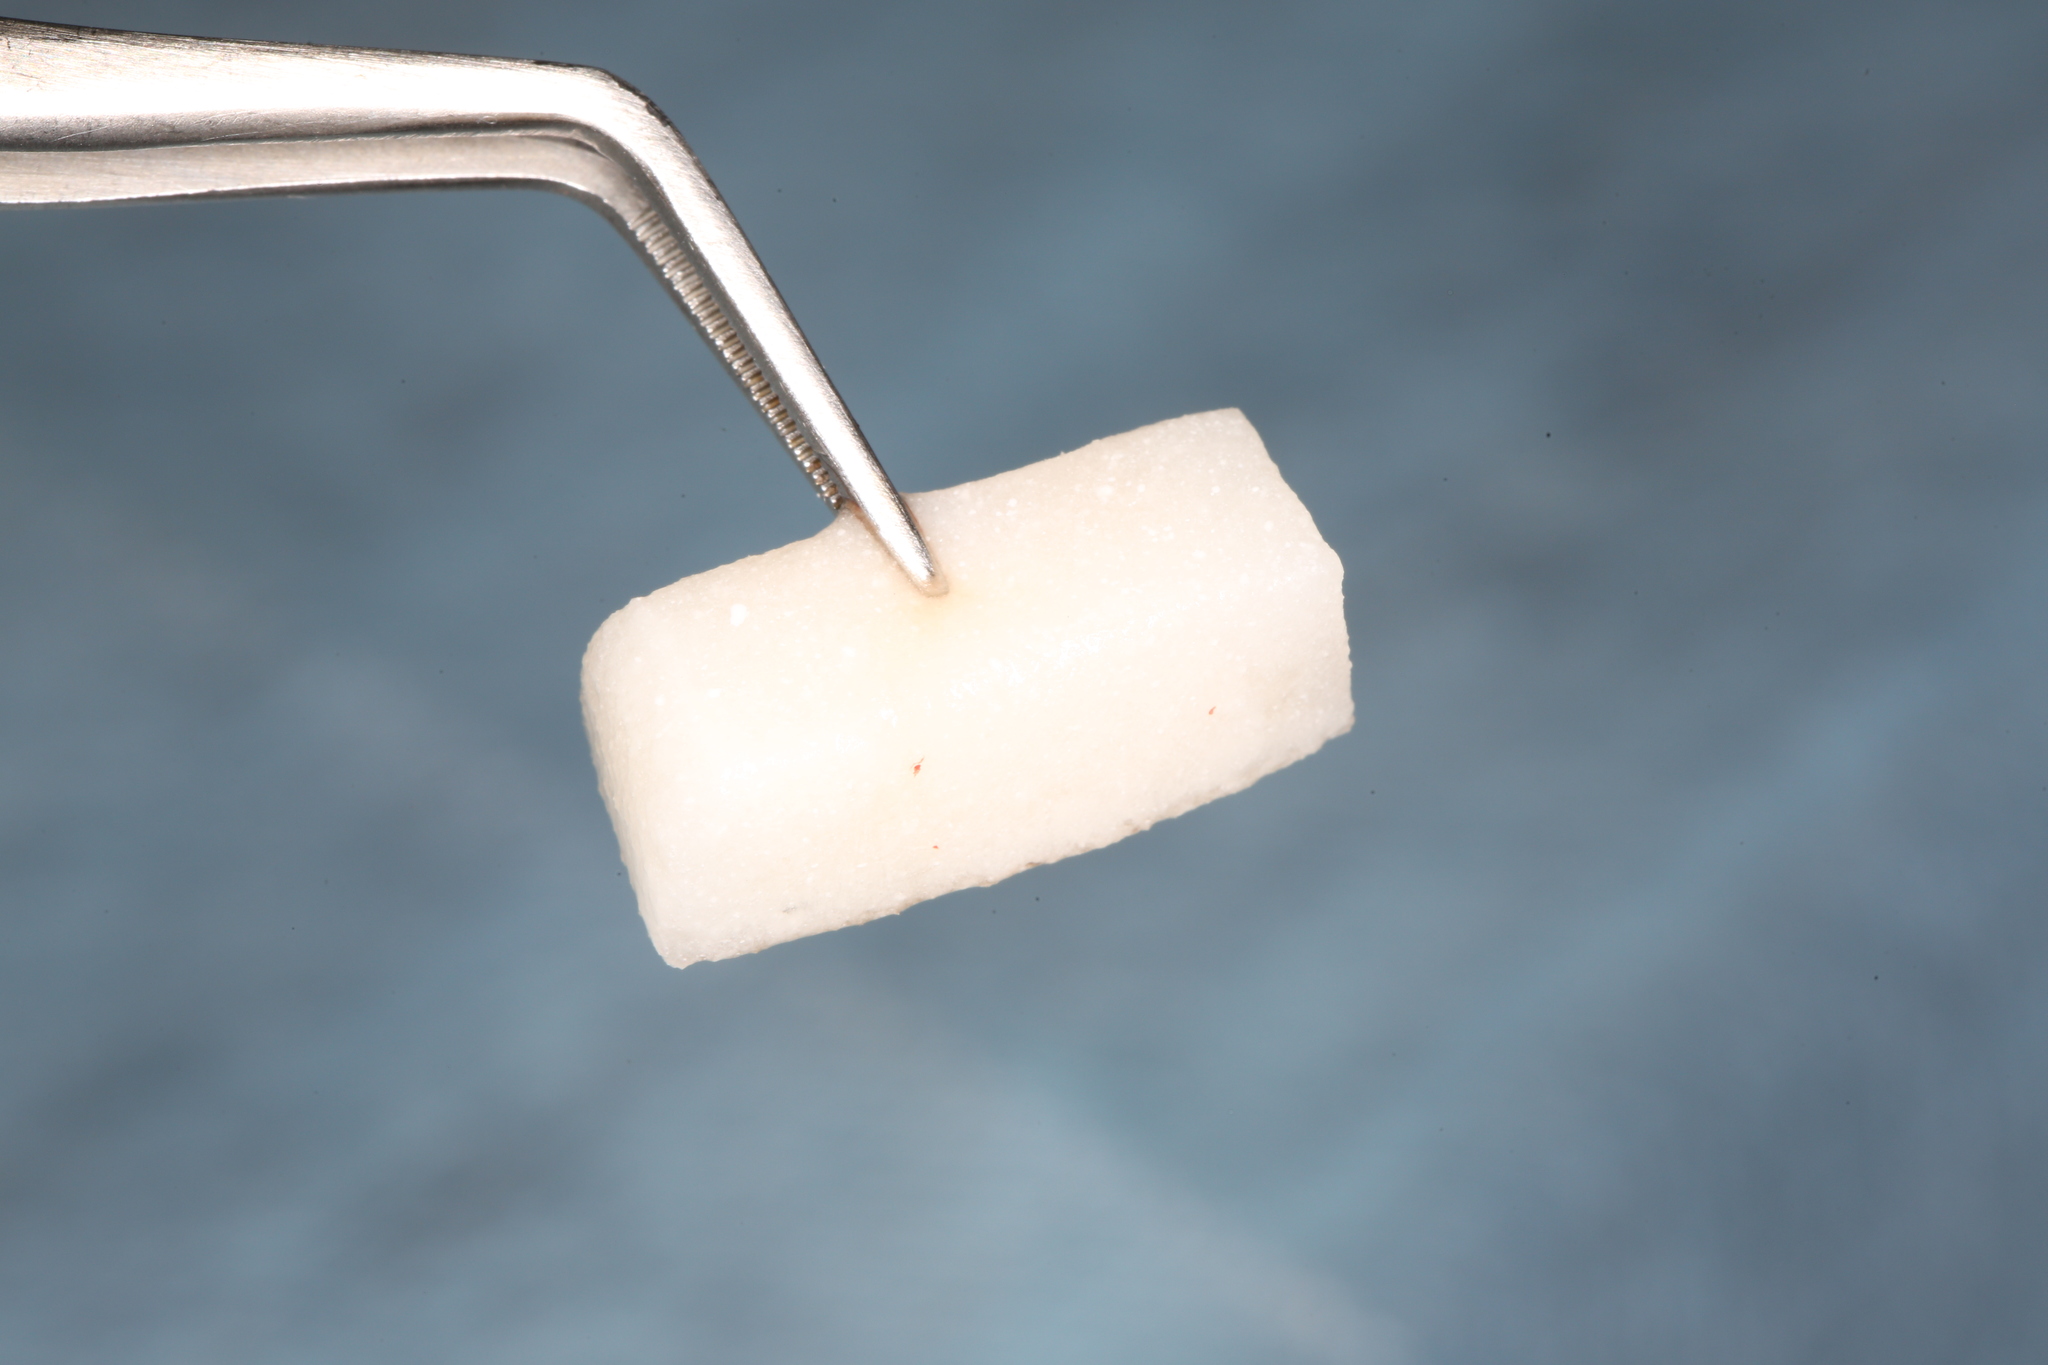
The tip is cut out the bone wall and placed in a cup with nat. solution.
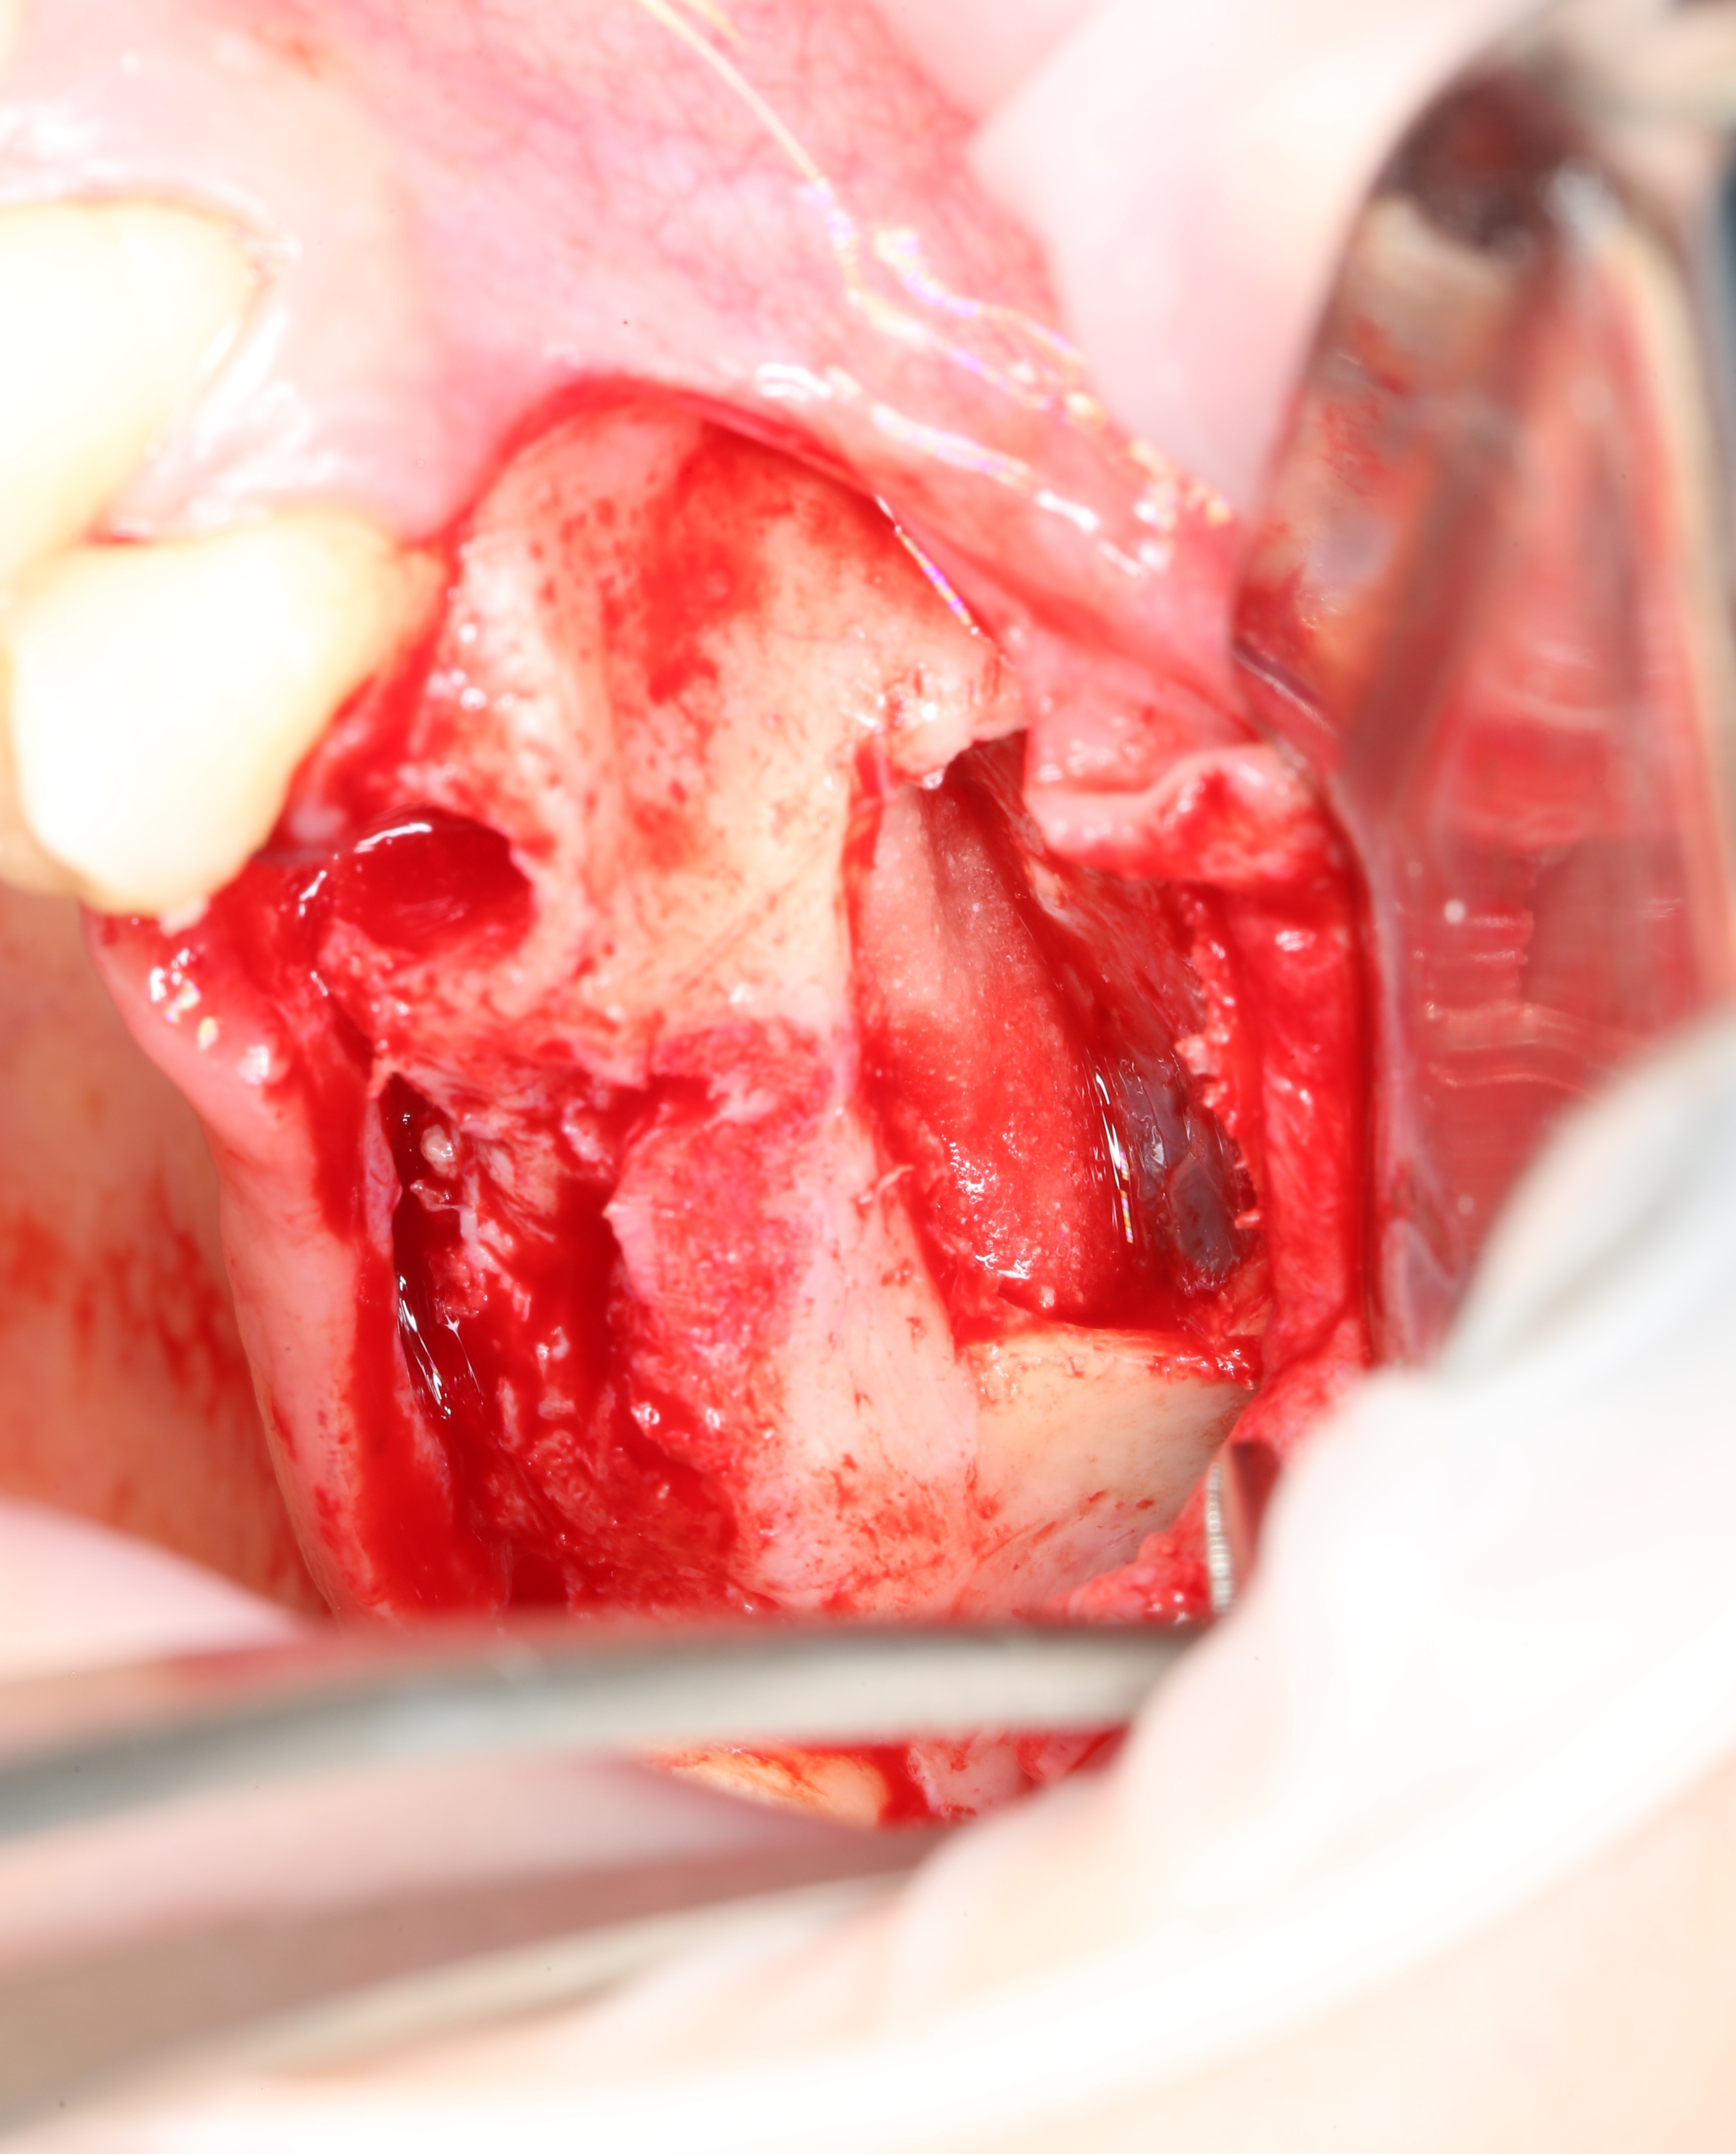
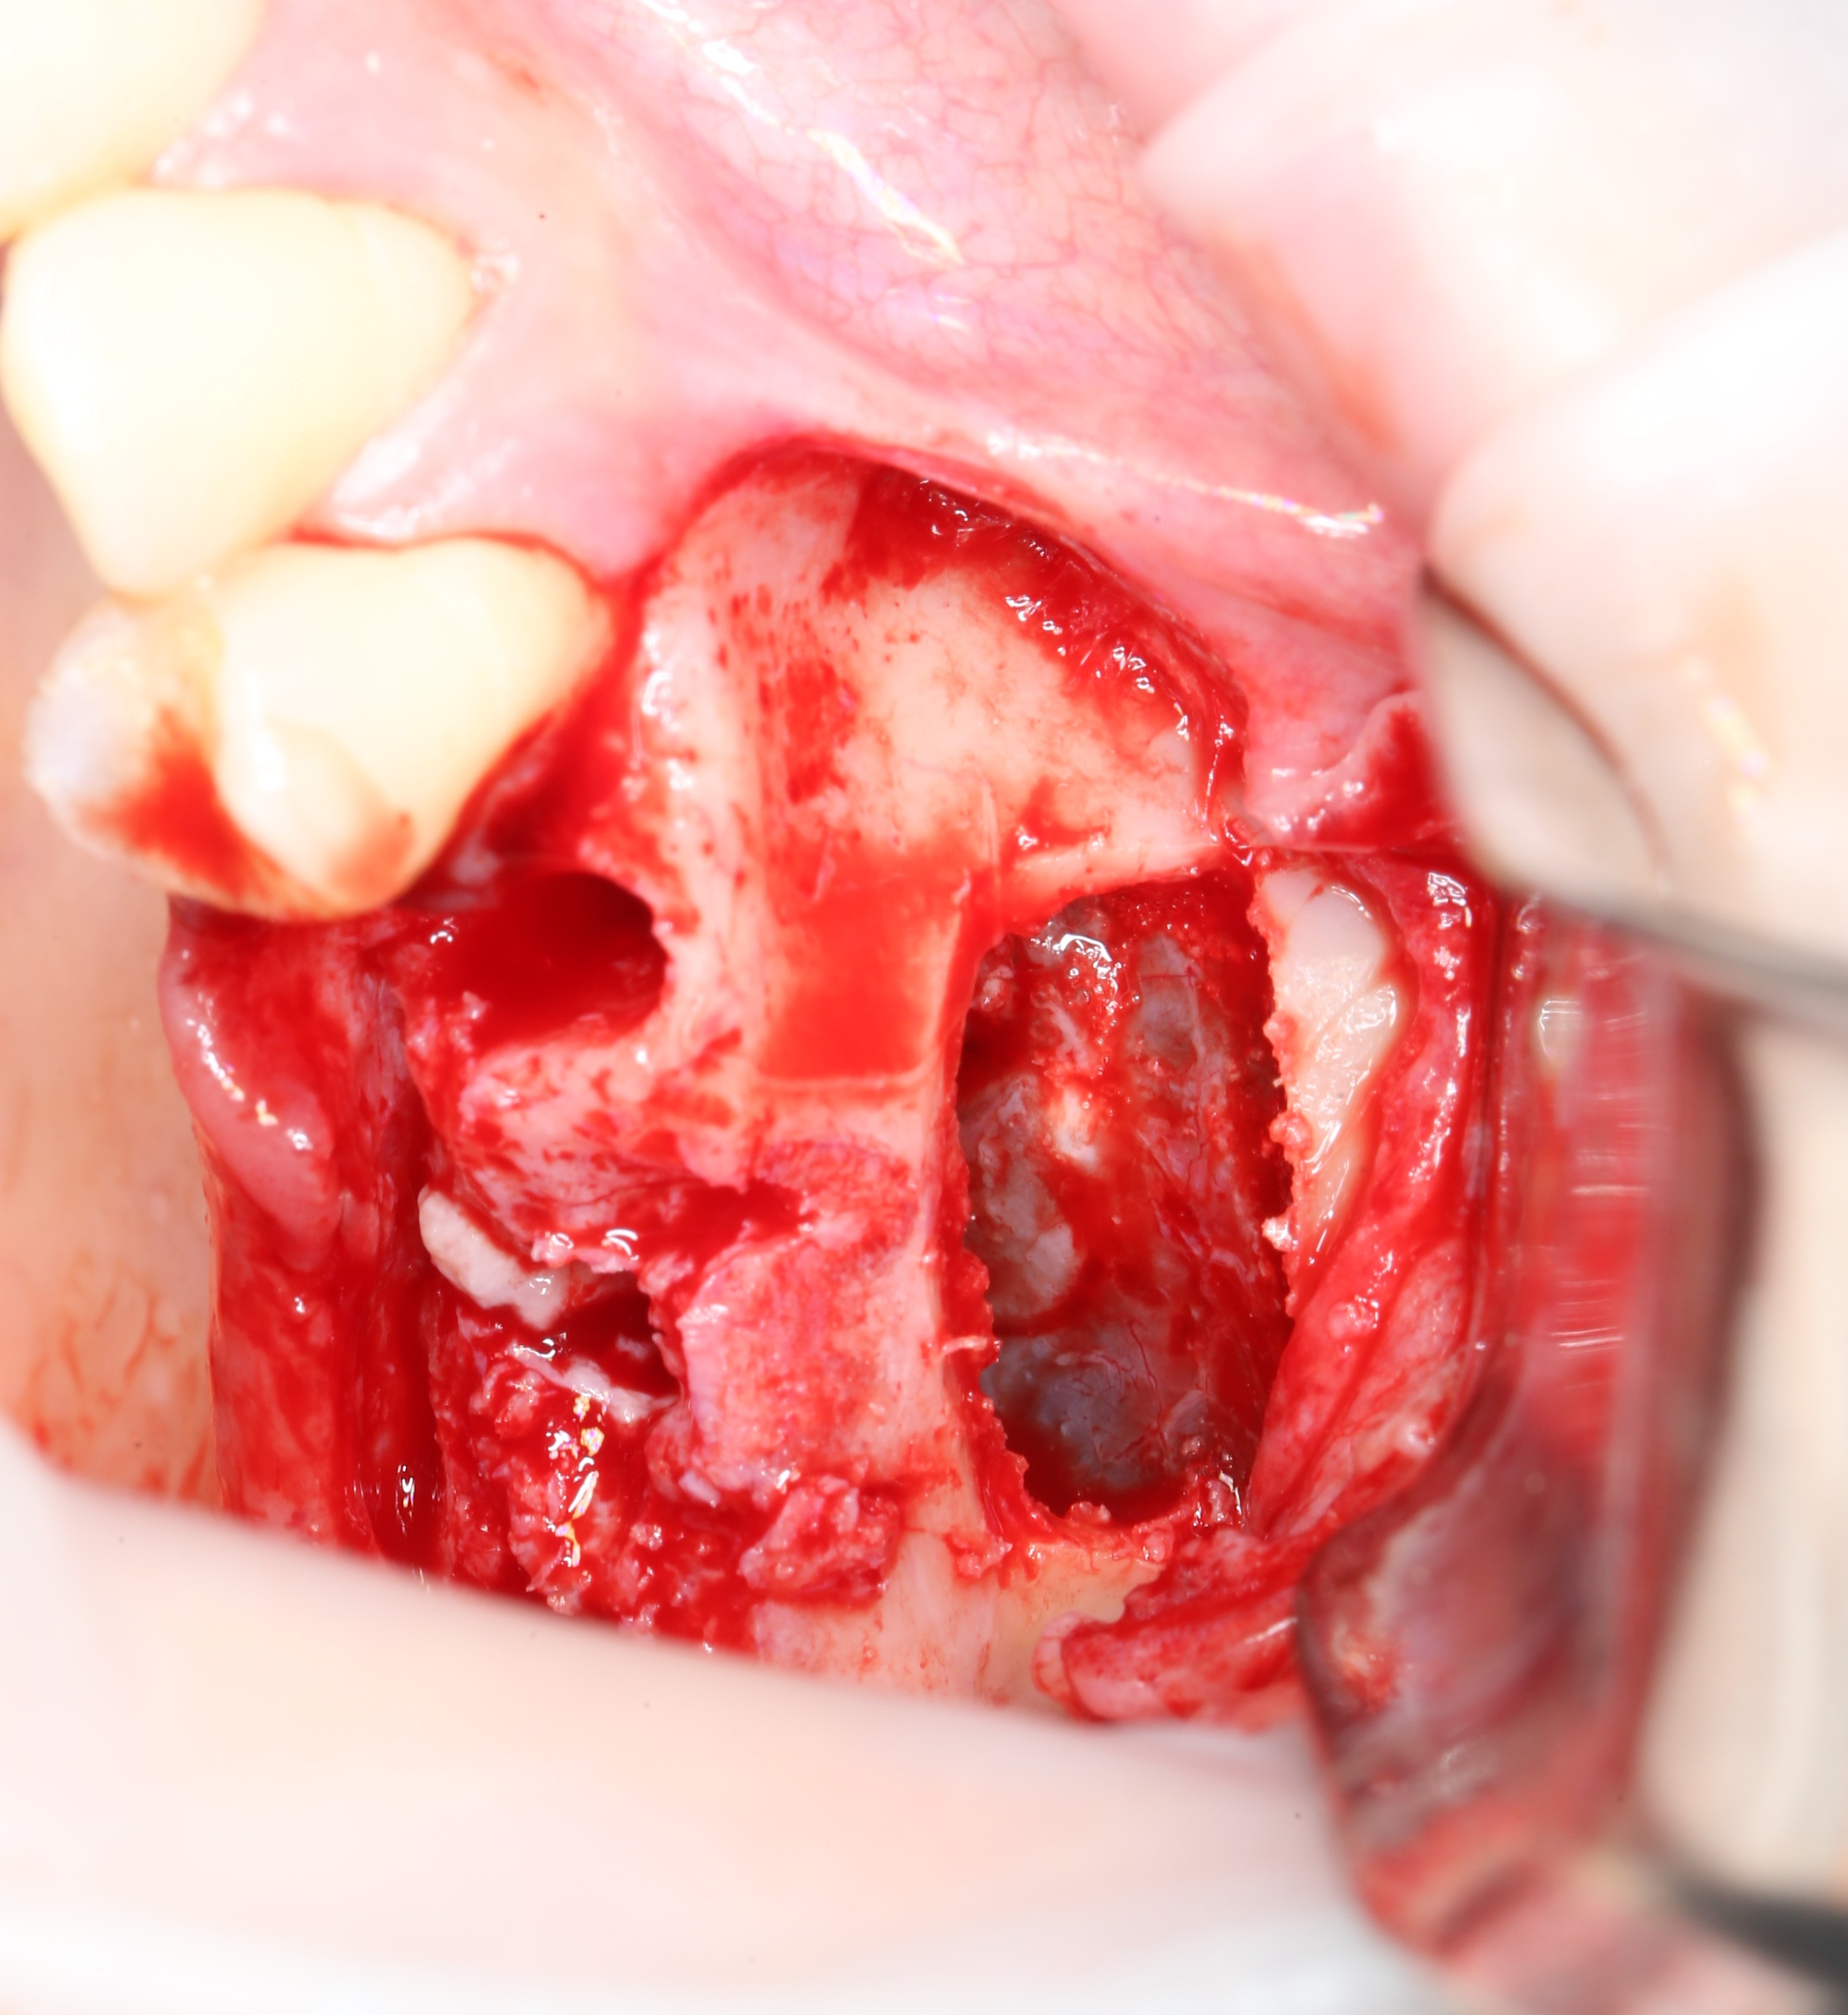
The mucous membrane that lines the sinus from the inside is clearly visible:
And this is the very bone wall (thickness):
The next step is the sinus lifting itself.
It is a mistake to believe that sinus lifting is an operation "B" in the maxillary (maxillary) sinus. In fact, the manipulation is carried out "UNDER" it.
As we have already found out, the sinus is a cavity in the upper jaw, a void, if you like, which is lined from the inside with a thin mucous membrane. Locally, the mucous membrane is detached from the bone tissue, and bone material is placed in the formed space between the bottom of the sinus and the mucous membrane, as in an envelope.
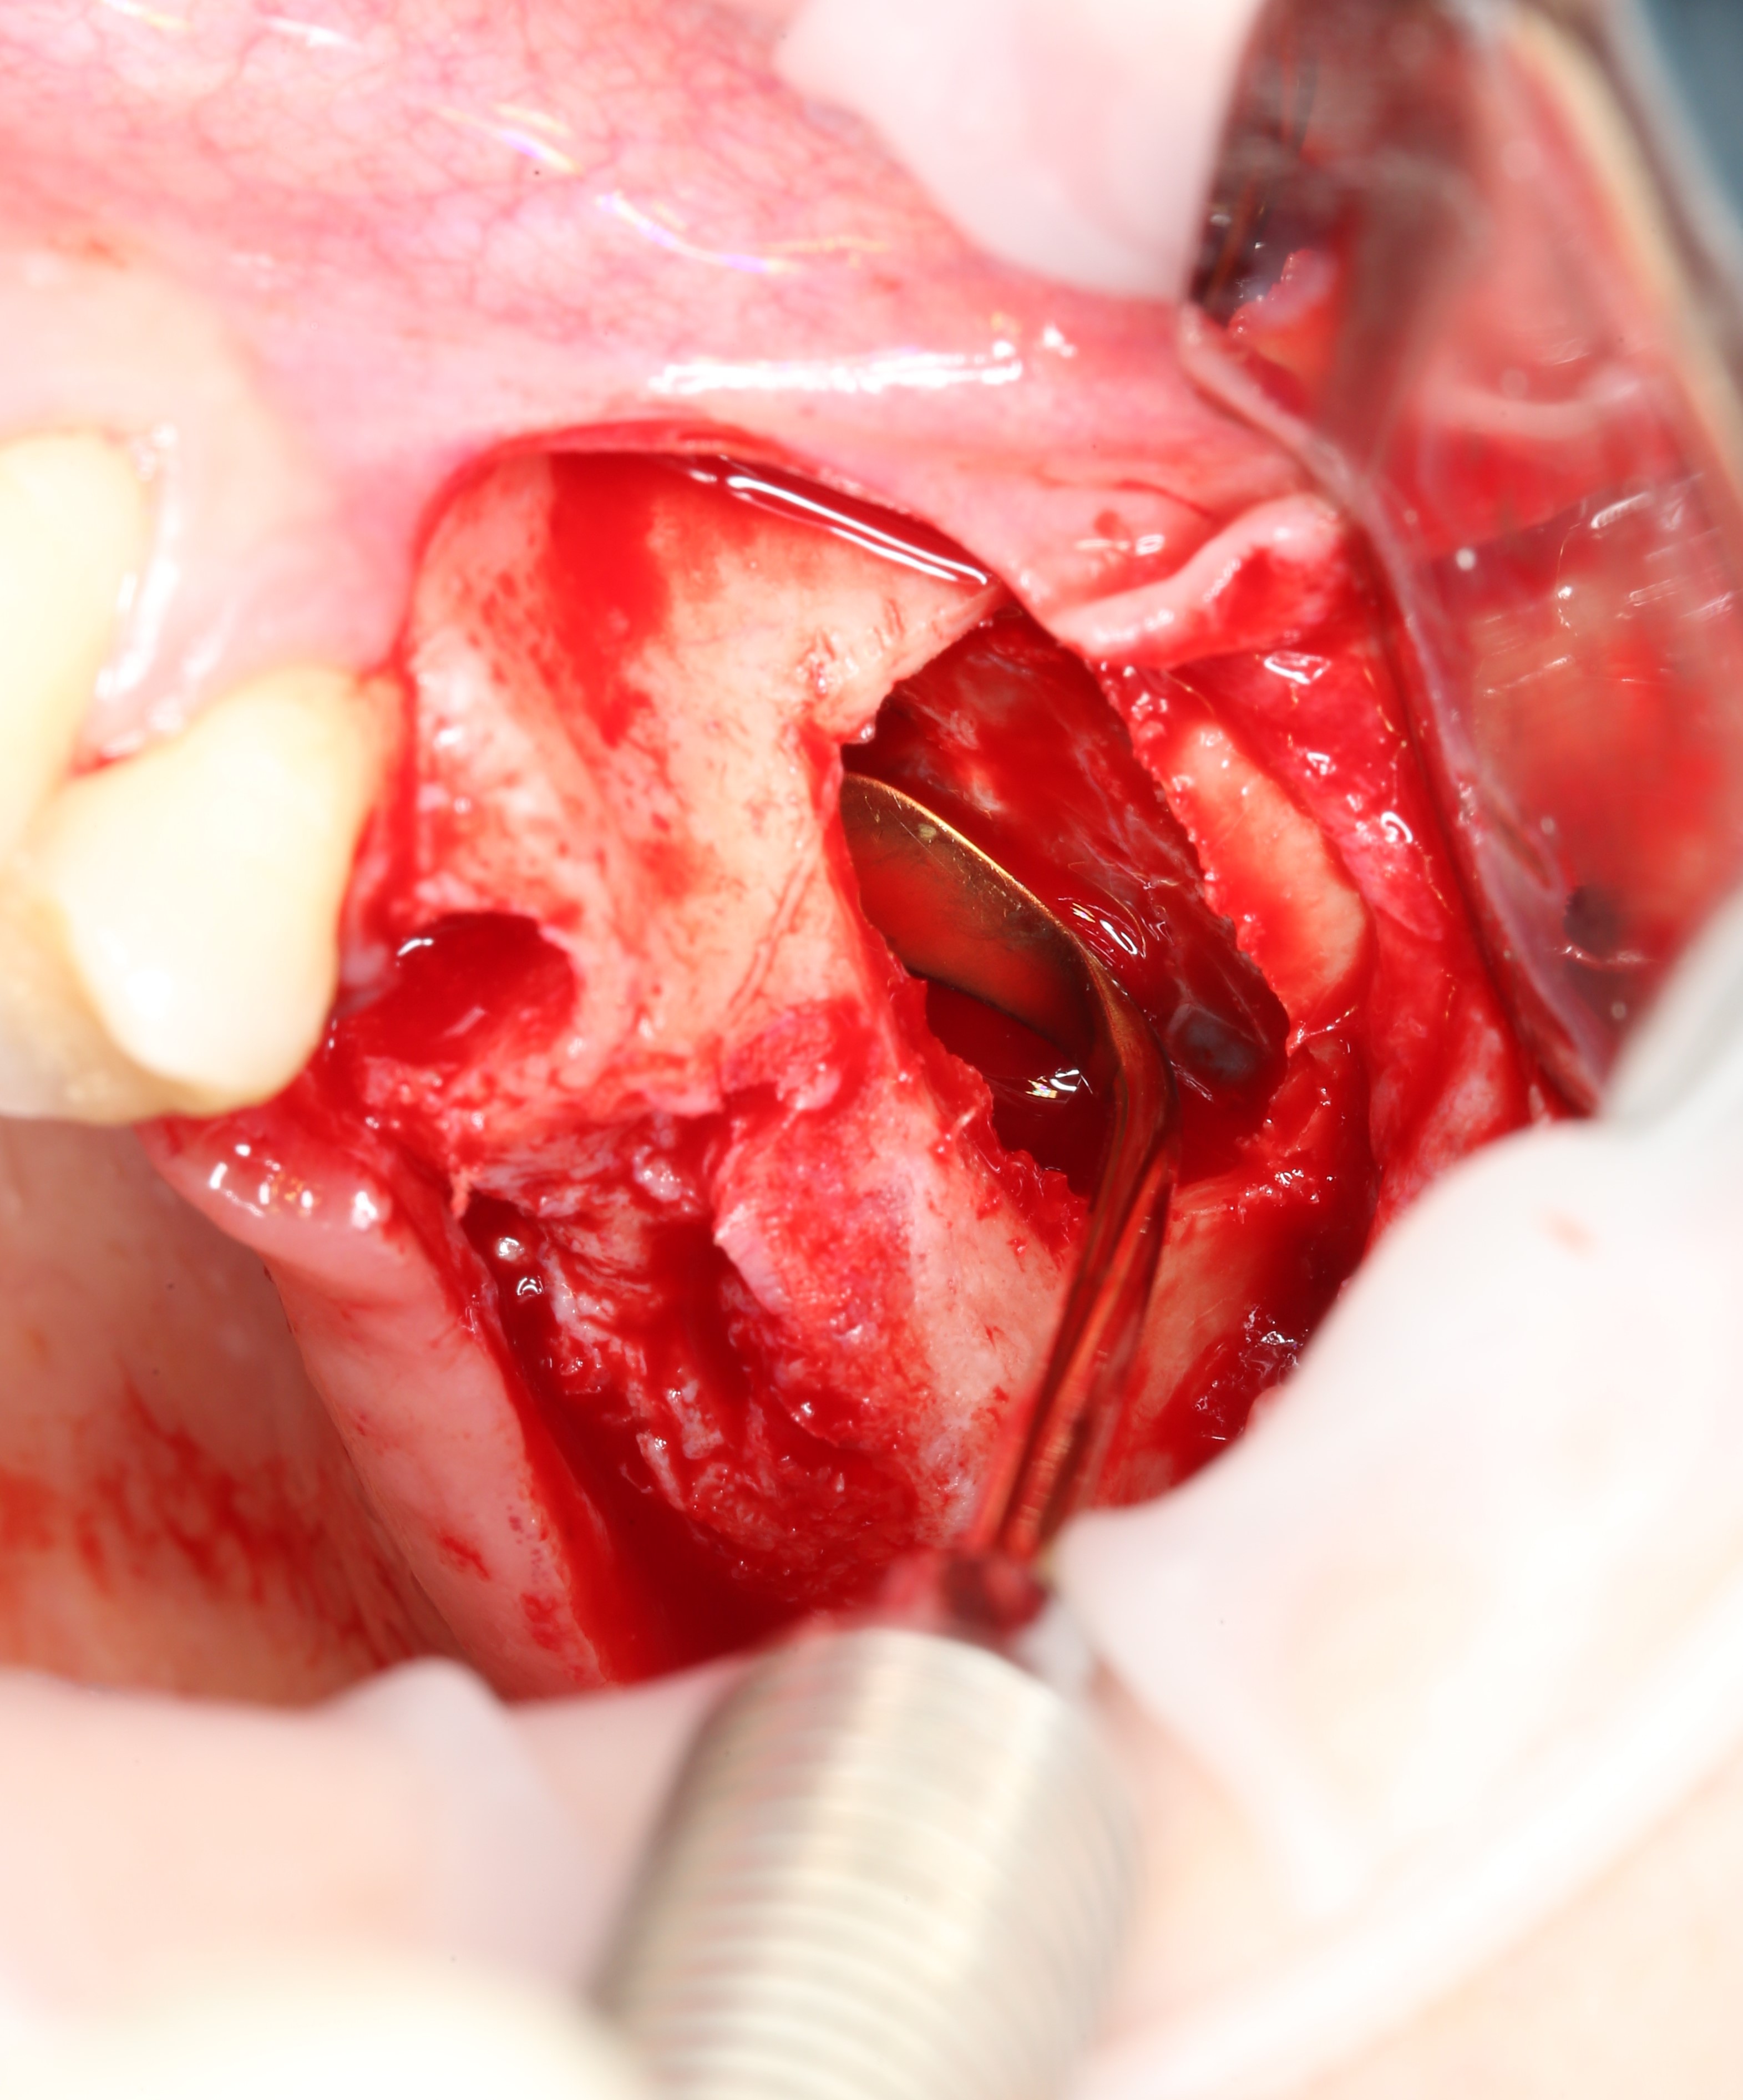
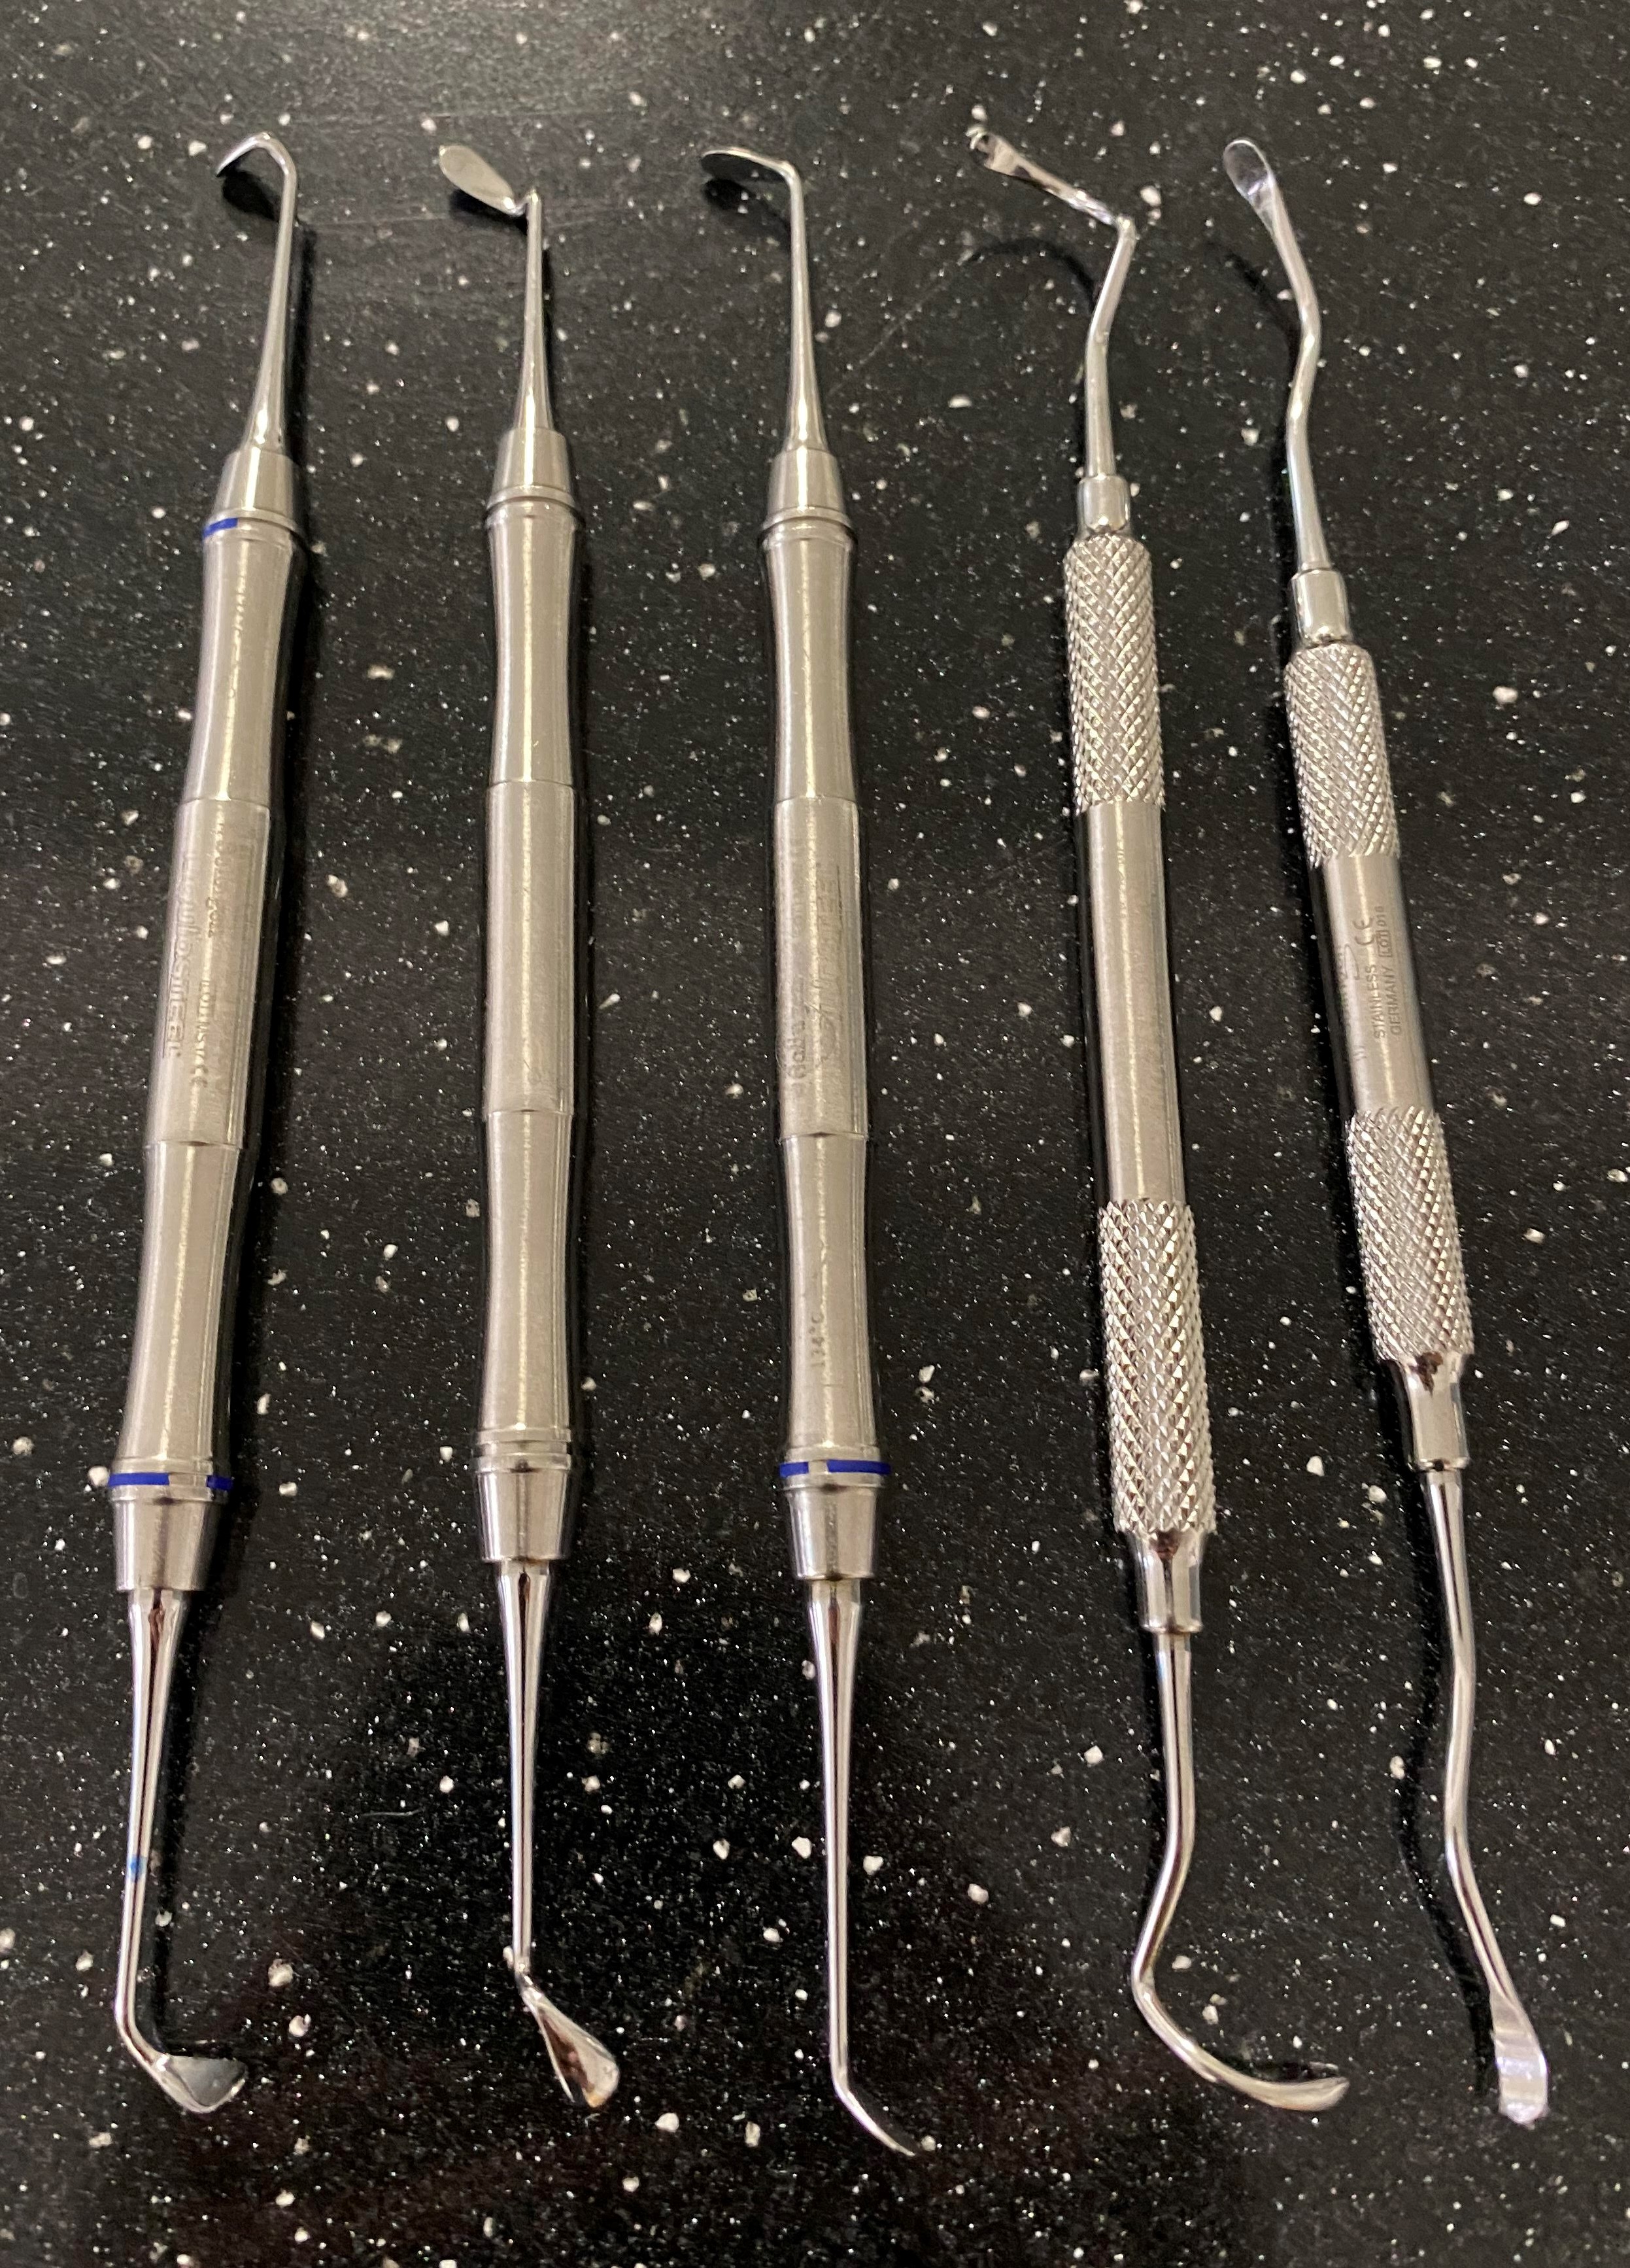
This manipulation is carried out using special curettes, the working part of which is bent at different angles. This allows you to detach the mucous membrane in any hard-to-reach places:
But you need to be careful, because any careless movement can lead to a rupture of
If the perforation is small, it can be easily removed. For this, an absorbable membrane is used, with which this perforation is closed. Then the operation can be continued.
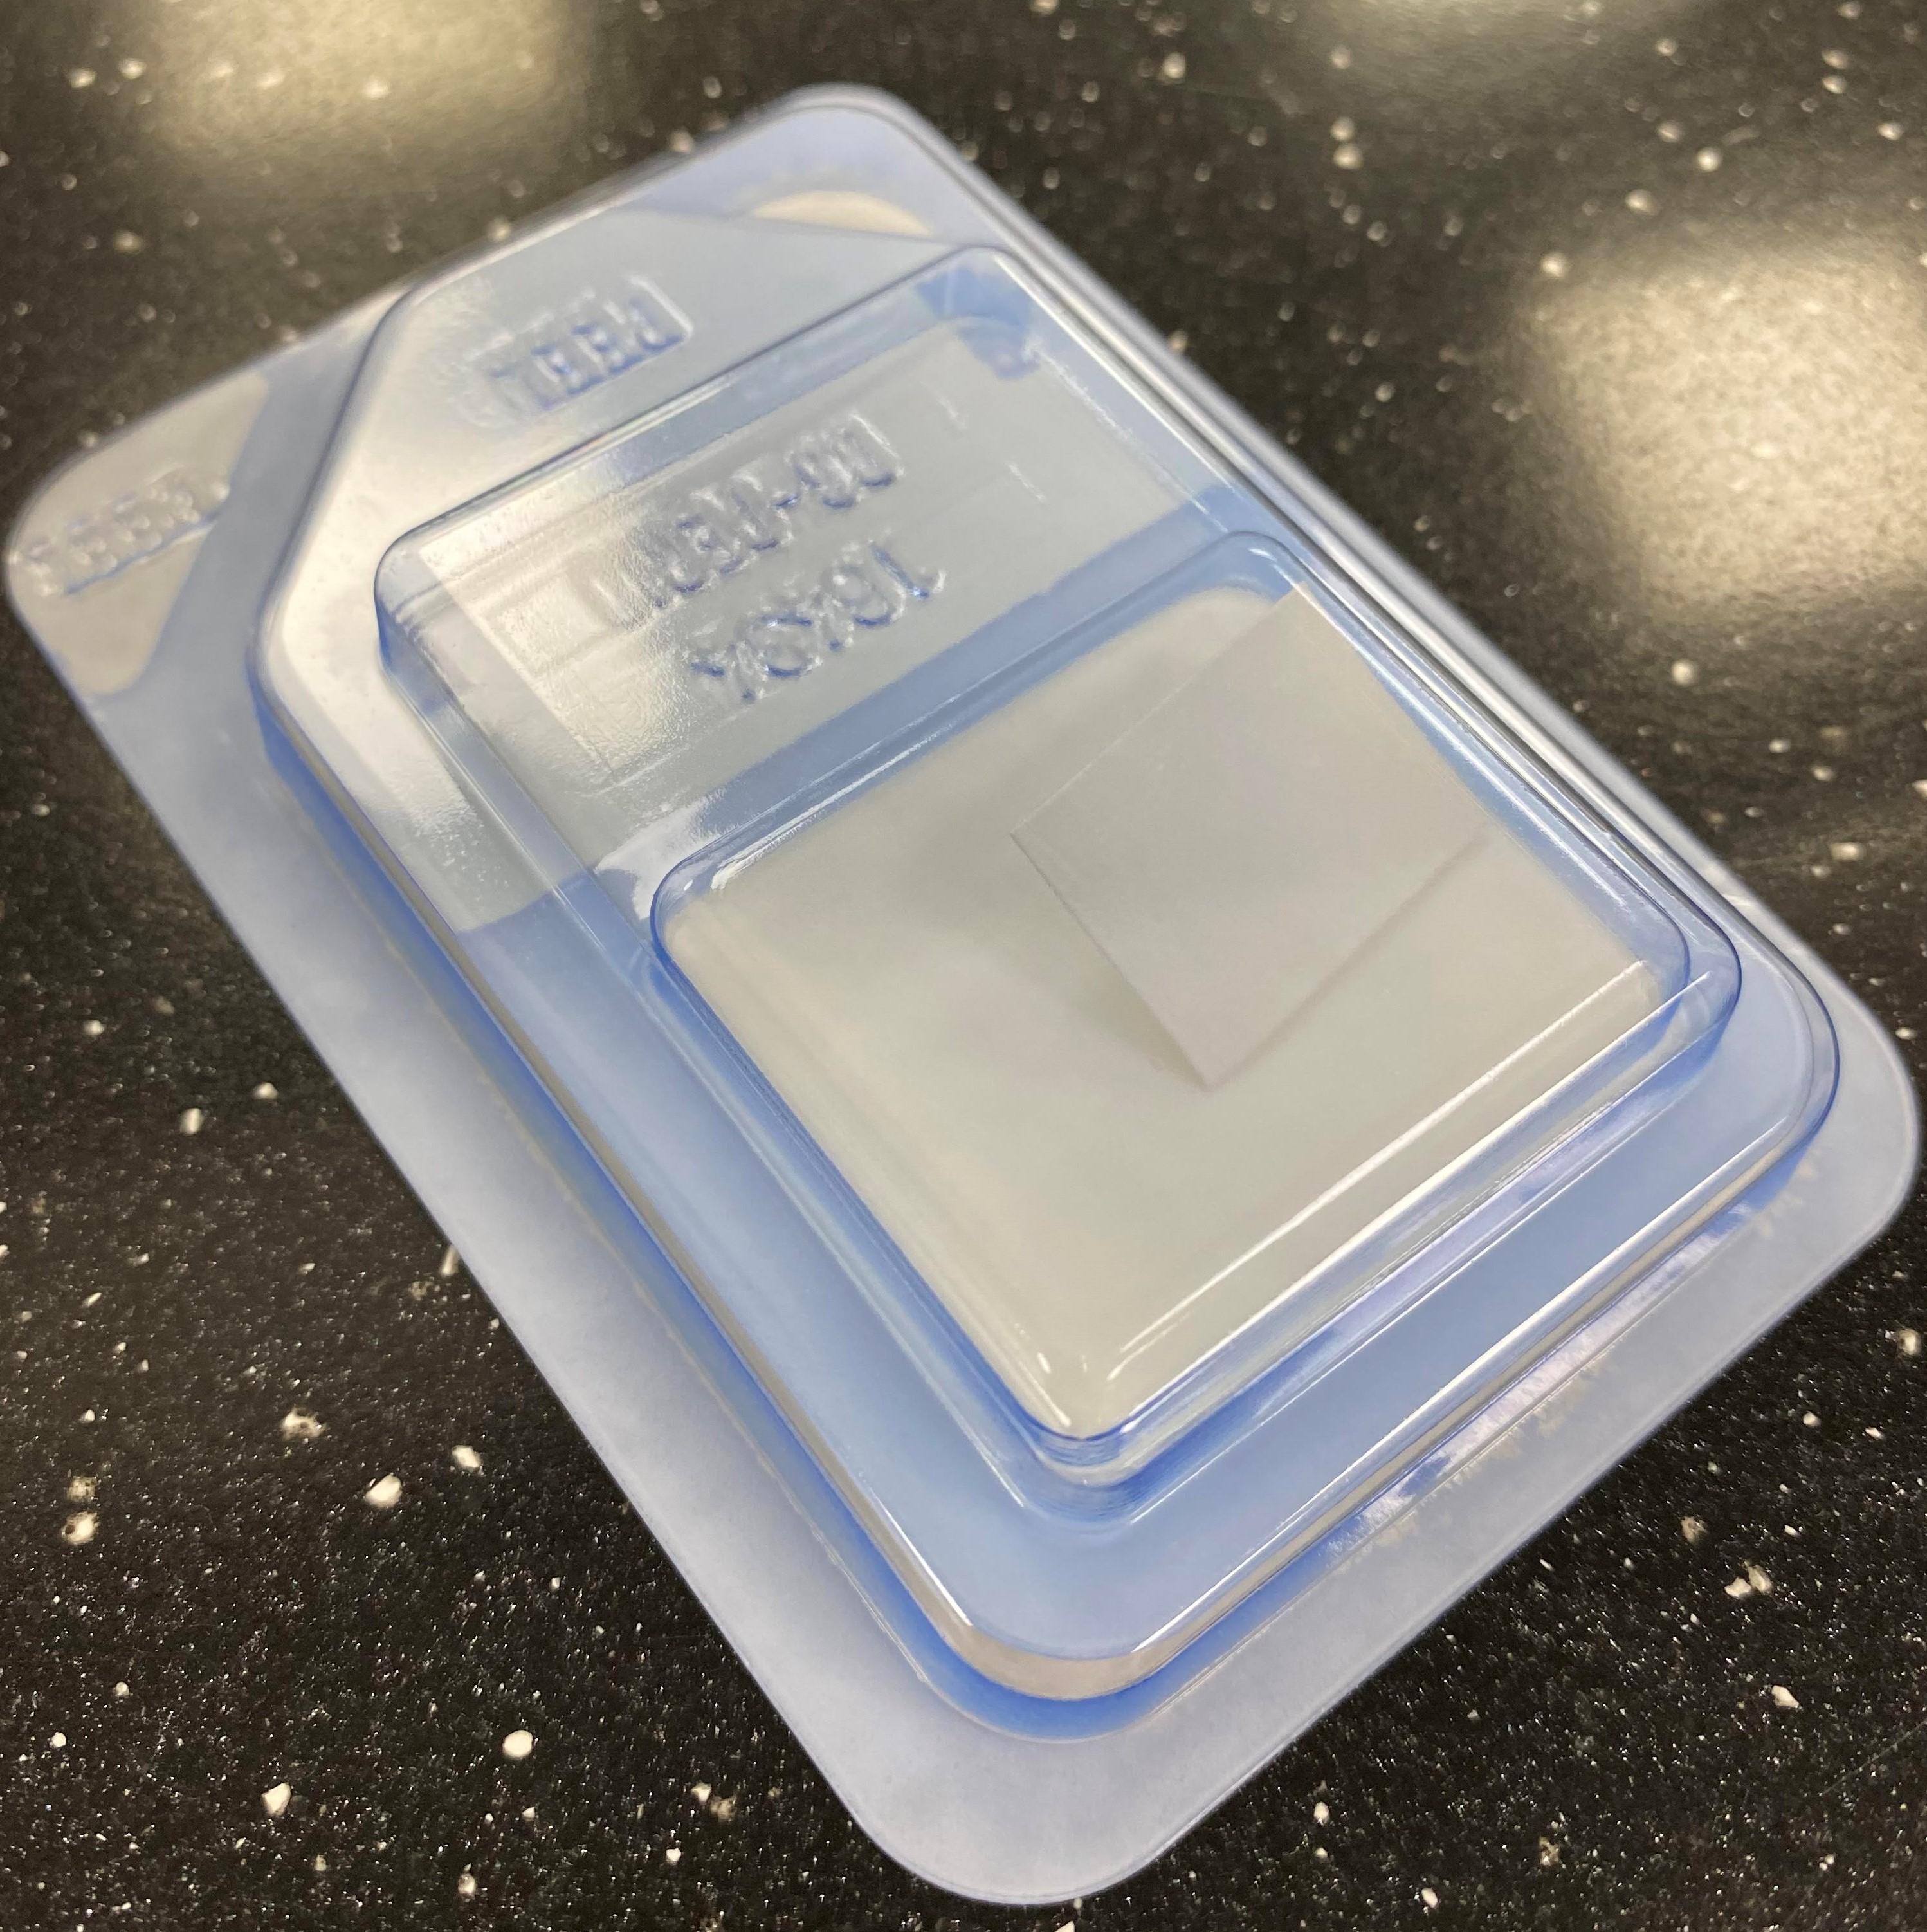
A hemostatic sponge moistened with nat. solution:
This is necessary in order not to damage the mucous membrane during the formation of the implant bed with a drill.
With the help of a cooling tip and overdrive cutters, implant beds are formed. You can familiarize yourself with the stages of implant placement in the article: “ Implant installation: how is it done? »
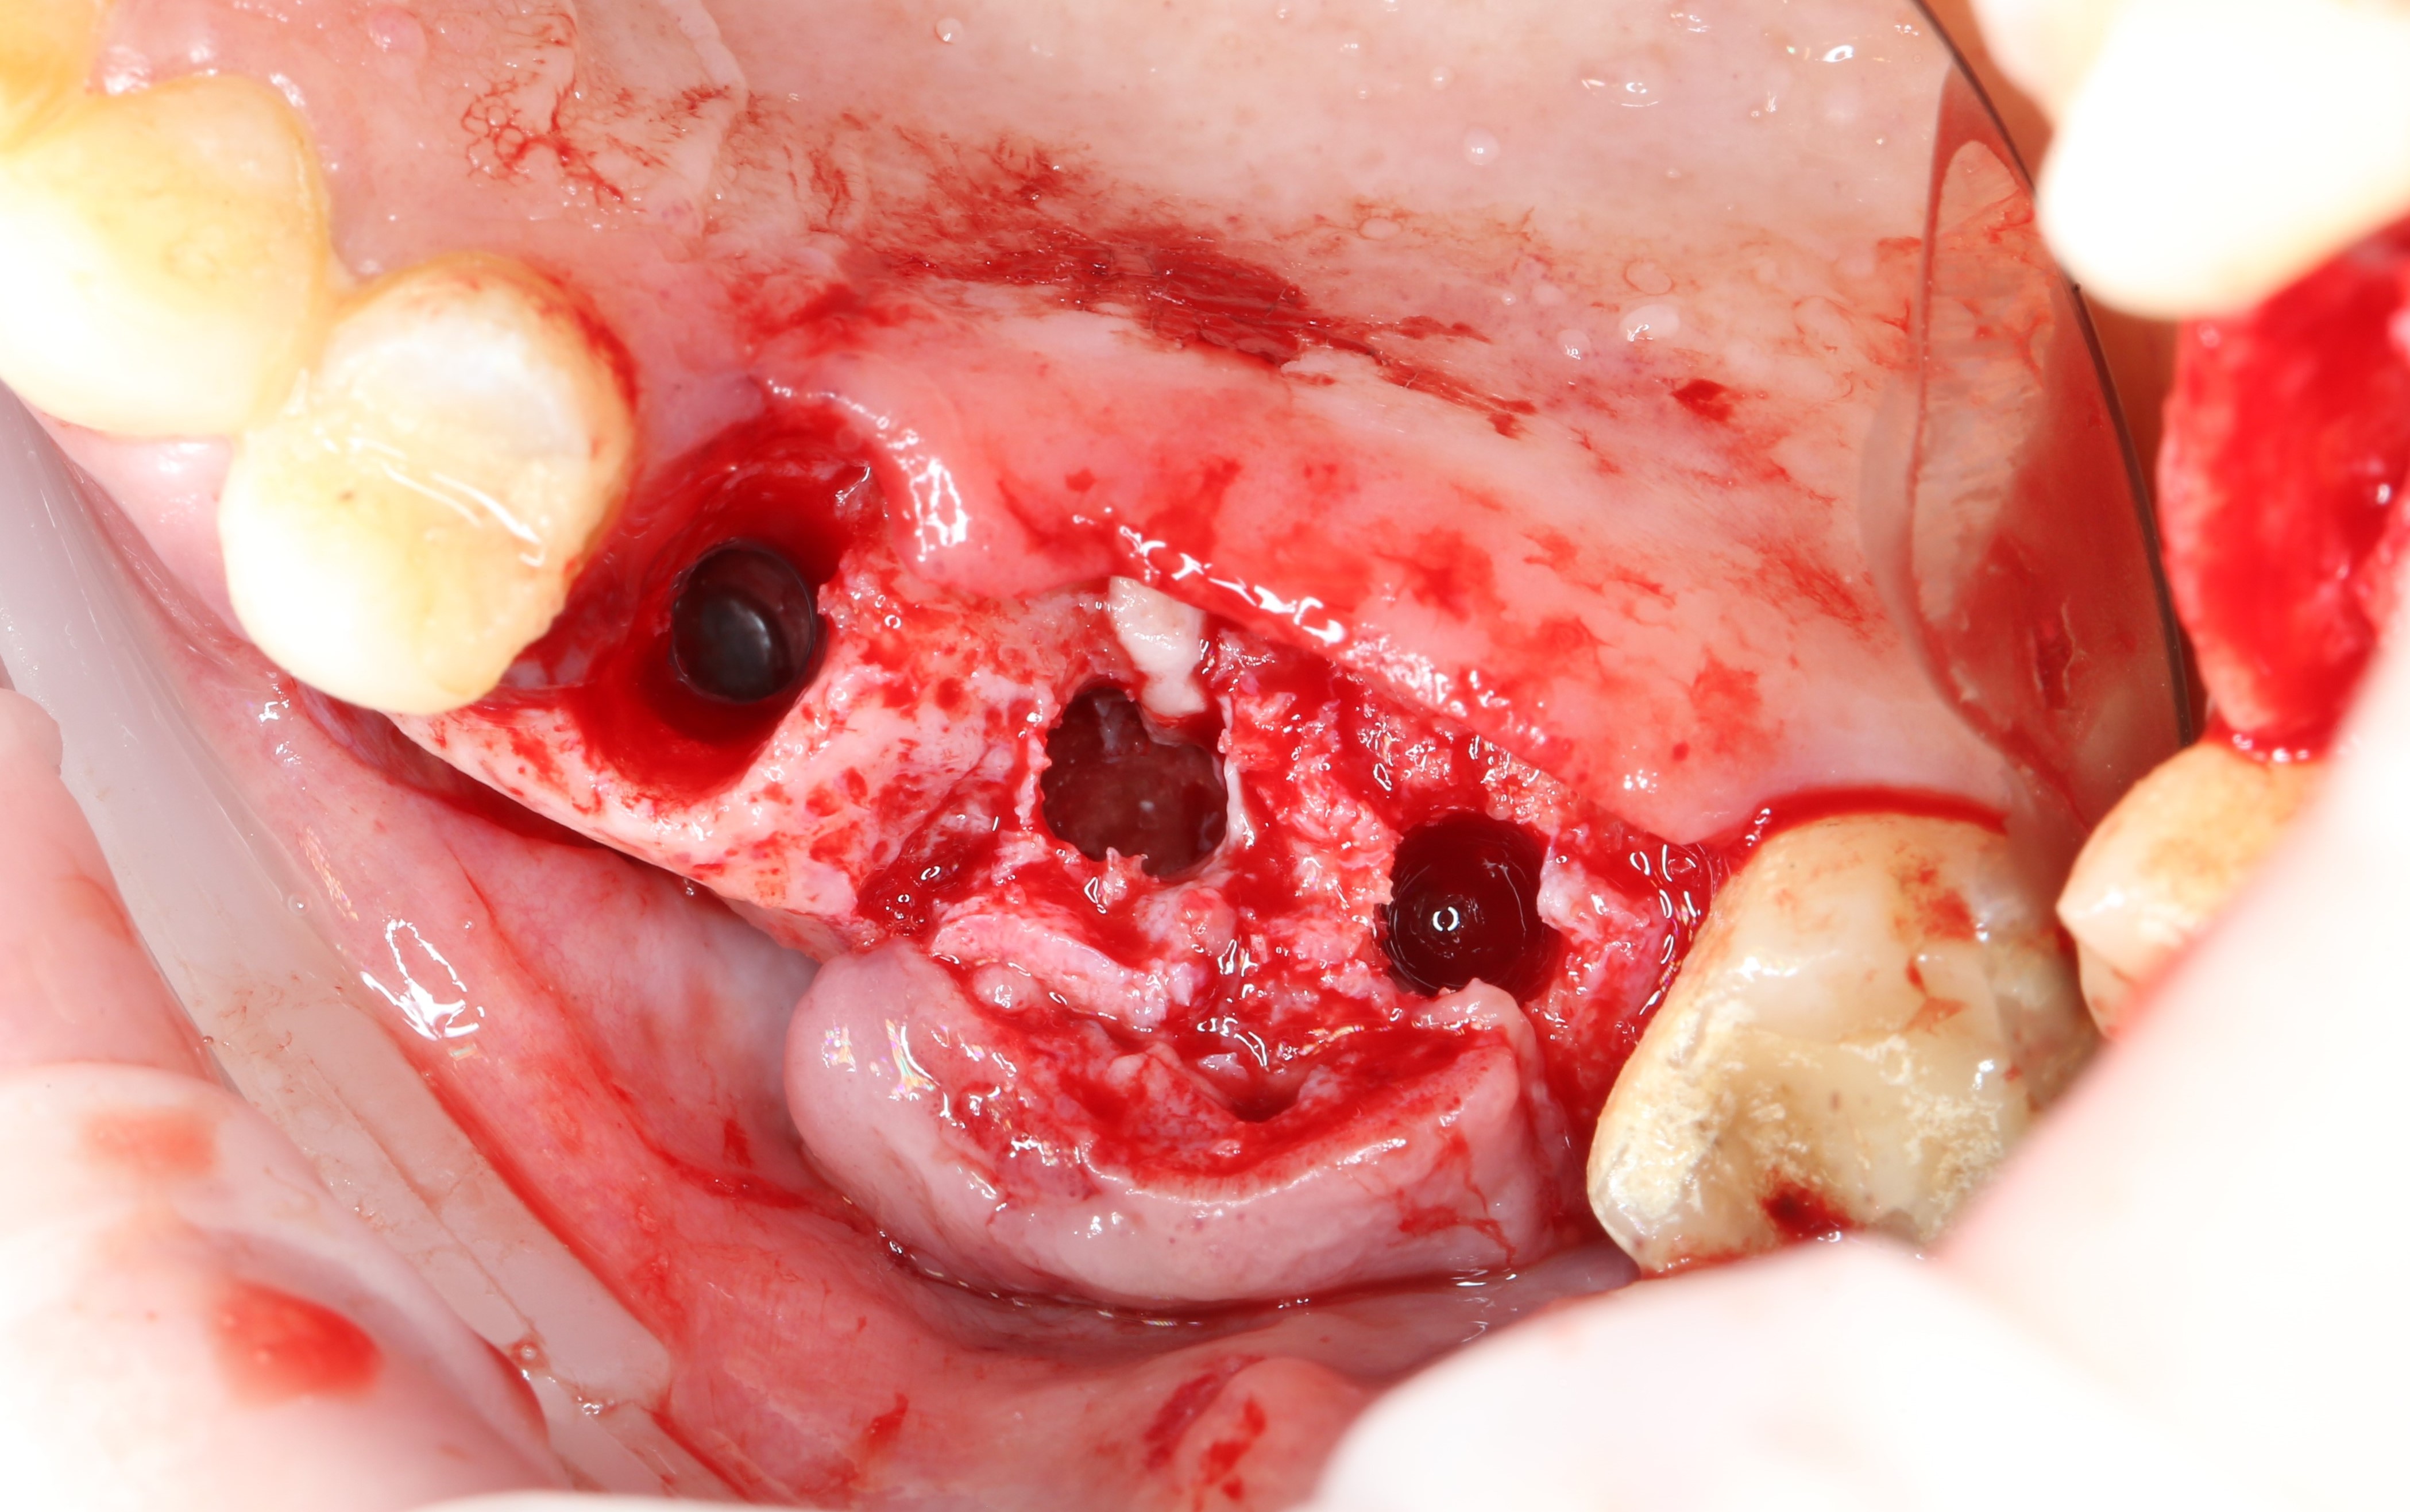
Using the analog (pin) of the implant, we control the parallelism.
Top view:
Next, the sponge and analogs are removed:
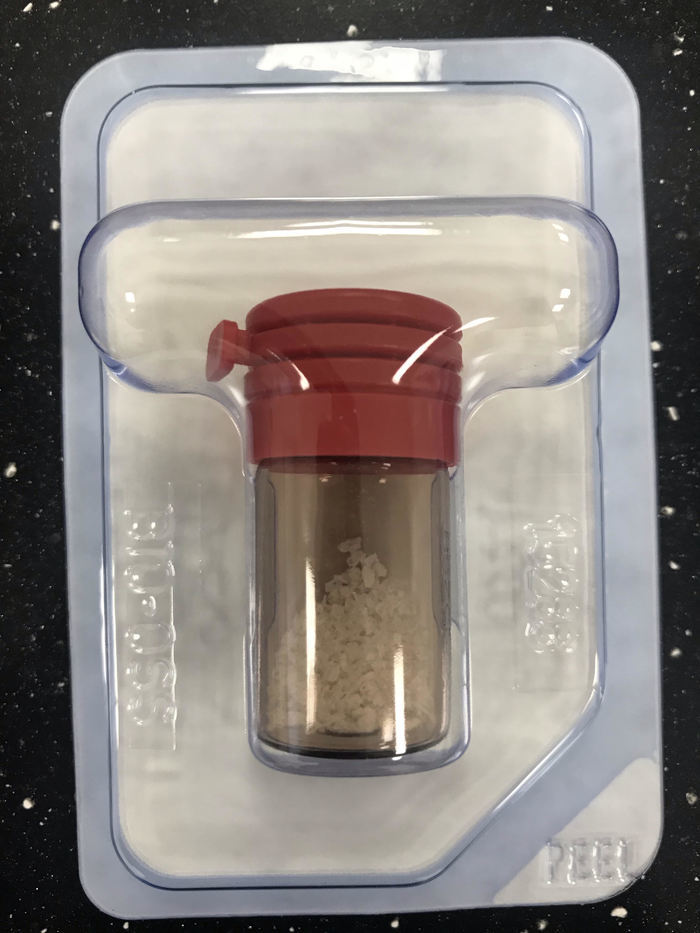
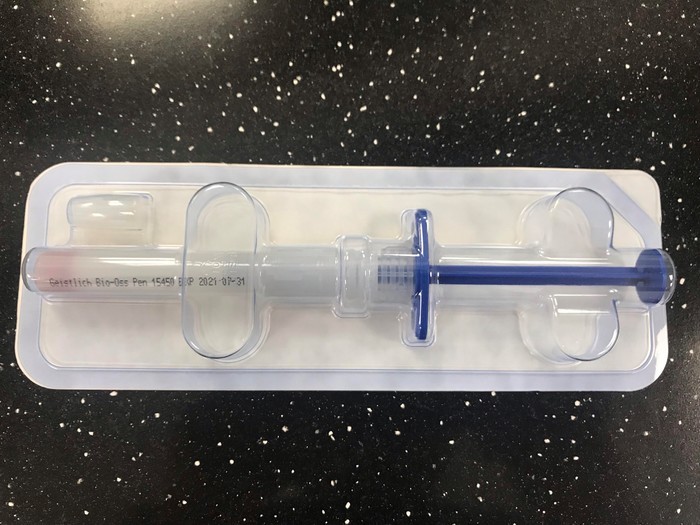
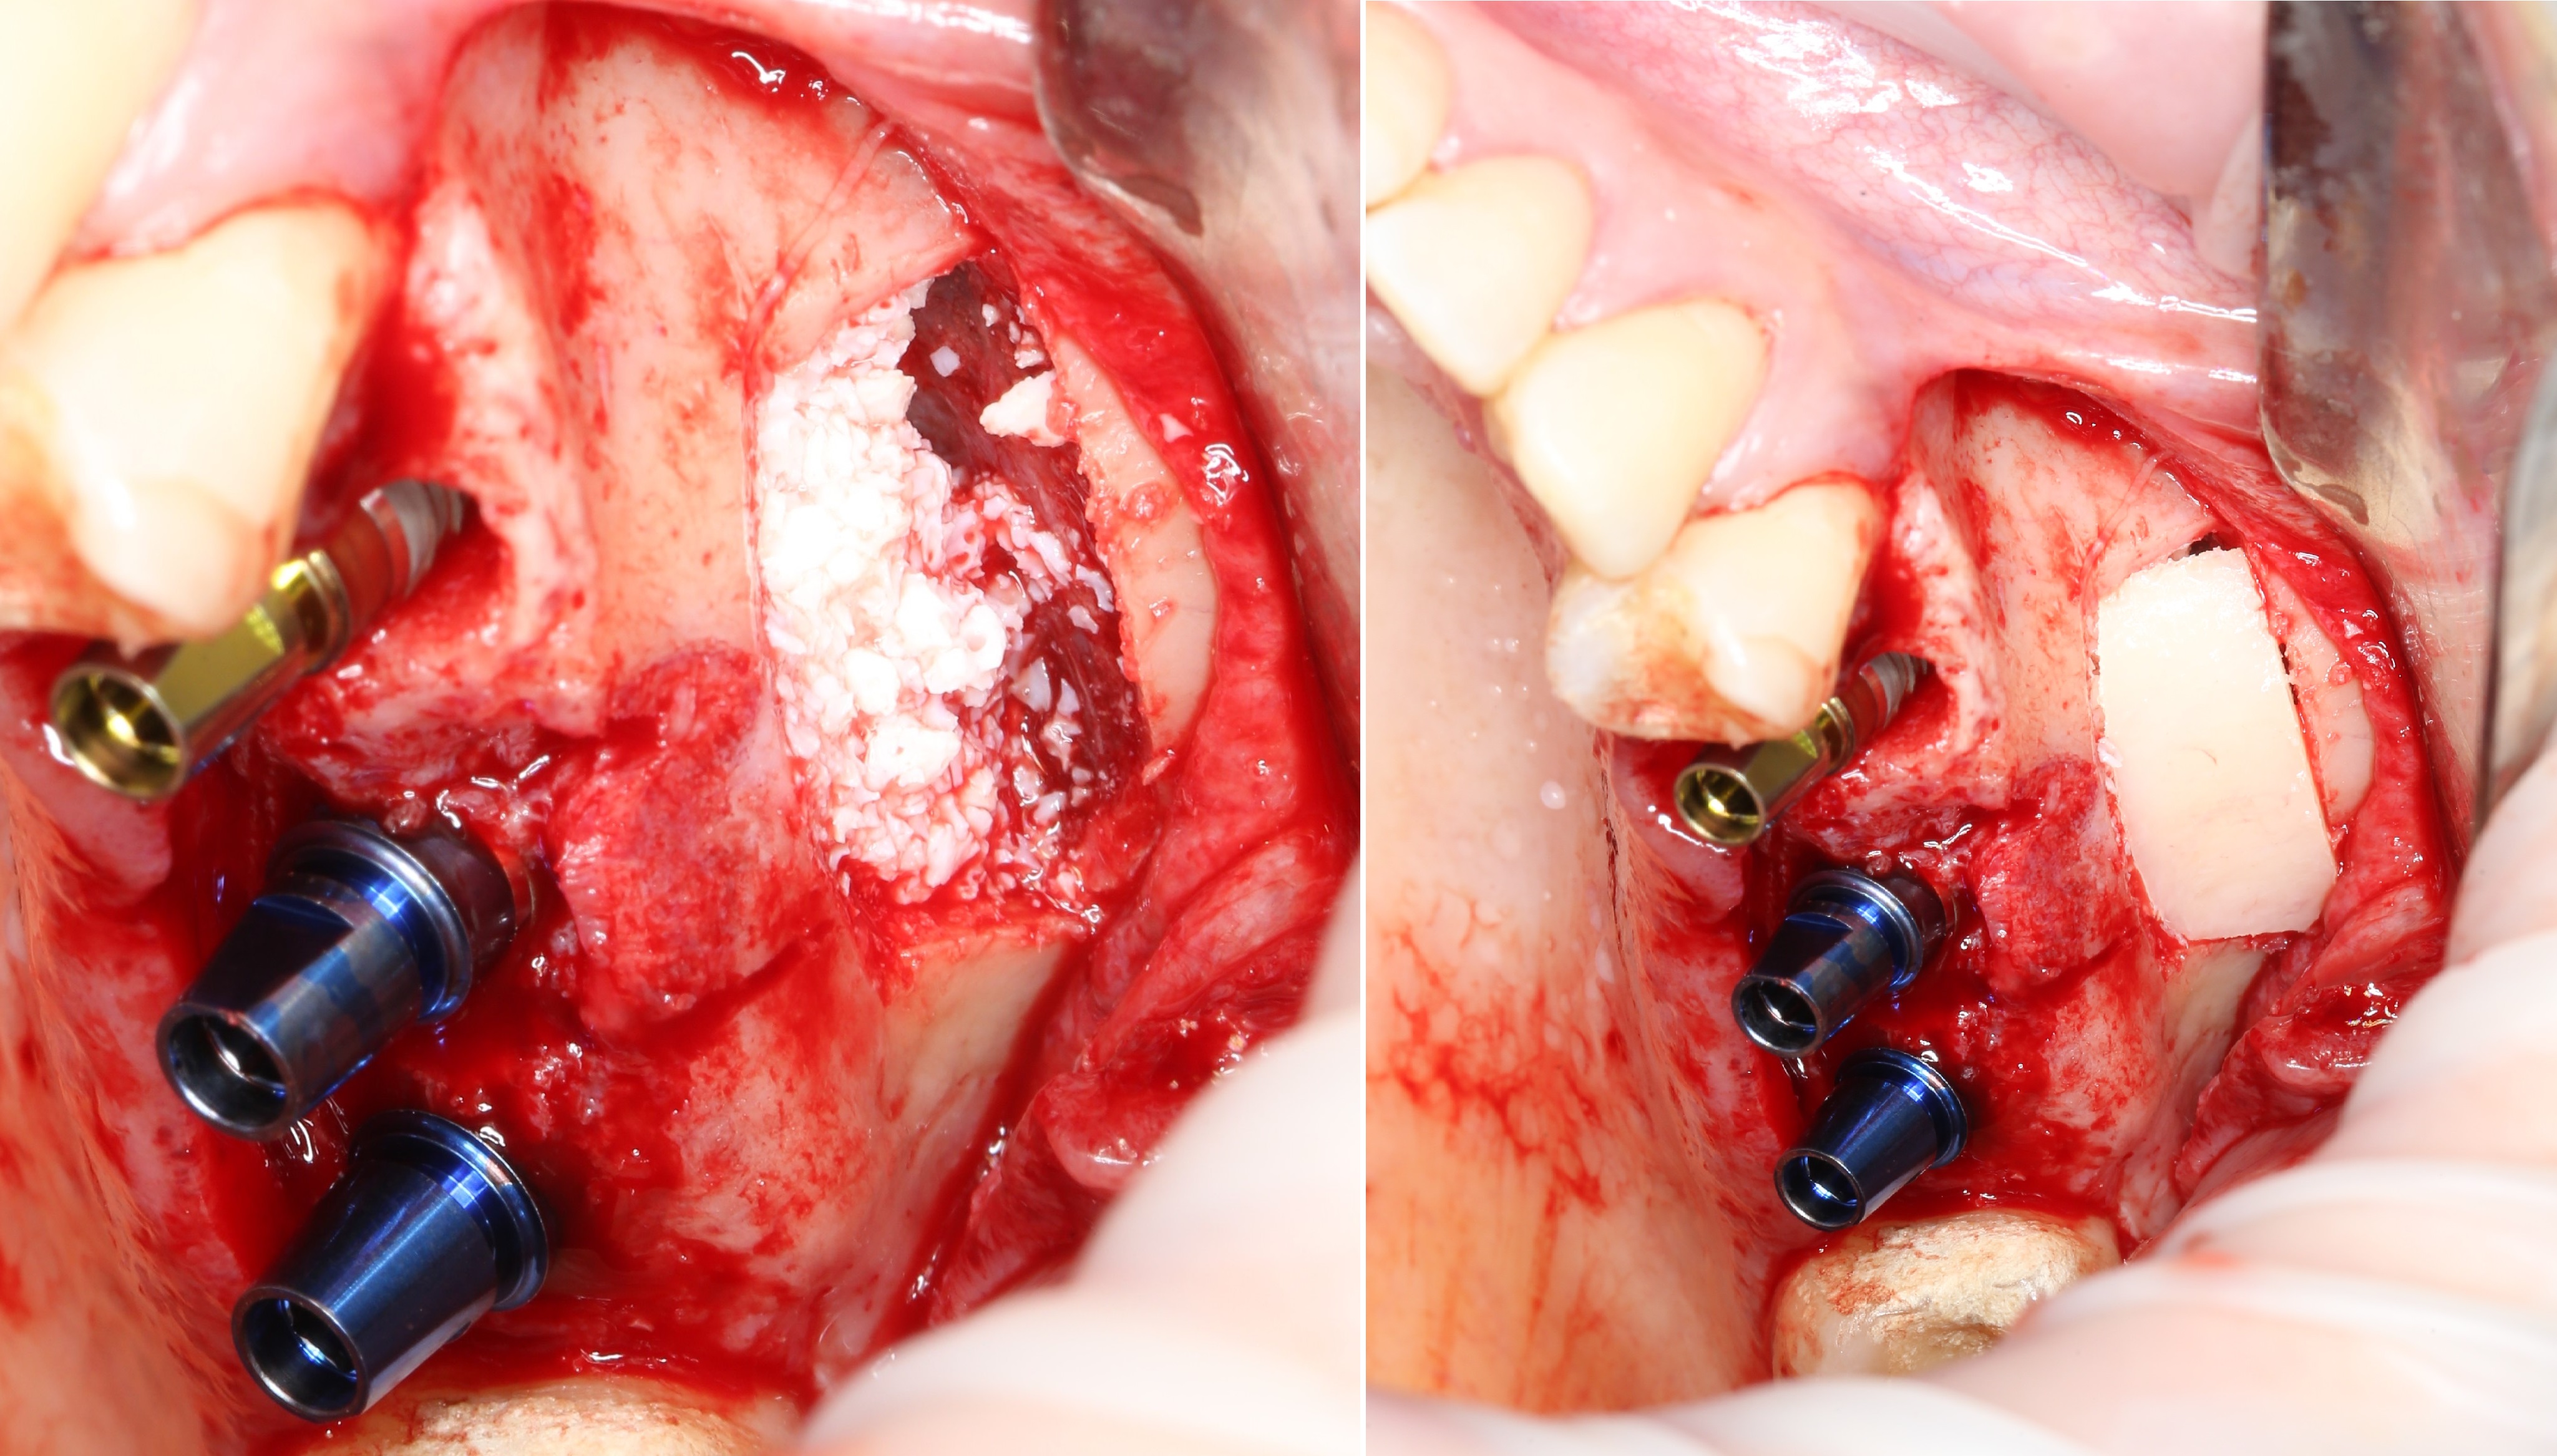
Bone material is applied.
It is available both in glass jars
and in special syringes, with which it is more convenient to add it.
This is how it looks in the oral cavity:

Bone material is distributed in portions:
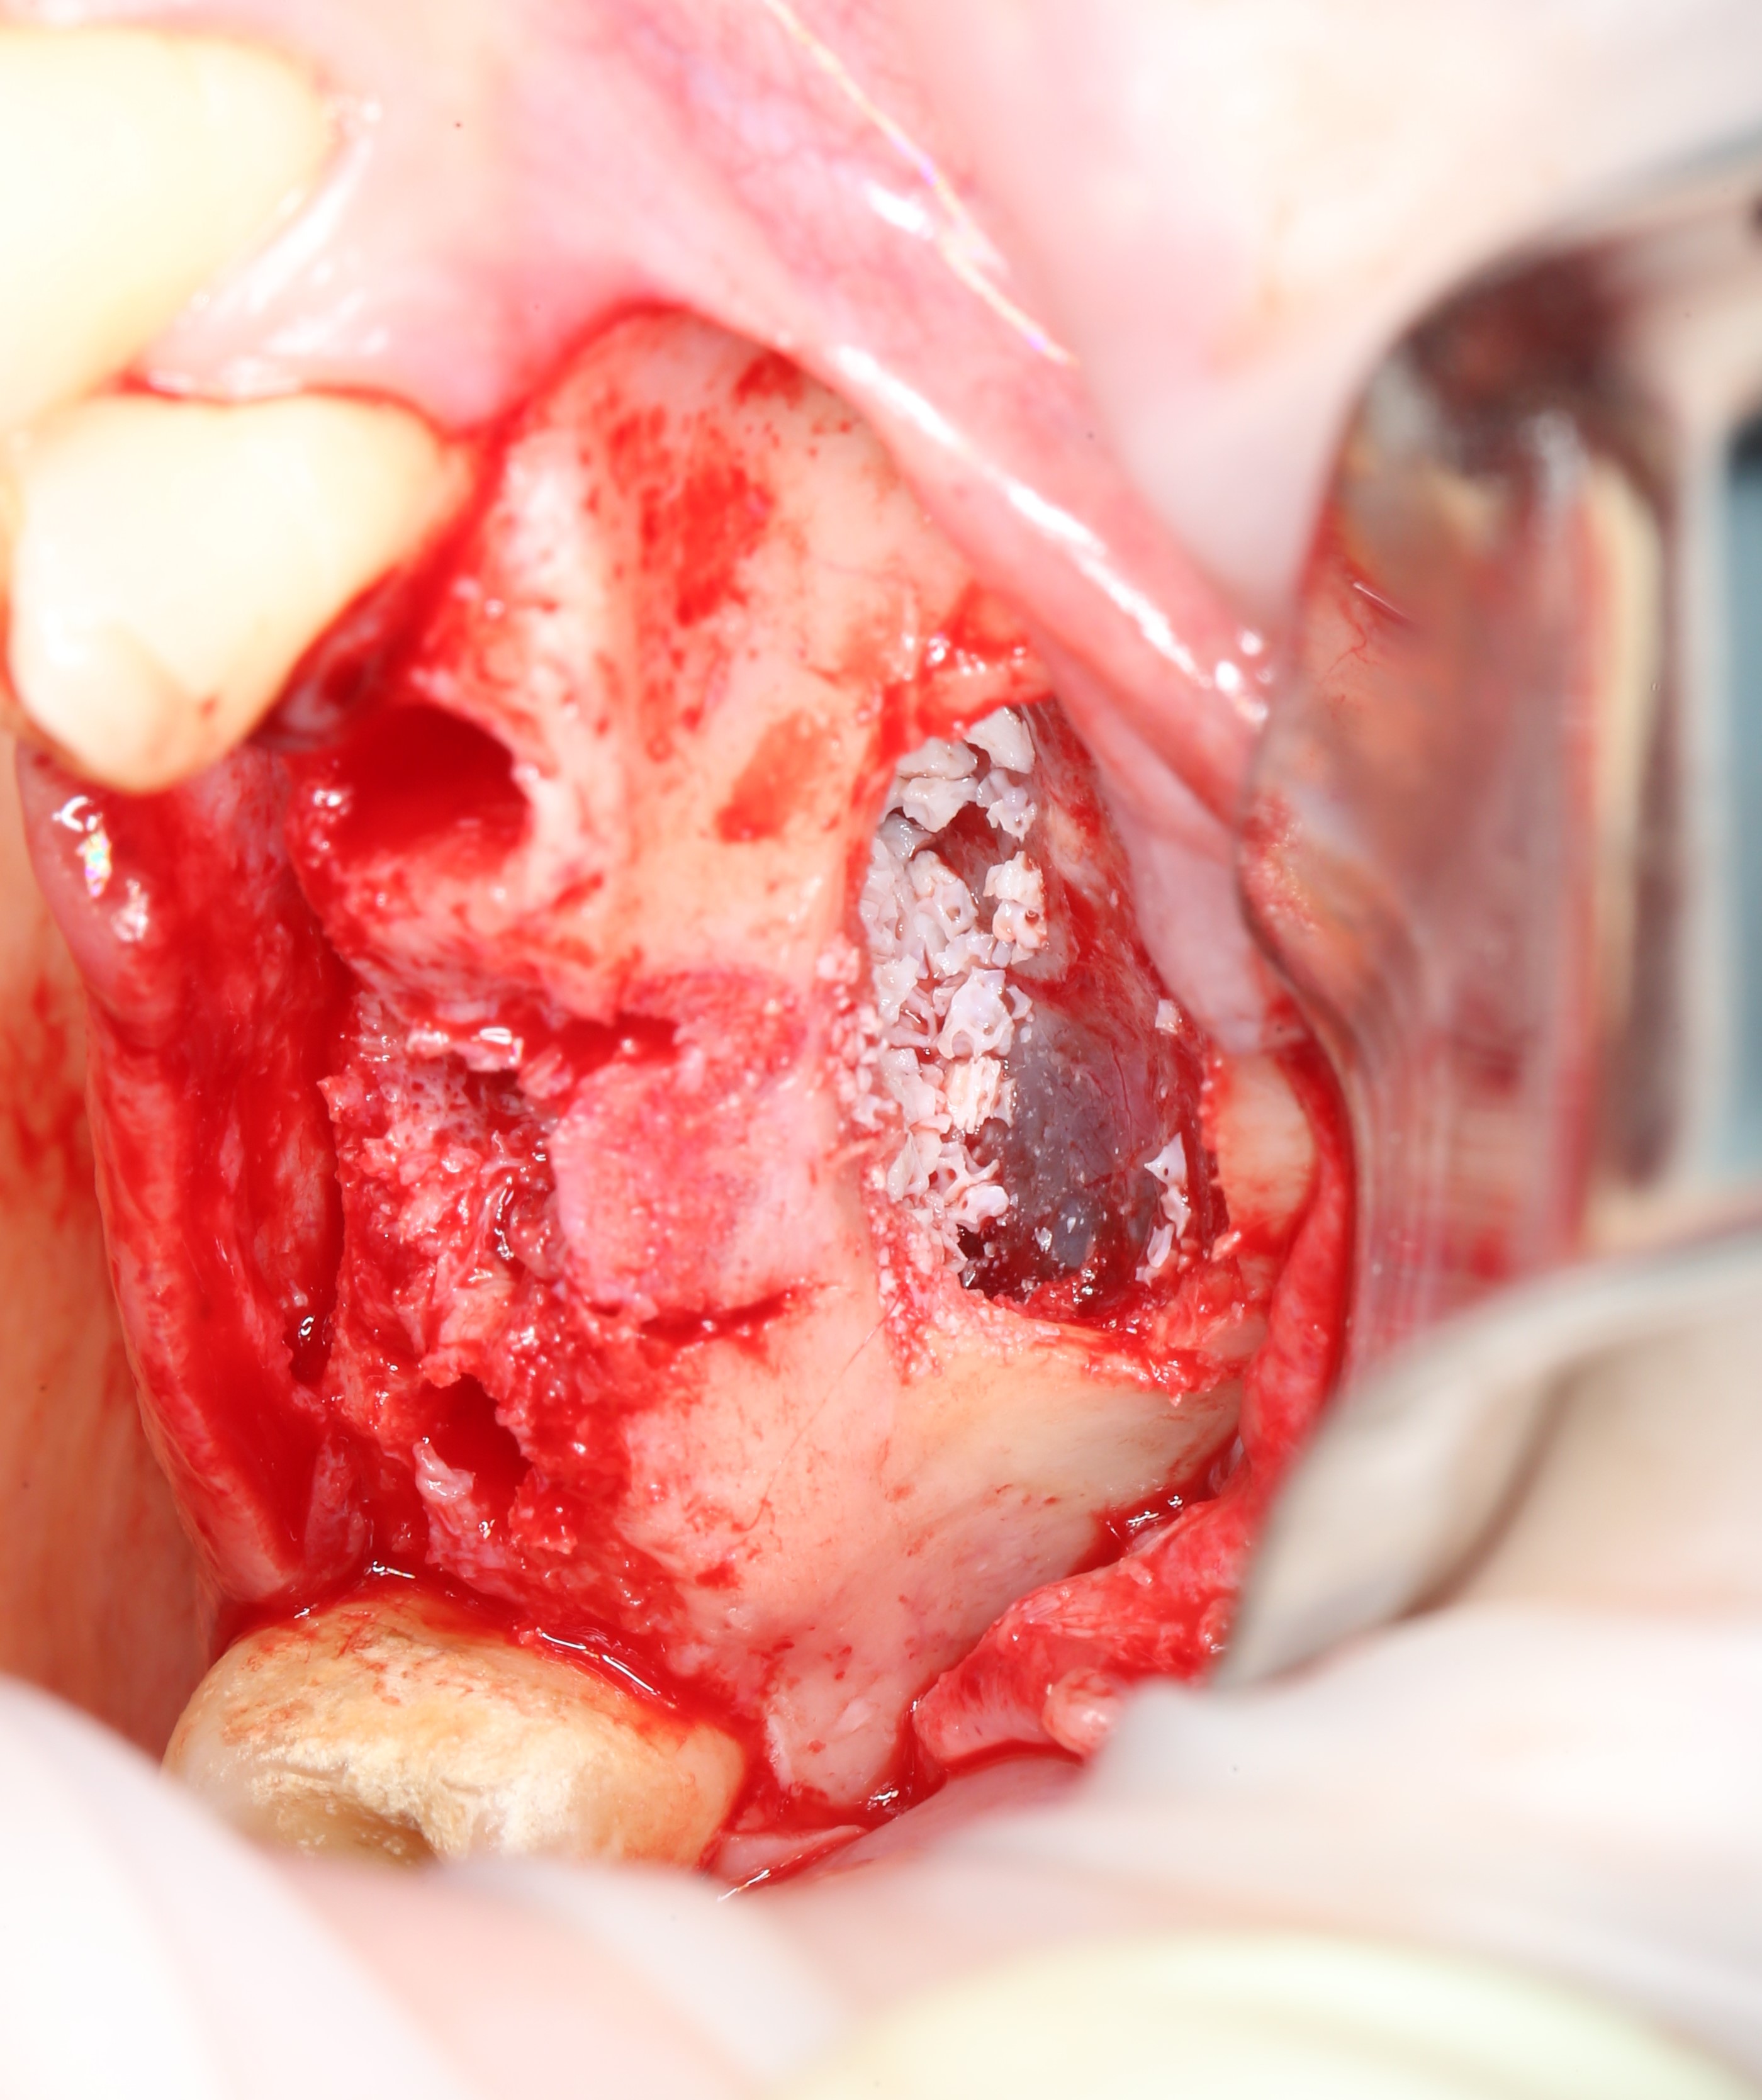
From the side of the formed holes, you can control its distribution:

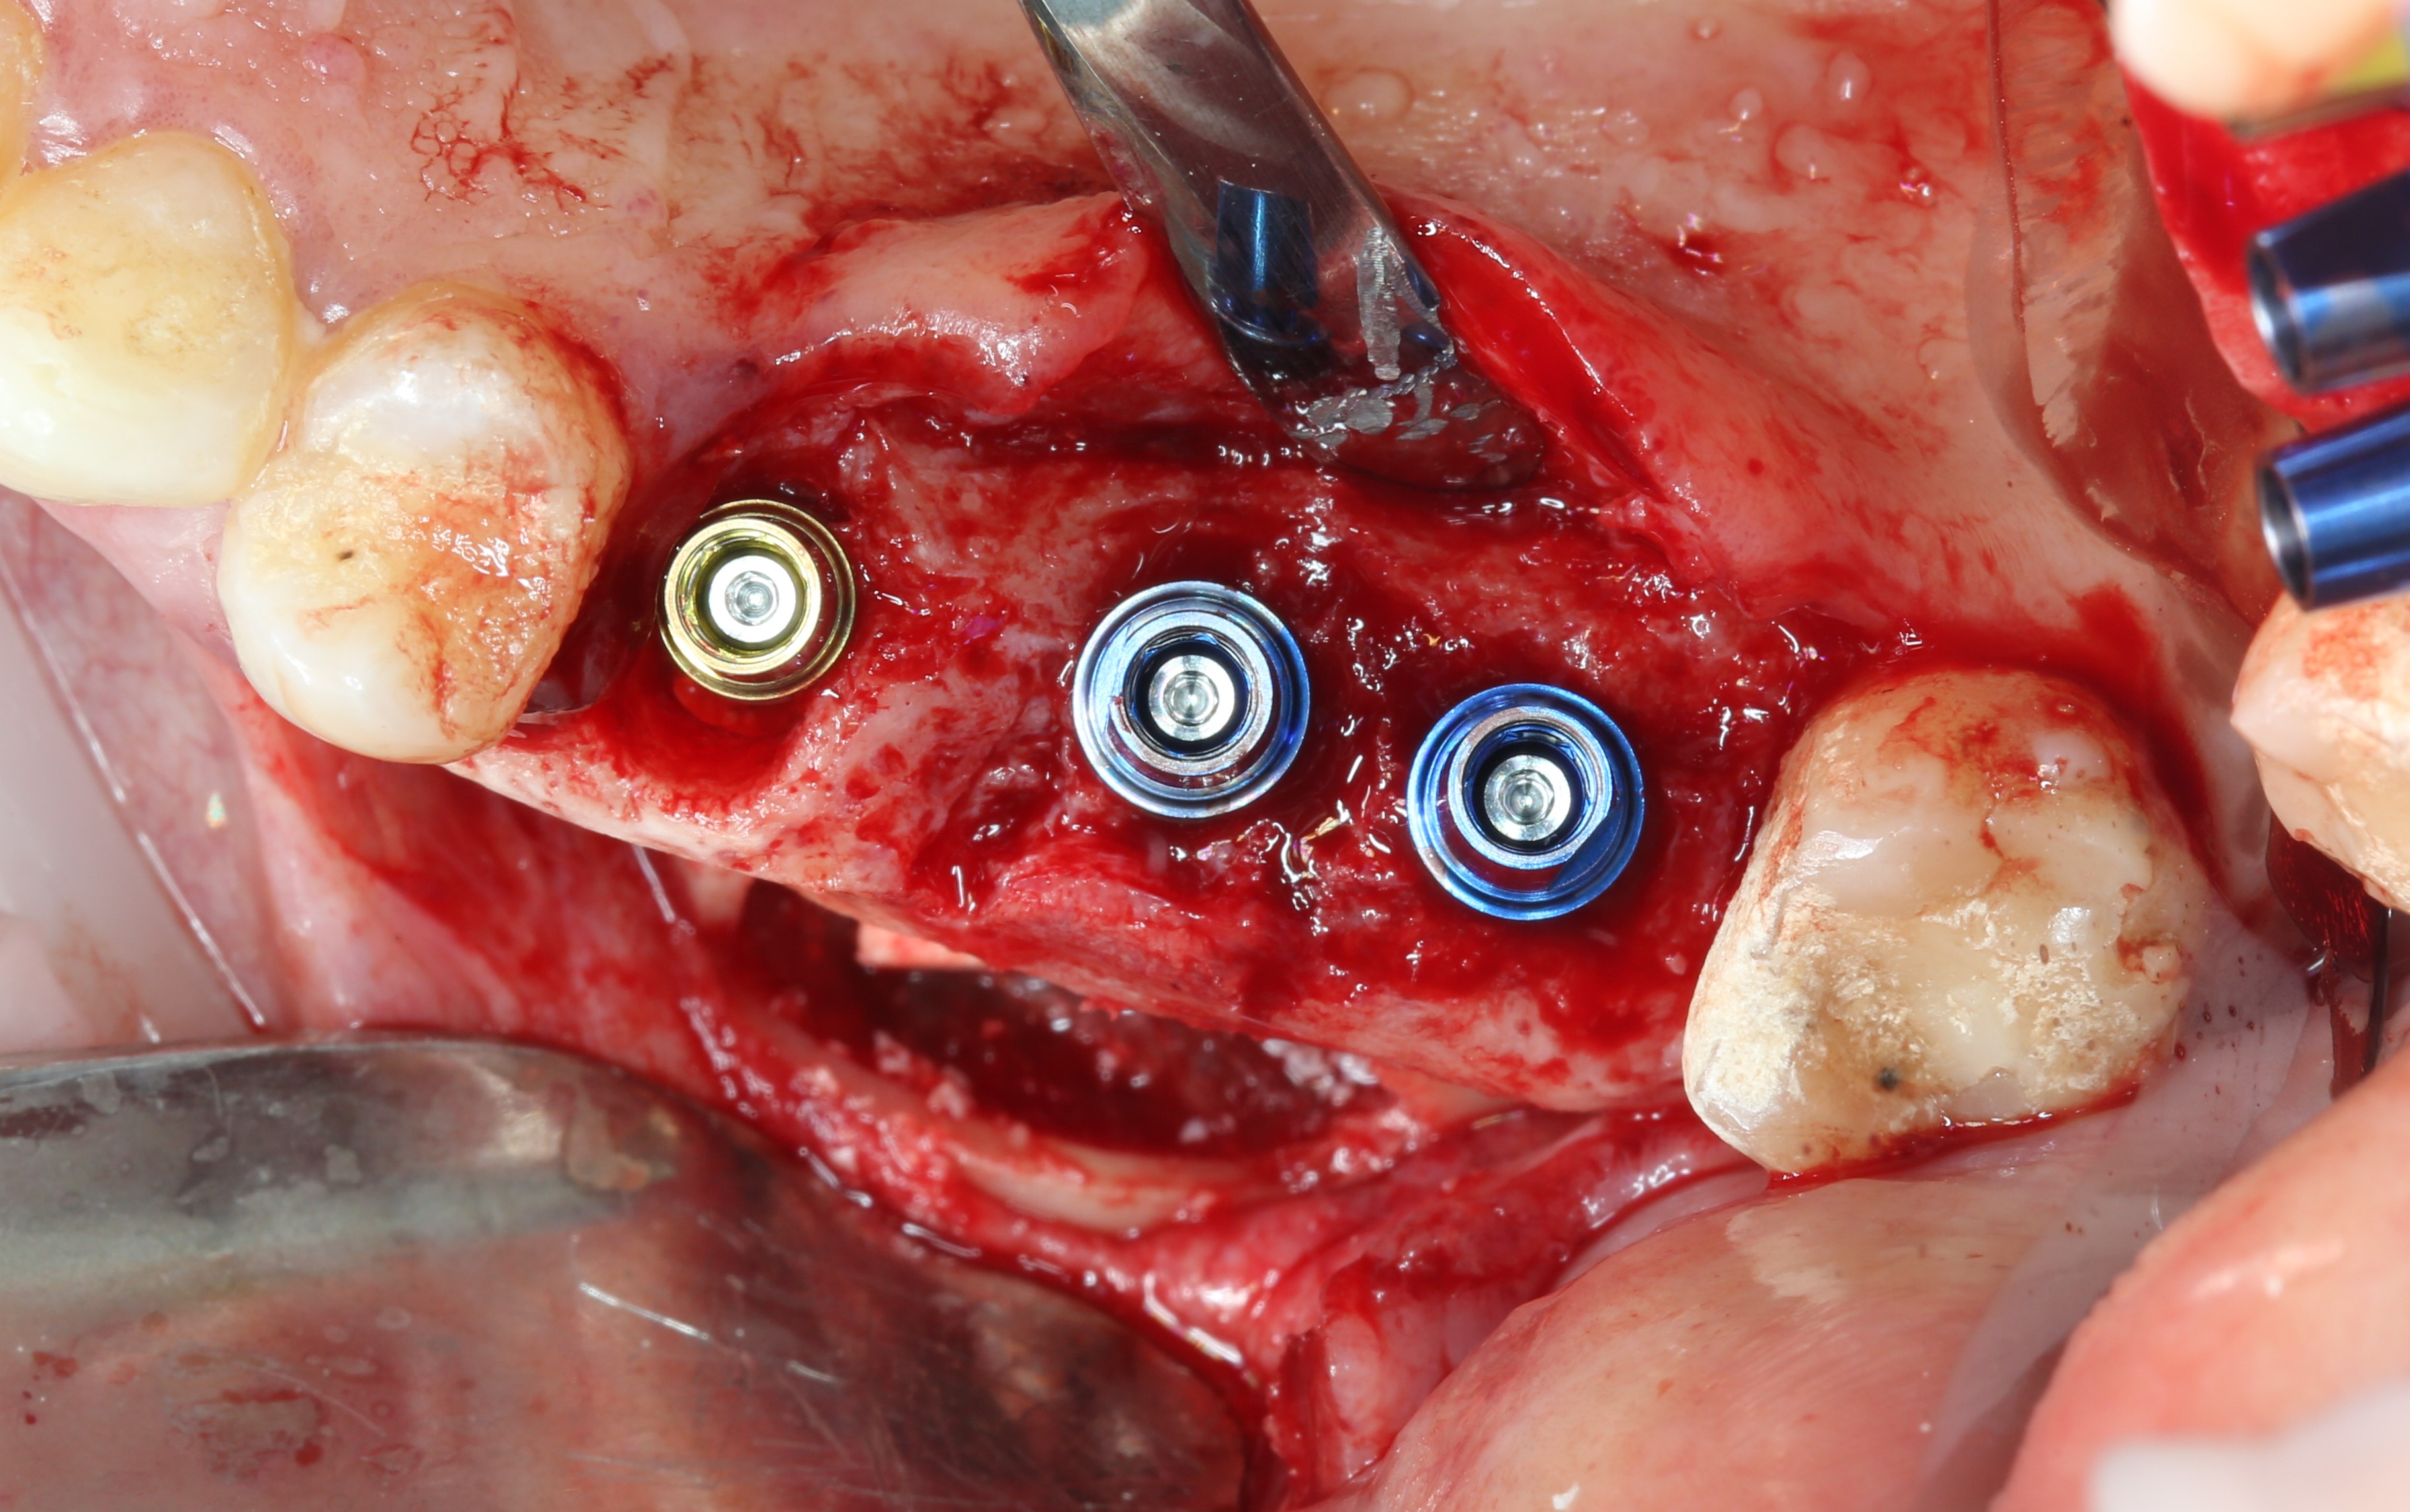
It is clearly visible that the bone chips are placed exactly where the implants will be located.
The implant looks like this: The
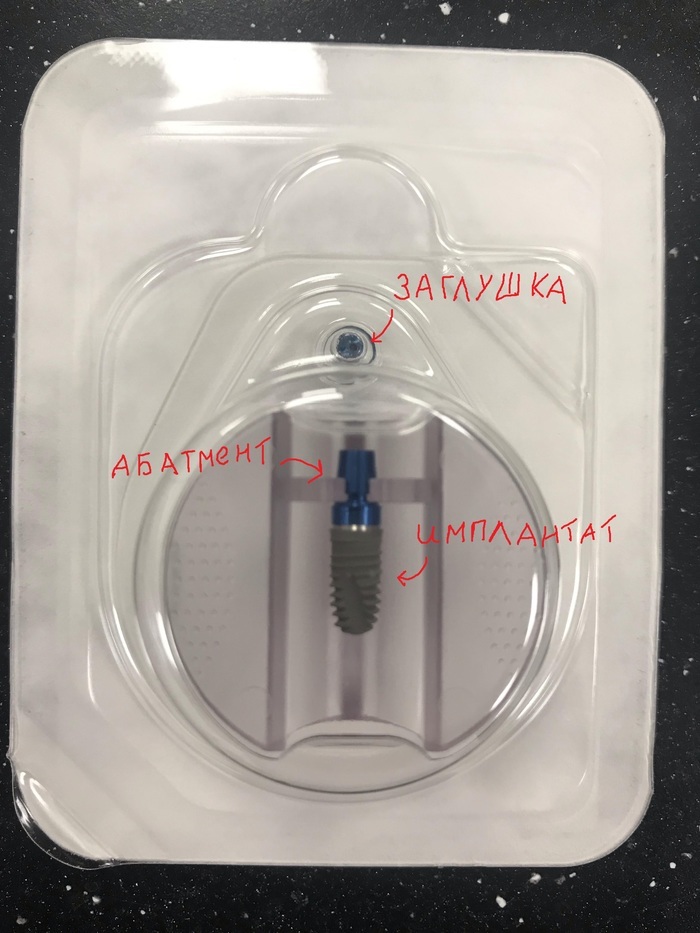
gray part is the implant itself. The blue part is the so-called temporary abutment. Basically, it acts as an implant holder.
After the implant is installed, the abutment is unscrewed, like a designer, with a special screwdriver .
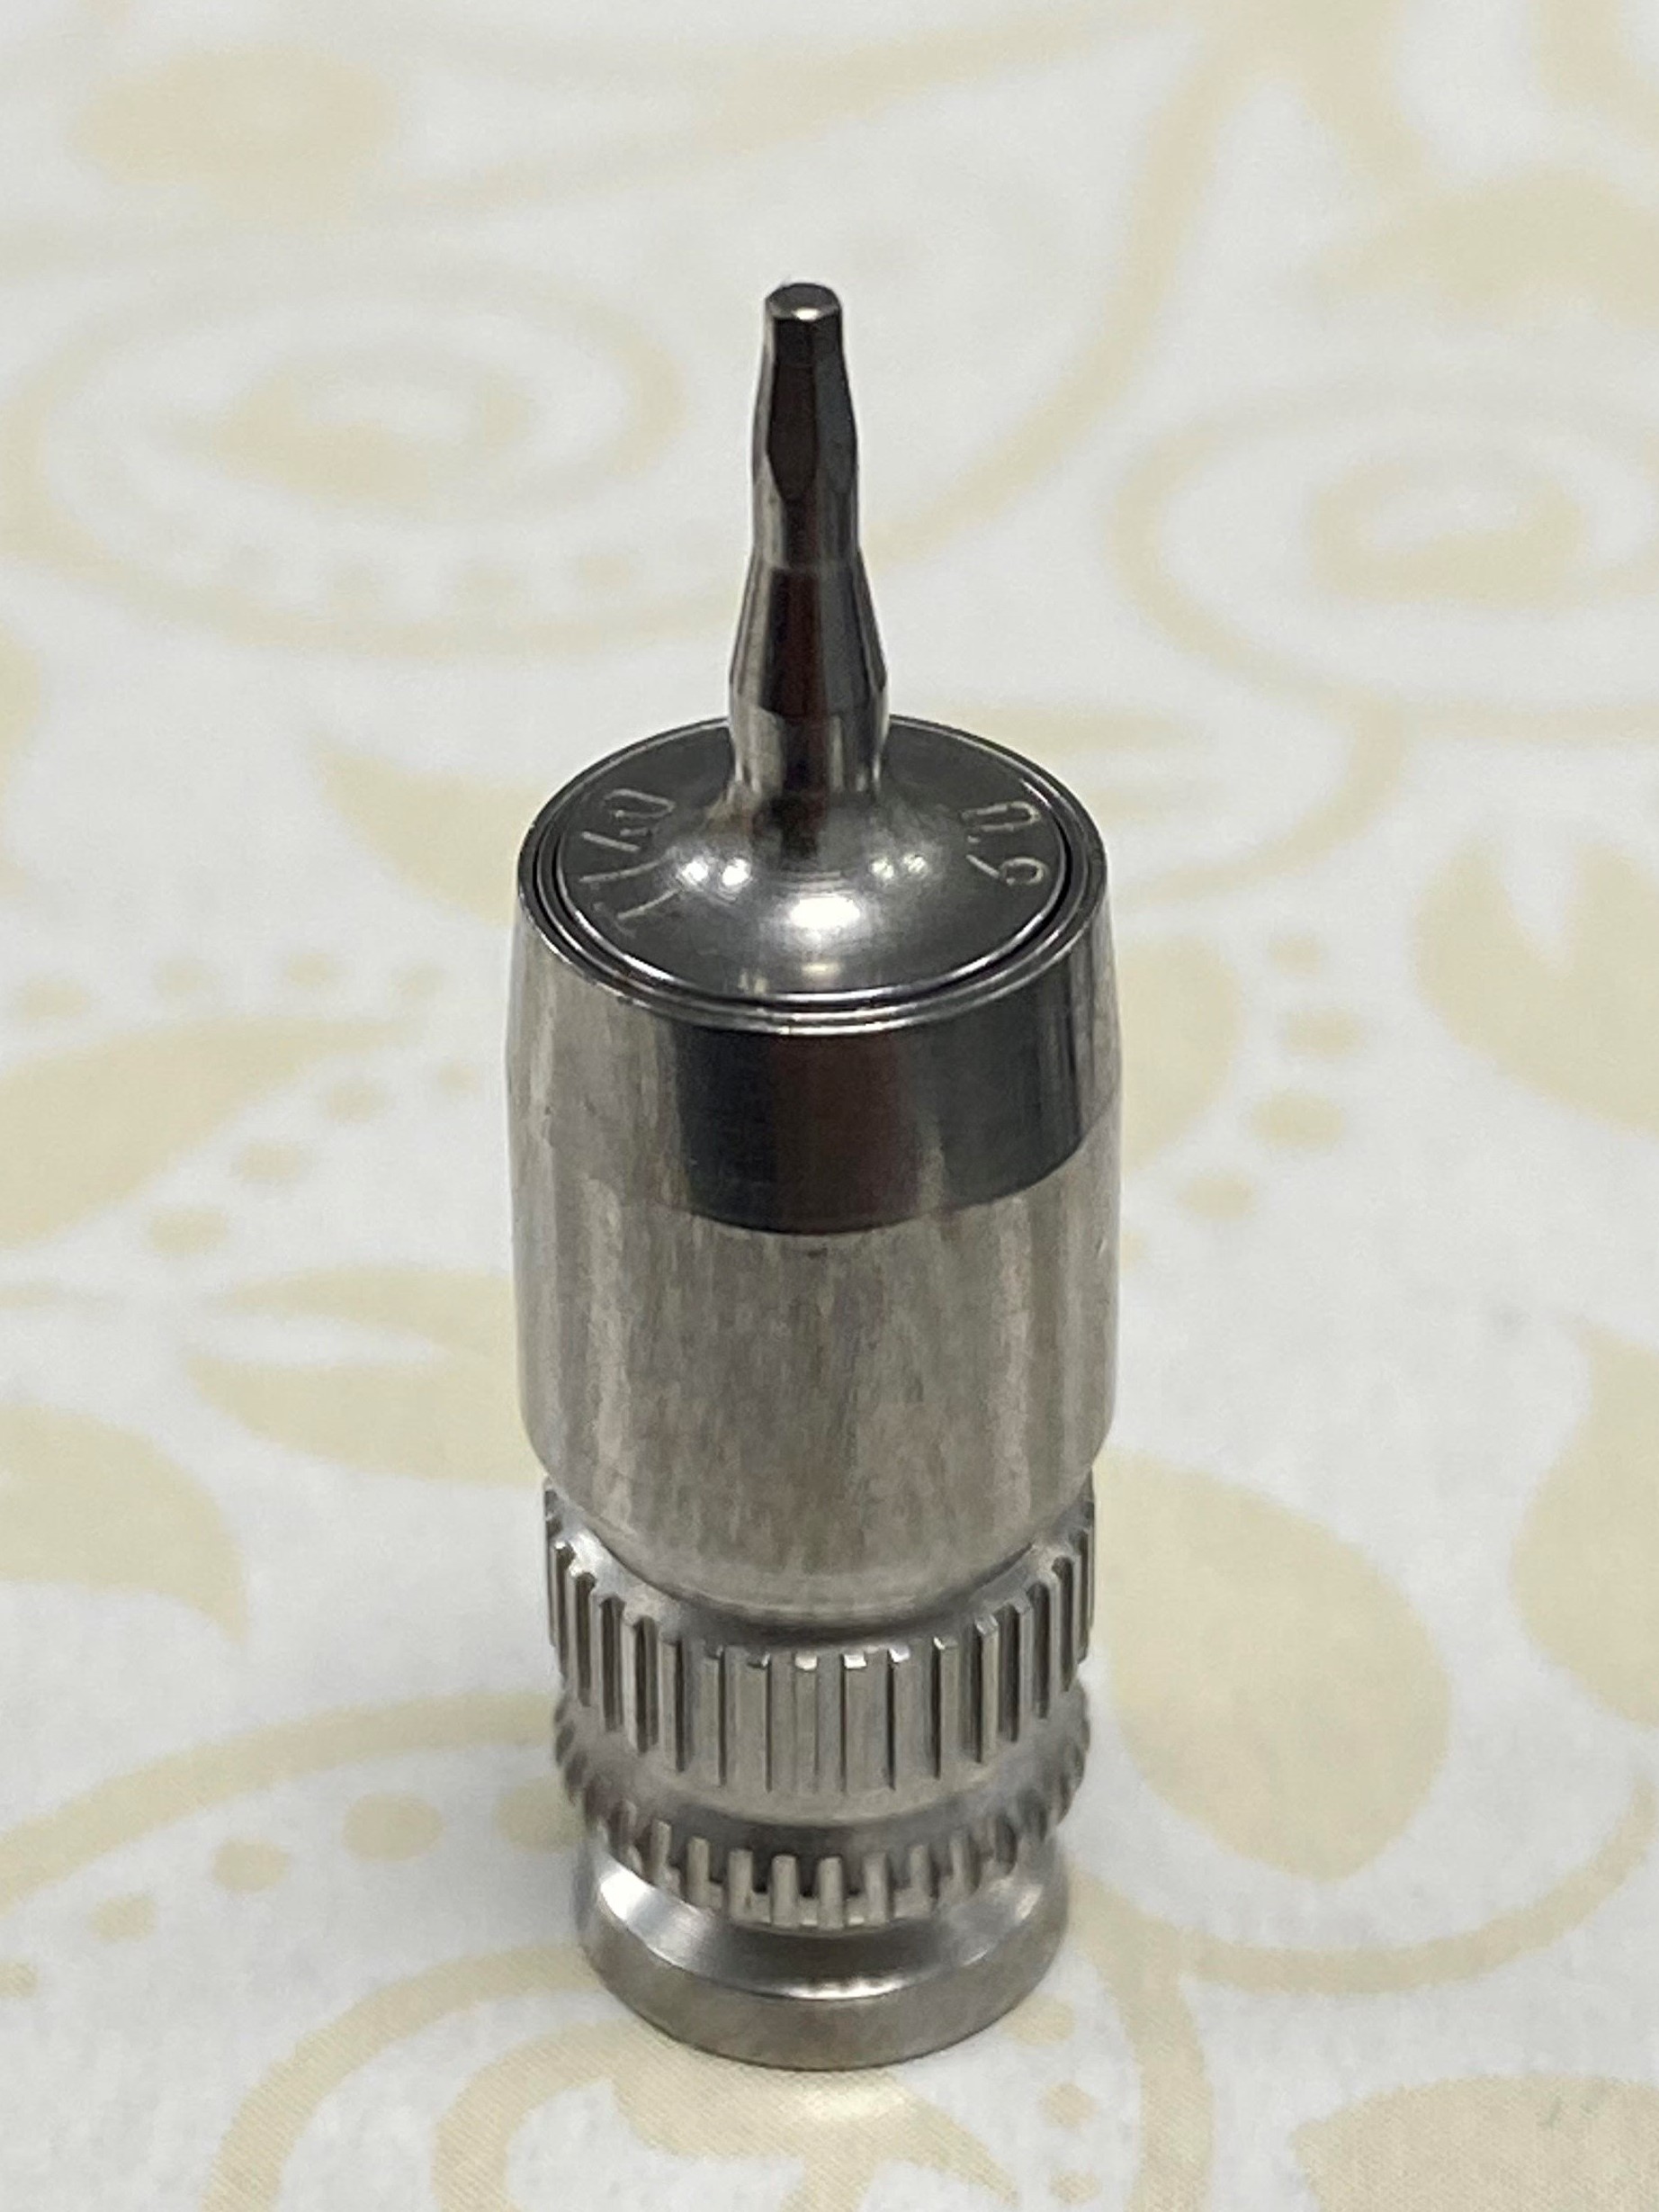
Photo for understanding the scale:

and a plug is screwed in its place. It is installed in the event that it is impossible to immediately install the healing cap. Then the implant and all its constituent parts are completely under the gum, which means that we will not see anything in the oral cavity after the operation. Well, except for the seams. In this situation, the shaper is installed after the implant has taken root.
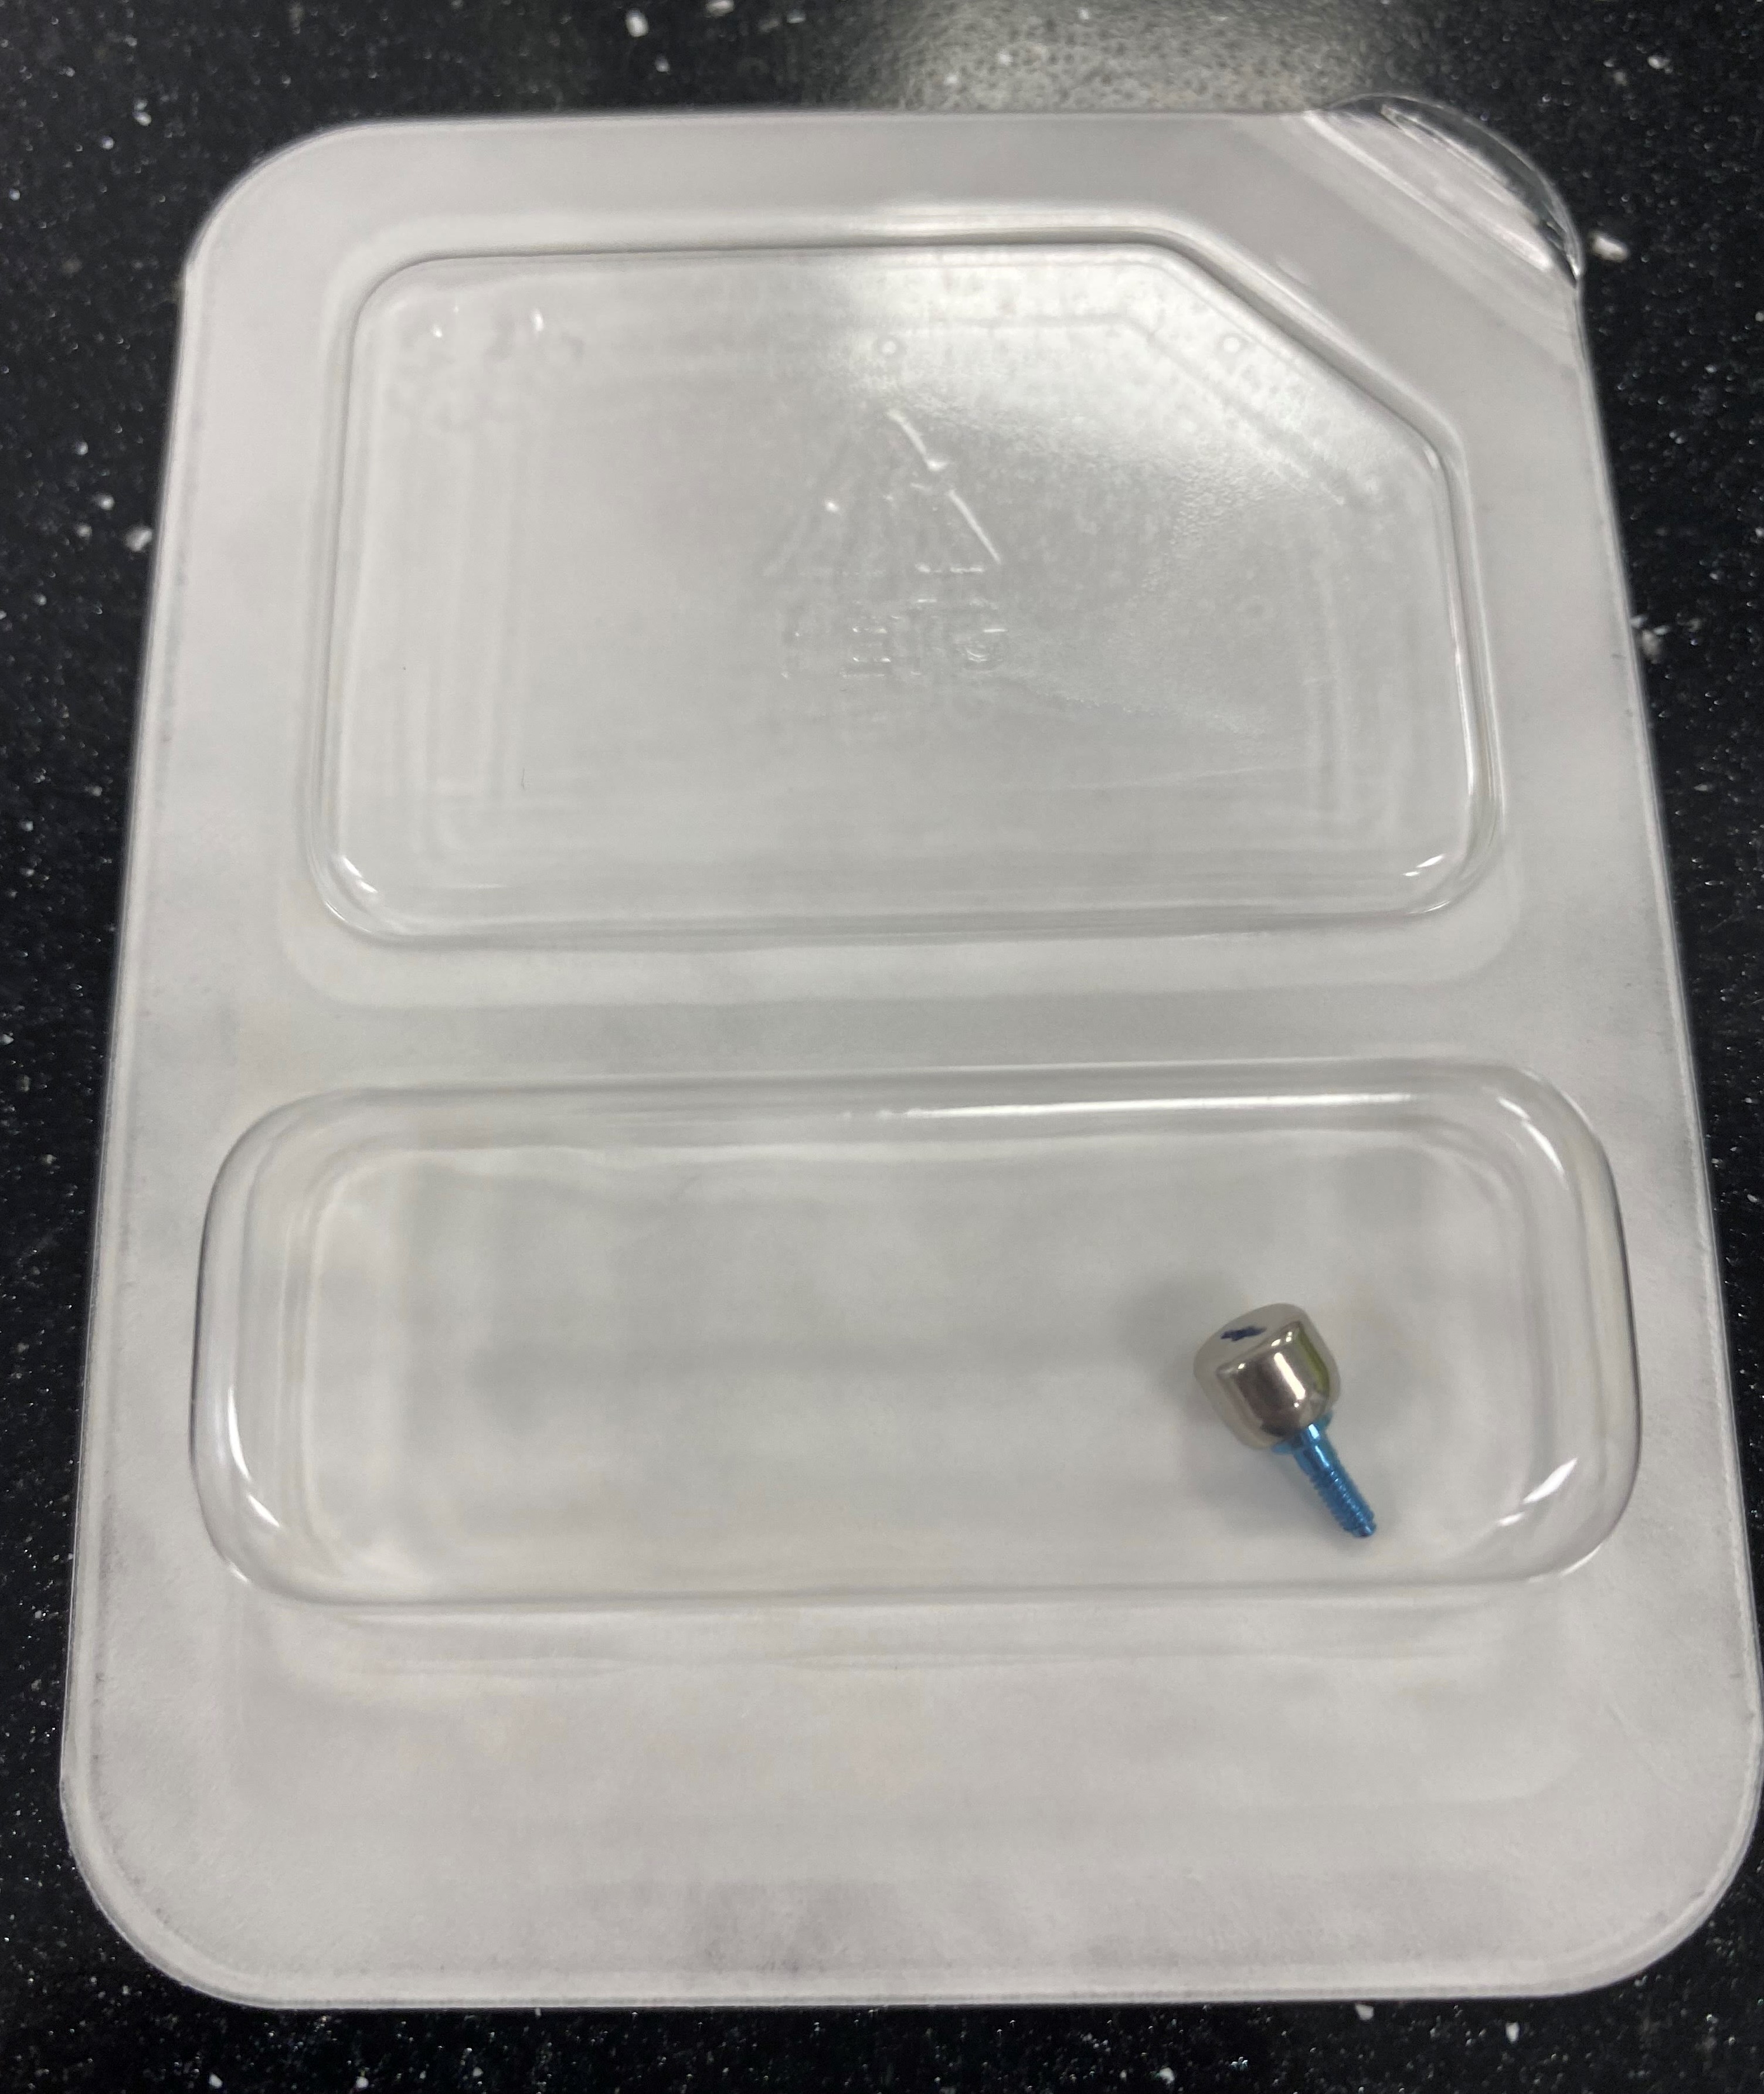
Below is an example of a healing abutment:
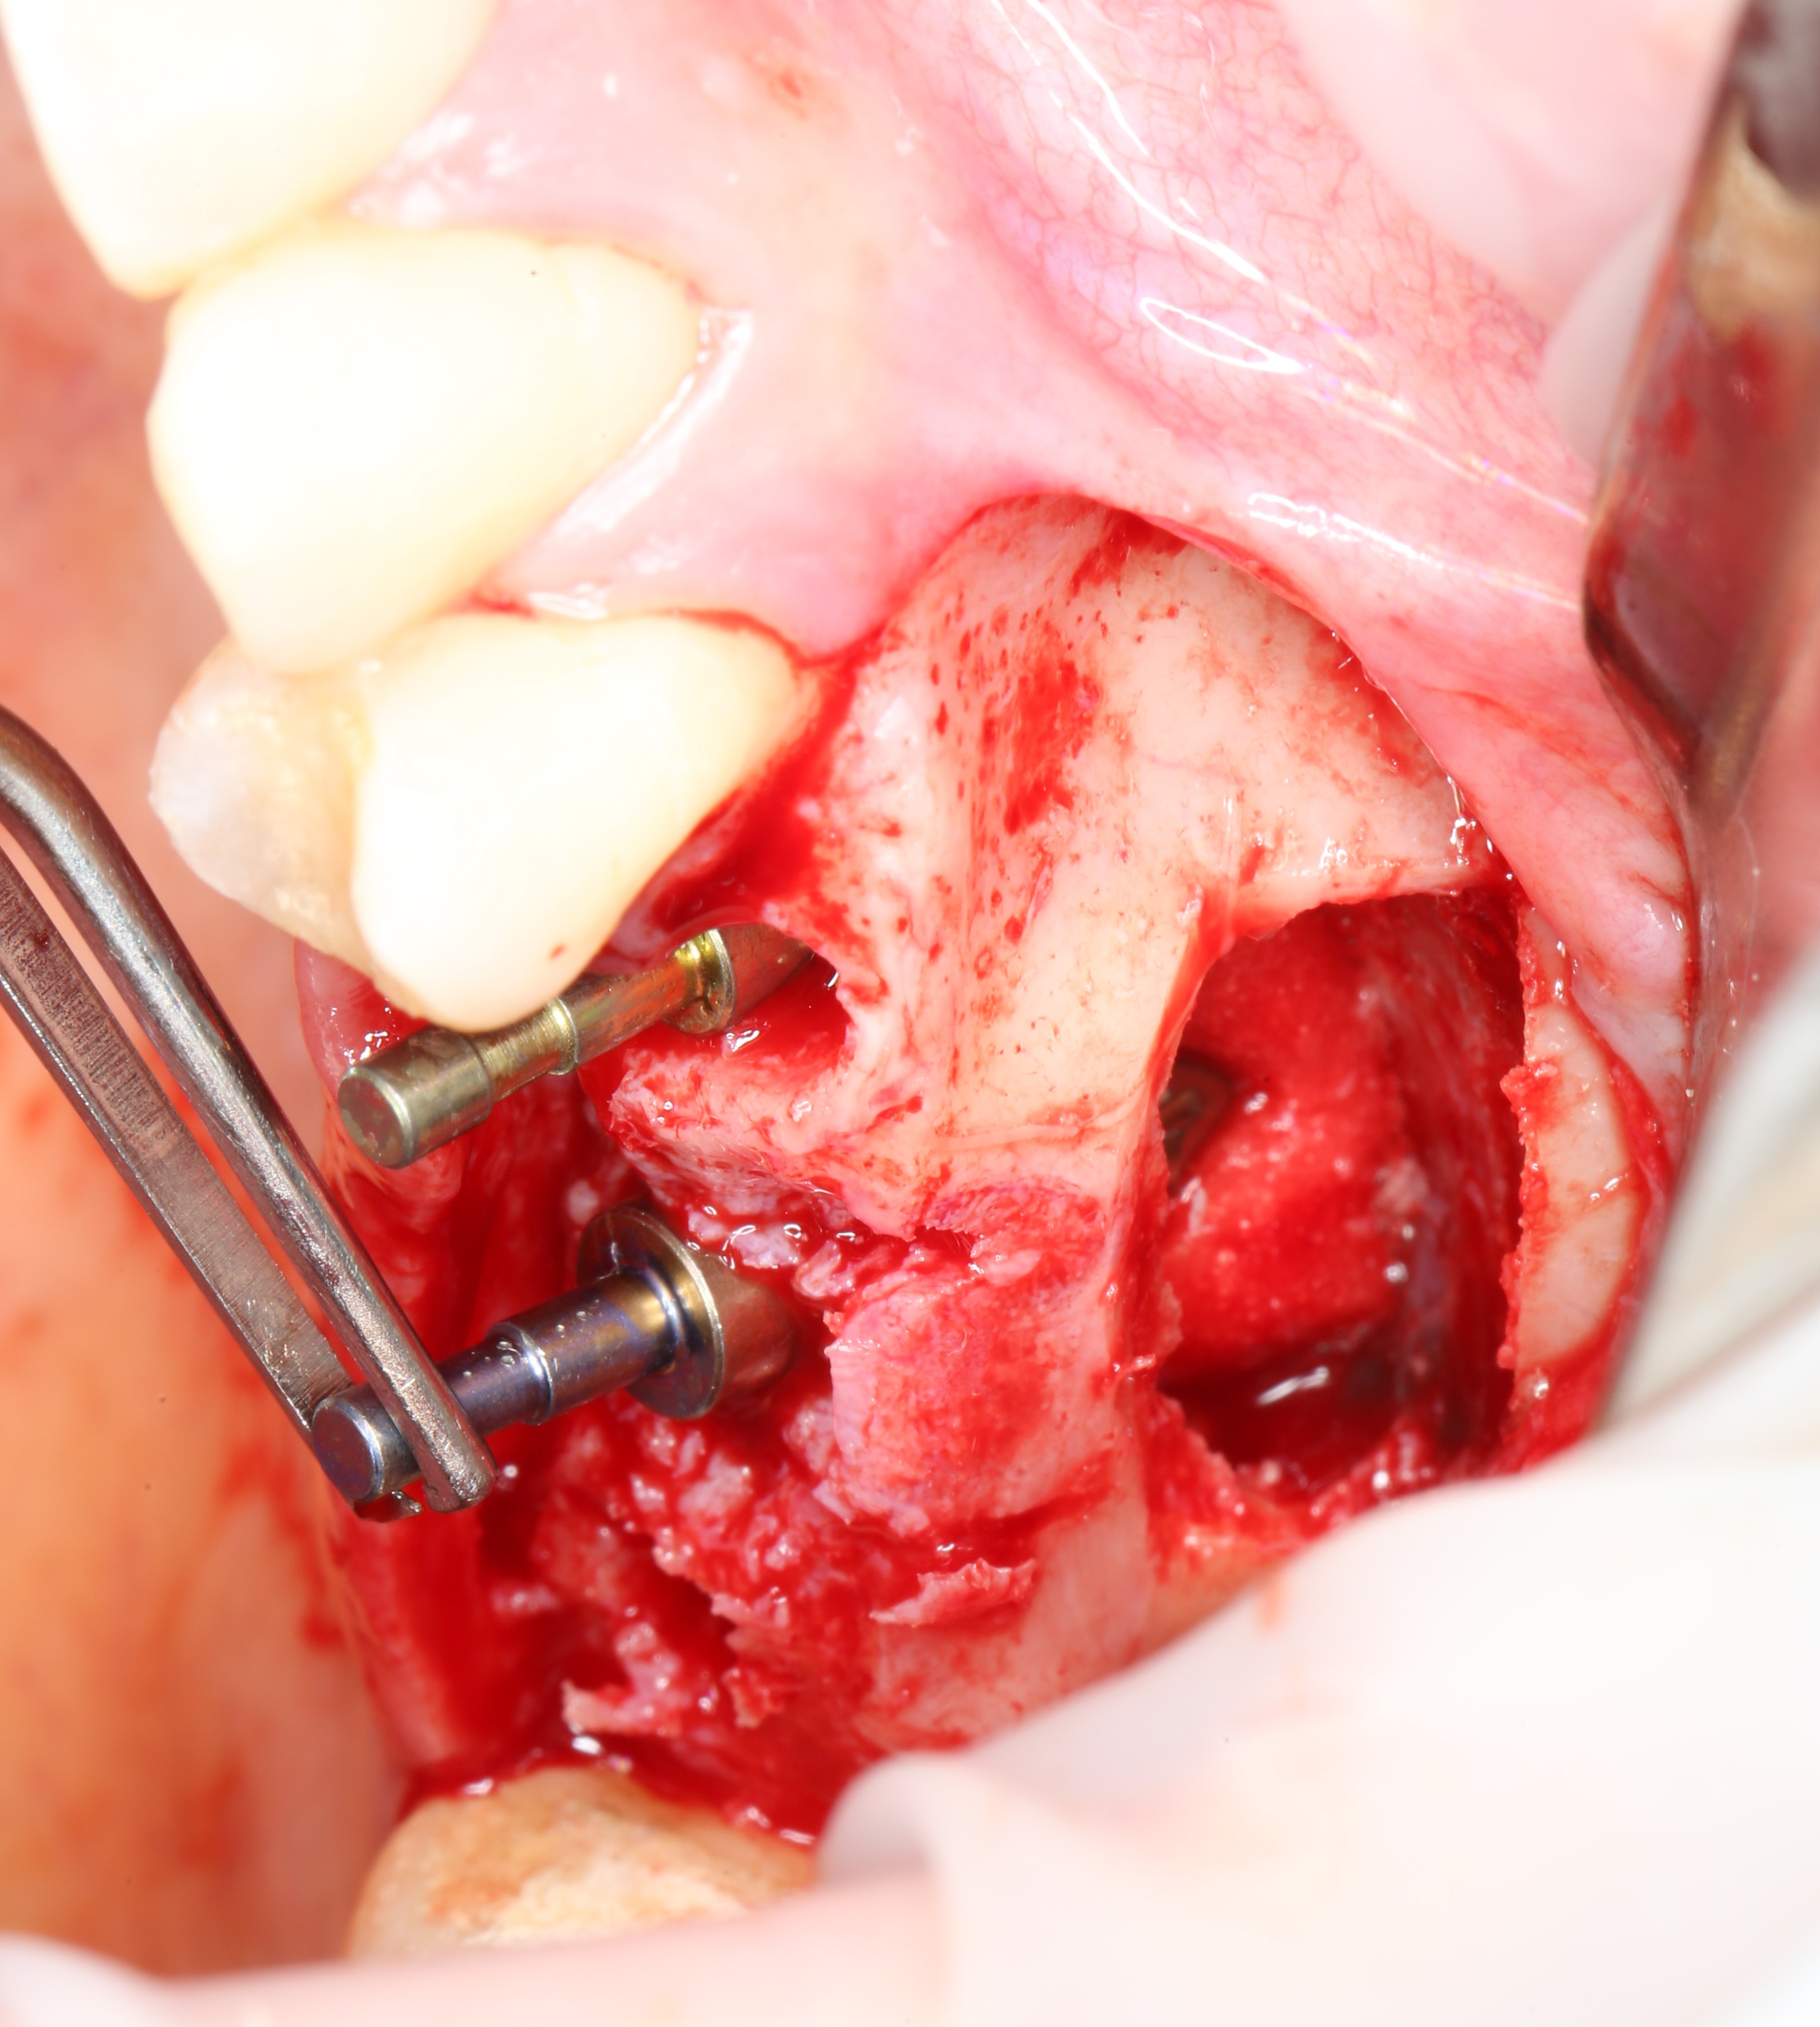
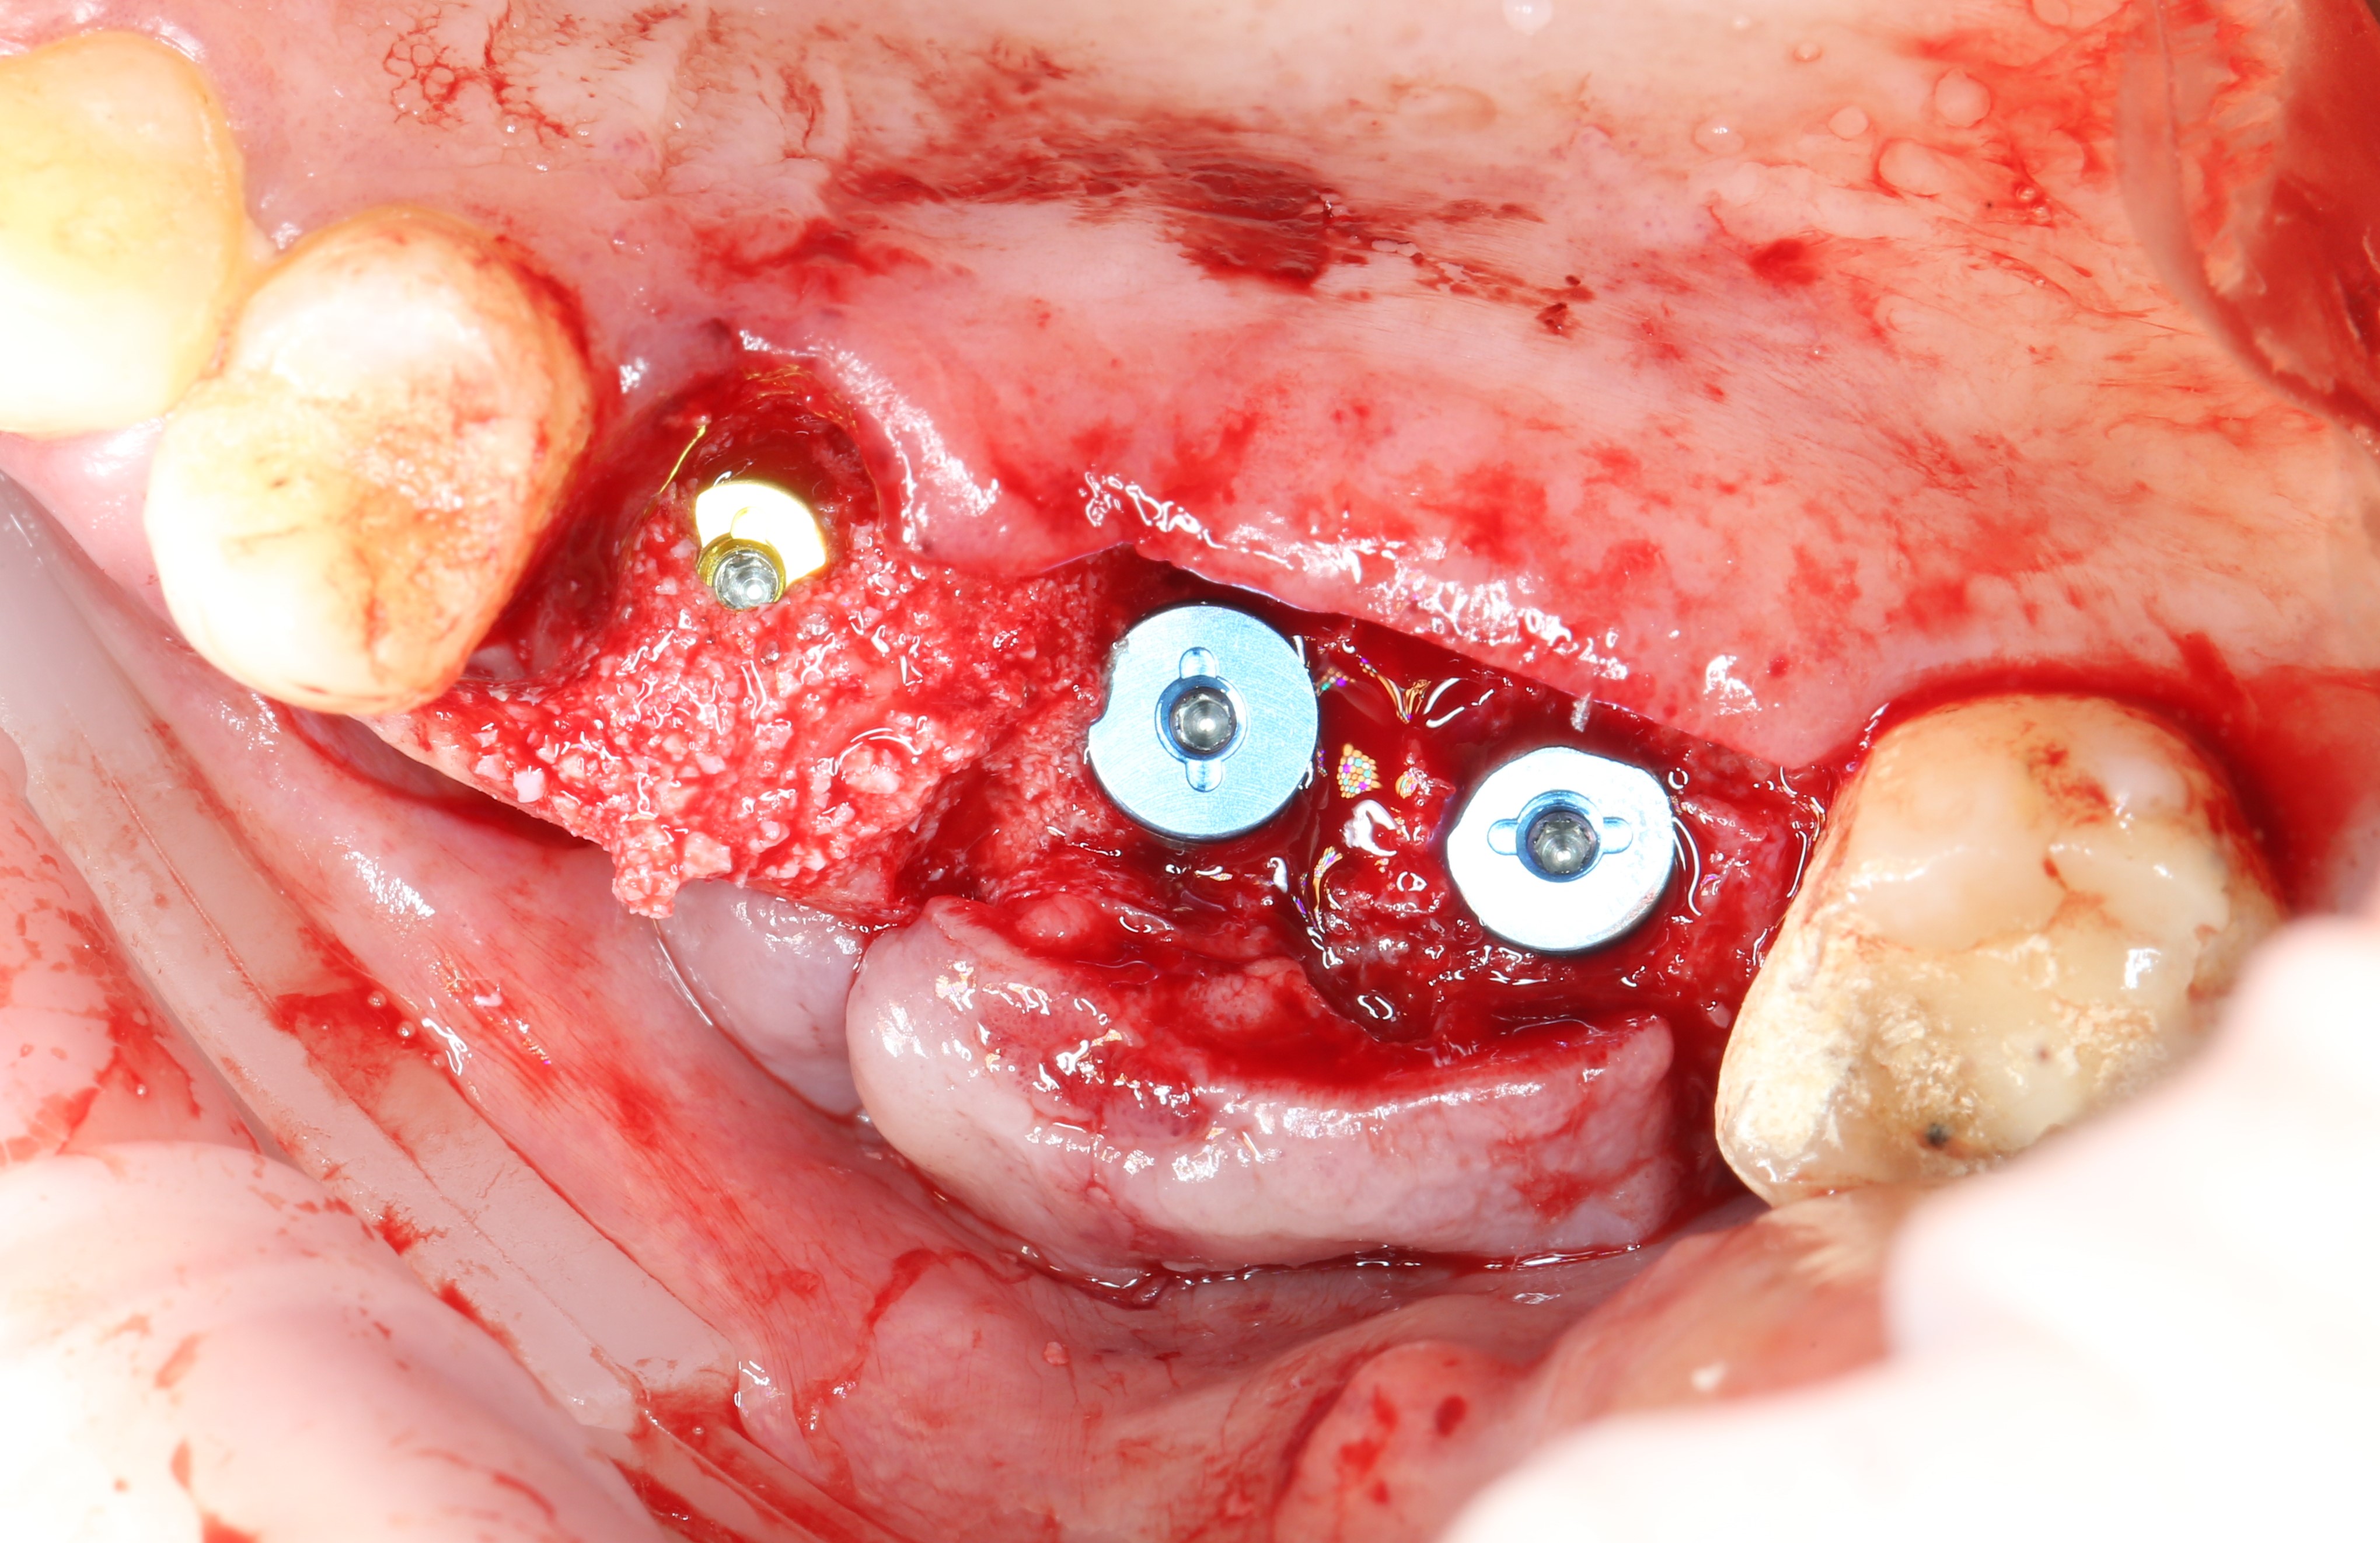
Implants are
placed : Next, an additional portion of bone material is placed, and the "window" is closed with a "cap" that was cut out with an ultrasonic tip:
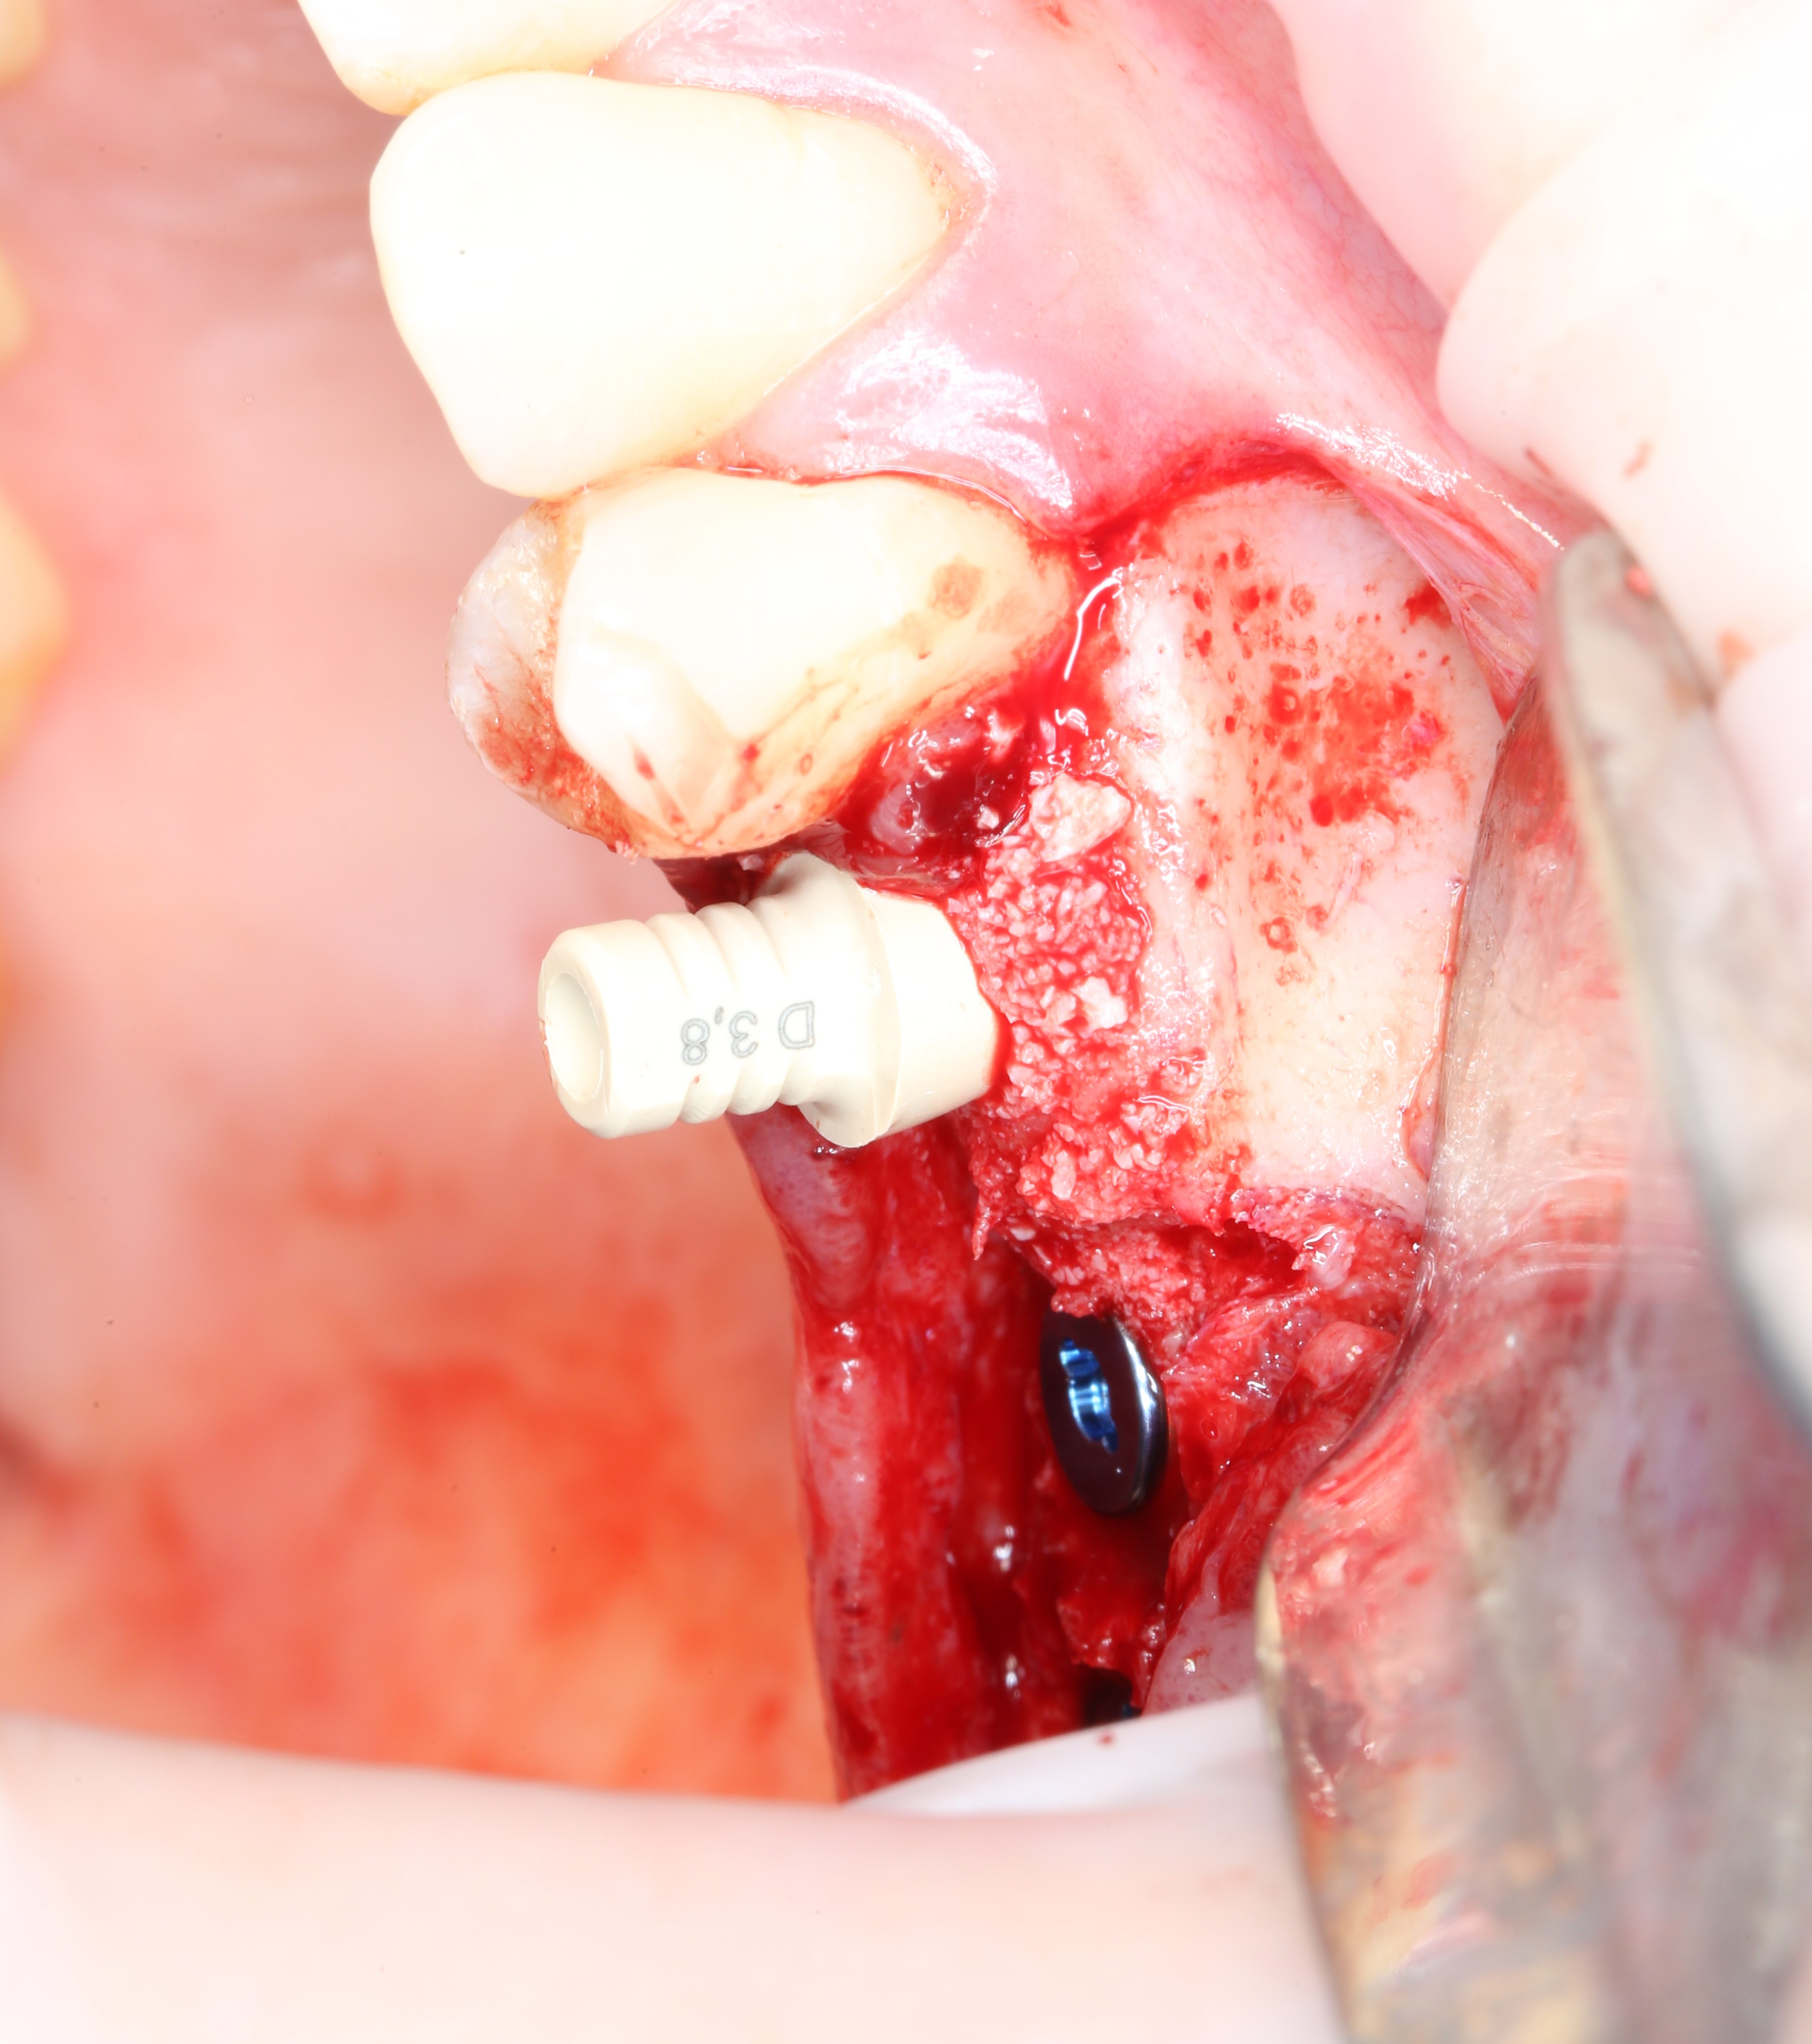
Temporary abutments are replaced with plugs :
Taking into account that sinus lifting in the area of the fifth tooth is not was performed, and the installed implant is sufficiently stable, the gingiva former is immediately installed. In this case, instead of the standard (round) shaper, you can use the Estetic cap. Its main function is the ability to fix a temporary crown on it, but we only need a shape that repeats the contours of the socket of the extracted tooth.

It is fixed to the implant with a screw:
Then sutures are applied (scissors and a needle holder):

A monofilament suture material is used (non-absorbable thread like a fishing line). Unlike absorbable sutures, this thread does not accumulate plaque and food debris, which is especially important in the case of operations.
We simply cut the protruding part of the abutment (it is made of plastic) so that it doesn’t interfere:

Why didn’t they immediately put the crown, if such a device was created for this?
In order for the implant to take root and to avoid complications, there should be no load on the implant.
Usually, the technique for fixing a temporary crown immediately after the implant is installed is practiced in the area of the central teeth. In this case, the cutting edge of the temporary crown is removed from the occlusion so that no pressure is applied to the implant when the upper and lower teeth are closed. But this will not help with the distant teeth. When chewing, the stress problem won't go away.
That's all for today. Next in line are articles on bone grafting - “how to do” splitting and transplantation of bone blocks.
Stay tuned!
Best regards, Andrey Dashkov
What else to read?
About dental implantation:
- Implant placement: how is it done?
- Sinus lift and one-stage implantation
- Implantation in the absence of teeth, as a result of untimely access to the dentist
About wisdom teeth and their removal:
- :
- , « »? -...
- . ?
- ? …
- : -!
:
- . I.
- . II: ?
, :
- :
- -
- ( )