
First, let me remind you that React Native (RN) is a cross-platform technology for building mobile apps. Many people think that its main advantage is the use of a single codebase for two applications, but I do not consider this to be the most valuable in RN. The core value is using React with all its benefits, including the wider web development community. It makes perfect sense for React developers to start building mobile apps with React Native after having a solid experience with React. But the mobile world is very different from the web. Today I want to share what to keep in mind as you dive into the world of mobile development.
1. Compactness of the screen
CSS assumes that you are working with a pixel as a physical unit of 1 / 96th of an inch. This is useful if you are creating a website only for desktop computers, but when working on a site for mobile devices, you need to consider different screen densities. That's why you need different margins, padding for different devices, and different assets (like images) for them. There is a good article explaining the mobile approach. Alternatively, you can refer directly to the Android Developer resource .
2. Navigation
A web browser usually has the current page, a back button for storing history, and other anchors. In the mobile version of the site, instead, we have screens, and navigation between them, acting in clear patterns: navigation through tabs, along the stack, and backtracking. You can't use React-router for this, but you can use the React navigation library for responsive navigation instead .

Animated tab navigation in React-Native
3. Styles
Here in the mobile world, CSS won't work, and none of the solutions that work with it work. You cannot use CSS-in-JS, LESS, or anything else. Instead, you can use JSON objects to define component styles.
Note:
- always use StyleSheet.create ({}) so that React-Native can cache styles;
- Flexbox is still here, only it has a different name.
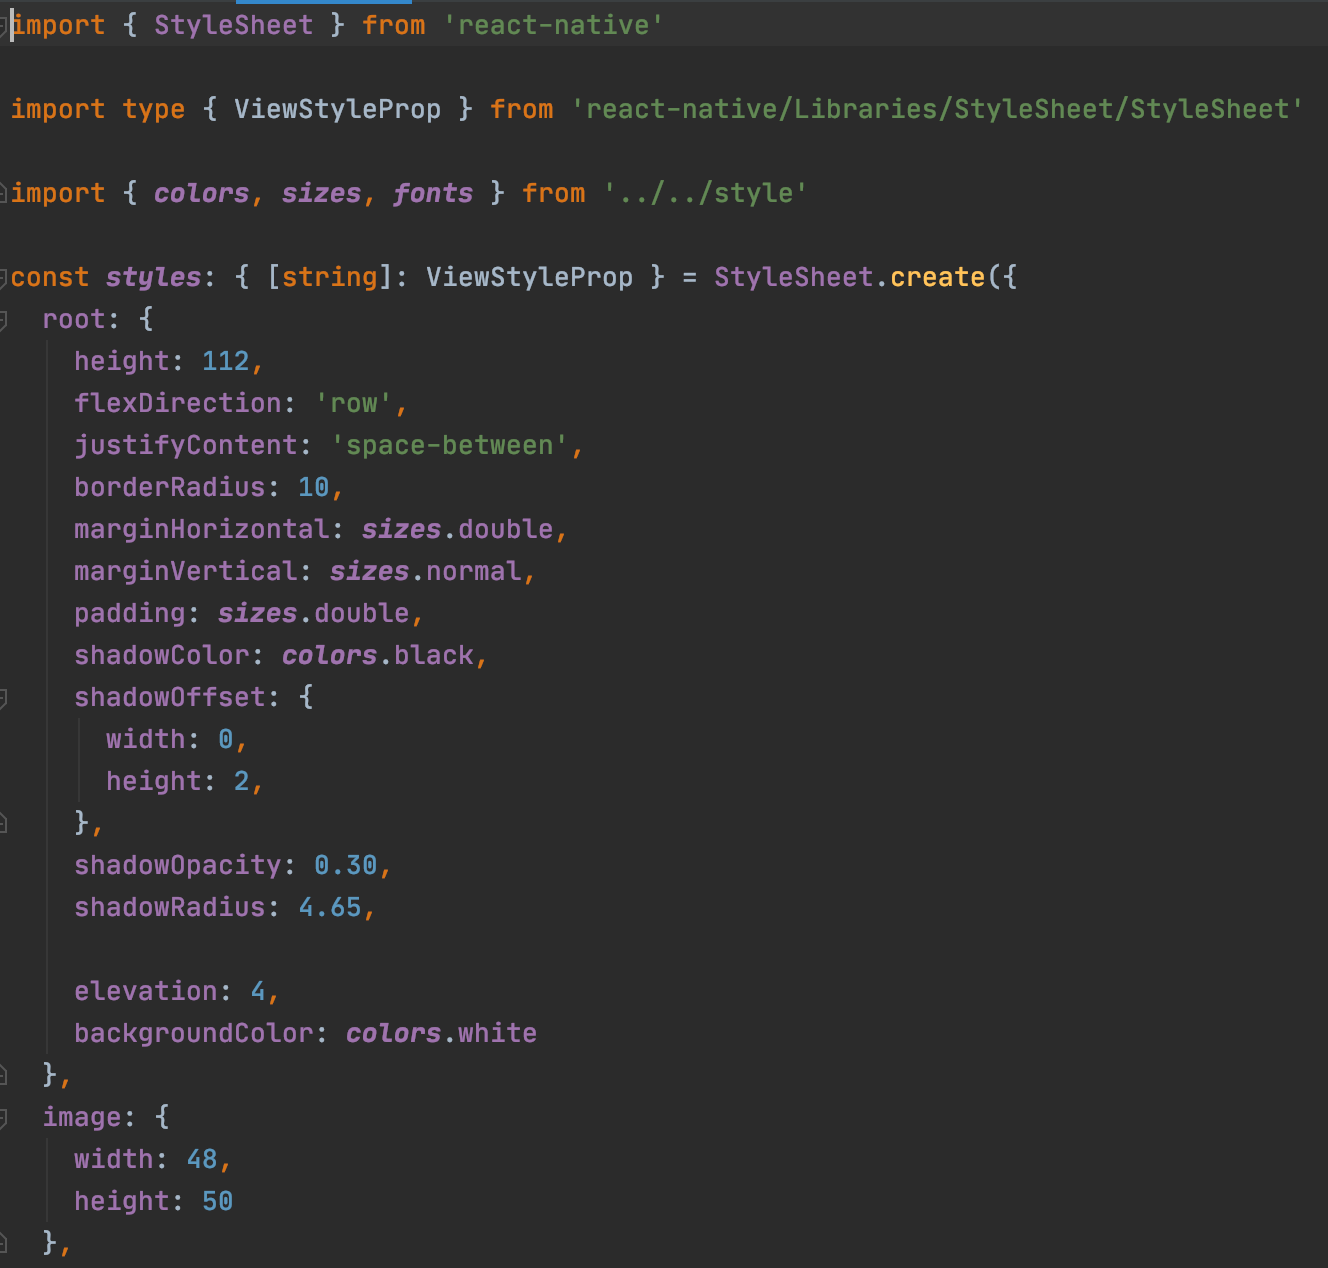
Styles example of React-Native
4. Network
If you're building a website or desktop application using React (say, Electron), then you can rely on a good and reasonably stable internet connection. But now we are talking about mobile devices, and here the Internet can be very slow, unstable, or even absent. Therefore, it is necessary to develop an application with this peculiarity in mind: connection requests, working offline (caching, for example). The connection can also break during the operation, so you need to be prepared for this.
5. Signature
Unlike a website, which can simply be deployed to an S3 compatible storage, a mobile app must be digitally signed for the phone to be sure the developer is trusted. This process can be really laborious, especially for iOS, where you need to buy a program for a developer, create an application id, a profile, generate and export a signing certificate ... On the Android platform it looks simpler: you can generate all the necessary data using one command line or using Android Studio and distribute the app immediately.
6. Dissemination
Again: you can't just upload content to S3 or a virtual machine. You need to go through Google Play and the App Store or distribute your application outside the official store, for example, if the application is corporate, intended only for employees of one organization. The App Store, however, simply will not allow publishing the application directly to the App Store, you will have to use some kind of MDM solution or simply distribute it via MS App Center, Firebase Distribution, etc.
In addition, there are many rules in stores that must be followed. These include icons, graphics, user interface guidelines , permissions, security, and more.
7. Tools
You can also use VSCode or WebStore or even Vim for code editing and Chrome as a debugger, or you can use Xcode and Android Studio for more benefits like logs, monitoring tools, file editing, and more. You'll also love Flipper, Reactotron, and other tools that will speed up your work with React-Native.

React-Native in WebStorm IDE
8. Emulators, simulators and devices
For web development, multiple browsers are sufficient. For mobile development, you need to run the code on a mobile device: you can use your phone, but you are unlikely to have devices with both Android and iOS at your fingertips.
Good news: you can use Android emulators (which can be downloaded and run from Android Studio) or iOS simulators built from Xcode if you're on a Mac (no, you can't have iOS simulators on any other hardware, at least legally ). It's a totally new experience, but fun.

9. Relationship with native code
Your js code will stay with you, but it will also interact with native code (Kotlin, Swift). The application must be linked correctly, otherwise it may crash or malfunction. The good news is that when working with React-Native since version 0.60, linking happens automatically for most external libraries.
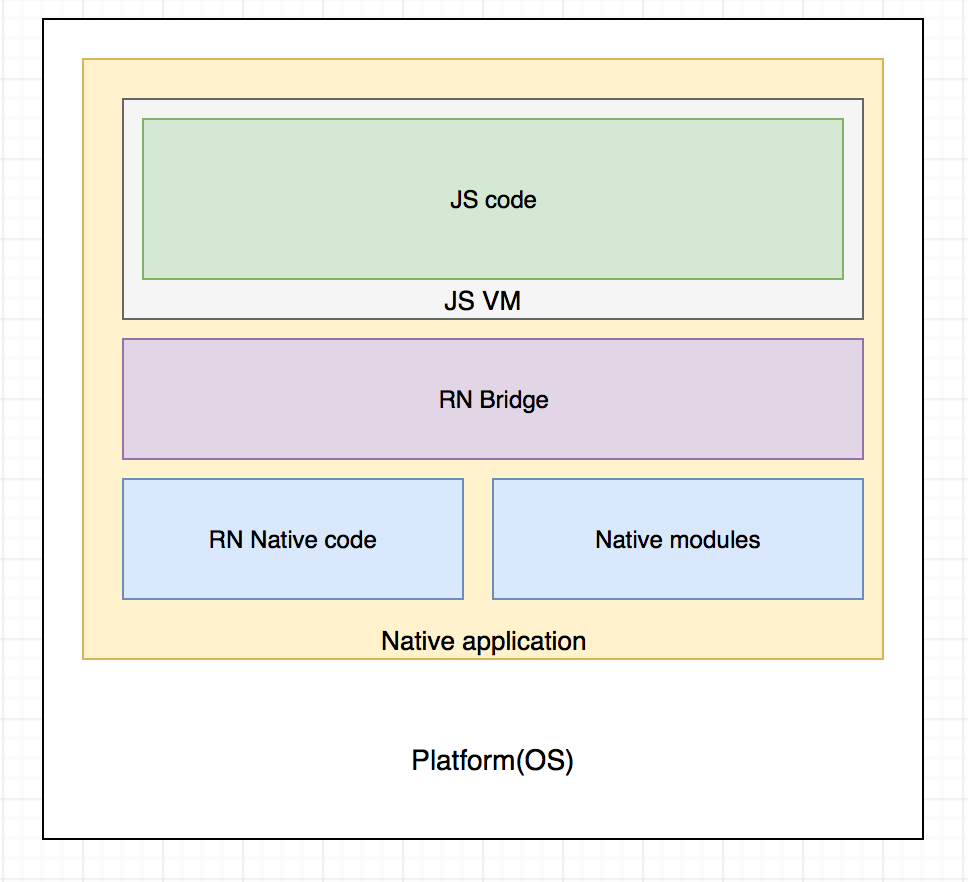
Architecture of a React-Native application
10. Code reuse
Great news, finally! If you are building both a web application and a mobile application, then you can reuse some of the code. You can definitely reuse the entire domain and network code, since there is no specificity for the Internet or mobile devices. You will most likely be able to reuse business logic as well, but this is less likely.
In future articles, I hope to take a closer look at each of these points.