We've researched all the popular methods and are sharing with the community.
Integration of WhatsApp with CRM (for example Bitrix24) is directly possible through the WhatsApp Business API, but access to it is limited. To gain access, you need to send company data for review. This is a long process, and access is often denied. Therefore, you have to resort to integration through external connectors.
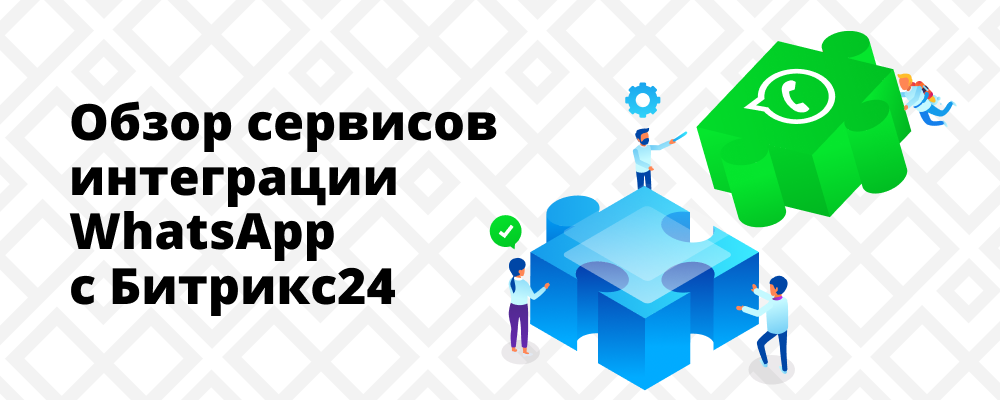
In the article, my colleague Maxim Vorobyov gave an overview of all the solutions to this issue as of August 2020.
The purpose of the publication is to provide a solution to a frequent and difficult task when implementing CRM.
We are not affiliated with any of the reviewers.
The text is detailed and honest.
External connectors
List of the most popular services for integrating with WhatsApp:
- Wazzup - https://wazzup24.com/
- i2crm - https://i2crm.ru/
- Chat2Desk - https://chat2desk.com/
- Pact.im - http://pact.im/
- OLChat - https://olchat.io/
Each of these services has the same principle of WhatsApp integration with CRM, namely:
- Installing an application from the marketplace.
- Creation of outgoing and incoming channels in the service itself (the outgoing channel is the Bitrix24 portal by the installed service application, the incoming channel is the WhatsApp Web application on the service side).
Authorization in WhatsApp occurs by scanning the QR code with the phone, which entails many inconveniences when working with the integration.
Summary Table of Integration Services Capabilities
| Wazzup | i2crm | Chat2Desk | Pact.im | OLChat | |
| Correspondence in the Bitrix24 chat | + | + | + | + | + |
| Citations and post statuses | + | - | - | - | - |
| Support for all types of media files | + | + | + | + | + |
| Automatic creation of a lead / contact / deal in crm when contacting via WhatsApp | + | + | + | + | + |
| History of correspondence in CRM cards | + | + | + | + | + |
| Ability to write to the client first | + | + | + | + | + |
| Voice messages | - | - | - | - | + |
| Working with business processes and robots | + | + | + | - | + |
| API | + | - | + | + | - |
| Working with WhatsApp Groups | - | - | + | - | + |
Next, we will analyze the integration services in detail.
Configuring integration with Wazzup
1. Registration on the service website
Go to the site https://wazzup24.com/ , go through the registration. After registration, a test period of 3 days will be available for free acquaintance with the work of the service
2. Adding an incoming channel
After authorization, the user enters his personal account.
Select “Channels” in the left menu, click on the “Add channel” button → “WhatsApp”.

A form with a QR code for authorization will open.
To continue, you need to open the WhatsApp application on your smartphone, go to Settings, WhatsApp Web, where you will be prompted to scan a QR code.
After scanning the QR code, a new active channel with our number will appear in your personal account.

3. Installing the Wazzup application from the Bitrix24 marketplace and setting up the integration (outgoing channel).
We find the application, install it.

Now you need to set up the integration in the personal account of the service.
Select the item "Integrations" in the left menu, click on the button "Add integration" → "Bitrix24".

It is required to enter the portal URL in the form.

When you click on the "Connect" button, a link for authorization via the OAuth protocol will appear. Chatbot Wazzup will appear on the portal

Wazzup functions
Let's write a message from the client:

In the open lines of Bitrix24, we see the client's message:

We will reply to the message from the Bitrix24 chat: The

message reached the client:

For this integration, the open line was configured in such a way that the data about the client was not automatically saved in the CRM. Let's add customer data to CRM manually. To do this, open the action menu → “Save to CRM”.

A notification will appear in the chat that a new lead has been created.
Let's go to the lead card. It has the ability to see the history of the correspondence and go to the chat.

Setting up the integration of Bitrix24 and i2crm
Let's carry out a step-by-step configuration of Bitrix24 integration with the i2crm service.
1. We register on the website https://i2crm.ru/ .
After registration is completed, users are given a trial period of 7 days to get acquainted with the work of the service.
2. Configuring the incoming channel
After authorizing on the site, you need to configure the incoming channel. To do this, select in the header “Settings” → “Incoming channels”

On the page that opens, click on the button “Create channel” → “WhatsApp”
When creating a channel, you can have a small list with advanced settings.
Press the button to connect WhatsApp, scan the QR code from the smartphone

After scanning the QR code, we see a message about successful connection. Press the button "Create channel"

3. Installing the i2crm application from the Bitrix24 marketplace and setting up the integration (outgoing channel)
Find the i2crm application in the Bitrix24 marketplace, install it.
We return to the site of the i2crm service, select “Settings” → “Outgoing channels” in the header.

Click on the button “Create channel” → “Bitrix24”
Select the necessary settings for integration, click “Connect Bitrix24”
After successful authorization via the OAuth protocol, a message is displayed about the successful access to the portal. Click “Create Channel”. Integration is now complete.
I2crm functionality
Let's write a test message to the number for which we configured the incoming channel:

We can open a chat in the portal, go to the tab with open lines and see the correspondence

In the settings during integration, we specified the "open lines" mode of operation. According to the logic of “open lines”, a message from a new contact will automatically create a lead in CRM:

Reply to a message from the Bitrix24 chat:

Check from a smartphone whether the message has arrived:

Setting up integration with OLChat
The integration process with OLChat is somewhat different from the integration with other services. When configuring this integration, you do not have to register on the connector's website. All settings will be done in the Bitrix24 application.
First you need to install the application from the Bitrix24 marketplace.
After installation, we will see notifications that OLChat is successfully connected.
Next, you need to connect the connector to an open line. To do this, in the Bitrix24 portal, go to "Contact Center" → "[OLChat] WhatsApp". Click “Connect”

After connecting, we will see the following in the chat with notifications:

The next thing to do is connect WhatsApp. Go to the “OLChat” tab in the Bitrix24 portal, hover the mouse over the “QR code” link. A pop-up window will display a QR code that needs to be scanned using the WhatsApp application on your smartphone.

After scanning the QR code, the connection status should change to “Connected”.

After completing these steps, the integration is configured and ready to work. All that remains is to set up an open Bitrix24 line for distributing incoming messages between managers, setting up working hours, logic of working with CRM, etc.
OLChat functionality
Let's create a new contact and write to the client first through the SMS functionality. Go to the contact card → “SMS”, select the service [OLChat] <Connector name>, write the text of the letter and send it

Check it in the phone, the letter has arrived:

We will reply to the message in this chat and see in response an automatic message from the settings of open lines of Bitrix24:

We can open correspondence with the client in Bitrix24 chats in the open lines section or directly through the CRM card:

Meanwhile, the portal received a notification about the client's response and the contact card was updated:

Let's delete the contact and dialogue in WhatsApp. Let's test the situation when the client wrote first. Let's write a message from the client and reply to it from the Bitrix24 chat:

Here, from the client's side, you can see an interesting detail - the name of the user who is currently chatting is added to the message sent from the Bitrix24 chat:

With this integration, the open line is configured so that the data is not automatically saved to CRM. Let's add a new lead from the chat in Bitrix24: in the action menu, select “Save to CRM”. Further, you can go directly from the chat to the card of the created lead.

Lead card:

OLChat application settings options
The main menu of the application has a toolbar, which contains the settings for the application and WhatsApp groups.
The “Add WhatsApp” button redirects the user to the “Contact Center” of the portal, where it is possible to add new open lines to the application.
The “Settings” button opens the settings window, where it is proposed to enable / disable the available functions of activations and robots of the application, as well as add your own icon for the connector.
The “WA Groups” button allows you to add and configure a WhatsApp group chat in the portal.

Let's connect the WhatsApp group. To do this, click the "Connect Group" button.
In the new window, select the connector:

After selecting the connector, select the available group:

Click on the button "Create group chat". In the group settings, you can add employees to the chat, as well as manage the incognito mode by hiding or showing the names of employees in the chat of the WhatsApp group.

The group chat itself is located in Bitrix24 chats (not in open line chats). All messages sent by employees in this chat will be sent to the WhatsApp group.
At the moment, OLChat does not have the ability to work with group chats in CRM.
WhatsApp groups and voice messages in OLChat
Let's connect an existing WhatsApp group. We select the connector and the group that we want to connect, click “Create group chat”

Bitrix24 has created a chat intended for communication in this WhatsApp group:

Let's write a message to the group from the client's smartphone:

Let's go back to the group chat in Bitrix24. The message came:

Now, let's reply to the message from the Bitrix24 chat.
Let's write 2 messages. One will be with "Incognito" on, and the other with off. This will check if OLChat really knows how to show / hide employee names.

The message "You do not know who answered you." was written with the "Hide employee names" option enabled, and the message "Now you know!" - off.
Let's check on the client's smartphone:

As you can see, when the "Hide employee names" option is disabled, the name of the employee who sent the message is added to the message sent from the Bitrix24 chat.
Let's go back to the Bitrix24 chat and click on the lightning bolt icon opposite the client's message. The OLChat application expands the functionality of standard actions on a message in Bitrix24, offering to save group members in WhatsApp to CRM.

Of all the connectors presented, only OLChat has support for voice messages.
Let's send a voice message from the client's smartphone to the group:

As you can see, the voice message has arrived. You can listen to it in Bitrix24:

Setting up integration with Pact.im
First, you need to register on the official website of the connector and go to your personal account. Next, you need to install the Pact.im service application in Bitrix24. After installation, a window will open where the code for configuring the integration will be indicated.
Next, go to your personal account on the Pact.im website. We select the “Integration with CRM” tab and in front of the “Bitrix24” field, insert the key specified after installing the application on the portal.

We return to our portal, select the “Pact” application in the left menu, see a message about the successful setup of the integration.
Next, you need to connect the channel with WhatsApp. Go to your personal account on the Pact.im website, go to the "Channels" tab.

At the setup stage, we are only interested in step 3 and step 5.
At step 3, we are asked to choose the settings for message synchronization.
At step 5, you need to scan the QR code from your phone for authorization via WhatsApp Web.
After the QR code has been scanned, it remains only to wait for the setting from the service.
The last stage of integration is setting up open lines on the portal. Go to our portal in “Contact Center” → “WhatsApp (via Pact.im)”

Next, you need to select an open line and click “Connect”.

This step completes the integration.
Pact.im functionality
We will write a message to the connected WhatsApp number:

A message has come to the open line:

We will reply to the message from the chat of open lines and check if the message has arrived in WhatsApp.

The client received our response:

You can see that the Pact.im application implements functionality similar to OLChat, namely, you can see the name of the employee who is currently responding to messages from the portal.
Let's save the correspondence in CRM. According to the settings of the selected open line, a new lead should be created in CRM.

The lead was created, you can see it in CRM.

Let's go to the lead card. From the card, you can go directly to the chat, view the history of correspondence.

Each of the presented integrations works with Bitrix24 open lines.
There is a small toolbar in the chat header of open Bitrix24 lines.

It allows you to:
- invite users from Bitrix24 to chat;
- forward the chat to an employee from Bitrix24;
- end the dialogue.
- open a menu of additional actions that allow you to pin / unpin the dialog for the current operator, save to CRM / go to the CRM card, view the message history and mark the chat as spam by forcibly ending it.
This functionality of open lines Bitrix24 fully works for all the presented integrations.
conclusions
At the moment, if you want to work with WhatsApp only from Bitrix24, then the most convenient to use is the OLChat service. It does not require registration on the service website, the integration setup process is intuitive, it is performed from the installed application in Bitrix24. Also, the service has two important advantages that make it stand out from the rest: work with WhatsApp groups and support for voice messages.
If you do not take these factors into account, then the functionality of all services is approximately the same. OLChat stands out for the fact that the service does not have a messenger in the personal account on the service website, while other services have the main functionality in the messenger on the website.
It is worth choosing one of them based on personal preferences and the cost of tariffs.