
. OTUS Machine Learning: . , -, : « ML» « ».In the first part of this tutorial, we successfully saved your classification model to a local directory and completed all the Jupyter Notebook model development work. From now on, the focus will be on deploying our model. To reuse the model for prediction, you can simply load it and call the method
predict()as you would normally in a Jupyter Notebook.
In order to test the model, in the same folder as the file
model.pkl, create a file main.pywith this code:
import pickle
#   ,
import numpy as np
from sklearn.neighbors import KNeighborsClassifier

#
with open('./model.pkl', 'rb') as model_pkl:
   knn = pickle.load(model_pkl)

#   (    )
unseen = np.array([[3.2, 1.1, 1.5, 2.1]])
result = knn.predict(unseen)

#
print('Predicted result for observation ' + str(unseen) + ' is: ' + str(result))
Reusing the model for forecasting.
You can call the predictor method multiple times on unknown observations without restarting the training process. However, when you run this py file in the terminal, you may encounter an error like this:
Traceback (most recent call last):
 File "main.py", line 4, in <module>
   from sklearn.neighbors import KNeighborsClassifier
ImportError: No module named sklearn.neighbors
This is because the package we are using is not available in the environment in which you run the file. This means that the environment used to develop the model (conda) is not identical to the runtime (python environment outside of conda) and this can be seen as a potential problem when running our code in other environments. I specifically wanted you to see this error, to help you understand the problem, and to re-emphasize the importance of using containers to deploy our code to avoid such problems. For now, you can simply manually install all the required packages using the "pip install" command. We'll come back here later to do this automatically.
After installing all the packages and successfully running the file, the model should quickly return the following message:
Predicted result for observation [[3.2 1.1 1.5 2.1]] is: [1]As you can see here, we use hardcoded unknown data to test the model. These numbers represent the sepal's length, its width, the length of the petal and its width, respectively. However, since we want to expose our model as a service, it must be exposed as a function that accepts requests containing these four parameters and returns a prediction result. This function can then be used for an API server (backend) or deployed in a serverless runtime such as Google Cloud Functions . In this tutorial, we'll try to build an API server together and put it in a Docker container.
How does the API work?
Let's talk about how web applications work today. Most web applications have two main components that cover almost all the functionality an application needs: frontend and backend. The frontend is focused on serving the interface (web page) to the user, and the frontend server often stores HTML, CSS, JS and other static files such as images and sounds. On the other hand, the backend server will handle all the business logic that responds to any requests sent from the frontend.

Illustration of the structure of web applications .
This is what happens when you open Medium in your browser.
- HTTP-
medium.com. DNS-, , . ., . -
* .html,* .css,* .js, - . - Medium . , «clap» () .
- (javascript) HTTP- id . URL- , . id XXXXXXX.
- (, ) .
- .
- , .
Of course, this might not be exactly the same process that happens when using the Medium web application, and in fact it would be much more complicated than this, but this simplified process can help you understand how a web application works.
Now I want you to focus on the blue arrows in the picture above. These are HTTP requests (sent from the browser) and HTTP responses (received by the browser or sent to the browser). The components that process requests from the browser and return responses to the backend server are called “APIs”.
Below is the API definition:
(API — application program interface) — , . , API , .
API!
There are many frameworks that help us build APIs with Python, including Flask, Django, Pyramid, Falcon, and Tornado. The advantages and disadvantages, as well as a comparison of these structures, are listed here . I'll be using Flask for this tutorial, but the technique and workflow remains the same as for the others, and as an alternative, you can use your favorite framework at this point.
The latest version of Flask can be installed via pip using this command:
pip install FlaskAll you need to do now is turn the code from the previous step into a function and register an API endpoint for it after initializing your Flask application. By default, a Flask application runs on localhost (127.0.0.1) and will listen for requests on port 5000.
import pickle
#   ,
import numpy as np
import sys
from sklearn.neighbors import KNeighborsClassifier

#  Flask   API
from flask import Flask, request

#
with open('./model.pkl', 'rb') as model_pkl:
   knn = pickle.load(model_pkl)

#   Flask
app = Flask(__name__)

#    API
@app.route('/predict')
def predict_iris():
   #
   sl = request.args.get('sl')
   sw = request.args.get('sw')
   pl = request.args.get('pl')
   pw = request.args.get('pw')

#    predict
#
   unseen = np.array([[sl, sw, pl, pw]])
   result = knn.predict(unseen)
  #
   return 'Predicted result for observation ' + str(unseen) + ' is: ' + str(result)
if __name__ == '__main__':
   app.run()
Representing your model as an API
On the terminal, you should see the following:
* Serving Flask app "main" (lazy loading)
* Environment: production
  WARNING: This is a development server. Do not use it in a production deployment.
  Use a production WSGI server instead.
* Debug mode: off
* Running on http://127.0.0.1:5000/ (Press CTRL+C to quit)
Open your browser and enter the following query in the address bar:
http://localhost:5000/predict?sl=3.2&sw=1.1&pl=1.5&pw=2.1If something like this appears in your browser, congratulations! You are now exposing your machine learning model as a service with an API endpoint.
Predicted result for observation [['3.2' '1.1' '1.5' '2.1']] is: [1]API Testing with Postman
We recently used our browser for quick API testing, but this is not a very efficient way. For example, we could not use the GET method, but instead use the POST method with the authentication token in the header, and it is not easy to get the browser to send such a request. In software development, Postman is widely used for testing APIs and is completely free for basic use.
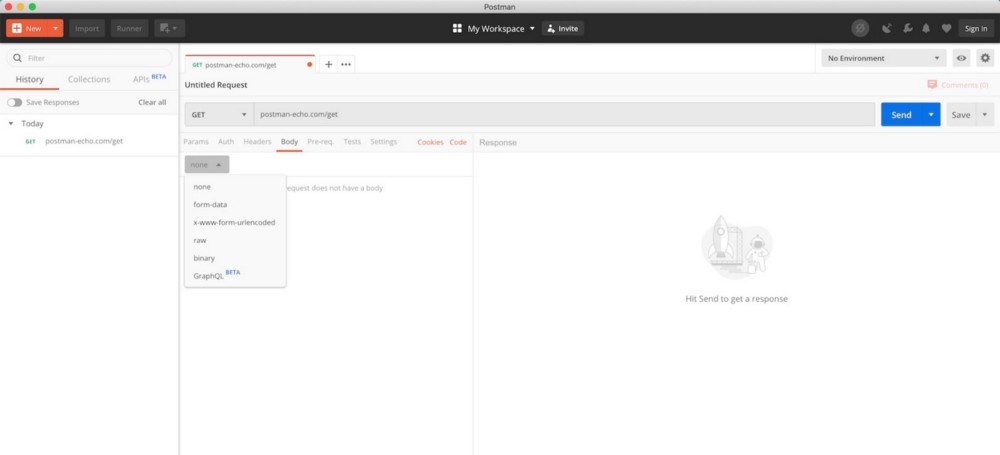
Postman UI (from Postman download page )
After downloading and installing Postman, open the tool and follow the instructions below to submit your request.

Sending a GET request with Postman
- , GET , API GET . , POST .
- URL .
- . , .
- «», API.
- .
- HTTP-. .
Now that you know how to expose your machine learning model as a service through an API endpoint and test that endpoint with Postma, the next step is to containerize your application with Docker, where we'll take a closer look at how Docker works and how it can help us. solve all the dependency problems we encountered before.
Read the first part.