In this article, you will learn how to use photogrammetry to photograph and insert real-world objects into Unity projects using Meshroom.
In the context of 3D models, photogrammetry is the process of creating 3D models from scanned objects.
Need realistic 3D models for your game idea but are on a budget? Looking to create an ultra-realistic gaming environment? If so, keep reading!
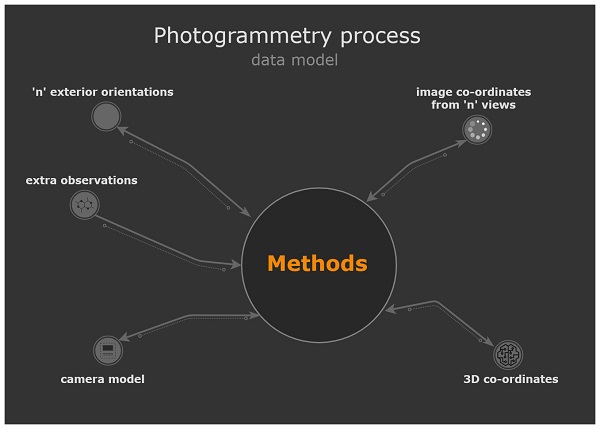
Using photogrammetry, we take input data, that is, photographs, and pass it through a pipeline or set of methods that process them. Data from these processes or output information is used to create the finished 3D model.
In this tutorial, we will use some photos of the dragon statue to create a detailed 3D model, clean it up in Blender and import the result into a dark and gloomy scene of a viking village.
You will also learn to:
- Choose a good subject for photographing.
- Take suitable photographs.
- Decide when and where to take photos.
- Remove bad photos.
- Use Meshroom to create 3D scans.
- Import models into Blender for cleaning and retouching.
- Reduce the number of polygons.
- Prepare and import 3D models into Unity.

Getting started
Note : A fairly powerful computer is required to perform a photo scan in Meshroom in a reasonable amount of time.
Download project materials . Next, unzip the zip file to a location convenient for you.
The archive contains the Starter and Final project files , which we will get to later.
Note : you will need to download another file, but more on that below.
To create a good photo scan, you need to photograph the model from many angles. In this tutorial we will already have all the necessary photos.
Before you take these photos, it is important to know some useful information on how to take pictures yourself.
Finding good subjects to shoot
Of course, you want to shoot objects that match the game environment or idea. In addition, there are some conditions that simplify photo scanning of objects:
- Flat bases.
- Sufficient contrast in colors or shades.
- Not too dark, otherwise it will be difficult to see the details.
- Not too large, otherwise it will be difficult to walk around objects and shoot them from different angles.
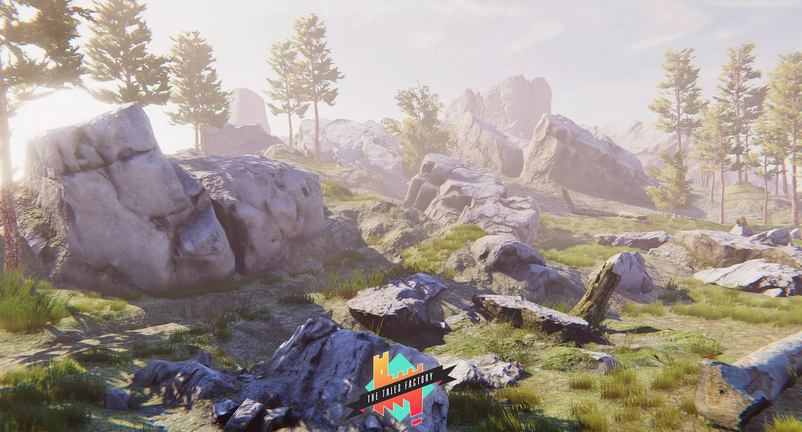
It is also worth considering creating photo scans of objects that are difficult to model. For example, natural objects are difficult to model because it is difficult to create organic materials.
The stones from The Tales Factory in the Unity Asset Store are a good example of this .
When to take photos
As for photographs, there are certain conditions and time of day that allow you to create high-quality photographic scans.
If you have an indoor studio and lighting, then you can simulate these conditions yourself. If not, then you have to work outdoors.
When working outdoors, remember the following:
- Take photos in daylight.
- Cloudy skies are best. The clouds scatter the lighting, which results in a more even distribution of light throughout the model.
- Dryness is good, humidity is bad! In humid conditions, you will likely get more reflections in your finished product. In some cases, the 3D model will even have bright reflections that destroy the realism.
Choose a neutral looking model that suits a wide range of potential conditions. This will allow you to apply effects depending on the environmental conditions in the game.
Is it raining in the game? Let's sketch out a shader that will add a glossy wet effect. The game takes place in a post-apocalyptic world where everything is old and shabby? Let's add the effect of aging or corrosion.
Taking photos
Download the collection of photos that you will be using in this tutorial. Due to its large size, it is not included in the downloads linked above. To download the collection, click on this link:
Download photos of the dragon sculpture (zip file, 695 MB)
Next, extract the zip file to a location convenient for you and open the folder. You will see approximately 100 photographs of the dragon sculpture taken from different angles and heights.

This is what you should strive for when taking photographs. 360 degree coverage of photos from different angles and heights ensures that all the details you need are captured.
When shooting, move around the subject to get a view from different angles. Try to move in as small a step as possible and take photos both up close and a little further. Aim for close-up details and photographs showing the entire model.
Do not move or rotate the model while shooting as this can confuse some software packages. Move yourself around the object without moving it.
Camera settings
To get a uniform looking set of photos, switch your camera to manual or pro mode . Most smartphone cameras allow you to switch to this mode, and DSLR cameras always have manual or M mode .
- Set the ISO to Fixed first . This setting changes the sensitivity of the digital camera sensor to light. The higher the values, the easier it is to take photos in the dark, but the more noisy they are. In good outdoor lighting conditions, it can usually be set to 100 or 200. Always select a fixed value for photo scanned images.
- If you are new to photography, use the Fixed Shutter or Fixed Aperture mode. These are sometimes referred to as Priority modes . This helps to fix one of the parameters, allowing the camera to control other parameters to maintain a uniform exposure. This is also done to get well-lit photos.
- When taking photos, they should always be in focus. Avoid blurry images.
- Always take pictures in the same orientation, landscape or portrait.

For midday and overcast lighting in this situation, a fixed ISO of 200 came up .
Creating photo scans with Meshroom
Meshroom is an open-source photogrammetry application that can be used to create 3D models from photographs. We will use it to create a photoscan of the dragon sculpture.
Download the latest version from here and install it. Windows or Linux is required to run the software.
After starting Meshroom, you will see the main interface. In this mode, you can do everything you need to create photo scans.
Here is a short description of each part of the main interface:
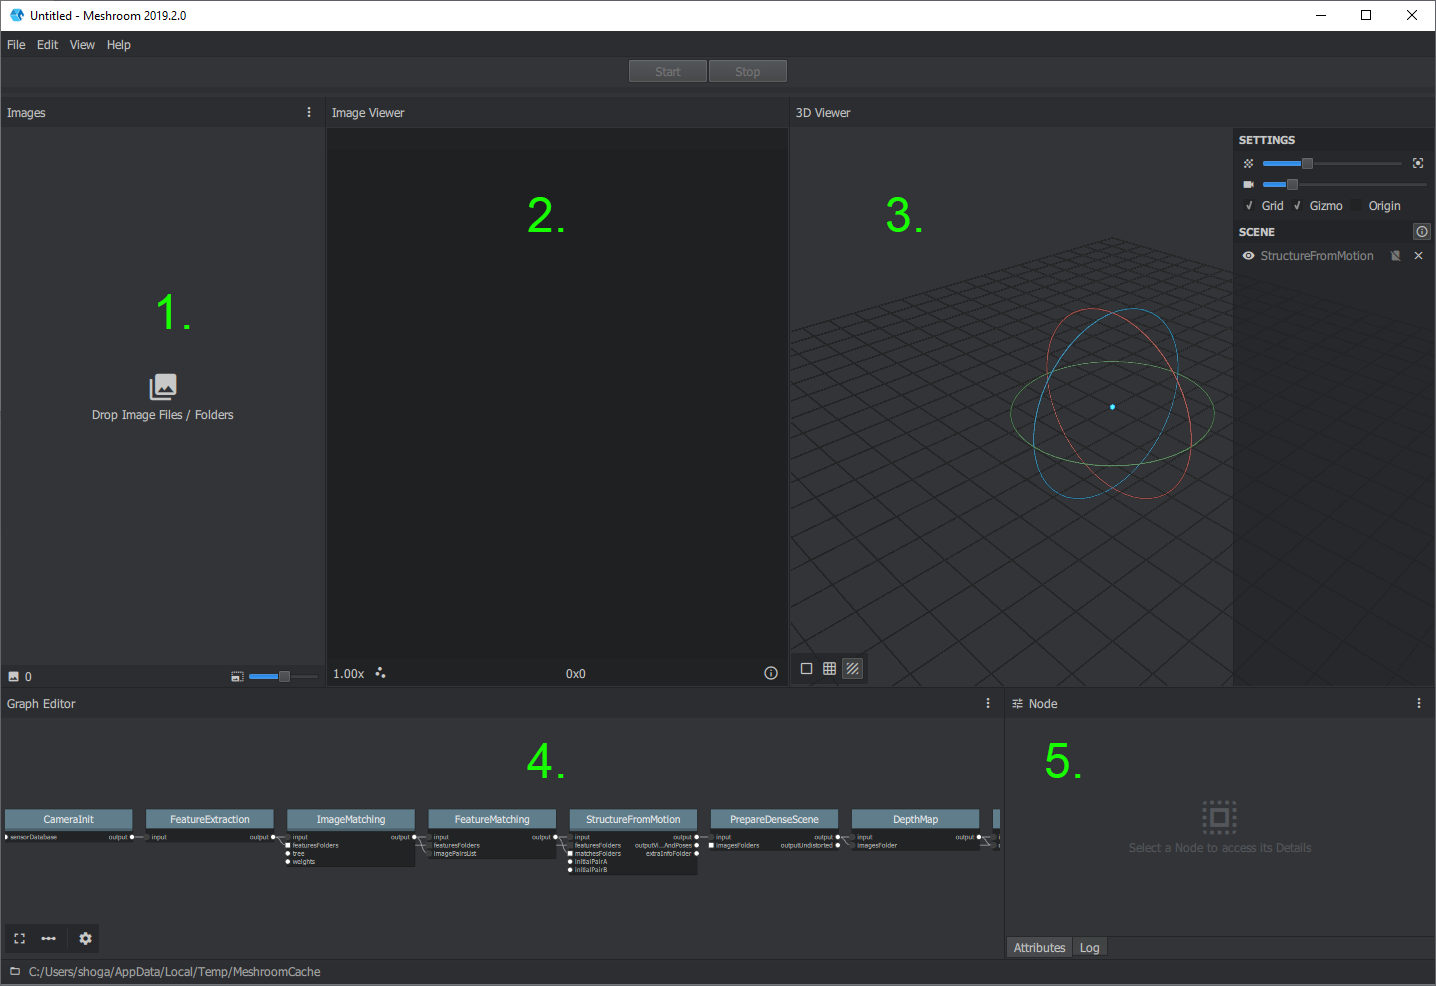
- Photos that need to be recreated in 3D are dragged here.
- The Image Viewer is simply a preview window for individual photos.
- 3D Viewer . , , , .
- Graph Editor , 3D. (, Node). . , .
- Node Graph Editor. , .
Import photos into Meshroom
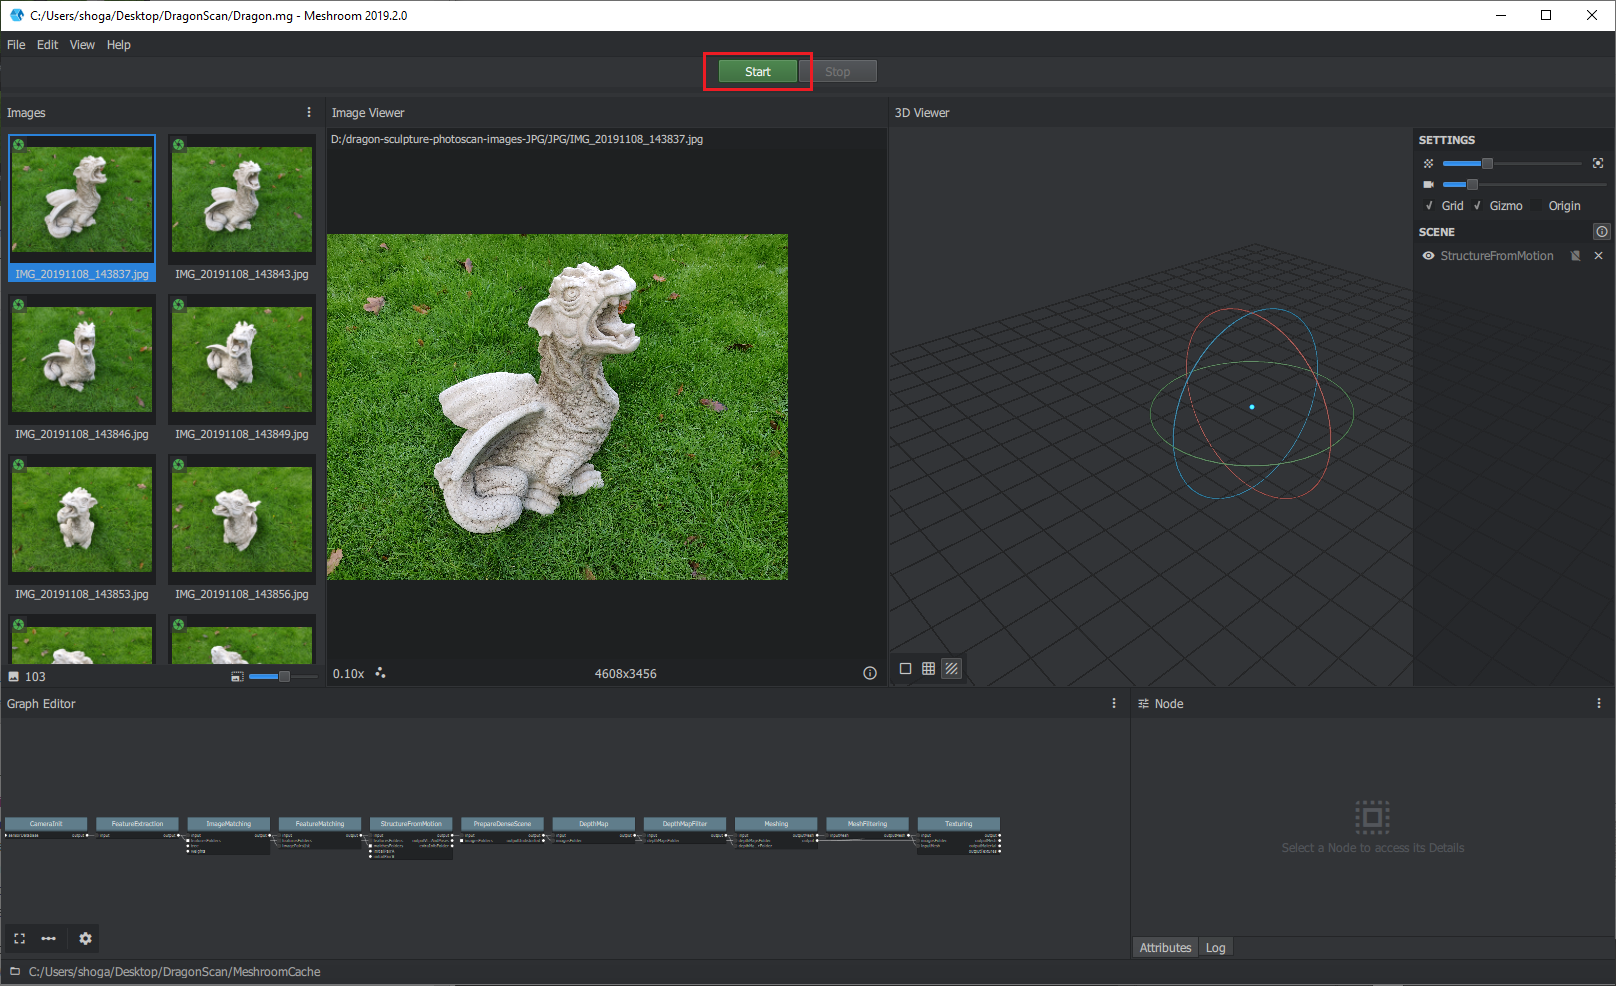
Go to the downloaded dragon sculpture photos. Then drag them into the Meshroom Images window .
The photos are displayed in the order of file names in the Images window .

Next click on File ► Save As… , select a new folder location on disk and save the project as Dragon.mg .

Next, close all unnecessary applications to prepare for the Meshroom re-creation process. Scanning will not start if the computer is low on resources.
Beginning the Meshroom Recreation Process
At this point, you are ready to start recreating. Click on the Start button to start the process.
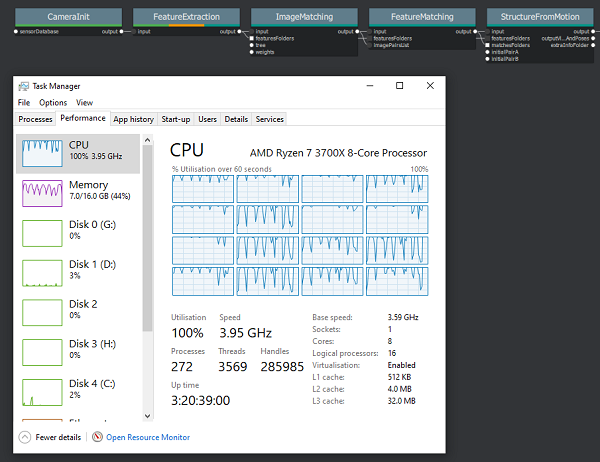
While the process is running, you can track its progress in the Graph Editor window . Notice the small, colored progress bars on each node. Your computer's processor will most likely reach completion in 15-30 minutes, depending on its speed.
Once completed, the resulting scan will be displayed in the 3D Viewer window .

Now hold down the left mouse button and drag the cursor to rotate the model or the middle mouse button and drag the cursor to pan the camera in the 3D view. Enjoy the 3D model your processor helped create!
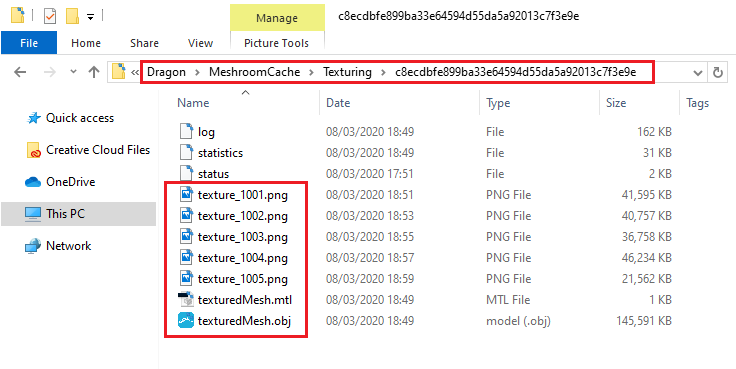
Next, open the folder where you saved the Meshroom project file. In it you will find the MeshroomCache folder . This is where the files of the scanned object were output.
Importing into Blender
Next, we'll use the popular 3D graphics application to import a scan of a 3D dragon model and clean it up to prepare it for import into Unity.
If you don't have Blender 2.80 or higher, download and install it. You can download it here .
Once the installation is complete, launch Blender.
If you are new to Blender then fear nothing and relax! While its interface and controls can be confusing, here you will find many keyboard shortcuts and screenshots that are useful to us.
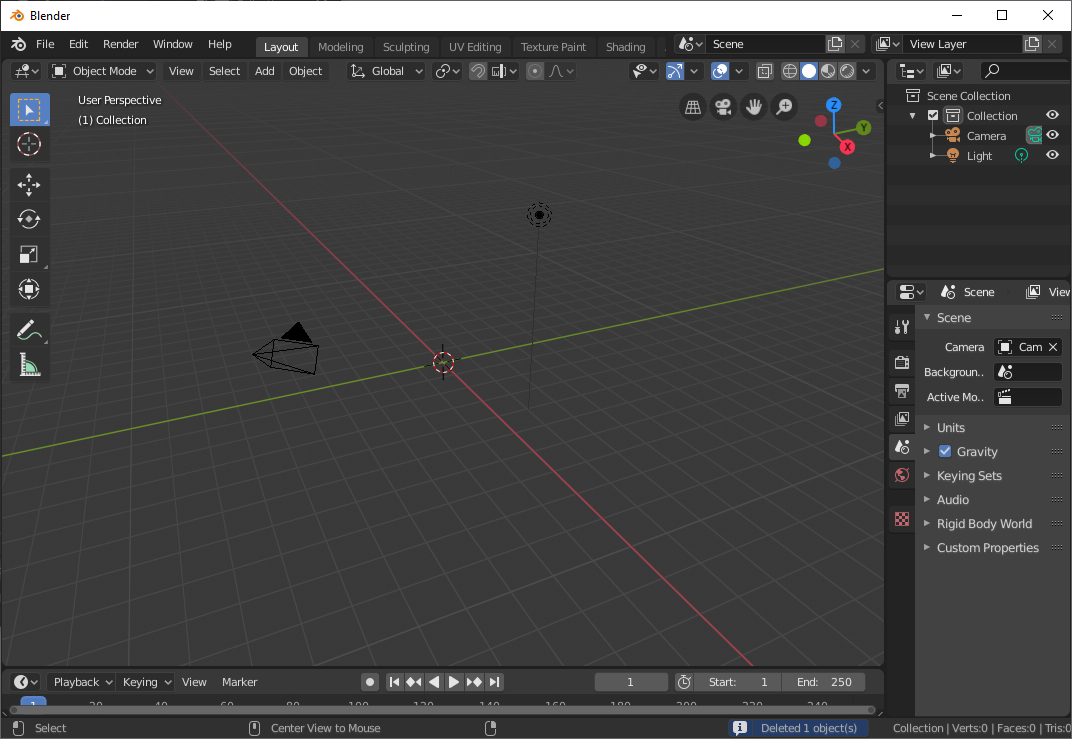
Once the Blender launch screen opens, click on General under New File . By default, the new file contains a cube object. Click on a cube to select it, then press Deleteto get rid of it. We now have a free space to work with:
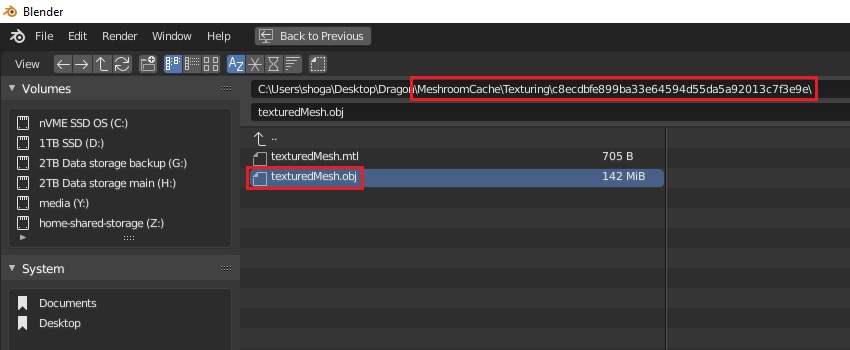
Next click on File ► Import ► Wavefront (.obj) . Navigate to the MeshroomCache folder where Meshroom saved the scanned object model files. In this folder, find the model in the MeshroomCache / Texturing / GUID subfolder . GUID is the name of a folder with a random identifier assigned after scanning is complete.
Then double click on texturedMesh.obj to import the scan into Blender.
The import can take a long time because the photo scanned model is quite large.

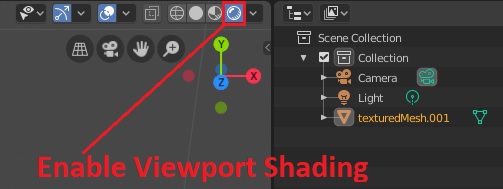
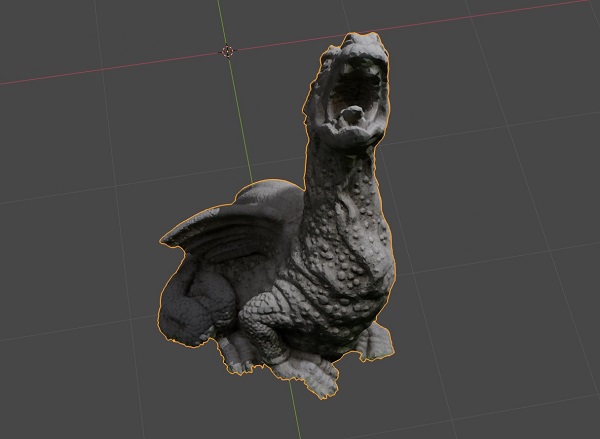
Let's start by getting an idea of what a photo-scanned dragon looks like by default. Click on the Viewport Shading button in the main Blender window to enable full shading and texturing for that window.
Then press and hold Shift + middle mouse button to drag the window so that the main dragon model is in the middle of the screen. Hold the middle mouse button and drag the cursor to rotate the window. You can zoom in and out with the mouse wheel.
See how good the default scan looks. Great job!
Blender fixes
The model is complex and has a lot of vertices and details. We will now reduce the polygon count with Blender's fast and efficient Decimate modifier .
If you are creating a commercially distributed game that requires more optimization, then it may take more time to qualitatively reduce the number of polygons. But so far we are quite happy with Decimate.
In the Scene Collection panel of the Blender editor, click texturedMesh ► Modifiers ► Add Modifier .

Select Decimate from the list .
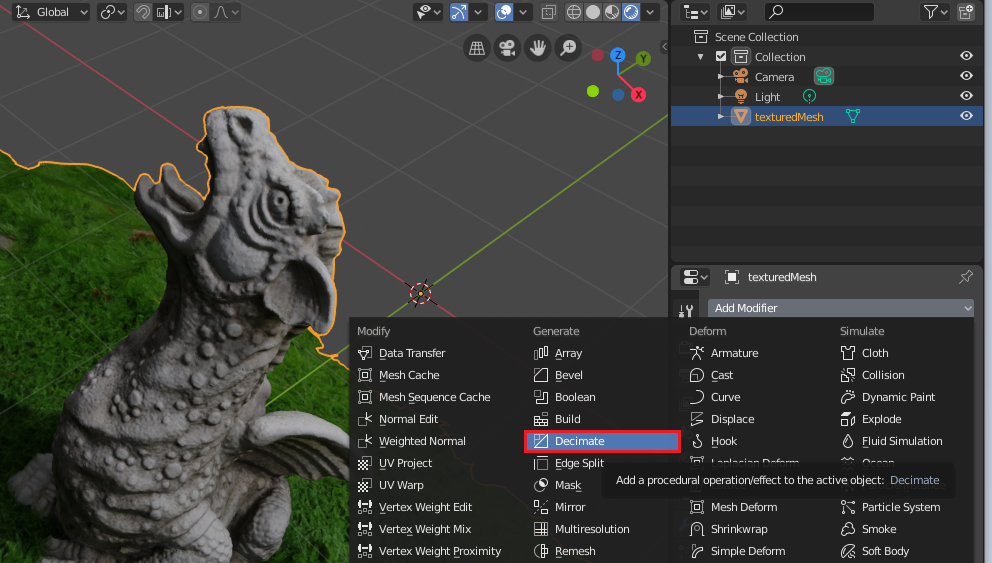
A small customization field appears with Decimate options.
Select Collapse with a Ratio of 0.1 and a Factor of 2.0 . Then click on Apply .
This will reduce the detail of the entire model and reduce the number of vertices by about 10 times! You won't notice much loss of detail, but the Unity profiler and game speed will thank you!
Getting rid of the grass
Now we need to tackle the most obvious.
If you're planning to create a scene in which the dragon is in the middle of a playground or immaculate lawn with grass, then you're done. But we are going to put this dragon in the surroundings of the Viking village, so this grass does not suit us.
Now let's focus on removing the grass from the mesh.
In Blender, switch from Object Mode to Edit Mode . To do this, you can use the UI or press Tab on your keyboard.
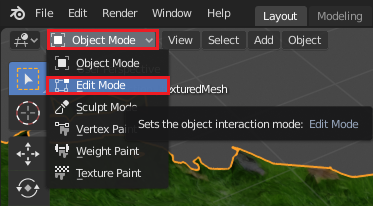
Notice the changes in the window: now the vertices of the dragon are displayed there, and they are all highlighted.

Selecting the vertices
Next, we will select only those vertices that belong to the grass around the base of the dragon, and then delete them.
Please note that the next step will take a lot of patience.
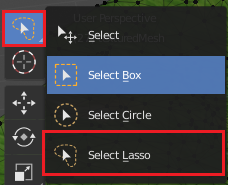
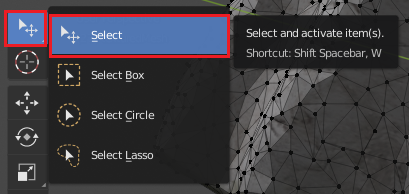
First, select the tool the Select the Lasso , pressing the Shift + Space, of L . ( Shift and Space at the same time, followed by L ).
Or use the UI panel to select the Select Lasso tool .
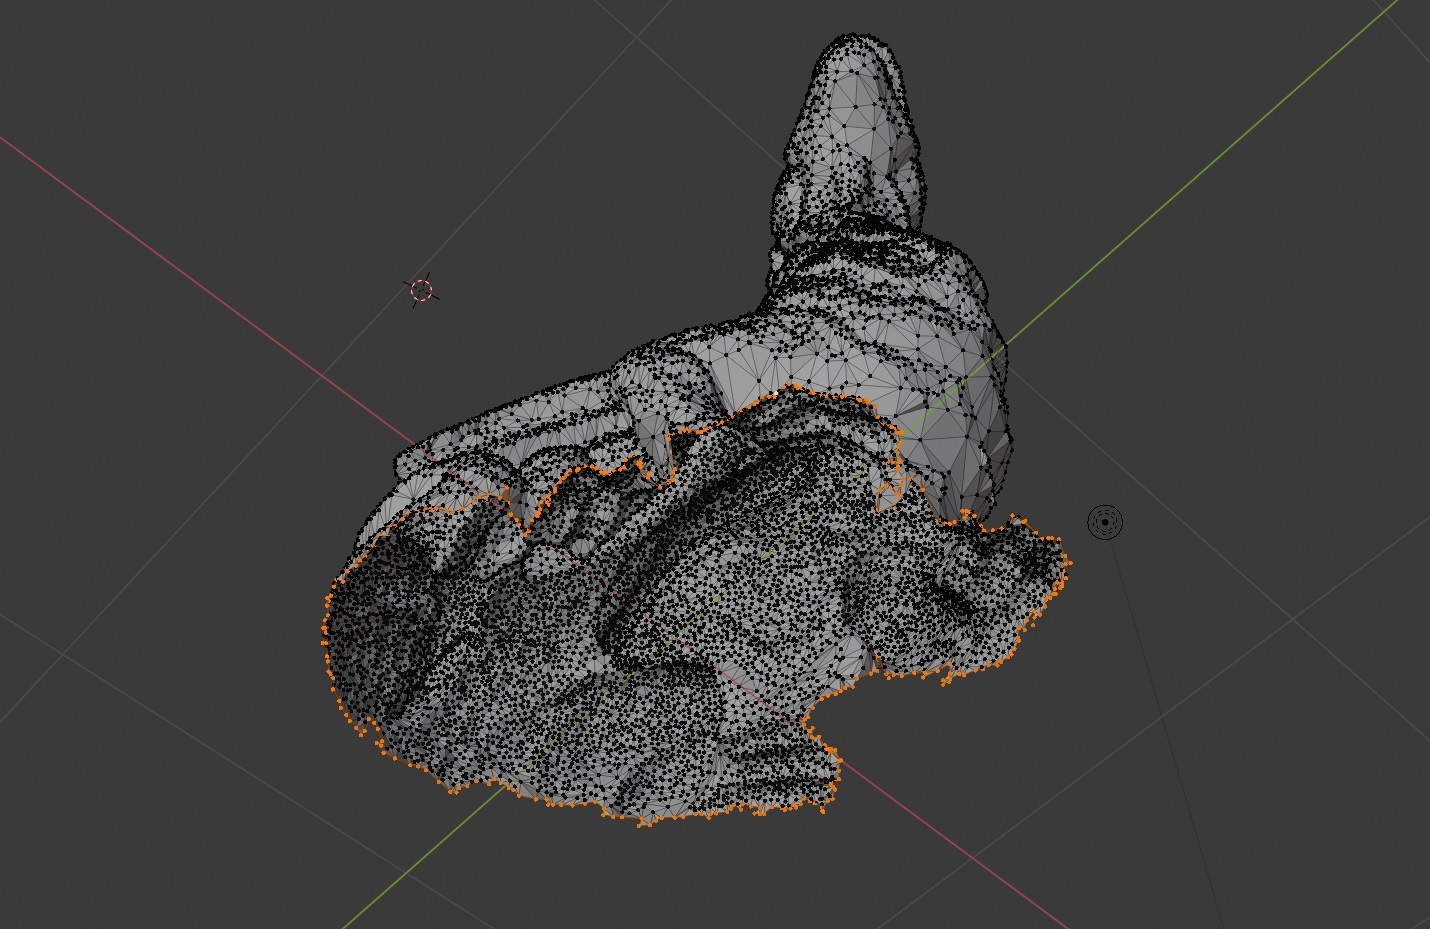
Next, use a combination of pressing the middle mouse button and dragging for rotation and the middle mouse button + Shift and dragging for a panoramic movement to inspect the model from all sides.
From each angle, the lasso carefully picks out the tops of the grass around the dragon's base. Press Shift between each selection to add new selectable regions to the already selected vertices.
Here's a GIF illustrating this process:

From time to time, you will need to rotate the viewport to select the vertices that are behind the edges of the grass mesh.
If you have selected some vertices that you do not want to delete, then click on them separately with Shift + left mouse button to remove them from the selected vertices.
With all the grass and the surrounding vertices selected, press Delete ► Vertices to delete them.


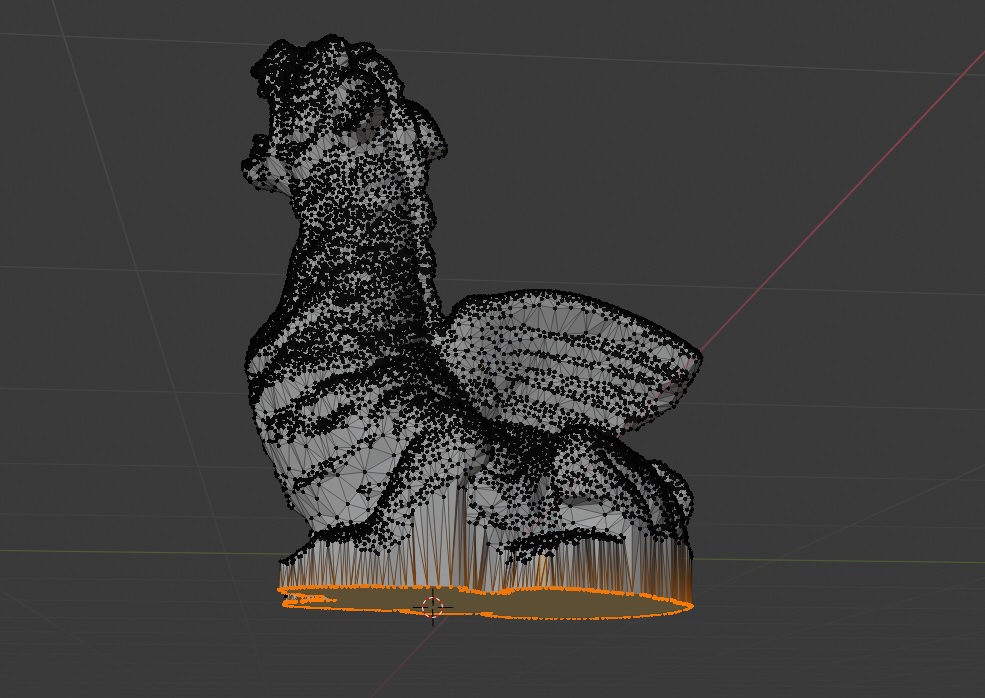
Look closely at the remaining mesh as you zoom in, zoom out and rotate the viewport. Repeat the selection and deletion process for all the vertices you missed.
Upon completion, you will see a similar scary picture:
Close the base of the mesh
Now go to Edit Mode if you are not already in it. Switching modes is done by pressing the Tab key . Then select the entire bottom border of the vertices of the dragon mesh using the Select tool and holding Shift . This will take patience.
Or you can use the Select Lasoo tool for this .
With the vertices selected, click Vertex Smooth Vertices .

This will smooth out our selected vertex ring a bit.
Now select the 3D Cursor tool by pressing Shift + Space, Space and position it at the level of the lowest vertex in the selected bottom border by pressing the left mouse button . To determine the lowest vertex, you can pan and rotate the viewport to view the dragon from the side.
Then press the key . ("Point") to select the Pivot Point , then select the 3D Cursor to use the position of the 3D cursor as the reference point.
Then press S, Z, 0, Enter(that's zero, not O). This series of commands will scale all the selected vertices to the same height as the anchor point we created with the 3D cursor.
Now we got something like this:

Finally, click on Vertex ► New Edge / Face from Vertices .
This will create a new base for the dragon by covering all selected vertices and creating a new face.

Moving the dragon
Then go back to Object Mode by pressing Tab and select the texturedMesh object . Move to the dragon scene start point coordinates with a tool Move , pressing the Shift + Space, G . Apply the Rotate tool by pressing Shift + Space Bar, R , and rotate it to the desired position.
Now select the 3D Cursor Tool and click about the middle of the dragon's back. Press F3 , enter Set Origin and press Enter . Next, select Origin to 3D Cursor from the list of commands that appears .
A yellow dot appears in the middle of the 3D cursor, indicating the new origin of the model.
We are ready to export the model!
Next, click File ► Export ► Wavefront (.obj) .
Select Path Mode ► Copy and make sure Selection Only is selected in Export Settings . Save the file as Dragon.obj in a location convenient for you.

The Copy value for the Export Path Mode ensures that textures are copied and referenced from the same folder as the .obj model. This avoids problems with lost textures when imported into Unity.
Moving everything to Unity
Now let's open the Starter project in Unity and then open the Assets / RW / Scenes / PhotoscanDragon scene . Find an empty pedestal between stones in the village. This is where we will install the photoscanned dragon model.

Now let's drag the exported model and its associated exported files into the Assets / RW / Models / Dragon project folder .

Then we will use the Unity Hierarchy window to find the FocalPoint GameObject . Drag the Assets / RW / Models / Dragon / Dragon.obj model into the scene and make it a child of the GameObject FocalPoint .
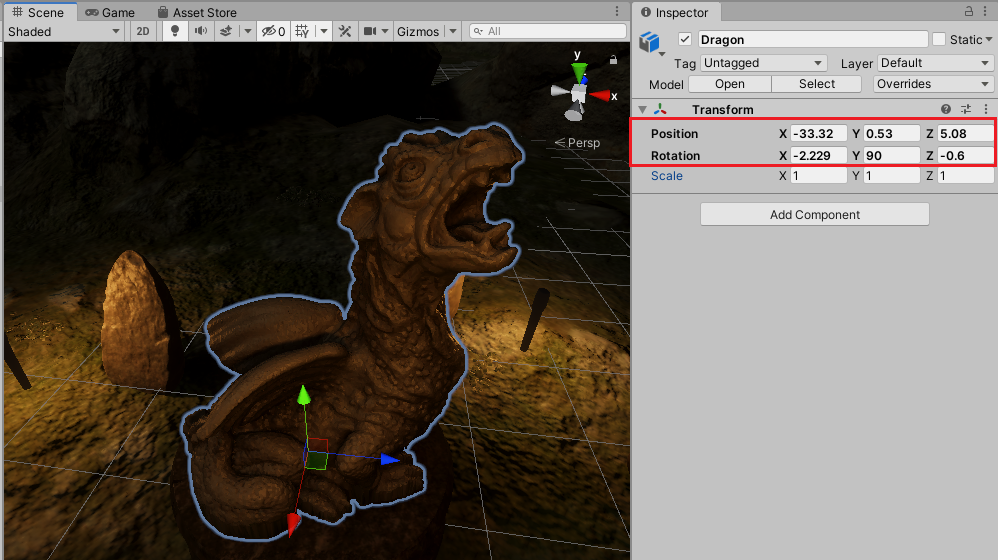
Now let's change the position and rotation of the Transform component of the Dragon object as follows:
- Position: (X: -33.32, Y: 0.53, Z: 5.08)
- Rotation: (X: -2.229, Y: 90, Z: -0.6)
Note : your position and rotation may be slightly different depending on where you clicked when setting the anchor point in Blender.
Now hit Play and admire our very own photo-scanned dragon taken from the real world and recreated in full 3D.
Where to go next?
The finished project can be downloaded from the link at the beginning of the article.
To get there, we went through many steps while learning about photogrammetry, editing 3D meshes in Blender, vertex manipulation, and transferring the entire model to Unity!
I'd like to thank The Tales Factory from the Unity Asset Store for allowing me to use the Photoscanned MountainsRocks PBR asset in the Dragon Viking Village scene.
I recommend checking out their excellent photo scanned assets .
The next steps are up to you. What would you like to recreate and integrate into your Unity projects? Below are resources and additional reading that may help you further your work:
- photogrammetry.com
- Meshroom on Github
- Display.Land is a new application for creating 3D captures of physical spaces using a smartphone camera.