Earth is the cradle of humanity, but you can't live in the cradle forever
This famous phrase of K.E. Tsiolkovsky is not forgotten to this day. NASA, ESA, Roskosmos, SpaceX and many other space companies send automatic missions to other planets, launch people into space and strive to bring the words of Konstantin Eduardovich to life.
But what if the development of a new rocket takes a long time, and you want to launch it here and now? Then you should do rocket modeling and build and launch your dream rocket yourself. And I will gladly tell you about my experience in designing missiles in this article.
Introduction
Hello! In this series of articles, I would like to share with you my experience in developing and launching rocket models, tell you about my first failures and dizzying successes, about how to do it and how not to do it. I will not go into the details of how to build a rocket, because there are many guides on this topic on the Internet, but I will focus on personal experience in order to save you from my mistakes and show you some of my interesting findings and solutions.
So,

Background
2017 “ ”. SiriusSat, 2018 - . — -. . , “” “” . , , .

SiriusSat-1 SiriusSat-2. ,
. 10 - .
SiriusSat-1 SiriusSat-2. ,
. 10 - .
First attempts to build the engine
The heart of any rocket is its engine , so you had to assemble it first. Caramel fuel is very popular among rocket modelers, due to the fact that it is easy to manufacture and its components (powdered sugar and potassium nitrate) can be found in any city.
Caramel engine, what kind of animal is this?
“” , . , , , . , . , , , , . .., . . 20 , , , 200- .., . , , .

. , ,
. , ,
I bought potassium nitrate at a nearby fertilizer store and powdered sugar at a grocery store. At that time, the inscription N - 13.6% and K2O - 46% did not bother me, but because of it later there were a lot of problems, which I will talk about a little later.

To make the body, I needed a plastic water pipe 100 mm long and 10 mm in diameter, bentonite (cat litter), to make plugs and to tamp the fuel itself, I needed to find any stick that could freely enter the engine. Saltpeter, bentonite and powdered sugar I ground separately in a mortar, just in case. Then he mixed potassium nitrate and powder in a ratio of 70% to 30%. Now it was necessary to drive all the components into the pipe as follows:
- Put a spoonful of ground bentonite into the pipe
- 10, . ,
- 80. , . ,
- , ,
- 50-70 .

— , —
I made a fuse-cord to ignite the engine . I boiled a jute rope in a solution of caramel fuel, taking the concentration by eye, about 2-3 teaspoons per glass of water. After boiling, it is necessary to let the cord dry, and if the proportions of the fuel solution were correct, then there will be a white coating of caramel on the rope. The engine and the cord to ignite it were ready, which meant that it had to be burned .
Unfortunately, I do not have photos of the first engine and a video of its tests, but in the end it did not take off, but it was noticeably smoking on the launch pad.
Conclusions:
- The combustion temperature was high, due to which the plastic pipe began to melt, and it was decided that the bodies of the following engines should be made of metal
- The nozzle was constantly clogged with the remnants of combustion products, which could increase the pressure in the engine and the rocket would simply explode, and no one needed rapid unscheduled disassembly . At that time, I thought that this was due to the wrong proportion of nitrate and due to the fact that the powdered sugar was not pure, so in the next engines I decided to experiment with the proportions and replace the powdered sugar with pure sugar
Thus, my first experience in engine building, although it looked sad, but it spurred me to move further in this direction and learn something new, because I really wanted to launch my rocket!
It's alive!
Having rummaged on the Internet, I approximately understood what the problem of the first engine was. Due to ramming, the fuel was distributed unevenly , cavities formed in it, and it was heterogeneous, which is why the combustion process was very sluggish and instead of a rocket, a good smoke bomb turned out. The solution to the problem was simple - to drive boiled caramel fuel into the pipe . I took a metal rod for the bathroom as a body and decided to experiment with the proportions of fuel and with the addition of iron oxide 3 (that is, ordinary rust), because it had to increase the burning rate.
Examples of pure caramel fuels with added rust. A source
I made the engines smaller, since I did not see the point in making a full-sized version, just as I did not see the point in plugs and a nozzle, they should not affect the fuel burning rate, because all the subjects were in equal environmental conditions.
Before cooking fuel, let's talk about safety precautions , because caramel is highly flammable and burns very briskly. You only need to cook fuel on an electric stove ; you cannot cook fuel on a gas stove or any other source of open fire. By the way, in the recent explosion of a pyrotechnics warehouse in Beirut, according to official data, it was saltpeter that ignited, so be extremely careful when cooking. Boiled
fuel on an electric stove in a pancake makerto the color and consistency of condensed milk. The pancake maker is so good that all the ingredients in it are evenly heated and do not burn.
As a result, I ended up with several test subjects:
- Engines with mortar and boiled caramel fuel
- Engines with grinded and boiled caramel fuel
- Engines with grinded and boiled caramel fuel with the addition of 1% iron oxide 3
Now it was necessary to test the engines. In the spoilers, the percentage of ingredients is written in the format Saltpeter / Sugar / Rust (if any), and inside there are gifs of the burns themselves.
60/40

59/40/1
57/43
54/45/1
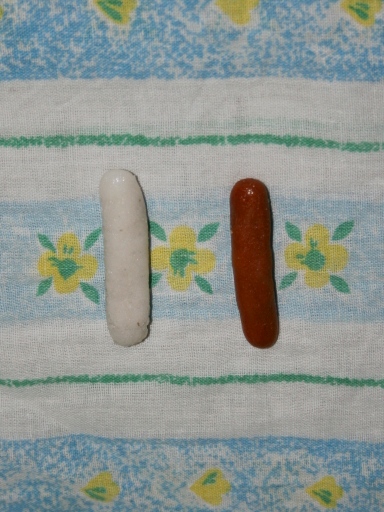
That's what's left of the fuel in the engines
Conclusions:
- This time, all the engines lit up and they burned very well, which of course pleased
- Rust increases the burning rate . For comparison, the 55/45 engine burned for about 35 seconds, and the 54/45/1 engine burned for 26 seconds;
- Grinding in a coffee grinder did not significantly increase the burning rate
- Even with the replacement of sugar, a lot of unburned substance remained in the engines (black and white substance in the “barrels” in the last photo), the composition of which was not known
In general, the fuel caught fire, it remains to decide whether to make a rocket on it, or look for another solution.
What's the bottom line?
As a result, we have poorly working engines. Their main problem is incomplete combustion of the fuel mixture (I wrote about the consequences of this above). The burning rate also pumped up. And here the ill-fated inscription N - 13.6% and K2O - 46% on the packing of nitrate pops up, because, most likely, potassium nitrate for fertilizers is unclean, and the remaining 40.4% is some kind of impurity that caused poor engine performance.
If you watched the recent video series of Amperki Rocket vs Lehi, then you noticed that they used chemically pure potassium nitrate. Thanks to her, they burned out all the fuel, and the burning rate was higher (2.85 mm / s versus my 1-1.25 mm / s). Well, another disadvantage of home-made engines is that their thrust is unknown, and in the future I would like to calculate the parameters of a rocket's flight.
As a result, I can conclude that you cannot build an engine on potassium nitrate for fertilizers. In general, on such a sad note, I finished the development of my engines, and began to look for those who make and sell ready-made engines.
Building a rocket
I bought the engines from Real Rockets . Since an electric igniter is also supplied with these engines, it was necessary to assemble a remote control for launching, and of course the rocket itself. In the same store I bought cardboard tubes for the body.
On the Internet, I found a circuit for the remote control and slightly altered it so that the engine would not accidentally ignite from the dialing, and as a result, the circuit turned out like this:
The body was made of PVC sheets, placed a soldered circuit inside, and brought the wires to the igniter (in diagram R2) to the terminals. I soldered crocodiles to the ignition wire, which were connected to the igniter.
As a result, we got such a remote control.

Well, like any space system, the remote control had to be tested, and it would be nice to see how the ready-made engines generally work.
Testing the operation of the remote control and the engine (be careful - ears)
For the rocket to fly vertically upwards, I decided to design it in the Open Rocket program , and then print all the details on a 3D printer. Using the rocket optimization function, I selected the shape and dimensions of the fairing and stabilizers based on the dimensions of the cardboard tube, the fairing (in which I wanted to install an altimeter, which I will discuss in the next part), the mass and thrust of the engine and its mountings. But first it was necessary to add the used engine.
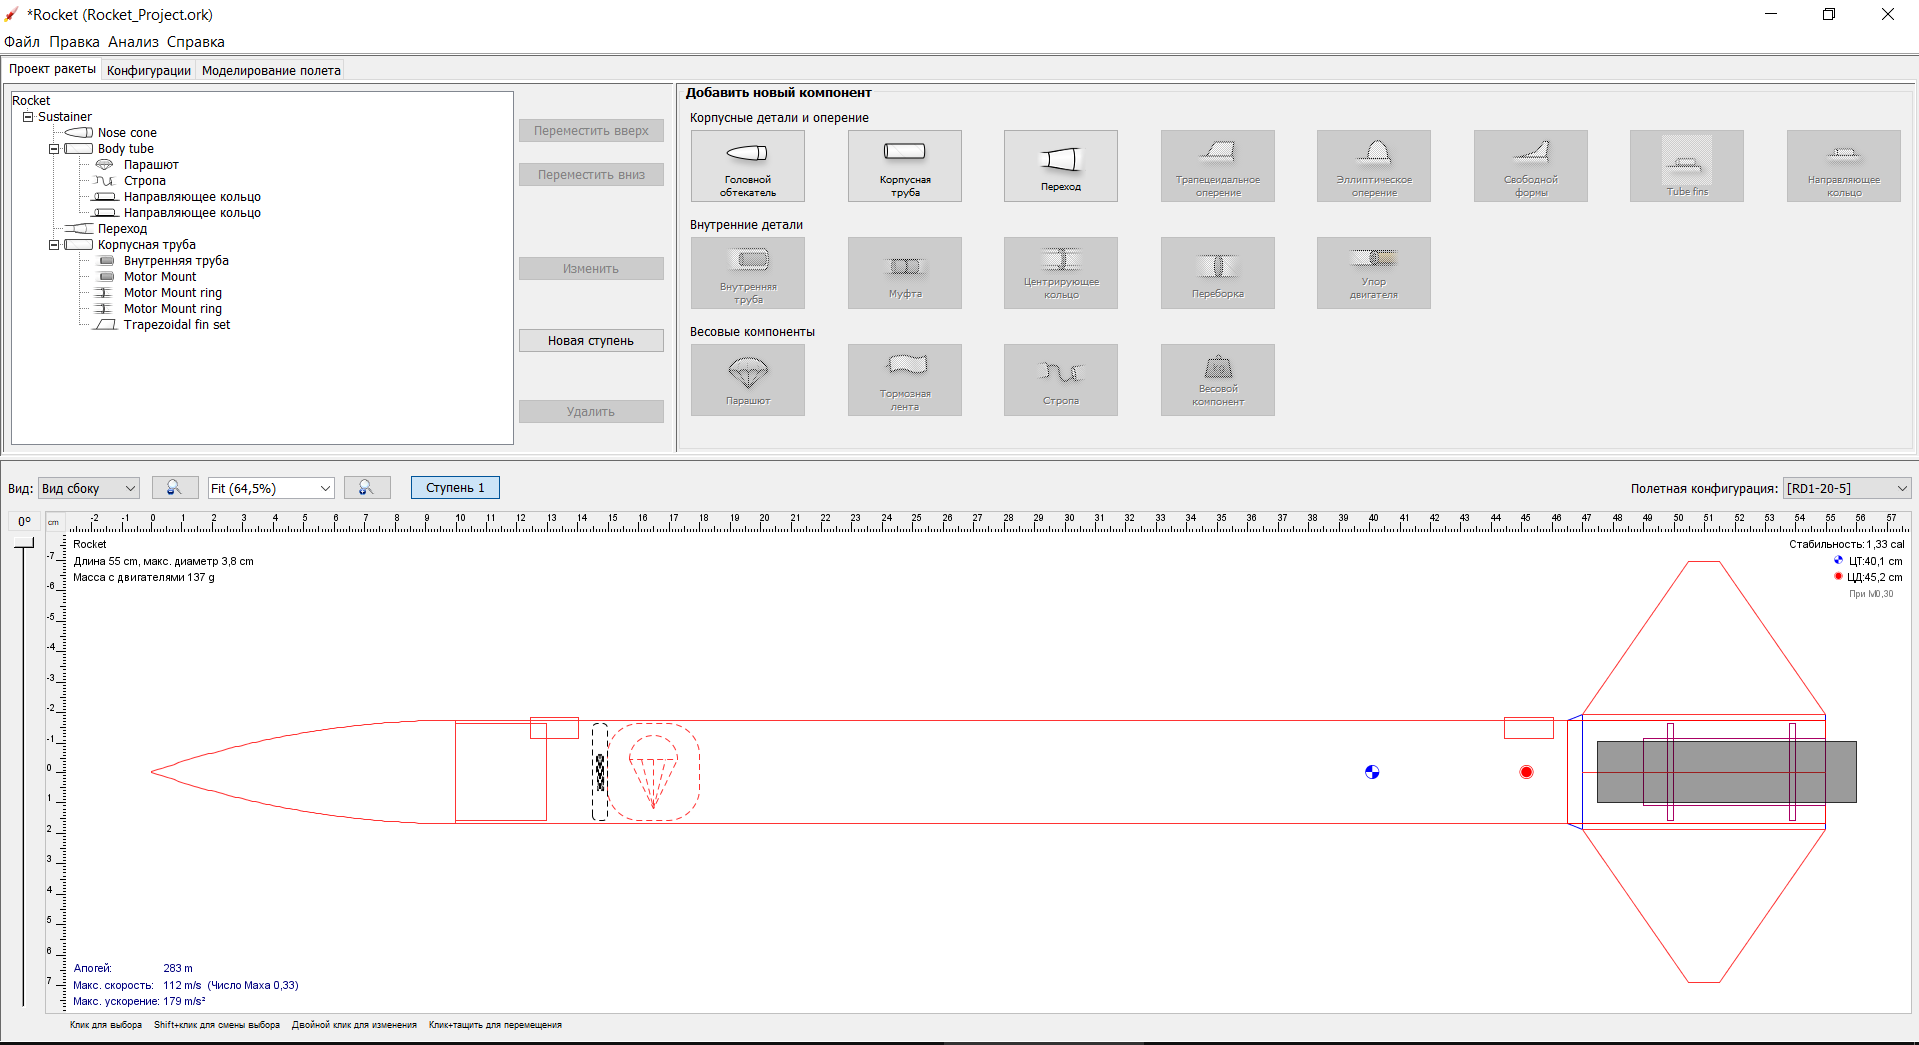
Open Rocket rocket drawing
How to add your engine to Open Rocket
Open Rocket , , . , :
! .
- , 1-20-5 Real Rockets
"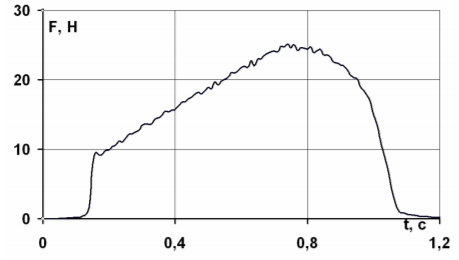
1-20-5
- ThrustCurve Tracer
- Open Image
- Setup Grid
- X axis , 0 — 1.2
- X sub-subdivisions , 2
- Y axis X axis , 0 — 30
- Y axis sub-subdivisions X axis sub-subdivisions , 2
- Draw points . , , . , ( - )
- ,
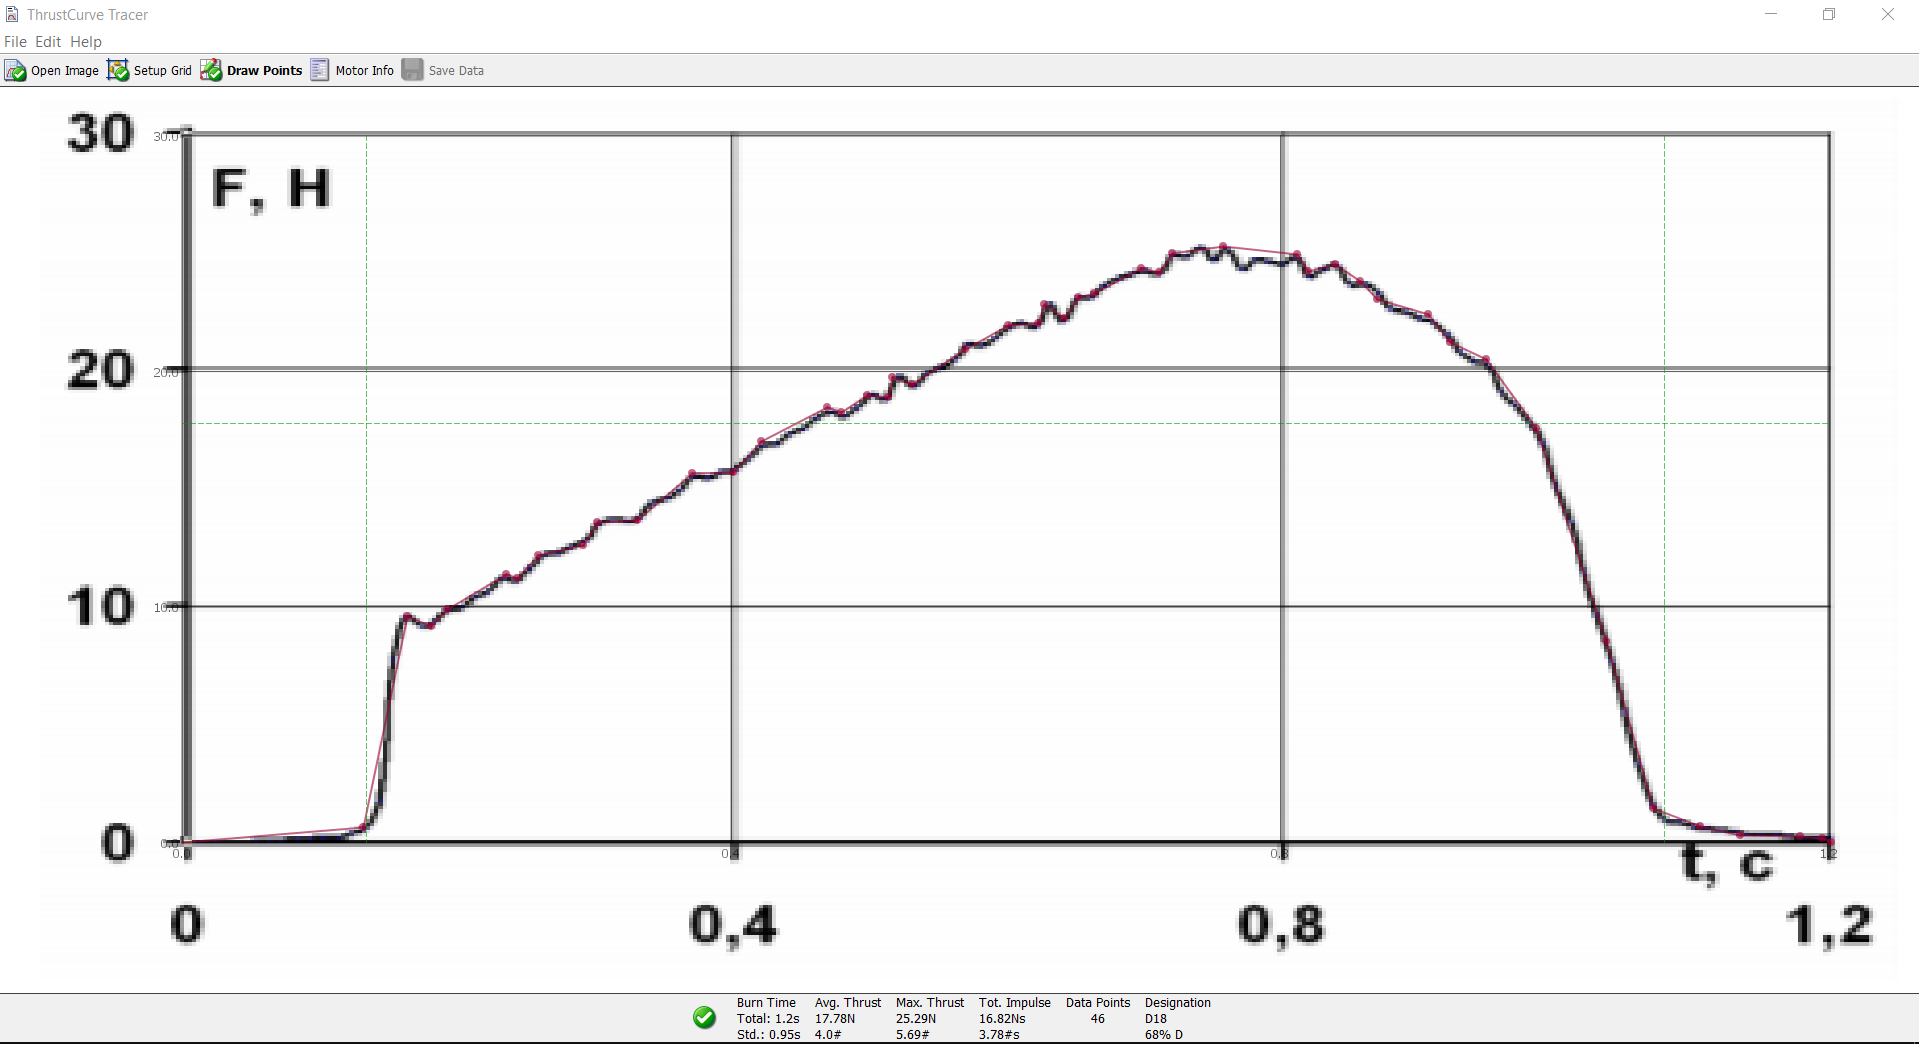
,
- Motor Info
- , Save Data .eng
- C:\Users\username\AppData\Roaming\OpenRocket\ThrustCurves
! .
How to calculate optimal parameters of a rocket in Open Rocket
( -> ). , .
. ( -> -> ) . , 3D , , : , , , .
. , , , .
, , . , — () . Open Rocket , . 2-3 , .
. ( -> -> ) . , 3D , , : , , , .
. , , , .
, , . , — () . Open Rocket , . 2-3 , .
When the shape of the fins and fairing were calculated, they had to be modeled and sent to print. I also modeled the motor mount.
Stabilizer Model

Fairing model

Engine Mount Model

Assembling the whole rocket


Assembled and painted rockets

Forward to the landfill!
With both rockets assembled, it's time to launch them! A steel rod 1500 mm long stuck into the ground played the role of a launch pad. The rocket was installed on it using guides (sheets of paper rolled into tubes).
The first launch of 3D printed rockets was both funny and scary. As it turned out, the engines were defective, because of which the
Missile launch with faulty engine
Effects

Rocket repair

-,
-,
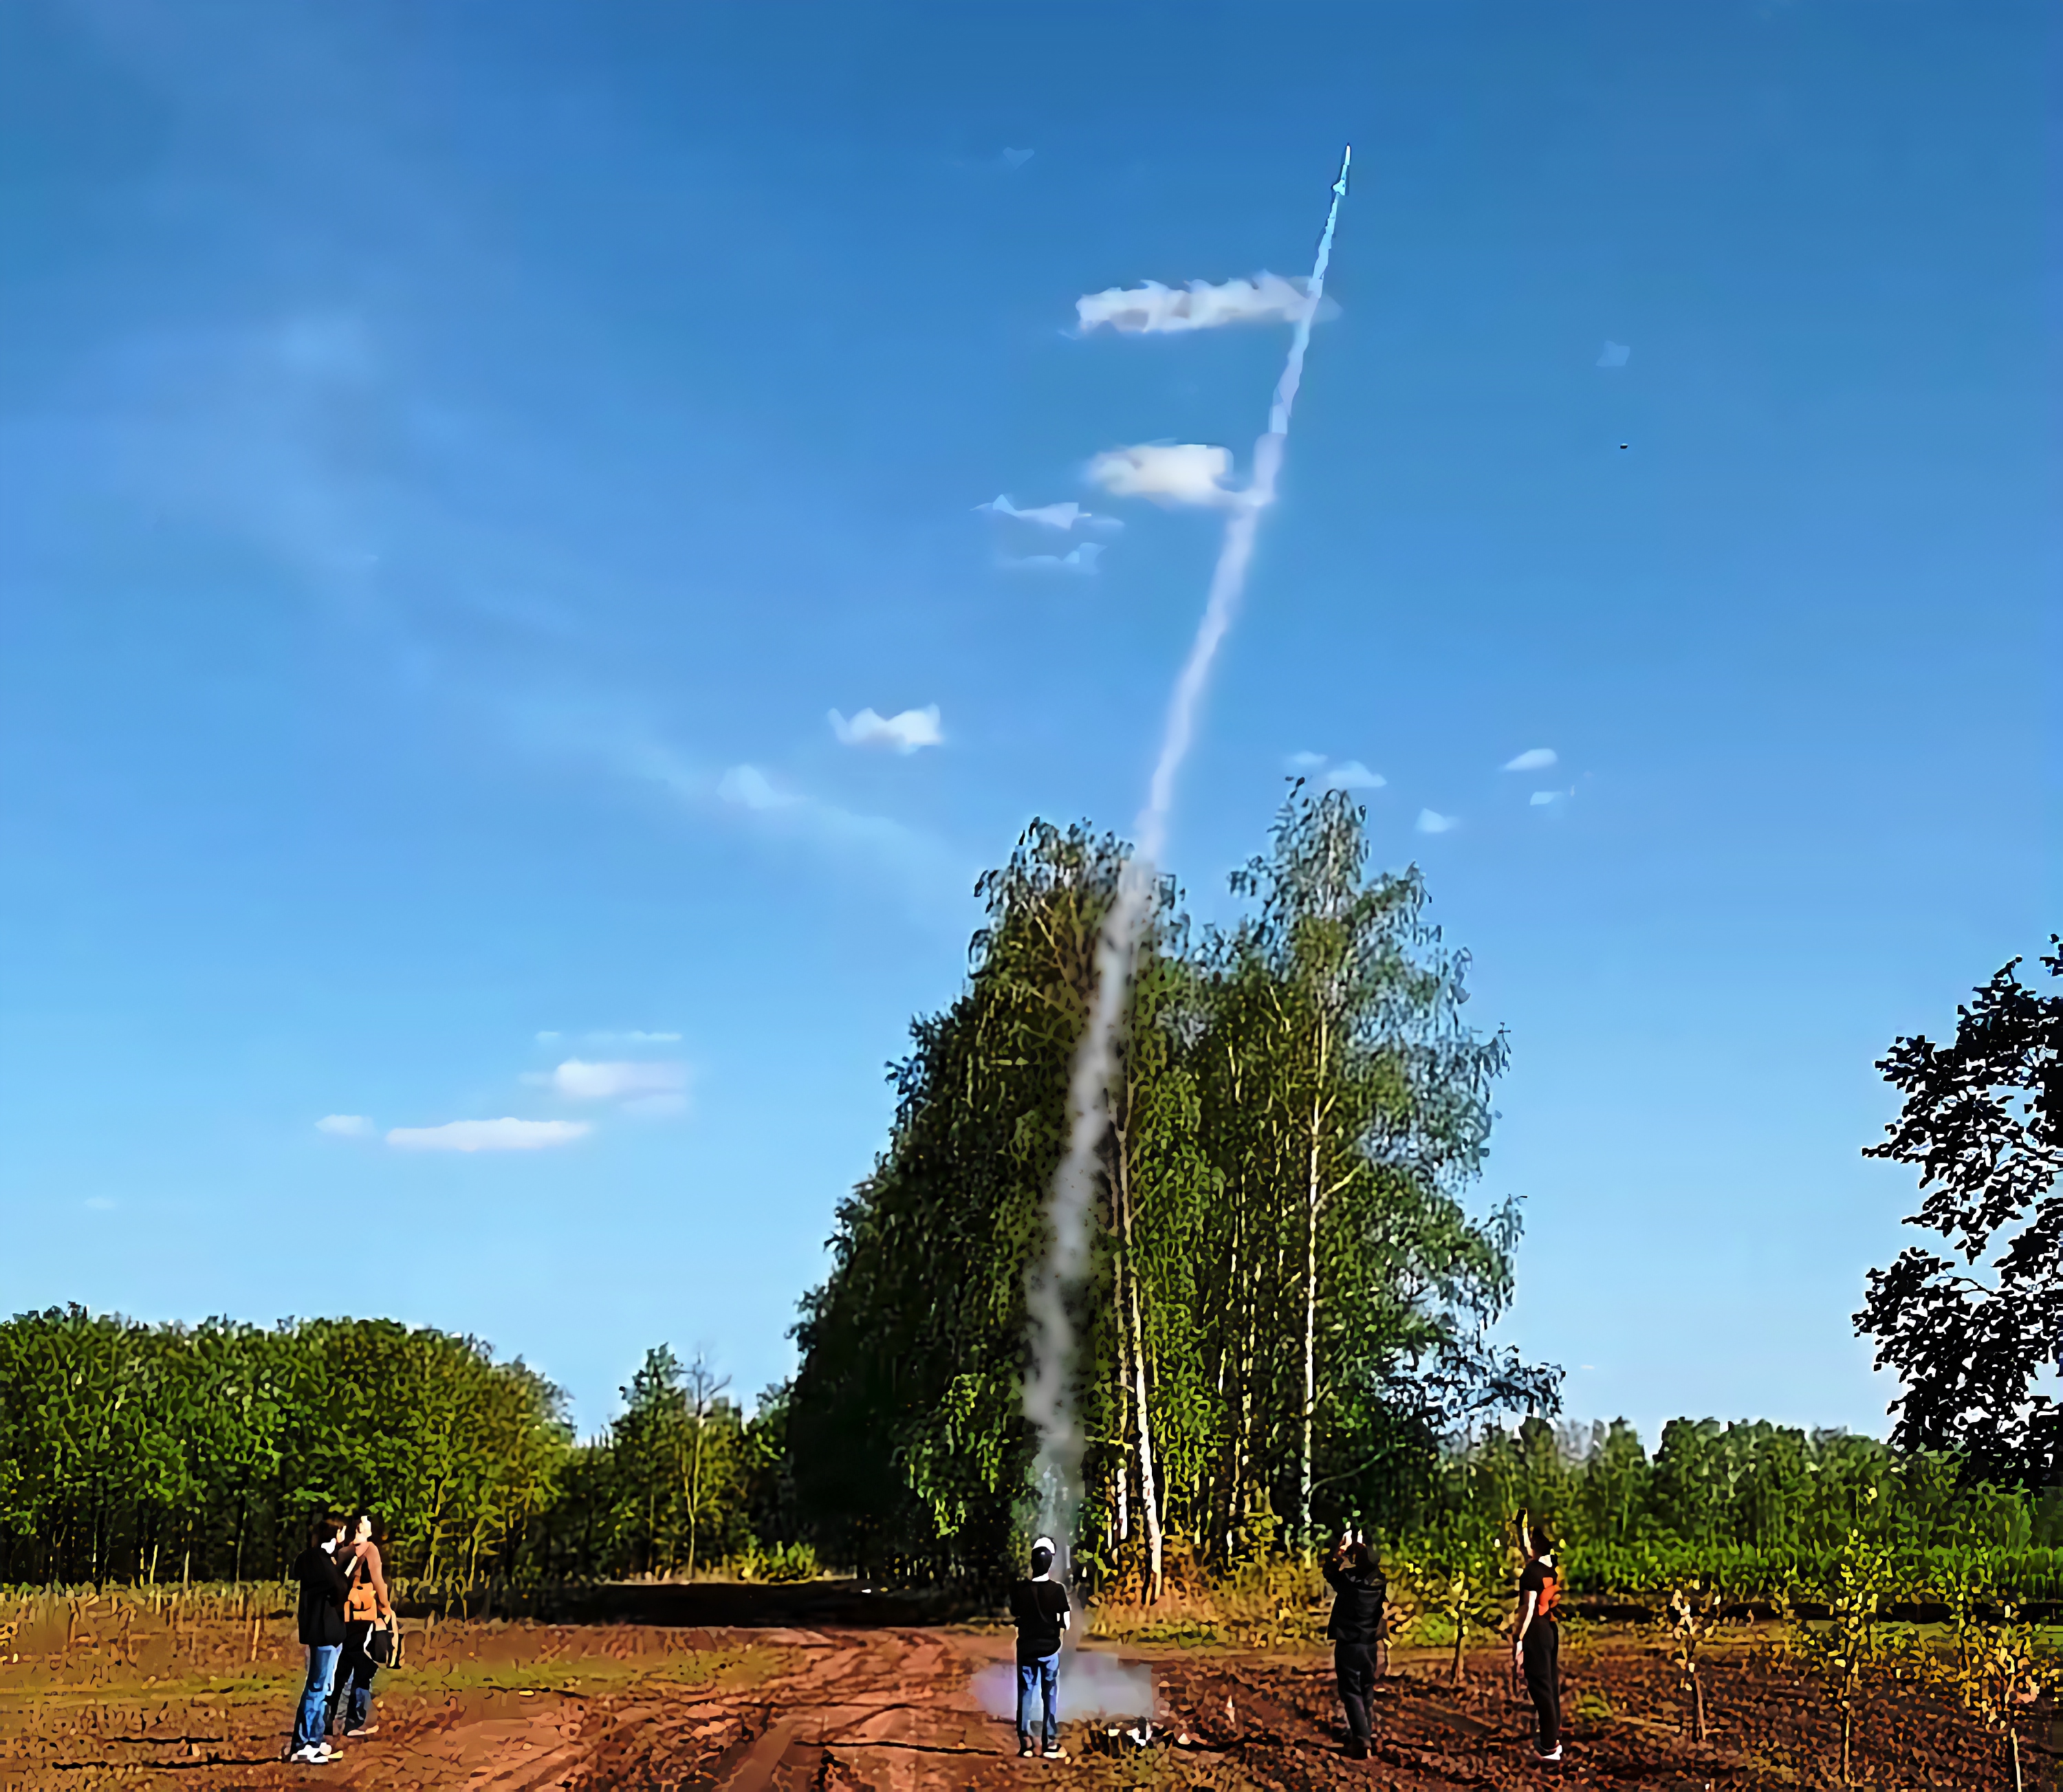
With a repaired rocket and new engines, we went to the test site again. This time, luck was on our side, and both missiles took off and landed softly, even repeatedly.
Successful launch (careful - ears)
Launch in slow-mo
Conclusion
In the end, I would like to say that I do not want to stop at simple rocket launches. One of my rockets has already flown with an altimeter , the development of which I will talk about in the next article. Now I am making an onboard camera, which I plan to install on a new rocket and launch it on more powerful RD1-30-5 engines.
And on this I have:

Thank you for attention!