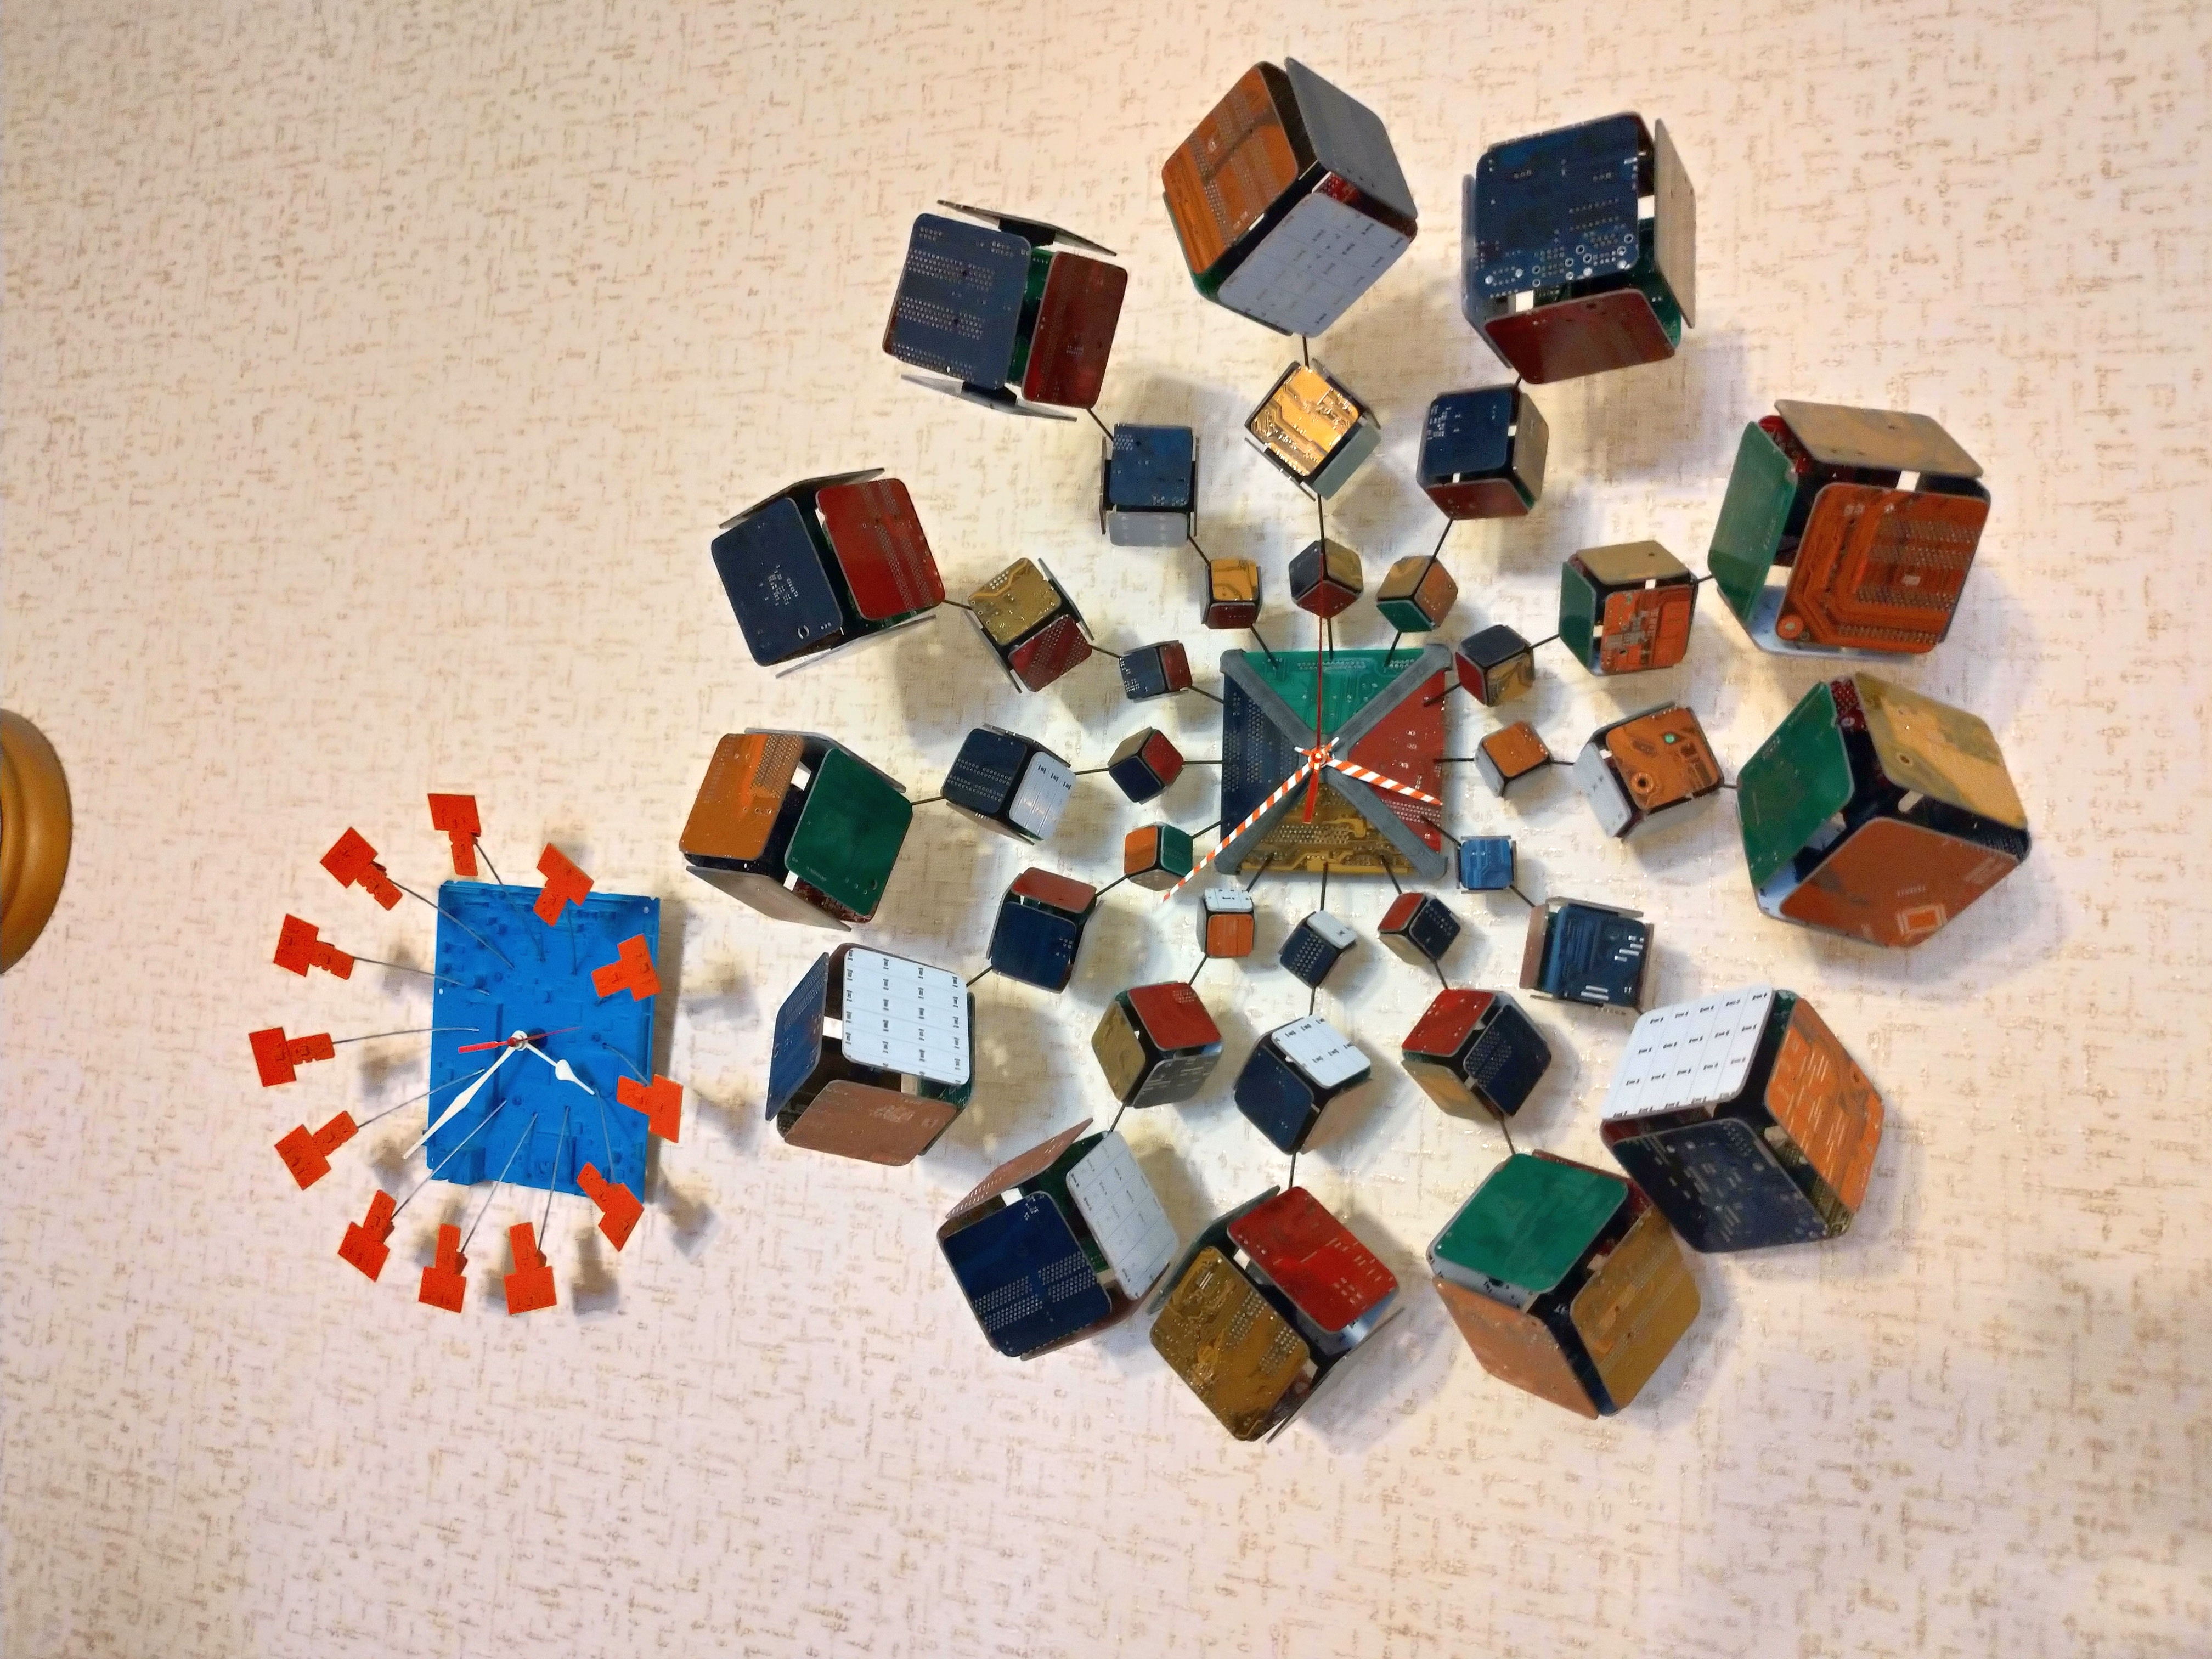
And here it is beautiful, not scary and interesting. Although it turned out not the Universe, but only a lot of cubes. The explosion of color is controllable - we rotate the cubes on the needles and create a pattern of color chaos that is pleasant to us. Then, if desired, we bring everything into harmony. And we look at the clock - how much has come, isn't it time to move on to a new stage of creation?
Make yourself a sandwich, for example ...
Rubik's Explosion clock - an original design idea, rotating elements, a creativity simulator in action.
How I made this watch.
I tried to assemble motherboards with solder mask colors that match the cube colors. The service technicians I know even got me orange ones! In general, they did not throw out the fees, they saved the nature!

Alas, there was no white. I thought of using purple instead of white. But there is a GOOD person in the world - he helped out! And I have boards from LED strips with a white solder mask!
I removed all elements from the motherboard. Cut into squares. In addition to the motherboard, I used bicycle spokes and parts printed on a 3D printer.
I will describe in more detail how I assembled the crosses of my cubes:

- I put one half of the cross-piece n2 and two halves of the sphere n1 on the bicycle spoke. The halves of the sphere were fixed on the spoke with cyanoacrylate.
- I planted the second half of the cross.
- 3. , , . , . .
- 4
I missed this: before assembling the cross, the spoke is threaded through the hole in the base and into the hole in the printed circuit board fixed on the base. Below are some screenshots of the 3d model of the base. There is not much to explain there.


Next is a photo of the assembly of the watch itself: first, the knitting needle in the base, I assemble the small cross, then the middle and large. At the end, I glue the squares of the printed circuit boards onto the crosspieces.


Below is a photo of the back side of the base.


Here you can see how the clock is attached to the wall. Because the center of gravity of the watch is slightly moved forward from the base (from the wall), then it was more correct to use a dowel hook. But there was no hook at hand, a big puck helped out.
In conclusion, I want to say that without 3D printing, I would not have done ... Or like this: with 3D printing it is much easier to get up.


